Home > Installation Instructions Rome Wall Mount Gold Shower Set

Installation Instructions for Rome Wall Mount Gold Shower Set

Rome Wall Mount Gold Shower Set

The Rome wall mount Gold shower is a combination of Shower Head & a Hand Held Shower that comes with a Single Handle. The Gold finish is classy and elegant. The Rome Gold Shower Set comes with a Ceramic Valve core and Brass Body. Introducing Rome Wall Mount Gold Shower Set in gold finish. This American standard shower system set would make a huge difference in your bathing experience. Create a spa-like oasis in your bathroom with this rain shower head. With this smart shower combo to perfect your day, you will feel relaxed and renewed with energy. It comes with a modern style Handheld shower head which is comfortable to hold and place back. Made of premium brass, the handheld showerhead provides an optimal performance even in low water pressure. All our products are of unique design and excellent quality.

Rome Wall Mount Gold Shower Set Specifications

  • Brand Name: BathSelect
  • Model Number: BS56GS
  • Type: Gold Shower Set
  • Material : Brass
  • Style: Classic
  • Connection Type: Standard 1/2
  • Finish: Gold
  • Feature: Easy Installation
  • Number of Handles: Single Handle
Rome Wall Mount Gold Shower Set
BathSelect® Manufacturer Warranty Information


  • INSTALLATION INSTRUCTIONS
    Fontana 16″ Round Multi Color LED Rain Shower Head

    Fontana 16″ Round Multi Color LED Rain Shower Head
    Fontana 16″ Round Multi Color LED Rain Shower Head
    Fontana 16″ Round Multi Color LED Rain Shower Head

    Fontana 16″ Round Multi Color LED Rain Shower Head


    5. Hole Locations For Wall Mount
    Remove Front Cover (5A) from Wall Mount (5B). Use Wall Mount Screw Holes (5C) to place the desired location. Using a punch or awl, tap the screw hole locations. Holes must be vertically aligned.

    7. Wall Mount Installation
    Place Wall Mount (7A) into wall and inset Mounting Screws (7B) through Wall Mount Holes (7C) and tighten until Wall Mount (7A) is flush with the wall. Do Not Over Tighten! Insert Front Cover (7D) into Wall Mount (7A).


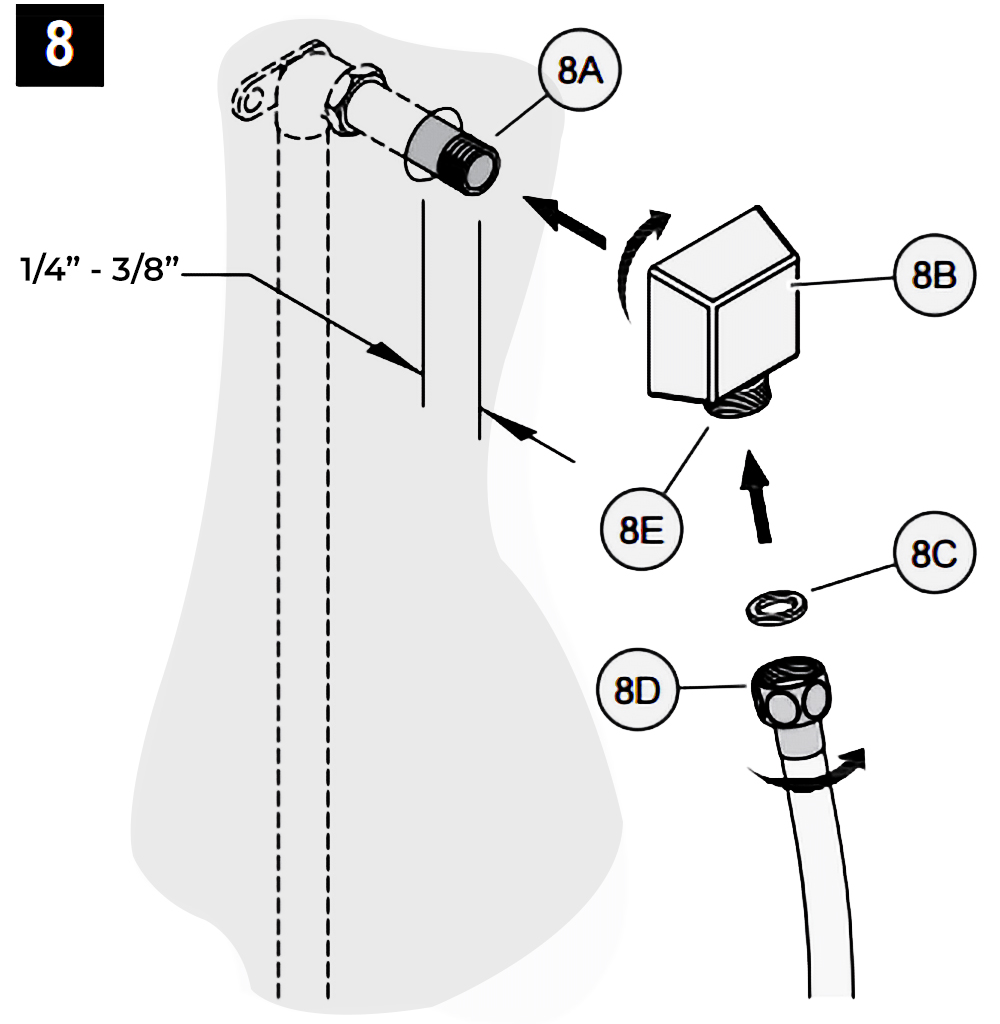
    8. Drop Elbow & Hose Installation
    Apply PTFE plumbers tape on both ends of Pipe Nipple (8A) (not included). Screw Pipe Nipple (8A) into the elbow inside the wall. The Pipe Nipple (8A) is to project 1/4” – 3/4” from the finished wall. Screw Drop Elbow (8B) onto Pipe Nipple (8A) and tighten until Drop Elbow (8B) is property positioned and flush to the finished wall.
    Place Rubber Seal (8C) inside Hex Hose Fitting (8D). Connect Hex Hose Fitting (8D) into Drop Elbow Outlet (8E) by turning Hex Hose Fitting (8D).


    9. Unit Start Up
    Turn on hot and cold water supplies, and check al connections for leaks.
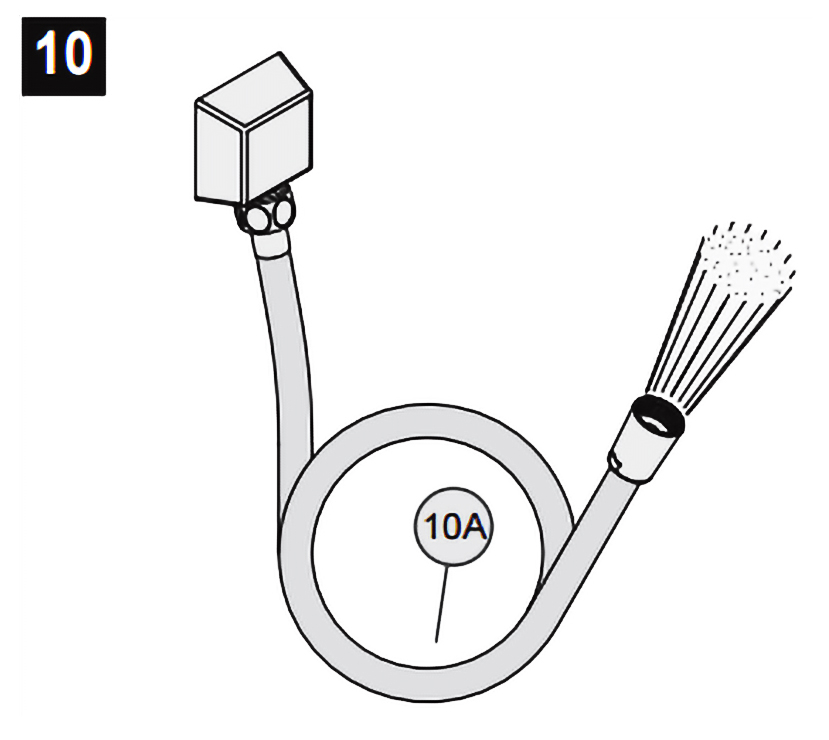

    10. Final Flushing
    For final flushing, turn valve on and allow water to run through the Hose (10A) for several minutes. Allow water to run for several minutes until all foreign matter clears the line.


  • BathSelect Ancient Round Antique Rainfall Wall ShoweBathSelect Ancient Round Antique Rainfall Wall Shower Head Installation Instructions Head Installation Instructions