.jpg)
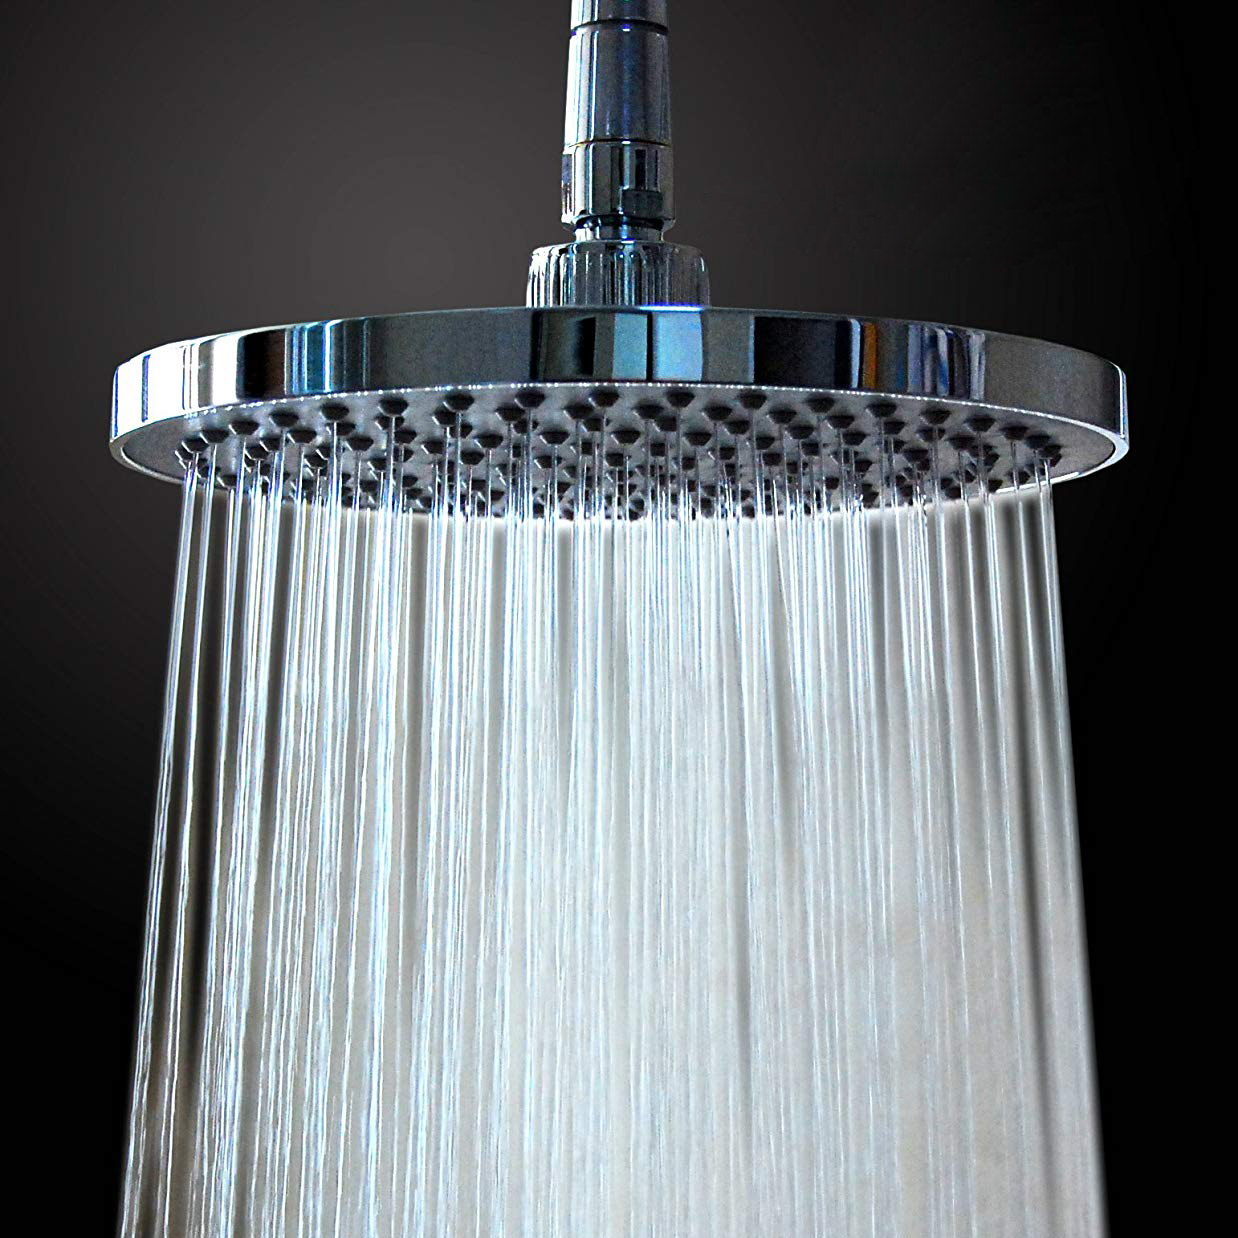
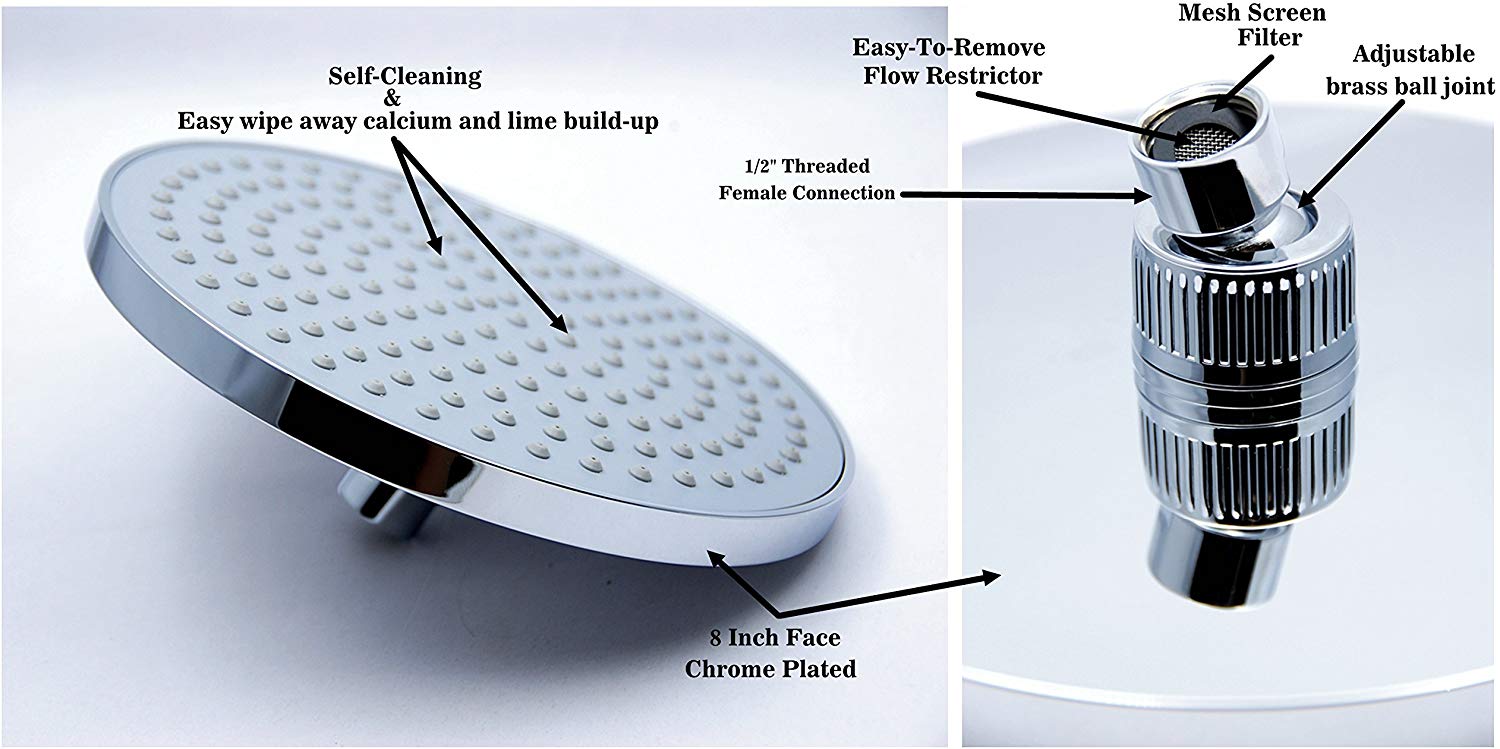
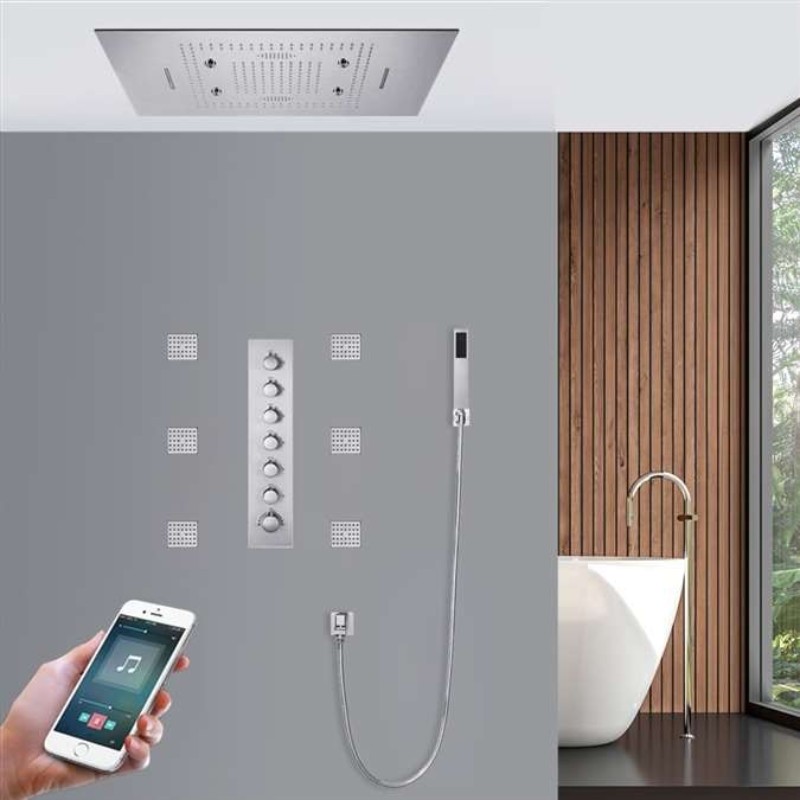
BathSelect Reno Stainless Steel Wall Mount Round Rainfall Shower Head In Chrome FinishWith this round stainless steel rainfall shower head, you can experience the new style of showering just over your head. No electricity or batteries are needed, and no need to figure out installation since it can be installed in minutes by simply unscrewing the old shower head and screwing in the new shower head, and no connections or adapters are needed it is made to fit all US 1/2" standard fittings that are simple. This high-tech is self-powered by water pressure and will automatically turn on in a minute. The shower head has an adjustable built-in swivel connector so you can point the shower head in any direction. Simply, you can turn on the fun in your shower just by turning on the water.
BathSelect Reno Stainless Steel Wall Mount Round Rainfall Shower Head In Chrome Finish Features
- Showerhead Length :16"
- Showerhead Width :16"
- Material: Stainless Steel
- Finish: Available in Chrome, Satin Nickel, Copper Metallic and Gold Metallic finish
- Color: Chrome
- Showerhead Style: Contemporary
- Rain Shower Mount Method: Wall or Ceiling Mount
- Connection :1/2" US standard (included)Shower Arm: Optional (purchased separately)
|
|
BathSelect® Manufacturer Warranty Information
|
|
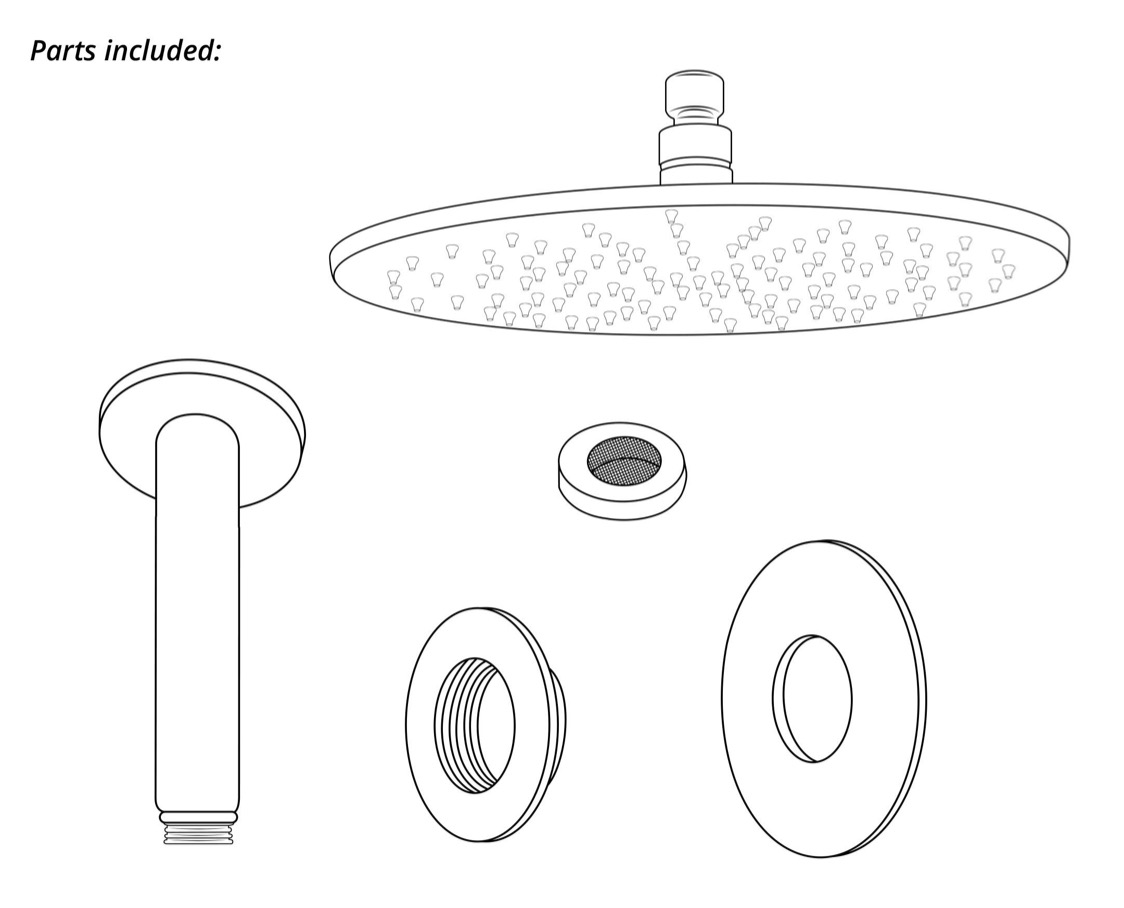
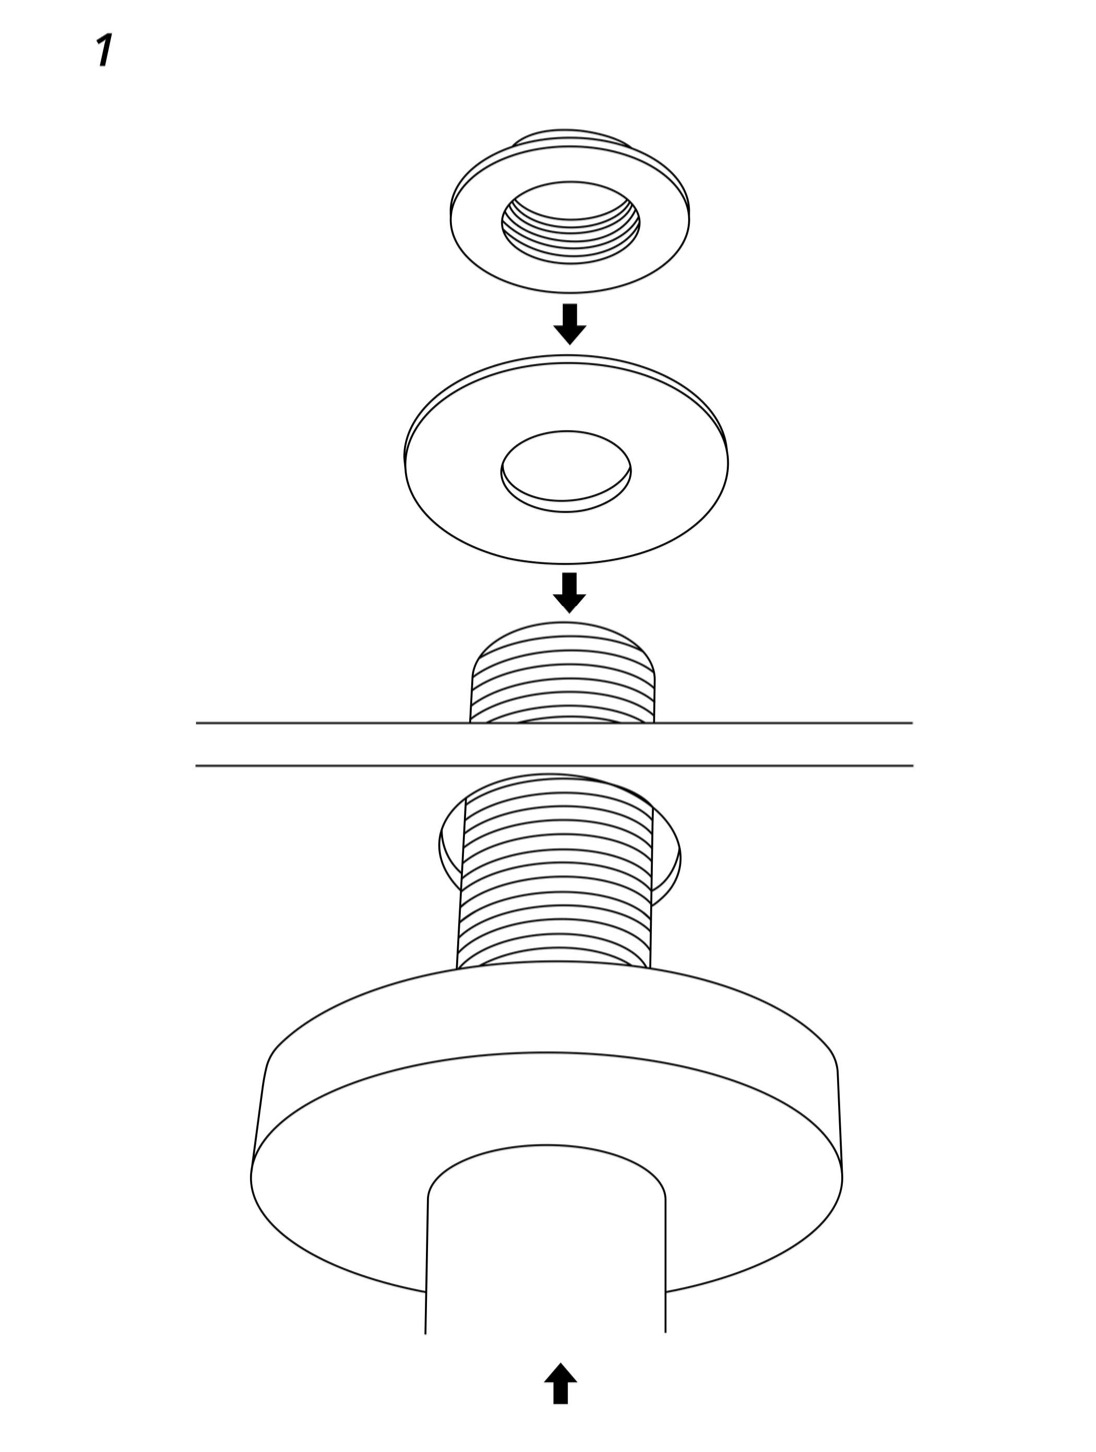
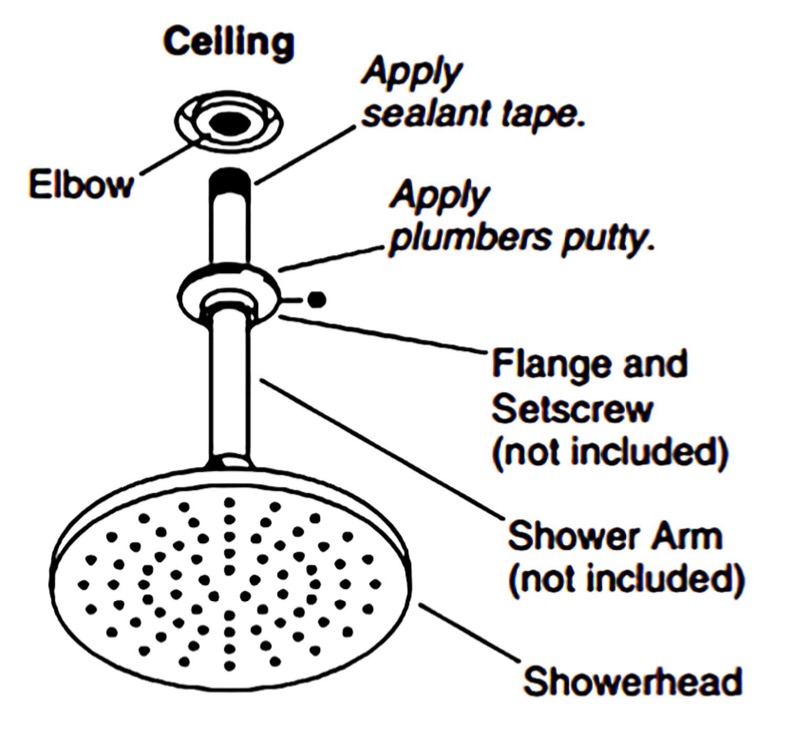
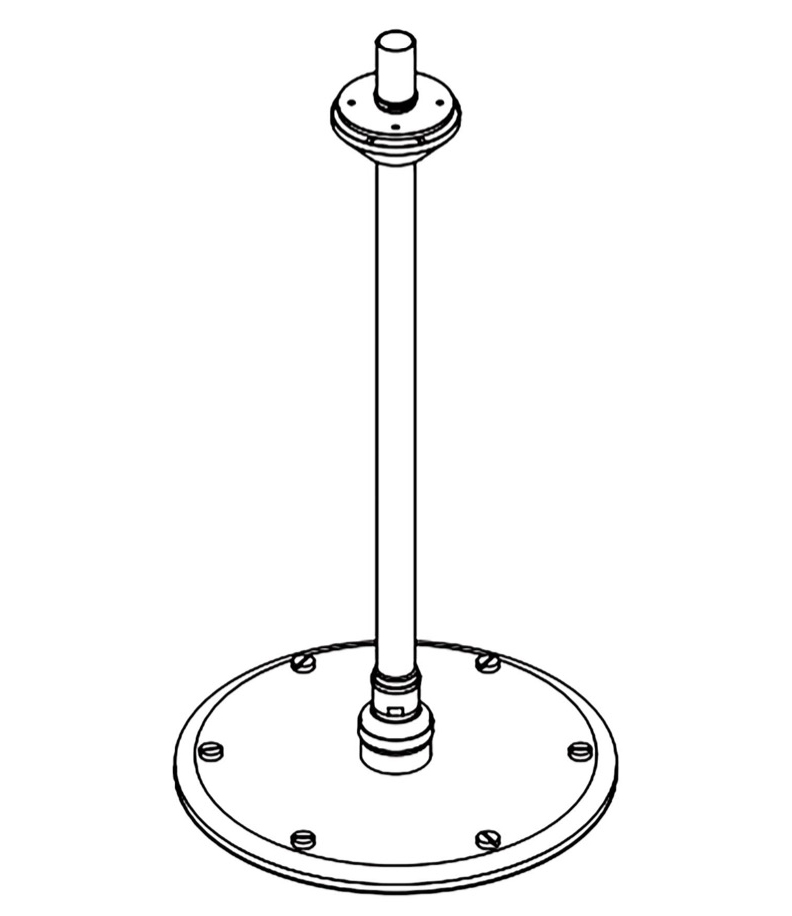
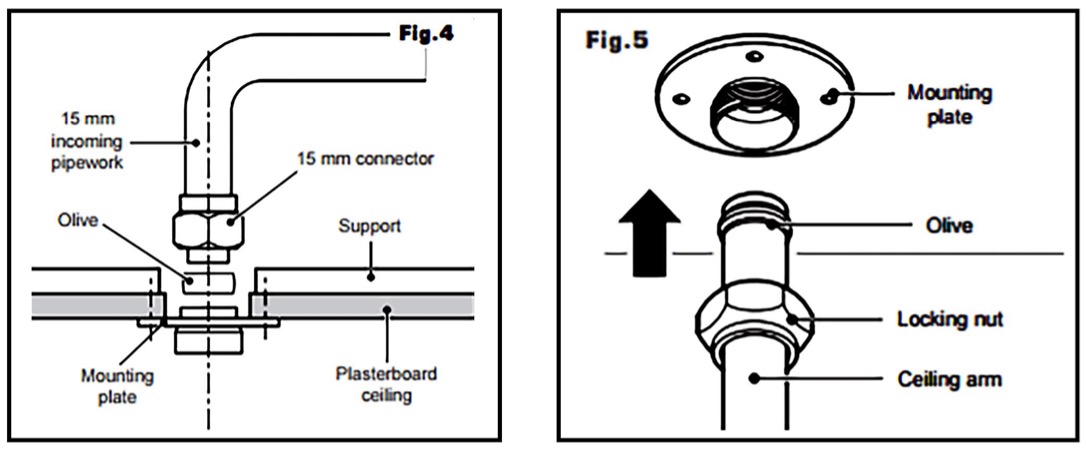
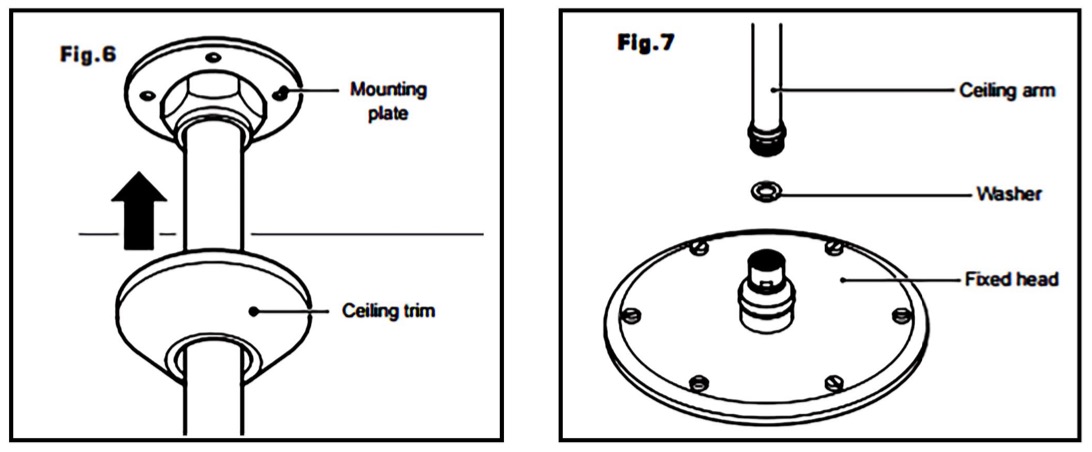
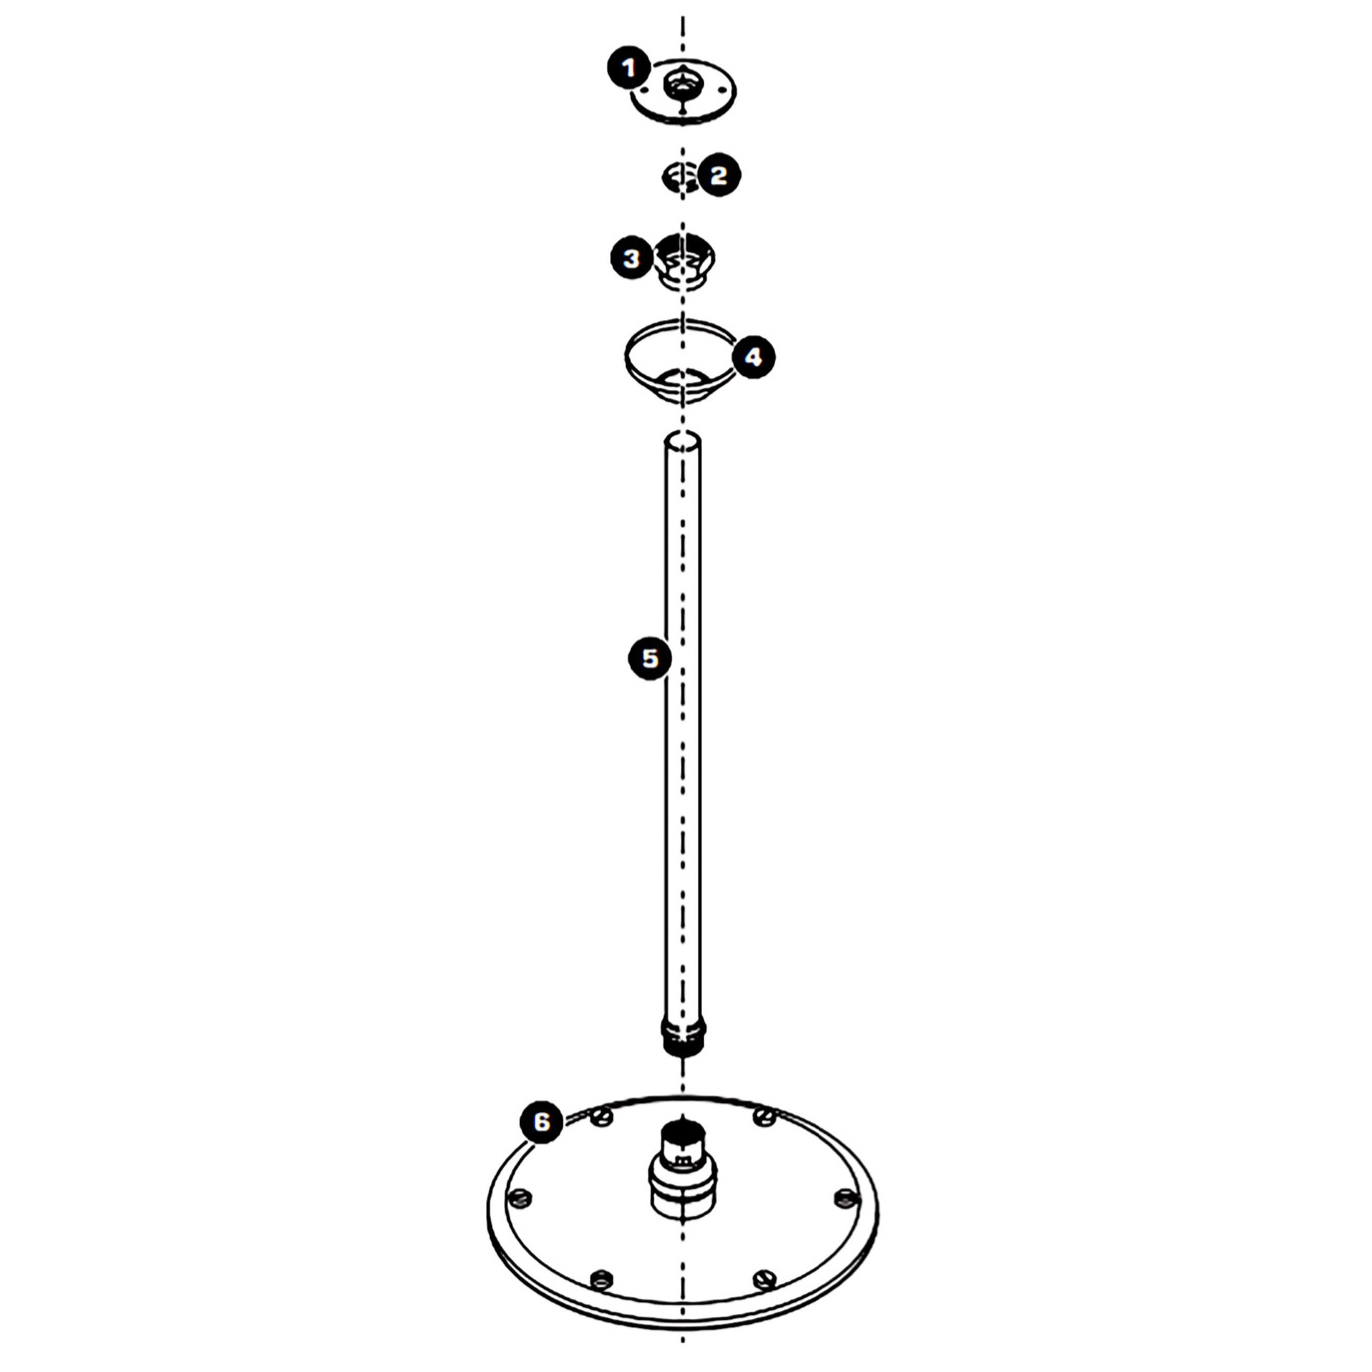
1. Ceiling arm mounting plate
2. Olive
3. Locking nut
4. Ceiling trim
5. Ceiling arm
6. Emily fixed showerhead
7. Fixing screws and wall plugs (not shown)
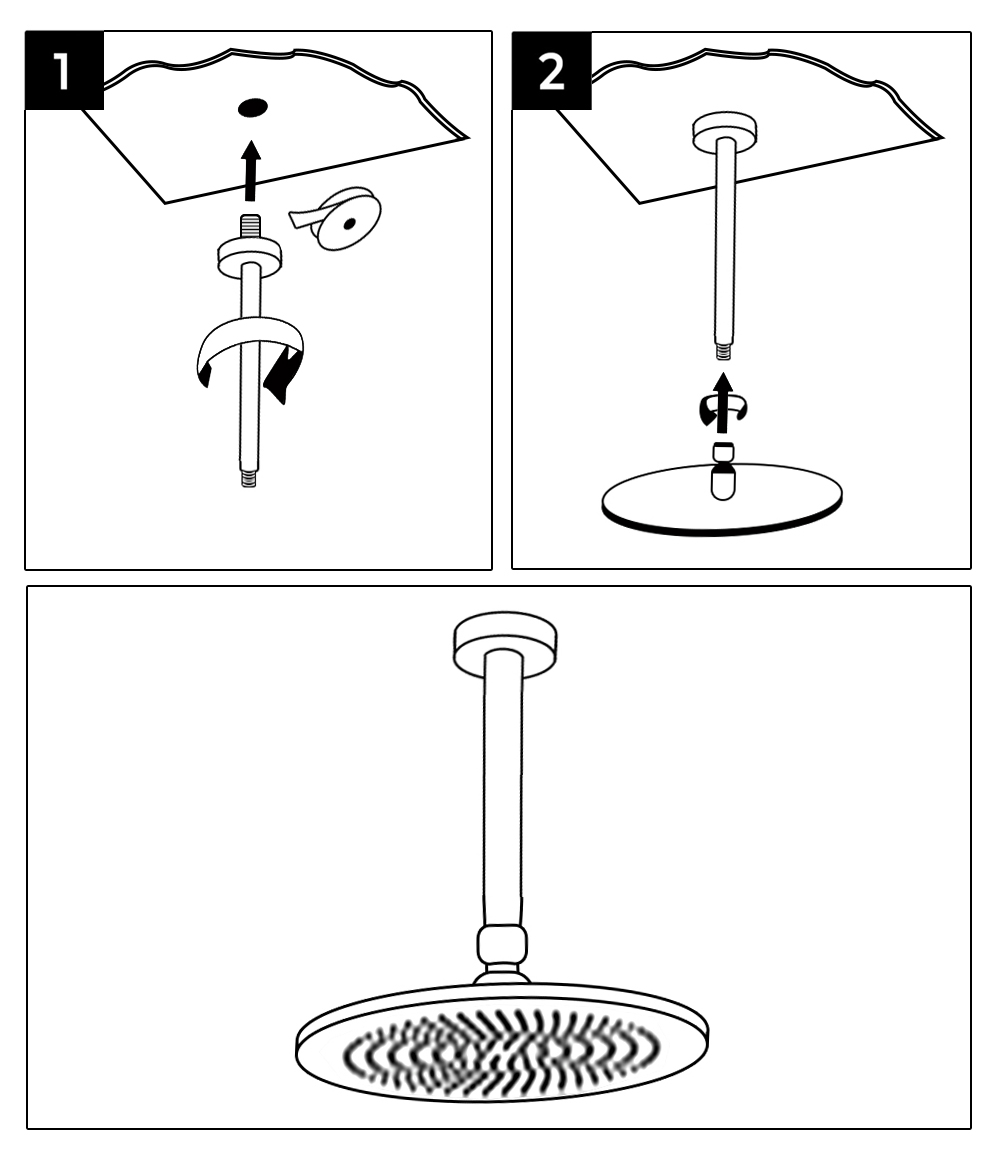
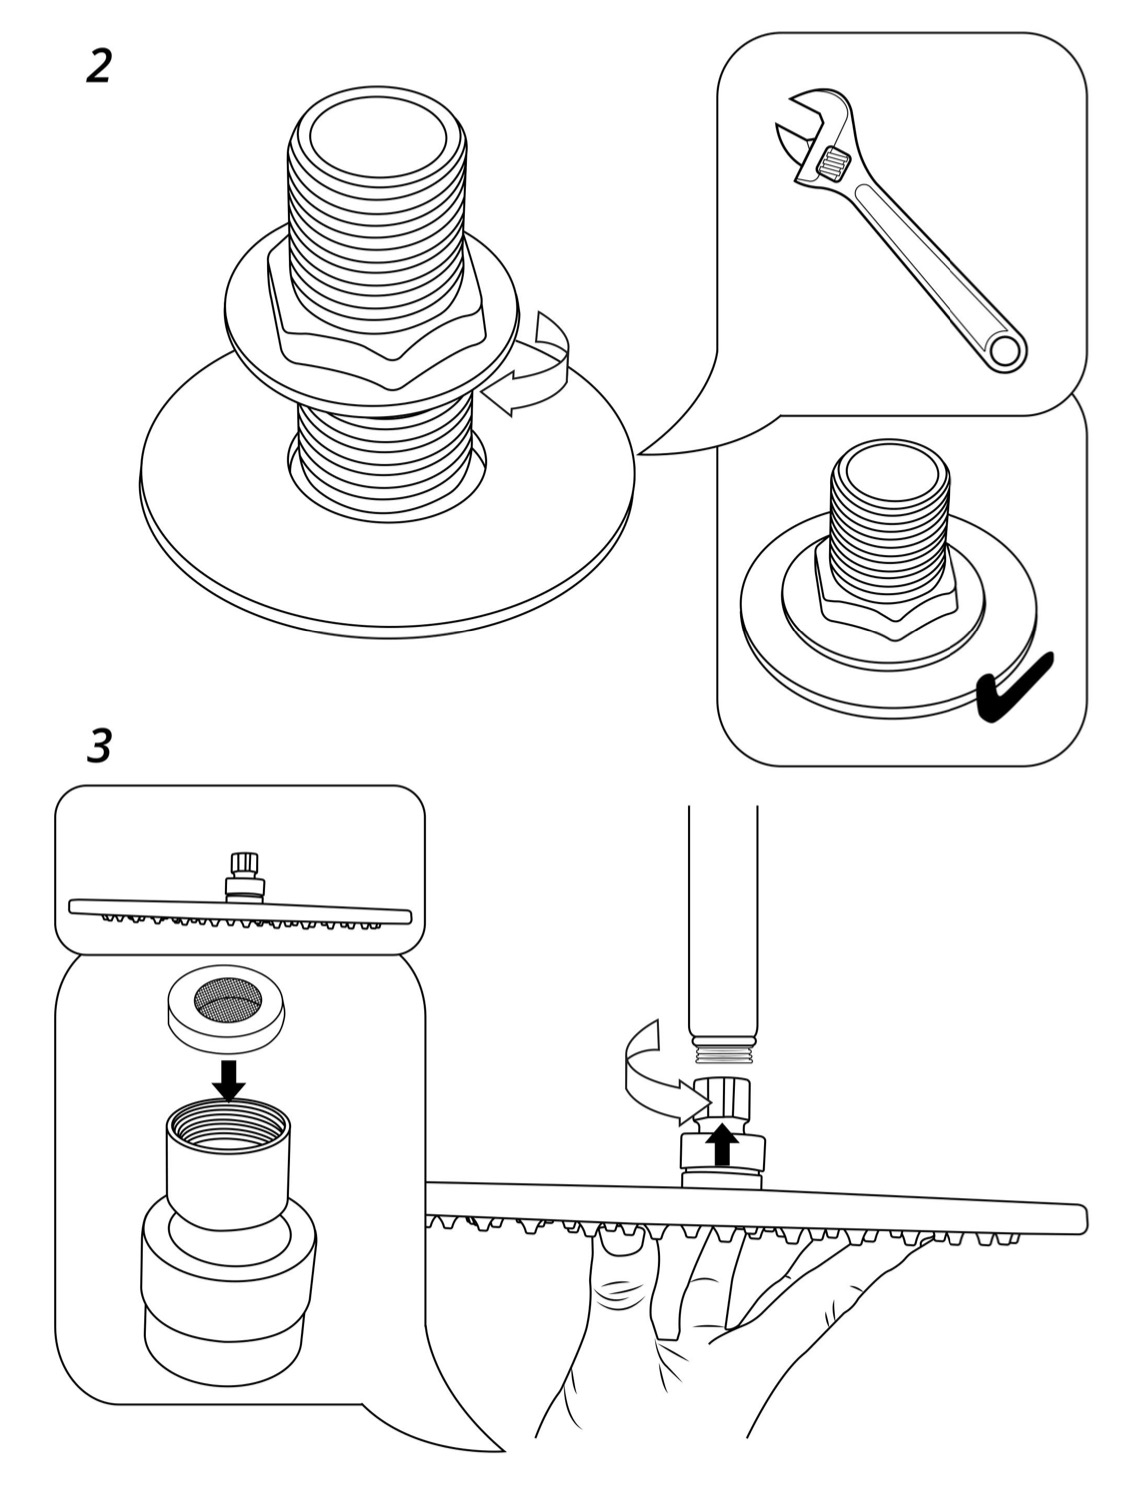
- Remove your existing shower head with a wrench.
- Set the wrench in place and turn the nut to the left to loosen it.
- Have a hand ready to catch the shower head when it falls so that the metal doesnt crack your shower floor.
- Clean the threads of the base of the shower head steel wool.
- Be sure to remove any debris that had collected around the threads.
- Wrap the threads with Teflon tape, This tape comes with almost all new shower faucets and heads and provides traction for the new hardware.
- Place a rubber O-ring inside the new shower head and water connection, this prevents any leaks and improves water pressure.
- Tighten the LED shower head.
- Test the Temperature Controlled Shower Head to make sure there are no leaks and that everything is working properly.
- Now you have a huge improvement in your bathroom for a minimal amount of cost and effort.
|
|


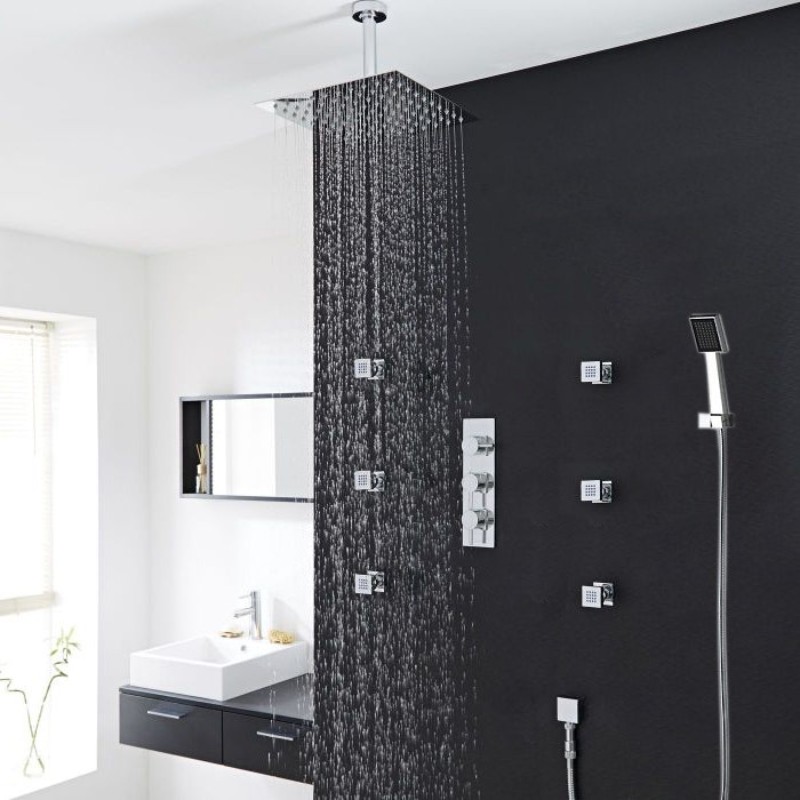
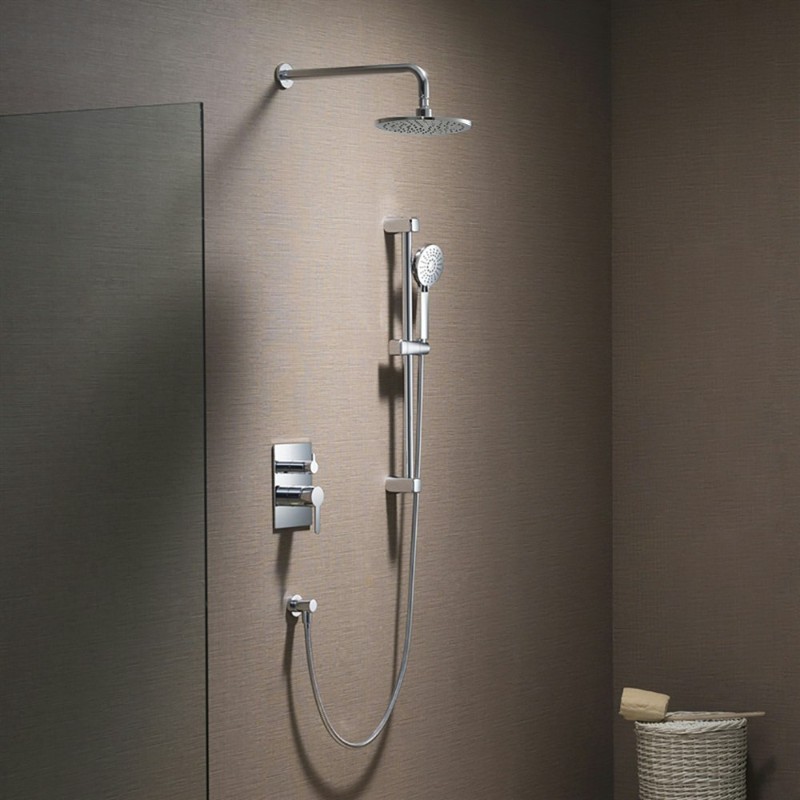
BathSelect offers a comprehensive collection of high-quality showers, flawlessly complementing any architecturally inspired bathroom.
We provide an extensive selection of unique designs and top-quality shower sets, ideally tailored for your architecturally inspired bathrooms!
Material and durability;
The material of the shower jets greatly impacts their durability and longevity. We provide stainless steel and brass shower jets, which are far more durable than plastic alternatives. The design of our shower jets also affects performance. Some of our showerheads are designed to create a relaxing rainfall effect, while others deliver a more targeted stream of water. Ultimately, the best shower jet for you depends on your individual preferences and needs. We invite you to explore our diverse selection of showerheads to find the perfect match for your bathroom!.BathSelect provides an extensive selection of unique design, top quality commercial for high traffic touchless bathroom faucets, ideally tailored for your architecturally-inspired commercial restroom!
|
|
|


.png)