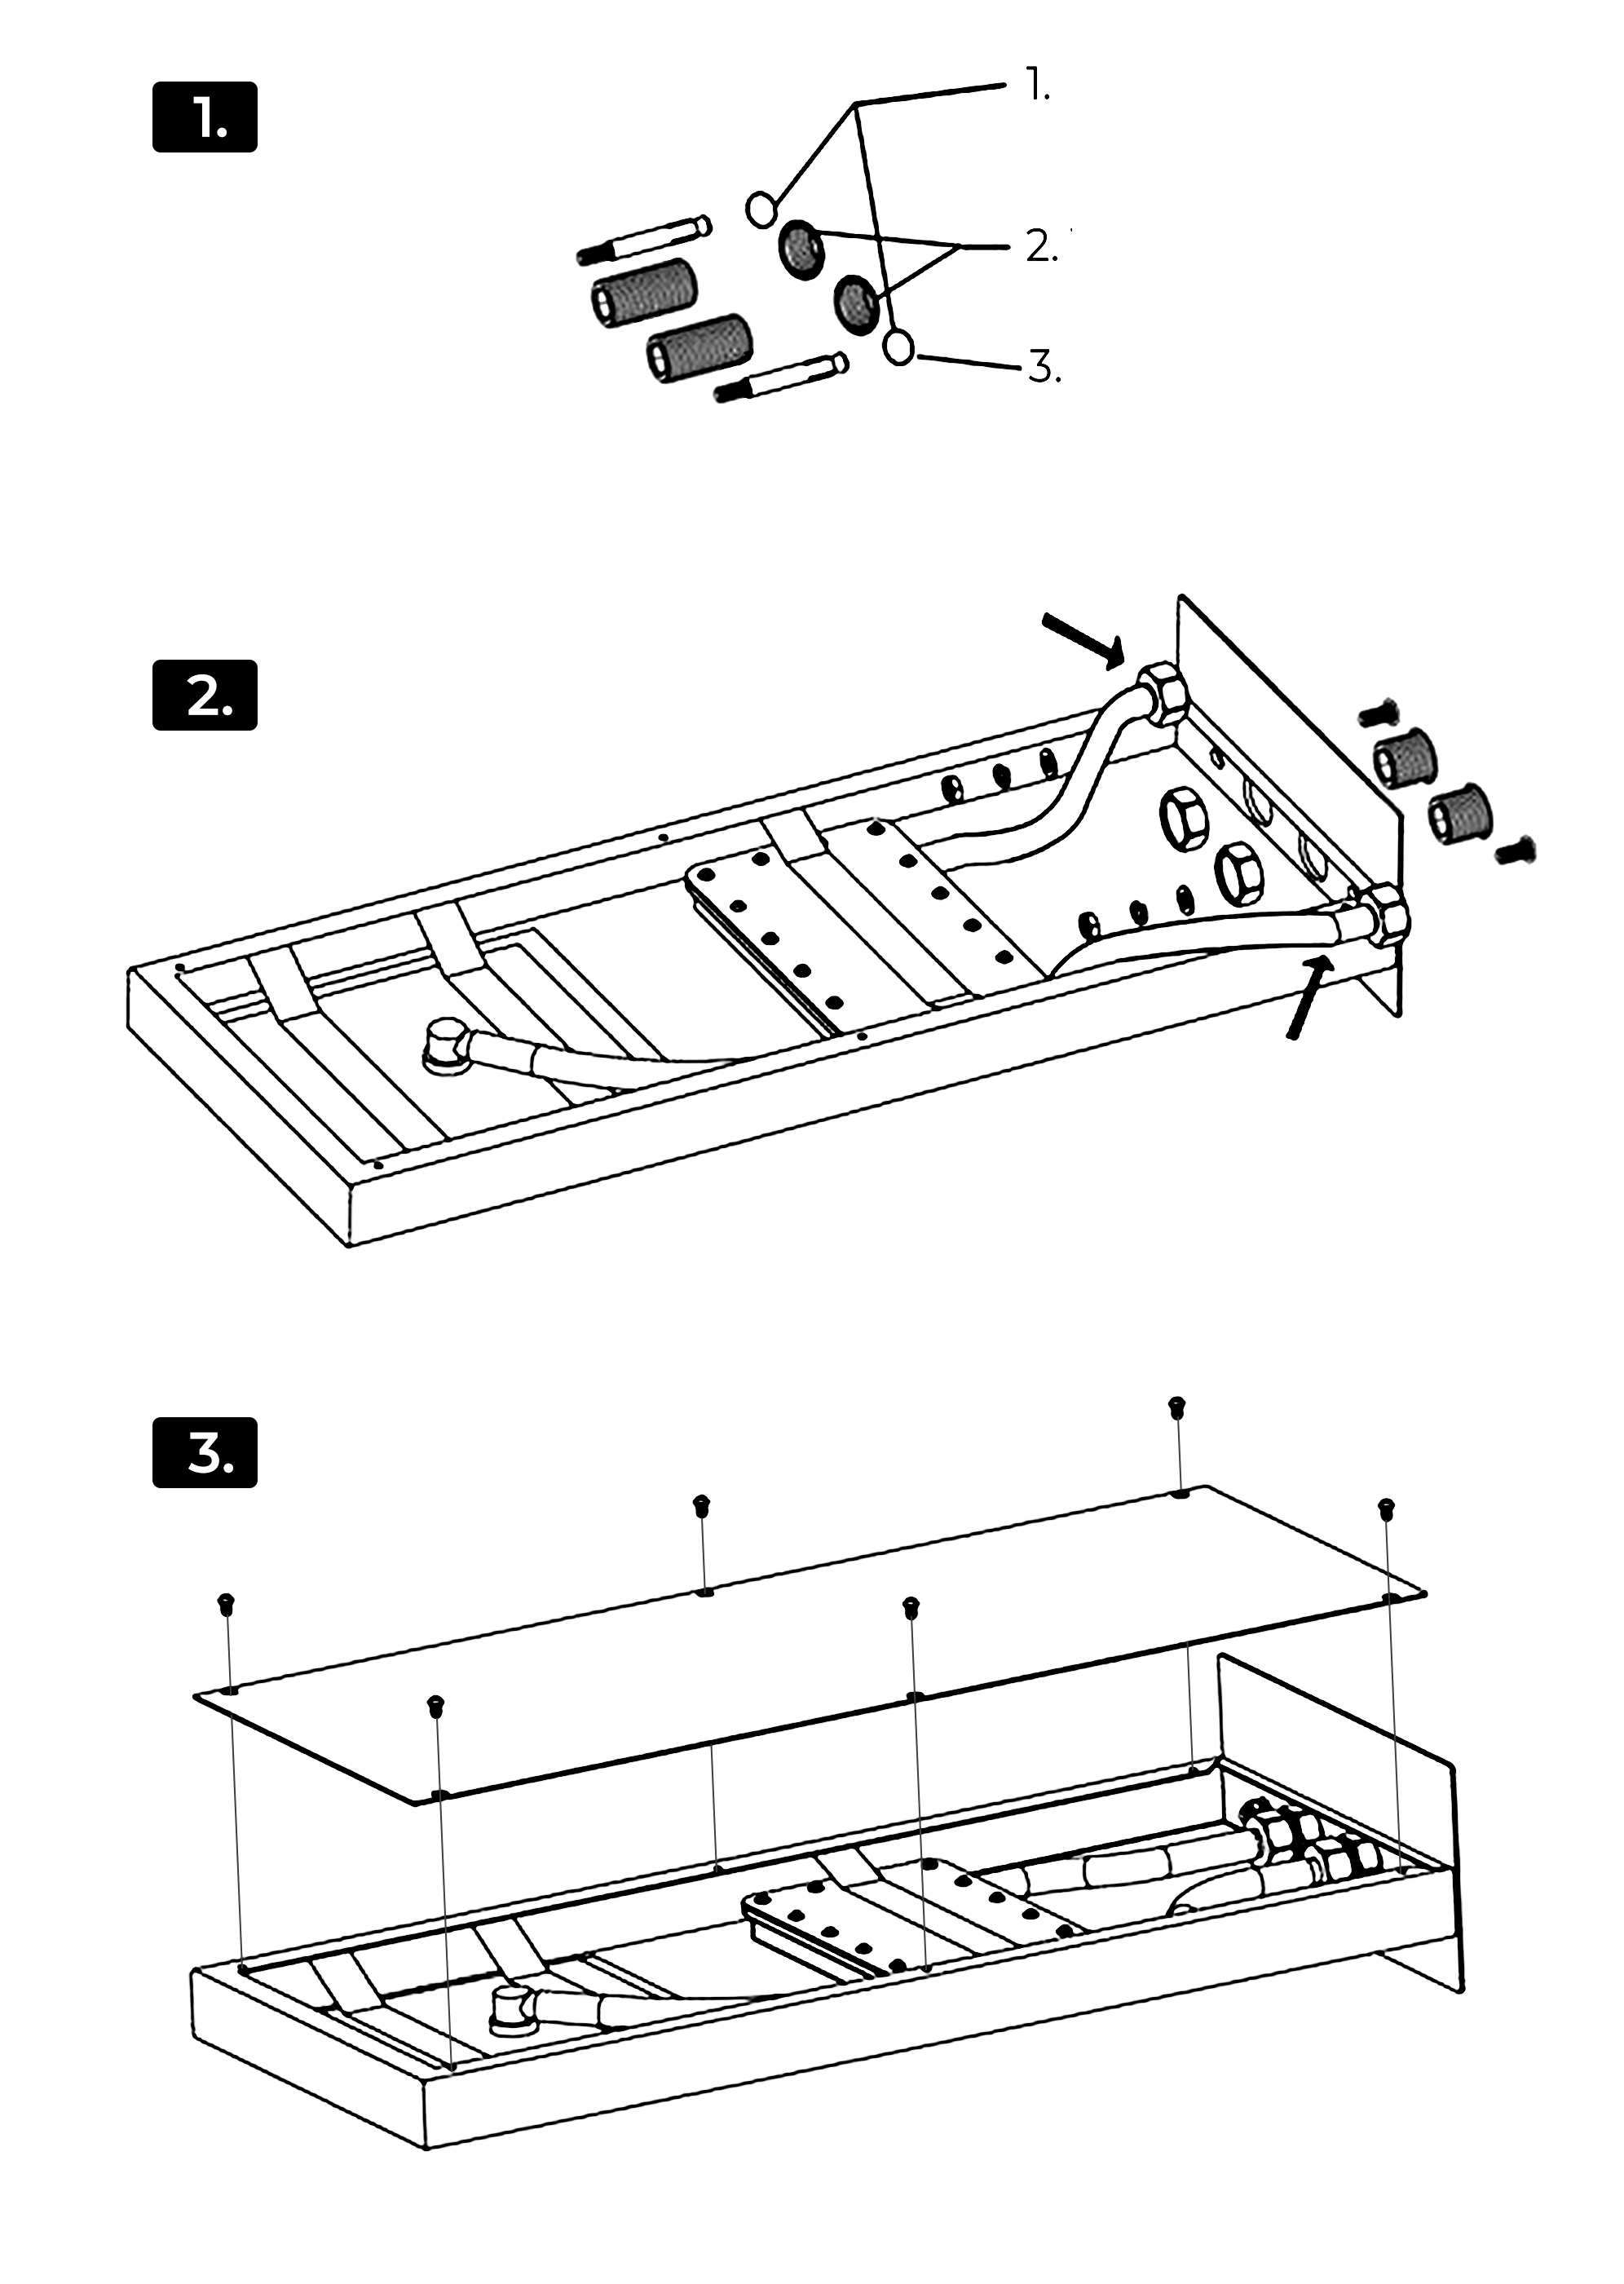
1. Open the top cover and drill according to the marked position.
2. Two inlet fittings are connected to the pipe joint of the wall; then the nut, expansion screw, and inlet pipe are connected.
3. Reinstall the top cover.
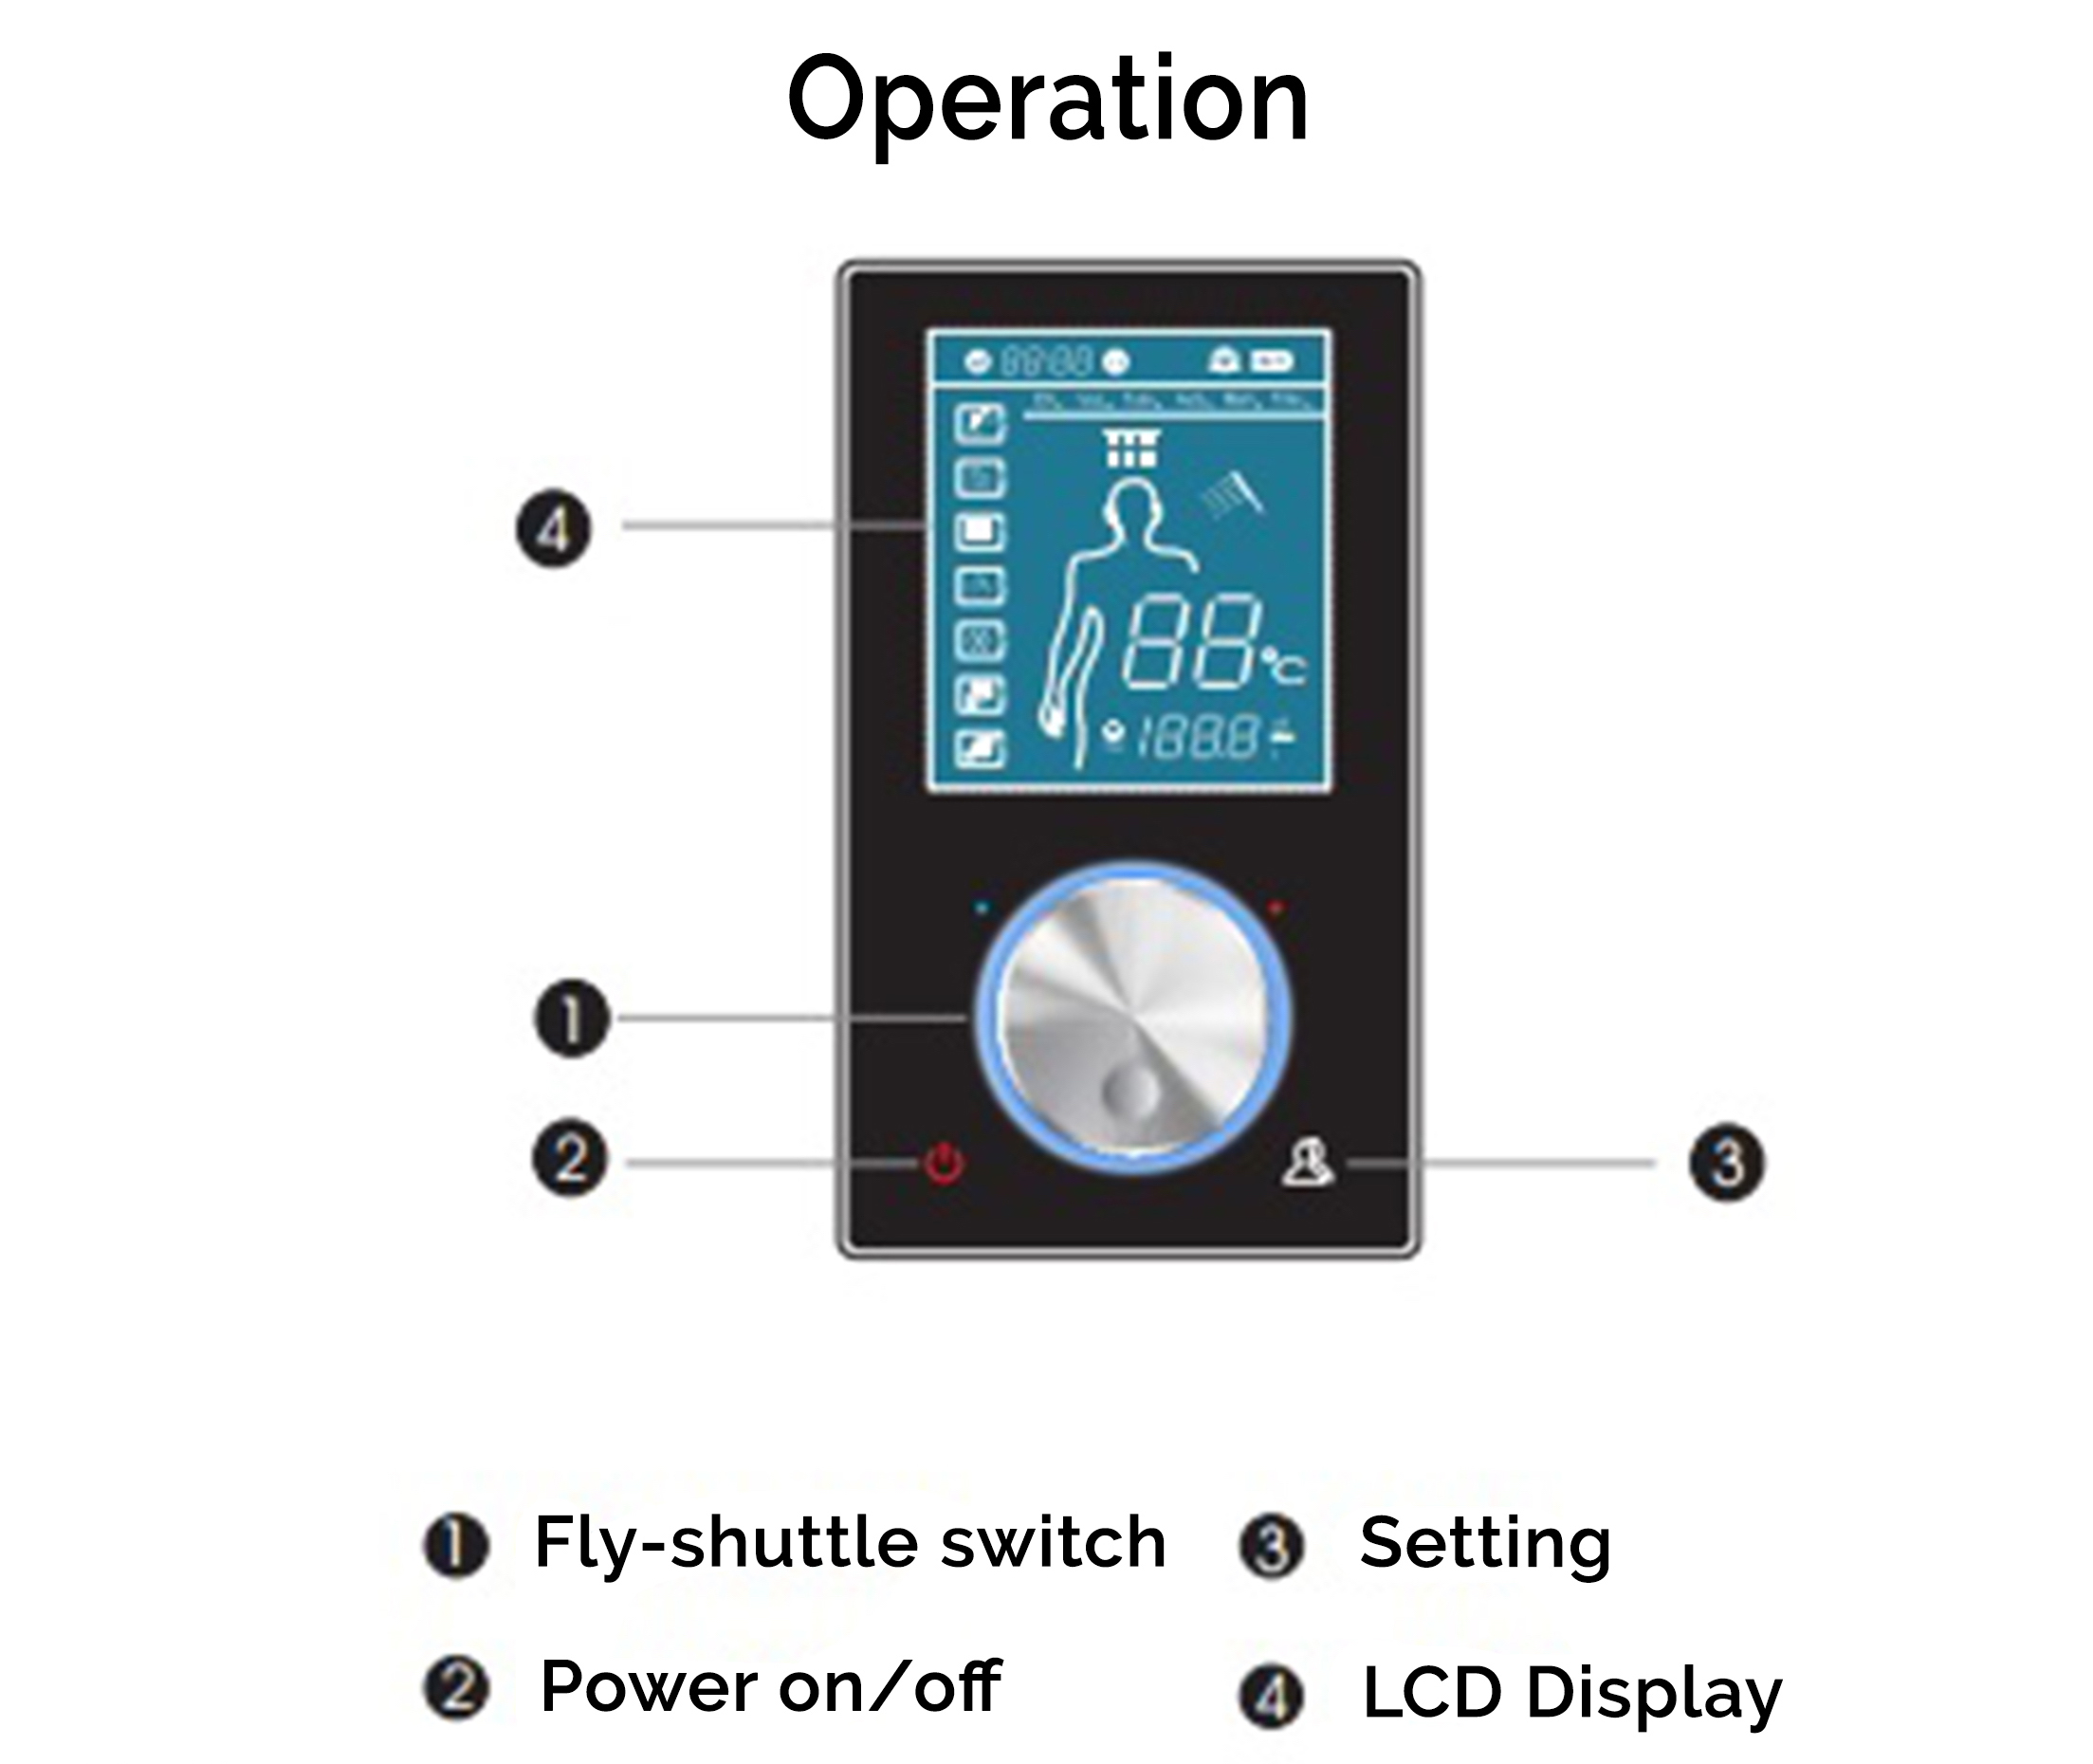
Operation
· Fly-shuttle switch
· Setting
· Power on/off
· LCD Display
Notice
1. The control panel is sensitive, when you install it, please avoid to let it face directly to the water from hand shower and the head shower because water will get it misoperation or lock the control panel.
2. The touch button is the best sensitive area.
3. The touch panel has water splash protection technology. When the system detects misoperation, no response, and need about 1 second to recover.
Function
1. Water TEMP adjust
2. Hand shower
3. Head Shower
4. Water flow adjust
Operation
1. Power on/off
Power on
After electrify, you can touch to make the system ON. When you hear buzzer sound, the fly-shuttle switch and the LCD panel would be lighting. Water TEMP and water flow will be the same as that you set last time. The cursor will be on the icon you using last time. The default working time is 60 minutes.
Power Off
When the system on, touch again to make the system OFF or the default working time is up, when you hear buzzer sound that means have close all the functions.
NOTE: (the background color of the fly-shuttle switch)
LED show blue color when TEMP below 33° C
LED show orange color when water TEMP between 34° C- 41° C
LED show red color when water TEMP over 41° C
2. Hand shower and head shower switch
When system on, rotating the fly-shuttle button left or right. the cursor would move to icon, pressing the fly-shuttle button to open hand shower or head shower (hand shower and head shower are inter-locked, you can turn on only one time), the corresponding operation icon would brighten up on the LCD panel after turning on. The cursor could move to icon, pressing again the fly-shuttle button to close hand shower or head shower, the corresponding function icon would be dark.
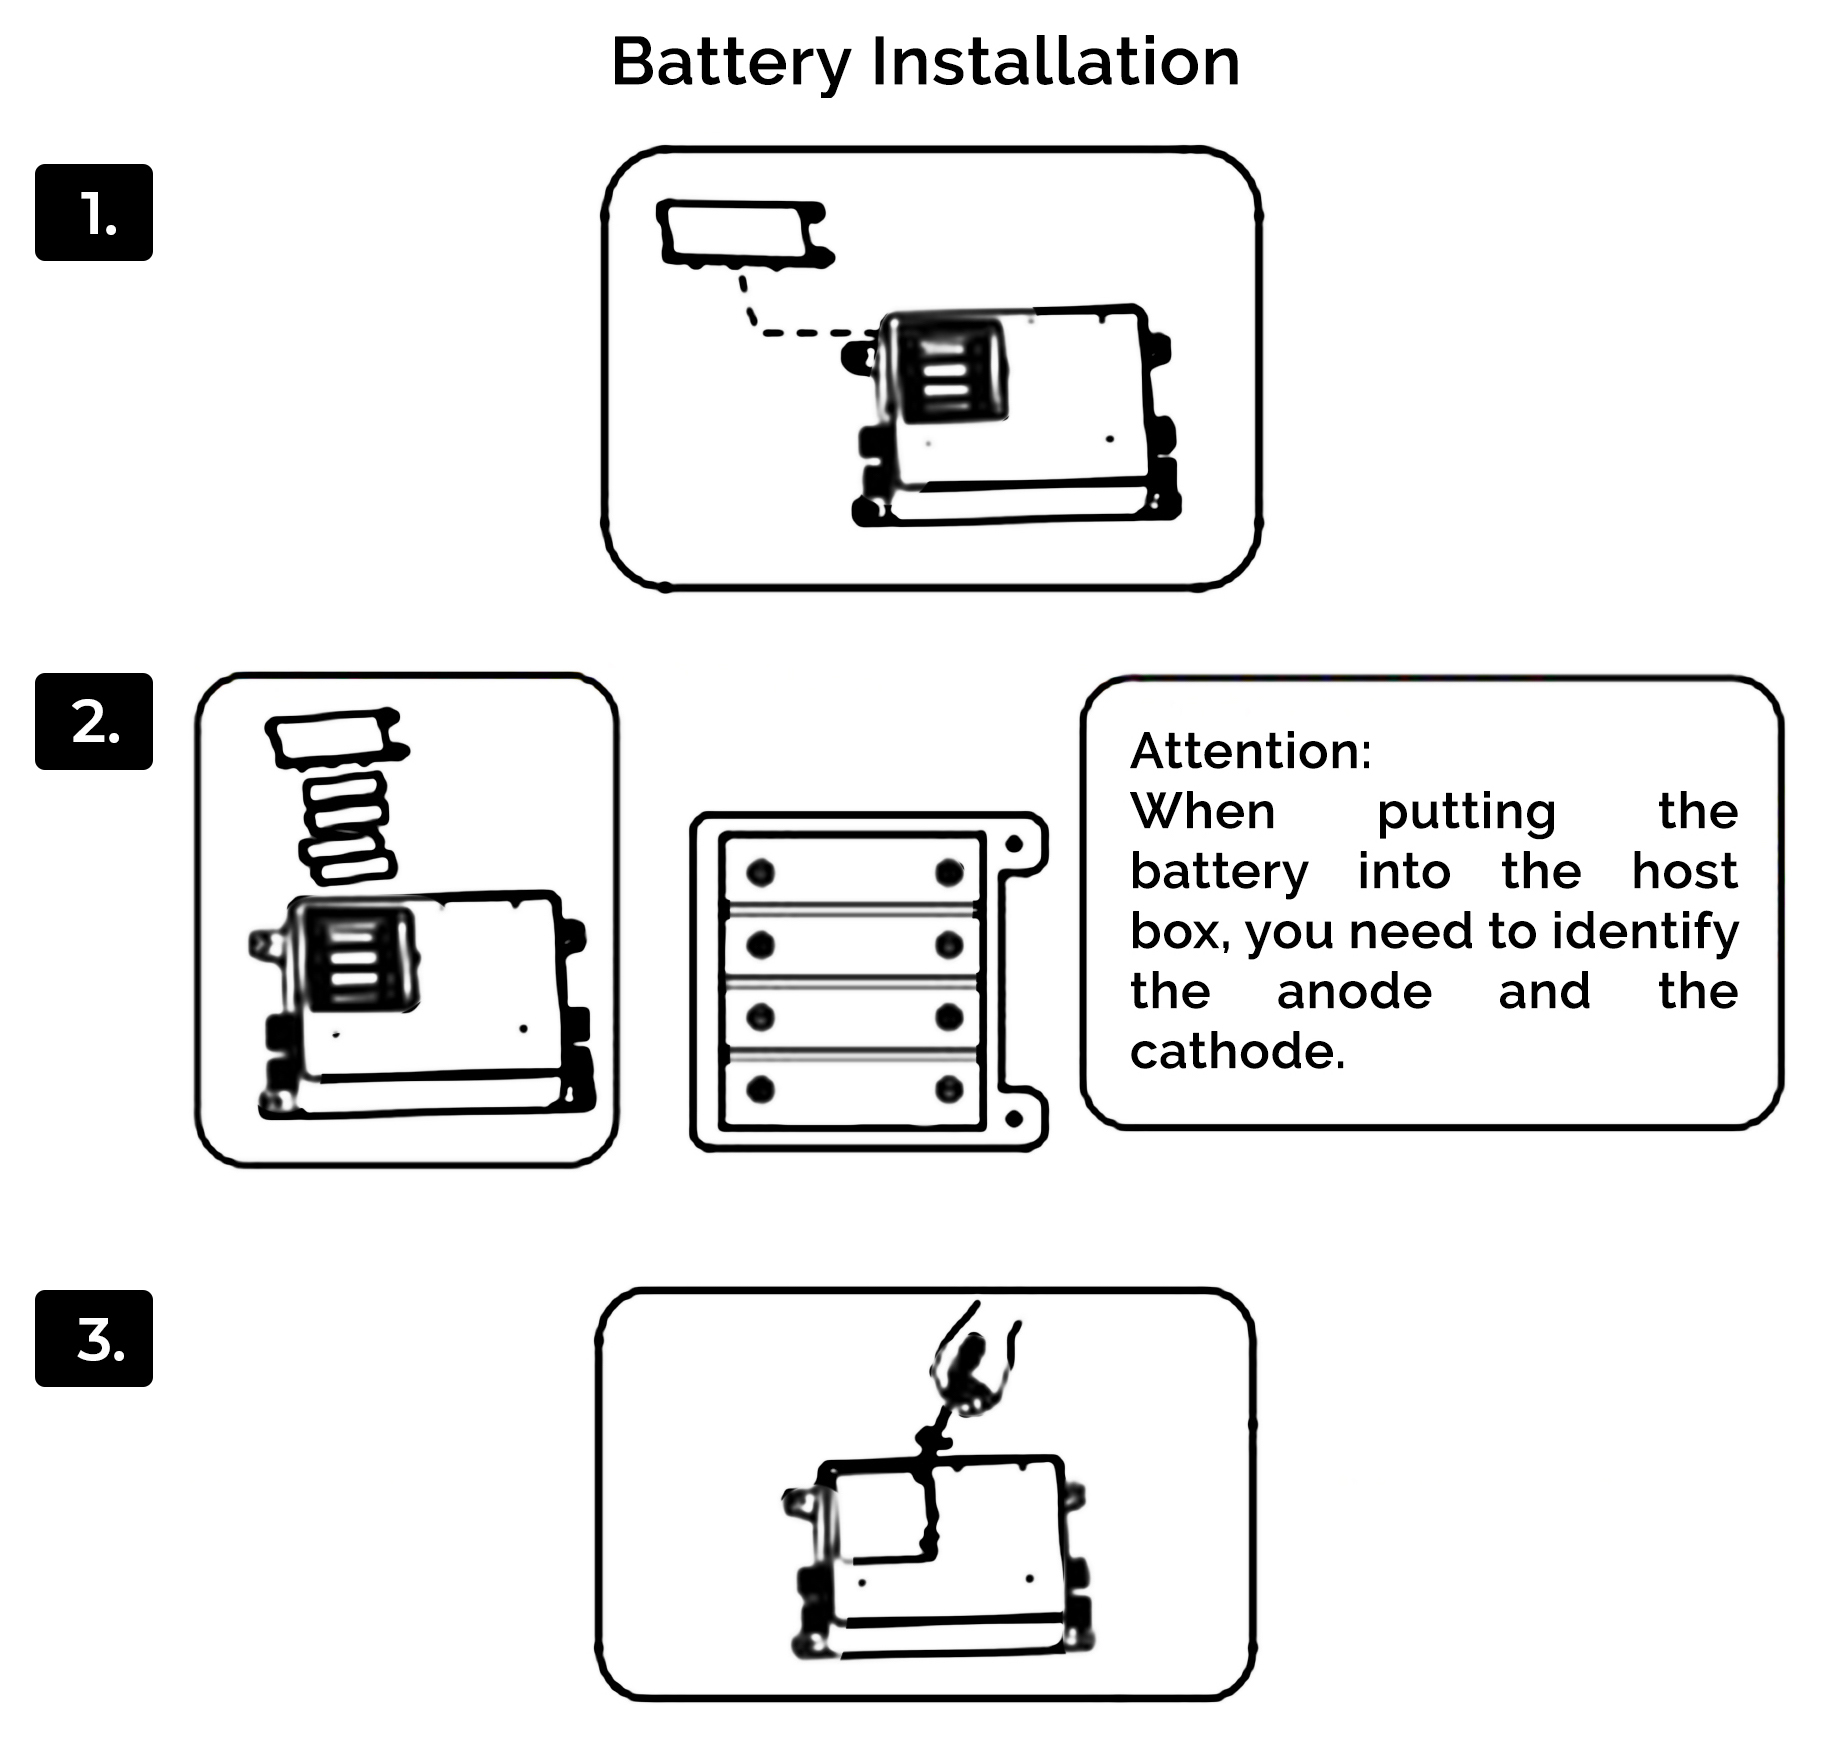
Battery Installation
1. Loose the screws on the battery cover and take it off.
2. Putting 4 pcs rechargeable batteries into the battery slot of the host box.
Attention: When putting the battery into the host box, you need to identify the anode and the cathode.
1. Insert the battery cover into the host box, and Lock it with the screws.
Caution:
Using rechargeable NI-MH battery [the 5#(AA) and the capacity is more than l000Mah).
After electrify, forbid using the normal 5#(AA) battery. Otherwise, would cause the battery explosion.
When the power cut, you can use the high quality normal 5#(AA) dry battery as the emergency measure. But you must unplug the adapter.
When you install the host box, please put the battery into it. If the product hasn't connected with the power in a long time. Please take out the battery from the host box. This way can avoid affecting the battery working life.
If you want the battery with a longer working life, you can charge the battery every some months.
Installation of the Control Panel
There are two kinds of installation ways shower controller according to the installation site, one way is to recess mount into the wall. Another way is to build into the shower panel.
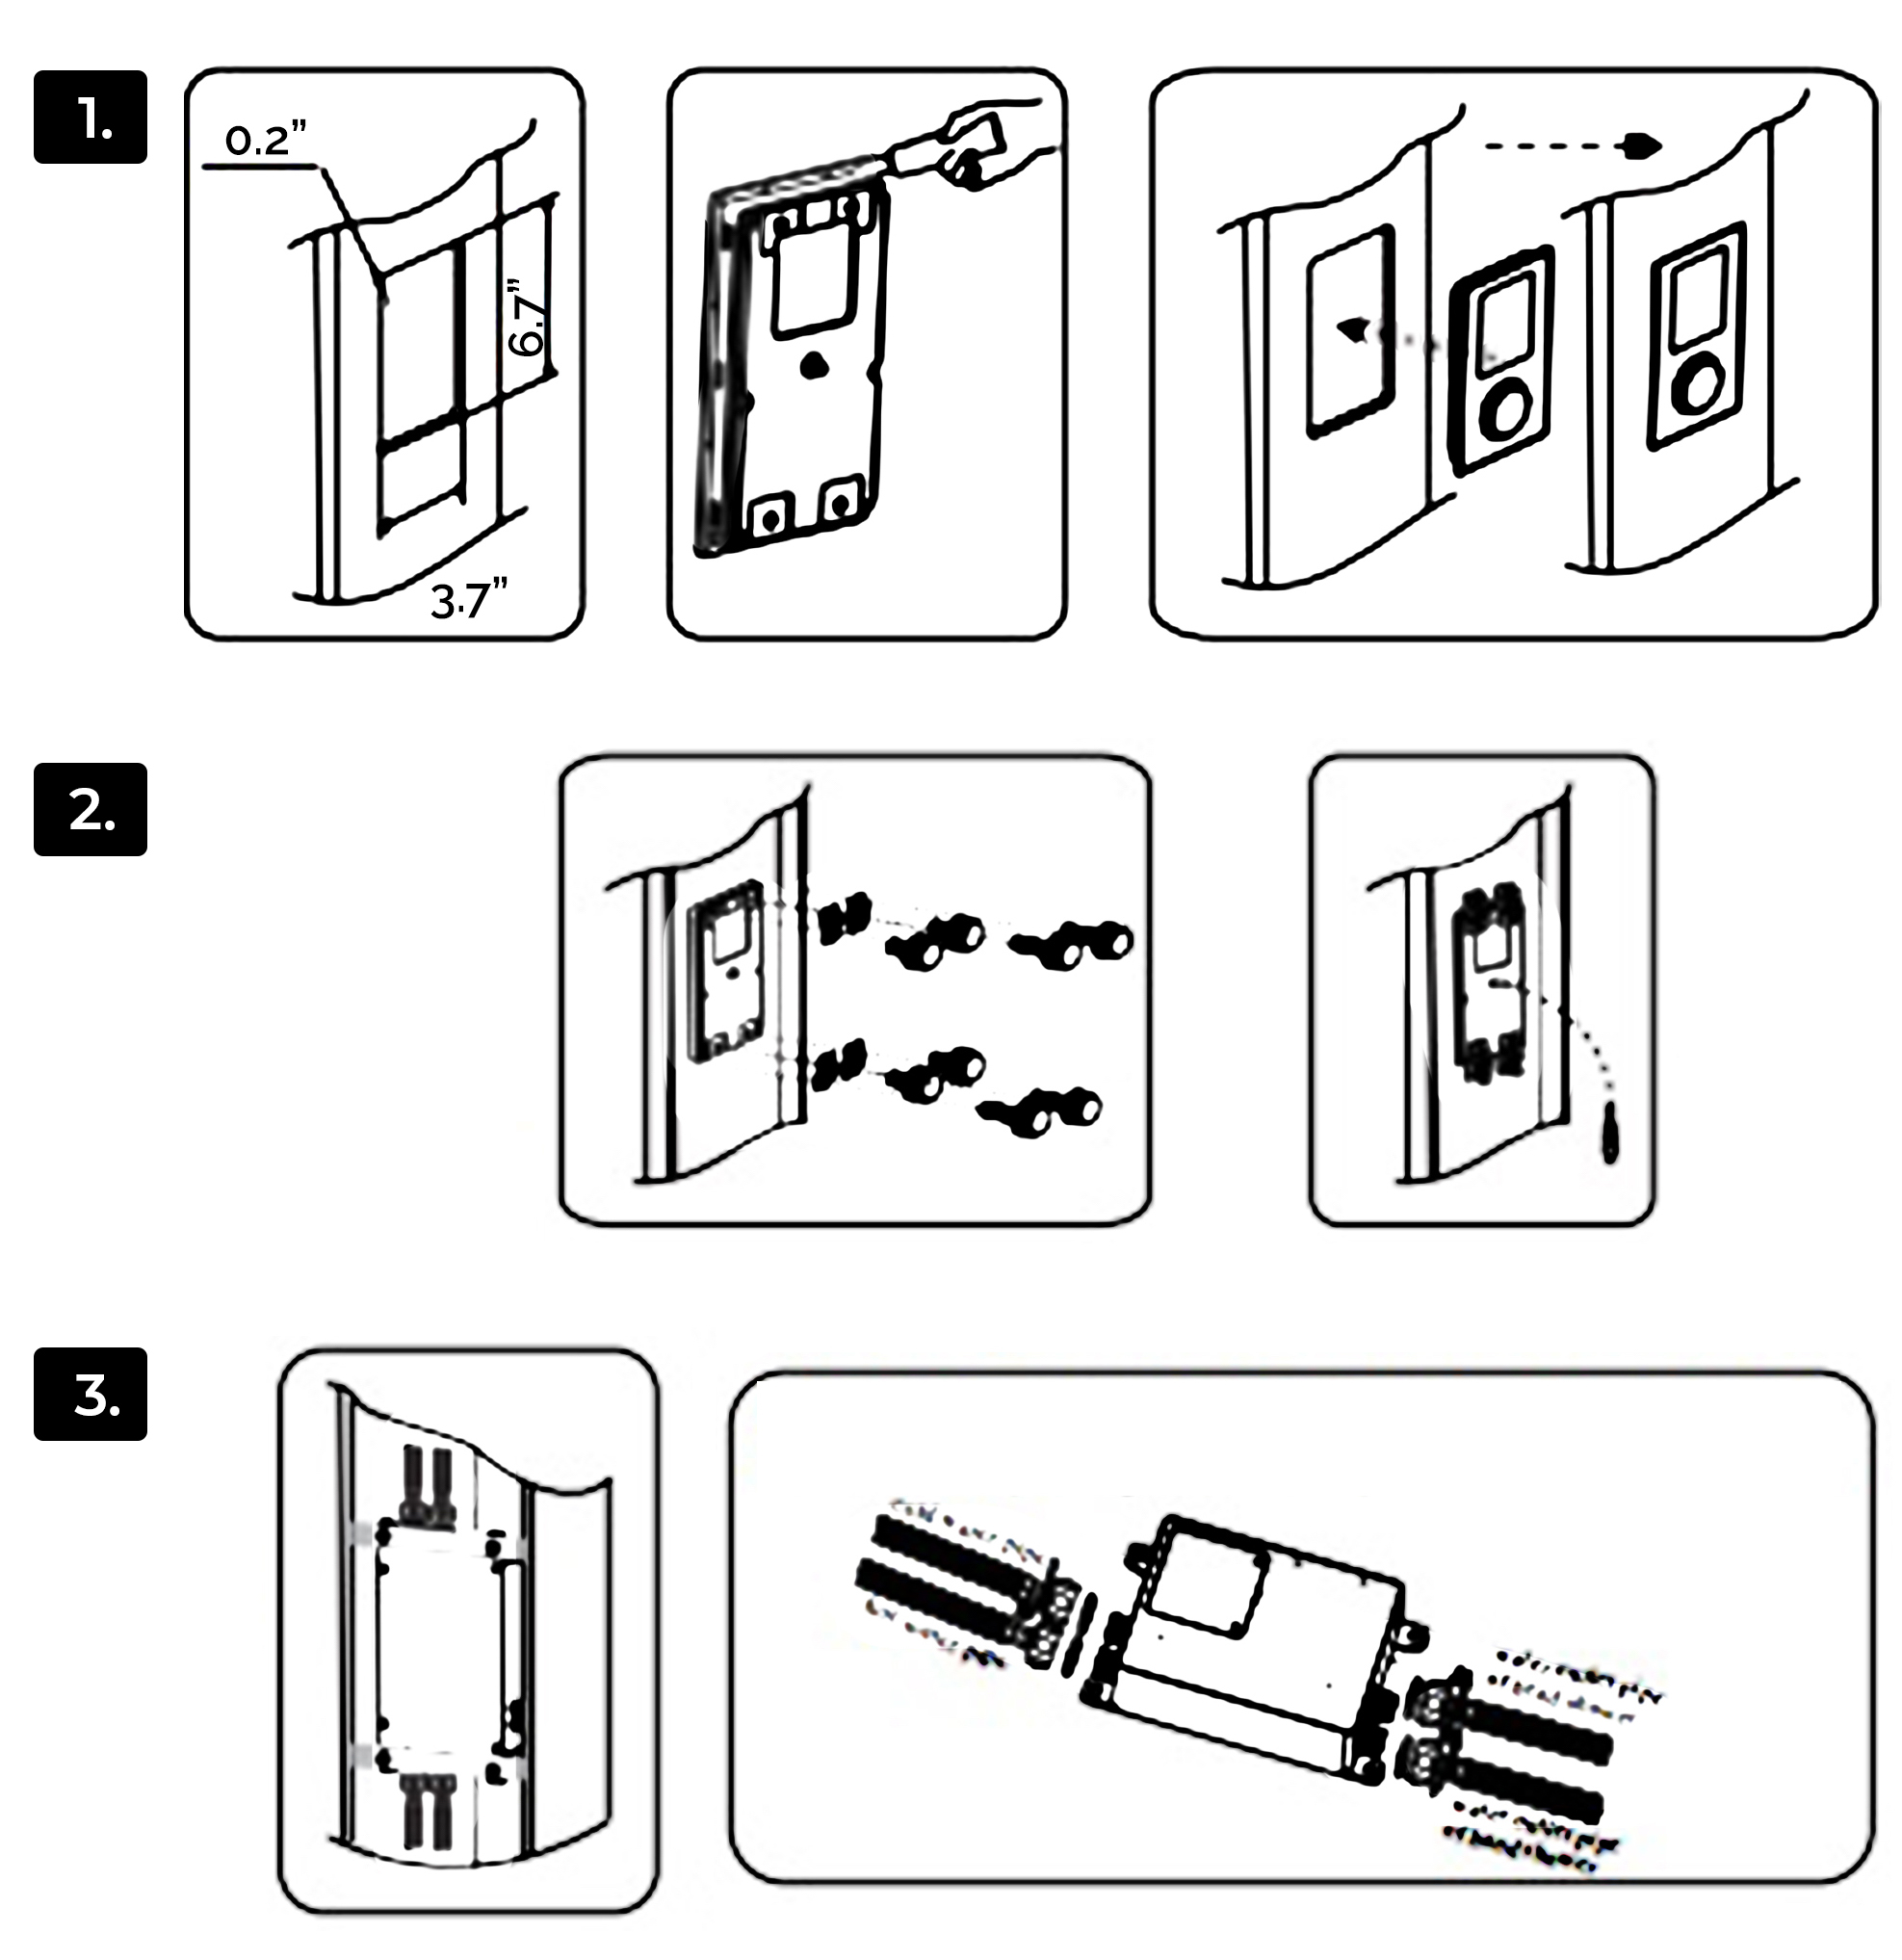
1. Build the control panel into the shower panel
Step 1: Open a hole (6.7" X 3.7") on the shower panel, putting some glass cement around the back of the control panel and fit it in the hole of the shower panel as picture shown.
Step 2: Fasten the mounting bracket onto the back of the control panel by screws.
Step 3: Install the host box on the back of the shower panel, connect the cold water and hot water pipe, hand shower, and head shower's pipes.
1. Connect the G1/2" hot and cold water inlet pipes to the host box, tighten it and make sure connection is well sealed (as the picture showed).
2. Connect the G1/2" water inlet pipe of the faucet to the water outlet pipe of the host box, tighten it and make sure connection is well seated (as the picture is shown).
Caution:
When installation, the hot water pipe, and the cold water pipe cannot mix up. Otherwise, the system cannot work.
When you tighten the connector nut, torque should not exceed 8NM, GB 2.5NM is OK, otherwise, it will damage the connector of the mixing valve and lead to water leaking.
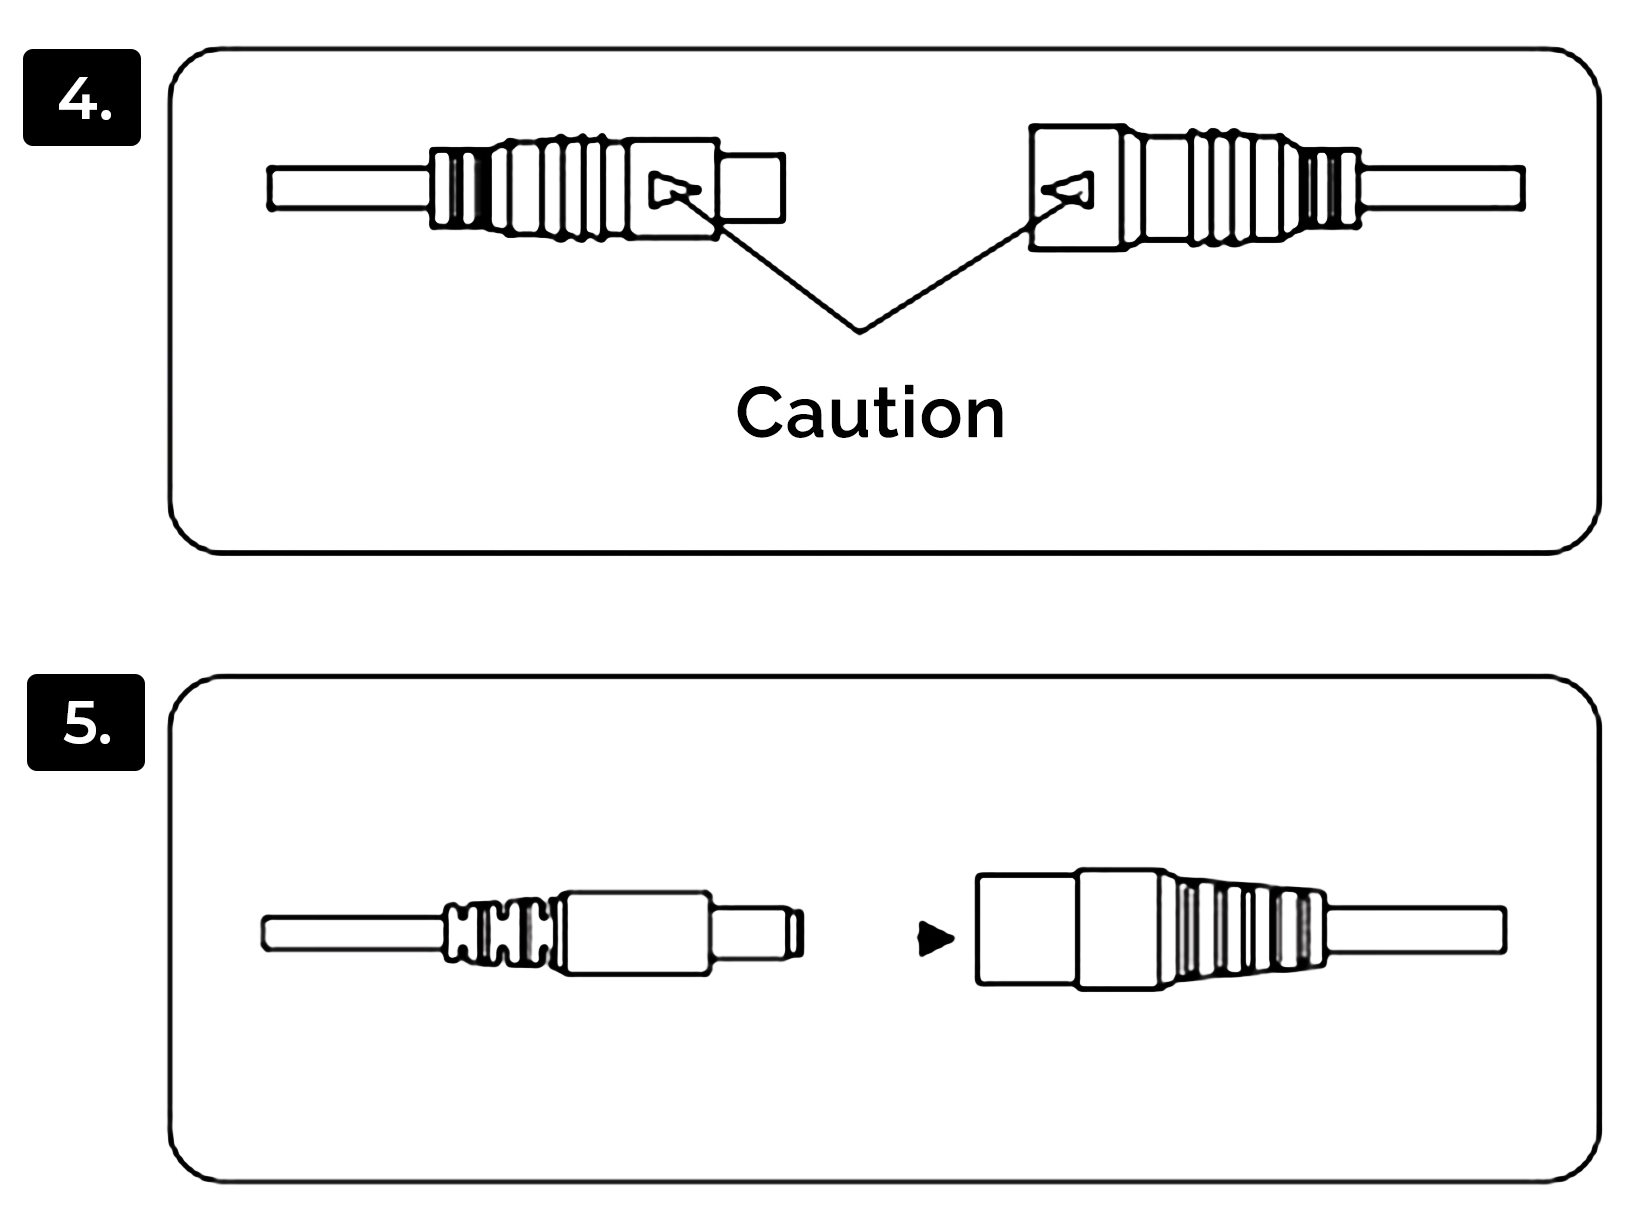
Step 4: Connect the host box control cable with the control cable of shower faucet as an arrow mark on the picture.
Caution:
When connecting the two control cables, you must follow the arrow mark which is shown in the cable joint. If not, it will damage the cable joint.
Step 5: Connect the power supply cable of the host box with the adapter.
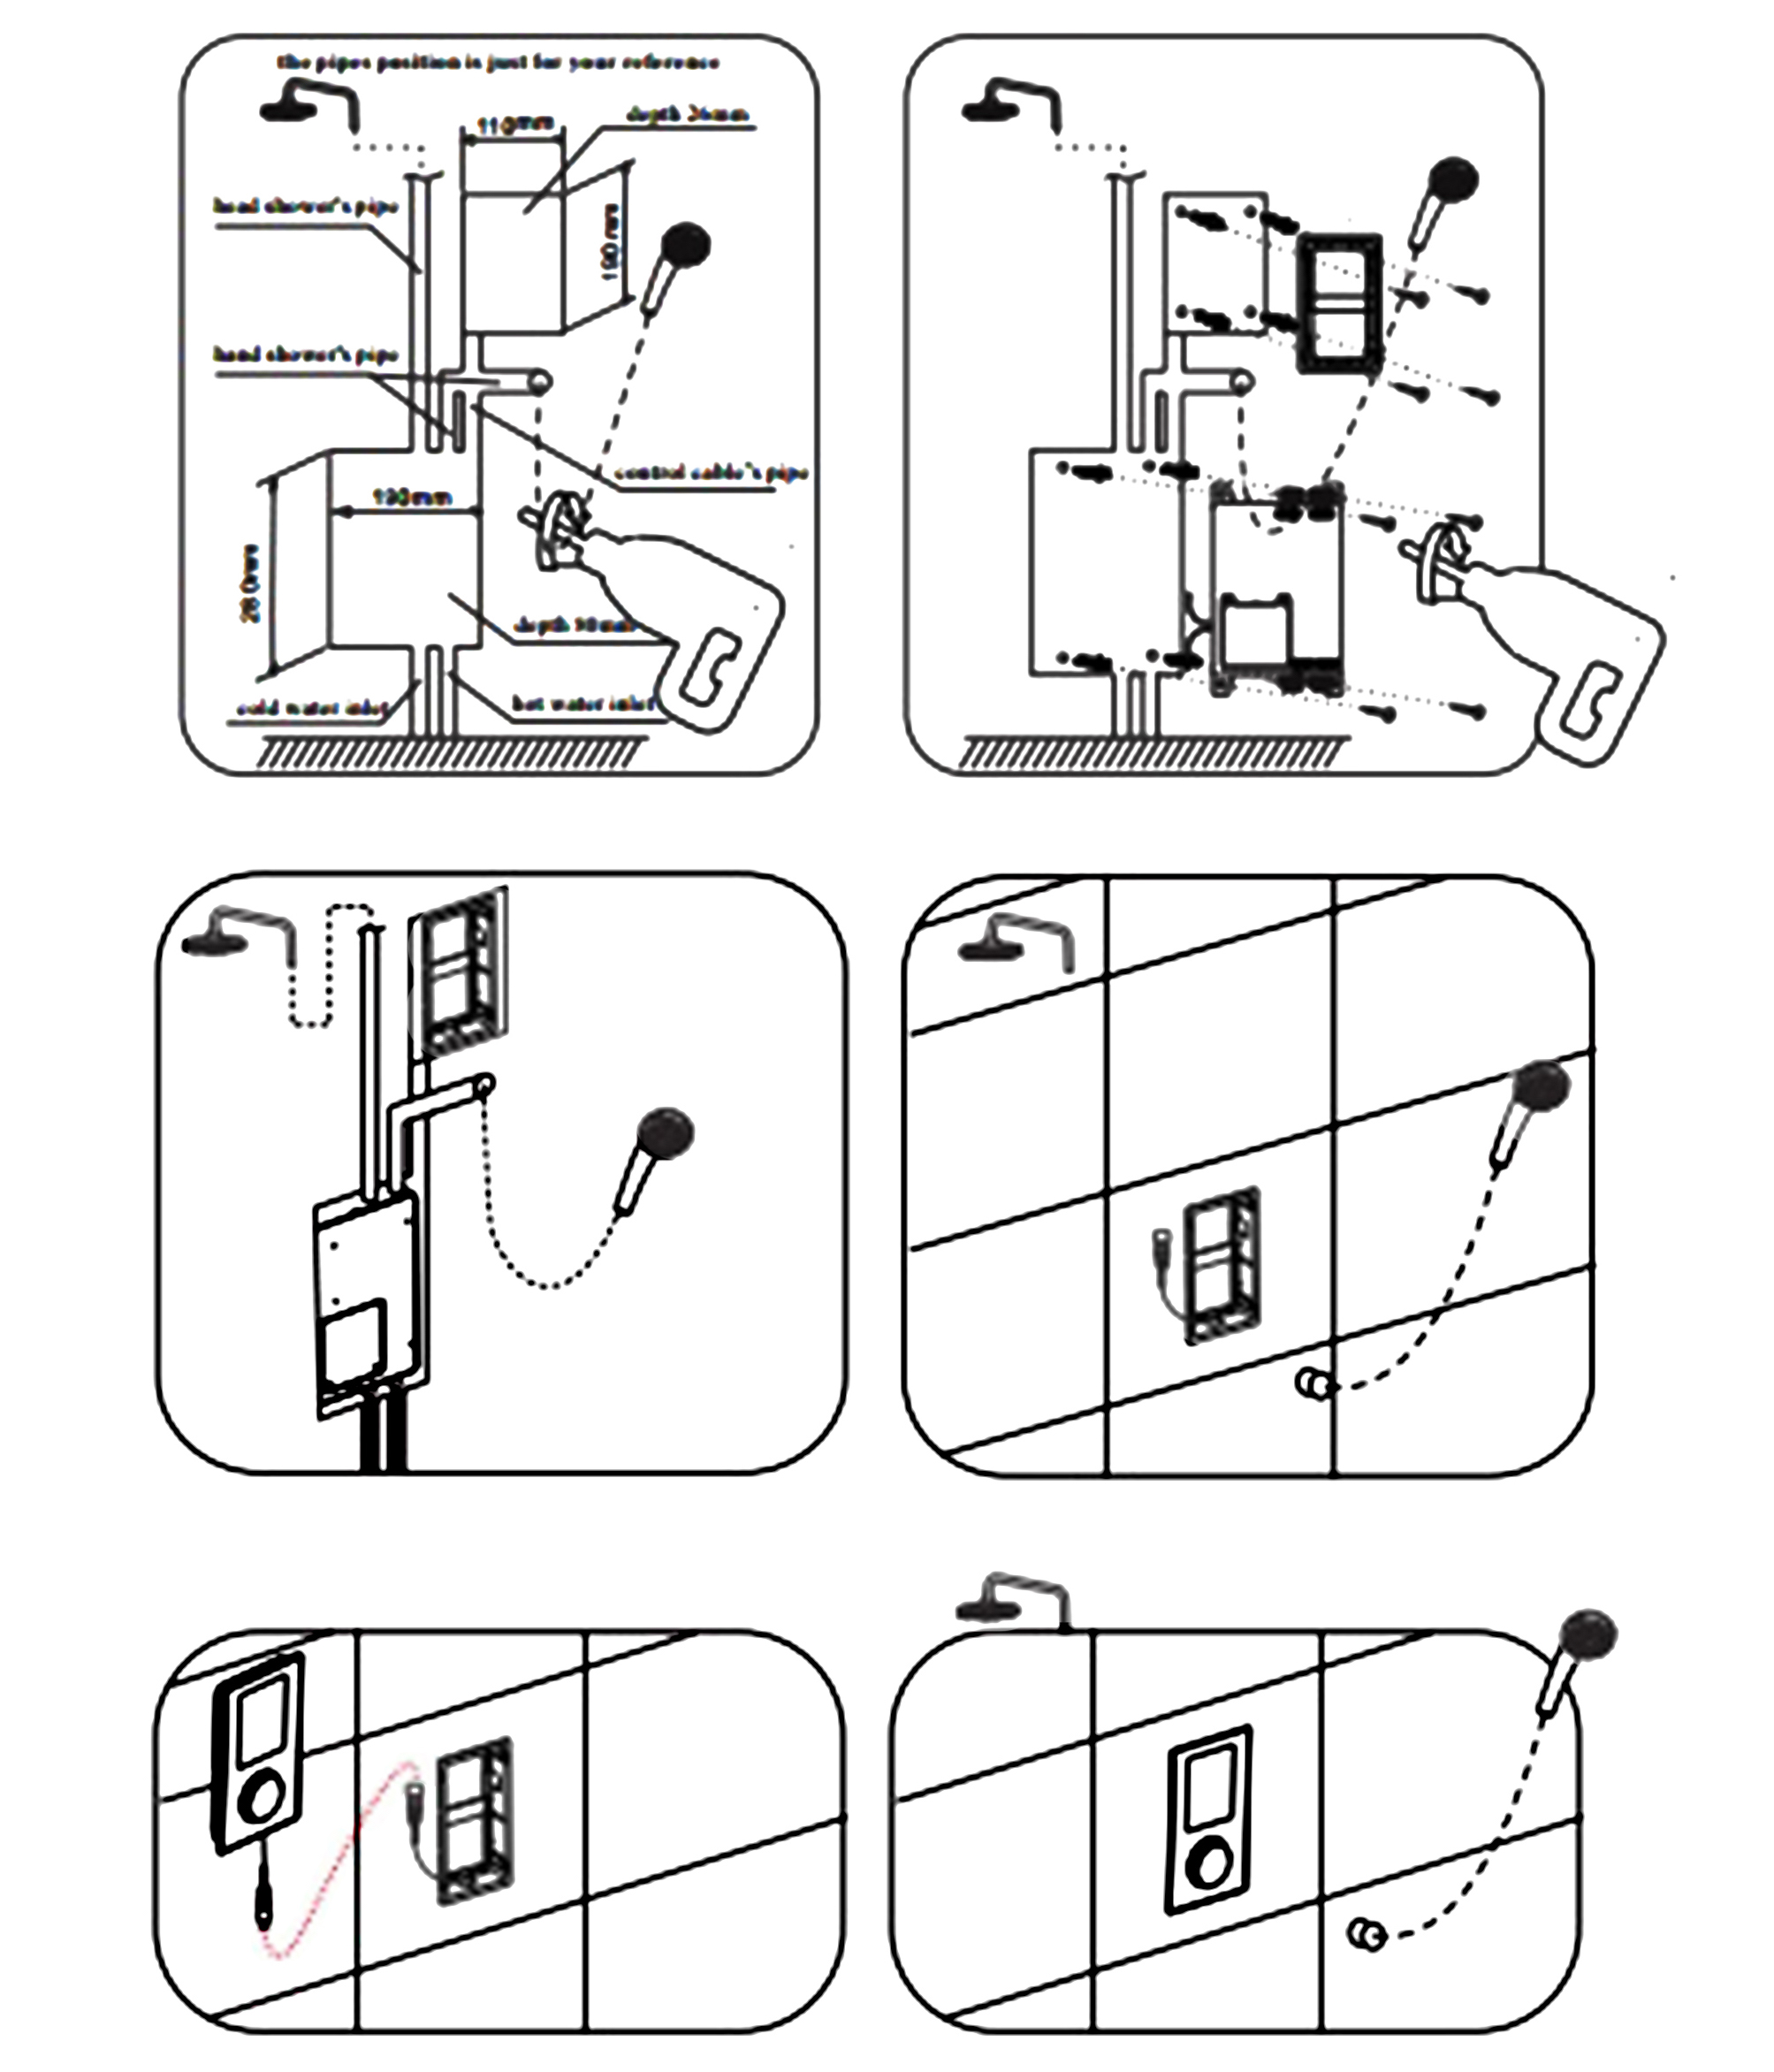
2. Recess mounted into wall
According to the wall thickness, you can choose installation method A or B.
Method A: If the wall is thin, the host box and the shower control panel can be installed in a different position.
Method B: If the wall is thick, the host box and the shower control panel can be installed in the same position.
Installation step of method A:
Step 1: Open two-hole in the wall, and reserve space for the pipes and adapter.
Step 2: Dill four holes by 6mm diameter on the upside hole for install the wall bracket (as the picture) and put the plastic screw into the hole.
Step 3: Drill four holes by 8mm diameter on the downside hole for the host box installation and put the expansion screws into the hole.
Step 4:
|
|