How to Install BathSelect Platinum Thermostatic Commercial Automatic motion sensor touchless faucet Solid Brass Construction In Oil Rubbed Bronze Finish | B505RB
The Platinum Sensor Faucet electronically controlled faucets that eliminate the need to touch or turn handles. Through the use of sensor beams the automatic faucet determines when an object is in front of it and automatically turns on the faucet. Since there is nothing to touch and nothing to reach for, an automatic faucet eliminates all of that cleaning and disinfecting that you do to try to maintain a hygienic surface. Bathroom sensor faucets are anti-erosion, anti-abrasion and high strength. Minimize waste of water, by using the automatic faucet. Immediately reduces water waste by eliminating unnecessary and unattended water flow.Fits all standard US plumbing.Uses 4AA Alkaline Batteries (purchase separately)
|
|

|
|
Features:
|
|
Visit Product Page 
|
- Touchless Operation
- Sensitive Sensor with Infrared AI Smart-Chip
- Factory set to 30-second Auto Shutoff (can be adjusted).
- Water Pressure: 0.5 - 7.0 KGS/cm, 10 - 125 psi
- Solid Brass Construction, Oil Rubbed Bronze Finish
- Easy to Install - Instructions Included
- Water resistant solenoid enclosure
- Advanced energy saving design for long lasting battery life
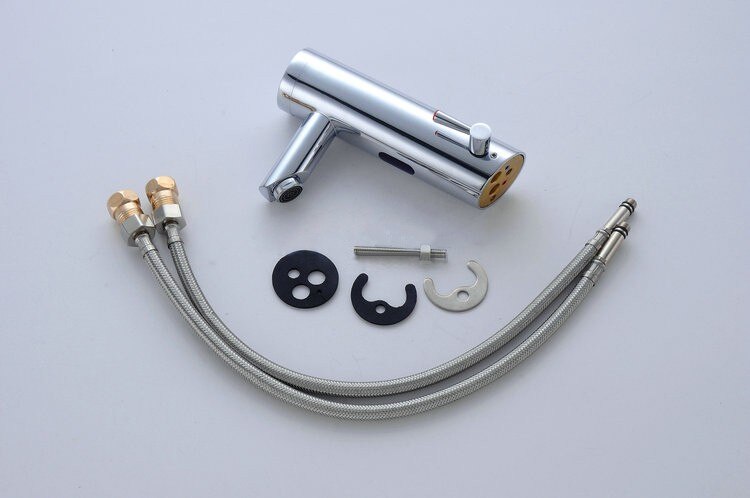
- Comes complete with Hoses & Accessories
- ADA Compliant
- Easily can be installed in new or retrofit applications.
- Can easily be installed in new or retrofit applications
- Usage: Commercial / Residential
|
sensor faucet
|

|
Important Note:
Before you begin, please read the installation instructions below. Observe all local building and safety codes.
Unpack and inspect the product for any shipping damages. If you find damages, do not install.
Please note all products must be installed by a professional and certified plumber otherwise warranty might be voided.
|
|
Sensor Faucet Installations Instructions
|
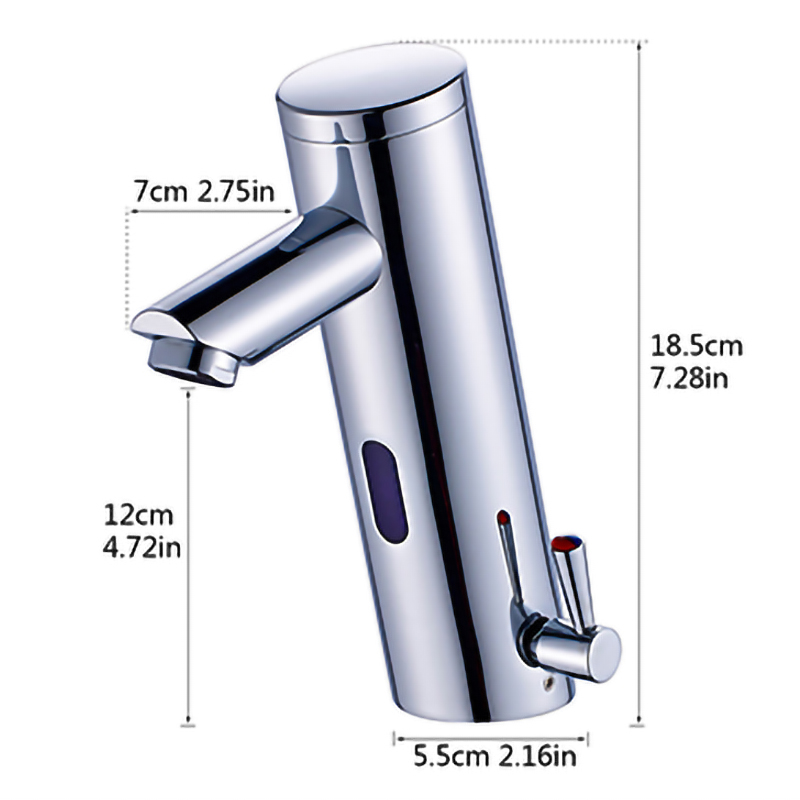
Size
|
faucet
|
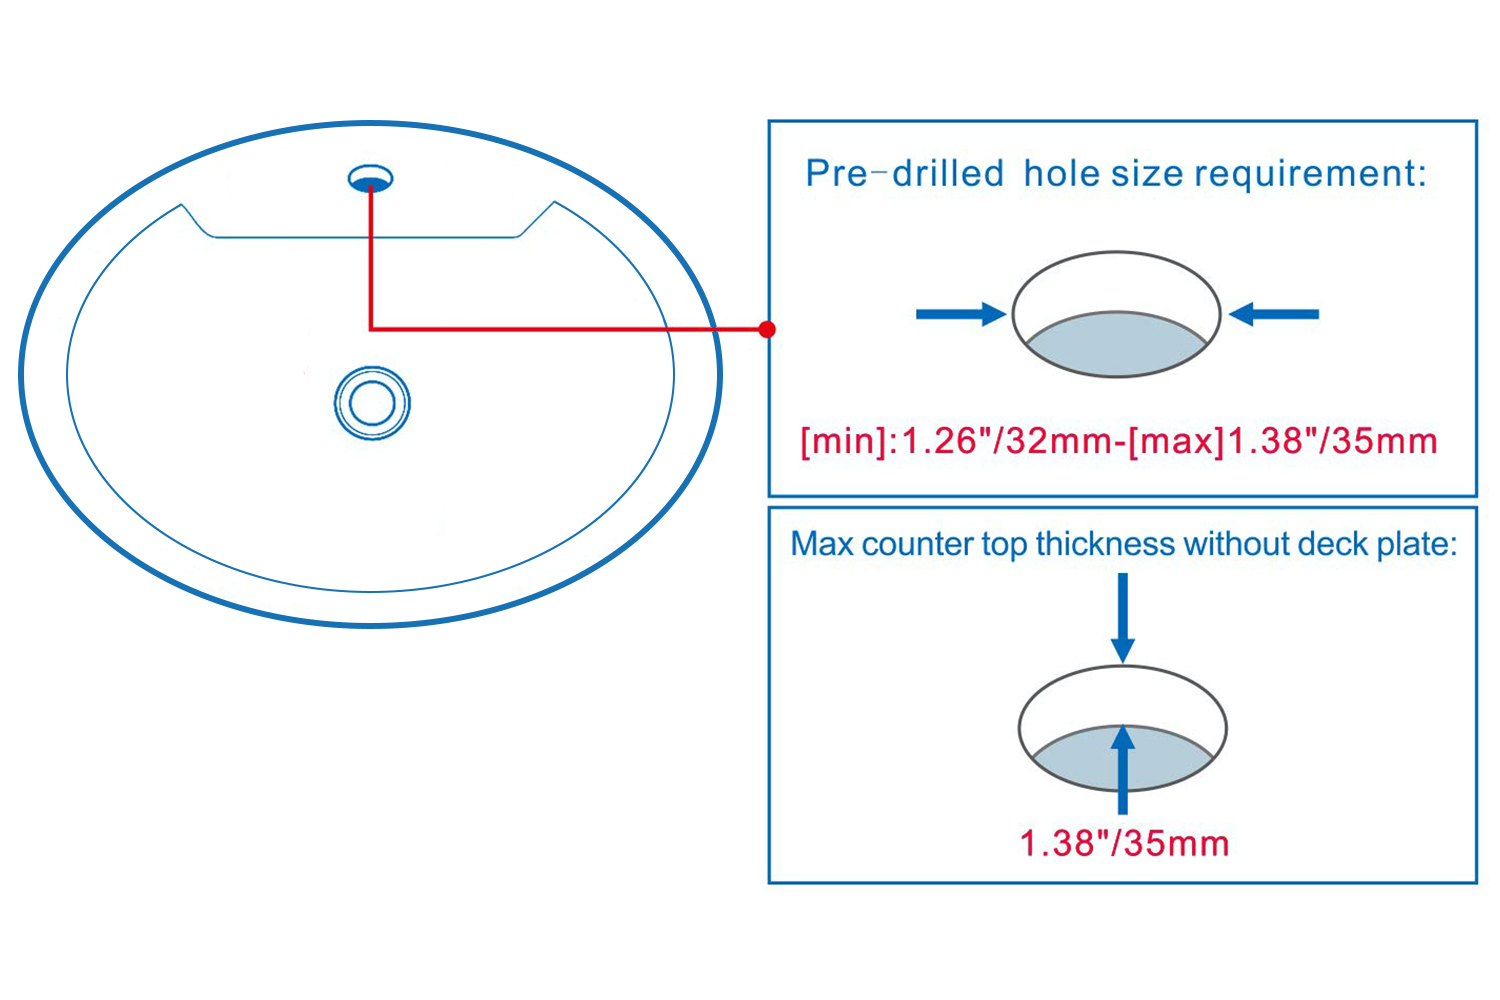
Hole Size Chart
|
|
|

|
|
|
|
|
Features:
- Cold and Hot integration. It is a mixer with the cold water in the left turning and hot water in the right turning.
- Water saving: Water flows out when your hands approach the induction zone, and stop immediately once you draw back your hands.
- Low power,electricity-saving: For DC type, 4pcs AA batteries can be used for about 2 years, if the faucet working 200 times a day.
Specification:
- Installation Type: Deck Mounted
- Installation Holes: One Hole
- Valve Type: Ceramic Valve
- Suitable Water Pressure: 0.3-1.2 MPa
- Temperature of environment:1-45° C (Cold & Hot water )
- Electric Power: DC Dry Battery
- Dia of inlet pipe: G1/2"
- Dia of outlet pipe: G1/2"
- Power: DC6V (4AA Alkaline batteries)
- Power consumption in static: <0.5 mW
- Detection Zone: Factory set 30cm
- Protection degree: IP56
Smart infrared sensor automatically adjusts the distance according to the environment.
|
|

|

|
|
|
|
|
|
|
Step 1: Battery Box
|
|
Step 2:
|
|
sensor
|
|
|
|
|
|
|
|
|
Step 3:
|
|
Step 4:
|

|
|
|
|
|
|
|
|
|
|
|
Step 5:
|
|
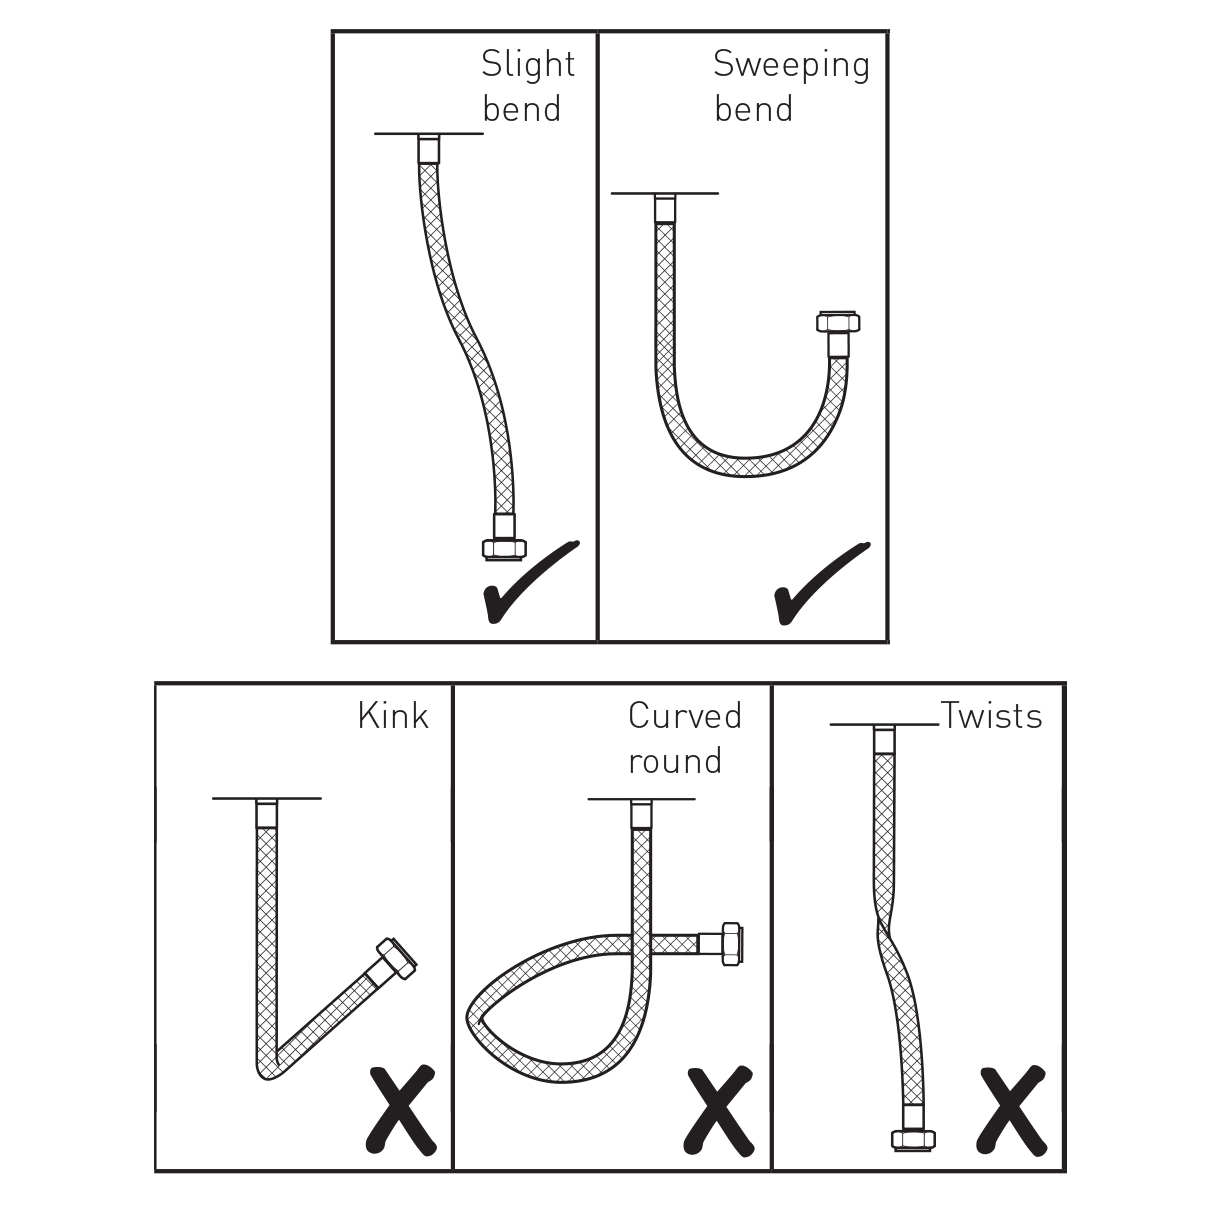
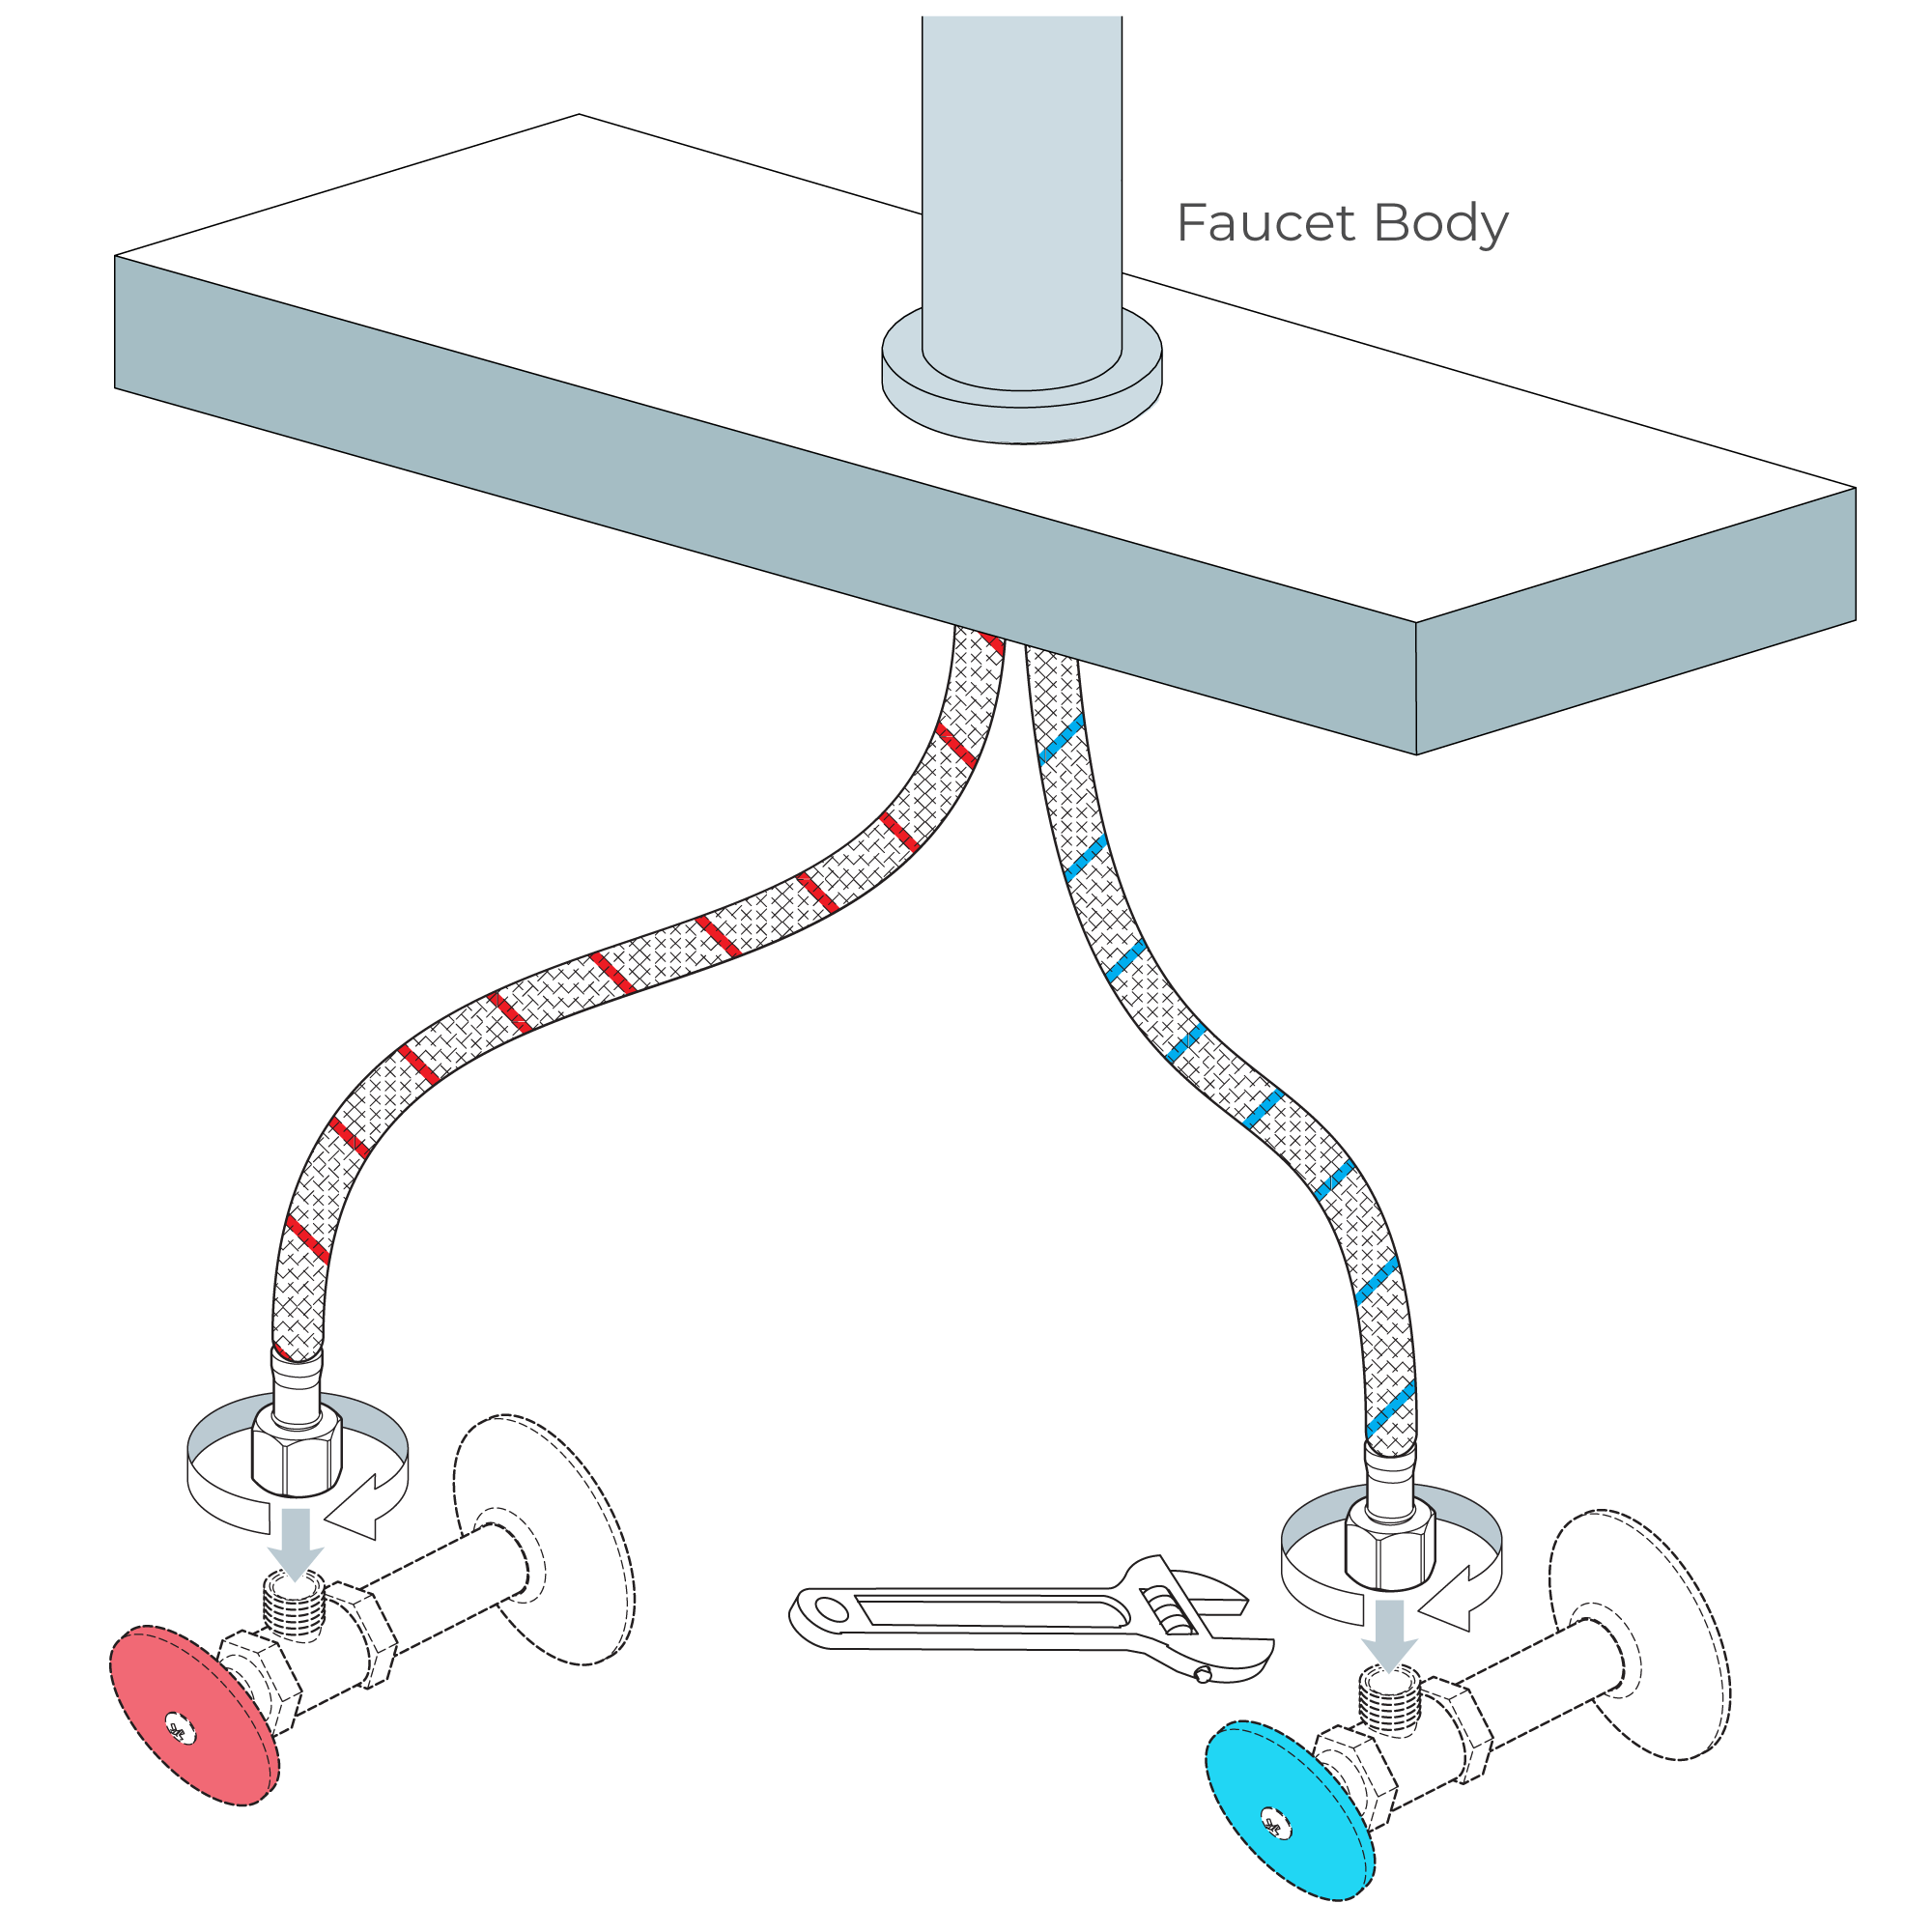
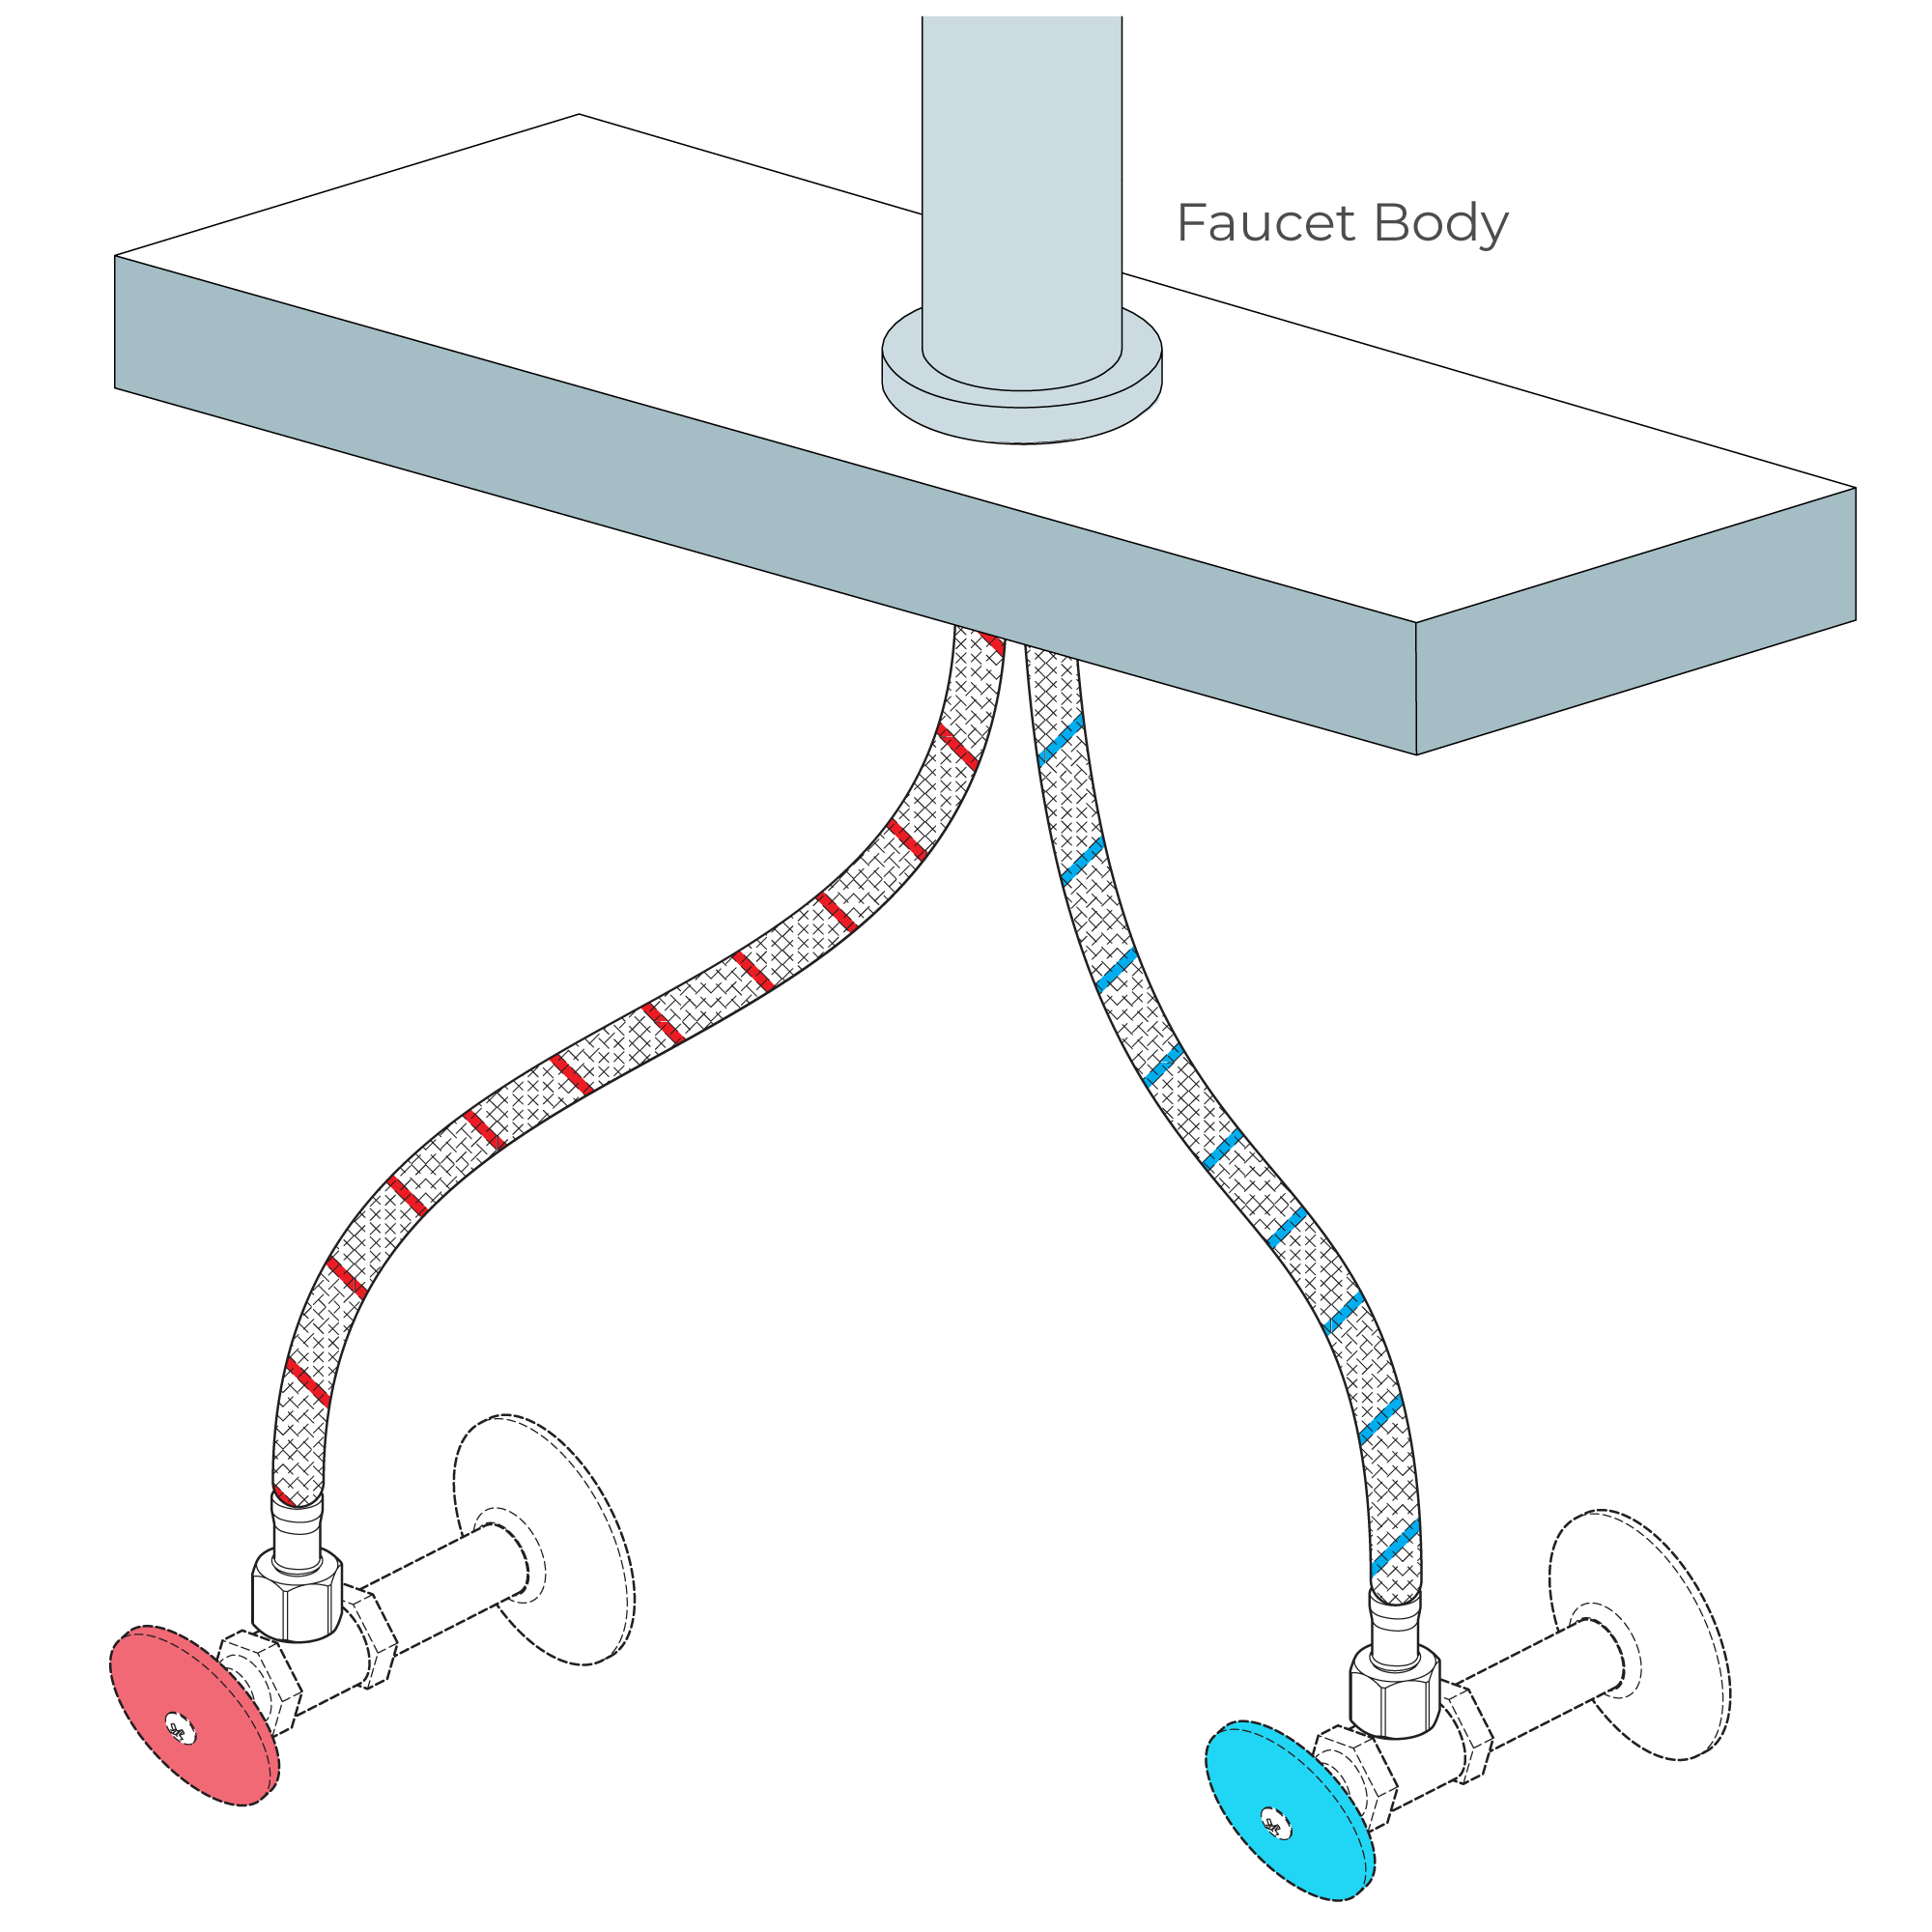
Step 6: Correct way for Hose
|
|
|

|
|
|
|
|
|
|
Before installing your new mixer, flush through the pipework to ensure removal of debris, turn off the water supply.
Ensure the O ring is in place at the bottom of the mixer body.
Push the control cable down through the hole and position the mixer on the basin. From the underside of the basin fit the rubber washer, metal washer onto the threaded tube followed by the nut. Tighten the nut to clamp the mixer to the basin. Tighten the 2 side screws up onto the washer.
CAUTION: Do not over tighten the nut/bolts as this may damage the basin.
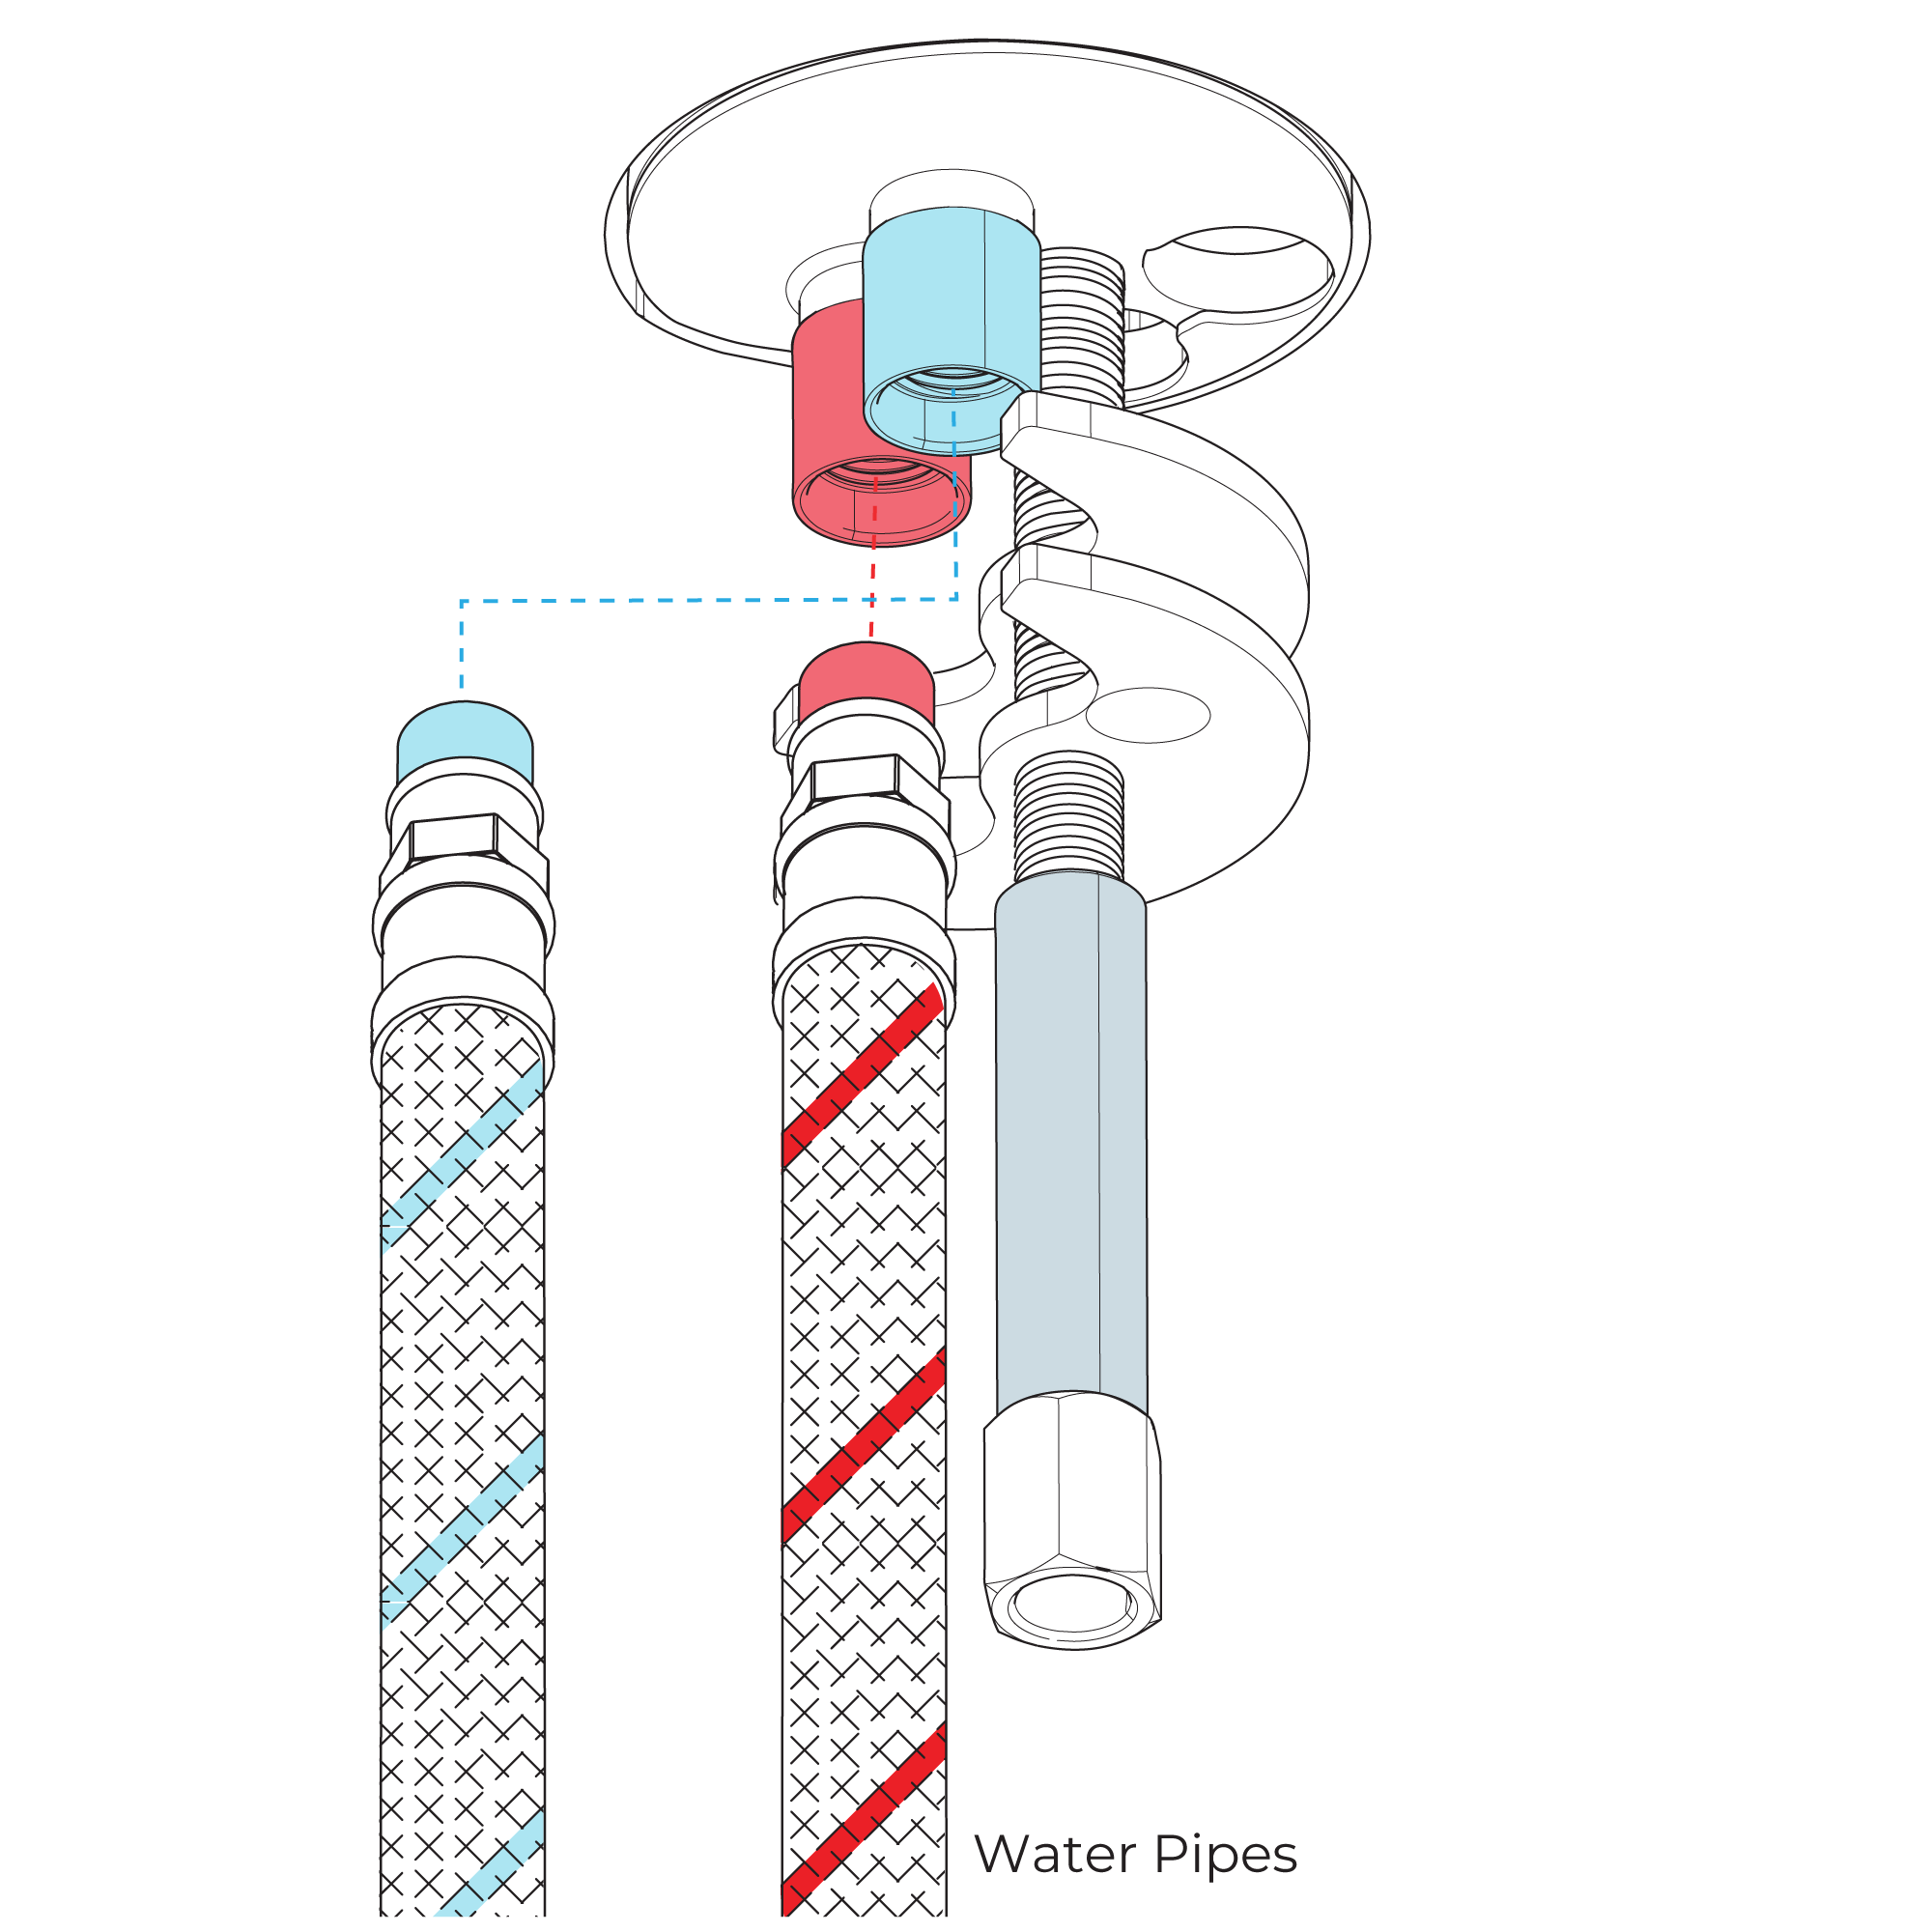
Screw the two flexible pipes to the mixer body, but do not over tighten, hand tighten only.
Connect the water supply to the inlet pipes.
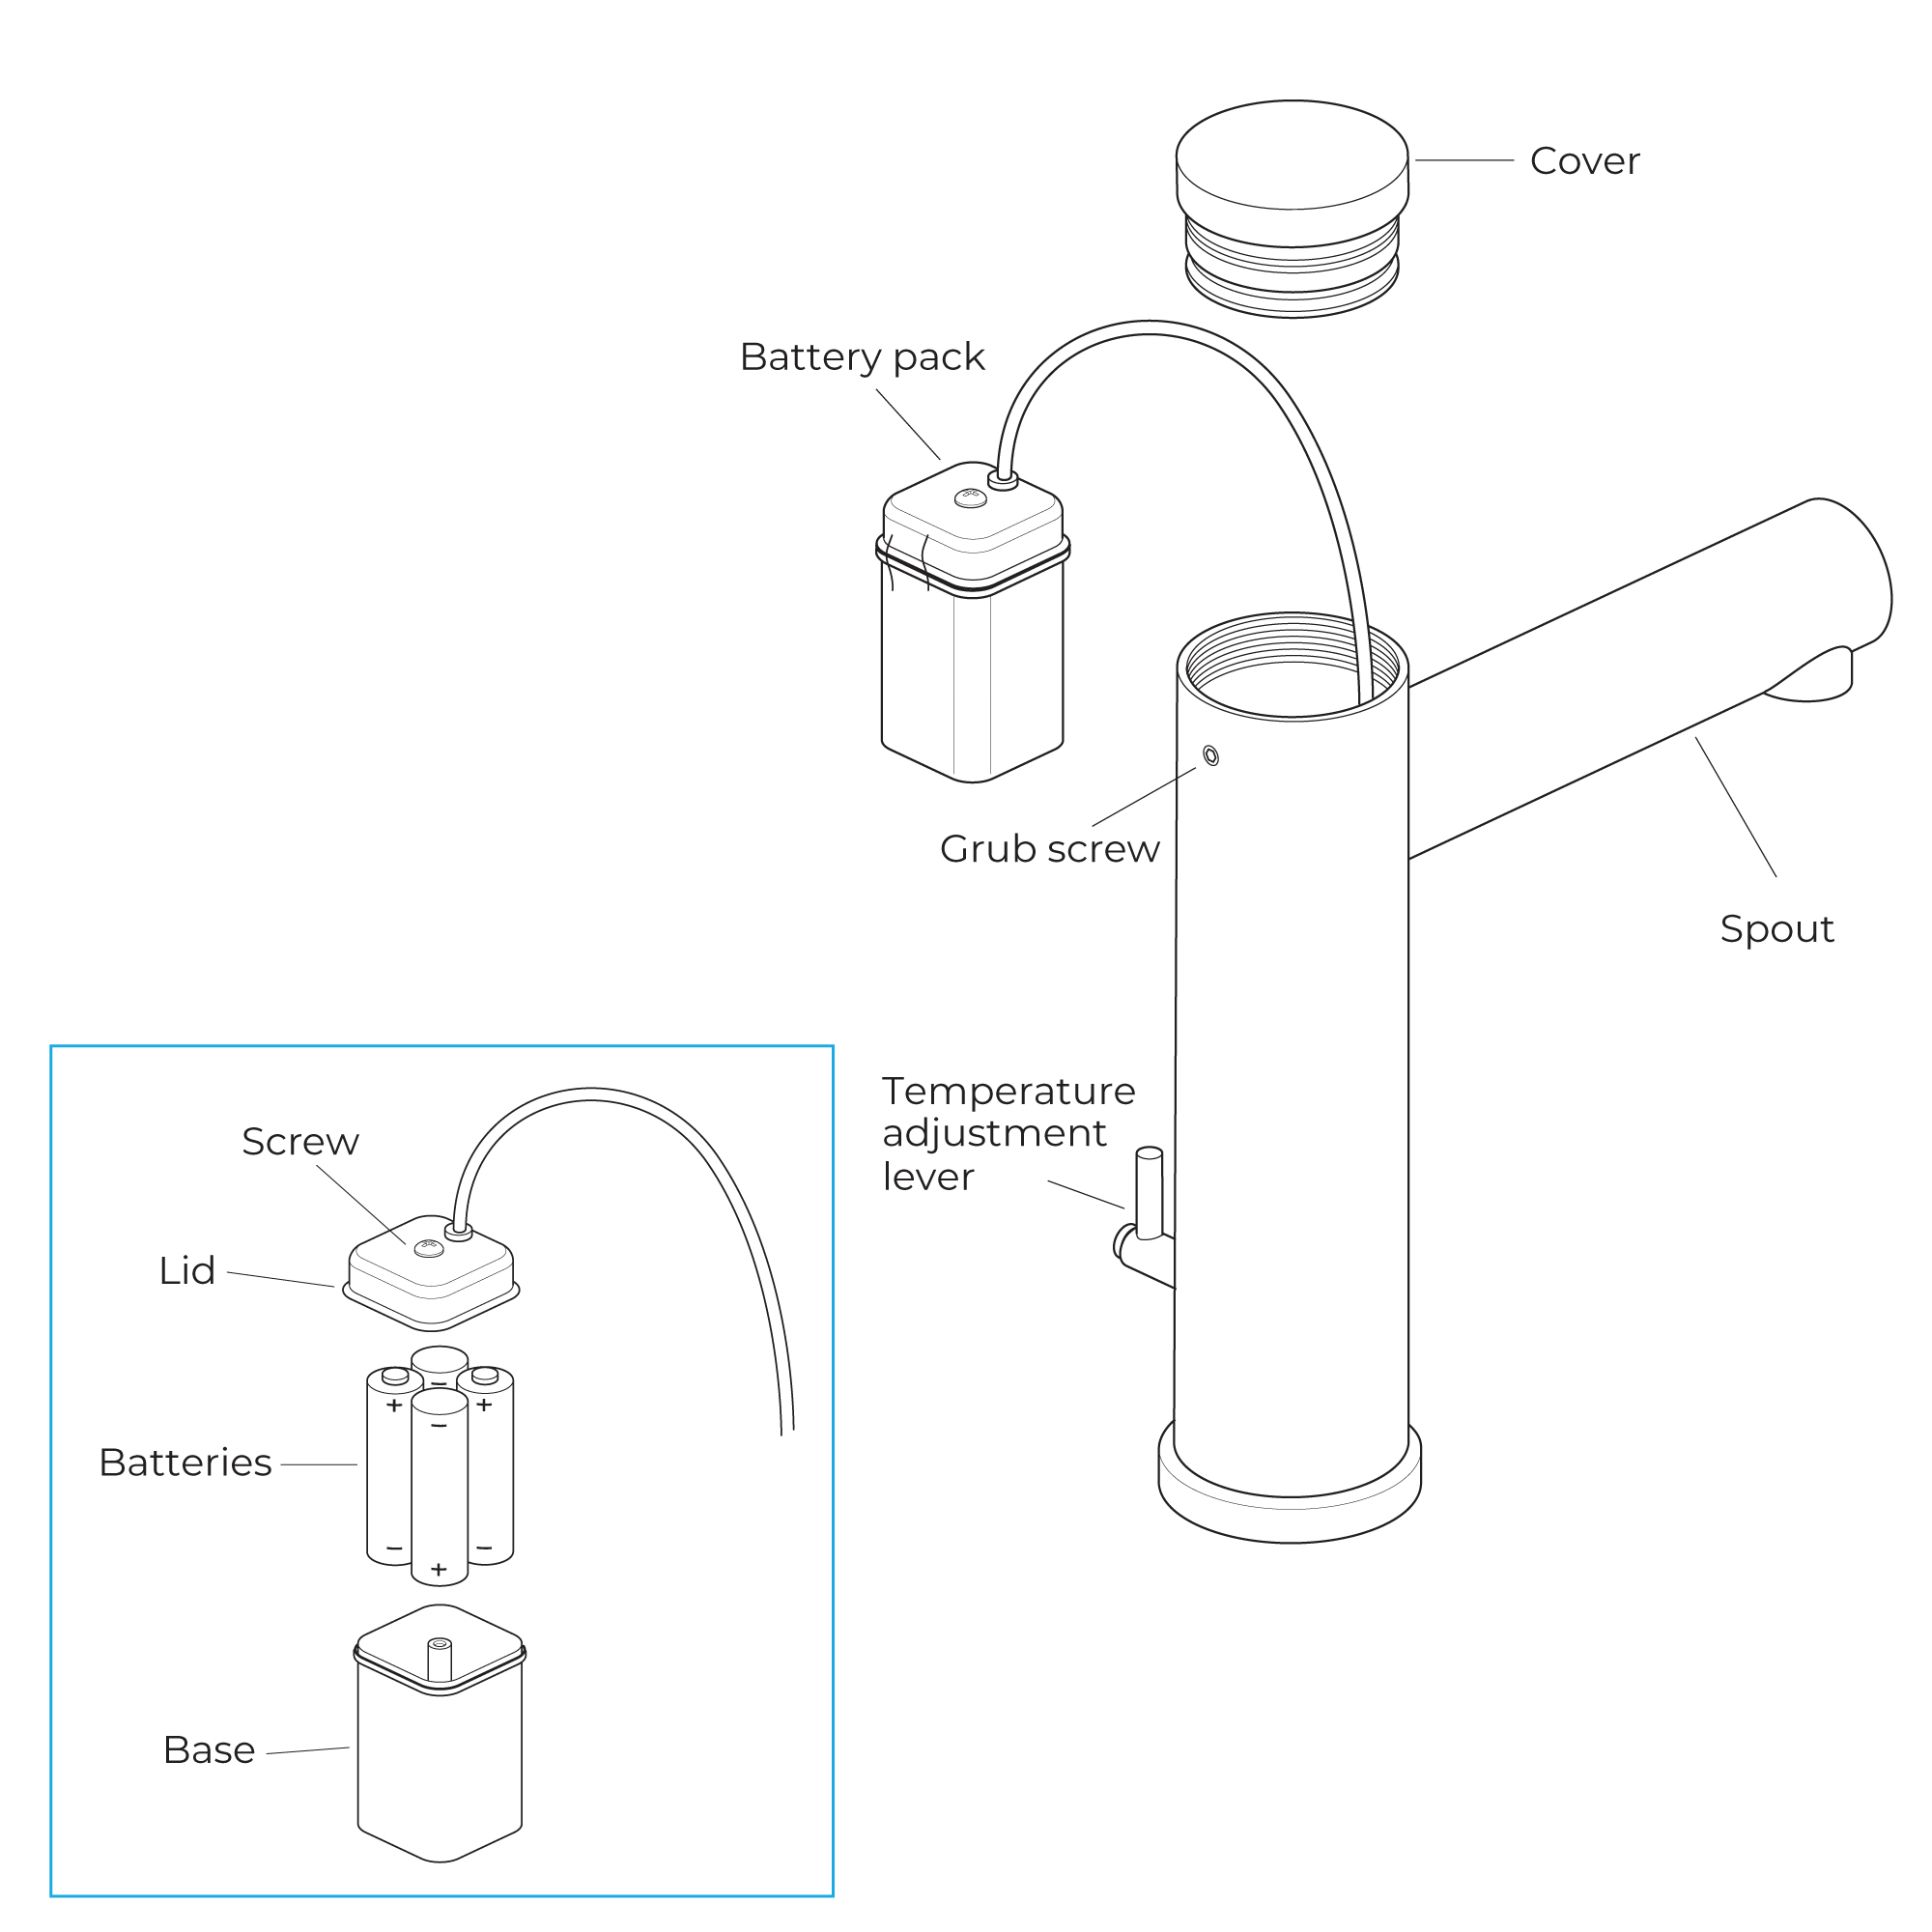
Battery installation and replacement
The unit is supplied with a battery backup. Should the mixer will still not function then the batteries may need replacing. Before installing the mixer fit the supplied batteries.
Unscrew the grub screw on the back of the mixer (do not remove) unscrew and remove the cover from the mixer and pull out the battery pack.
Undo the screw on the top of the battery pack and remove the lid. Insert the 4 batteries.
Place the battery pack back into the mixer, replace the cover and tighten the grub screw.
|
|
|
Flexible Connecting Hose
Care must be taken when connecting the flexible connection hose from the power supply box to the spout to ensure it does not bend sharply and kink or twist.
See above for recommended ways to fit the flexible connecting hose.
Important: Failure to follow these guidelines may result in poor performance and damage to the flexible connection hose.
|
|
|
|
|
|