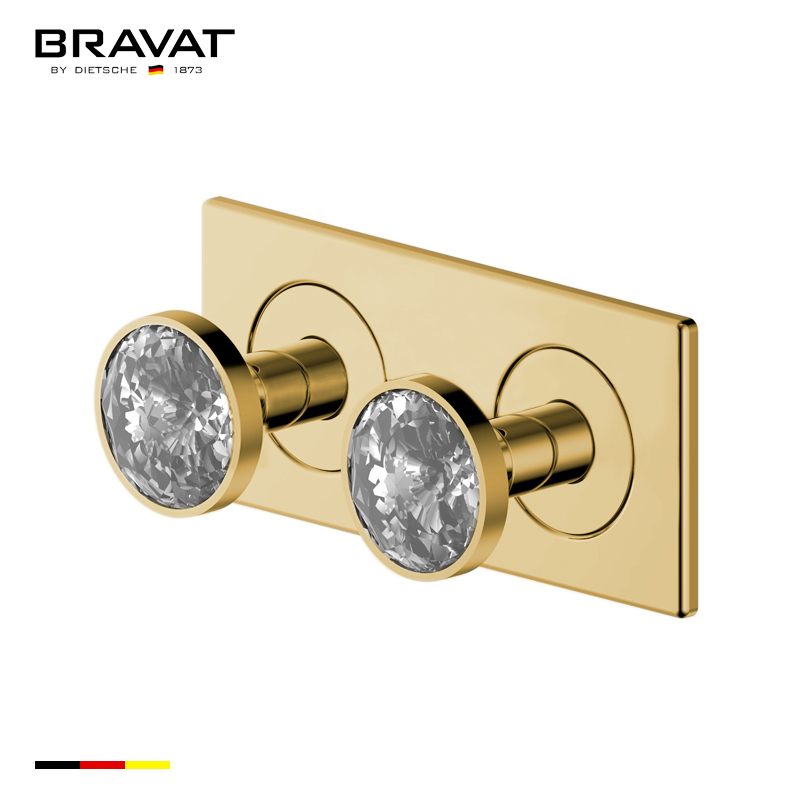
Bravat Two Crystal Handle Thermostatic Bathroom Shower Mixer In Brushed Gold Finish
This style of shower mixer is the perfect solution for updating your existing bathroom hardware. Add a modern look to your bathroom with the Bravat two crystal handle thermostatic bathroom shower mixer. The brushed gold finish is highly reflective for a mirror-like look that works with any decorating style. This unique design give you a different user experience. Designed for hassle-free installation. Monitor pressure balance valve keeps the water temperature within a safe, helping to protect you from sudden changes in hot or cold water pressure.This wall mixer has a bold and attractive look that enhances the look of any bathroom. This has an elegant design and elevates the appeal of your decor made from the highest quality and for great tastes. It comes super seal technology inside, capable of delivering superior performance with a solid construction for long durability that will upgrade your bathroom with a modern and cool look for a long period of time. With German quality and stylish designs, Bravat products are popular in luxury hotels and commercial constructions around the world. It is Bravat's global strategic goal to provide the customer with not only excellent products but also leading lifestyle. .
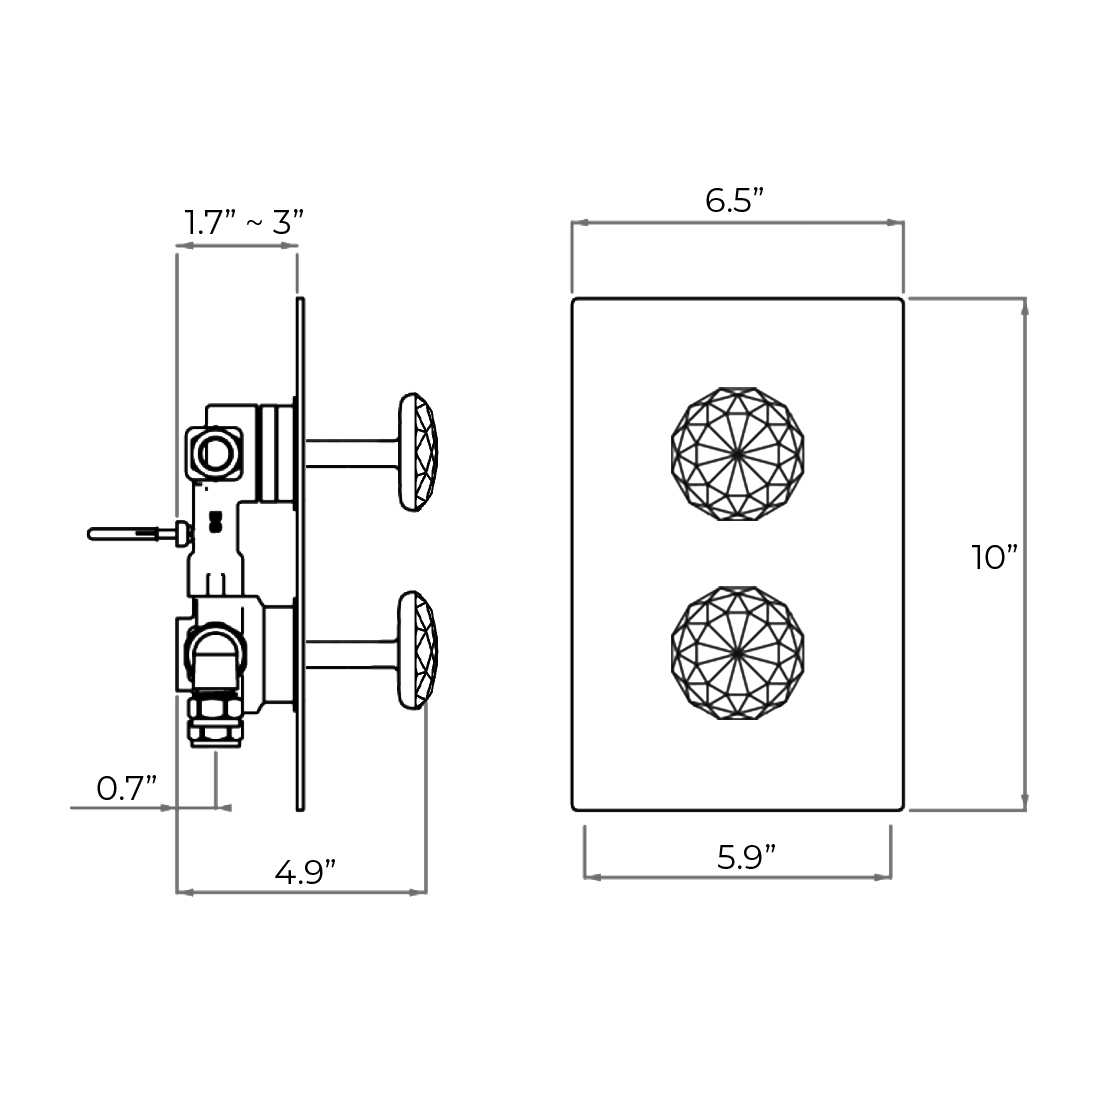
Bravat Two Crystal Handle Thermostatic Bathroom Shower Mixer In Brushed Gold Finish Features
Unpack and inspect the product for any shipping damages. If you find damages, do not install.
Please note all showers must be installed by a professional and certified plumber otherwise warranty may be voided
mixer
mixer
Two Handle Thermostatic Mixer Installation Instructions
Step 1
mixer
Step 2
mixer
Step 3
Step 4
Step 5
Step 6
Step 7
Step 8
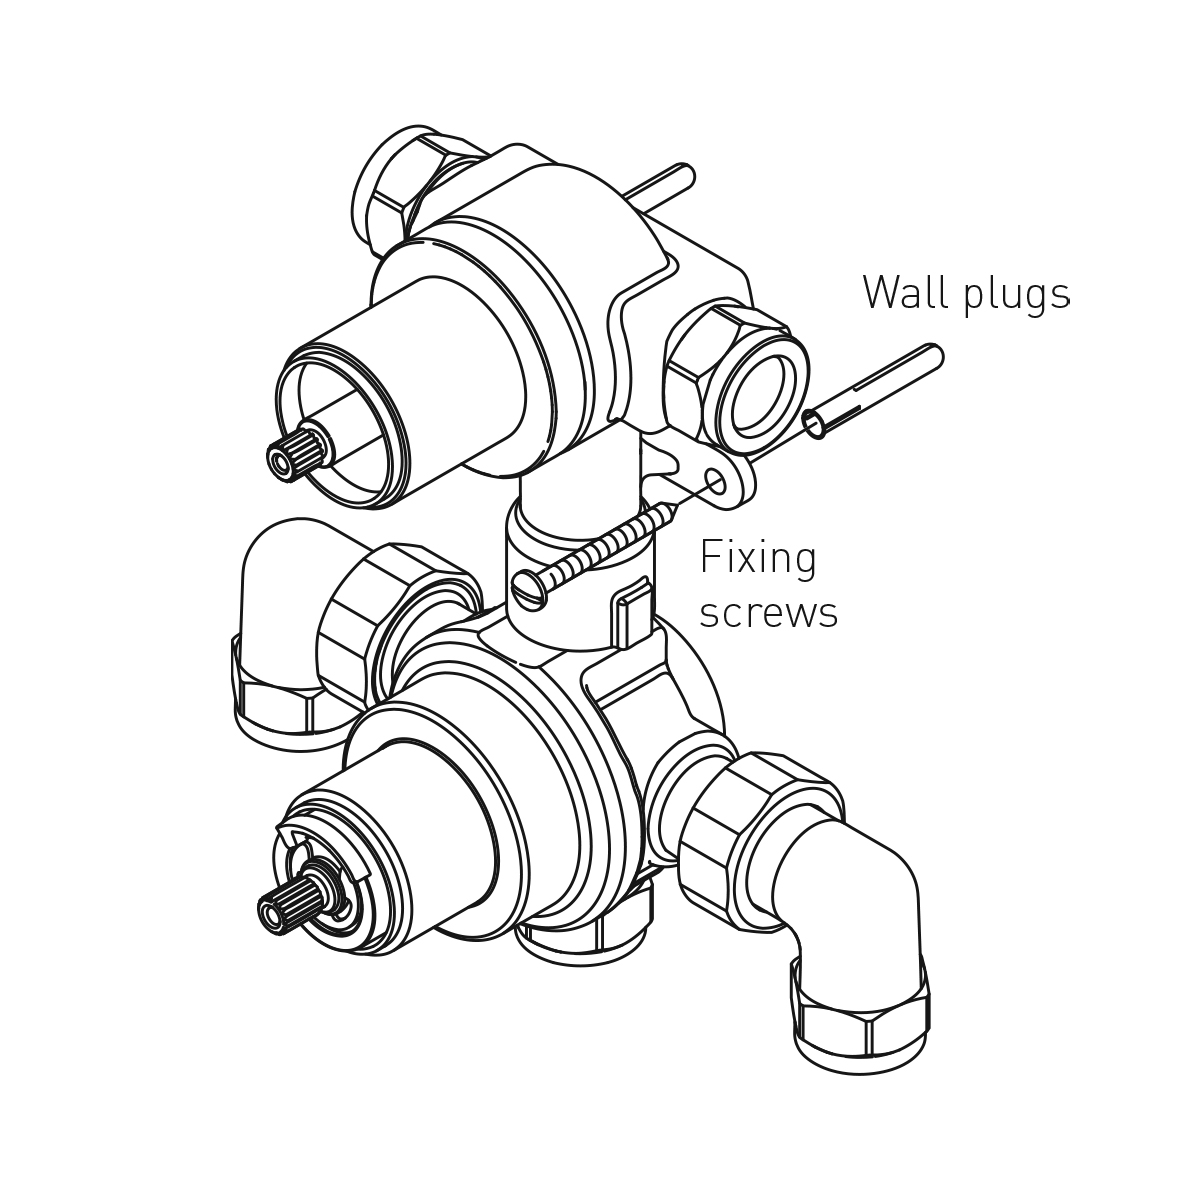
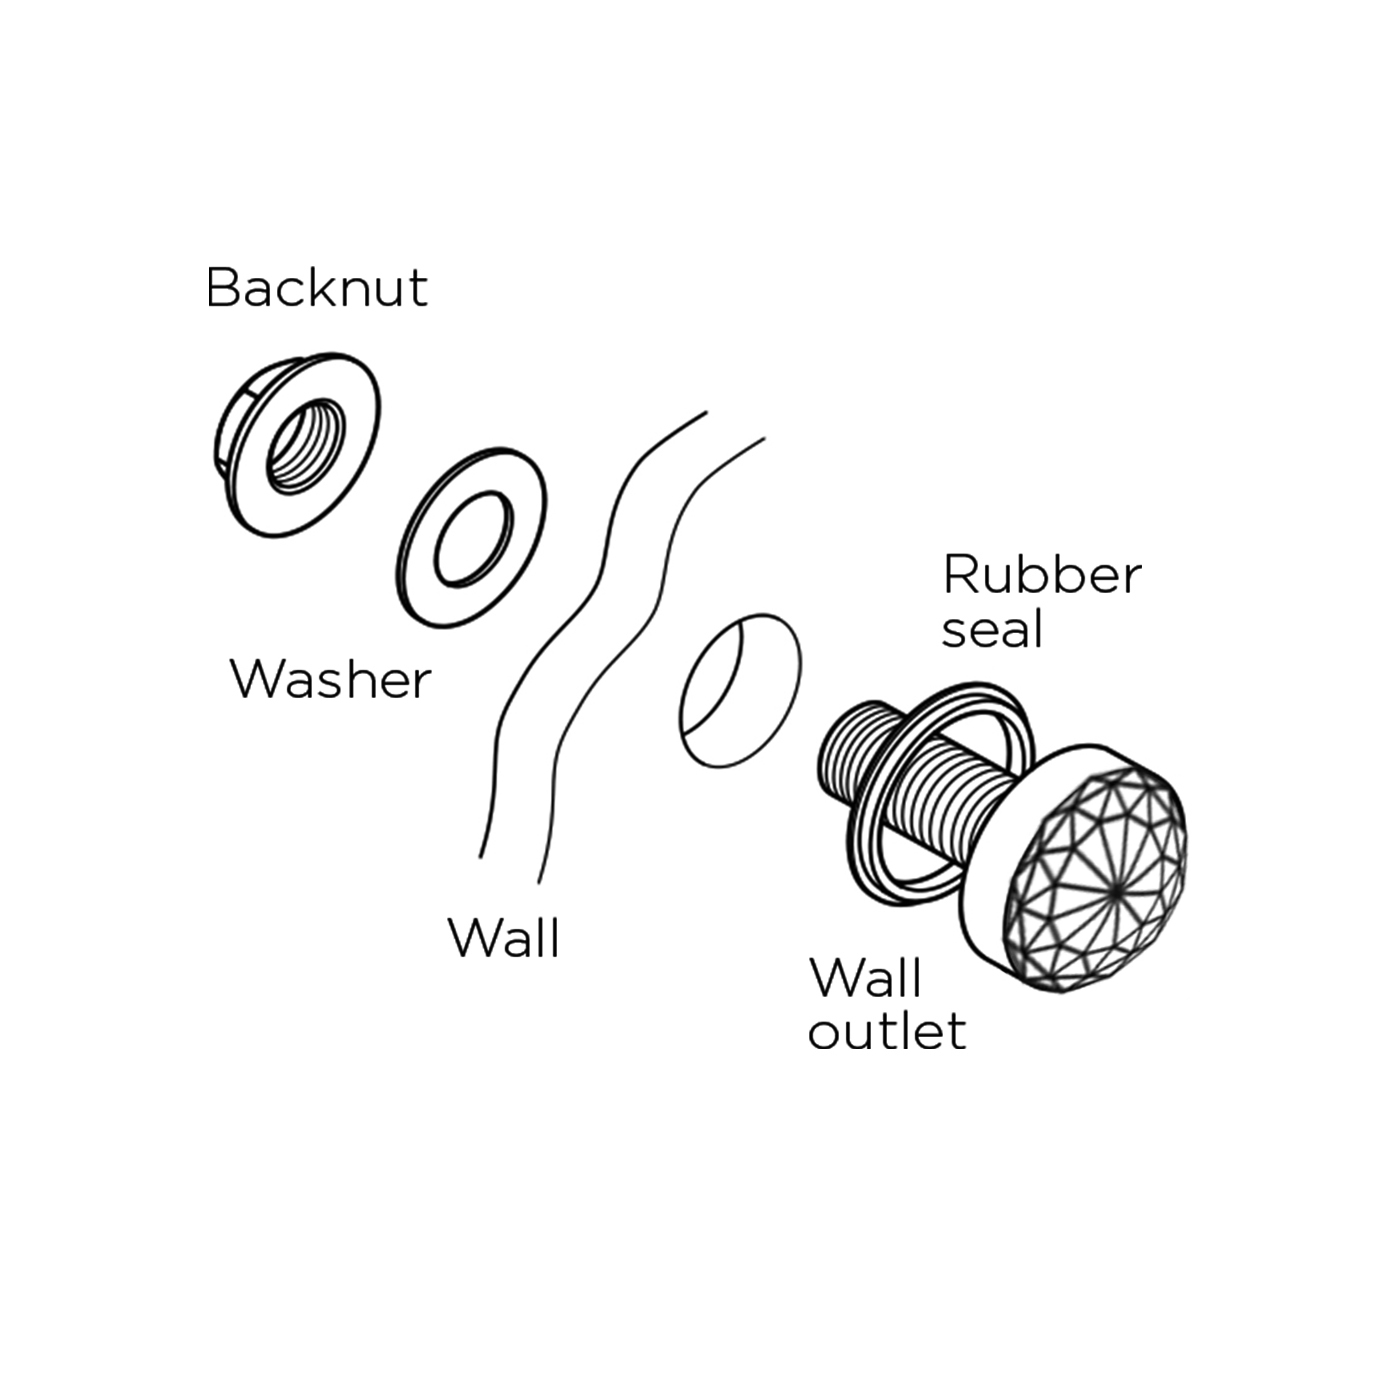
1. Attach shower valve to the wall Place the shower valve in the required position and mark the centers of the fixing holes onto the wall. Drill suitable holes and insert the wall
plugs. Securely attach the shower valve to
the wall using the screws supplied.
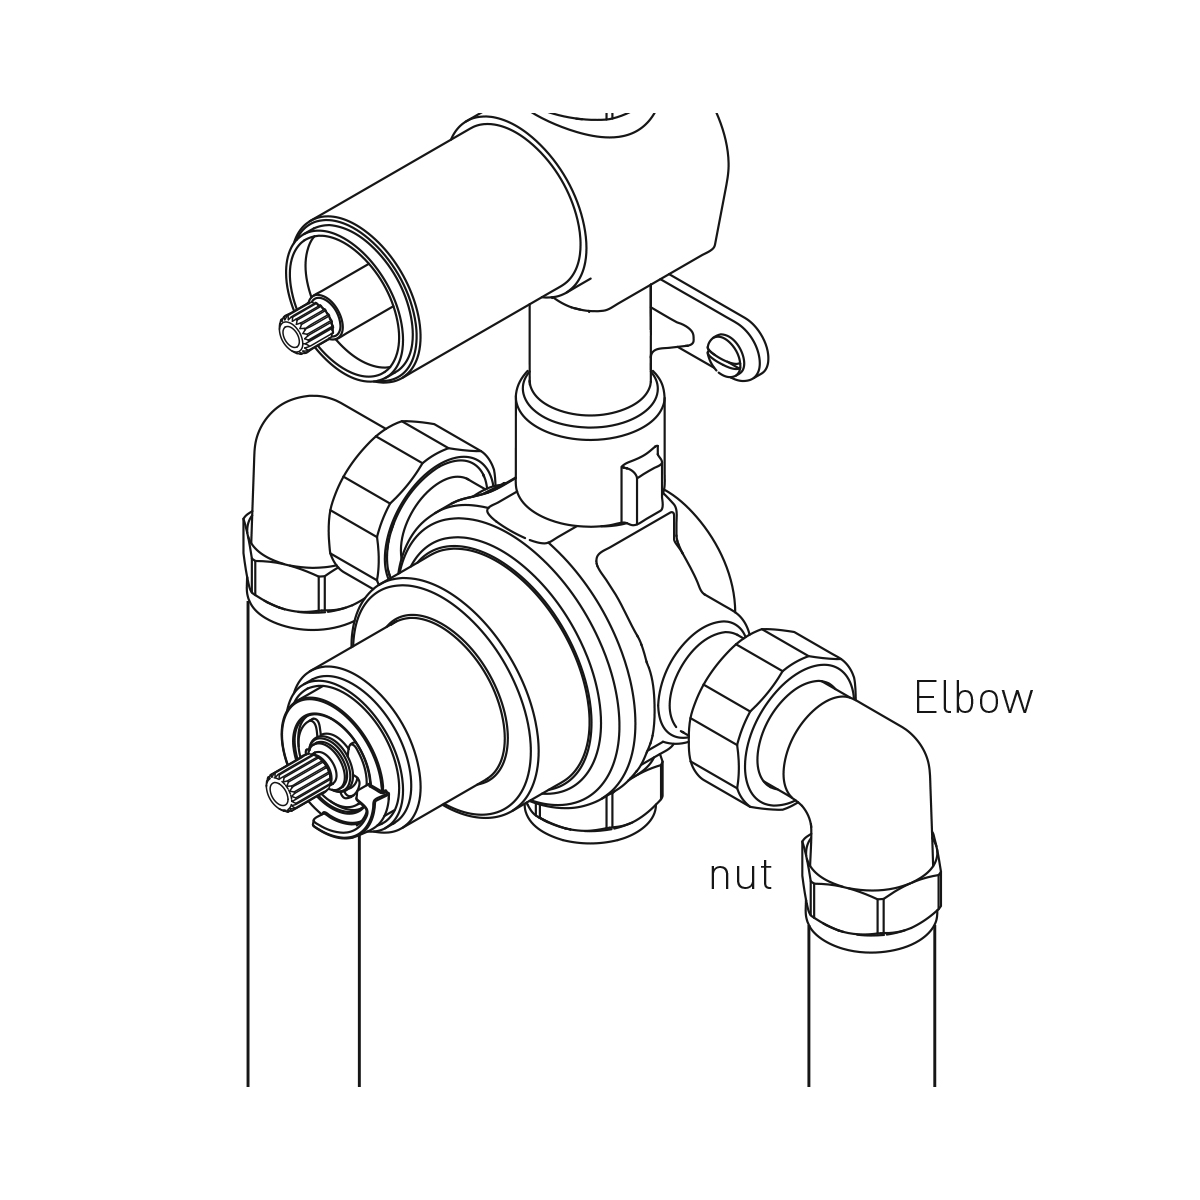
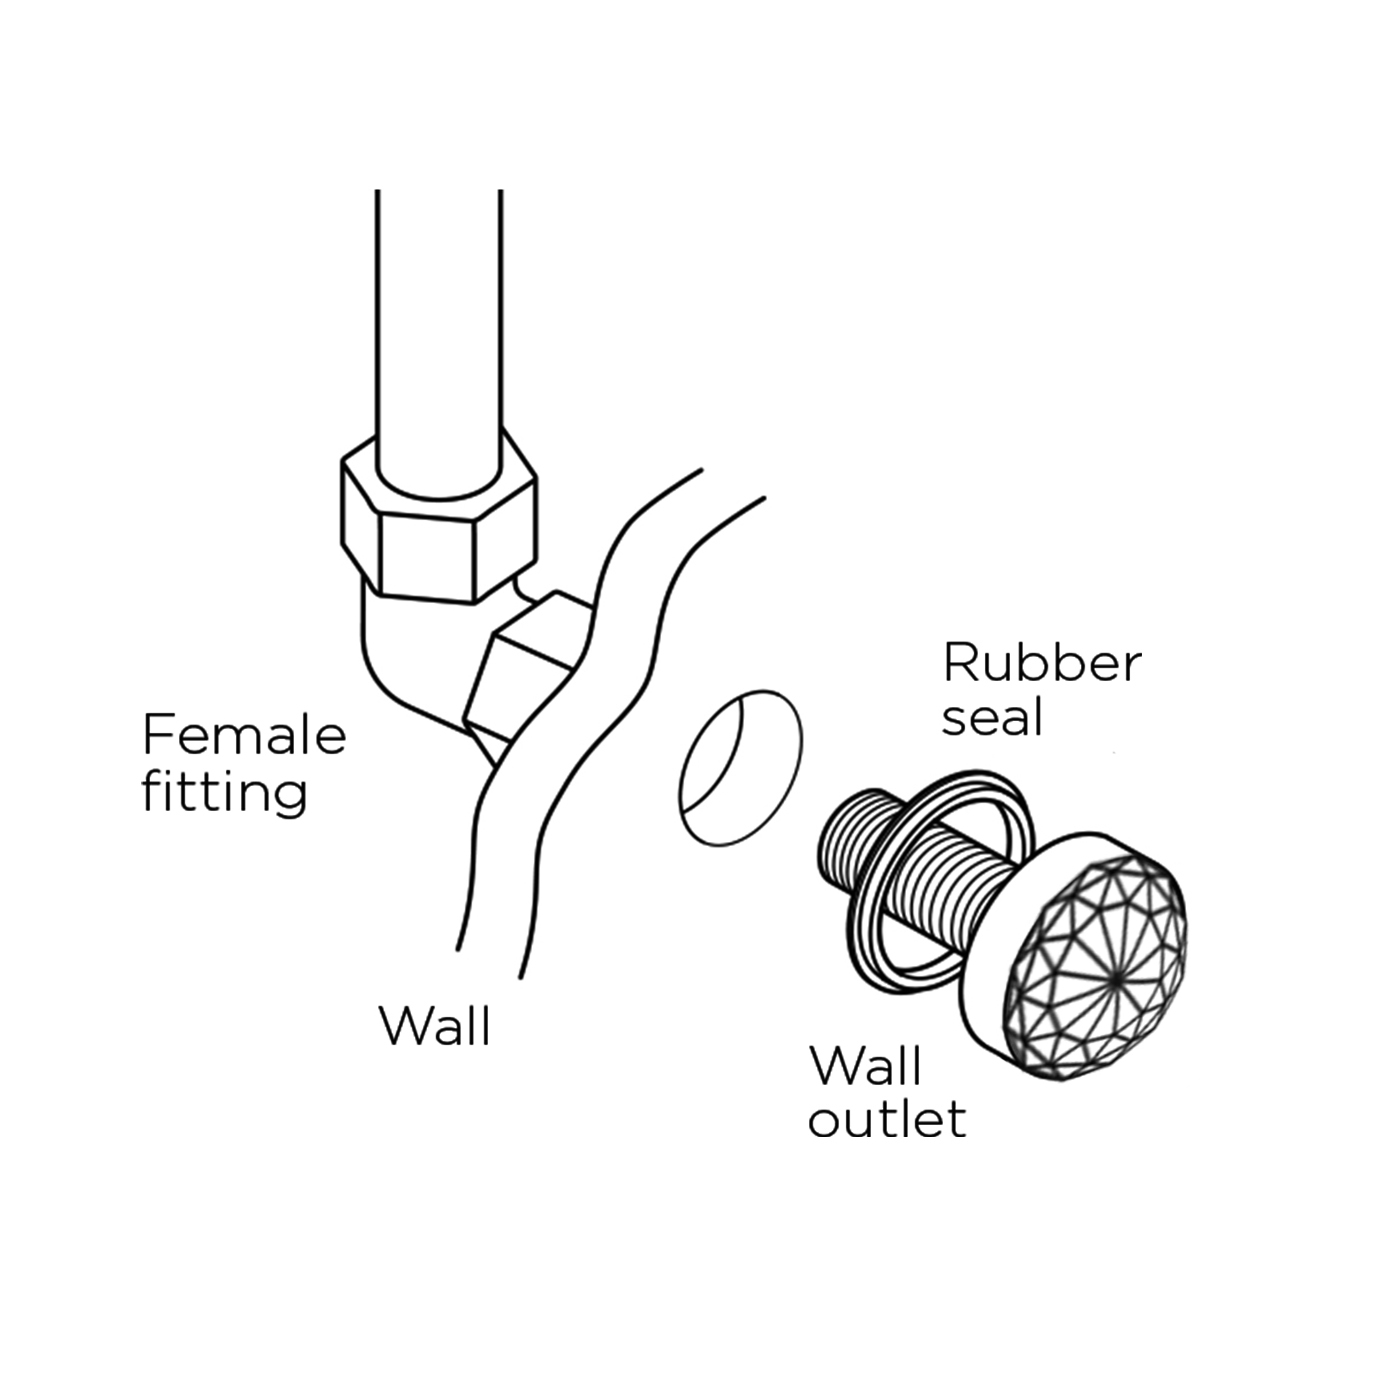
2.Connect water supply pipes Insert 15mm hot and cold water supply pipes into the inlet connections and tighten nuts, ensuring the olives are fitted.
3. Plumb in outlets Insert 15mm pipework into the top and bottom outlets and plumb into the users chosen products. Ensure the olives are fitted when tightening the nuts.
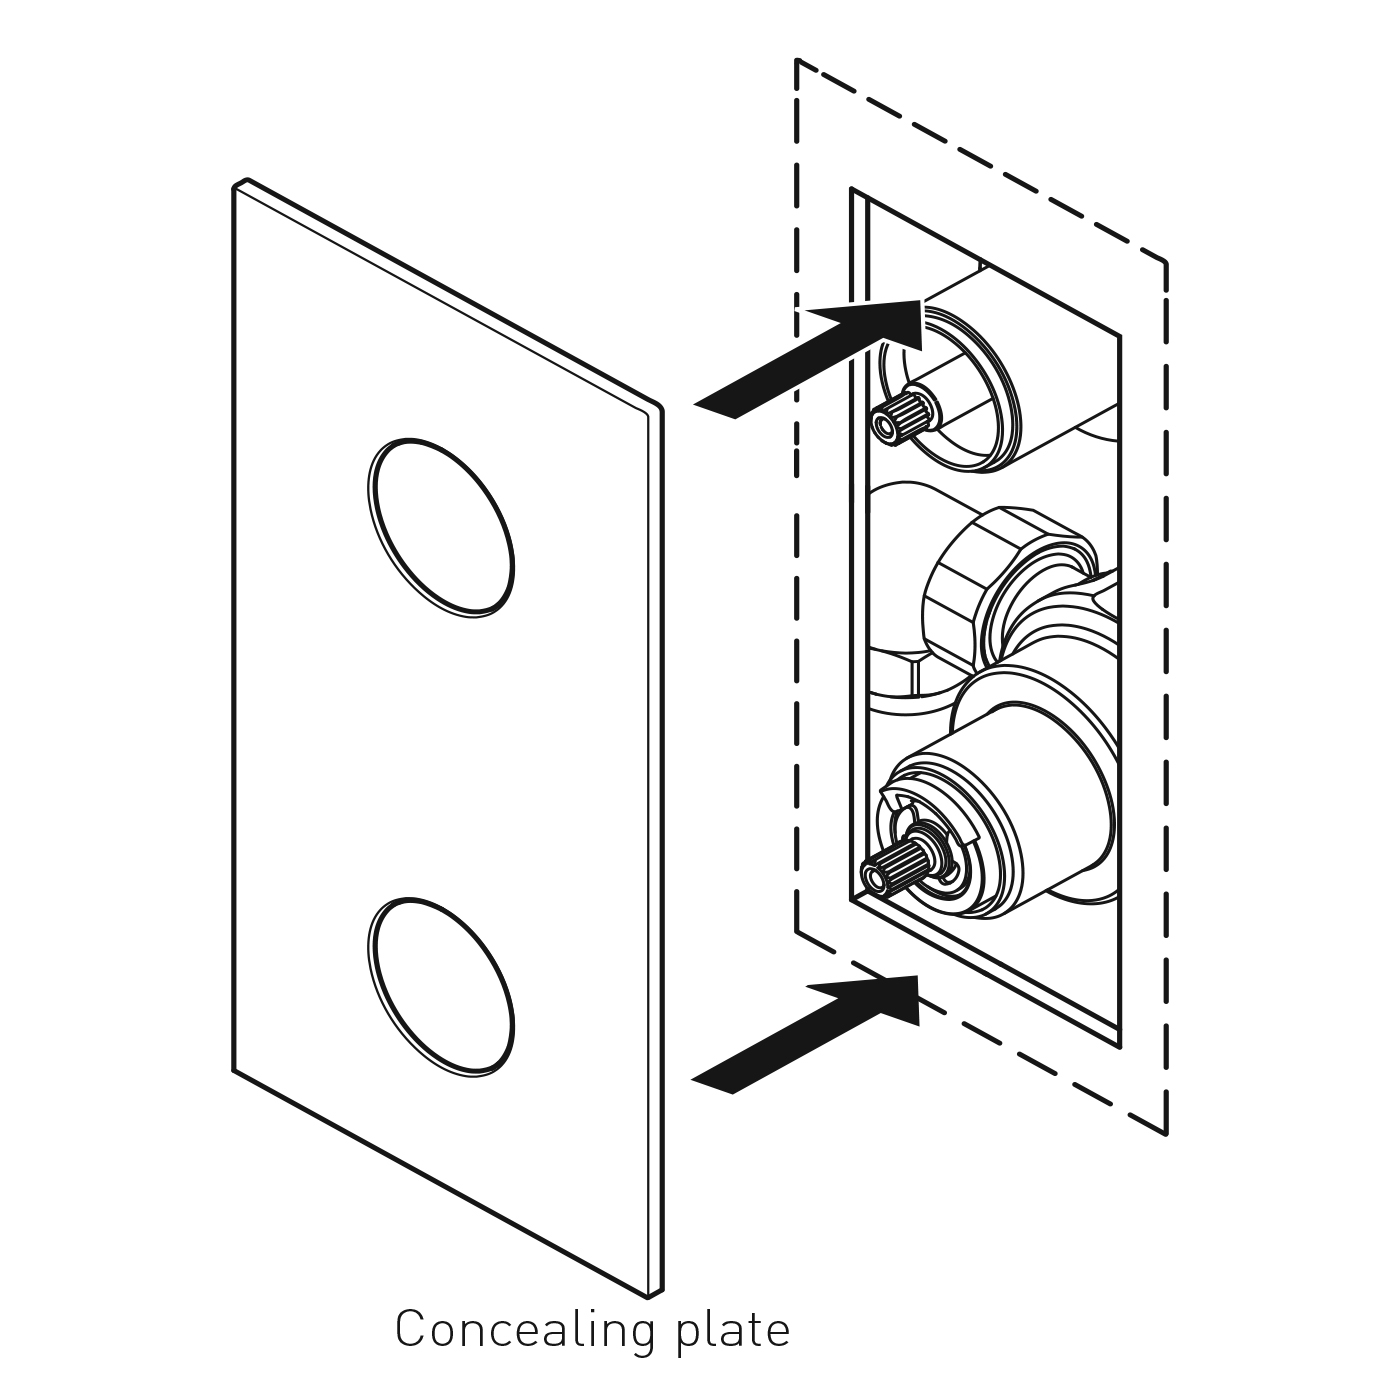
4. Fit concealing plate Note: The concealing plate can be used as a template by drawing around the plate and measuring in by 10mm to give sufficient clearance.
See page 18 for concealing plate
adjustment. Run a bead of waterproof silicone sealant around the inner edge of the concealing plate. Slide the concealing plate onto the shower valve control handles and apply firm pressure to ensure silicon sealant spreads.
5. Fit Handles Push the spline adaptors (if required) onto the valve spindles. Push the handles onto the spline adaptors and secure by tightening the grub screw and push-fit the cap into position.