How to install Peru Thermostatic Brushed Gold Rainfall Shower Set And Hand Held Shower With SPA Massage Jets And 2-Way Mixer Valve
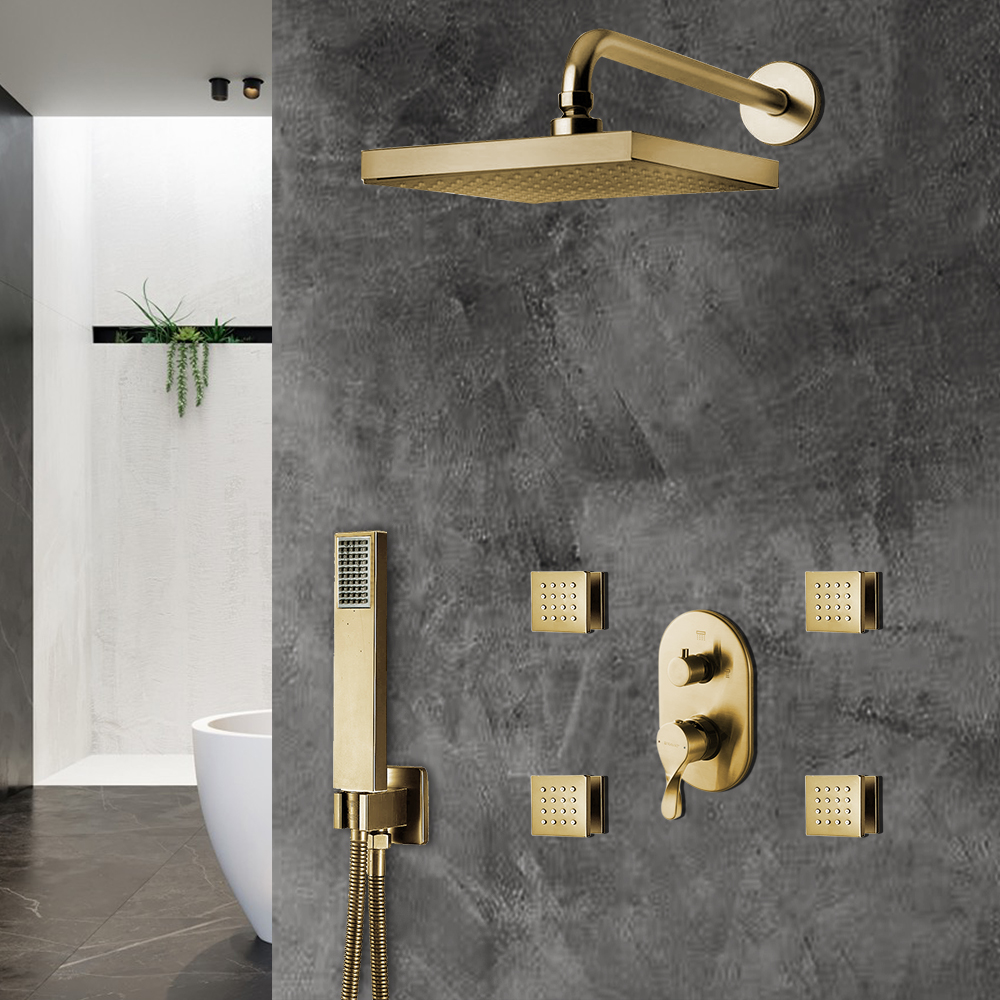
Peru Thermostatic Brushed Gold Rainfall Shower Set And Hand Held Shower With SPA Massage Jets And 2-Way Mixer ValveThis shower system is a blend of modern outlook and fabulous showering experience.Enhance your bathroom with Peru Thermostatic Brushed Gold Rainfall Shower Set And Hand Held Shower With SPA Massage Jets And 2-Way Mixer Valve which comes complete with the rainfall shower head along with four square body jets and the thermostatic shower valve and a hand held shower. Its rainfall effect experience makes showering experience more soothing and relaxing. Its optimum design and innovative technology allow for voluminous soft droplets to make your showering experience a fun one. This shower set has been made with premium grade lightweight. Water flow capacity is around 10-60 L/min. The valve core material is a high quality of ceramic. It is ceiling wall shower head. Functions overview are Intelligence constant temperature, brass, large flow temperature water mixing, side spray, free switching spray, corrosion resistant. Peru Thermostatic Brushed Gold Rainfall Shower Set And Hand Held Shower With SPA Massage Jets And 2-Way Mixer Valve can make you experience the true feeling of rain, as well as SPA body massage spray, relieving fatigue and stress. It is your best choice, a choice to enjoy life.
Peru Thermostatic Brushed Gold Rainfall Shower Set And Hand Held Shower With SPA Massage Jets And 2-Way Mixer Valve Specifications
- Type: Bathroom Shower Set
- Product Code: BST10238
- Product Brand: BathSelect
- Installation Mount: Embedded Wall Mount
- Number of Jets: Four
- Installation Type: US Standard
- Fixed Support: Yes
- Style: Contemporary
- Color: Brushed Gold
- Shape: Square
- Material: Brass
- Customization : Yes
- Shower Water Flow: 10-60 L/min
- Valve Core Material: Ceramic
- Surface Finish: Brushed
- Function: Massage Body Jet
|  |
BathSelect® Manufacturer Warranty Information
- Before you begin, please read the installation instructions below. Observe all local building and safety codes.
- Unpack and inspect the product for any shipping damages. If you find damages, do not install.
- Please note all showers must be installed by a professional and certified plumber otherwise warranty may be voided.
|
shower
|
Shower
|
|
Shower Head Installation Instructions
|
|
|
|
|
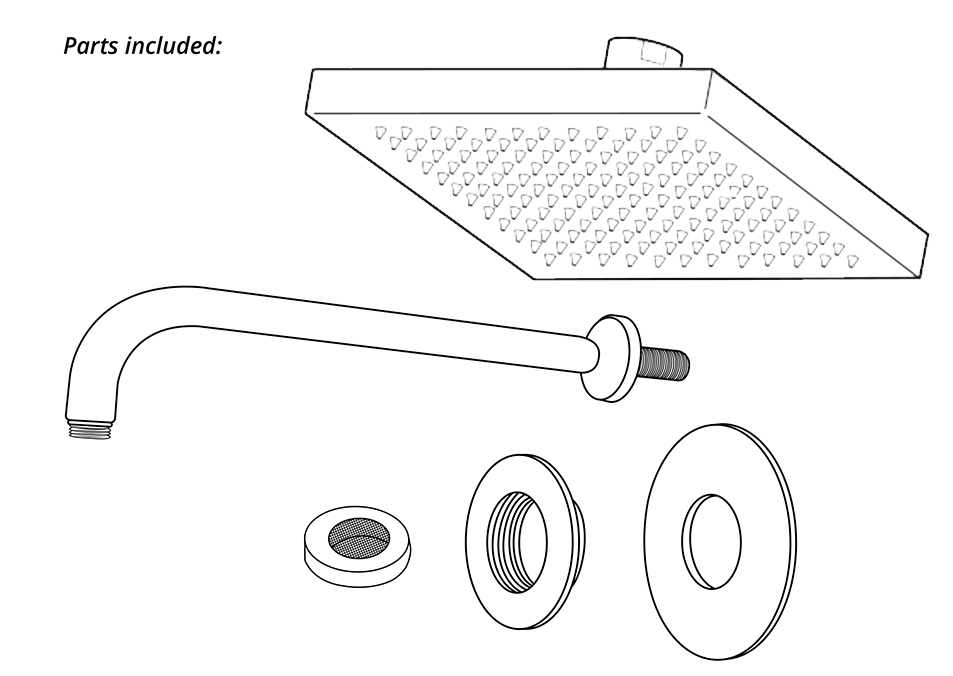
Shower Head Parts Included:
- Wall Mounting Arm
- Locking nut
- Wall trim
- Shower arm
- Showerhead
- Fixing screws and wall plugs (not shown)
|
|
|
|
|
|
|
|
|
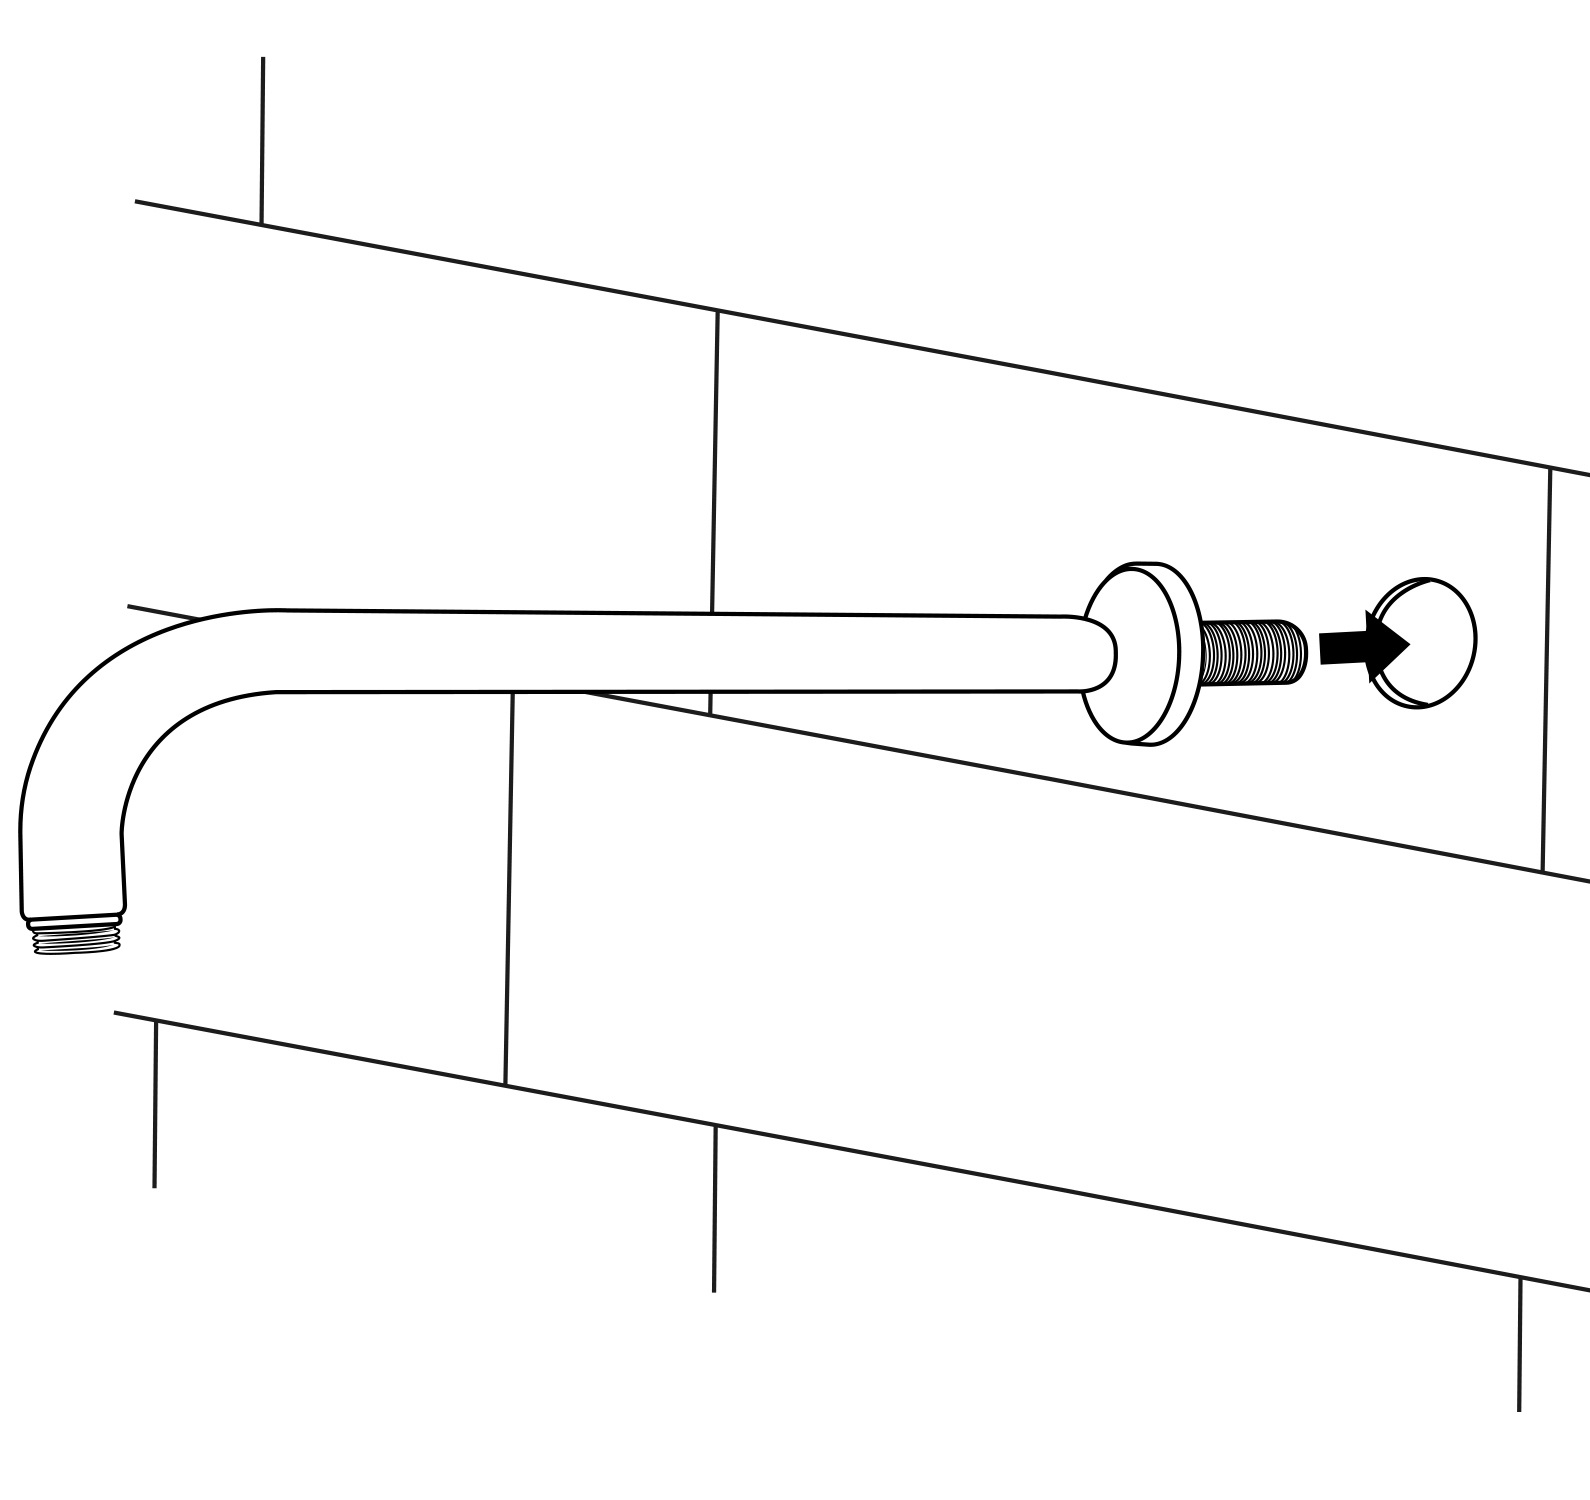
Step 1:
|
|
|
Step 2:
|
|
Step 3:
|
|
shower
|
|
|
shower
|
|
|
Step 4:
|
|
|
Step 5:
|
|
Step 6:
|
|
|
|
|
|

|
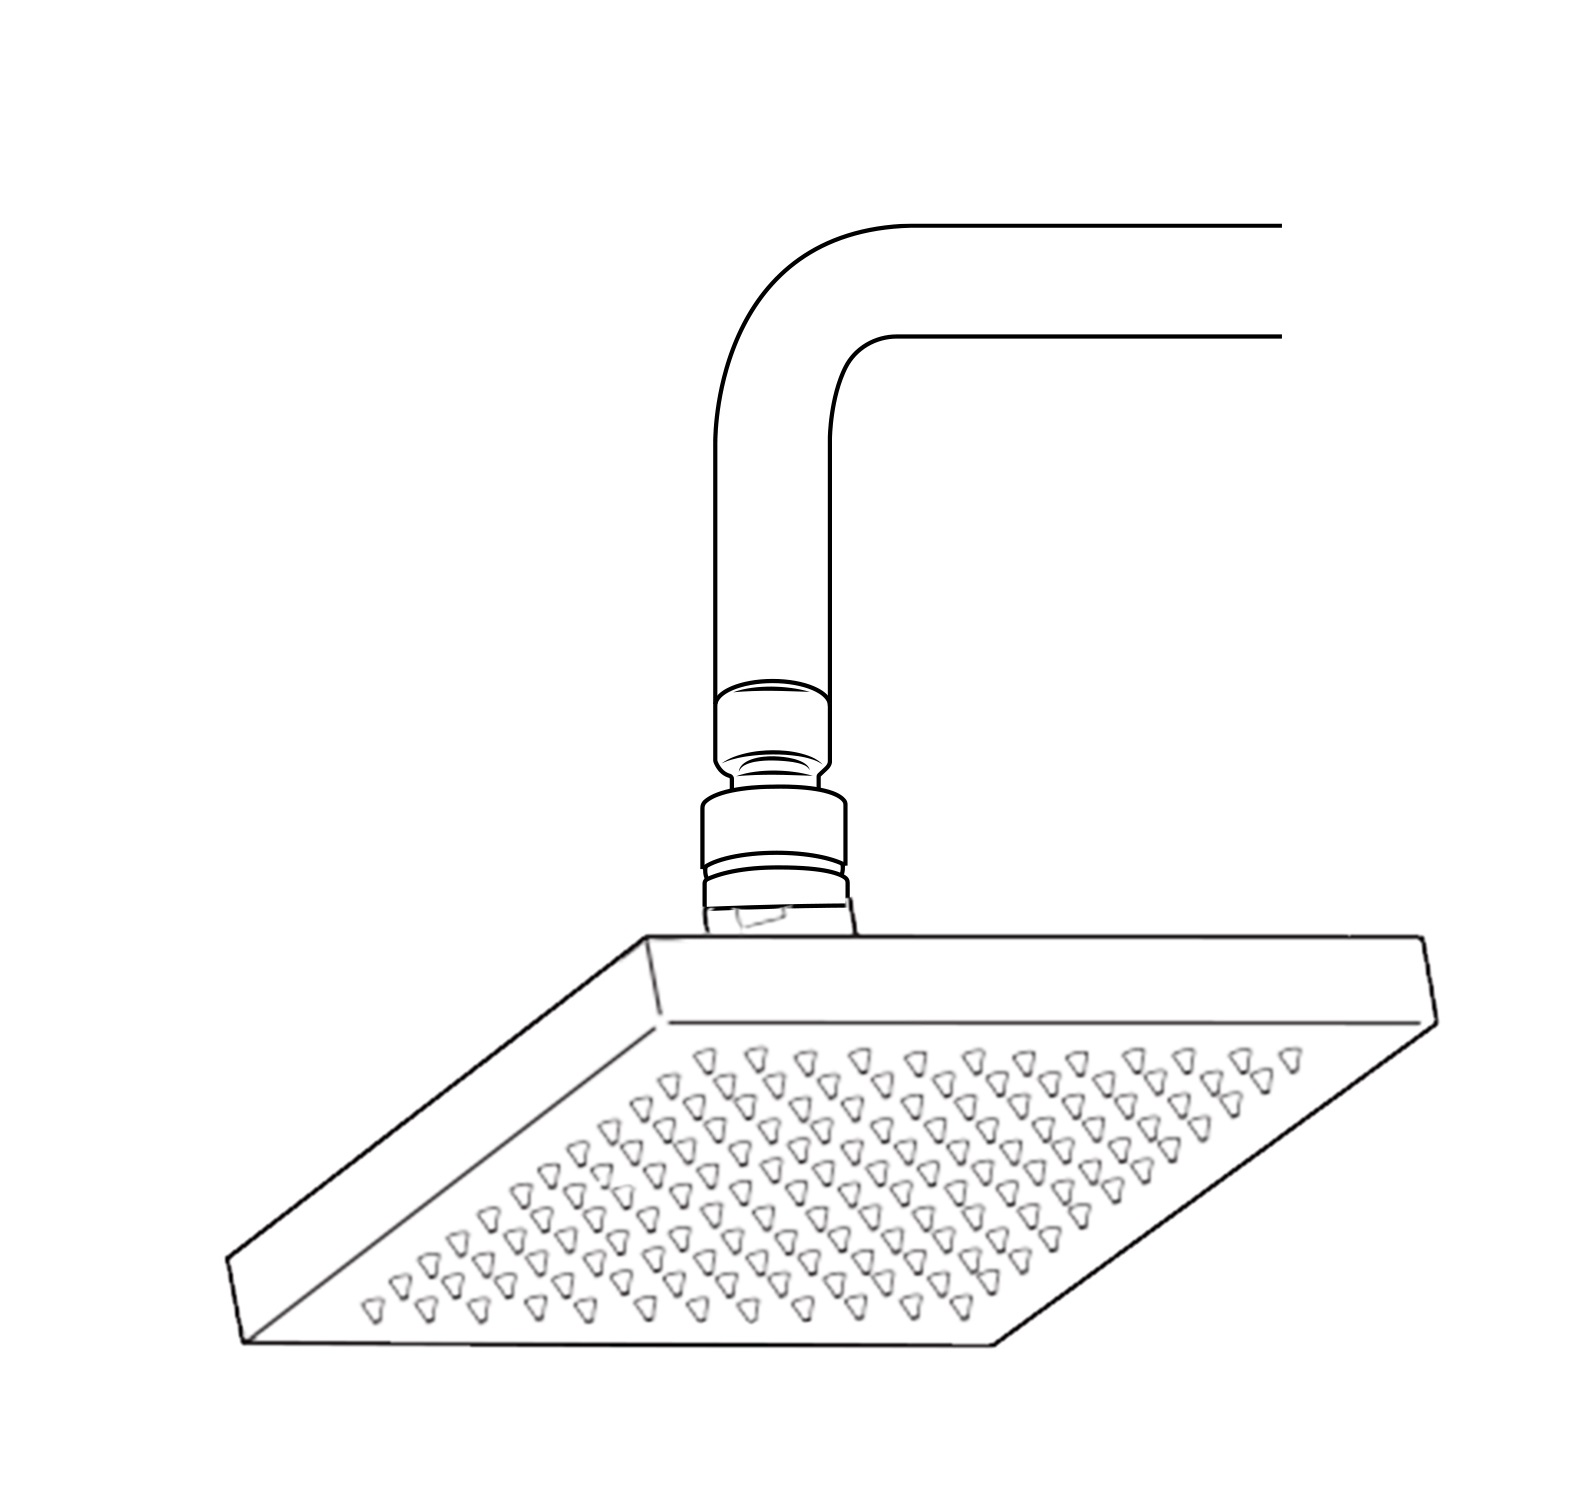
- Use your hands counter clockwise to unscrew the old showerhead and removed it.
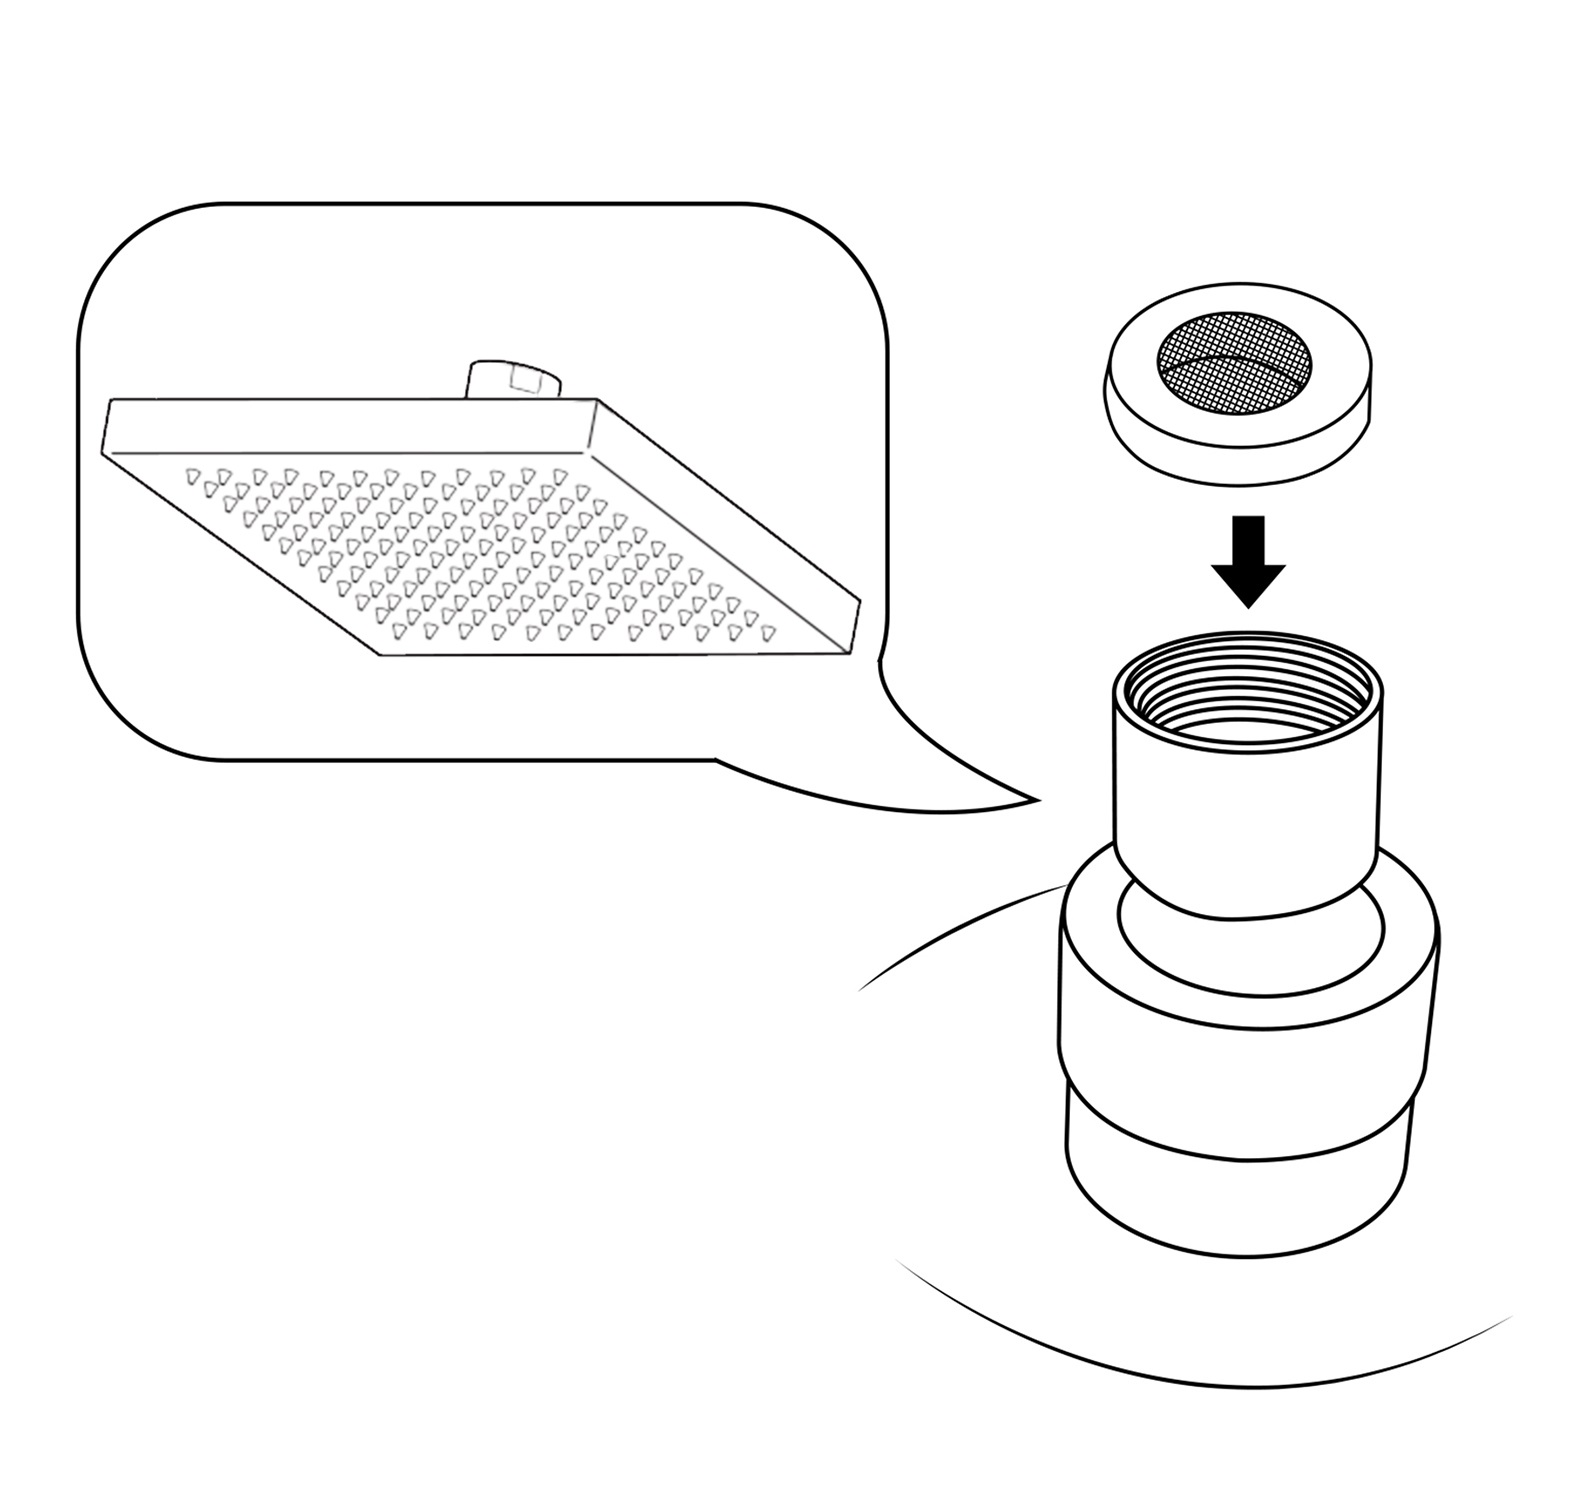
- Take out the showerhead, make sure the shower filter is placed in the connector.
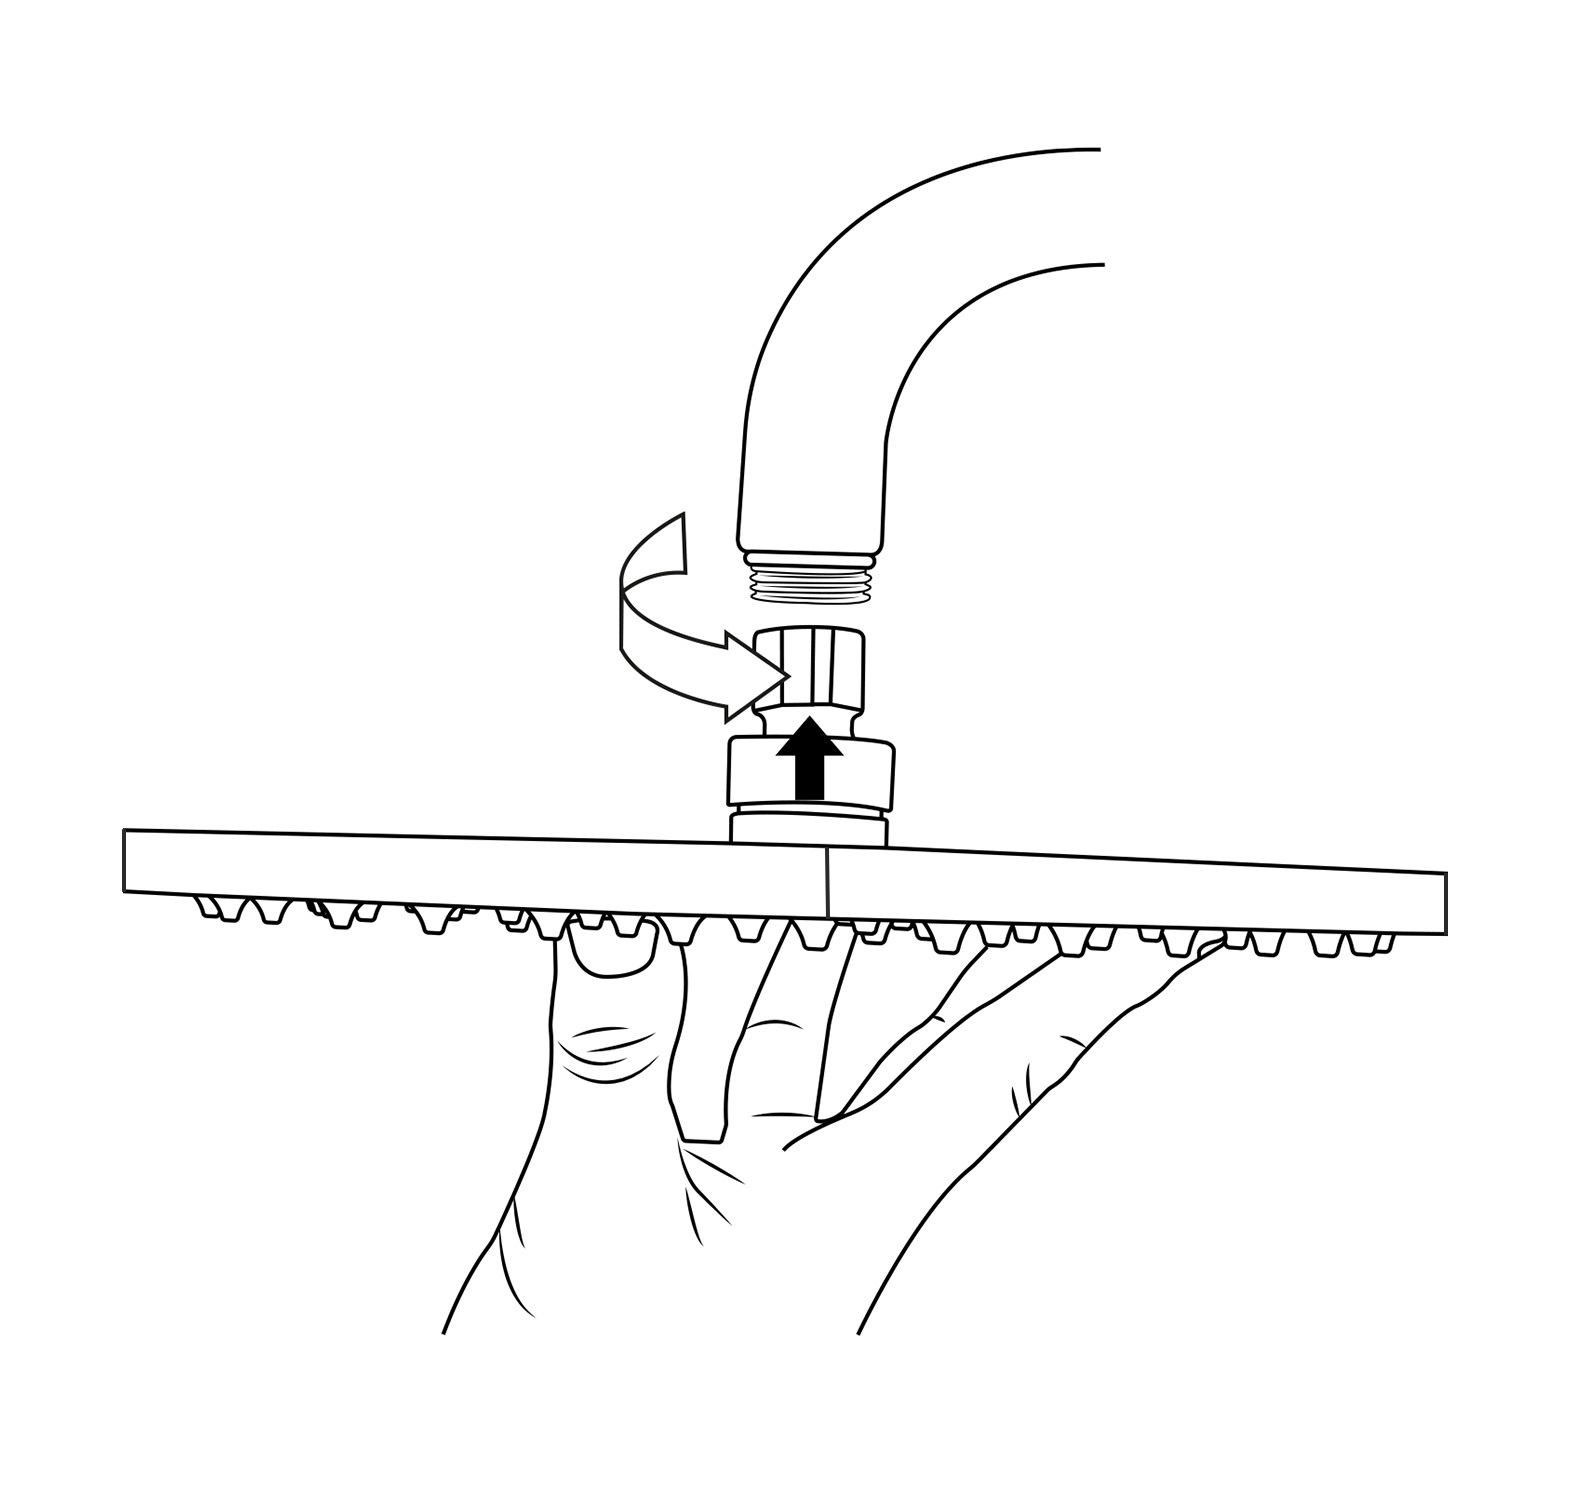
- Ensure the showerhead full horizontal alignment wall mounted shower arm thread.
- Use your hands clockwise to tighten showerhead.
HandHeld Shower Installation Instructions
Hand-Held Shower Installation Instructions
HandHeld Shower Installation Instructions
|
Step 1:
|
|
Step 2:
|
|
Step 3 & 4:
|
|
Hand
Held
Shower
|

|
Hand
Held
Shower
|
|
|
Handheld Shower
|
|
Handheld Shower
|
|
Handheld Shower
|
|
Step 5:
|
|
Step 6 & 7:
|
|
Step 8:
|
|
|
|
|
|
2. HOLE LOCATIONS FOR WALL MOUNT
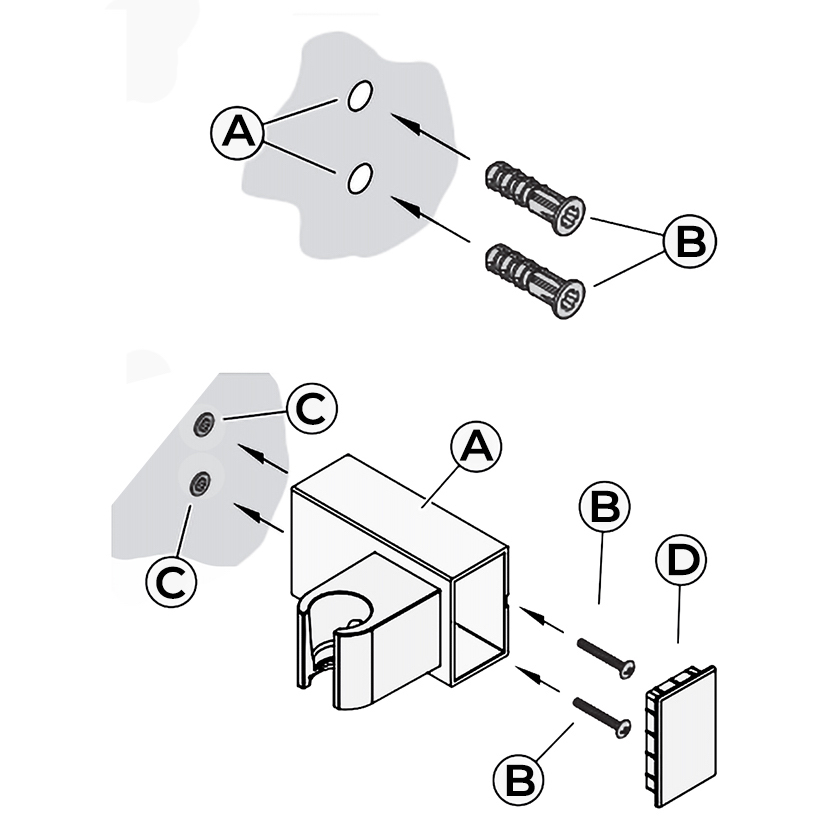
Remove Front Cover (A) from Wall Mount (B). Use Wall Mount Screw Holes (C) to place the desired location. Using a punch or awl, tap the screw hole locations.
Holes must be vertically aligned.
3. ANCHOR INSTALLATION
Drill two 1/4” dia. Holes (A). If installing into a studs drill two 1/8” dia. holes and do not use Anchors (B). Insert Anchors (B) into Holes (A) and tap flush with the wall.
4. WALL MOUNT INSTALLATION
Place Wall Mount (A) into wall and inset Mounting Screws (B) through Wall Mount Holes (C) and tighten until Wall Mount (A) is flush with the wall.
Do Not Over Tighten! Insert Front Cover (D) into Wall Mount (A)
5. DROP ELBOW & HOSE INSTALLATION
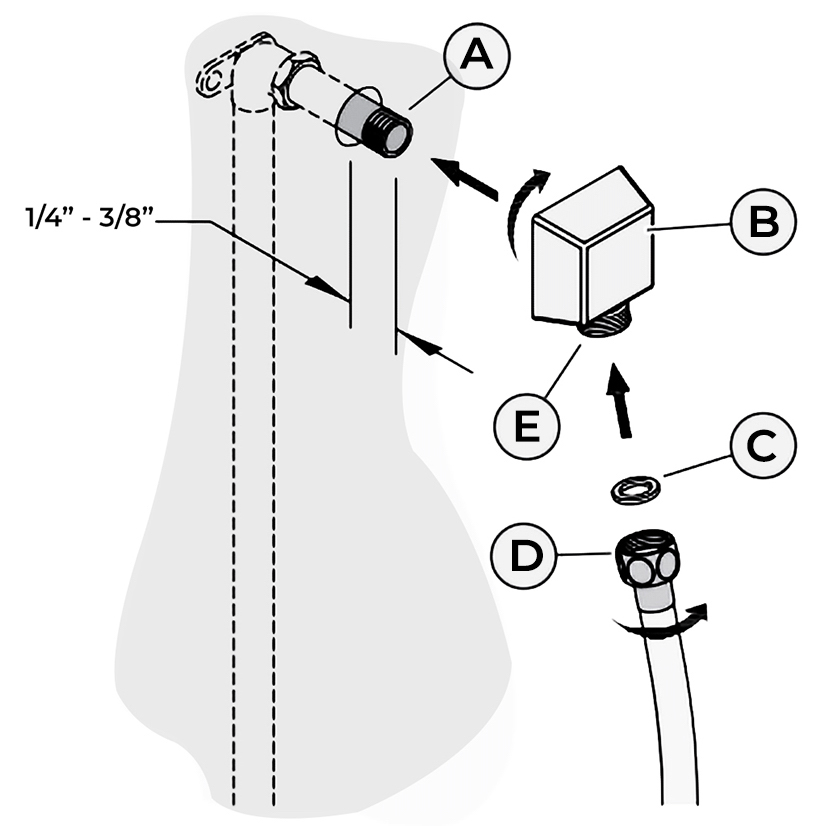
Apply PTFE plumbers tape on both ends of Pipe Nipple (A) (not included). Screw Pipe Nipple (A) into the elbow inside the wall.
The Pipe Nipple (A) is to project 1/4” – 3/4” from the finished wall. Screw Drop Elbow (B) onto Pipe Nipple (A) and tighten until Drop Elbow (B) is property positioned and flush to the finished wall.
Place Rubber Seal (C) inside Hex Hose Fitting (D). Connect Hex Hose Fitting (D) into Drop Elbow Outlet (E) by turning Hex Hose Fitting (D).
6. UNIT STARTUP
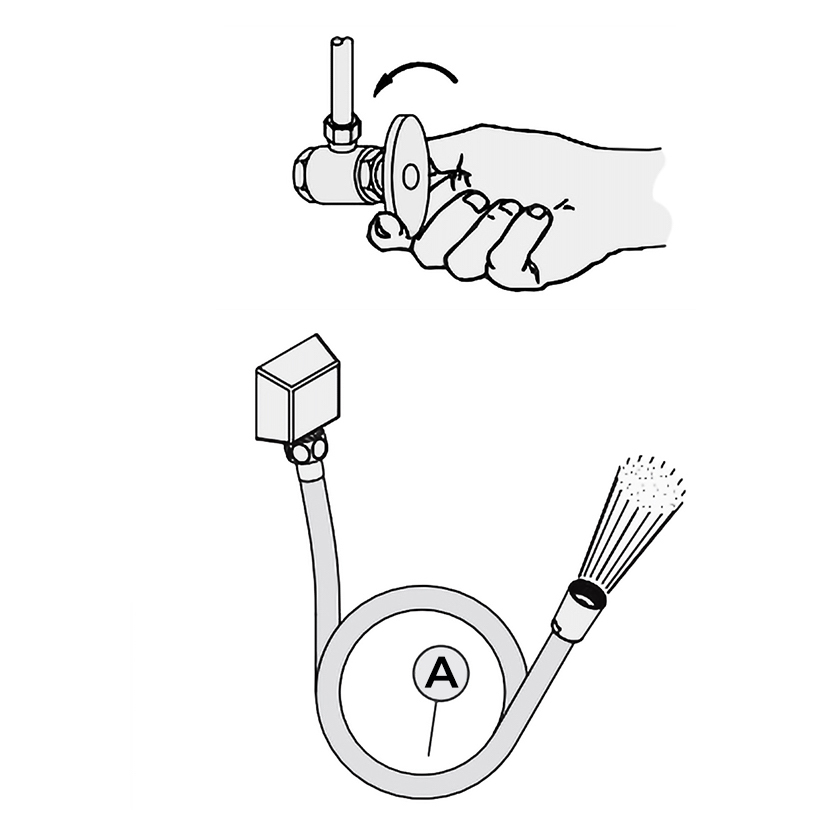
Turn on hot and cold water supplies, and check all connections for leaks.
7. FINAL FLUSHING
For final flushing, turn the valve on and allow water to run through the Hose (A) for several minutes.
Allow water to run for several minutes until all foreign matter clears the line.
8. SHOWER ARM INSTALLATION
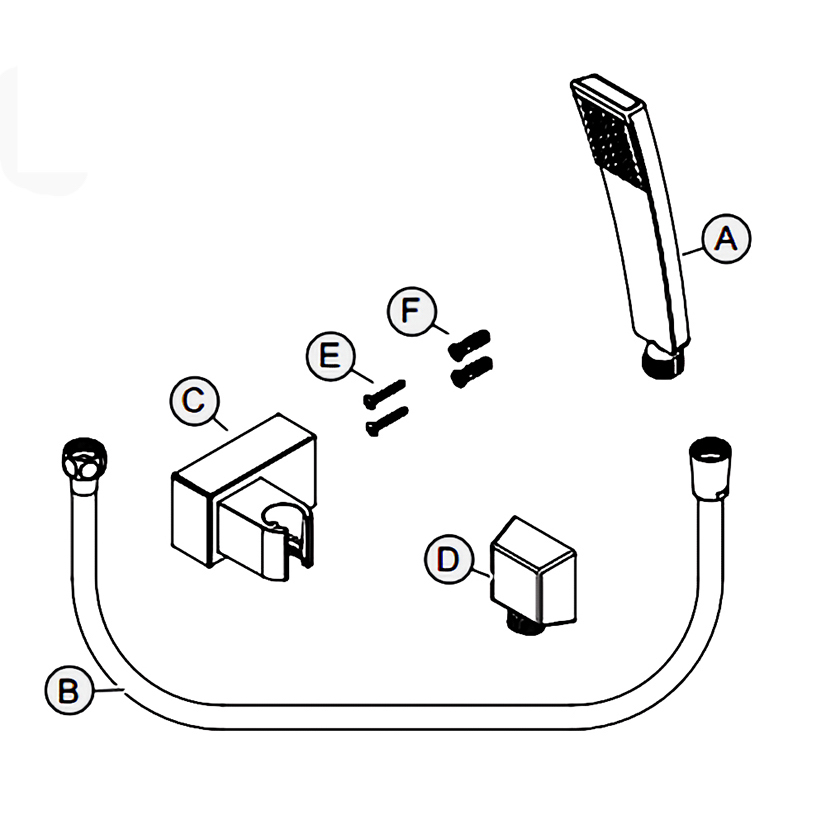
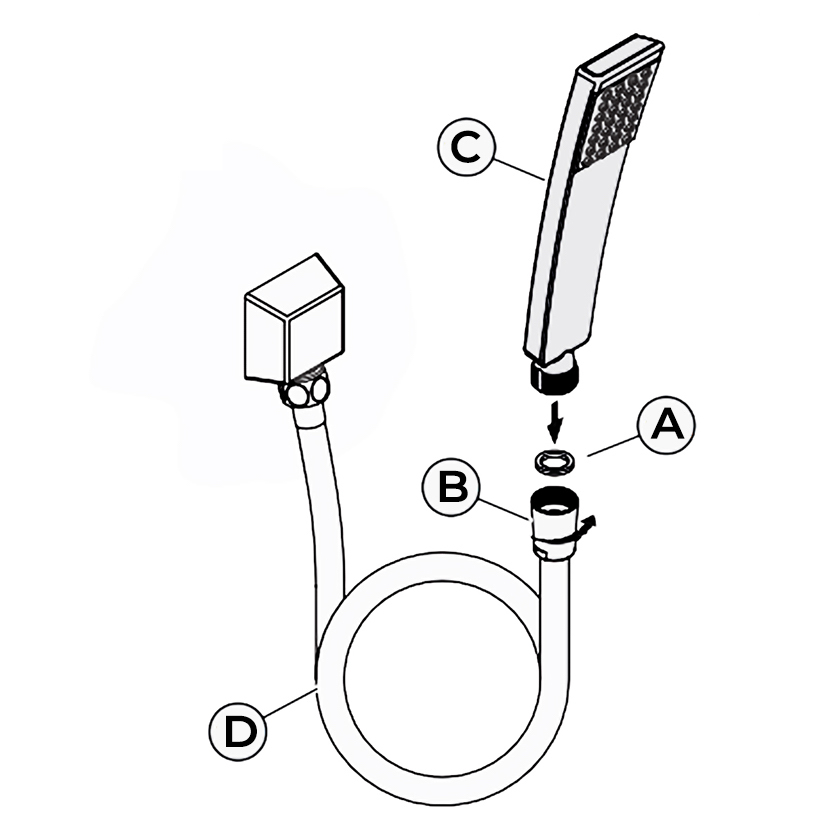
Place Rubber Seal (A) inside Tapered Hose Fitting (B). Conned Hand Shower (C) to Hose (D) by turning Tapered Hose Fitting (B ) clockwise.
Warning: Make sure Hand Shower (C) is securely tightened to Hose (D).
Body Sprays Installation Instructions
Shower Body Jets Installation Instructions
Body Sprays Installation Instructions
|
Step 1:
|
|
Step 2:
|
|
Step 3:
|
|
Body
Sprays
|
|
Body
Sprays
|
|
|
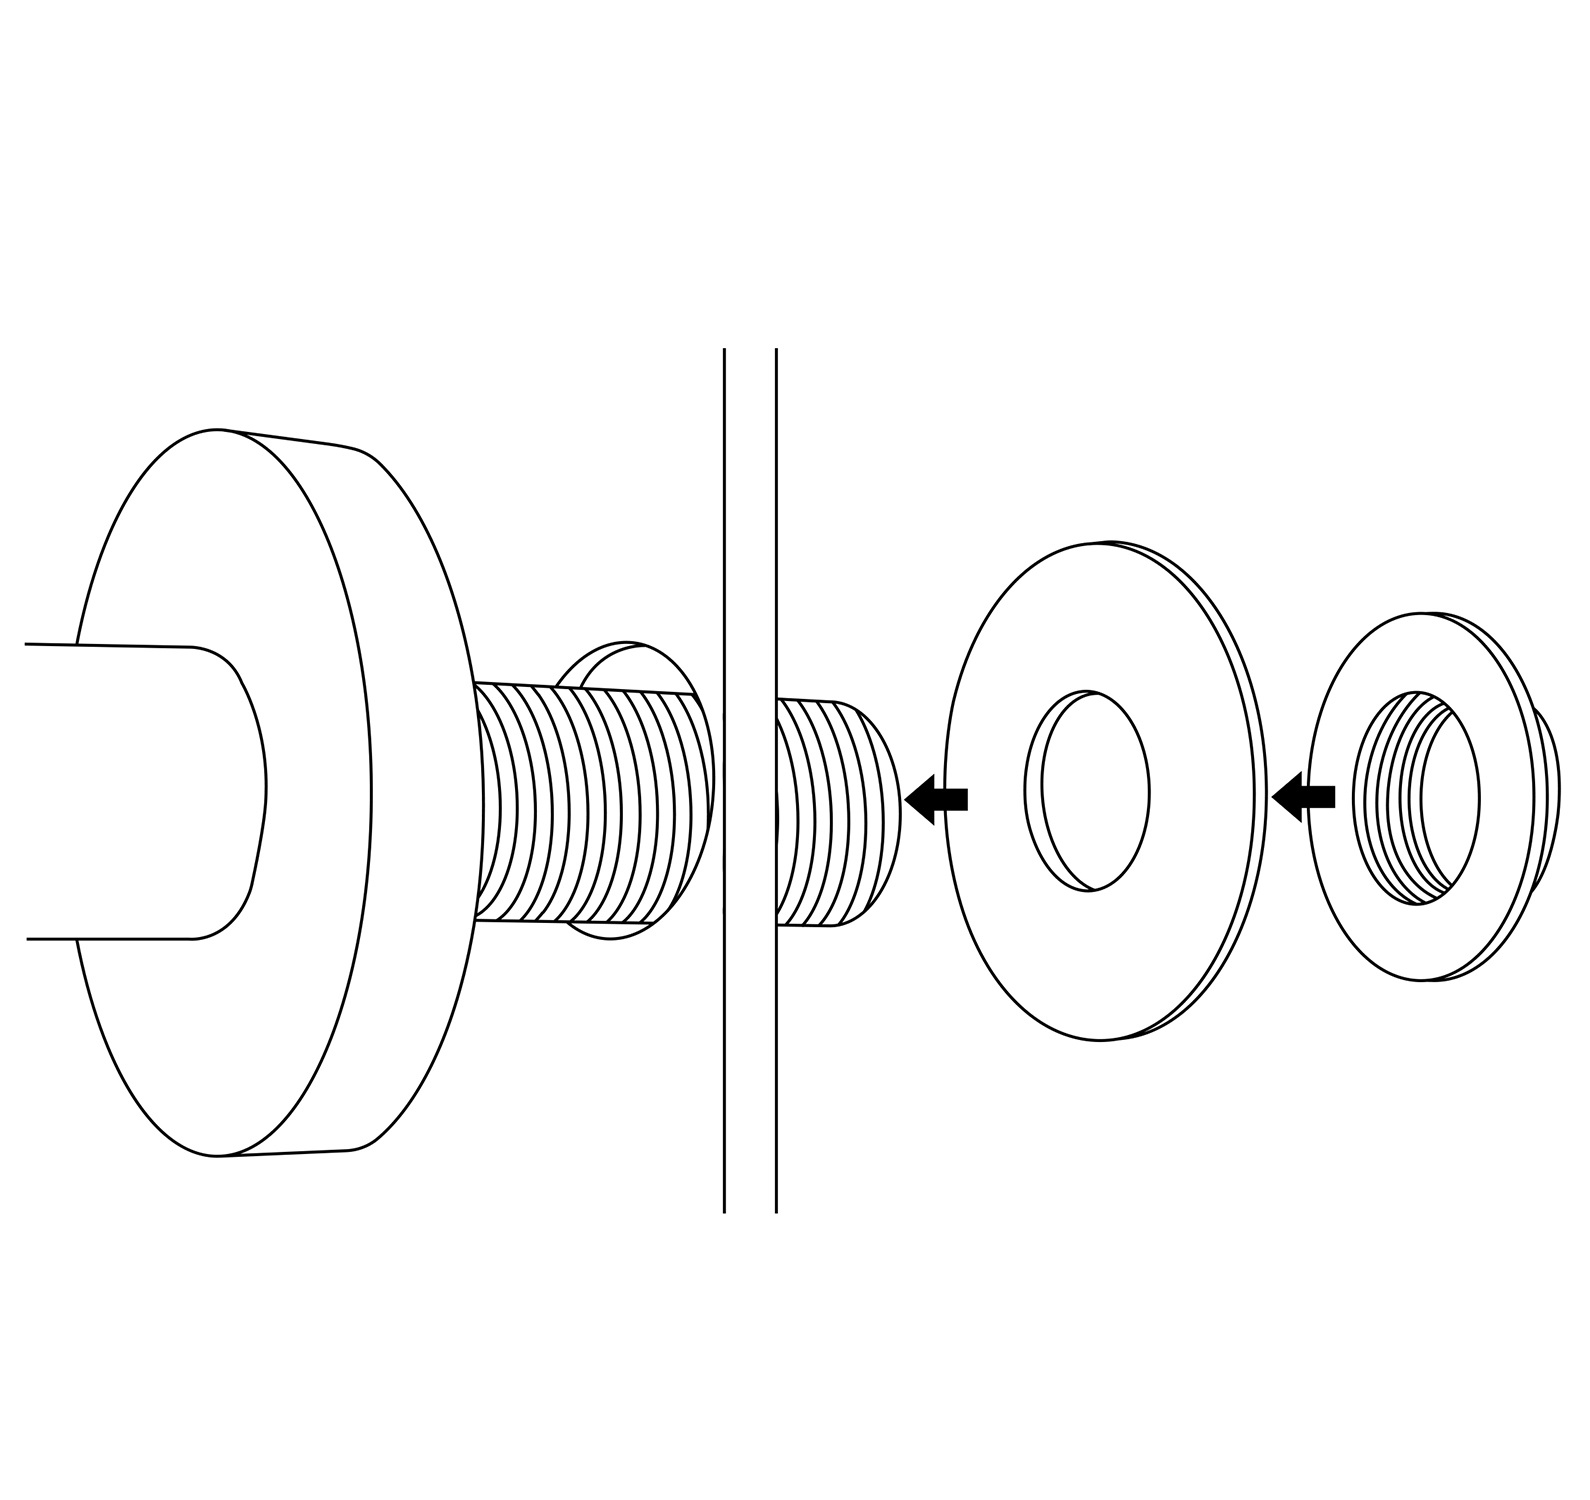
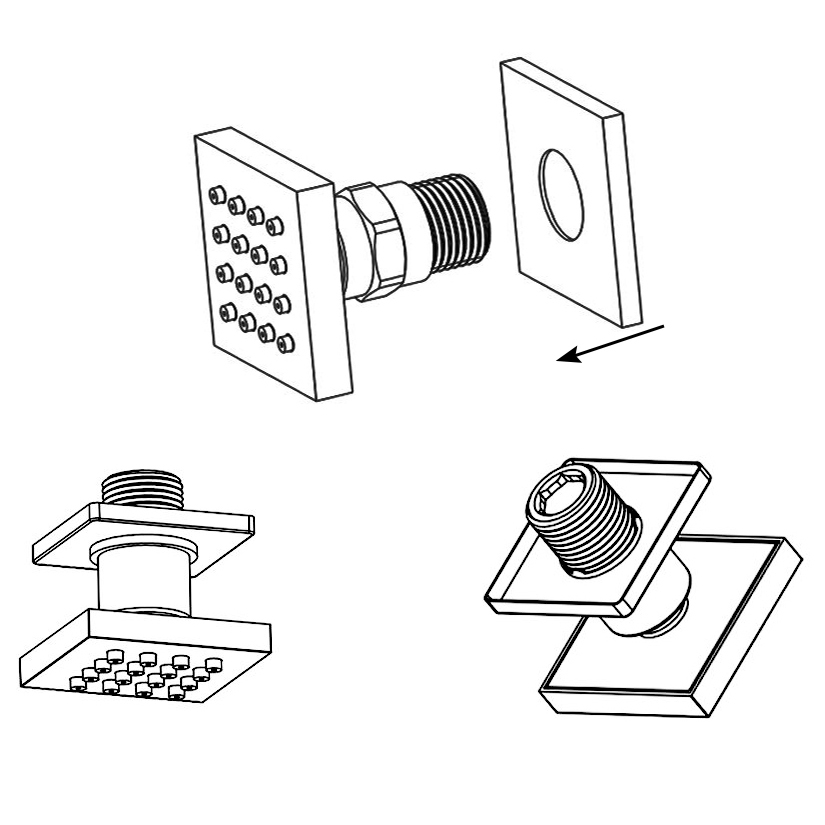
Set the decorative cover on the body jet.
|
|
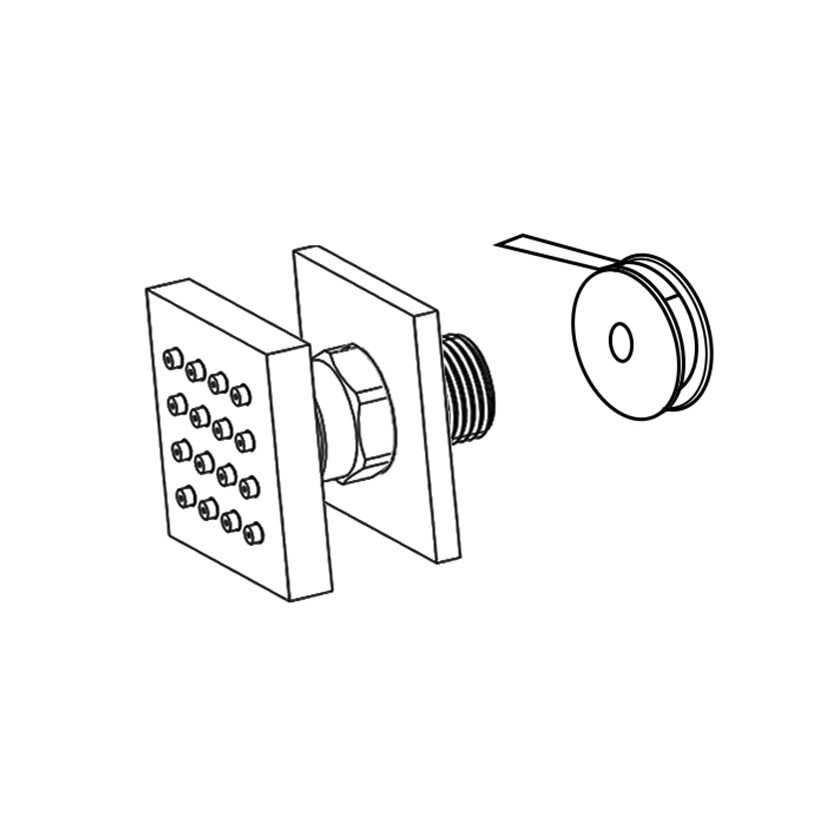
Roll the raw material belt in the thread screws.
|
|
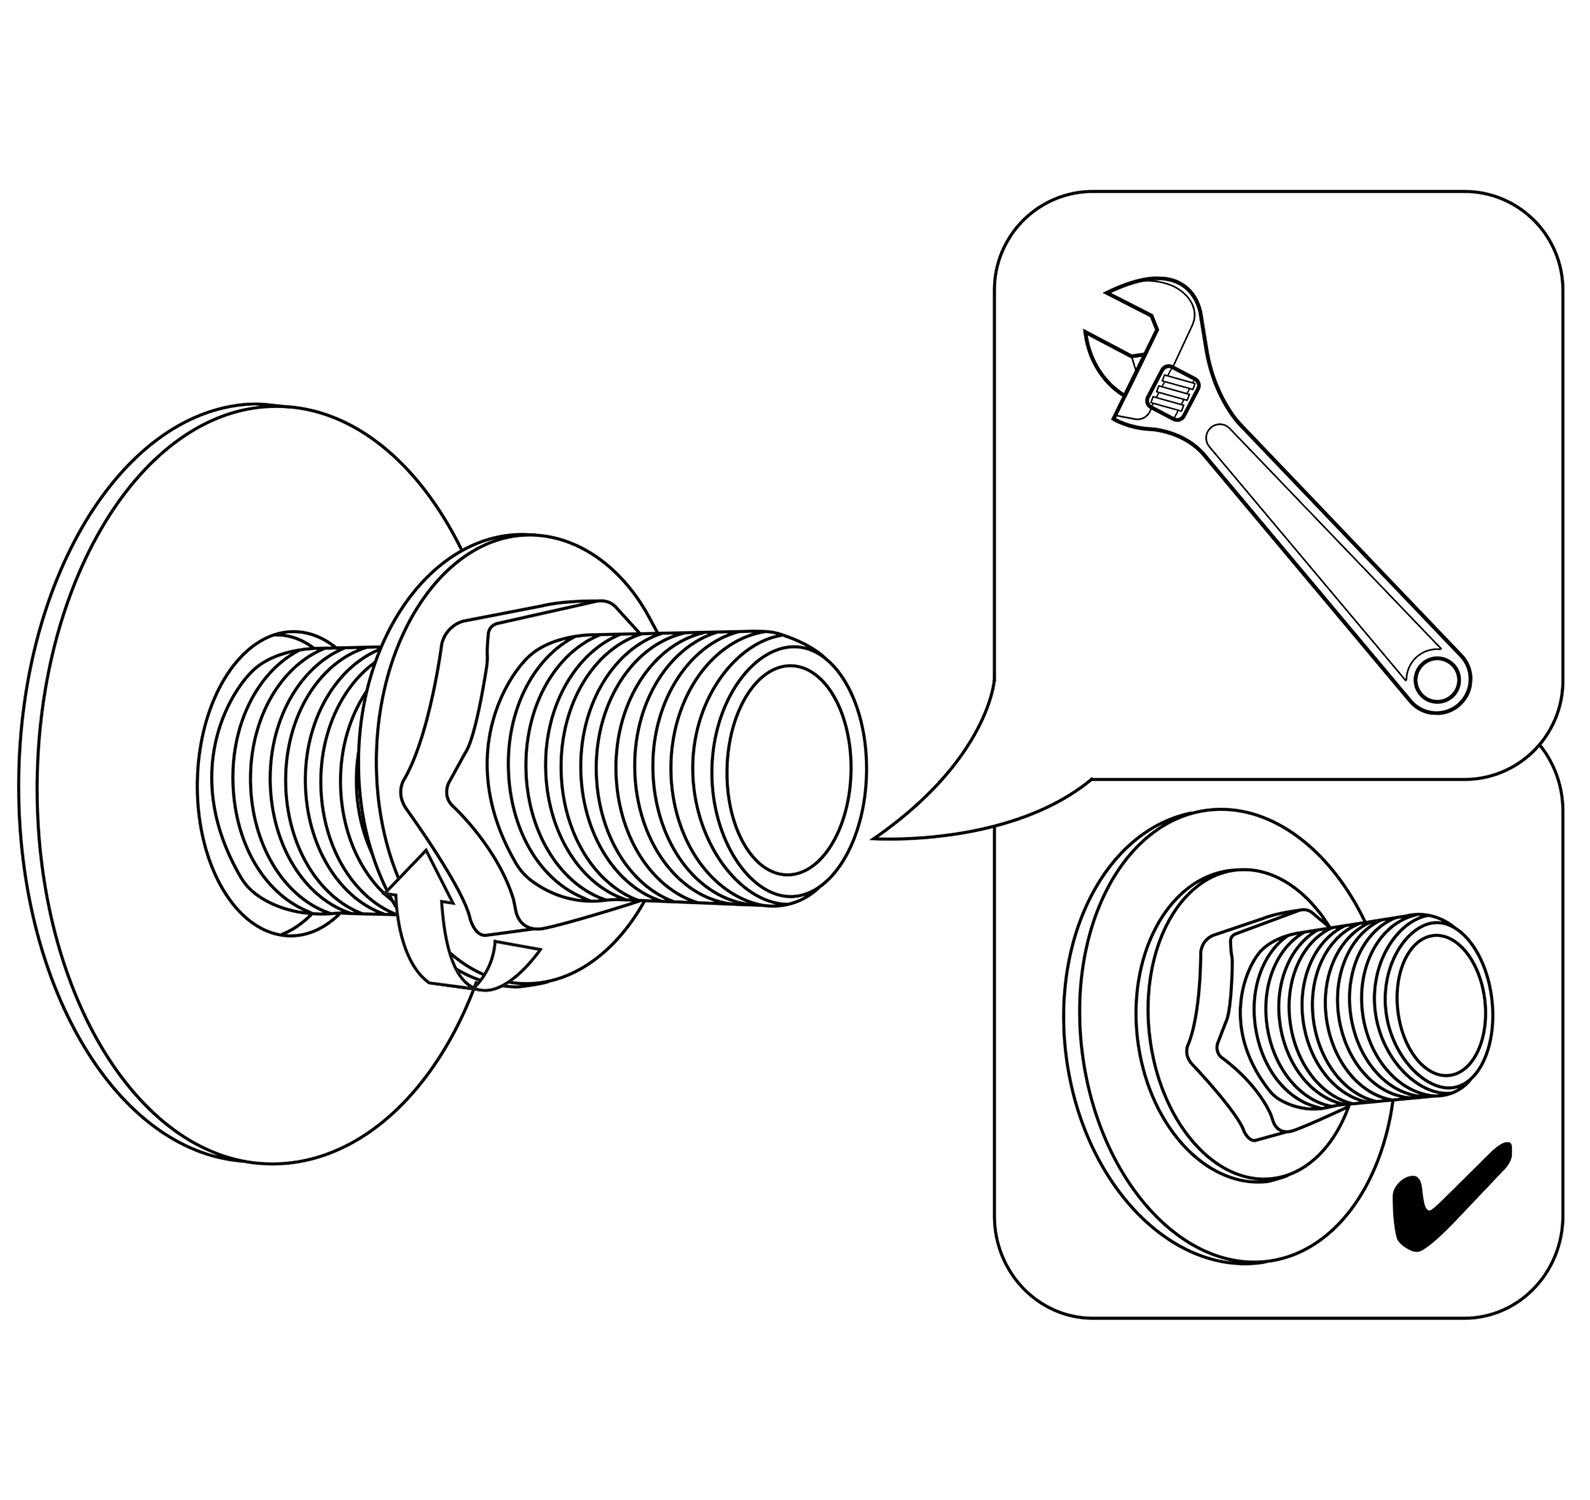
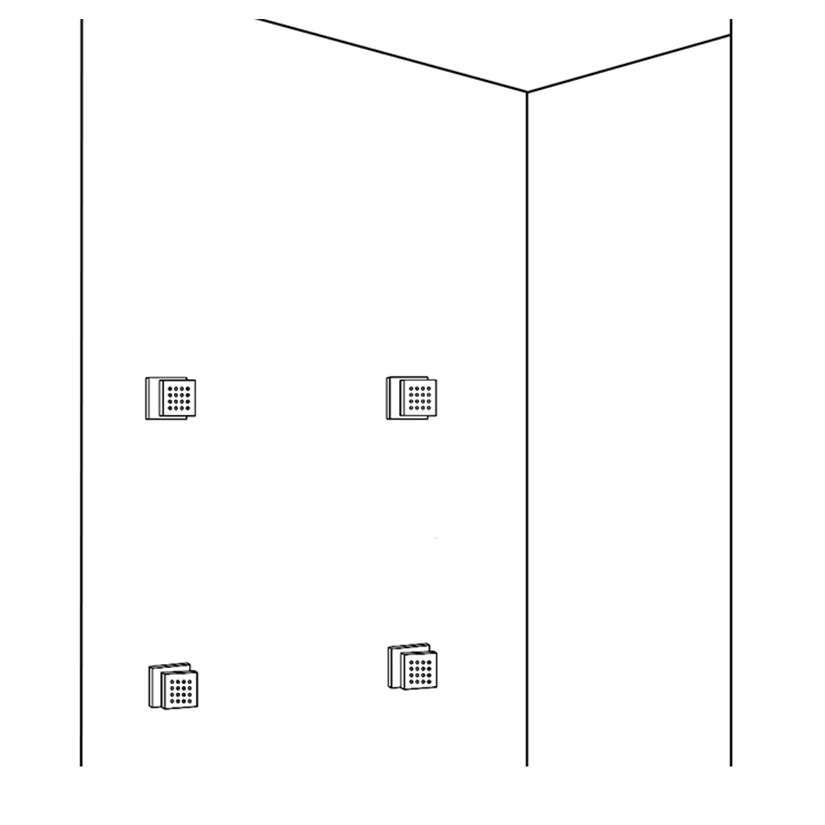
Use a wrench to tighten 6 body jets on
the water outlet holes in a clockwise direction.
|
Mixer Installation Instructions
Thermostatic Shower Mixer Installation Instructions
Thermostatic Shower Mixer
Step 1:
|