Home > Milano Digital Shower Sytem Installation Instruction

The Milano Solid Brass Color Changing LED Rain Digital Shower System

Our Milano Digital shower system is a blend of modern outlook and fabulous showering fun. Its LED lighting experience makes environment around you more soothing and tempting. Its optimum design and innovative technology allows for voluminous soft droplets to makes your showering experience a fun. It is cost-effective, environment friendly and hygiene complemented. It never allows precious water to be wasted. Turn on the fun in your shower just by turning on the water, the LED lights will automatically light up and set the mood. It will automatically change colors according to the temperature of the water so you always know how the water will feel on your skin just by looking at it. They will even change colors automatically based on the water temperature. The lights will dim and brighten when you lower and raise the pressure so you can set the perfect mood, water and light. All this with no batteries, everything is self-powered by a built in dynamo that takes advantage of the water pressure to create the energy to light the bulbs. Never be scalded again by entering a shower that is just too hot. The threading is universal so it will fit any standard shower head by simply unscrewing the old one by hand and attaching the new one.

Milano Digital Shower System- Solid Brass Color Changing Water Powered Led Shower Head Features:

  • Brand Name: BathSelect
  • Model Number: BT-631R
  • Type: Digital LED Shower Set
  • Material: Solid Brass
  • Finish: Polished Chrome
  • Style: Contemporary Rain Showerhead
  • Showerhead Height (thickness: 0.33
  • Showerhead Sizes Available: 8", 10", 12", or 16"
  • LED Power Source: Water Flow
  • LED Color: Blue, Green, Red
  • Mount Method: Wall or Ceiling Mount
  • Connection: 1/2" US standard (included)
  • Shower Arm: Included
  • Body Jets: Comes with solid brass 360° adjustable
  • Flow Rate: 2.5 GPM
  • Comes with solid brass digital mixer
  • All parts are solid brass (no plastic parts!!!)
  • A shower arm is included.
  • The shower head can be used with either wall or ceiling mount arm
  • Modern stylish design completely brushed stainless steel made to match or stand out from your other bathroom fixtures
  • High quality this modern shower head is made out of solid brass, so its made to last!!
Milano Digital Shower Sytem- Solid Brass Color Changing Water Powered Led Shower Head

BathSelect® Manufacturer Warranty Information
Installation Instruction For Milano Digital Shower System

Solid Brass Color Changing Water Powered Led Shower Head


  • Before you begin, please read the installation instructions below. Observe all local building and safety codes.
  • Unpack and inspect the product for any shipping damages. If you find damages, do not install.
  • Please note all showers must be installed by a professional and certified plumber otherwise warranty might be voided


Shower Head Installation


No tools required, ½ connector fits standard sized shower plumbing.


  1. Use your hands counter clockwise to unscrew the old showerhead and removed it.
  2. Take out the showerhead, make sure the shower filter is placed in the connector.
  3. Ensure the showerhead full horizontal alignment wall mounted shower arm thread.
  4. Use your hands clockwise to tighten showerhead.


Hand-Held Shower Instructions


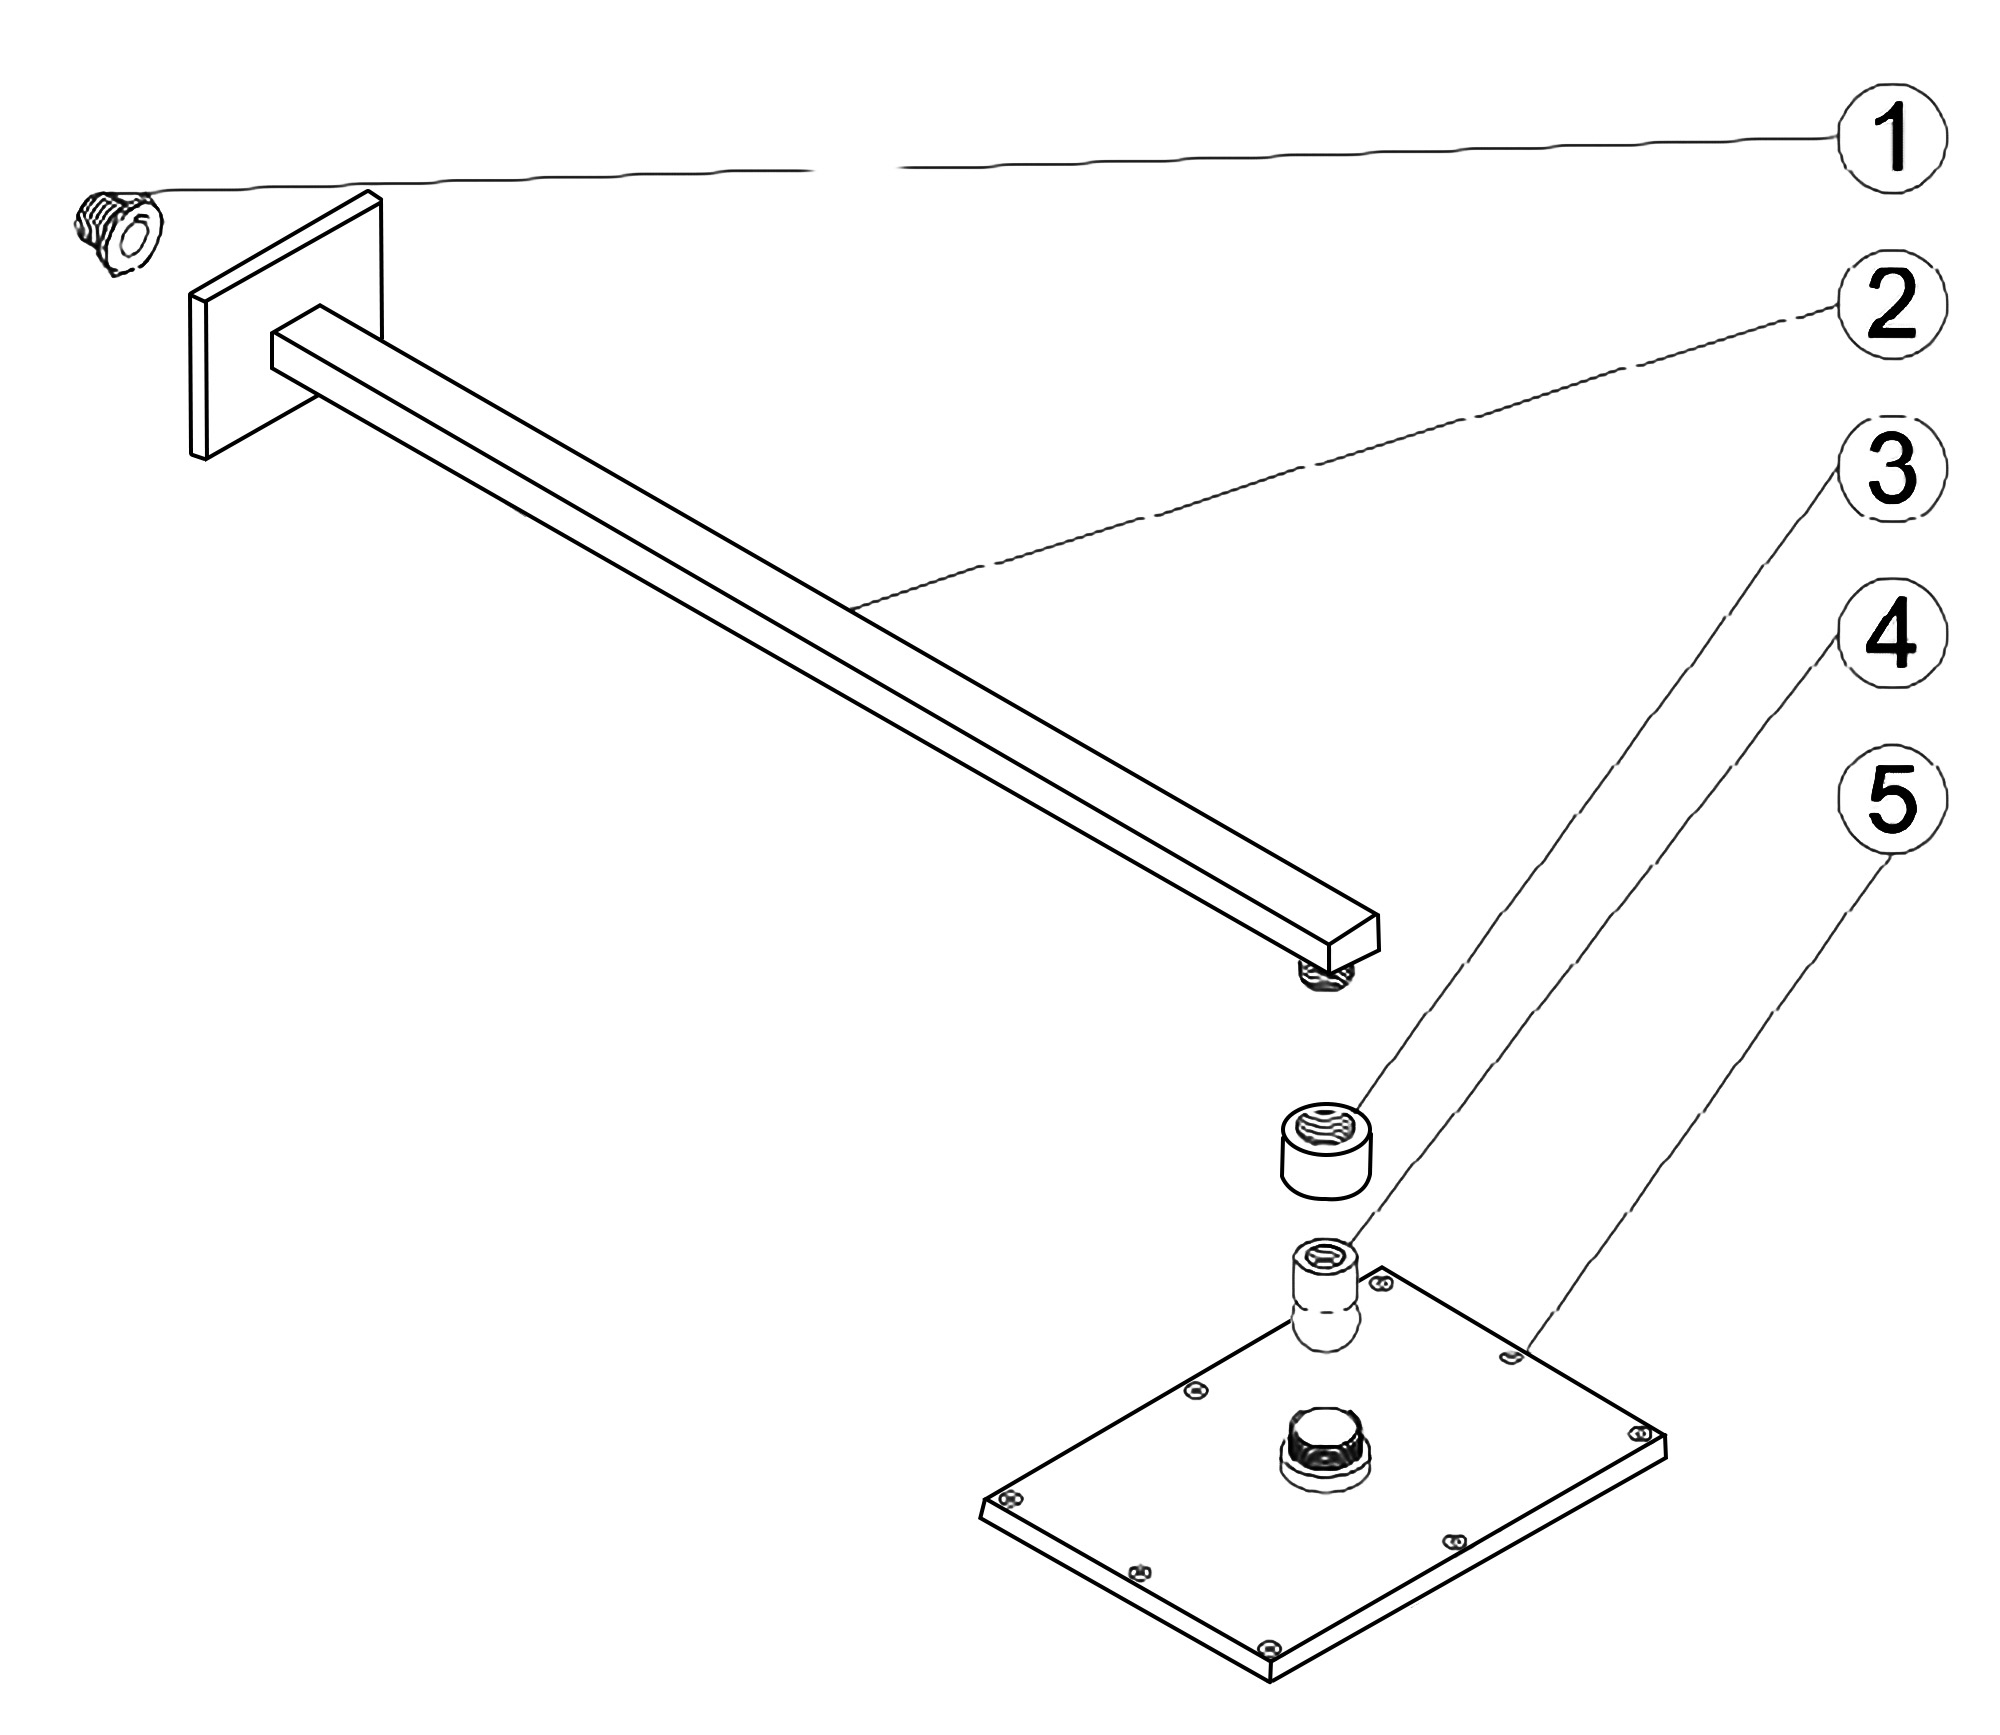
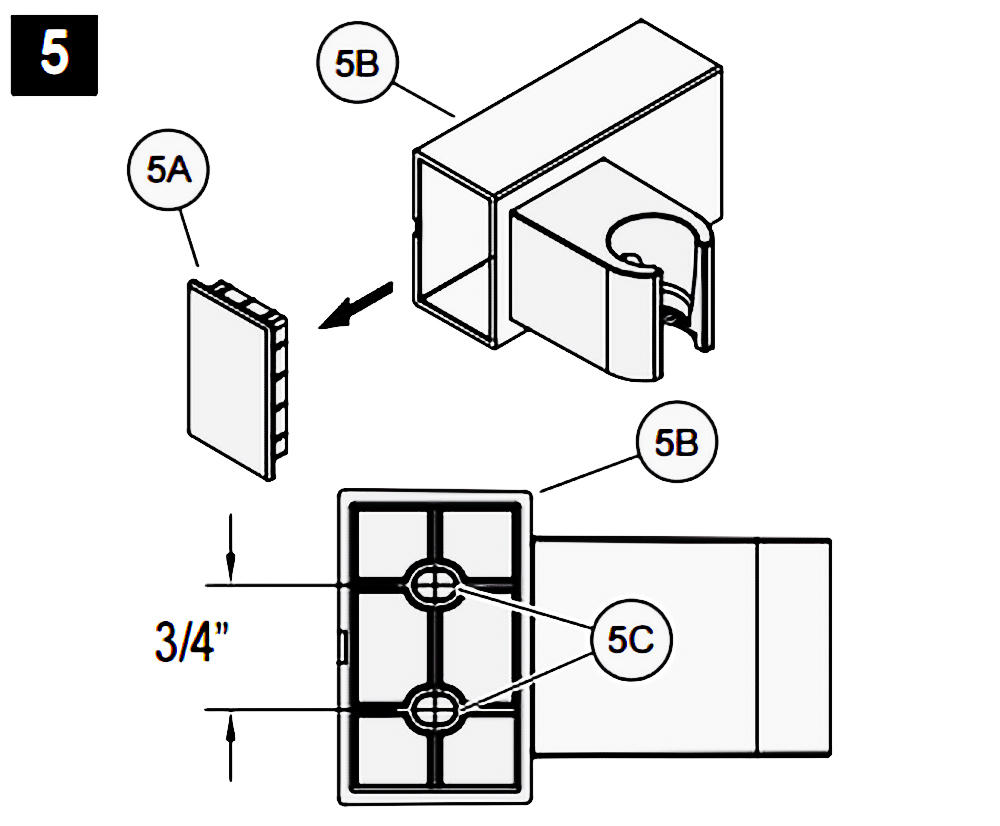
5. HOLE LOCATIONS FOR WALL MOUNT

Remove Front Cover (5A) from Wall Mount (5B). Use Wall Mount Screw Holes (5C) to place the desired location. Using a punch or awl, tap the screw hole locations. Holes must be vertically aligned.


6. ANCHOR INSTALLATION

Drill two 1/4” dia. Holes (6A). If installing into a studs drill two 1/8” dia. holes and do not use Anchors (6B). Insert Anchors (6B) into Holes (6A) and tap flush with the wall.


7. WALL MOUNT INSTALLATION

Place Wall Mount (7A) into wall and inset Mounting Screws (7B) through Wall Mount Holes (7C) and tighten until Wall Mount (7A) is flush with the wall. Do Not Over Tighten! Insert Front Cover (7D) into Wall Mount (7A)


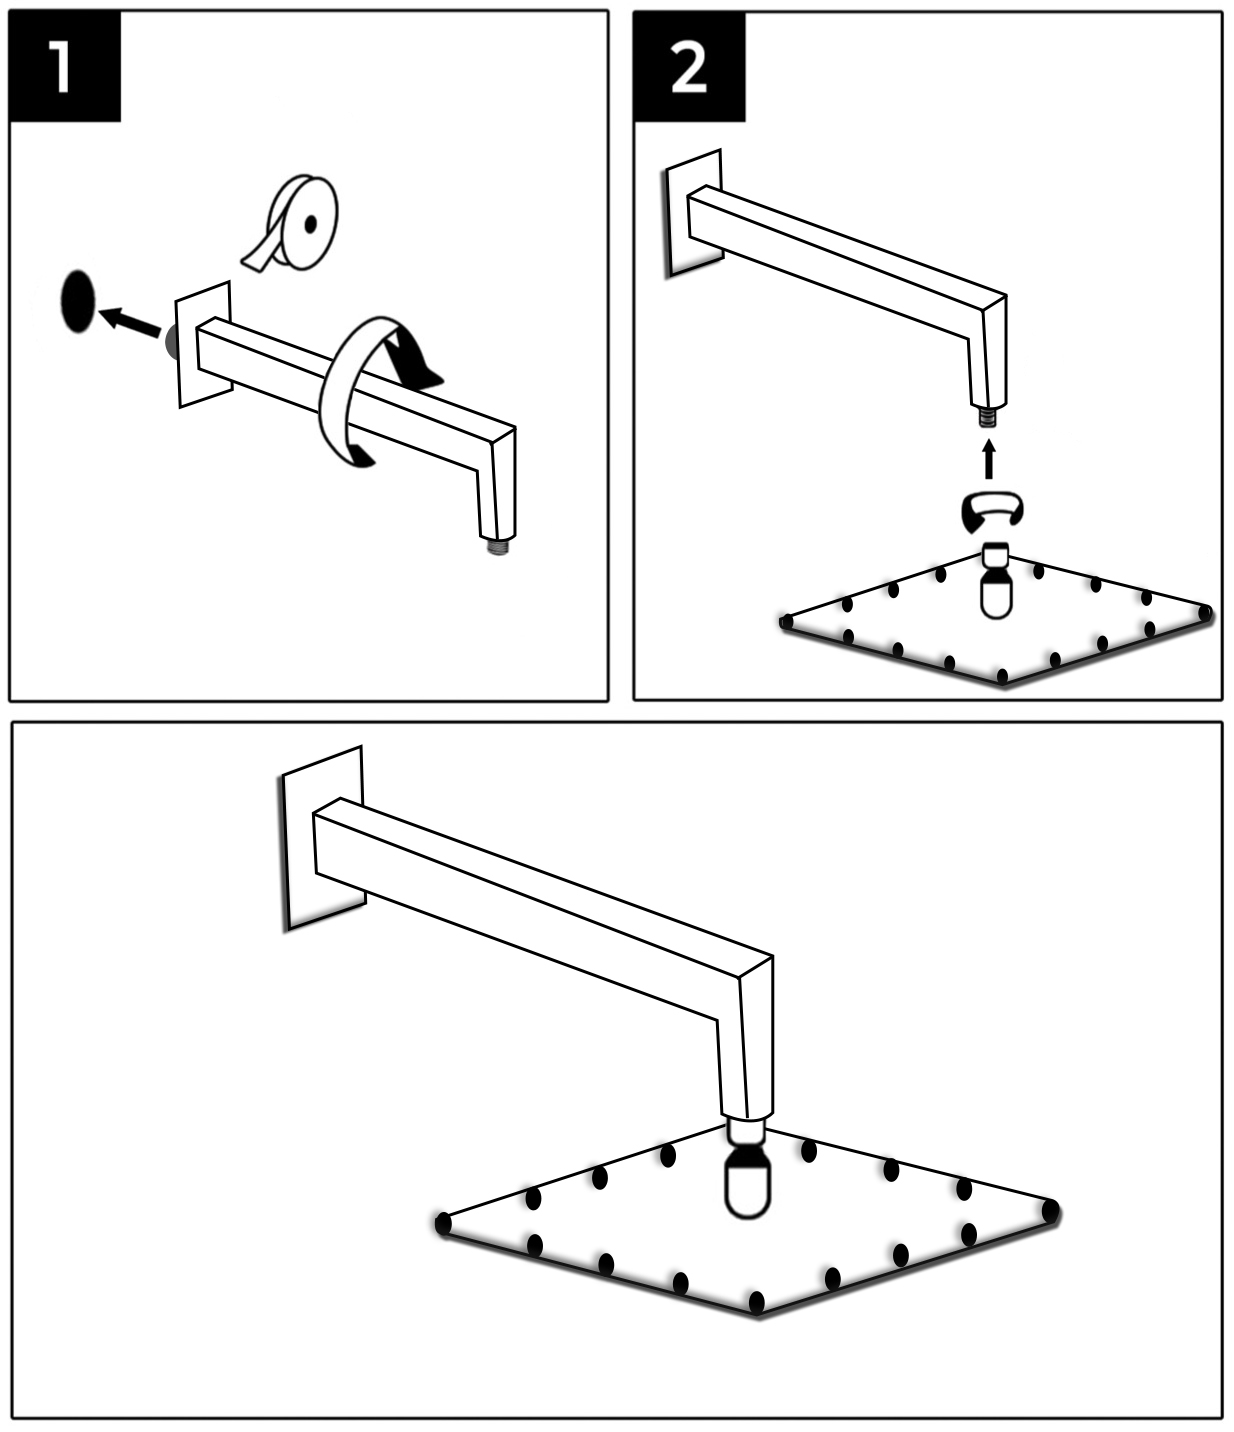
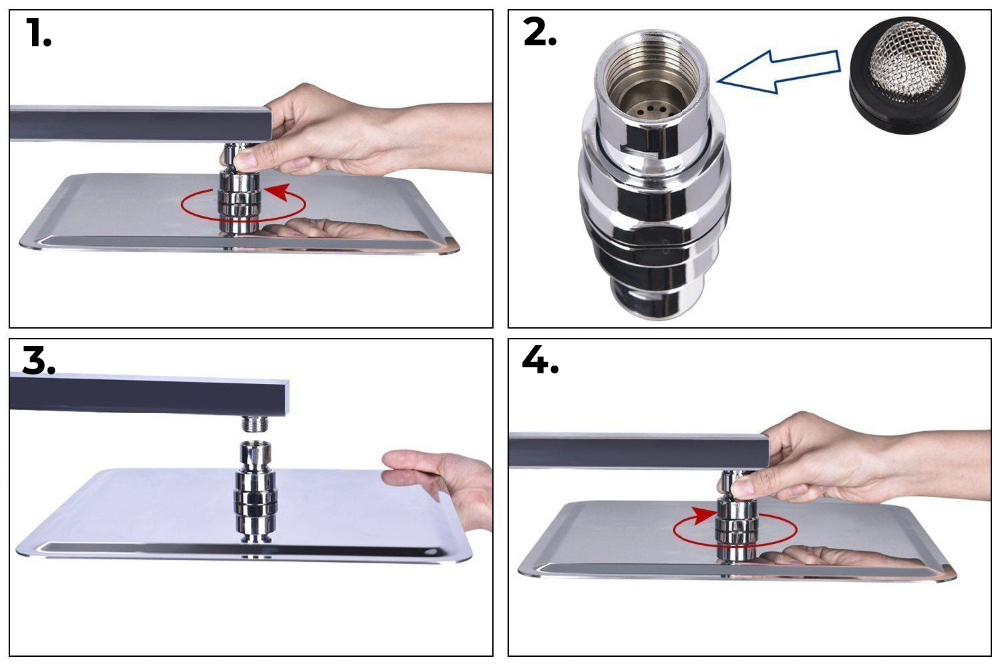
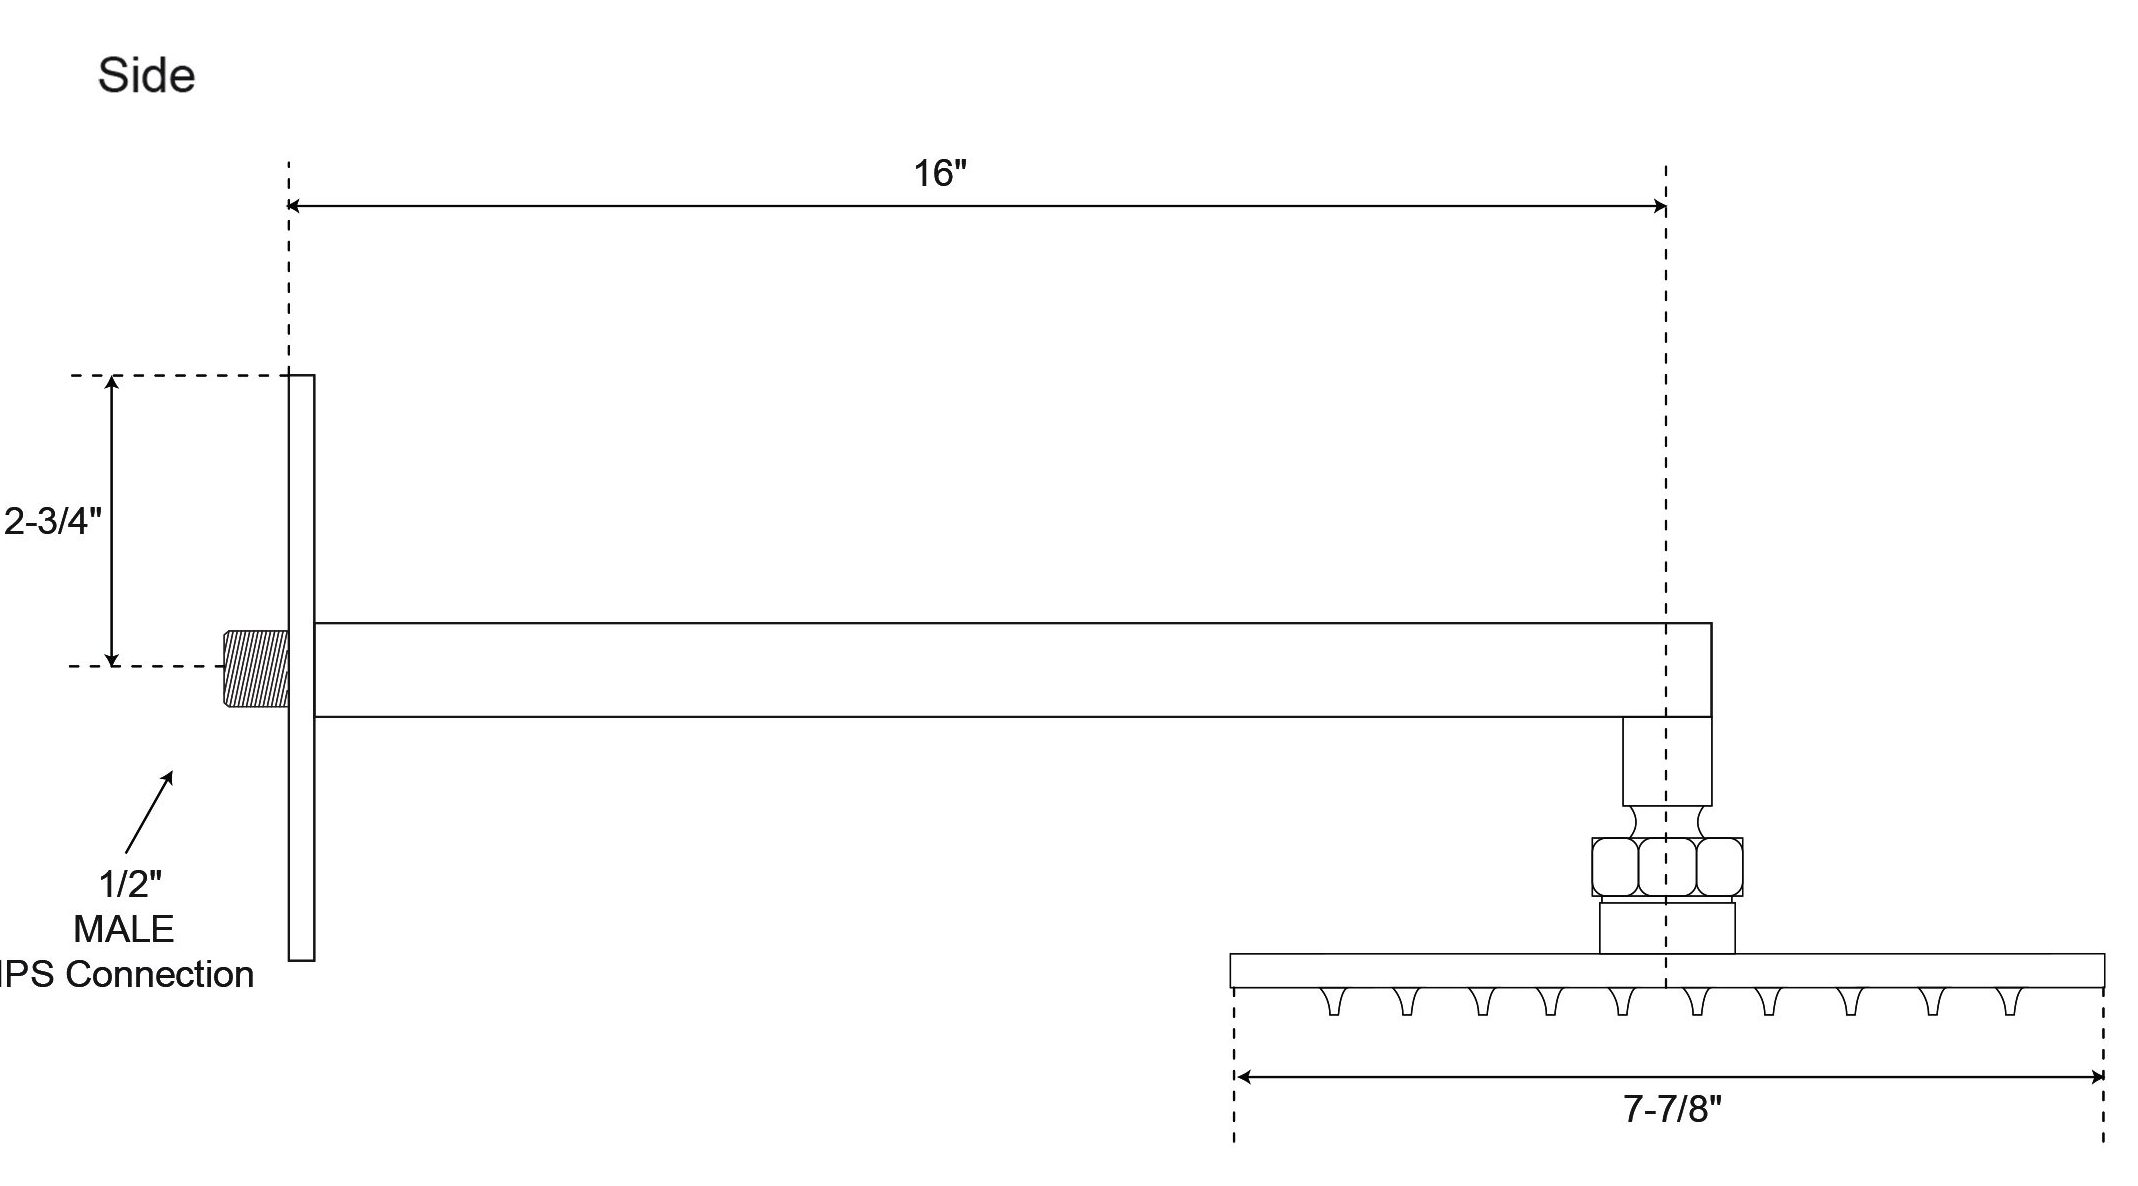
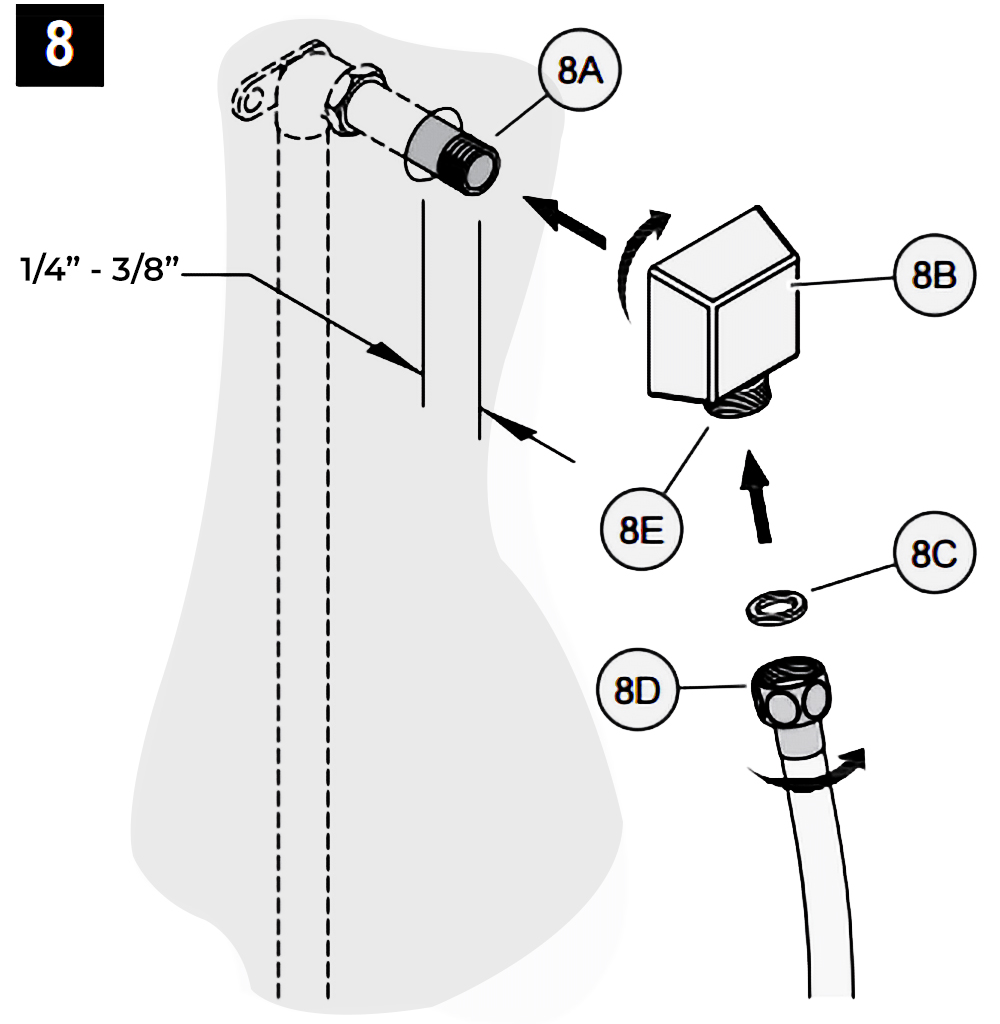
8. DROP ELBOW & HOSE INSTALLATION

Apply PTFE plumbers tape on both ends of Pipe Nipple (8A) (not included). Screw Pipe Nipple (8A) into the elbow inside the wall. The Pipe Nipple (8A) is to project 1/4” – 3/4” from the finished wall. Screw Drop Elbow (8B) onto Pipe Nipple (8A) and tighten until Drop Elbow (8B) is property positioned and flush to the finished wall.

Place Rubber Seal (8C) inside Hex Hose Fitting (8D). Connect Hex Hose Fitting (8D) into Drop Elbow Outlet (8E) by turning Hex Hose Fitting (8D).


9. UNIT STARTUP

Turn on hot and cold water supplies, and check all connections for leaks.
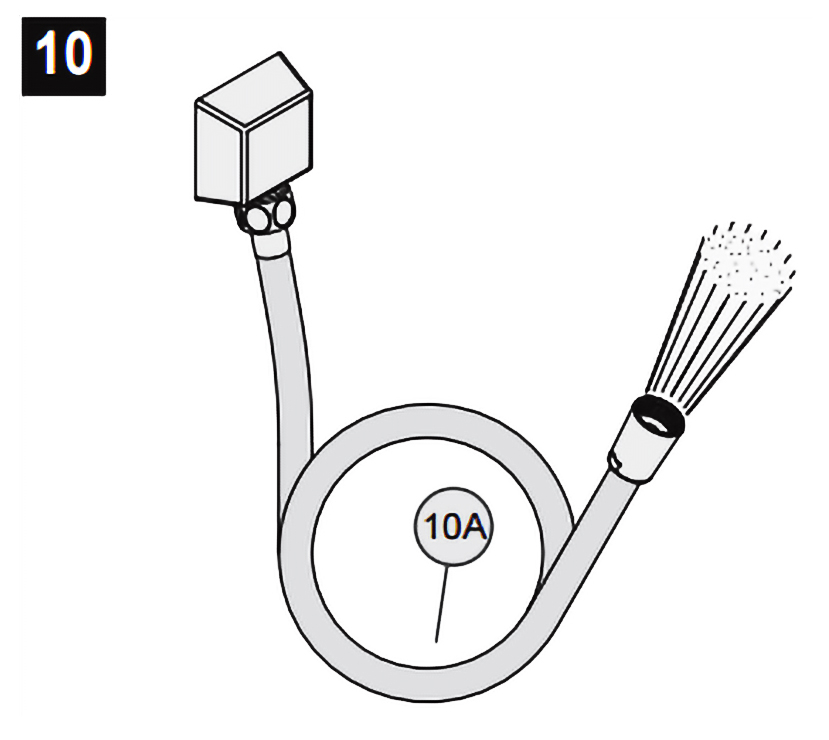

10. FINAL FLUSHING

For final flushing, turn the valve on and allow water to run through the Hose (10A) for several minutes. Allow water to run for several minutes until all foreign matter clears the line.


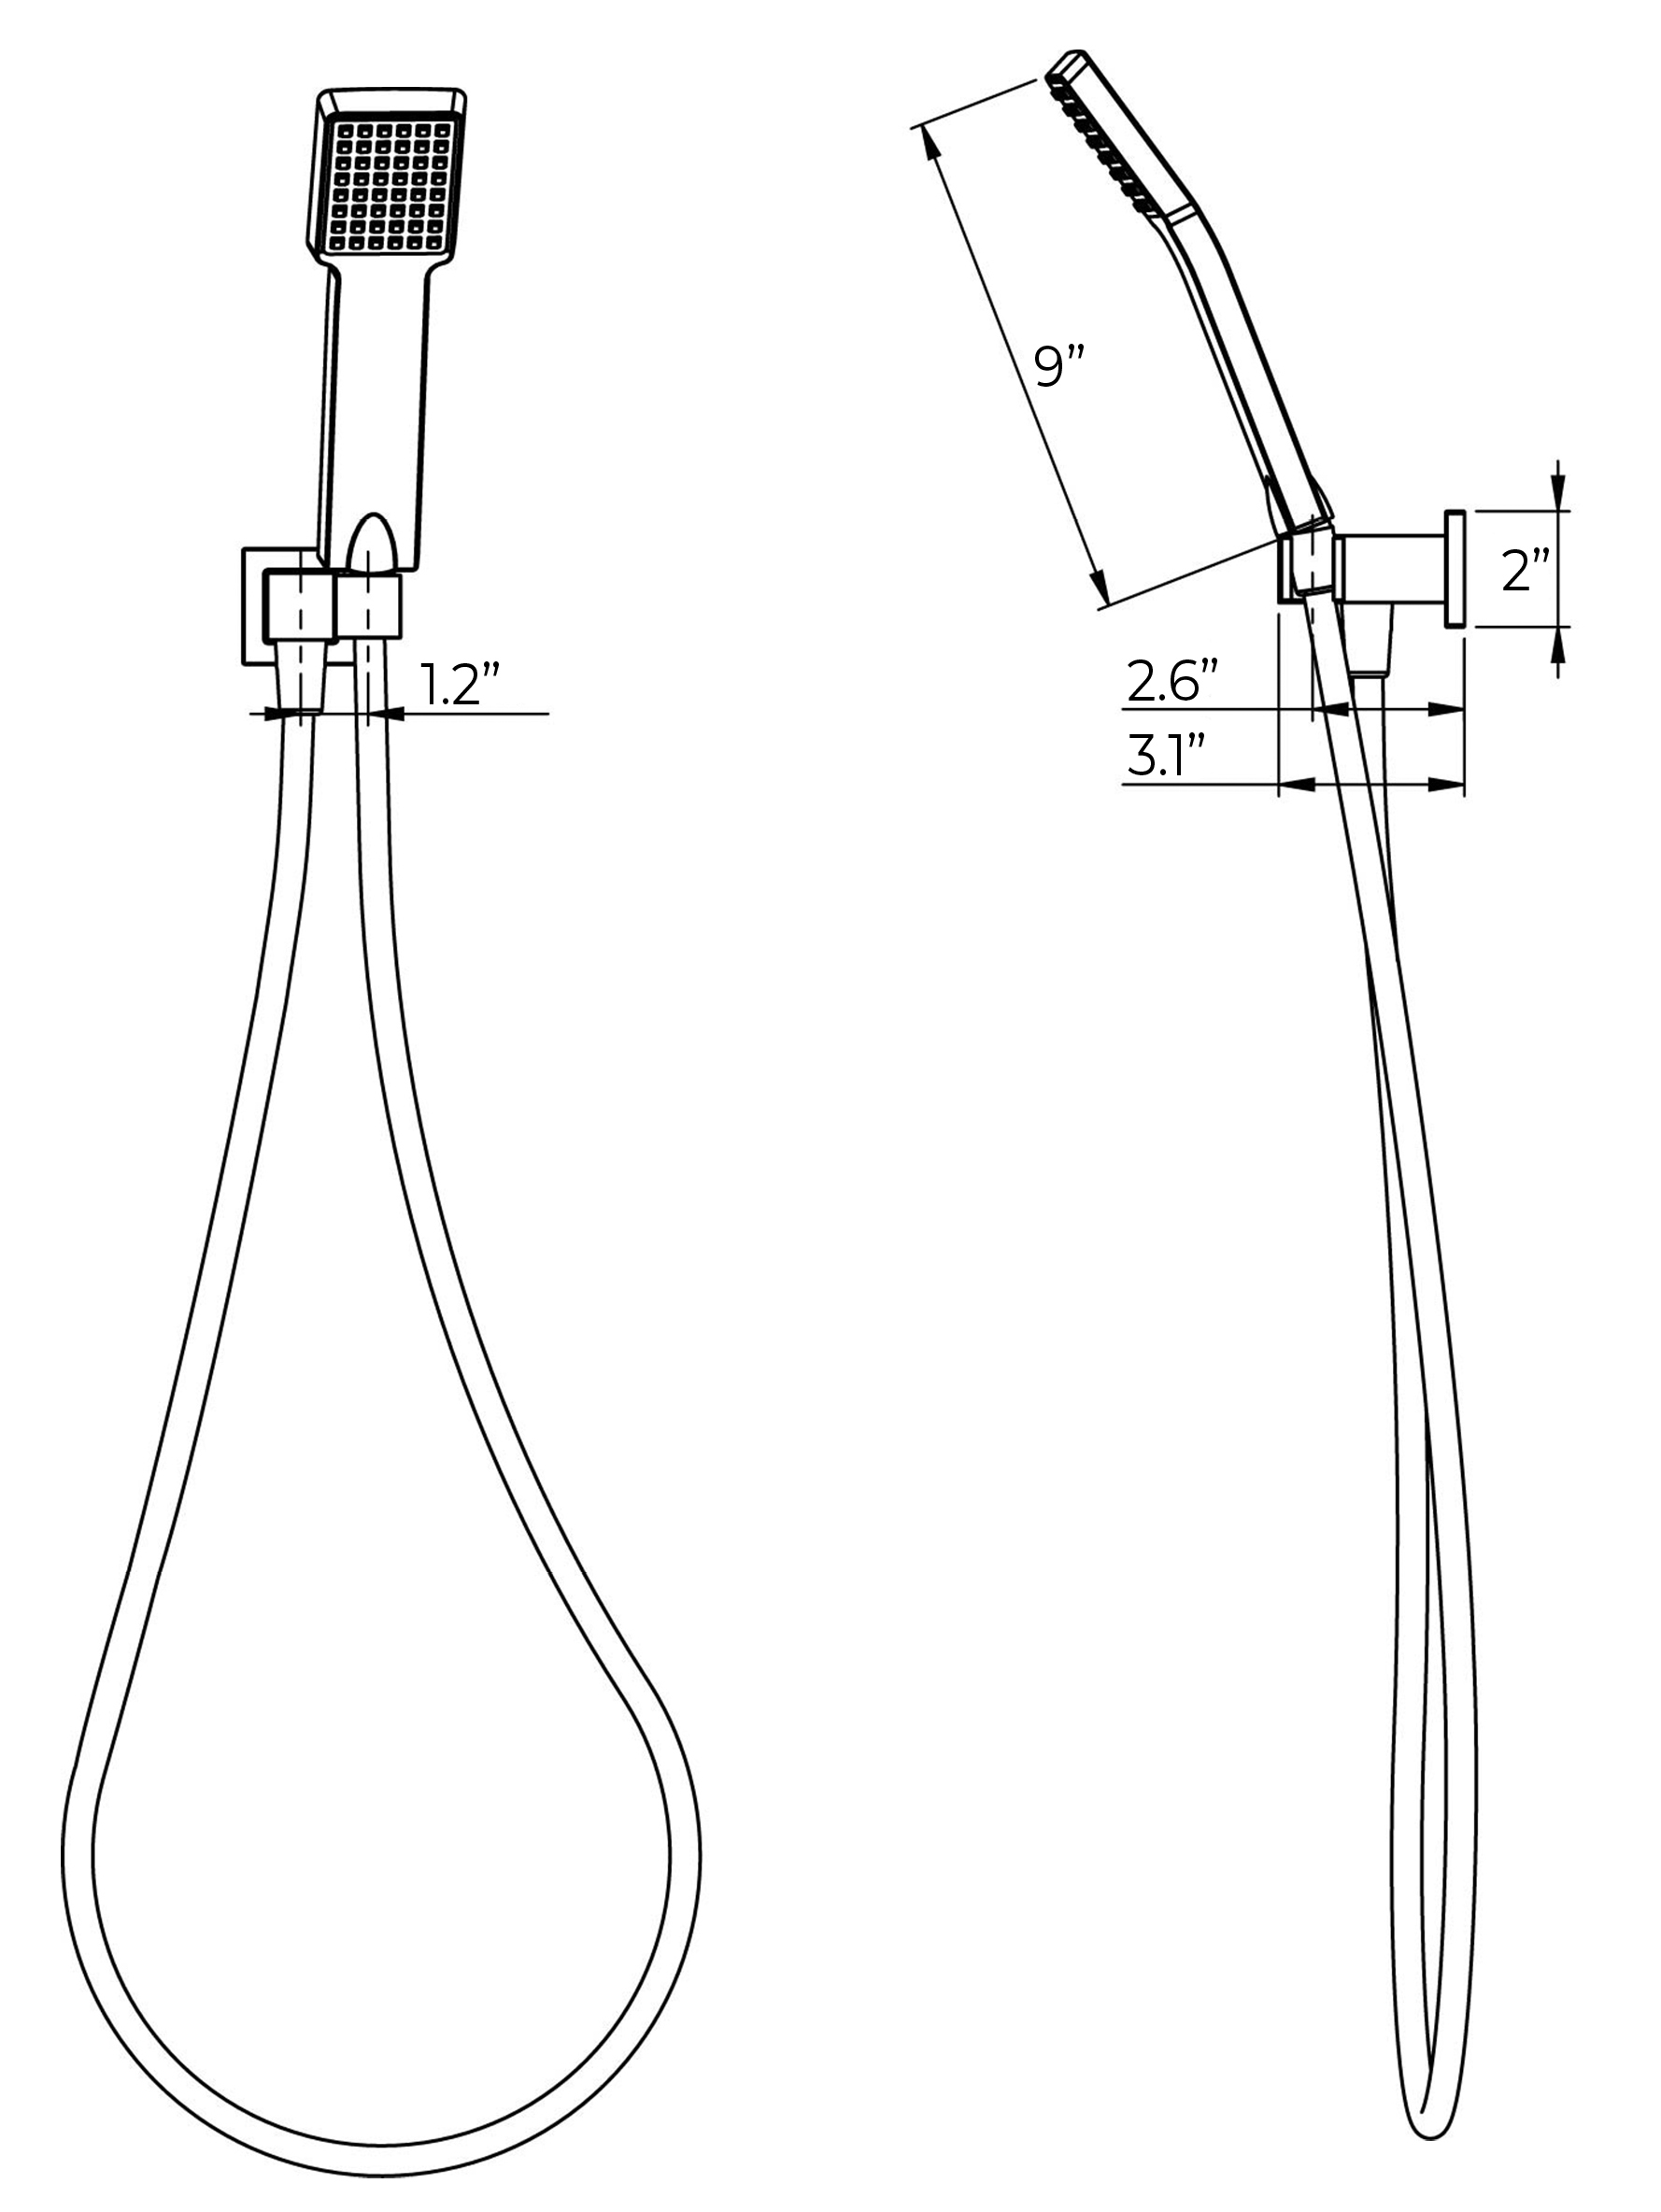
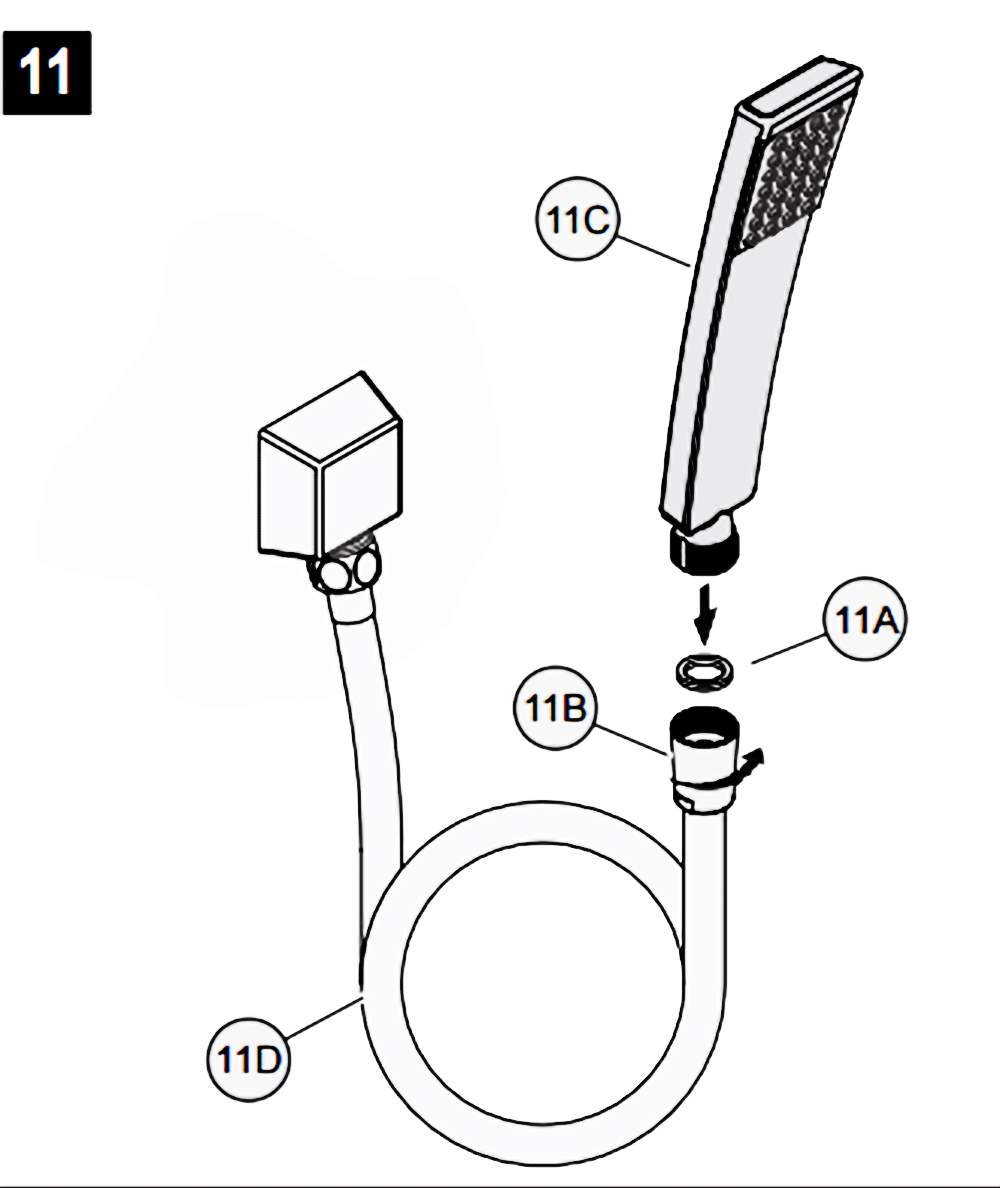
11. SHOWER ARM INSTALLATION

Place Rubber Seal (11A) inside Tapered Hose Fitting (11B). Conned Hand Shower (11C) to Hose (11D) by turning Tapered Hose Fitting (118) clockwise.


BathSelect Ancient Round Antique Rainfall Wall ShoweBathSelect Ancient Round Antique Rainfall Wall Shower Head Installation Instructions Head Installation Instructions