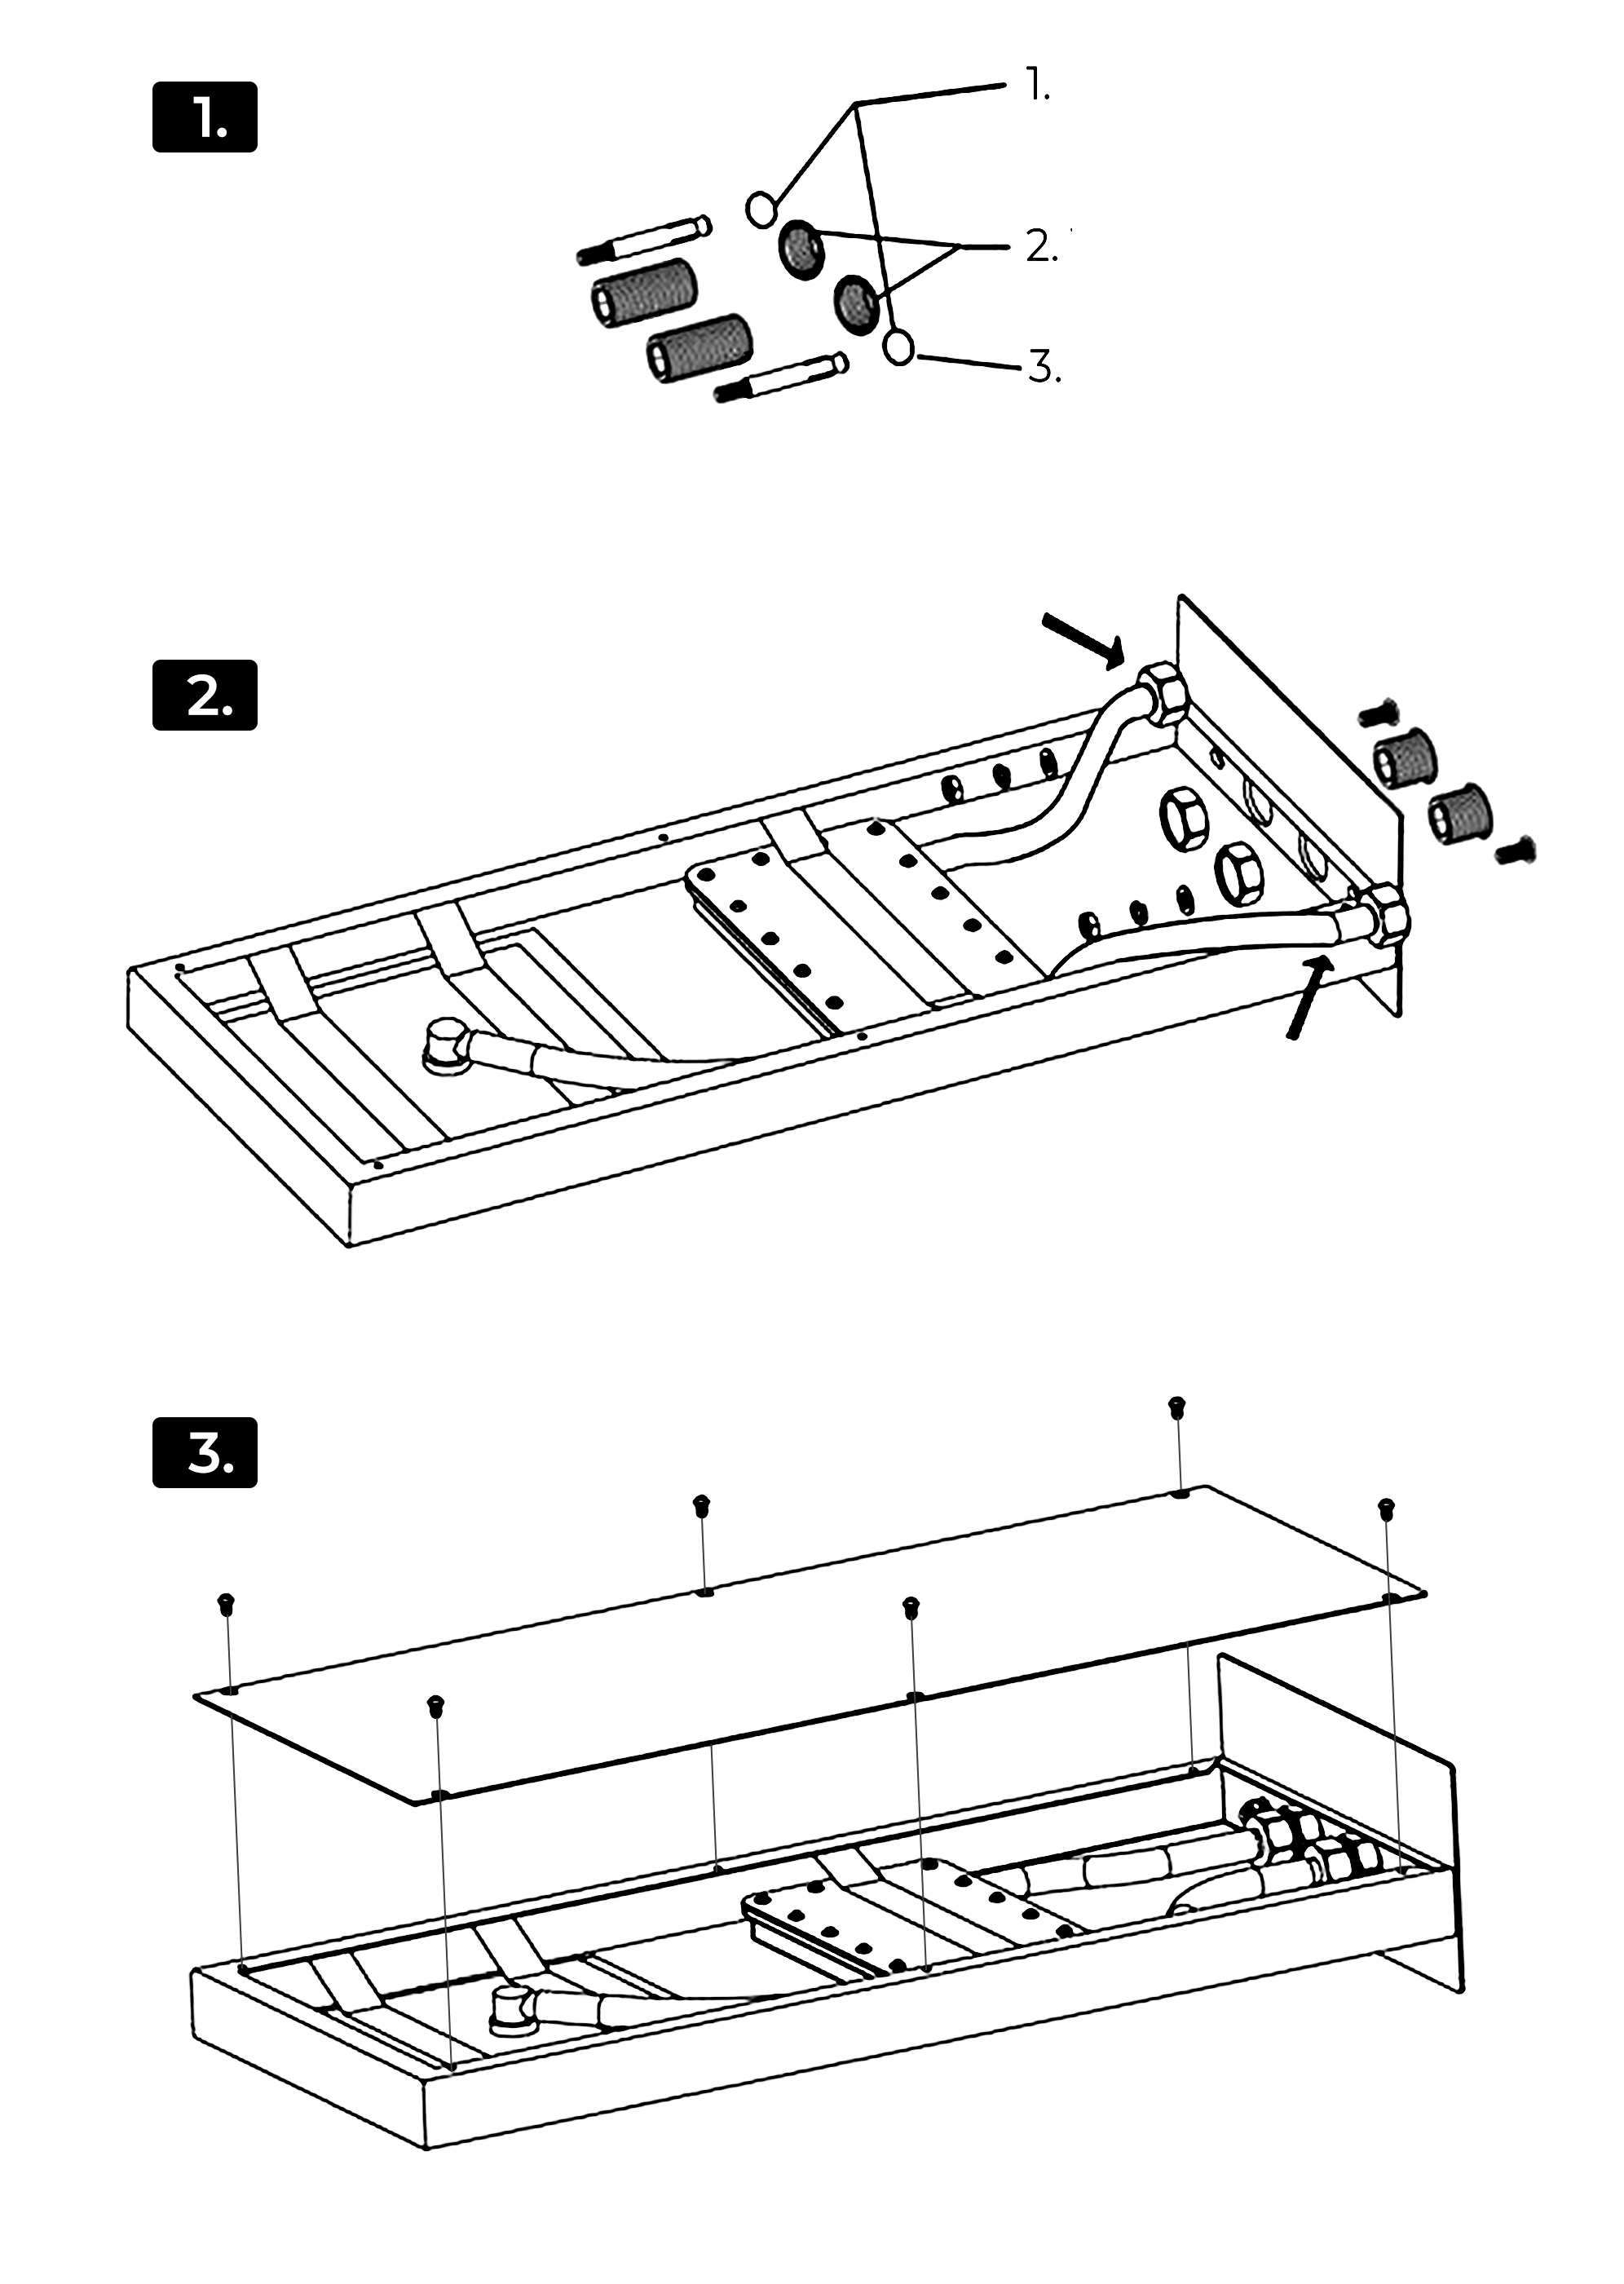
Home > Lima Waterfall and Rainfall Shower Set Installation Instruction

Installation Manual For Lima Waterfall and Rainfall Shower Set

Lima Waterfall and Rainfall Shower Set with Thermostatic Mixer Valve

The Lima Waterfall and Rainfall Shower Set with Thermostatic Mixer Valve comes with durable ceramic valves installed in it that ensure zero water leaks. This amazing faucet is manufactured using superior quality raw material and works at a water temperature of 90 degrees. What makes it distinguishable is its elegant finish and adherence to the best quality standards. It is tested at 1.6Mpa water pressure for quality assurance.

Lima Waterfall and Rainfall Shower Set with Thermostatic Mixer Valve Features:

  • Brand Name: BathSelect
  • Model Number: BZ-5609
  • Type: Thermostatic Shower Set
  • Installation: Wall Mount
  • Style: Contemporary
  • Finish: Chrome
  • Shower Head Function: Rainfall, Waterfall
  • Number of Handles: Three Handles
  • Valve Type: Ceramic Valve
  • Faucet Spout & Body Material: Brass
  • Faucet Handle Material: Zinc Alloy
  • Shower Head Size: 21.6" * 9" (550*230mm)
  • Handheld Shower Material: A grade ABS
  • Shower HeadMaterial: Stainless Steel
  • Shower Head Material: Brass
  • Flow Rate: 2 .5 GPM
  • Milan Juno 24"LED Rain Shower Head Thermostatic Shower Valve Set
    BathSelectฎ Manufacturer Warranty Information

    • Before you begin, please read the installation instructions below. Observe all local building and safety codes.
    • Unpack and inspect the product for any shipping damages. If you find damages, do not install.
    • Please note all showers must be installed by a professional and certified plumber otherwise warranty might be voided.
    shower

    1. Open the top cover and drill according to the marked position.
    • Mark by the position of the four holes.
    • Take care to avoid wires and pipes to prevent damage.
    • Be sure to confirm that the four holes are on the same horizontal line

    2. Two inlet fittings are connected to the pipe joint of the wall; then the nut, expansion screw, and inlet pipe are connected.

    3. Reinstall the top cover.


    Shower Body-Jet Installation


    Step 1

    shower Step 2 shower

    Step 3

    Step 4


    Step 1:

    Multiple Bodyspray Installation
    • Water Supply
    • Nipple Mamelon Nipple
    • Pressure Balancing Loop

    1. Route the water supply lines.
    2. If installing more than one bodyspray off the same supply line, construct a pressure balancing loop. Locate a tee along the loop at each bodyspray installation location.
    3. Do not strap the pipes at this time.

    Single Bodyspray Installation
    • Nipple Mamelon Nipple
    1. Route the water supply line.
    2. Install an elbow to the end of the supply pipe at the bodyspray installation location.
    Step 2:
    Install the Plaster Guard
    • Elbow (or Tee)
    • Install the plaster guard

    Set Piping Depth
    Align mark with the front of the stud face
    • Thin Wall

    Align mark with the front of the stud face
    • Standard Wall
    install the plaster guard. Push until the plaster guard is snug against the face of the elbow (or tee).

    Step 3:
    1. Install the water-resistant wallboard.
    2. Cut out a 4" (10.2 cm) to 4-1/4" (10.8 cm) square at each the installation location.
    3. Install the finished wall material.
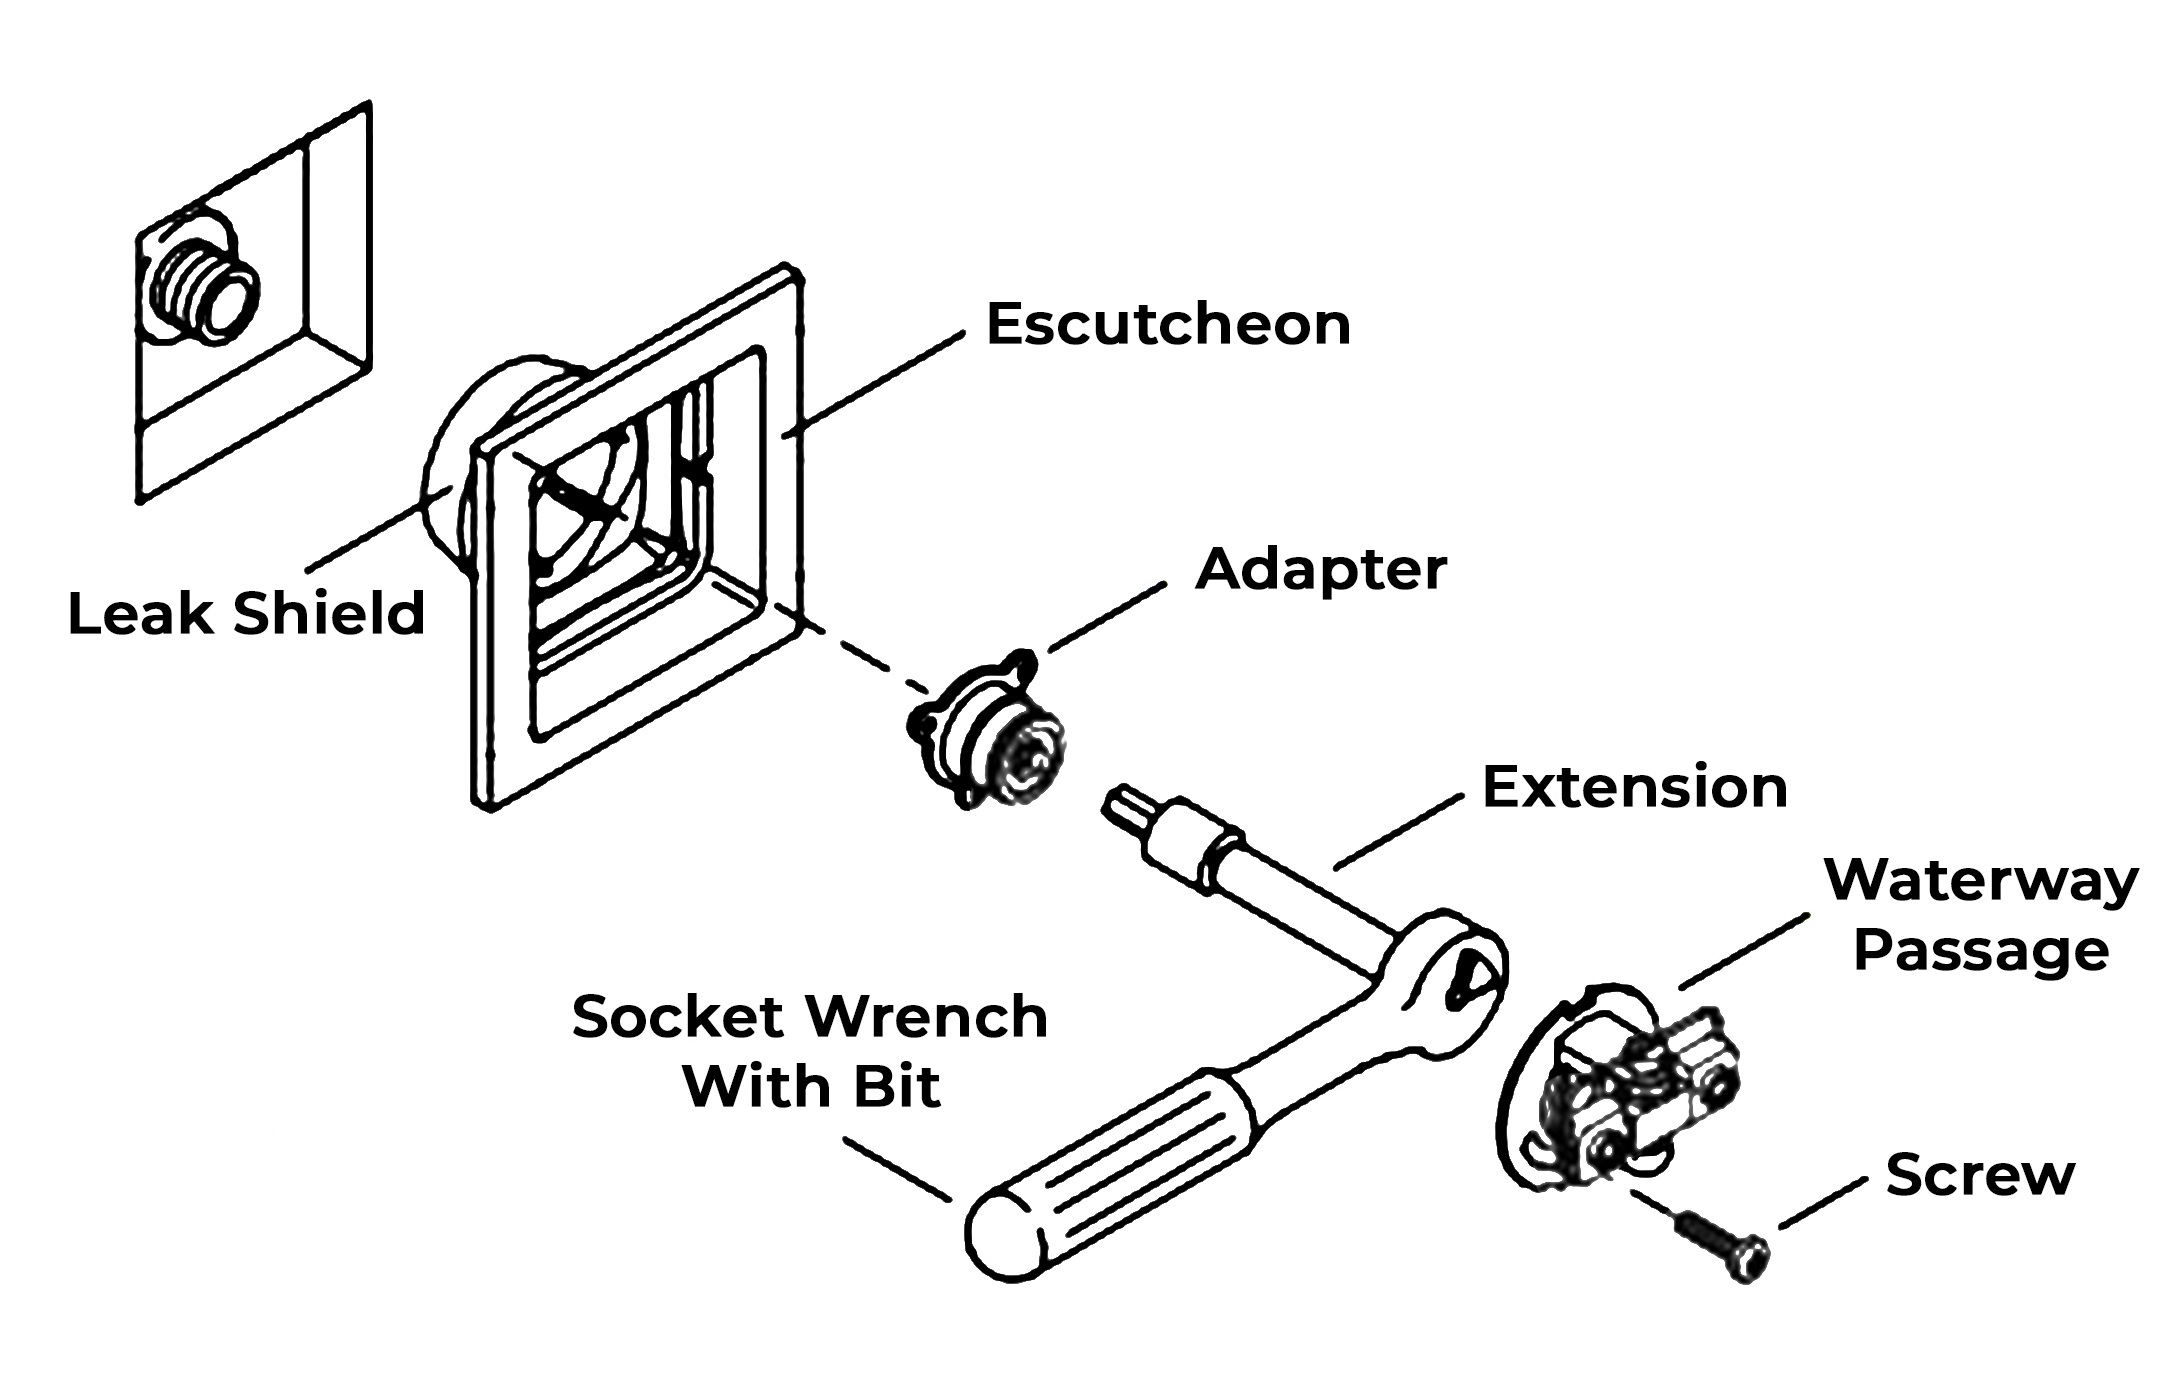
    Step 4:
    • Escutcheon
    • Leak Shield
    • Adapter
    • Extension
    • Socket Wrench With Bit
    • Screw
    • Waterway Passage

    1. Insert the escutcheon into the rough opening. The double ribs of the leak shield should be facing up.
    2. If the leak shield makes contact with the elbow: Enlarge the hole in the back of the leak shield to 1-1/4" (3.2 cm).
    3. Thread the adapter onto the nipple using the provided 0.4" bit, 11 mm or 7/16" socket, extension and socket wrench. Use masking tape to hold the bit in place, as the bit could fall off and cause damage.
    IMPORTANT! The escutcheon should sit loosely at this point. If it is tight against the wall, use a longer pipe nipple.
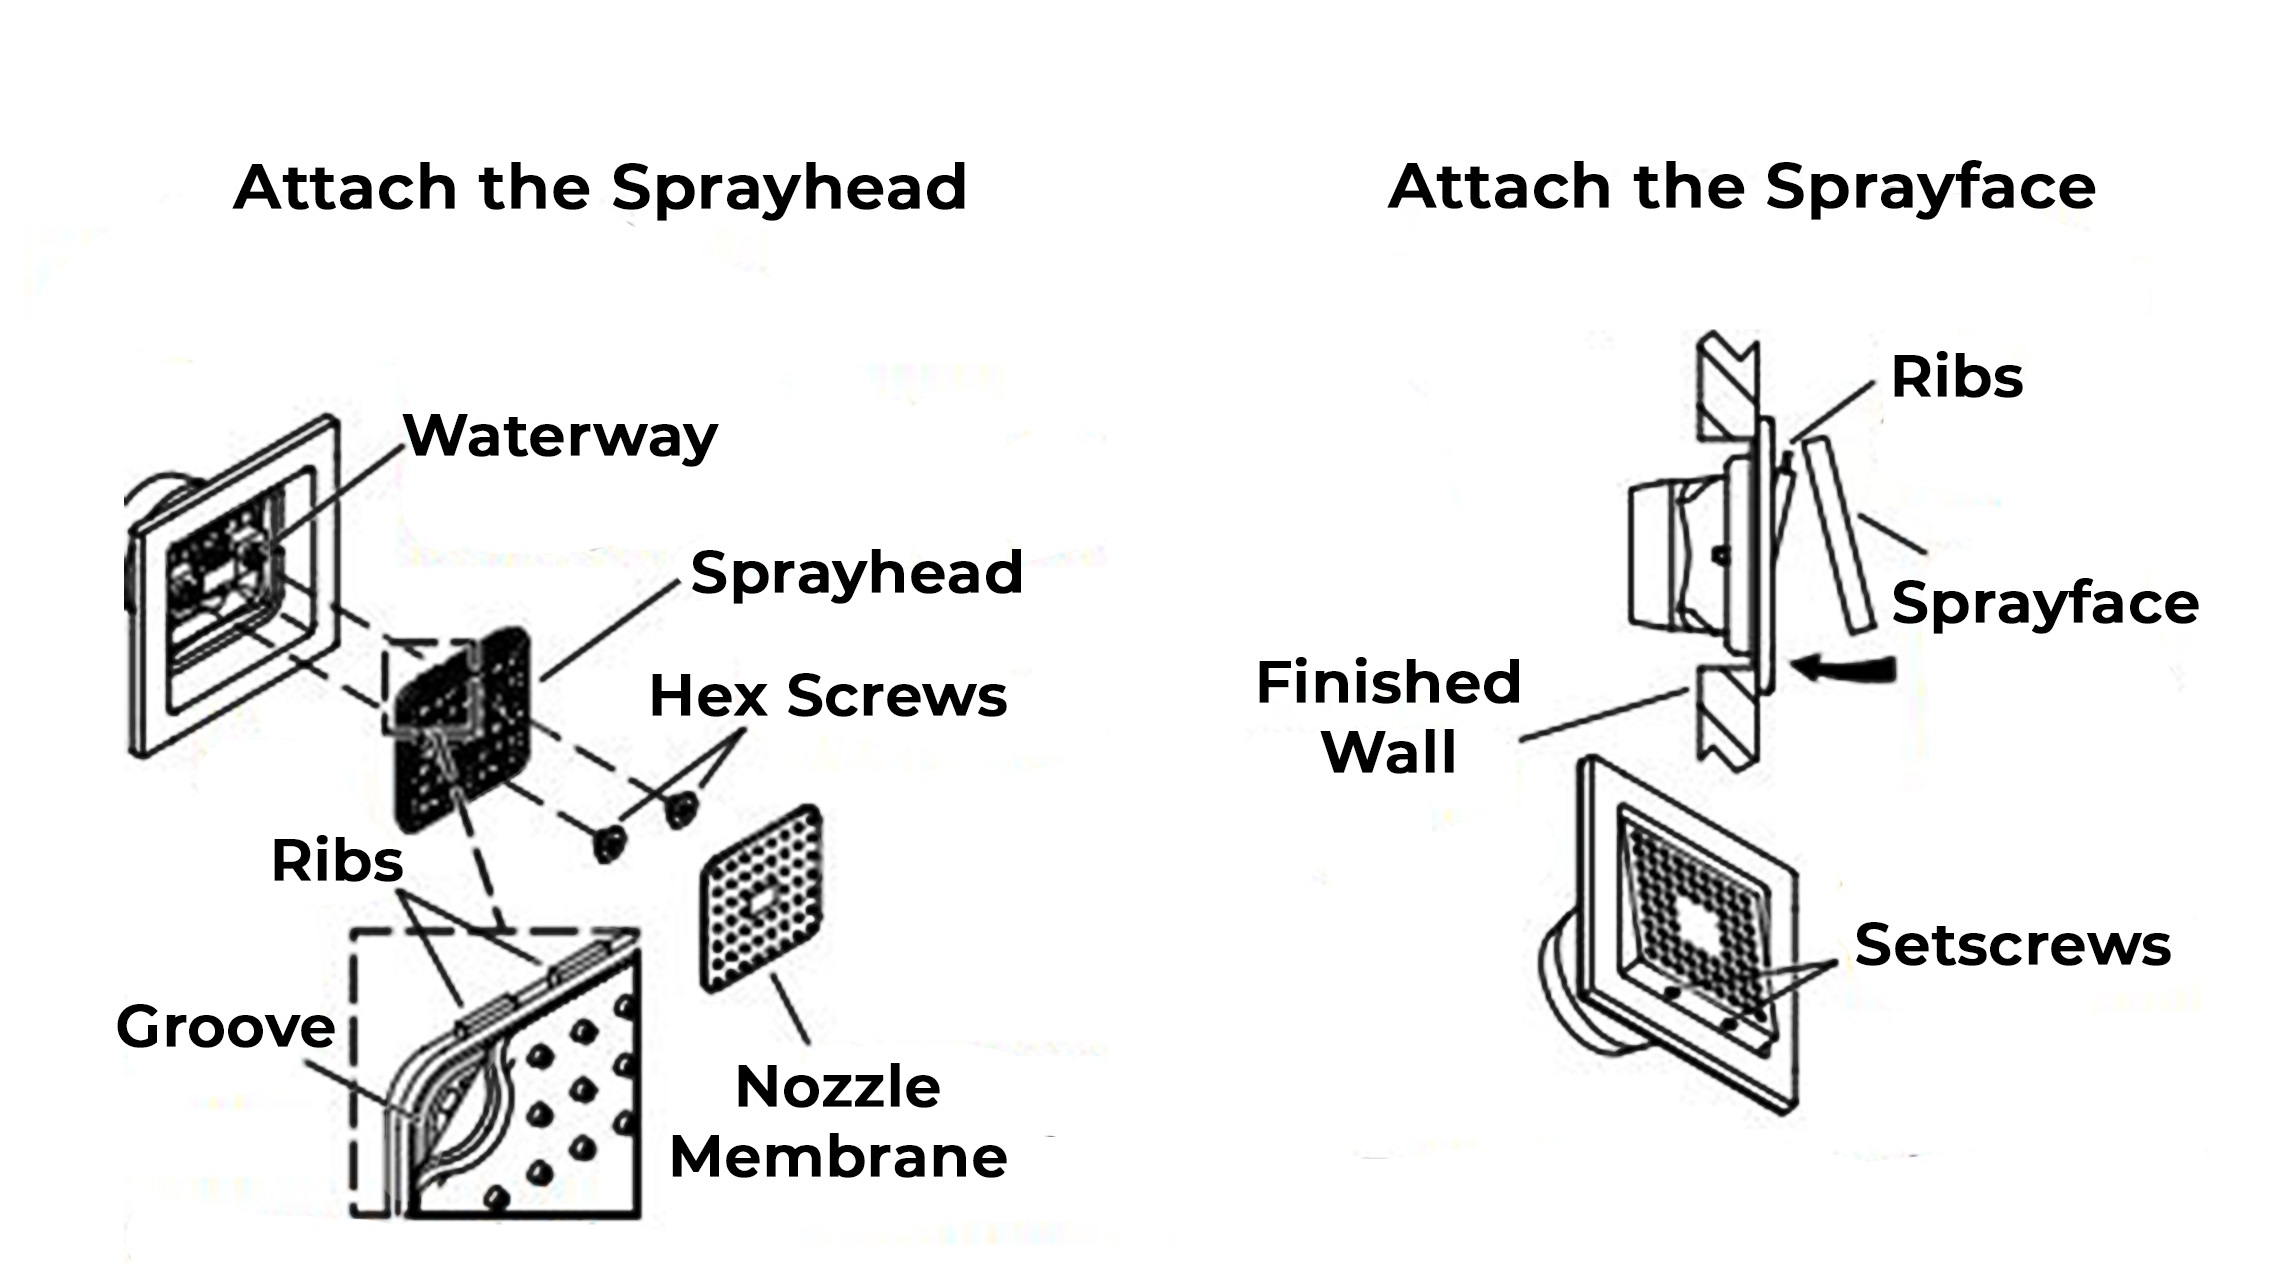
    4. Align the groove in the waterway with the double ribs on the leak shield.
    5. Press the waterway into place over the adapter. Secure the waterway to the adapter with the screw provided.
    6. Verify that the escutcheon does not turn or shift.


    Hand-Held Shower Instructions

    Step 1


    shower Step 2


    Shower Mixer Installation Instructions

    Mixer Mixer Connections

    BathSelect Ancient Round Antique Rainfall Wall ShoweBathSelect Ancient Round Antique Rainfall Wall Shower Head Installation Instructions Head Installation Instructions