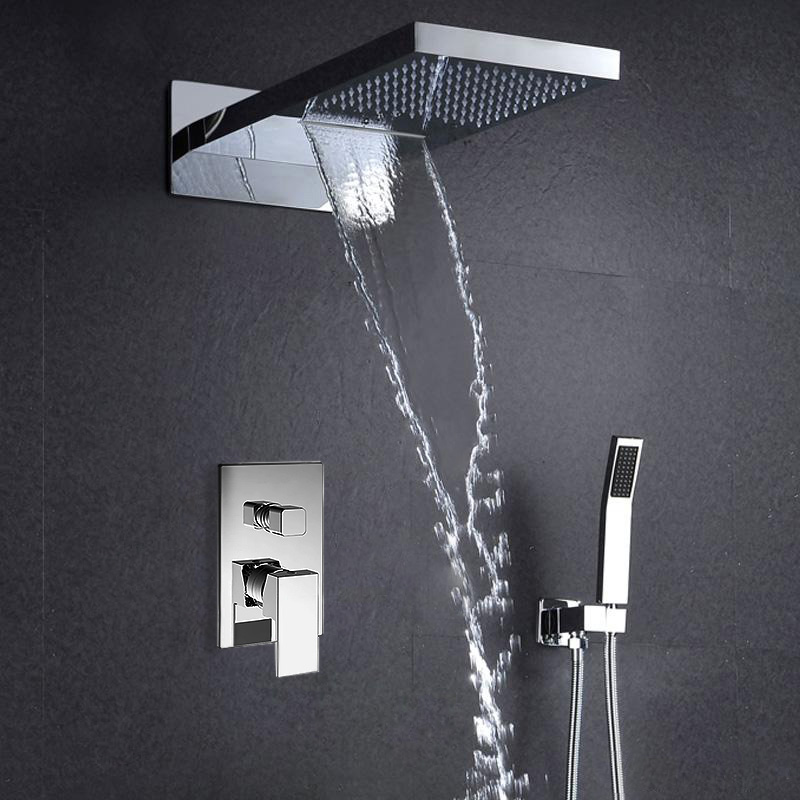
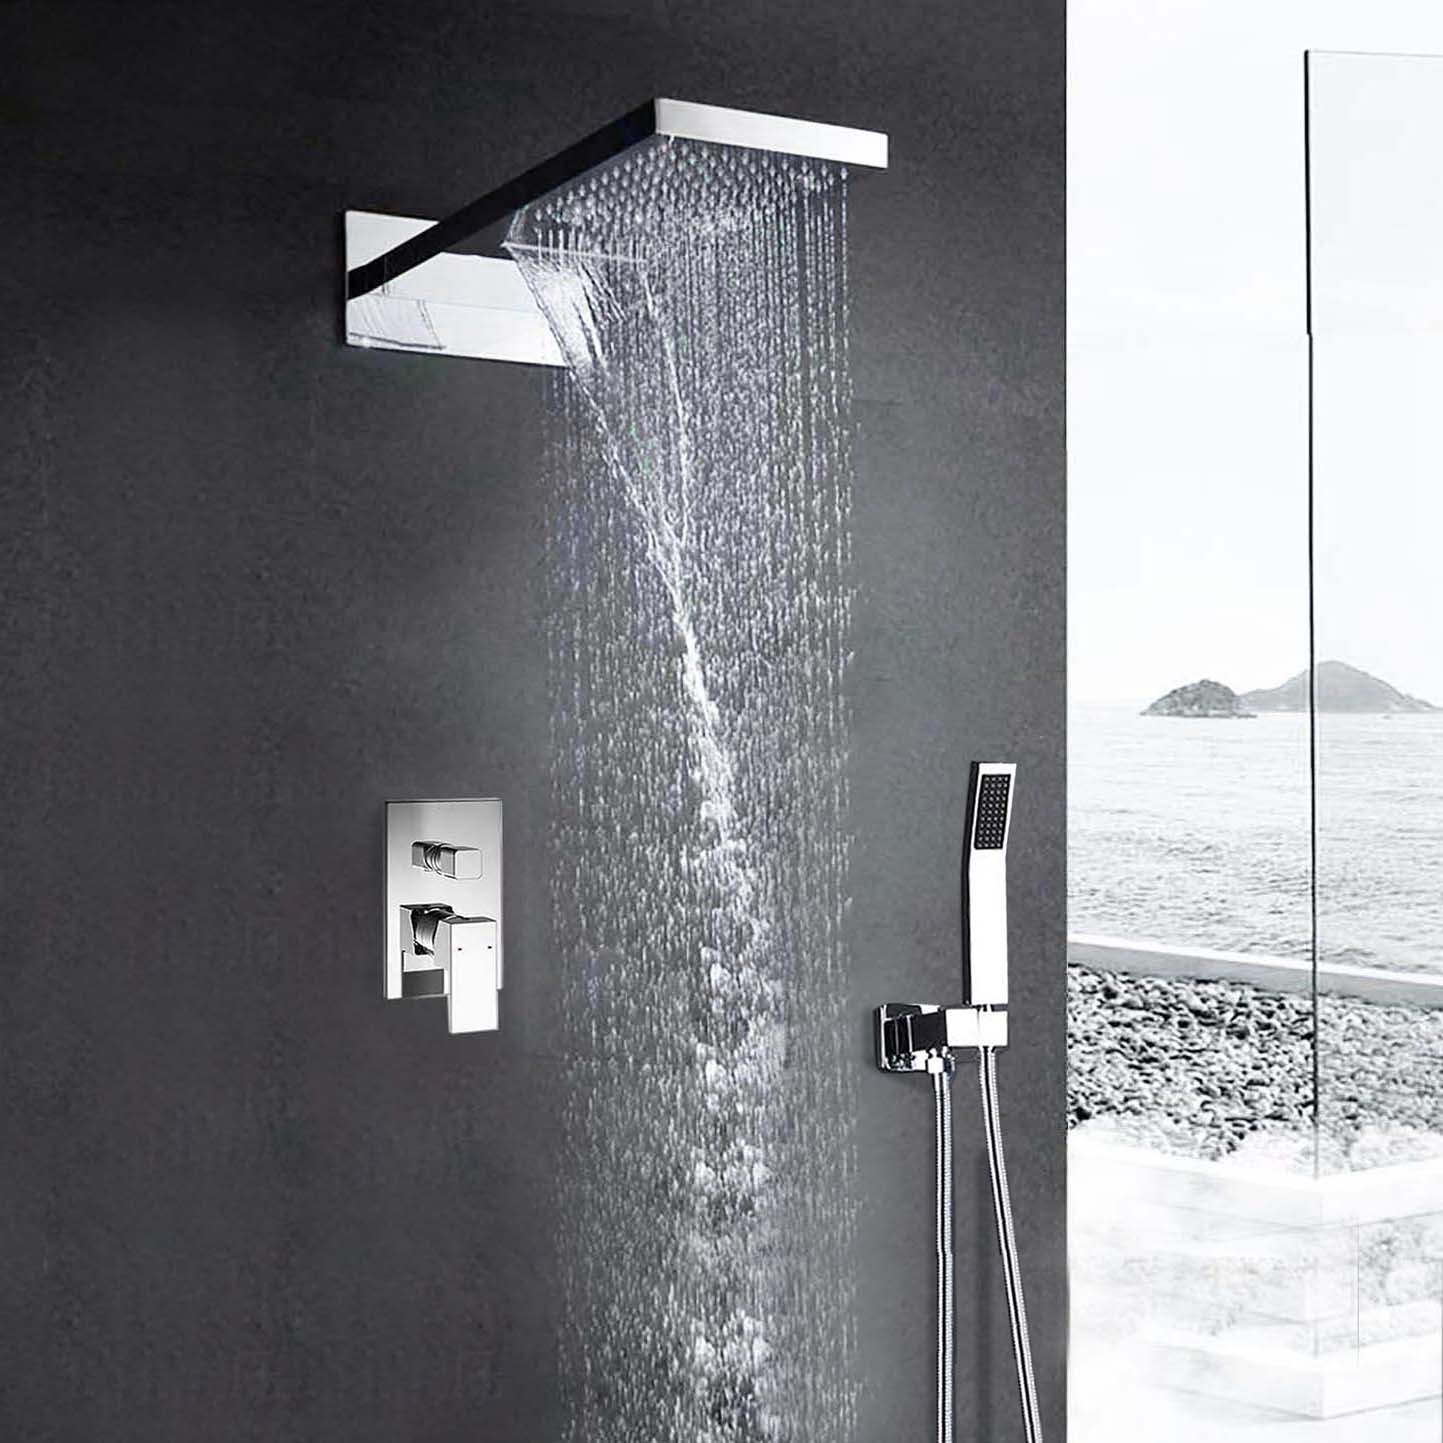
22" Super Big Multifunctional Shower Head Mirror Chromed Polished 2 Way Rainfall Shower Set
Multifunctional Shower Head Mirror Chromed Polished Details
- Type : Bath Shower Set
- Cold/Hot Water Control Type : Dual Holder Dual Control
- Number of Handle : Single Handle
- Bath & Shower Faucet Type : Shower Sets
- Valve Core Material : Ceramic
- Type : Fixed Support Type
- Surface Treatment : Polished
- Surface Finish : Chrome
- Style : Contemporary
- Installation Type : Wall Mount
- Auto Faucet : Hot and Cold Hand Free Faucet
- Bathroom Faucets Sink : Temperature Sensor 3 Color Water
- Flow Rate : 2.5 GPM
|
|
BathSelect® Manufacturer Warranty Information
Installation Manual For 22" Lina Multifunctional Shower Head
|

|
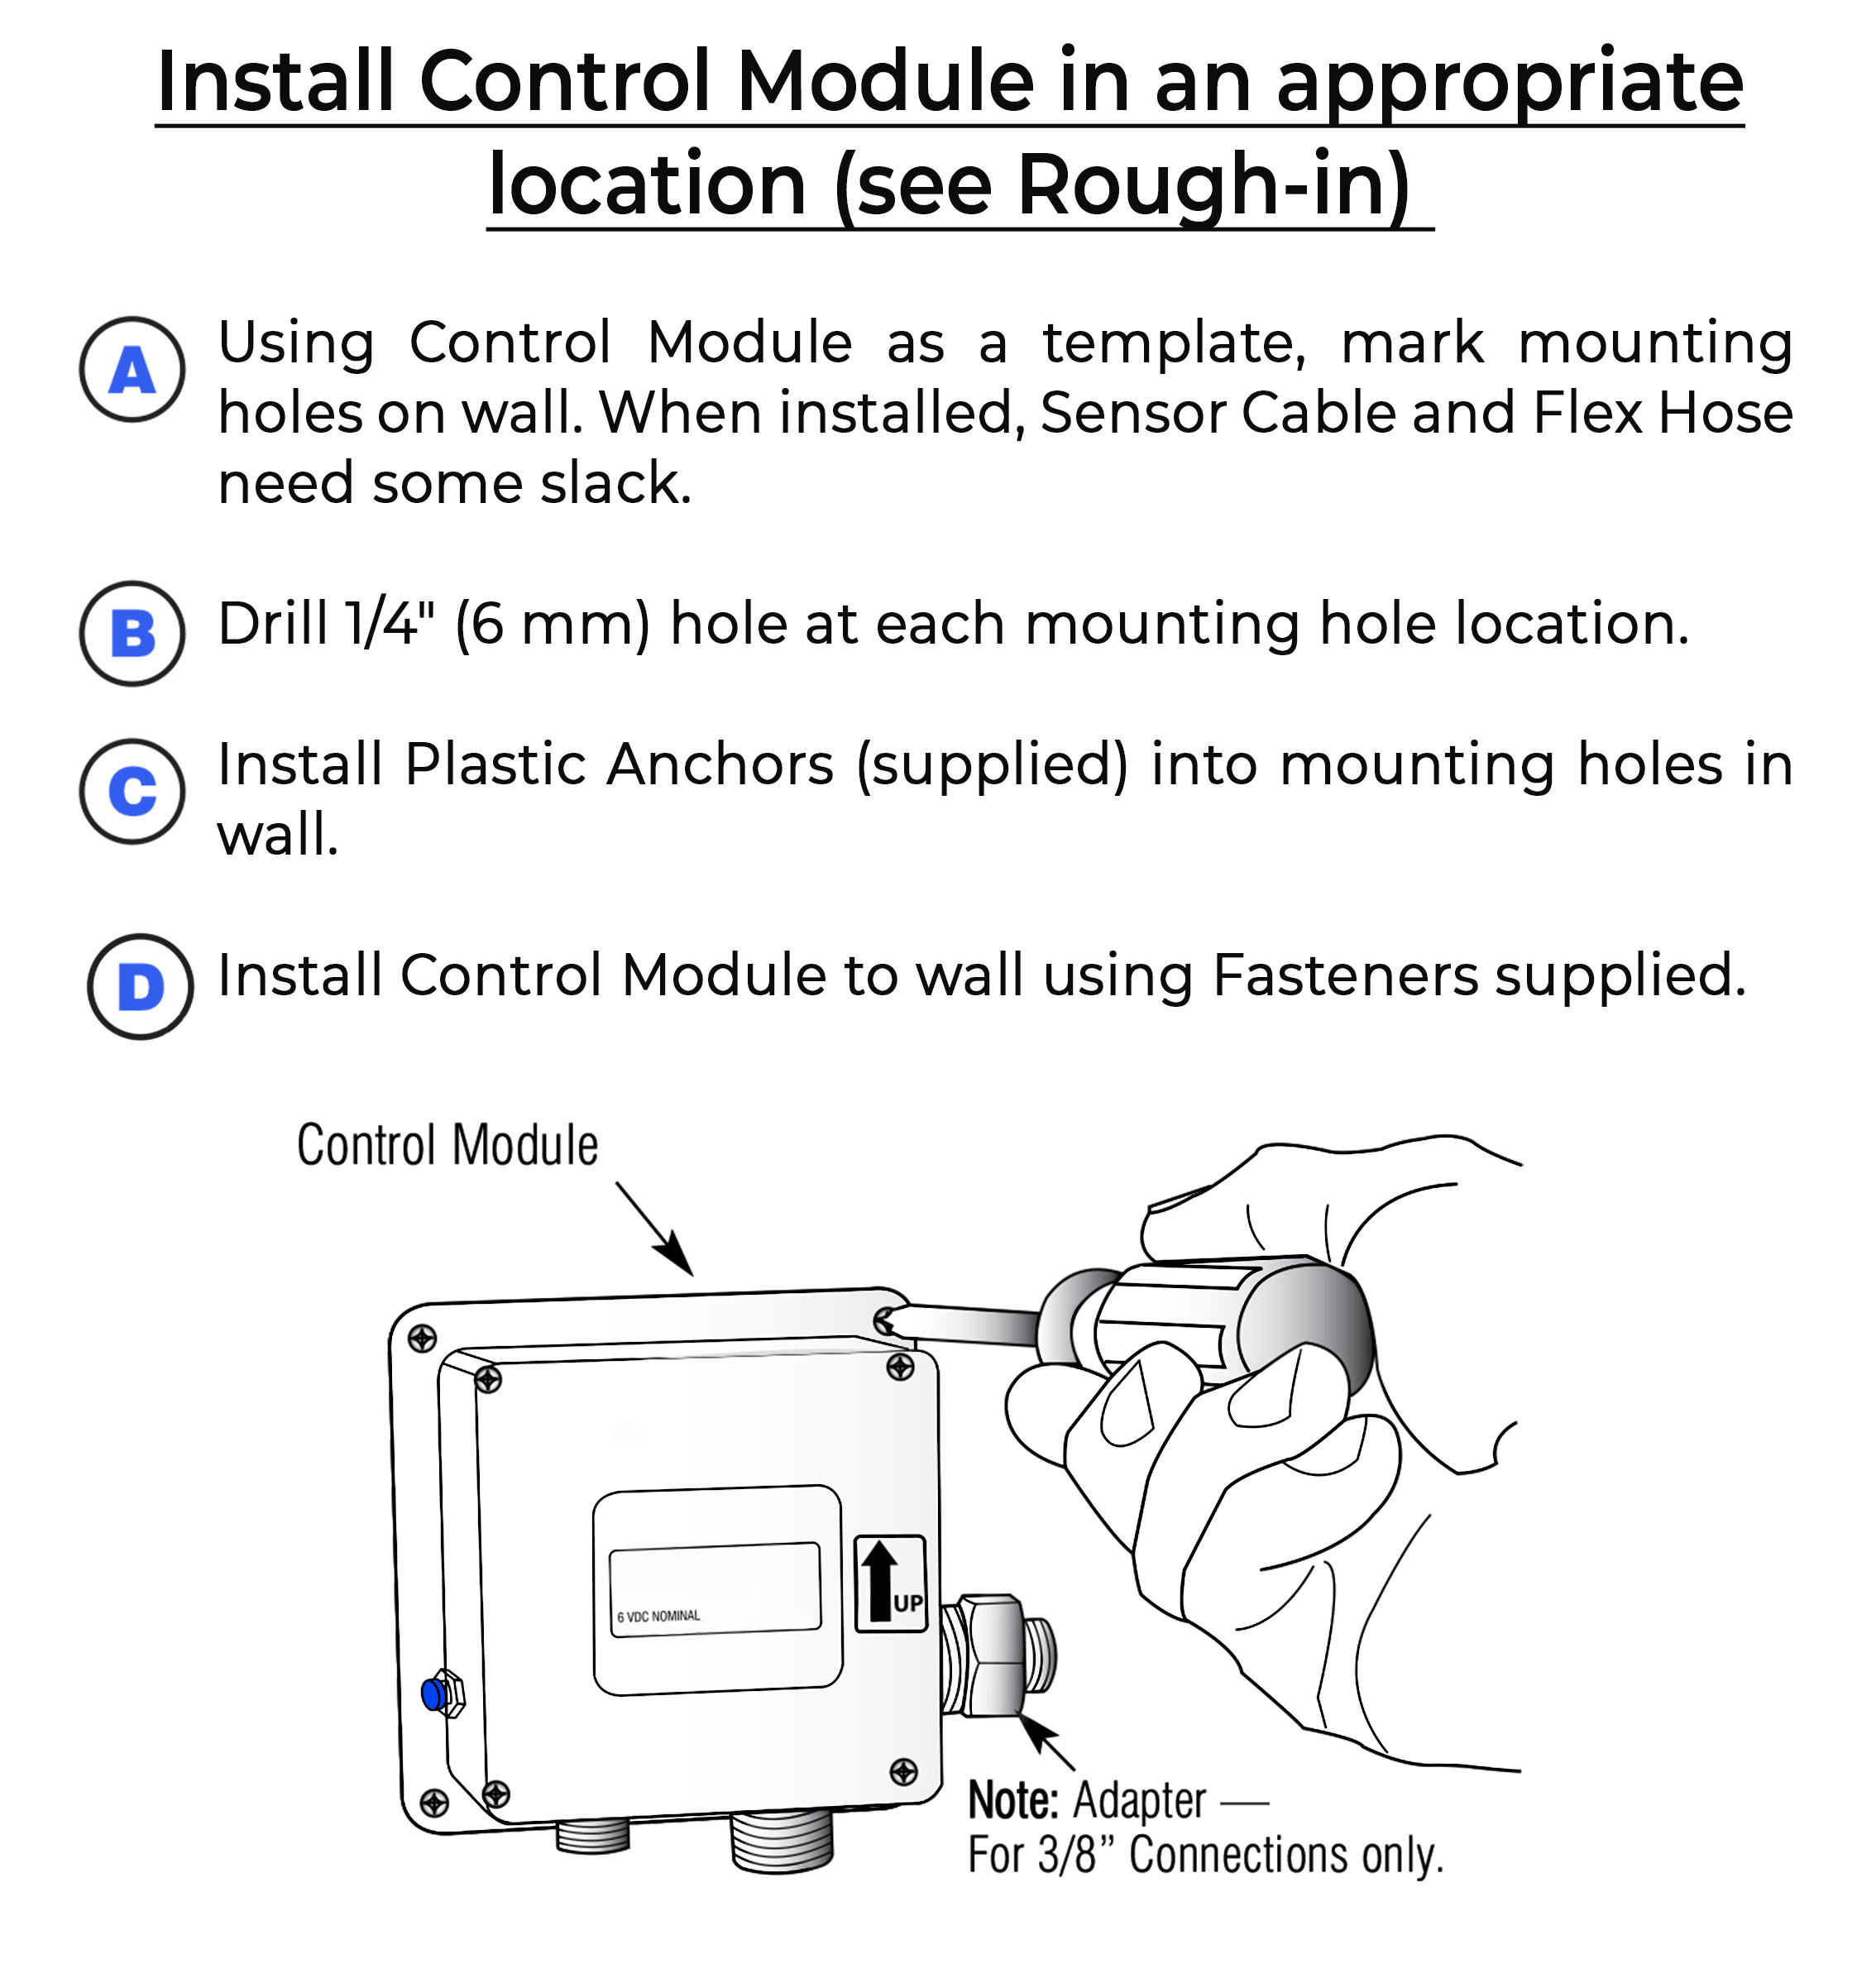
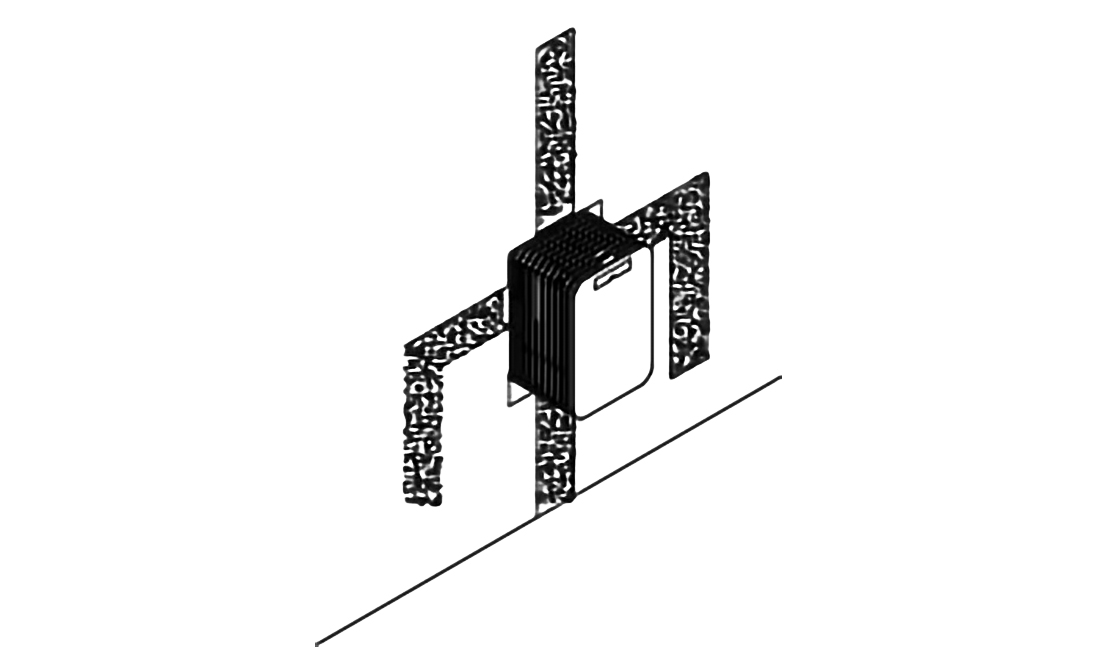
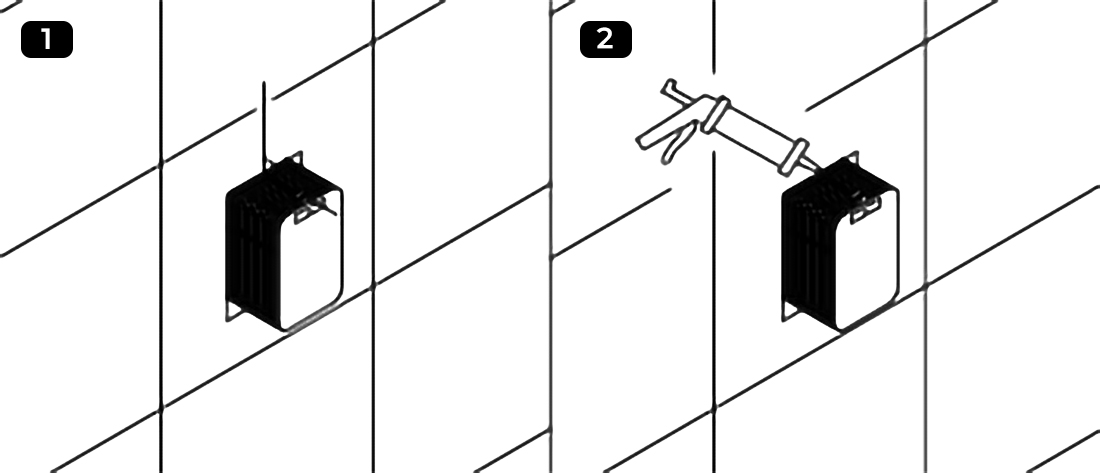
1. Open the top cover and drill according to the marked position.
- Mark by the position of the four holes.
- Take care to avoid wires and pipes to prevent damage.
- Be sure to confirm that the four holes are on the same horizontal line.
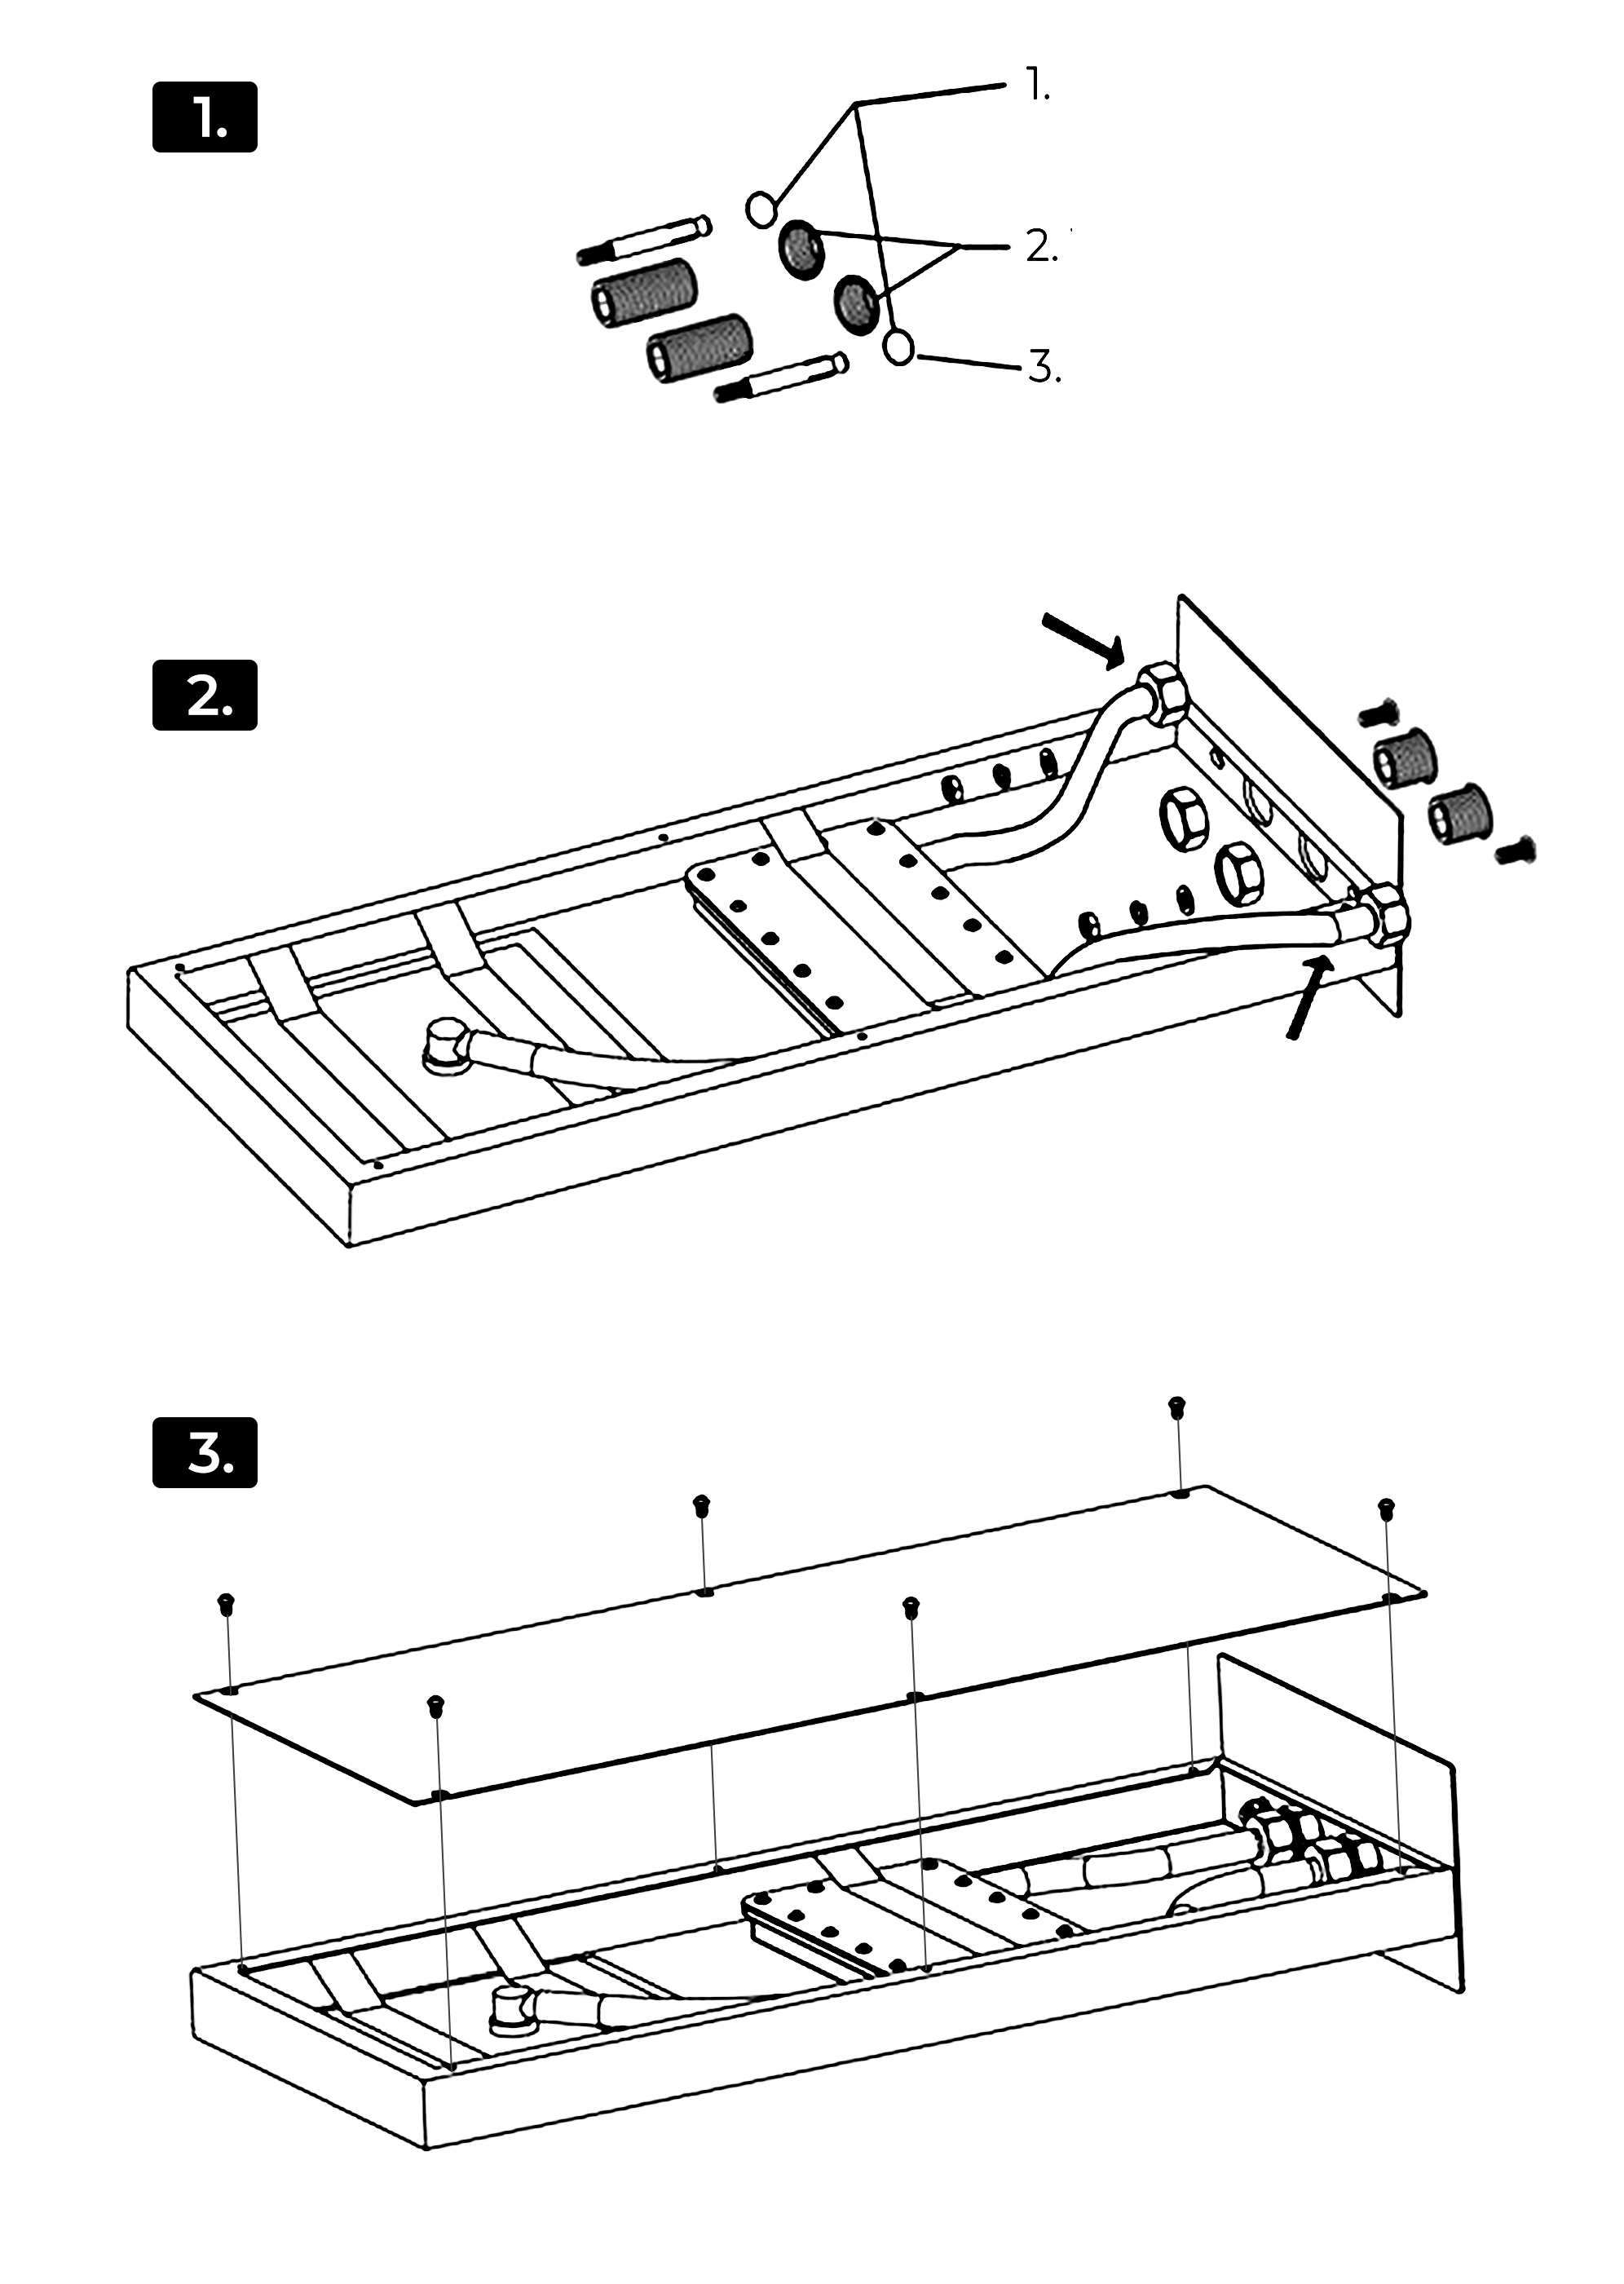
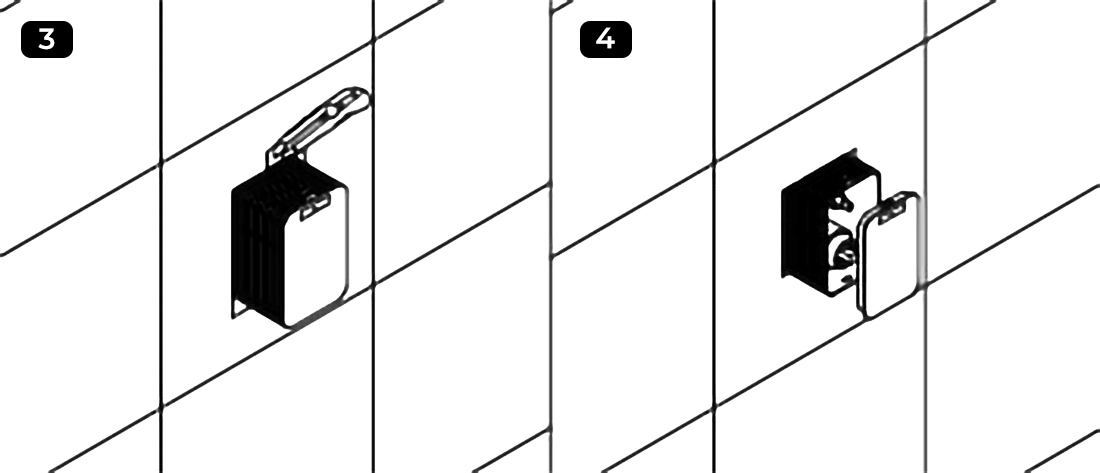
2. Two inlet fittings are connected to the pipe joint of the wall; then the nut, expansion screw, and inlet pipe are connected.
3. Reinstall the top cover.
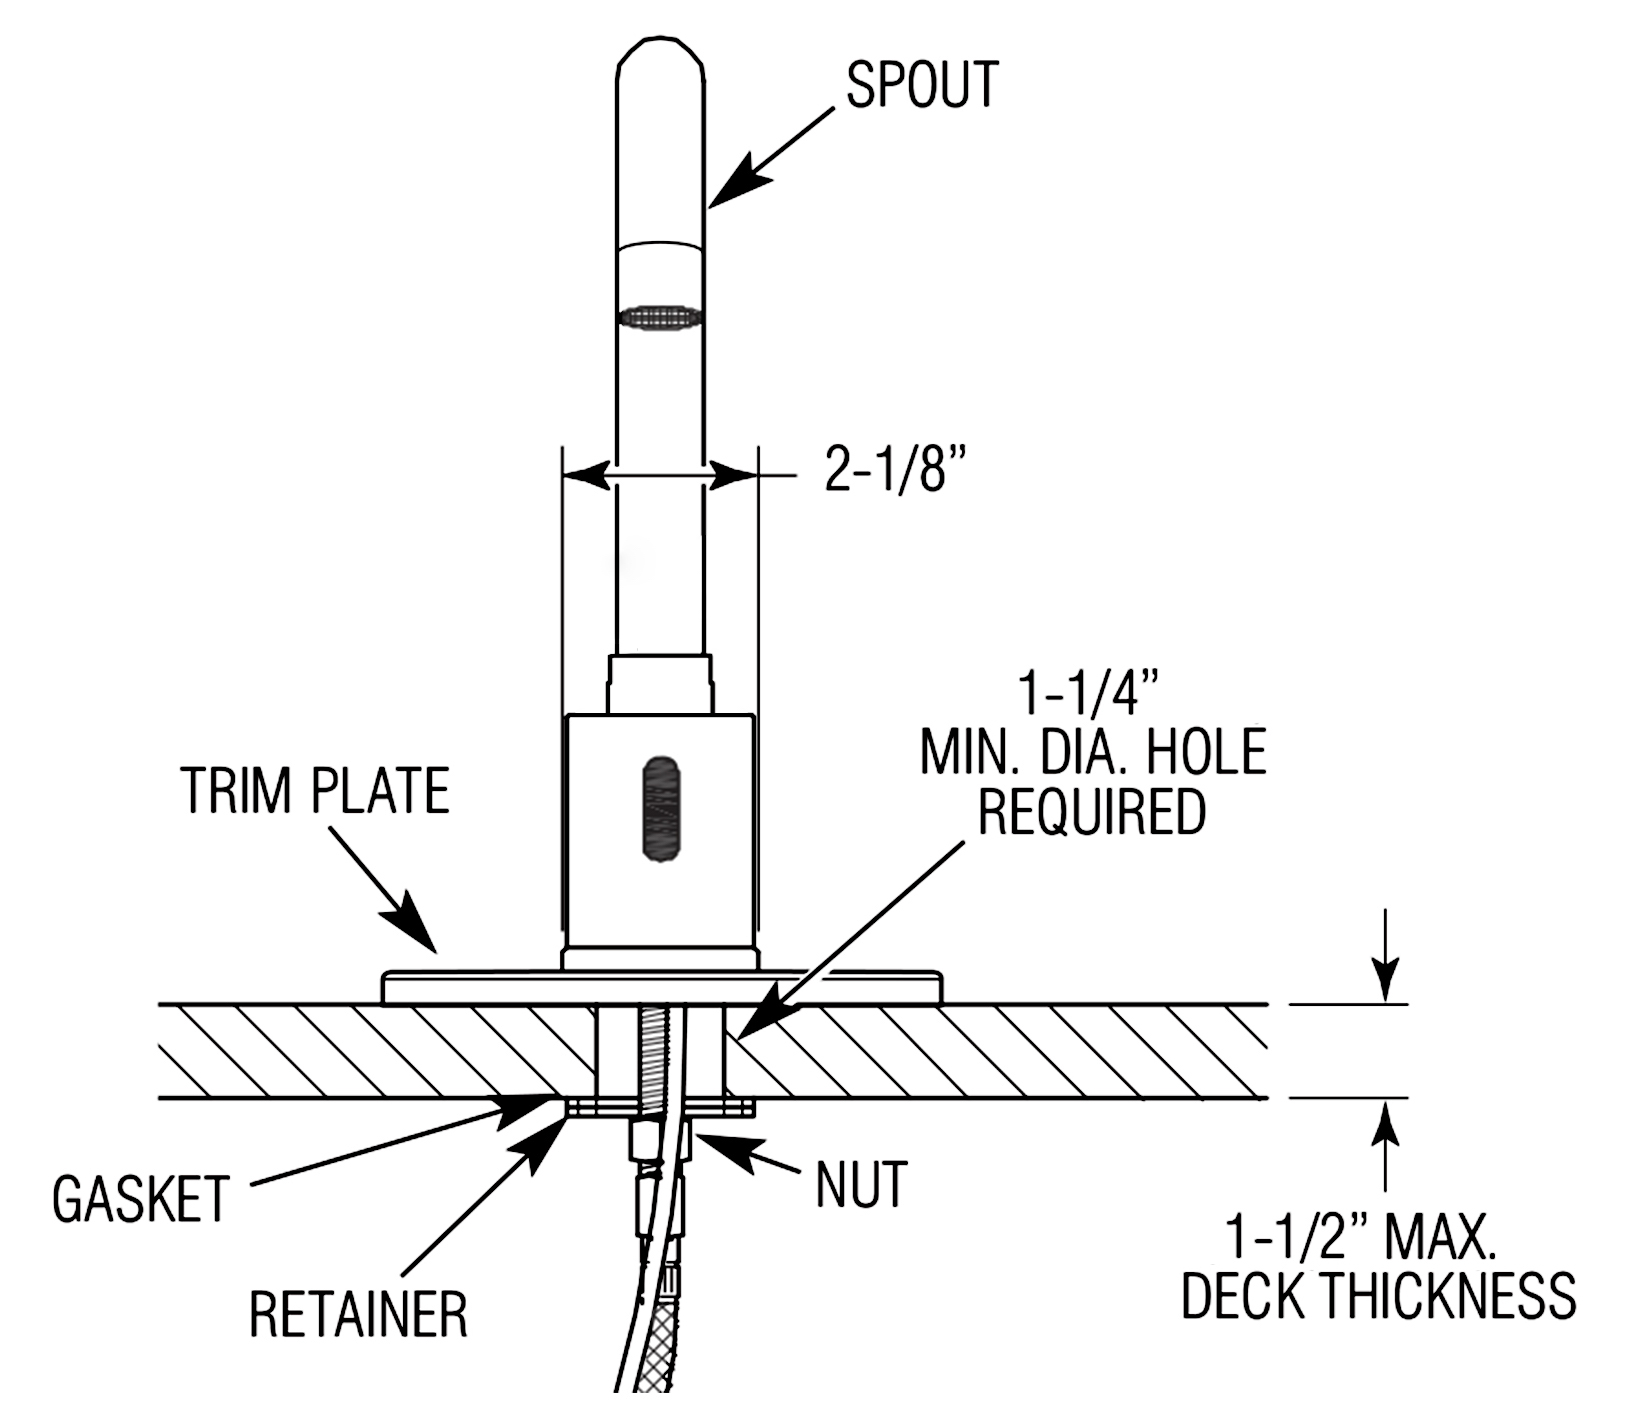

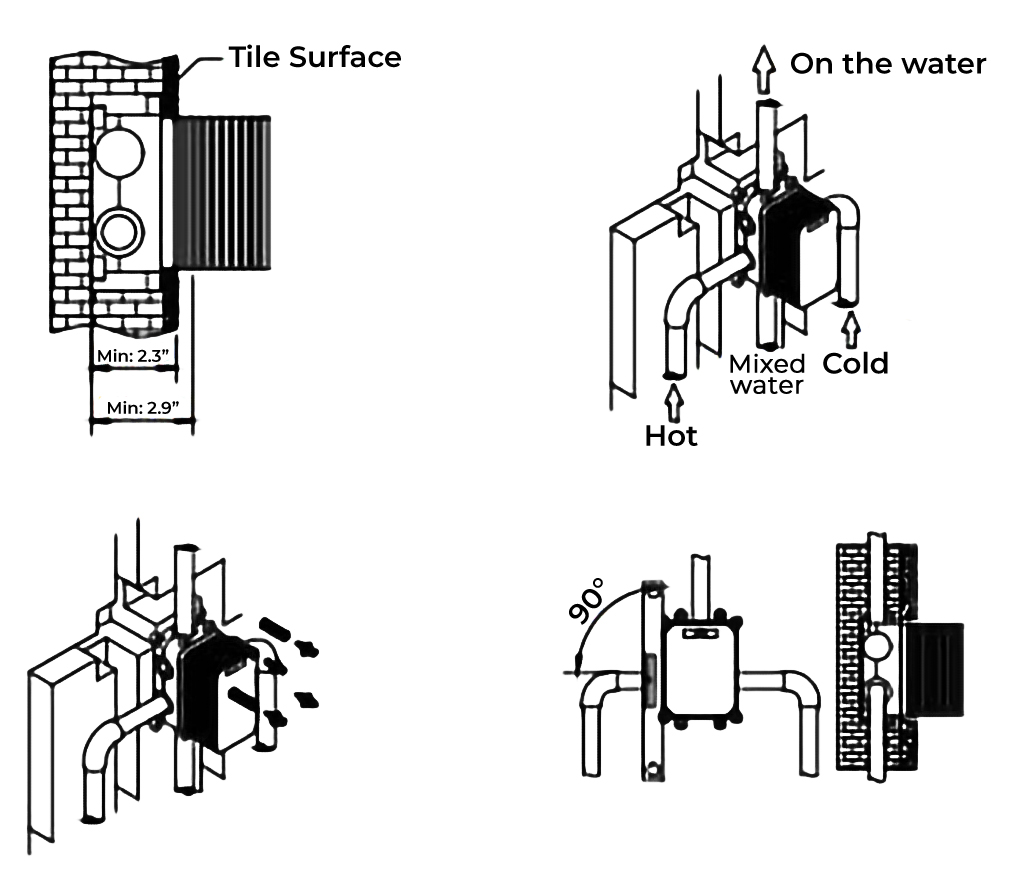
Basic-size, according to the embedded box to open the hole on solid wall, should consider installing the metope of the distance between 60-75mm, for example, after blank wall in the shop, the ceramic tile surface to increase the thickness of the 20 mm, so PiQiang in the depth of the hole should be chosen 40 to 55 mm.
Hole bottom should remain flat so that subsequent adjustment embedded box of vertical and horizontal convenient installation for the principle
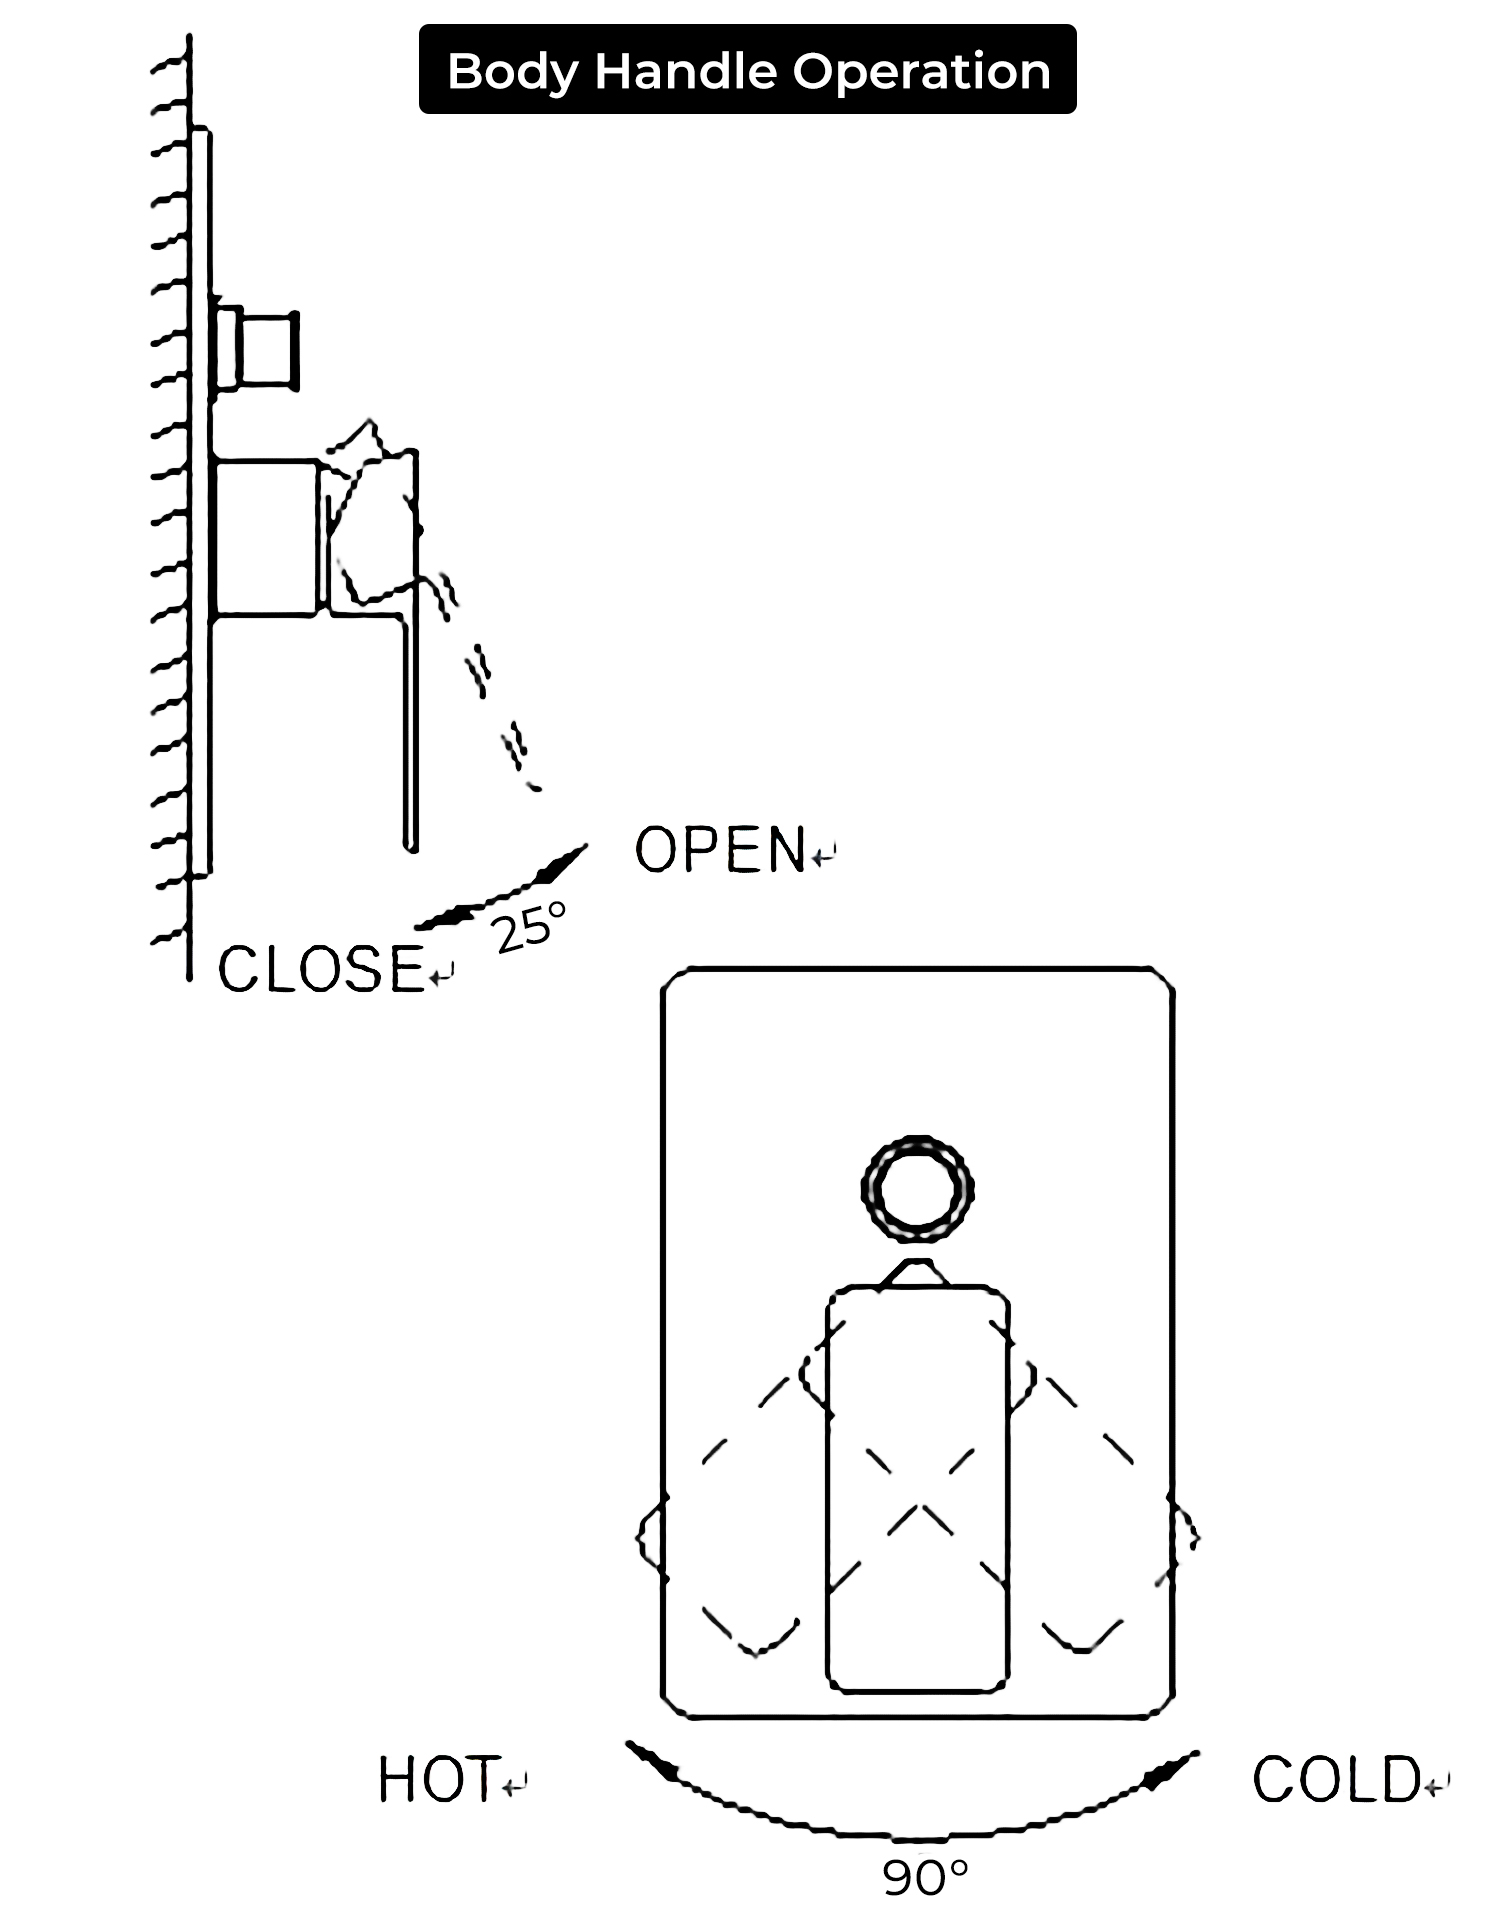
Pay attention to the direction of the up and down or so embedded box, on the left by hot water pipes, right after the cold water pipes, pick up and down the mixed water pipes.
After the pipe connection, according to the pipeline arrangement, and open the corresponding channel slot tube in the blank wall.
Embedded box fixed before, to embed box and trial test and pipe water clean connection pipe, and test before mixing water channels should be open.
Test, before opening the switch valve core, open the water to test around inlet pipe, is connected closely with no leakage and the water pipe test after dosing open state, weather to test on the mixed water pipe connection without leakage. At the same time clean tube foreign bodies in case of influencing water control valve function.
It will be embedded in a box into the solid wall with a self-tapping screw that is fixed on the wall.
With parallel ruler for correction of embedded box of horizontal and vertical direction to embed box into a level with the ground, and metope as 90°. In the absence of good correction will influence the control panel installation effect.
Once again confirm the pipe connection is correct, try no leakage, water shower other embedded with the packing box and pipe joint is fixed.
Solid wall embedded box is installed, laid our behind the wall can be a follow-up control valve installation.
The lying of the wall not to embed box is open, lest the box into the packing after solidification effect of control valve installation.
Control valve set surface for plating and smooth surface should be kept inside the original packaging before installation to prevent scratches, corrosion, and lost.
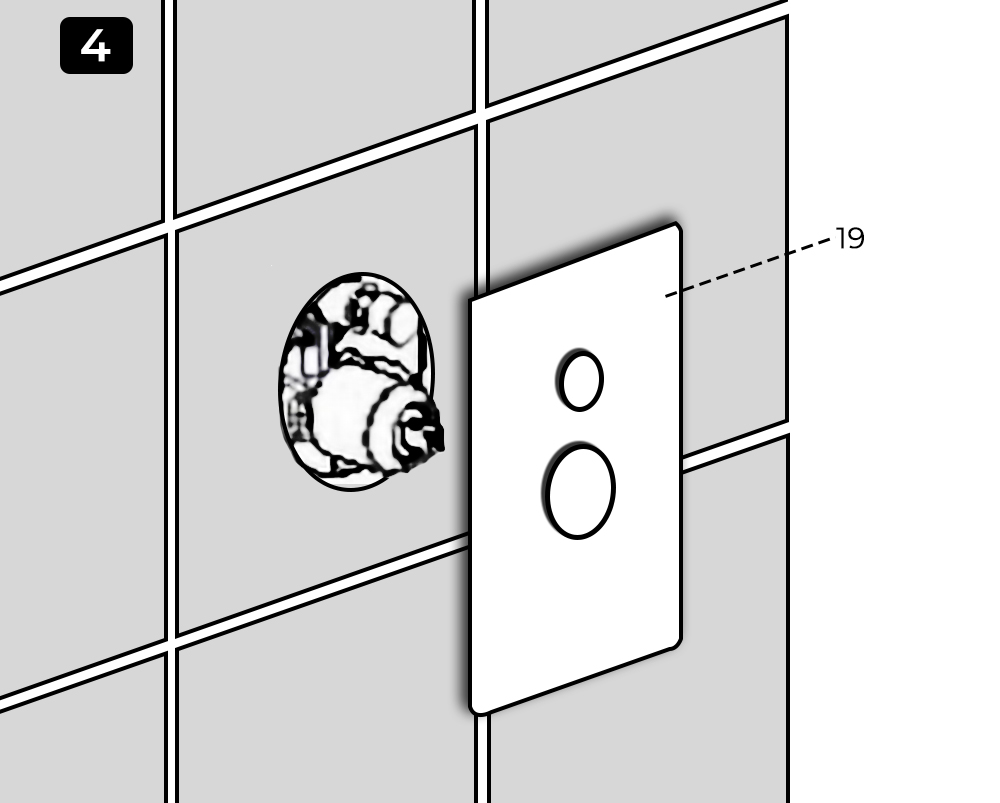
Laid metope ceramic tile or other adornment metope, keep the metope smooth, with embedded box into 90″ vertically.
Along with the embedded highlights, the glass on the edge glue, embedded box to improve waterproof performance prolongs service life.
Cut off using a cutting tool embedded box of highlighting, keep away from the wall 2-4mm highly advisable.
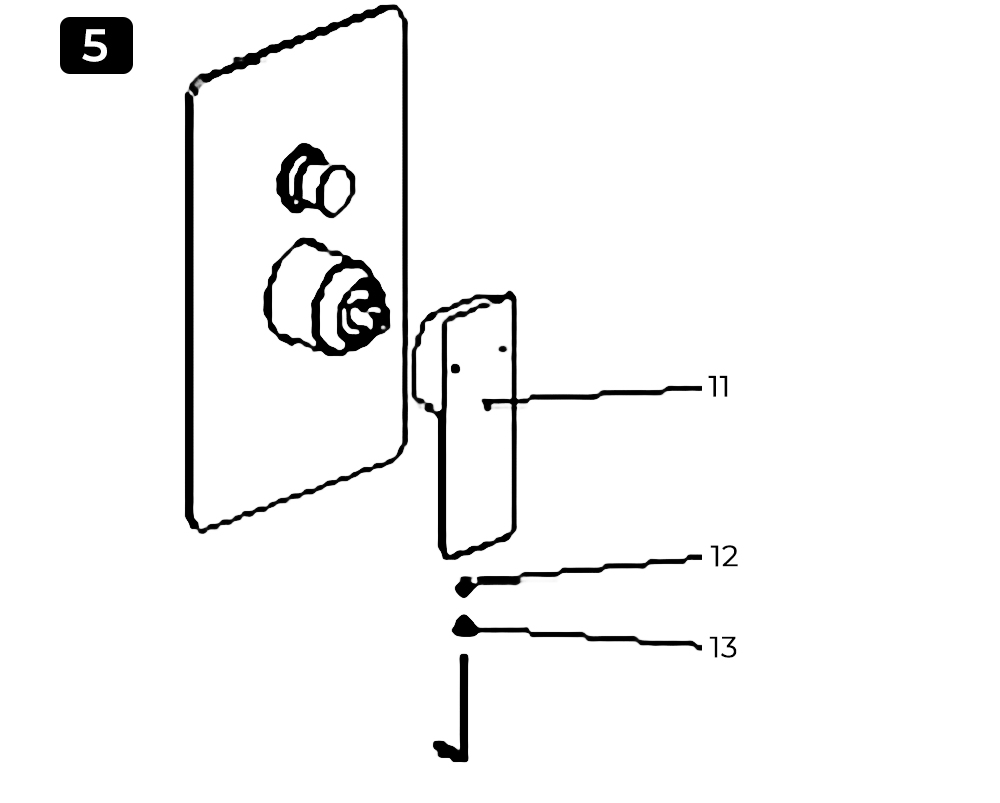
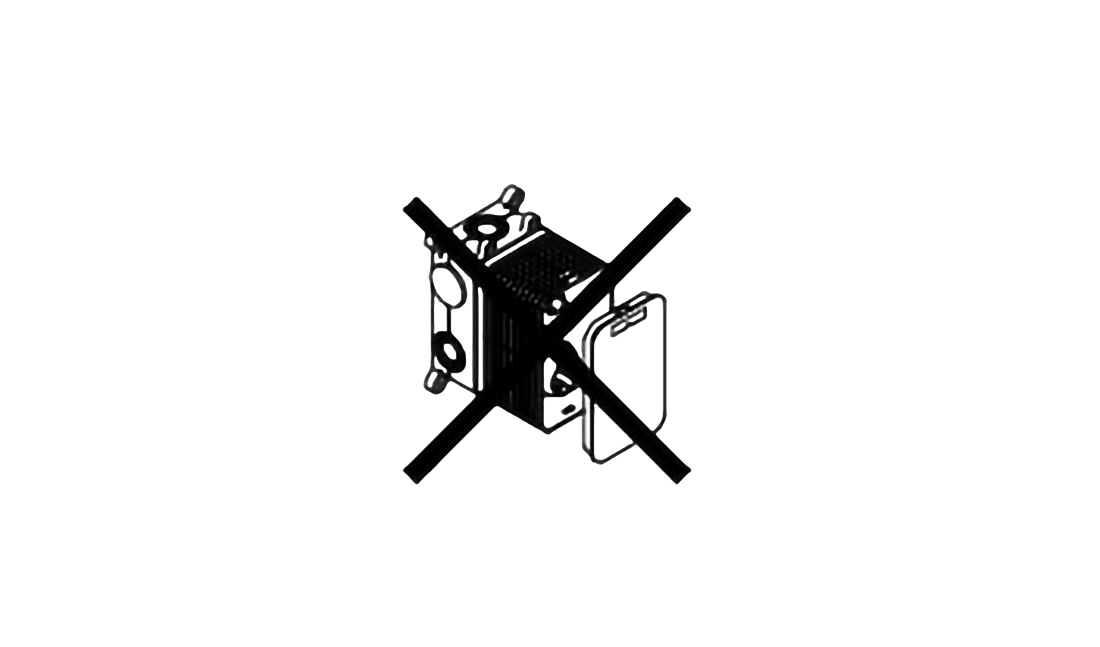
Try yo remove embedded lifted the lid plate and water components

Installed control panel, check on panel hole protecting glue before set cut, such as unprotected glue set directly into the panel is easy to scratch panel install the switch handle, with packing with small hexagonal wrench clockwise to switch handle is fixed on a main valve spool control valve in, install decorative rubber plugs.
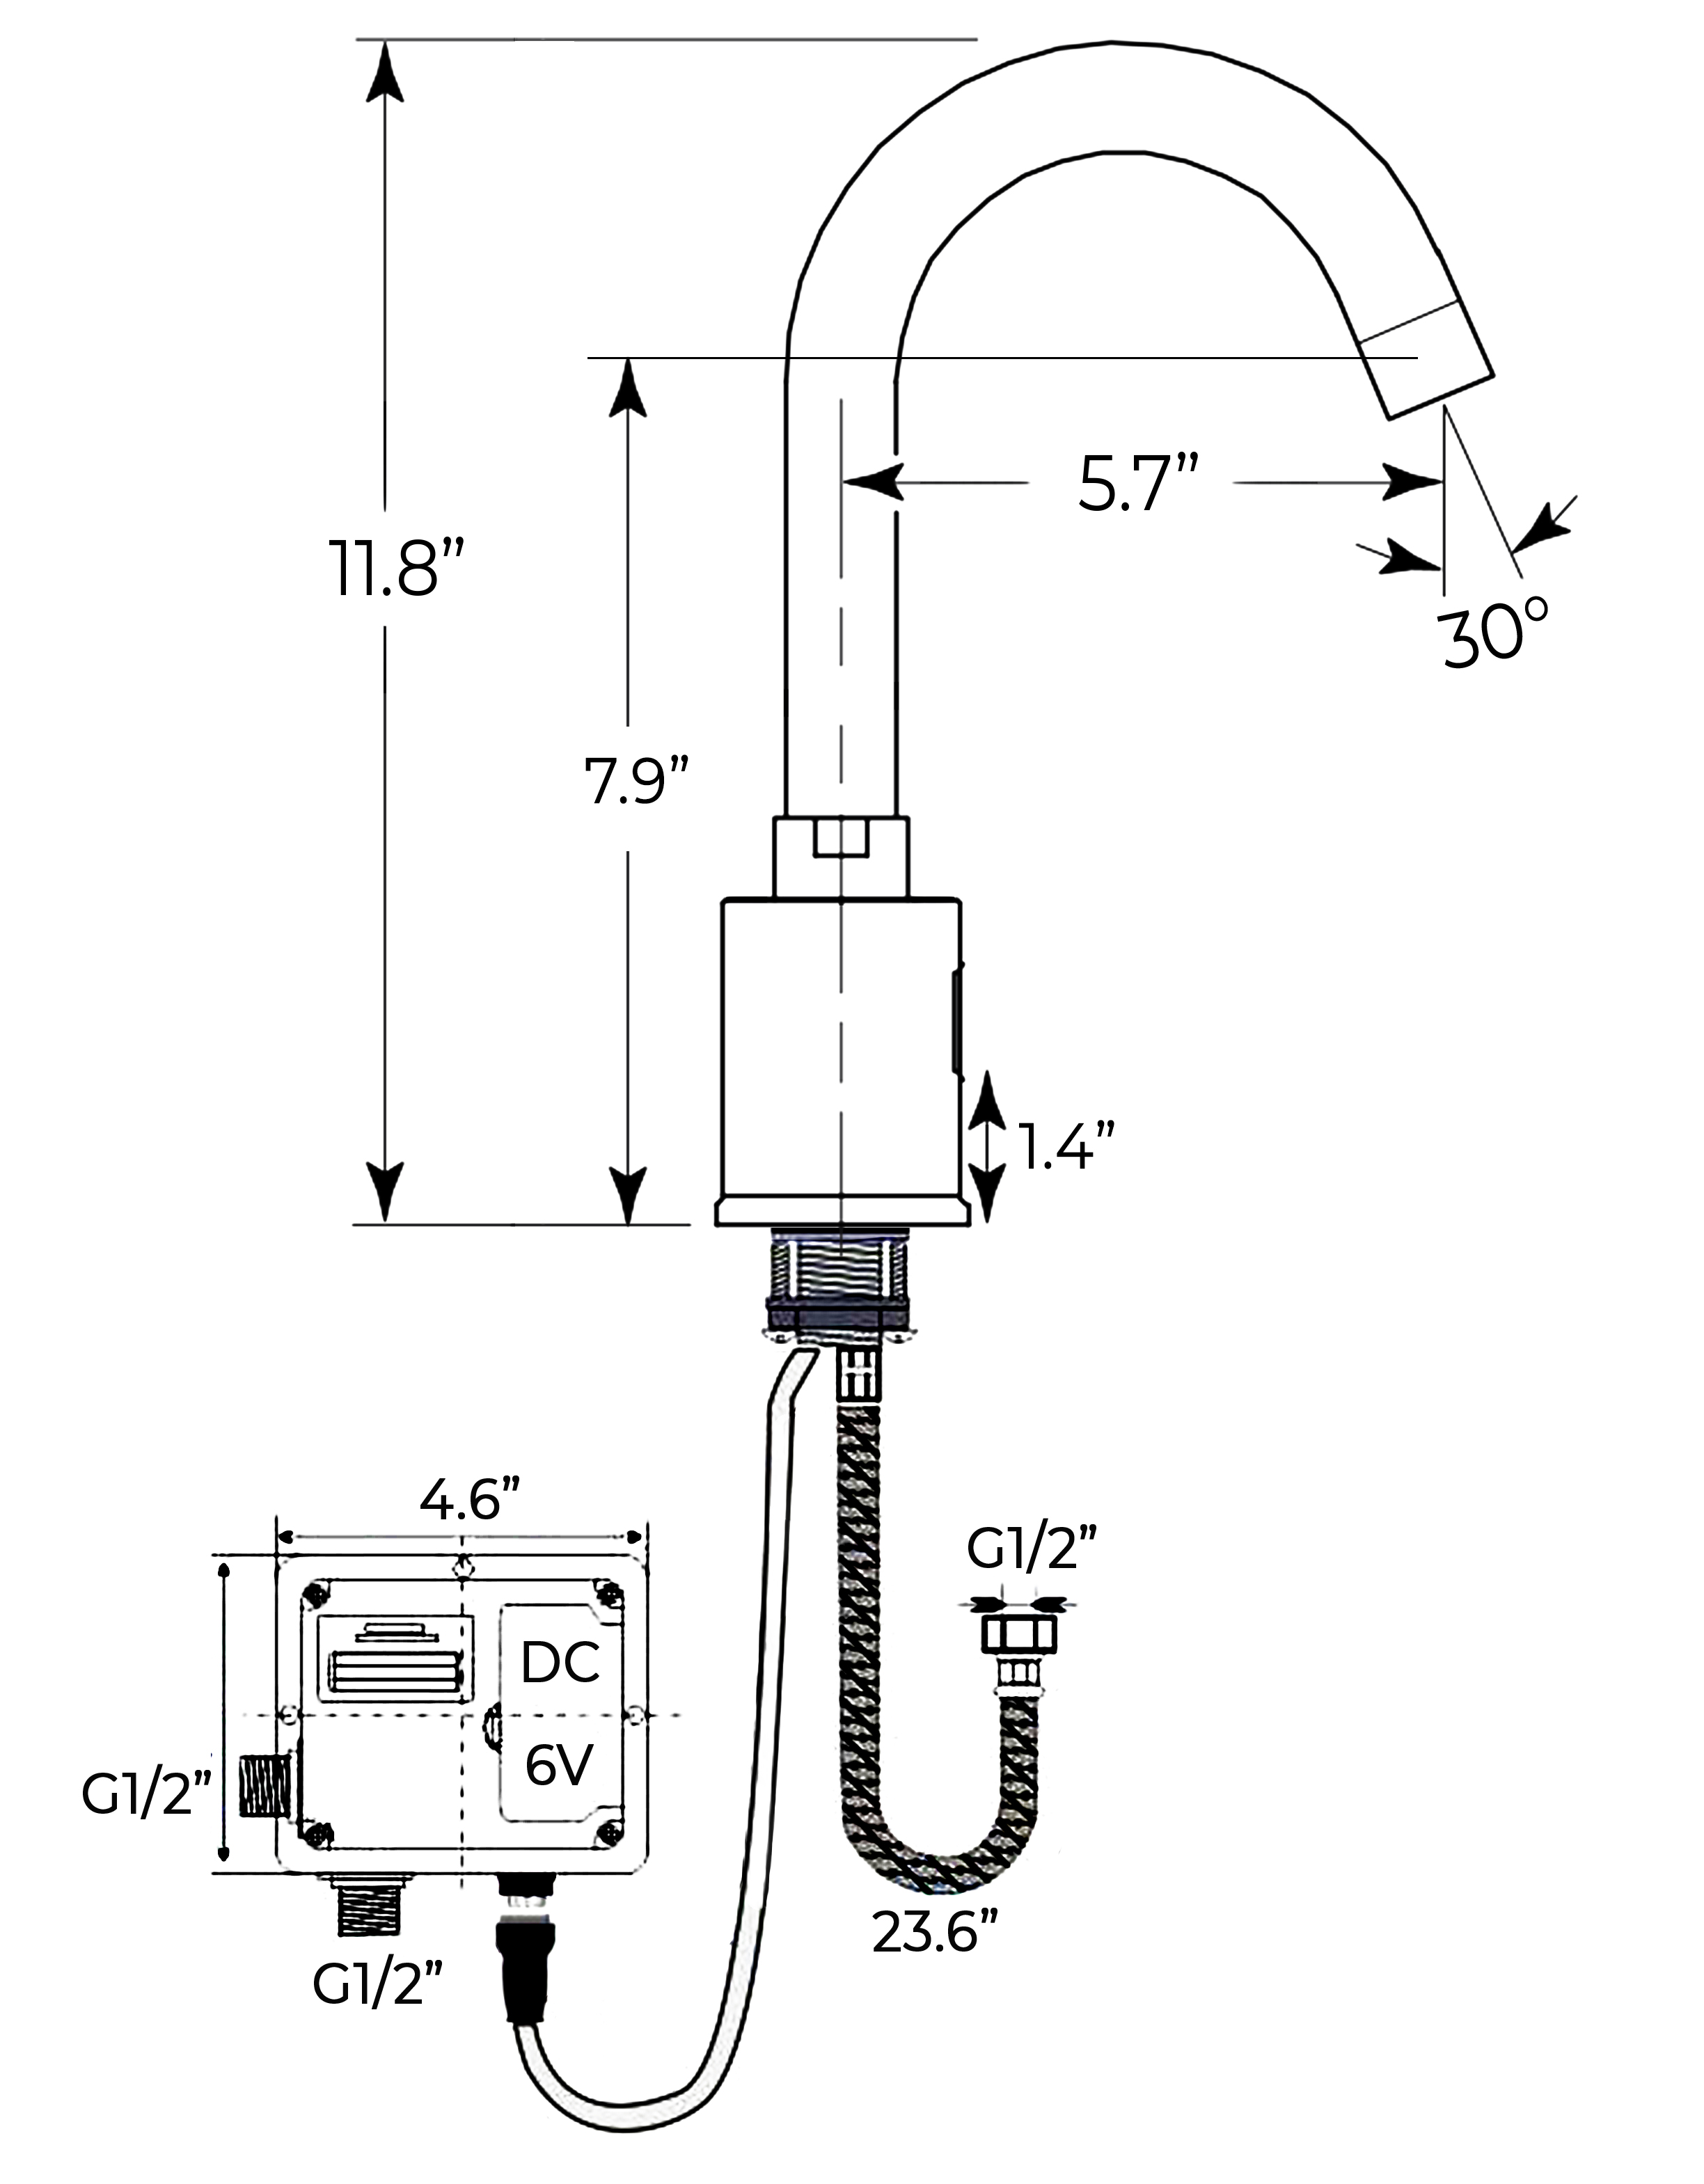
Hand-Held Shower Instructions
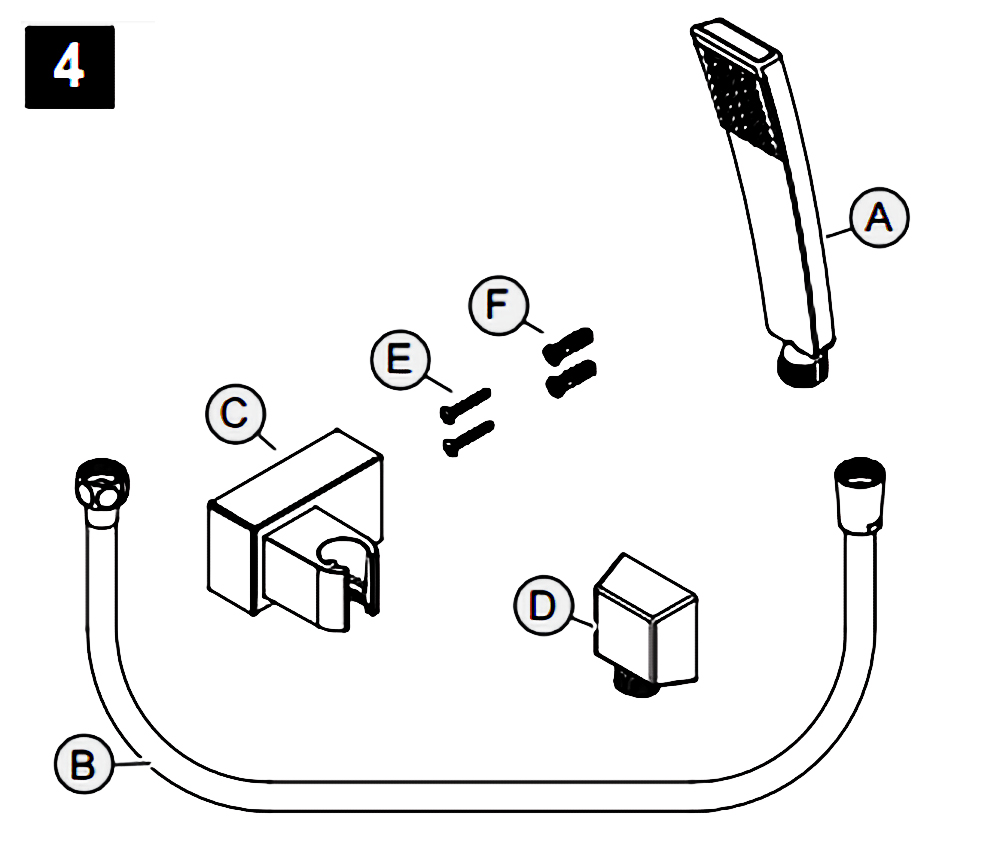
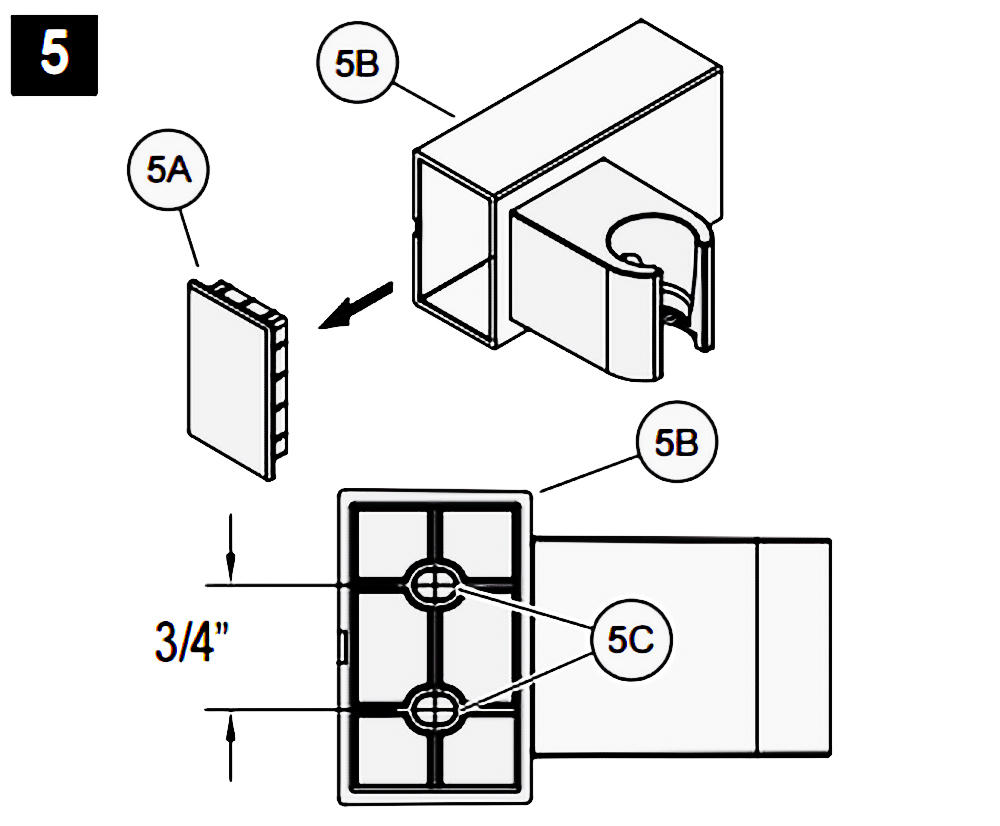
5. Hole Locations For Wall Mount
Remove Front Cover (5A) from Wall Mount (5B). Use Wall Mount Screw Holes (5C) to place the desired location. Using a punch or awl, tap the screw hole locations. Holes must be vertically aligned.

7. Wall Mount Installation
Place Wall Mount (7A) into wall and inset Mounting Screws (7B) through Wall Mount Holes (7C) and tighten until Wall Mount (7A) is flush with the wall. Do Not Over Tighten! Insert Front Cover (7D) into Wall Mount (7A).
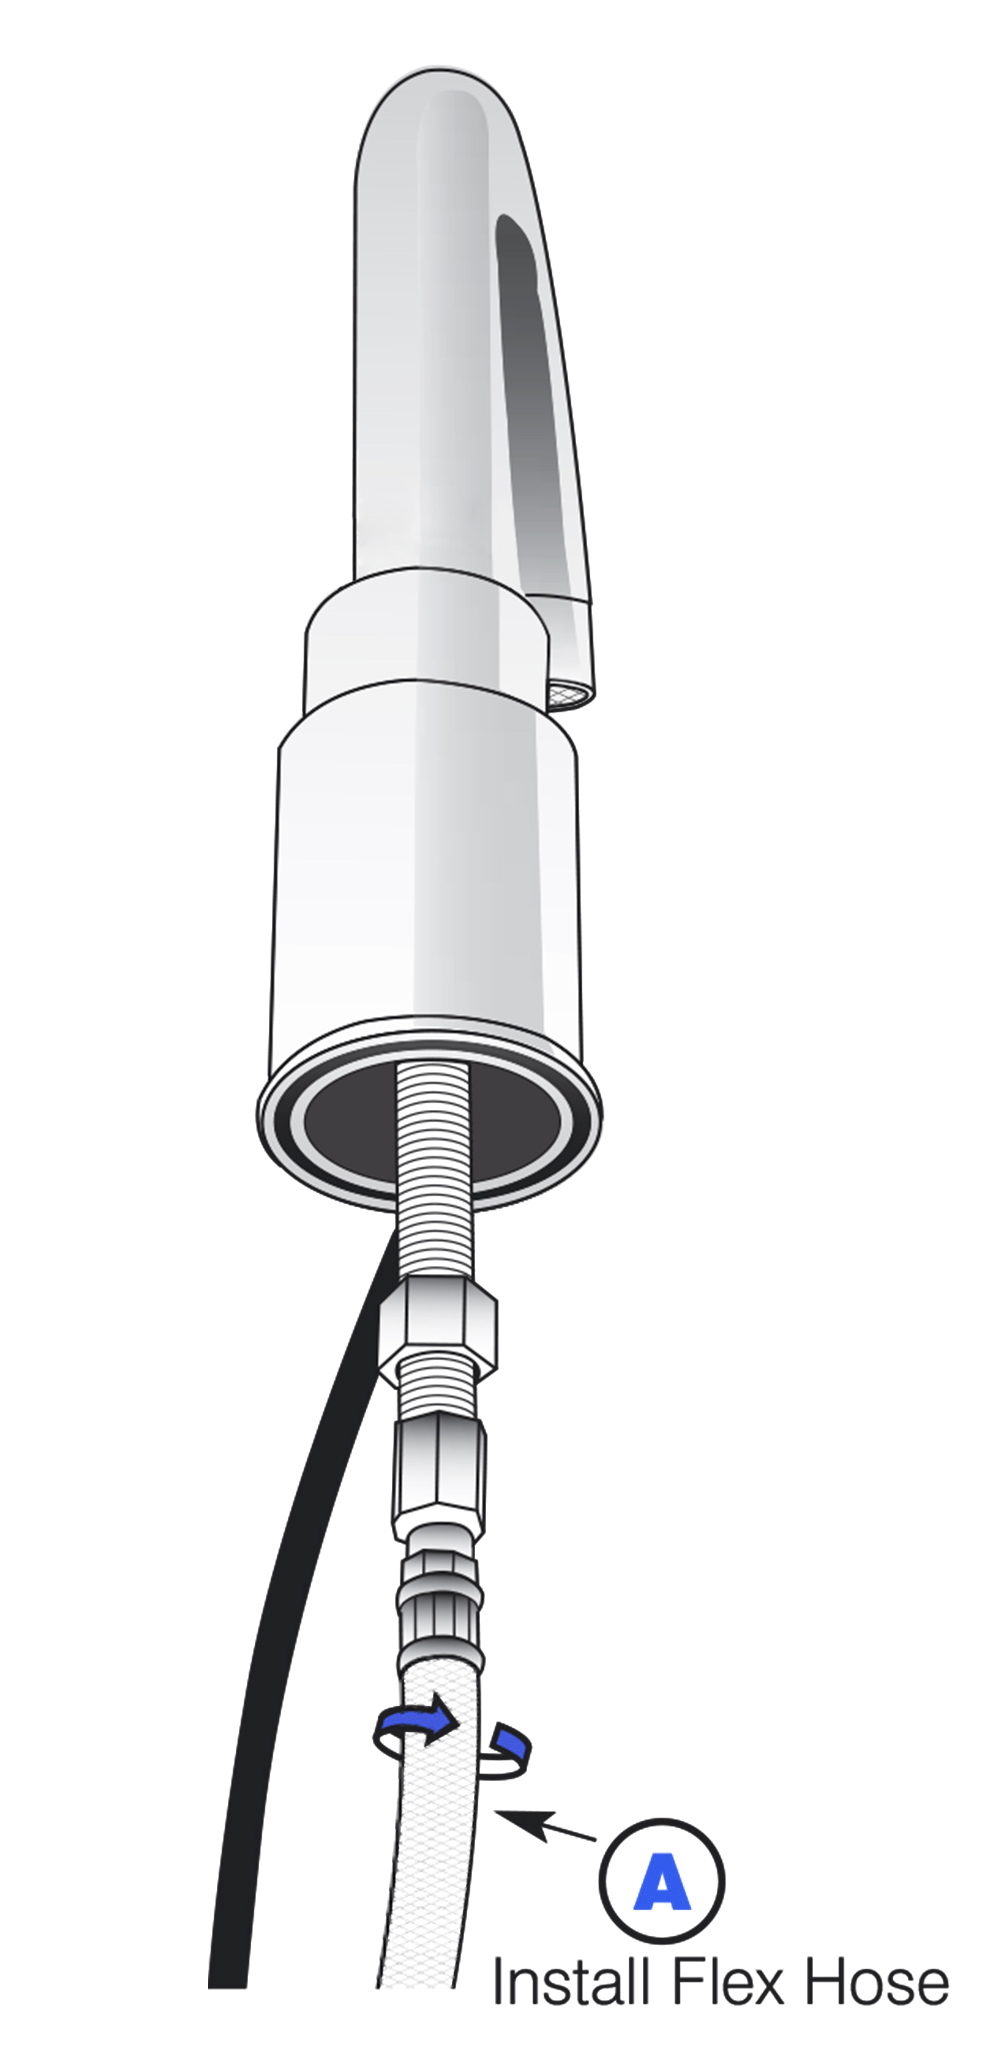
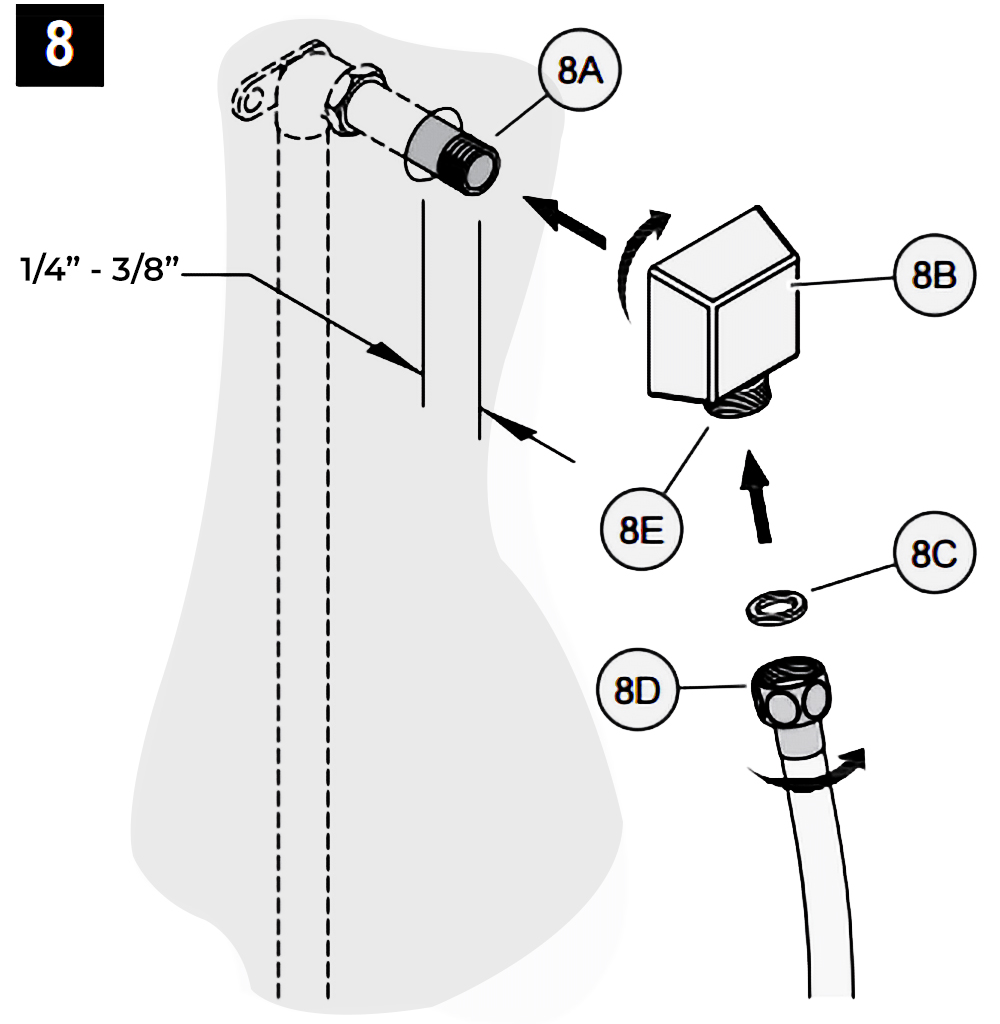 8. Drop Elbow & Hose Installation 8. Drop Elbow & Hose Installation
Apply PTFE plumbers tape on both ends of Pipe Nipple (8A) (not included). Screw Pipe Nipple (8A) into the elbow inside the wall. The Pipe Nipple (8A) is to project 1/4 3/4 from the finished wall. Screw Drop Elbow (8B) onto Pipe Nipple (8A) and tighten until Drop Elbow (8B) is property positioned and flush to the finished wall.
Place Rubber Seal (8C) inside Hex Hose Fitting (8D). Connect Hex Hose Fitting (8D) into Drop Elbow Outlet (8E) by turning Hex Hose Fitting (8D).
9. Unit Start Up
Turn on hot and cold water supplies, and check al connections for leaks.
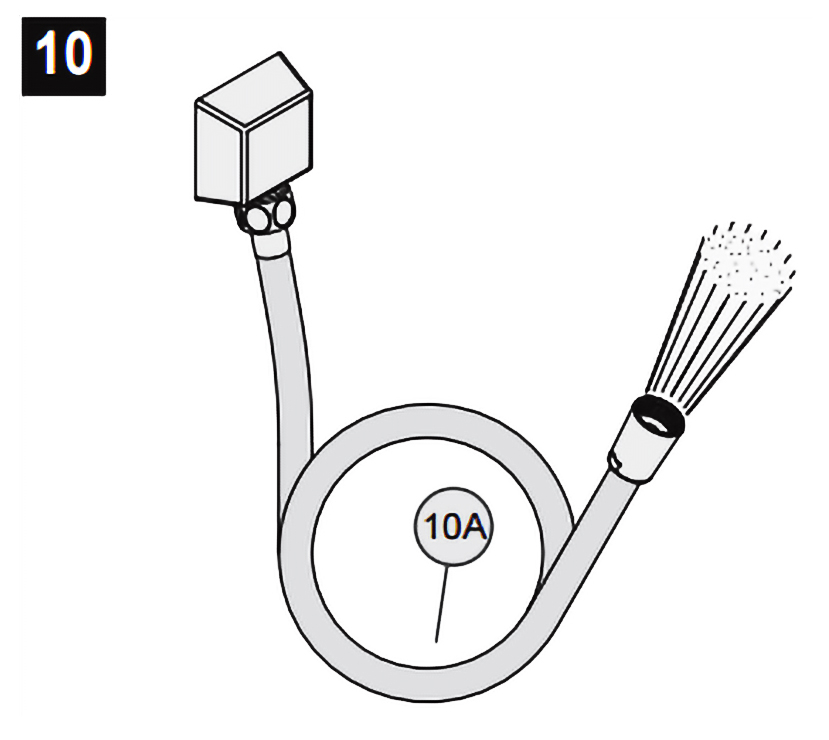 10. Final Flushing 10. Final Flushing
For final flushing, turn valve on and allow water to run through the Hose (10A) for several minutes. Allow water to run for several minutes until all foreign matter clears the line.
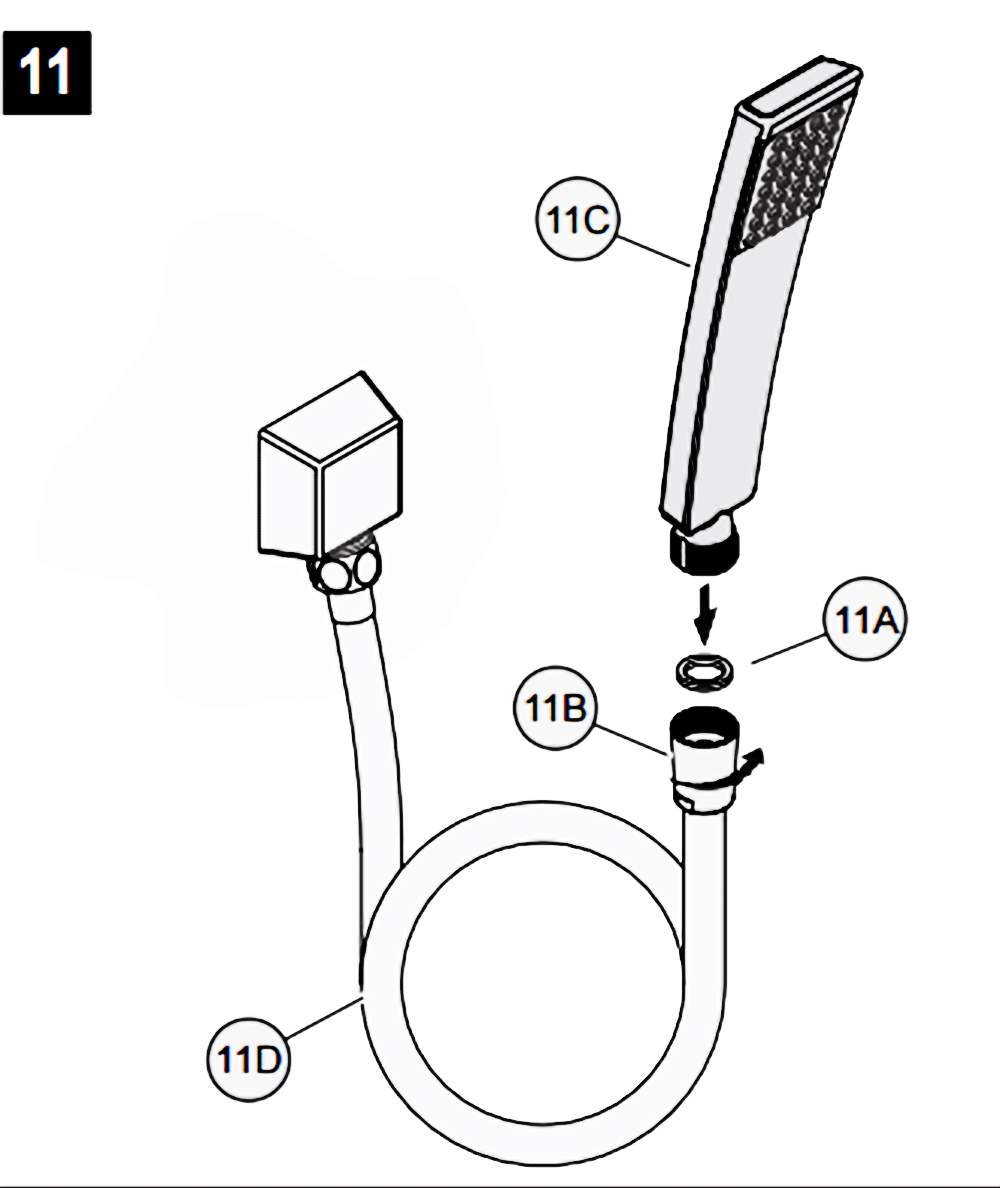
11. Shower Arm Installation
Place Rubber Seal (11A) inside Tapered Hose Fitting (11B). Conned Hand Shower (11C) to Hose (11D) by turning Tapered Hose Fitting (118) clockwise.
Warning: Make sure Hand Shower (11C) is securely tightened to Hose (11D).
|