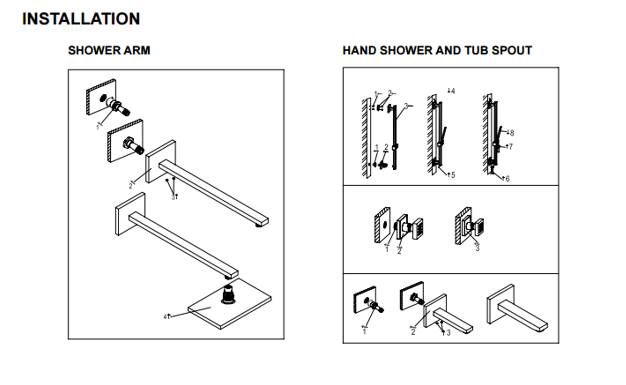
Installation Instructions for Napoli LED Rainfall Thermostatic Shower Set
- Before you begin, please read the installation instructions below. Observe all local building and safety codes.
- Unpack and inspect the product for any shipping damages. If you find damages, do not install.
- Please note all showers must be installed by a professional and certified plumber otherwise warranty might be voided.
|
|
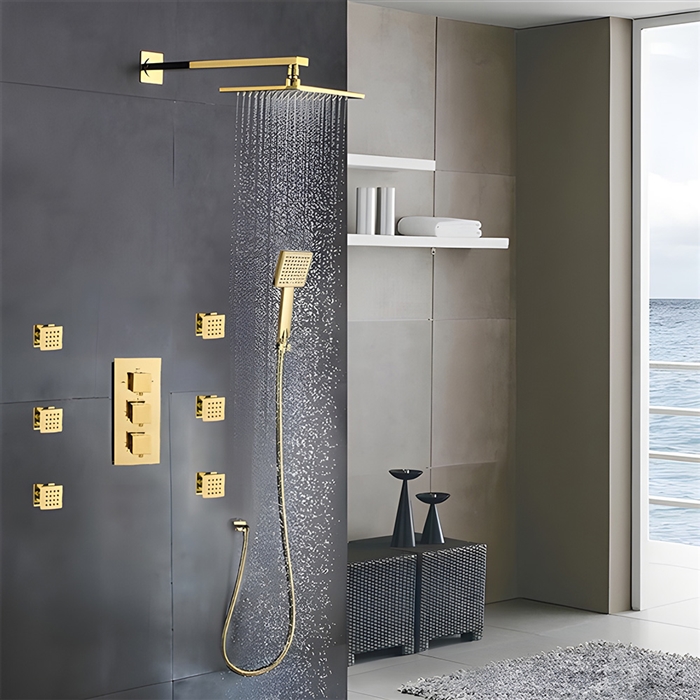
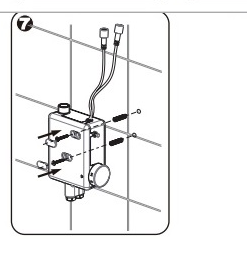
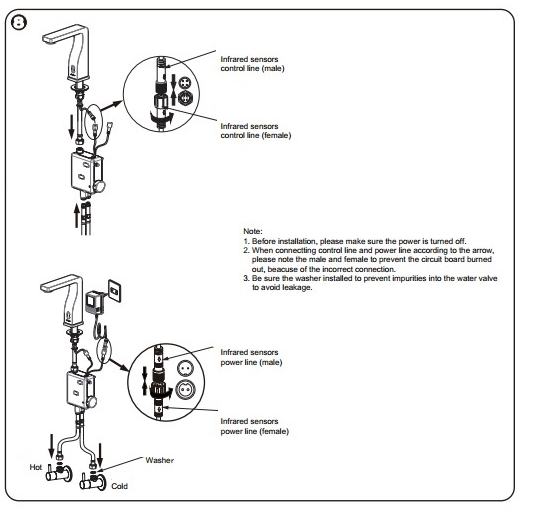
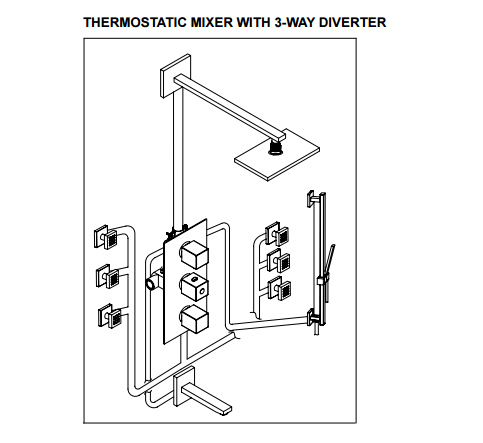
THERMOSTATIC VALVE INFORMATION
The thermostatic shower system features three valves that allow you to keep water temperatures consistent each time the shower is used and create a customised shower system.
Valve A operates as a standard three-way shower diverter. You can select a combination of shower heads, body sprays and hand showers. This valve is able to connect to up to three different outputs. If only two outputs are desired, close the third output with a threaded brass plug (provided). The three-way diverter valve allows you to alternate between any of your selected shower outputs by directing the water from the shower head to each additional accessory, one at a time and features an On/Off switch to turn your shower or tub on and off.
Valve B connects conventionally to your hot and cold water supply with the hot water on the left and the cold water on the right. This valve is used to control the water temperature only, it will not turn the water on or off.
Valve C enables you to have an additional output. This valve operates independently from Valve A allowing two outputs to be used at one time. This valve is typically connected to the body jet feature, allowing the body jets and shower head to be used simultaneously but can be configured to accommodate any speciality shower design. If no additional output is desired this valve can be closed with a threaded brass plug.
Your plumber can determine the proper plumbing layout for your customised shower configuration. All rough-in work should be completed by a professional.
|


