.jpg)
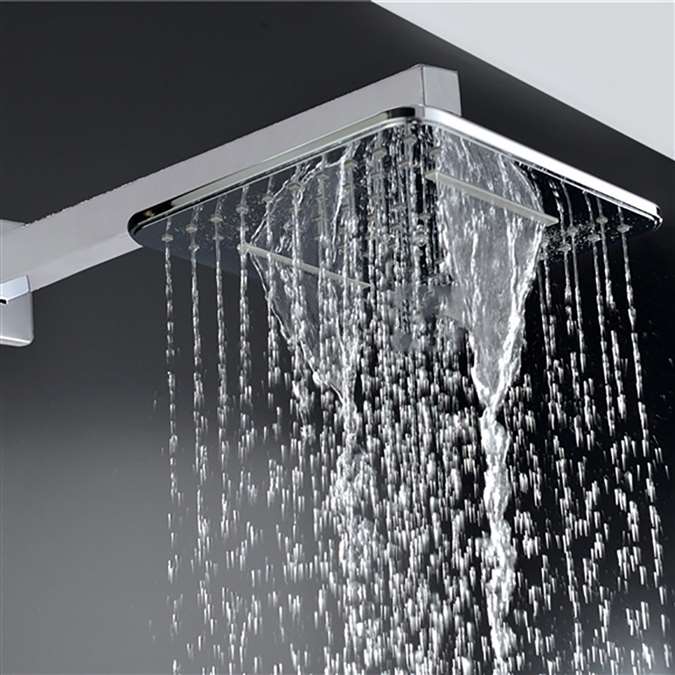
Genoa Wall-Mount Chrome Finish LED Rainfall Shower Set
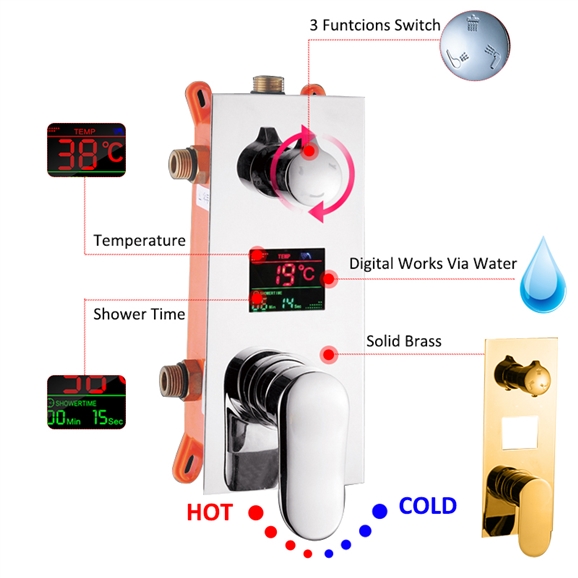
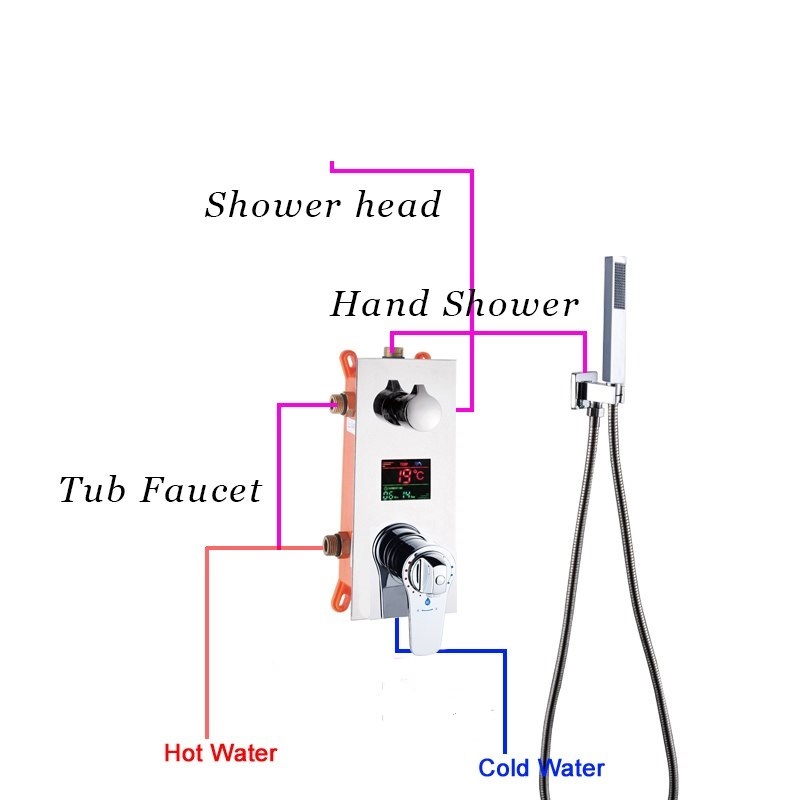
Genoa LED Rainfall Shower Set is a Chrome Finish, Wall-Mount Shower Set that comes with a Tub Spout. The Genoa Shower Set is made of Solid Brass making it highly durable along with the Ceramic Valve Core. The Genoa Rainfall Shower Set comes with a digital mixer. This has an elegant design and elevates the appeal of your decor made from the highest quality and for great tastes. It comes super seal technology inside, capable of delivering superior performance with solid construction for long durability that will upgrade your bathroom with a modern and cool look for a long period of time.
Genoa Wall-Mount Chrome Finish LED Rainfall Shower Set Features:
|
Brand Name: BathSelect
Model Number: BS19RC
Type: Digital Shower Set
LED Rainfall Shower Set
Size : 8 Inch
Style : Contemporary
Number of Handle : Single Handle
Surface Finish : Chrome
Valve Core Material : Ceramic
Installation : Wall Mount
Feature: Hot & Cold
|
|
Installation Instructions for Genoa Wall-Mount Chrome Finish Shower Set
- Before you begin, please read the installation instructions below. Observe all local building and safety codes.
- Unpack and inspect the product for any shipping damages. If you find damages, do not install.
- Please note all showers must be installed by a professional and certified plumber otherwise warranty might be voided
|

|
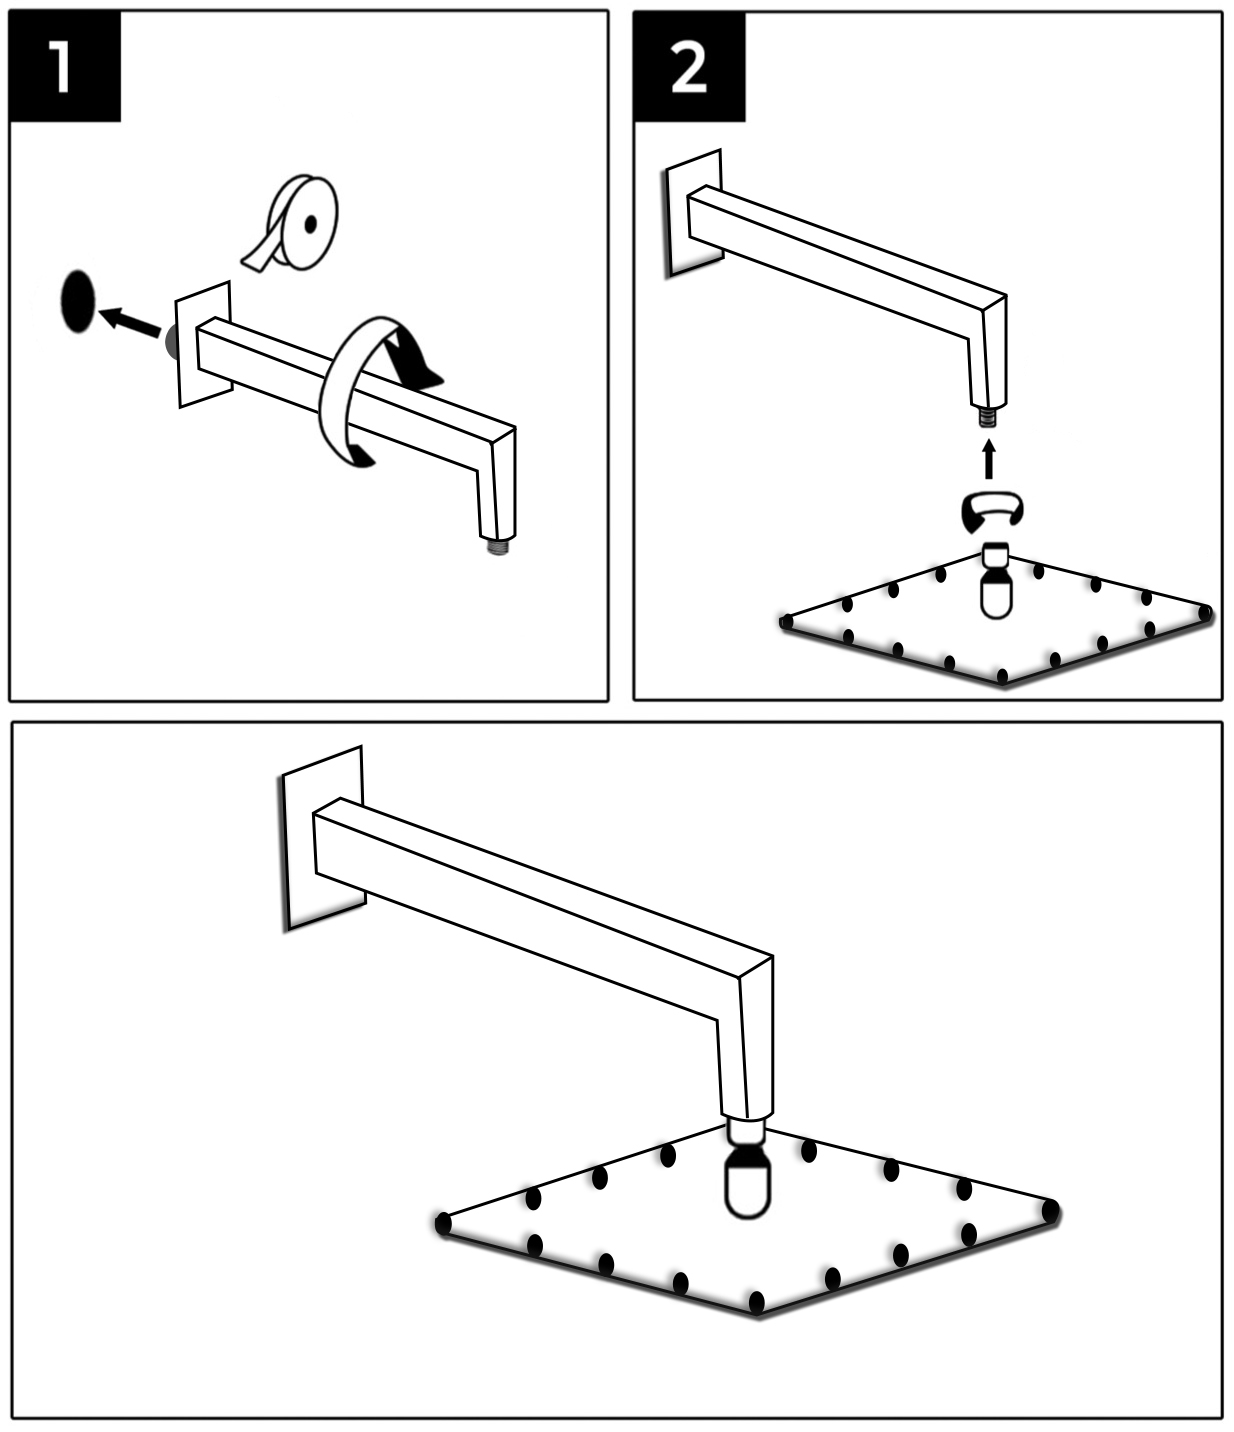
Wall Mount Shower Head Installation
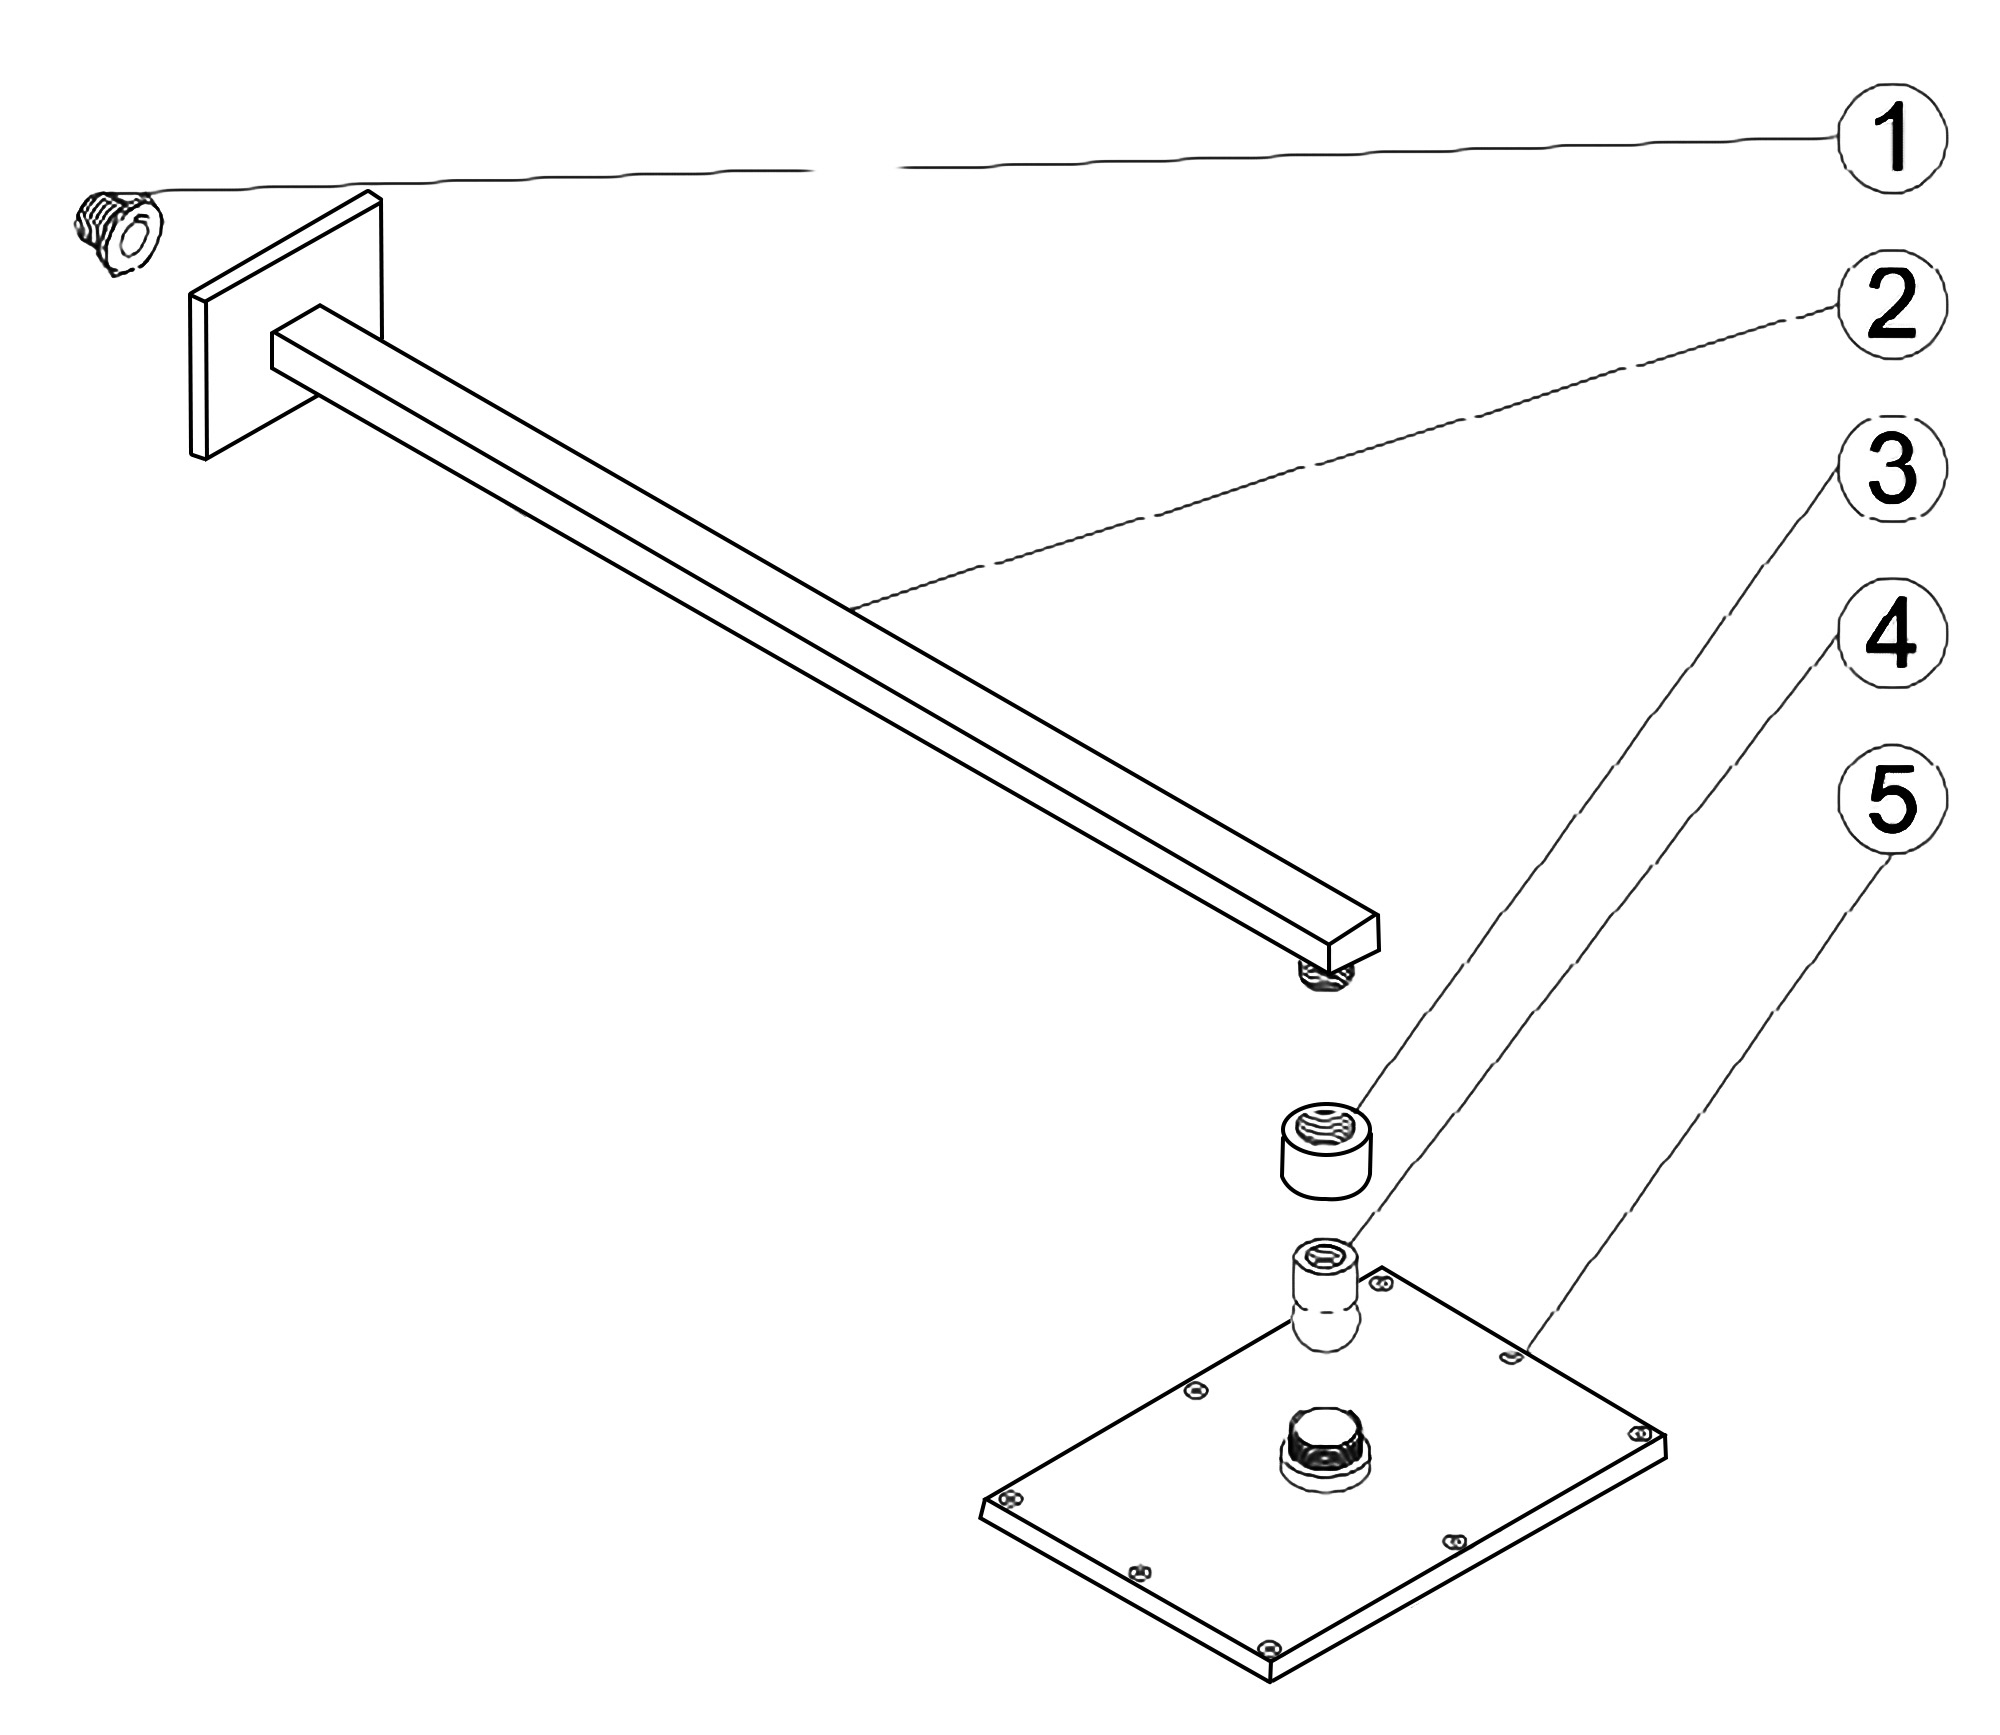
- Use your hands counter clockwise to unscrew the old showerhead and removed it.
- Take out the showerhead, make sure the shower filter is placed in the connector.
- Ensure the showerhead full horizontal alignment wall mounted shower arm thread.
- Use your hands clockwise to tighten showerhead.
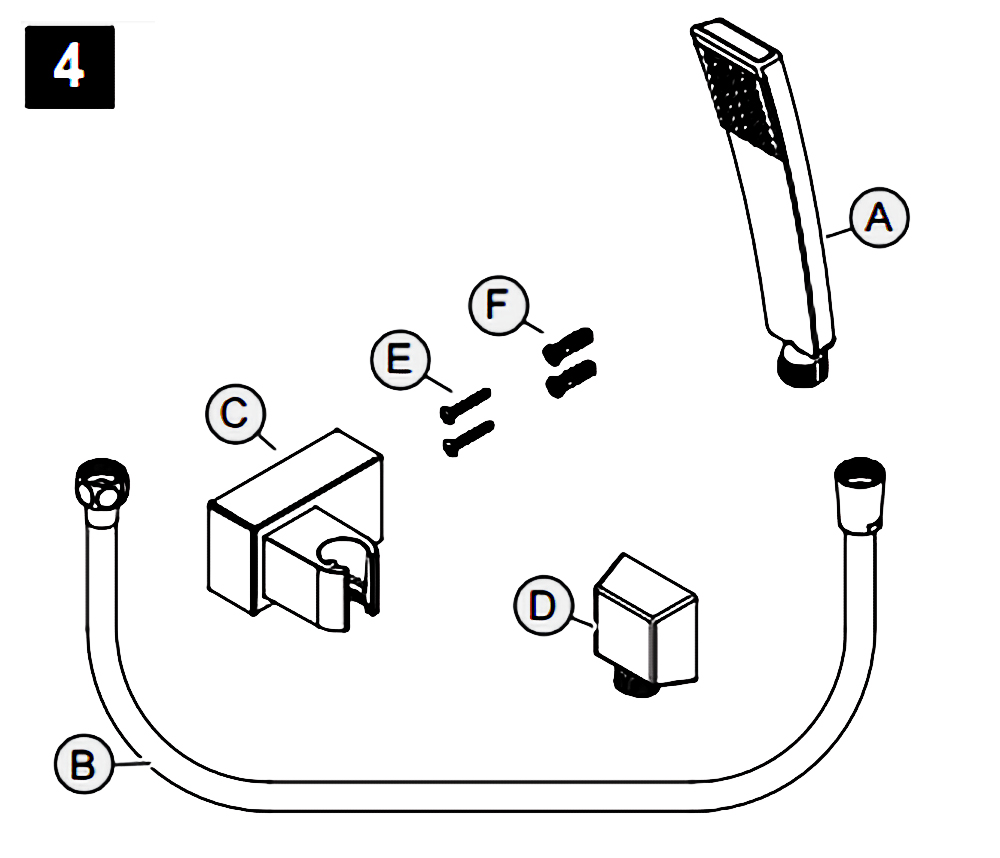
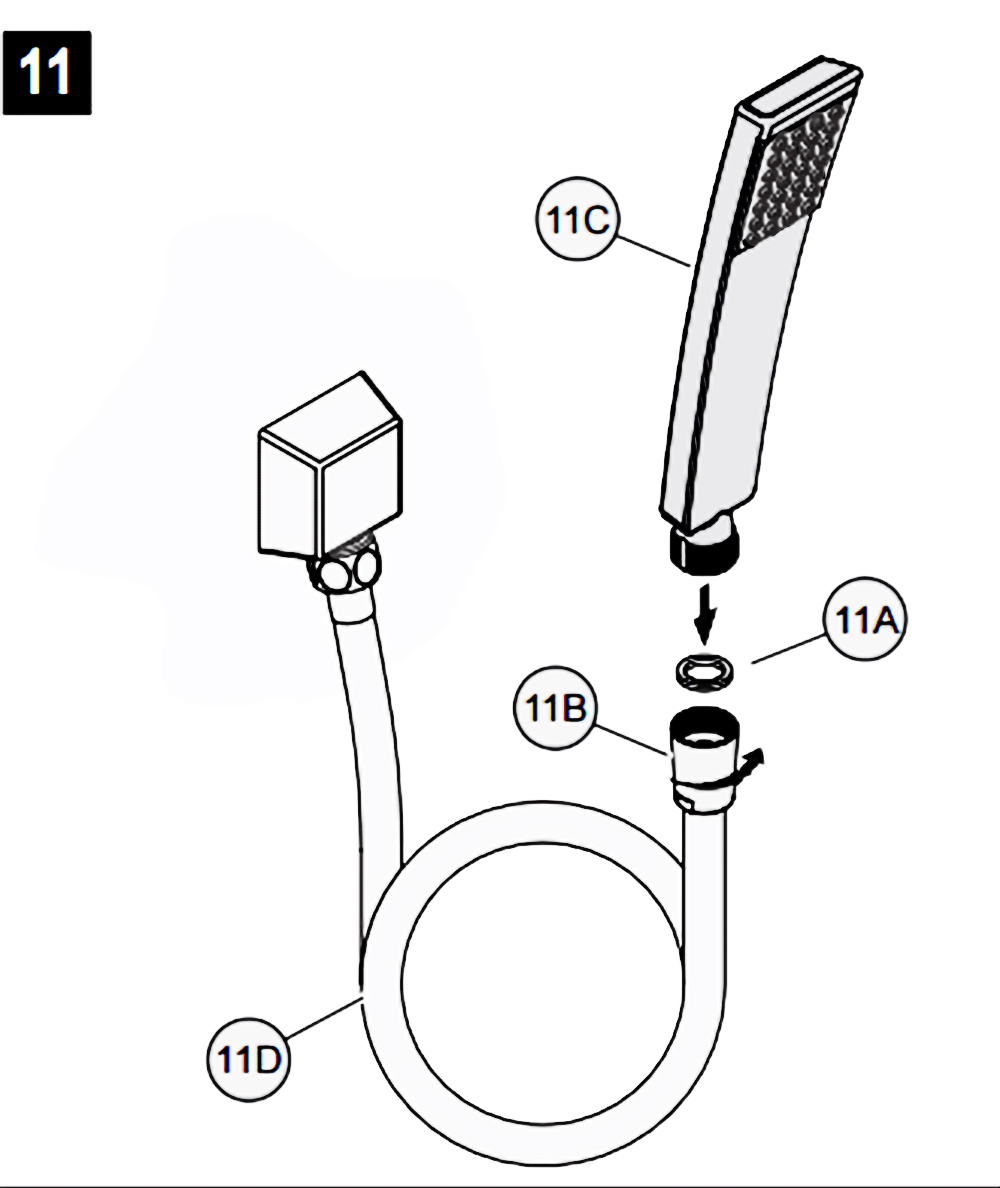
Hand-Held Shower Instructions
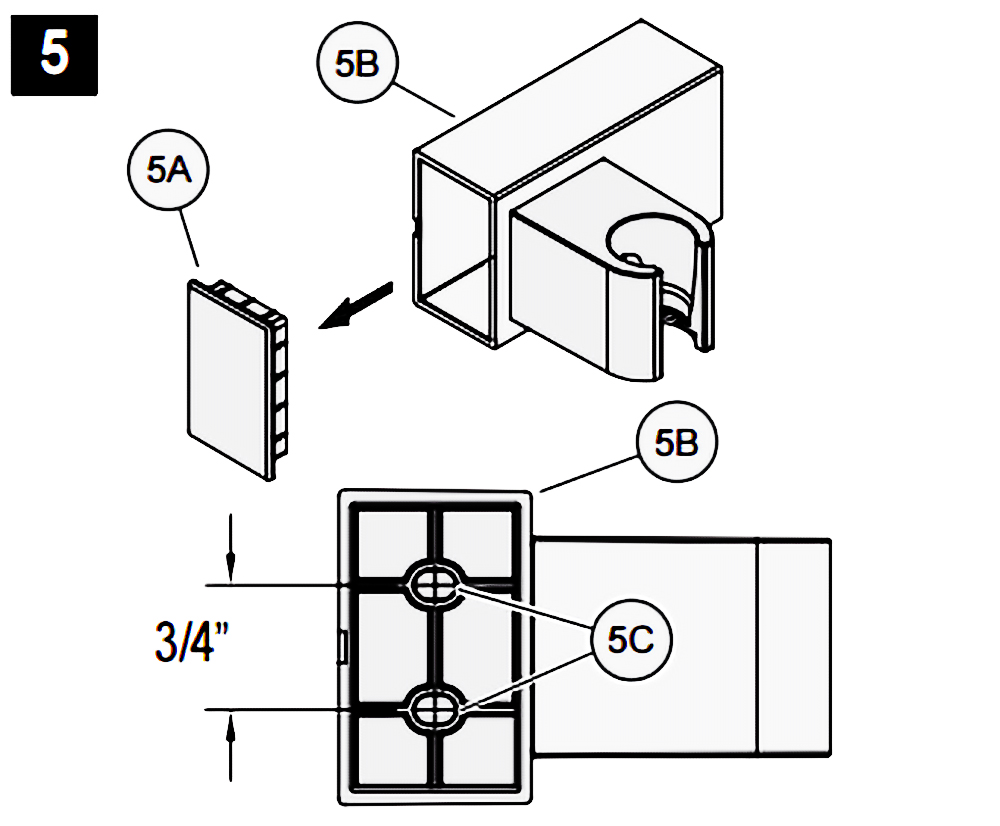
5. HOLE LOCATIONS FOR WALL MOUNT
Remove Front Cover (5A) from Wall Mount (5B). Use Wall Mount Screw Holes (5C) to place the desired location. Using a punch or awl, tap the screw hole locations. Holes must be vertically aligned.
- ANCHOR INSTALLATION
Drill two 1/4 dia. Holes (6A). If installing into a studs drill two 1/8 dia. holes and do not use Anchors (6B). Insert Anchors (6B) into Holes (6A) and tap flush with wall.
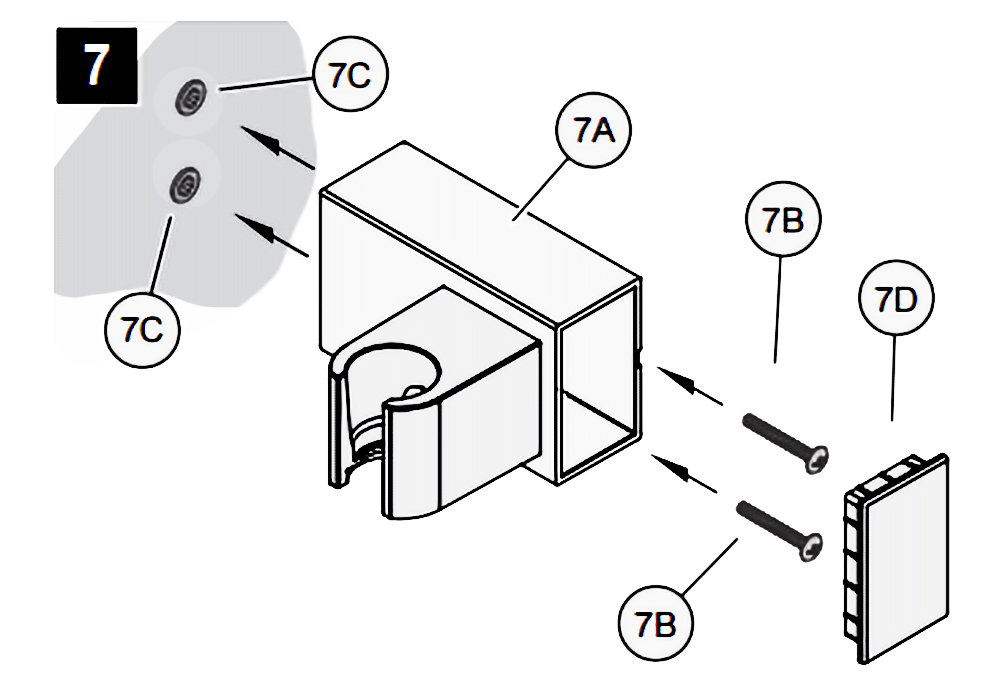
- WALL MOUNT INSTALLATION
Place Wall Mount (7A) into wall and inset Mounting Screws (7B) through Wall Mount Holes (7C) and tighten until Wall Mount (7A) is flush with the wall. Do Not Over Tighten! Insert Front Cover (7D) into Wall Mount (7A)
- DROP ELBOW & HOSE INSTALLATION
Apply PTFE plumbers tape on both ends of Pipe Nipple (8A) (not included). Screw Pipe Nipple (8A) into the elbow inside the wall. The Pipe Nipple (8A) is to project 1/4 3/4 from the finished wall. Screw Drop Elbow (8B) onto Pipe Nipple (8A) and tighten until Drop Elbow (8B) is property positioned and flush to the finished wall.
Place Rubber Seal (8C) inside Hex Hose Fitting (8D). Connect Hex Hose Fitting (8D) into Drop Elbow Outlet (8E) by turning Hex Hose Fitting (8D).
- UNIT STARTUP
Turn on hot and cold water supplies, and check all connections for leaks.
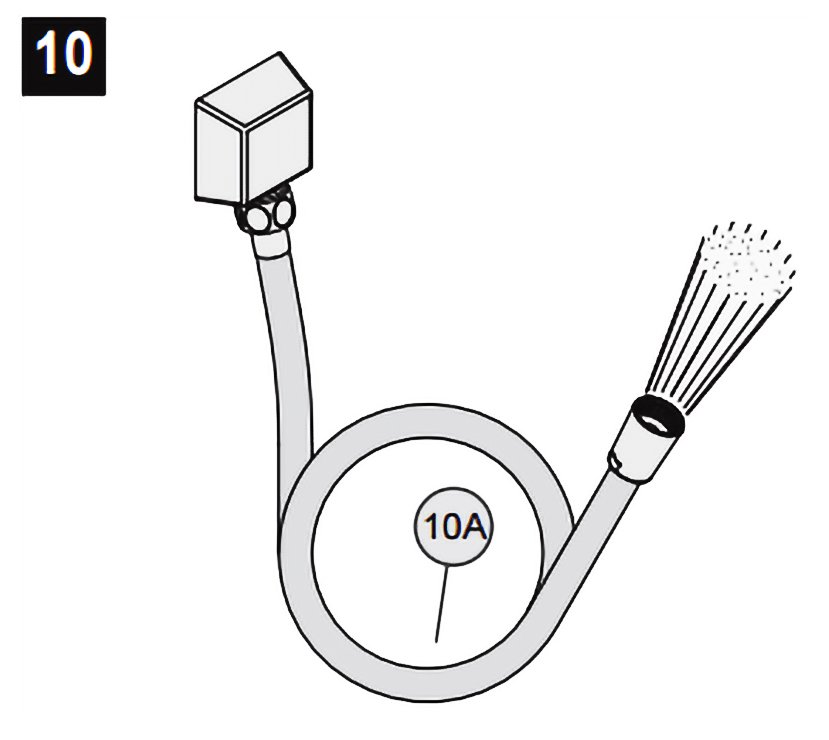
- FINAL FLUSHING
For final flushing, turn the valve on and allow water to run through the Hose (10A) for several minutes. Allow water to run for several minutes until all foreign matter clears the line.
|