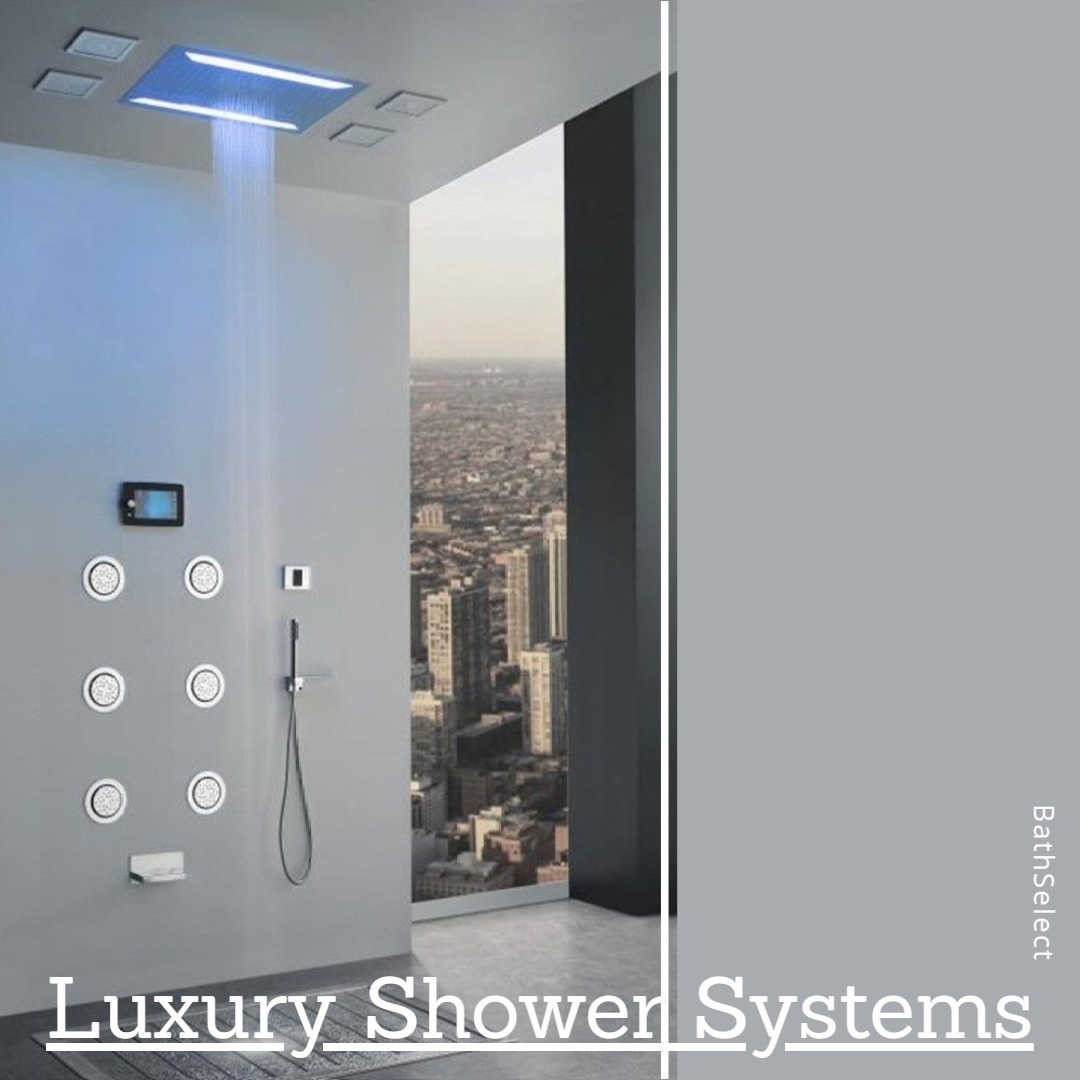
Ultimate Unique Design for Your Personnel Preference and Specific Needs
You can design your bathroom shower with BathSelect vast selection of
bathroom fixtures, including jetted body showers and shower massage sprays available in a variety of finishes, sizes, and styles. If you're shopping for a new jetted body shower as part of a whole scale bathroom renovation or just to add a touch of luxury to your pre-existing bathroom, then be sure to Shop BathSelect jetted body showers for the best value & price. Instant jets invigorate, wake and massage you as soon as you step in, and will surely help you get your day off to a fresh start.
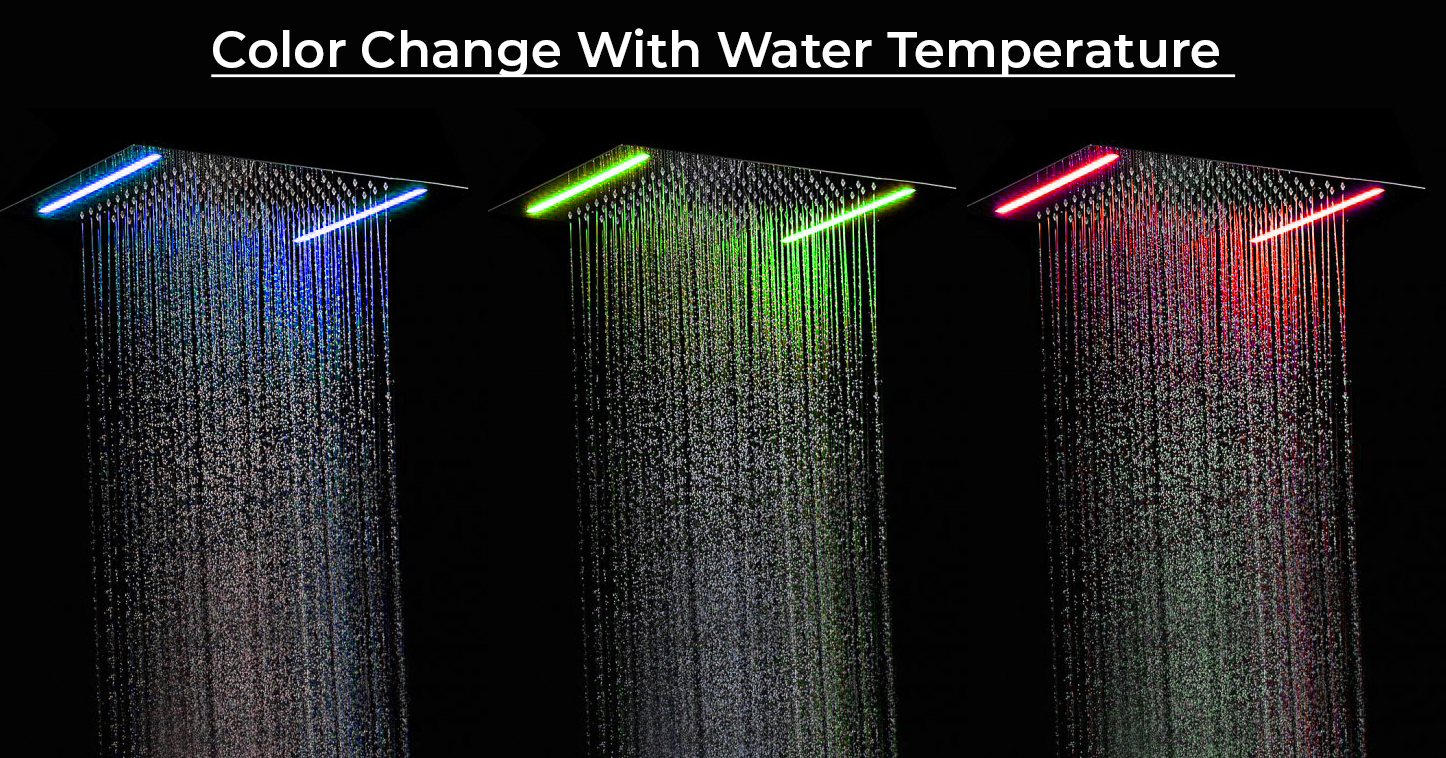
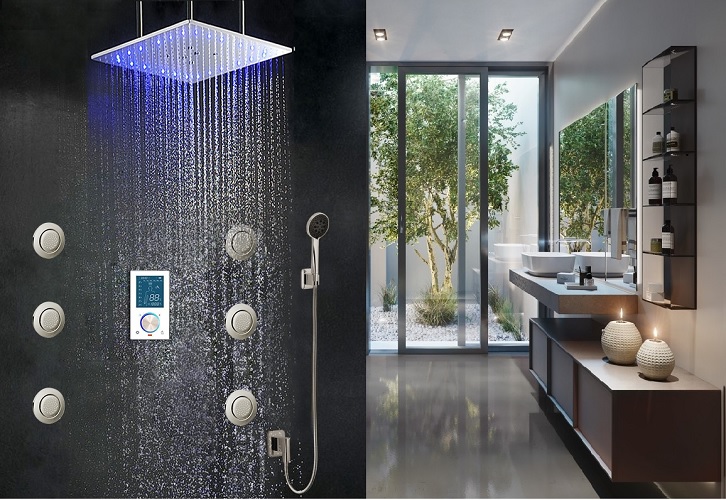
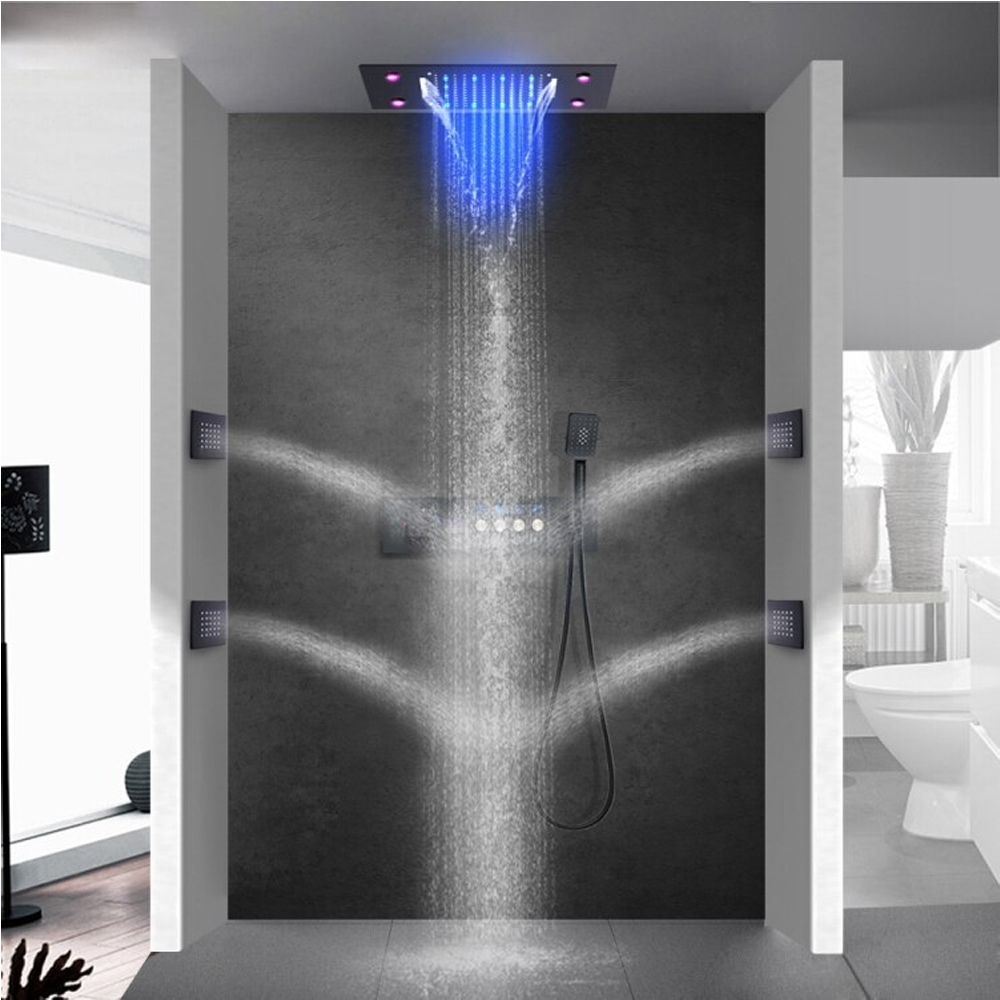
Our multi head shower system and multi jet shower shower systems with body sprays are available in many finishes to choose from. All our shower system with body jets comes with LED water powered options . This full body shower system comes with built in thermostatic shower mixer and are also available in digital display options. Such Jet shower will rejuvenate your bathing habits. With an invigorating shower with BathSelect showers, the options are endless. We go beyond daily showers; we help customize your shower experience. Enjoy a unique and customized experience using BathSelect
Body Massage Shower Sprays. Now ready shower jets for sale!
Create a unique and customized experience using
BathSelect Body Shower Massage Jets
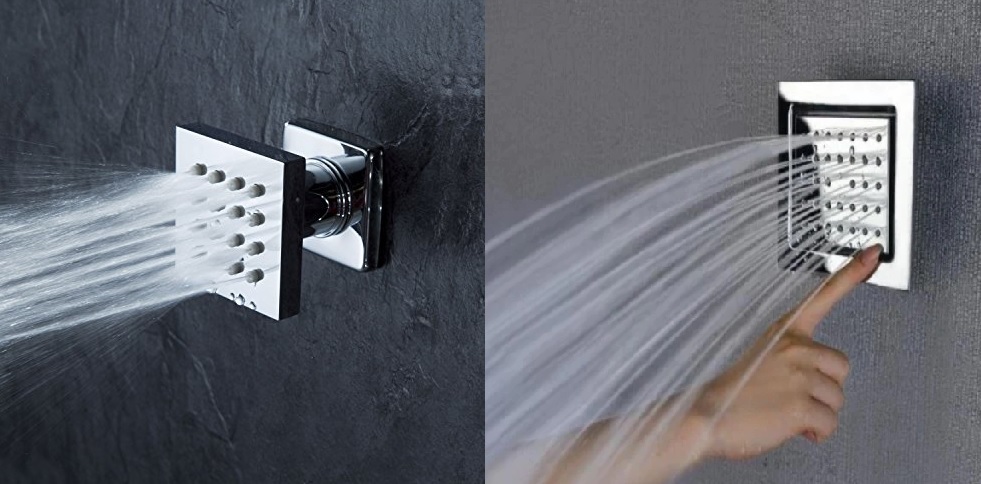
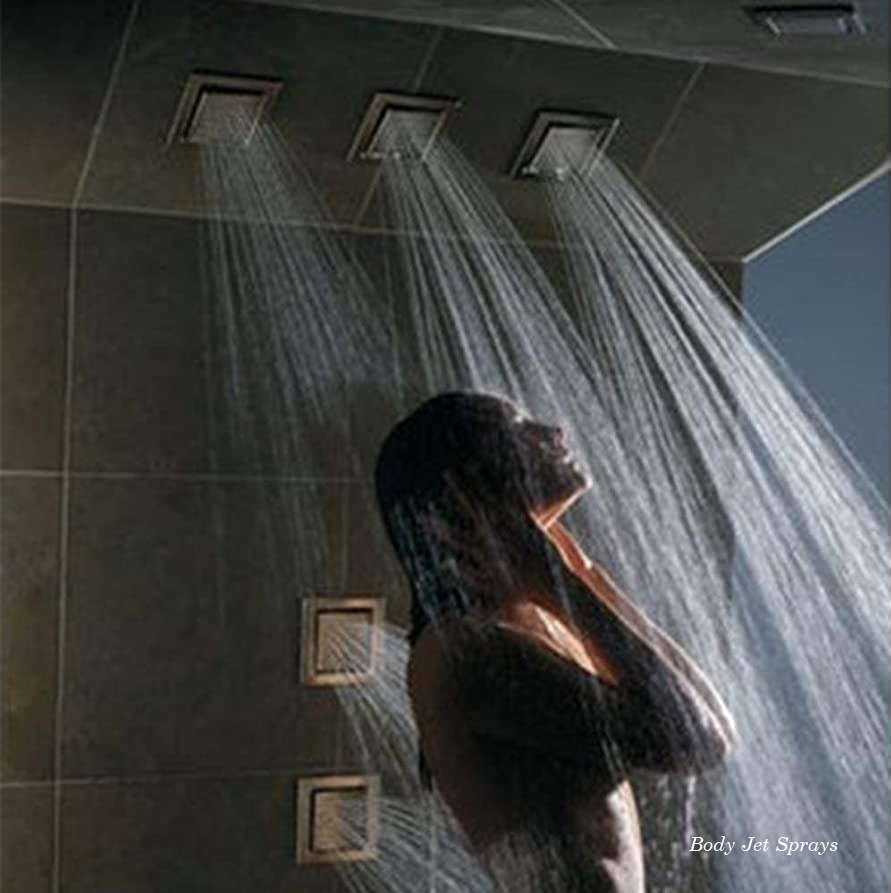
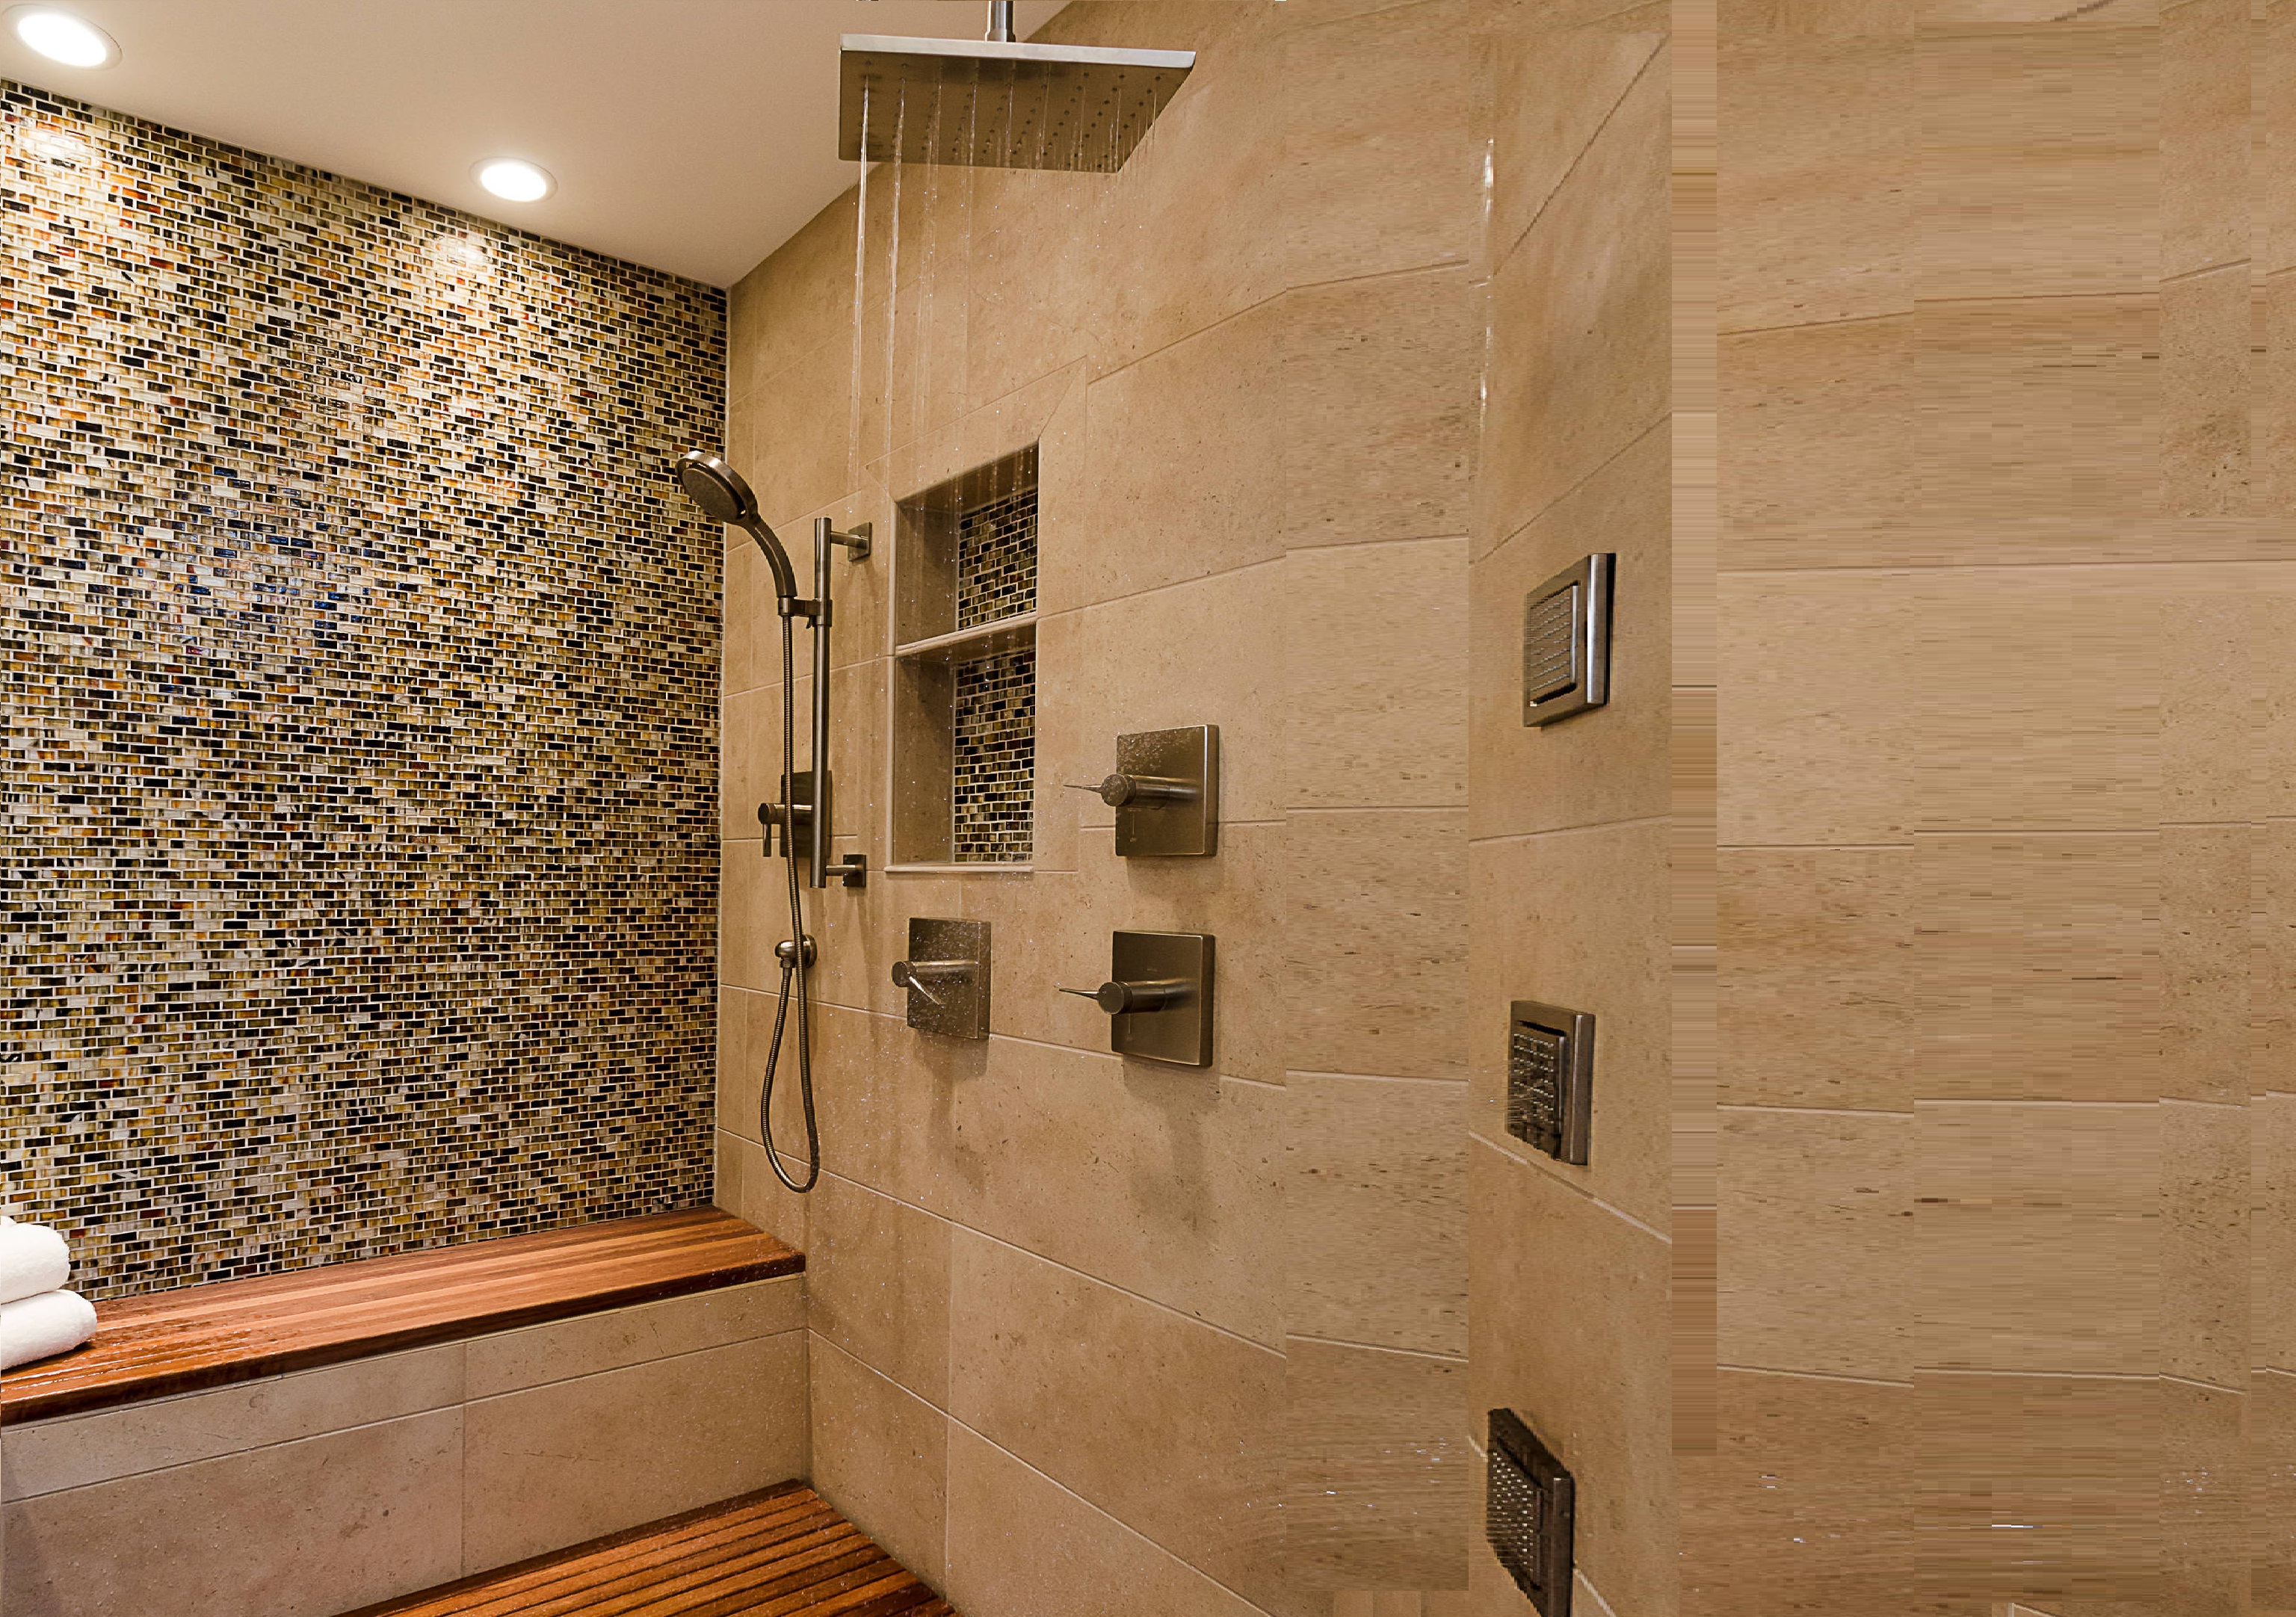
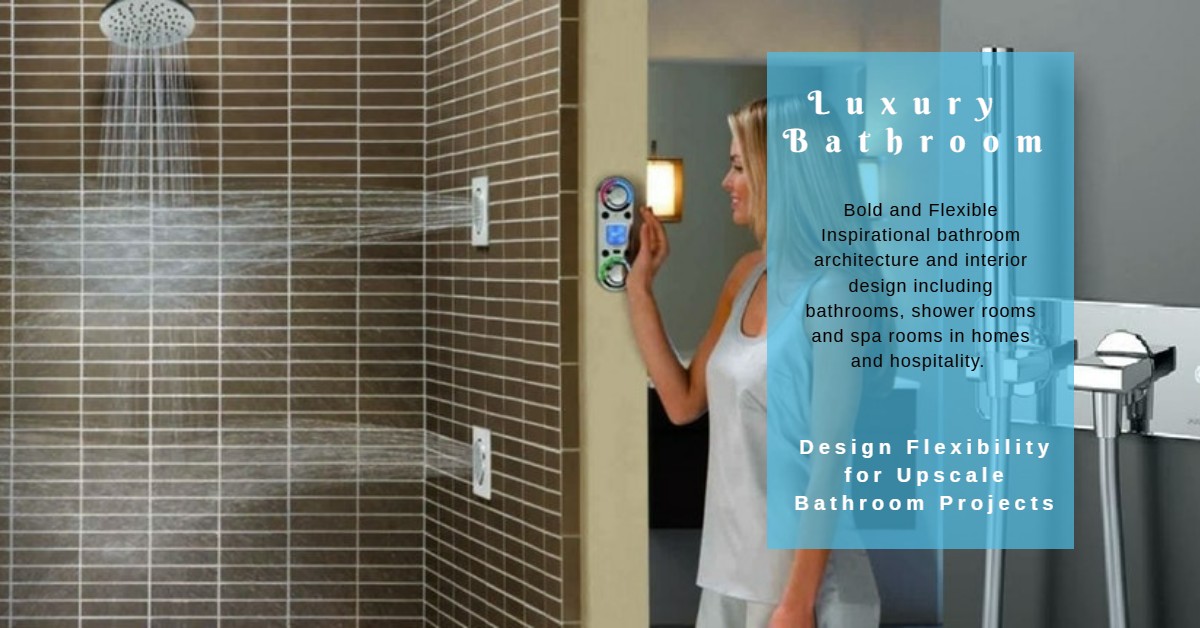
Our body massage shower system are designed to provide a more intense flow of water for a massage-like experience. BathSelect types of shower heads typically have multiple spray settings, you have an options of wide spray, concentrated spray, or a pulsating spray while the body shower jets can be integrated into your custom shower design to create a spa-like experience in the comfort of your own home. Also they can be controlled by separate valve or by a digital control panel that allows you to customize the flow and temperature of the water and the functions, the options are endless we go beyond plain showers; we help customize your shower experience.
Features & Benefits
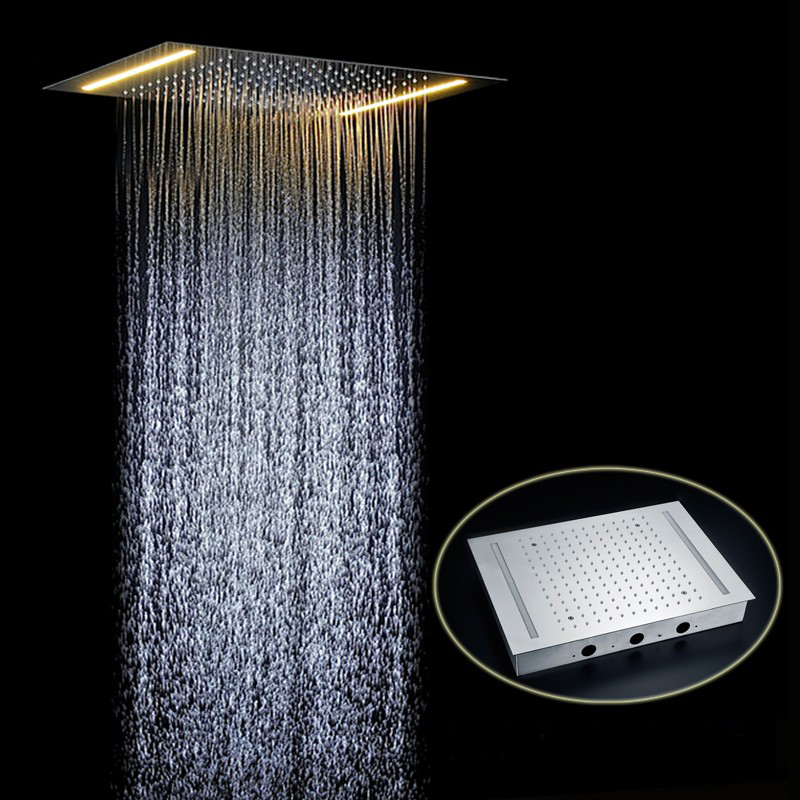
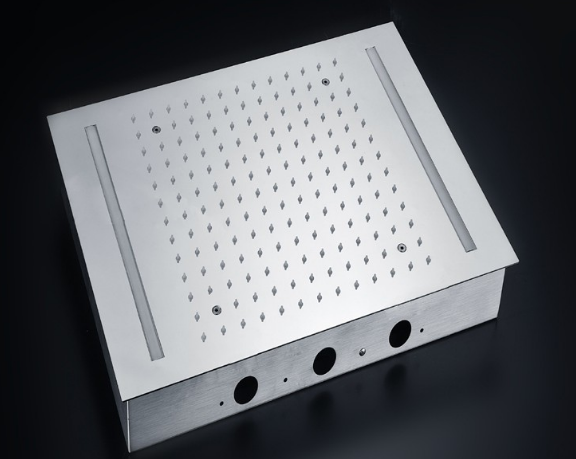
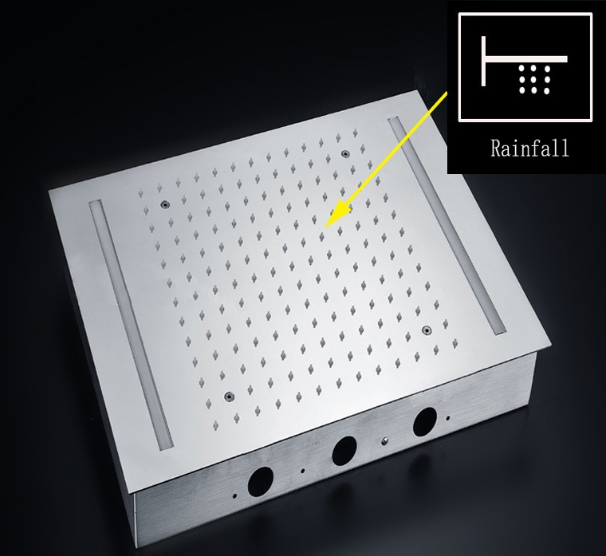
There are many types of shower massage systems available in the market today that offer different features and benefits and BathSelect offer many and beyond these popular options which include shower systems with body jets, multi-head shower systems, jet shower systems, and massage shower systems. BathSelect massage shower systems come with features such as rain shower heads, shower massage jets, shower body sprays, and full-body shower heads that can provide a spa-like experience in the comfort of your own bathroom. Shower systems with body jets are designed to deliver a full-body massage and create a spa-like experience in the shower. Multi-head shower systems typically feature multiple shower heads that can be used simultaneously or separately. BathSelect Jet shower systems use powerful jets to provide a more intense and invigorating shower experience. BathSelect Massage shower systems use water pressure to create a massage-like sensation and help ease sore muscles.
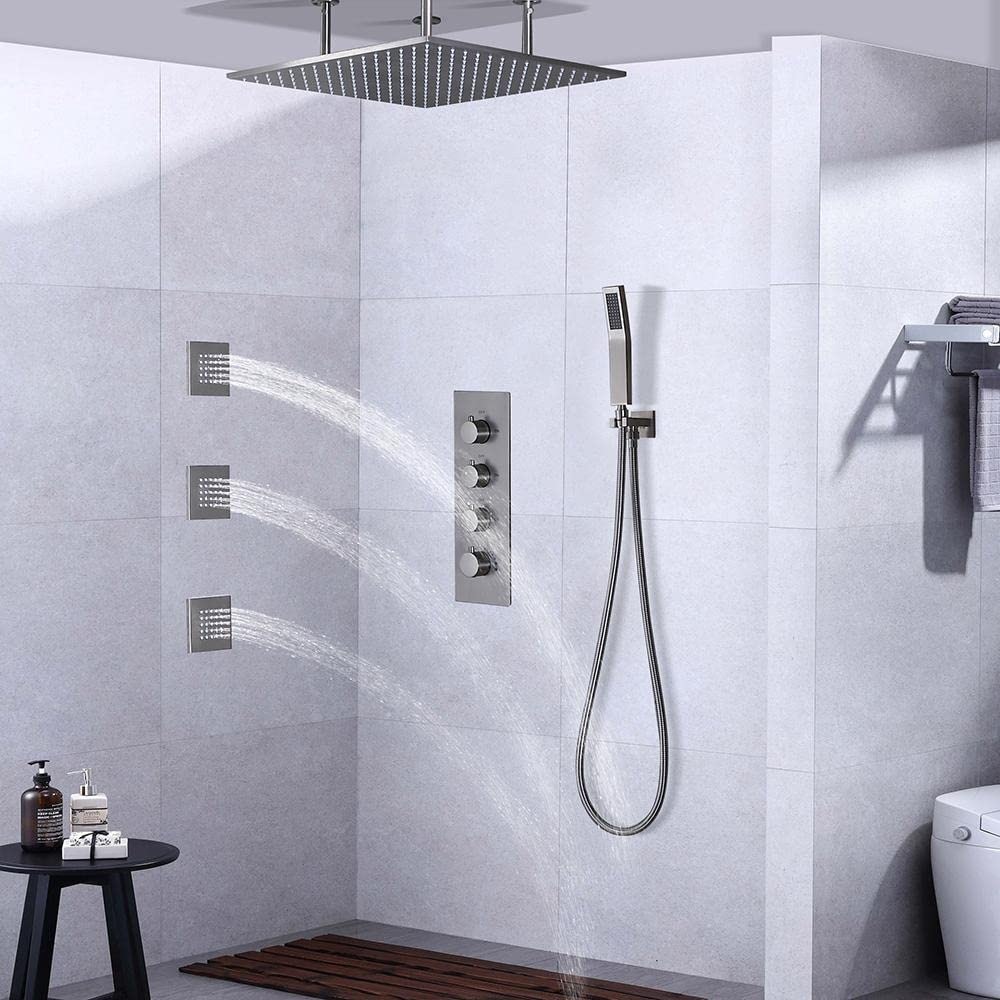
Other features of BathSelect shower systems can include rain shower heads, shower body sprays, and wall-mounted shower jets, which can provide a luxurious and customized shower experience. BathSelect Shower systems can customized and designed for use in both stand-up showers and bathtubs, with options like jetted tubs with showers or walk-in showers with body jets. When choosing BathSelect shower system, consider factors like the cost, functionality of the product, as well as the level of customization and spa-like features it provides. With so many options available, BathSelect make it easy for you to find a shower system that can meet your needs and provide a luxurious and relaxing shower experience. There are a few factors that can make one shower jet better than another. Here are some of the most important: Water pressure; BathSelect shower jet are available with higher water pressure and can provide a more invigorating and effective showering experience.
If you're looking for a powerful, massaging shower, you'll want to choose BathSelect. Adjustability: BathSelect shower jets can be adjusted to allow for different spray patterns and water flows. This is useful if you want to customize your shower experience to suit your preferences. Coverage; BathSelect provides different sizes and shapes of shower jets this impact how well the water is distributed across your body. In addition BathSelect provides larger showerhead so it can provide you with better coverage, while a smaller one may be more focused.
BathSelect offers a comprehensive collection of high-quality showers, perfectly complementing any architecturally inspired bathroom.
We provide extensive selection of unique designs, and top quality bathroom fixtures, ideally tailored for your architecturally-inspired bathrooms!
Material and durability; The material the shower jets are made of can affect their durability and longevity, we provide stainless steel or brass shower jets and these are much more durable than plastic ones. Design; Our design of the shower jet can also impact its performance. While our showerheads are designed to create a rainfall effect, while others are designed for a more focused stream of water. Ultimately, the best shower jet for you will depend on your individual preferences and needs. It's a good idea to browse our different types of showerheads to find the one that works best for you.


 (1)2.jpg)