|
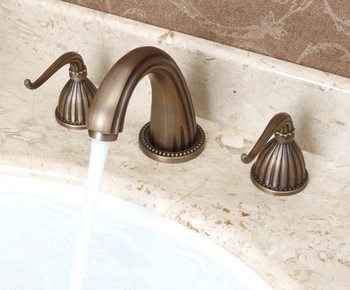
Installation Instructions for Venice Dual Handle Brass Antique Faucet
|
|
Faucet Care and Maintenance
IMPORTANT FAUCET INSTALLATION NOTICE
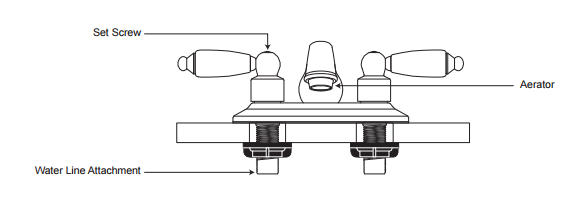
Before using a newly installed faucet, remove the aerator, if applicable. Turn on the water to the faucet and let it flow for 15 seconds. This flushes out sediment in the water line, preventing it from becoming lodged in the faucet valves, which can affect performance and cause damage to the faucet.
FLUSHING WATER LINES
If your faucet has an uneven flow or is dripping, it may be due to a buildup of sediment. Follow these steps to restore normal water flow. If your faucet does not have an aerator, proceed to step 4.
What Youll Need: Open-ended wrench, large bucket, pliers, towel, rag
|
1. Place a towel at the base of the faucet and remove the faucet aerator. If using pliers, place a rag around the aerator to protect the finish.
|

|
|
2. Turn on the cold and hot water, letting the faucet run for 10-15 seconds
|

|
|
3. Rinse out the aerator, carefully noting the placement of washers inside. replace the aerator and check water flow. If there is no improvement, continue to Step 4.
|

|
|
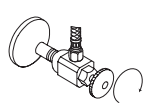
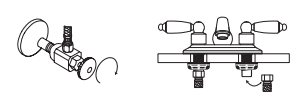
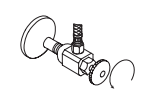
4. Close the shut-off valves or turn off your homes water main, twisting the valve clockwise as far as possible.
|
|
|
5. Turn on the hot and cold faucet taps to release any pressure and excess water. Turn off.
|

|
|
6. With a wrench, remove water lines underneath the faucet, placing the ends in a bucket.
|
|
|
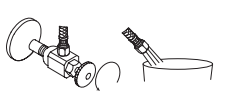
7. Open the shut-off valve or water main and let water flow into the bucket for 15 seconds.
|
|
|
8. Close the shut-off valve or main supply, then reattach the water lines to the faucet.
|
|
|
9. Reopen the valves to restore water to the faucet and check for leaks.
|
|
.
INSTALLATION INSTRUCTIONS
Before installing, read entire Widespread Faucet Installation Instructions. Observe all local building and safety codes.
For the following Installation Instructions for your new Widespread Faucet it is assumed that any old fixtures have been removed and any repairs or modifications to the water supply have been completed.
Unpack and inspect the product for any shipping damages. If you find damages. If you find damages, do not install. Contact Customer Service at 1-800-856-(Bath)2284. If you need assistance or have questions while installing your Widespread Faucet, contact Customer Service.
We recommend consulting a professional if you are unfamiliar with installing bathroom fixtures.
TOOLS AND MATERIALS:
- Adjustable Wrench
- Silicone Sealant
- Damp Cloth
INSTALLATION
Install the rough-in valve body behind the finished wall. Attach the valve body to wood blocking between two wall studs with wood screws. Be sure that the rough-in valve is completely level, and connect to the main water supply.
- When the wall around the rough-in valve is finished, install your faucet trim.
- If your faucet spout is not assembled, assemble by connecting the threaded outlet to the faucet body. If your spout is already assembled move on to the next step.
- If your faucet features a decorative face plate, secure the face plate to the wall with silicone sealant before installing your handle and spout trim pieces. Make sure that the face plate is properly aligned over the rough-in valve and perfectly straight. If your faucet does not feature a face plate move on to the next step.
- If the decorative spout escutcheon is not attached, place the escutcheon on the body of the spout and install the spout over the spout shank. Screw the spout into place and press the escutcheon firmly against the finished wall.
- Tighten any set screws in the spout with the Allen wrench.
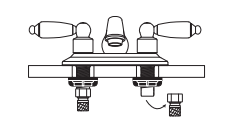
- Install the handle(s) and any necessary hardware and tighten the set screws with your Allen wrench. If rubber O-rings or sealing gaskets are included, Place between the handle body and wall to create a water tight seal.
- When your faucet installation is complete, turn on the water supply. Check to make sure that all connections are tight (no water should be leaking) and that the hot and cold supplies are working correctly. Turn the water on and allow the water to flow through the spout for approximately 60 seconds. Allow sealant to cure for 24 hours before use.
|


