dgtssyt.jpg)
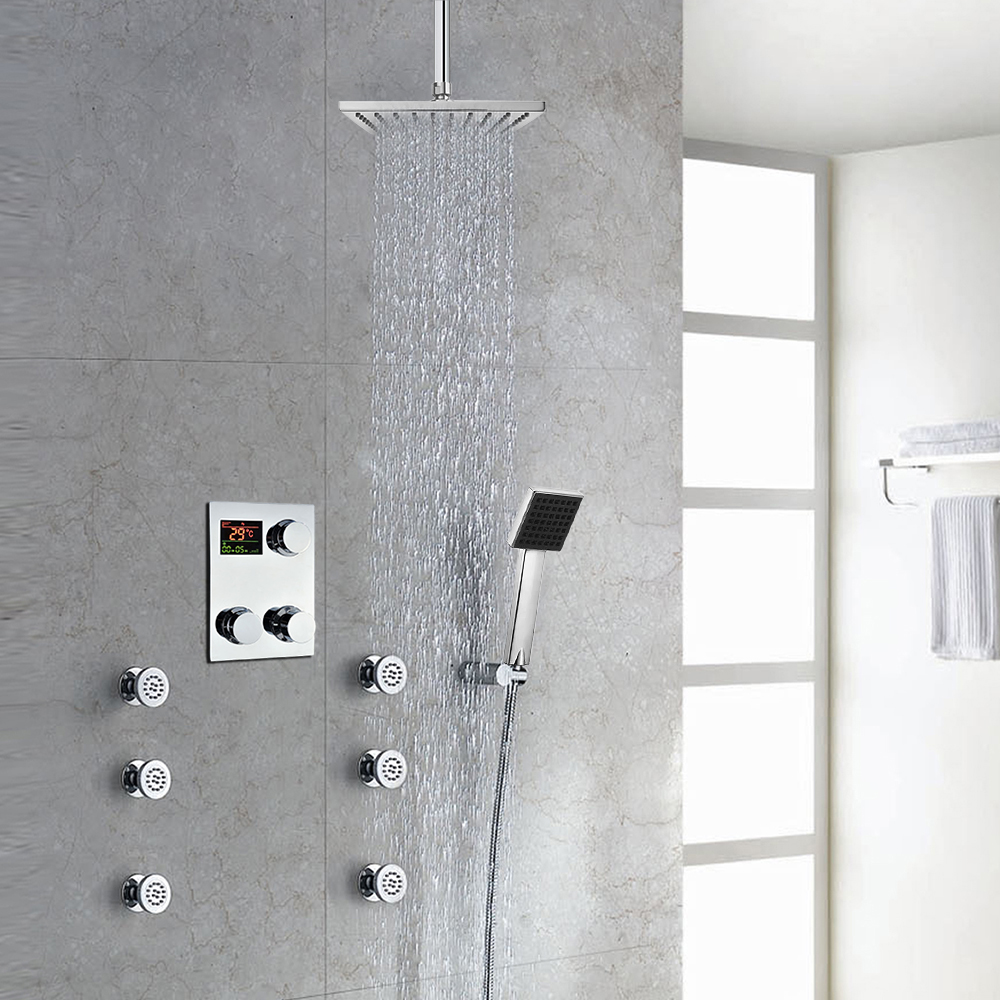
Installation Instructions for Thermostatic Digital Display Bathroom Rainfall Shower Set
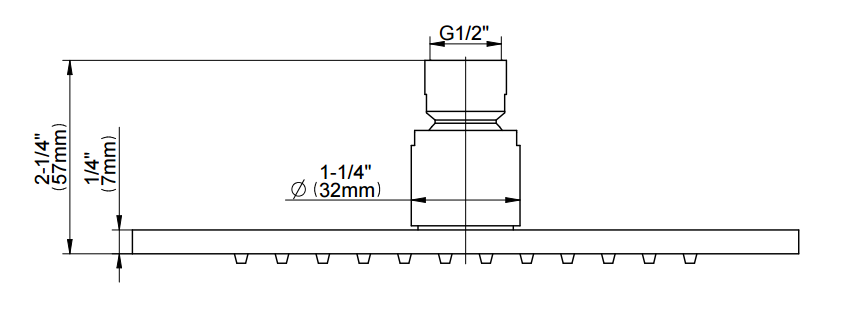
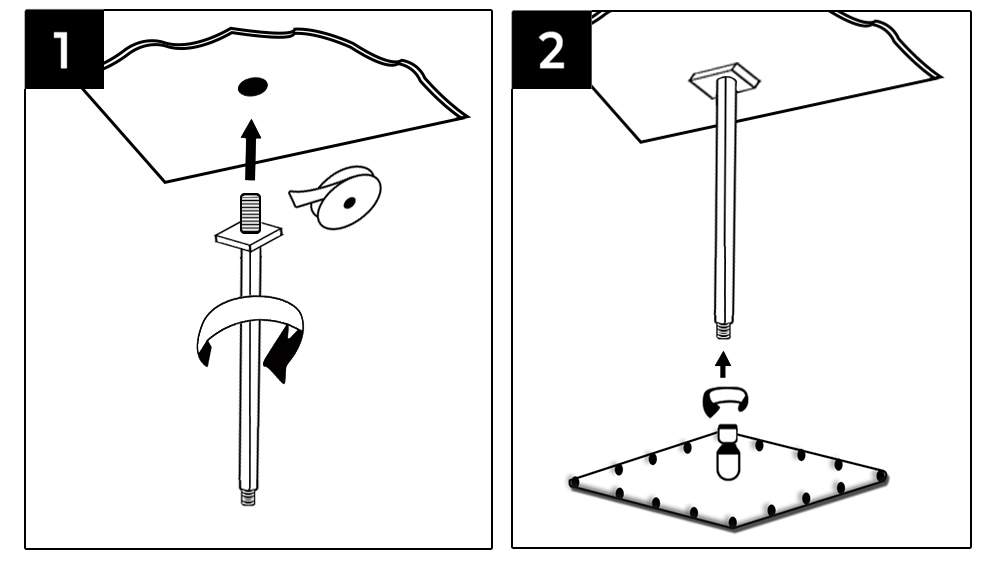
Shower Head Installation
- Remove your existing shower head with a wrench.
- Set the wrench in place and turn the nut to the left to loosen it.
- Have a hand ready to catch the shower head when it falls so that the metal doesnt crack your shower floor.
- Clean the threads of the base of the shower head steel wool.
- Be sure to remove any debris that had collected around the threads.
- Wrap the threads with Teflon tape, This tape comes with almost all new shower faucets and heads and provides traction for the new hardware.
- Place a rubber O-ring inside the new shower head and water connection, this prevents any leaks and improves water pressure.
- Tighten the LED shower head.
- Test the Temperature Controlled Shower Head to make sure there are no leaks and that everything is working properly.
- Now you have a huge improvement in your bathroom for a minimal amount of cost and effort.
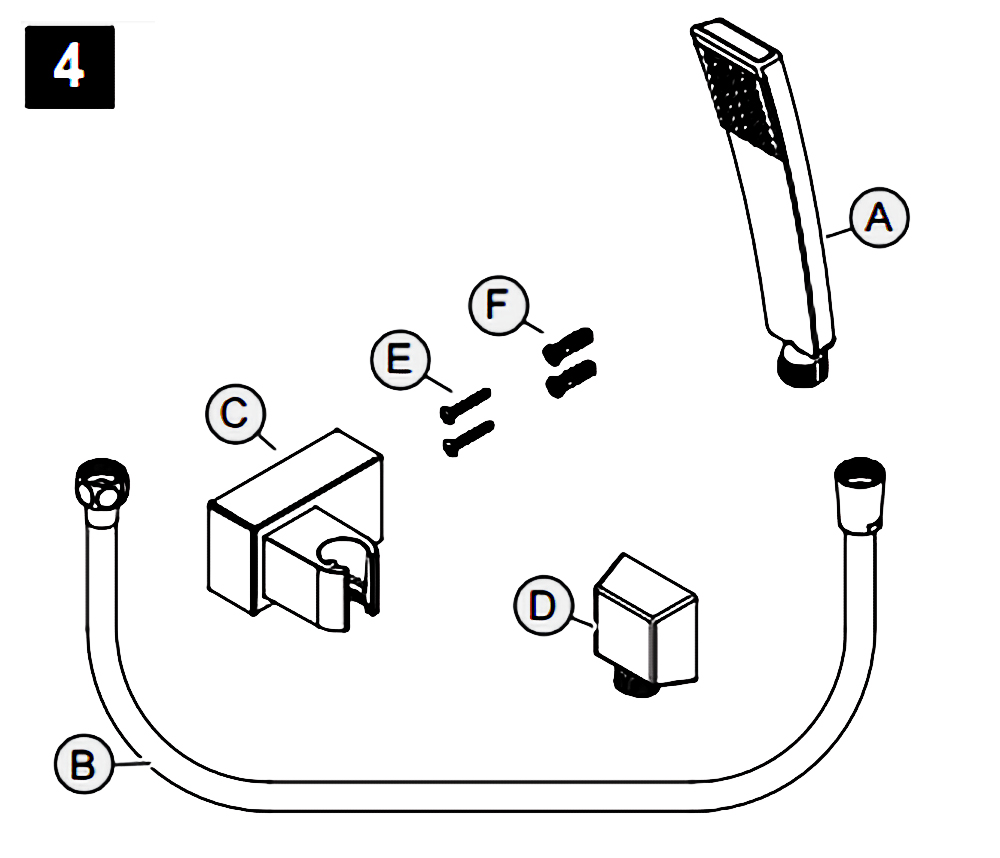
Hand-Held Shower Instructions
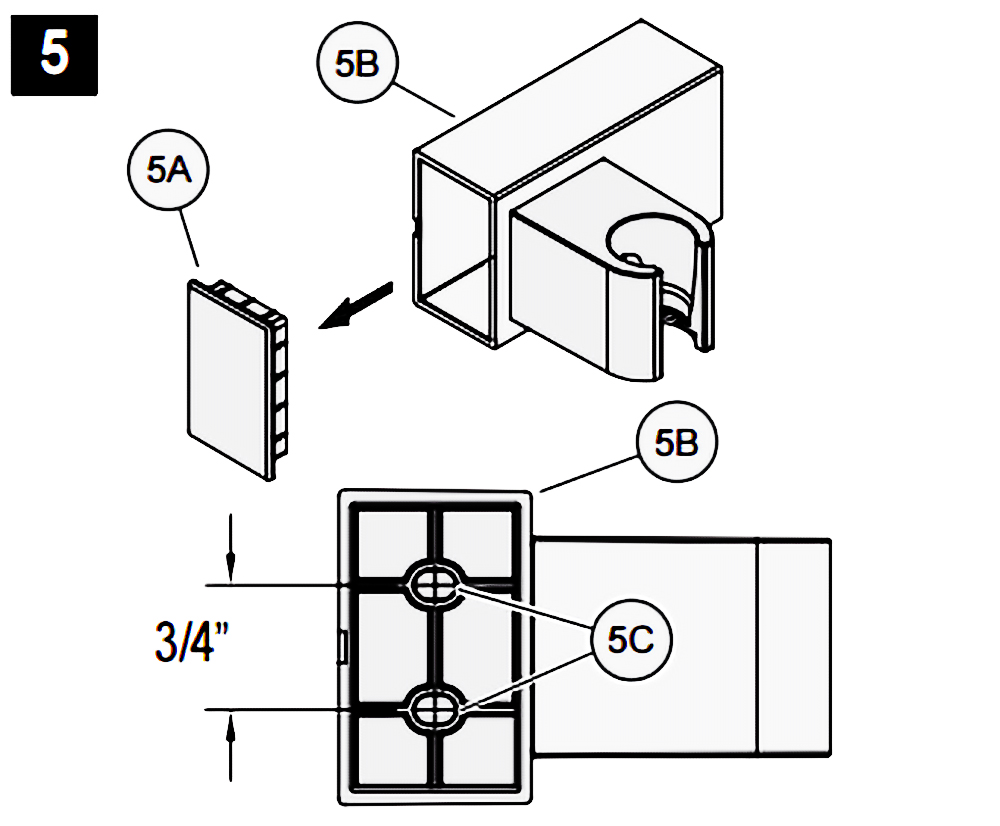
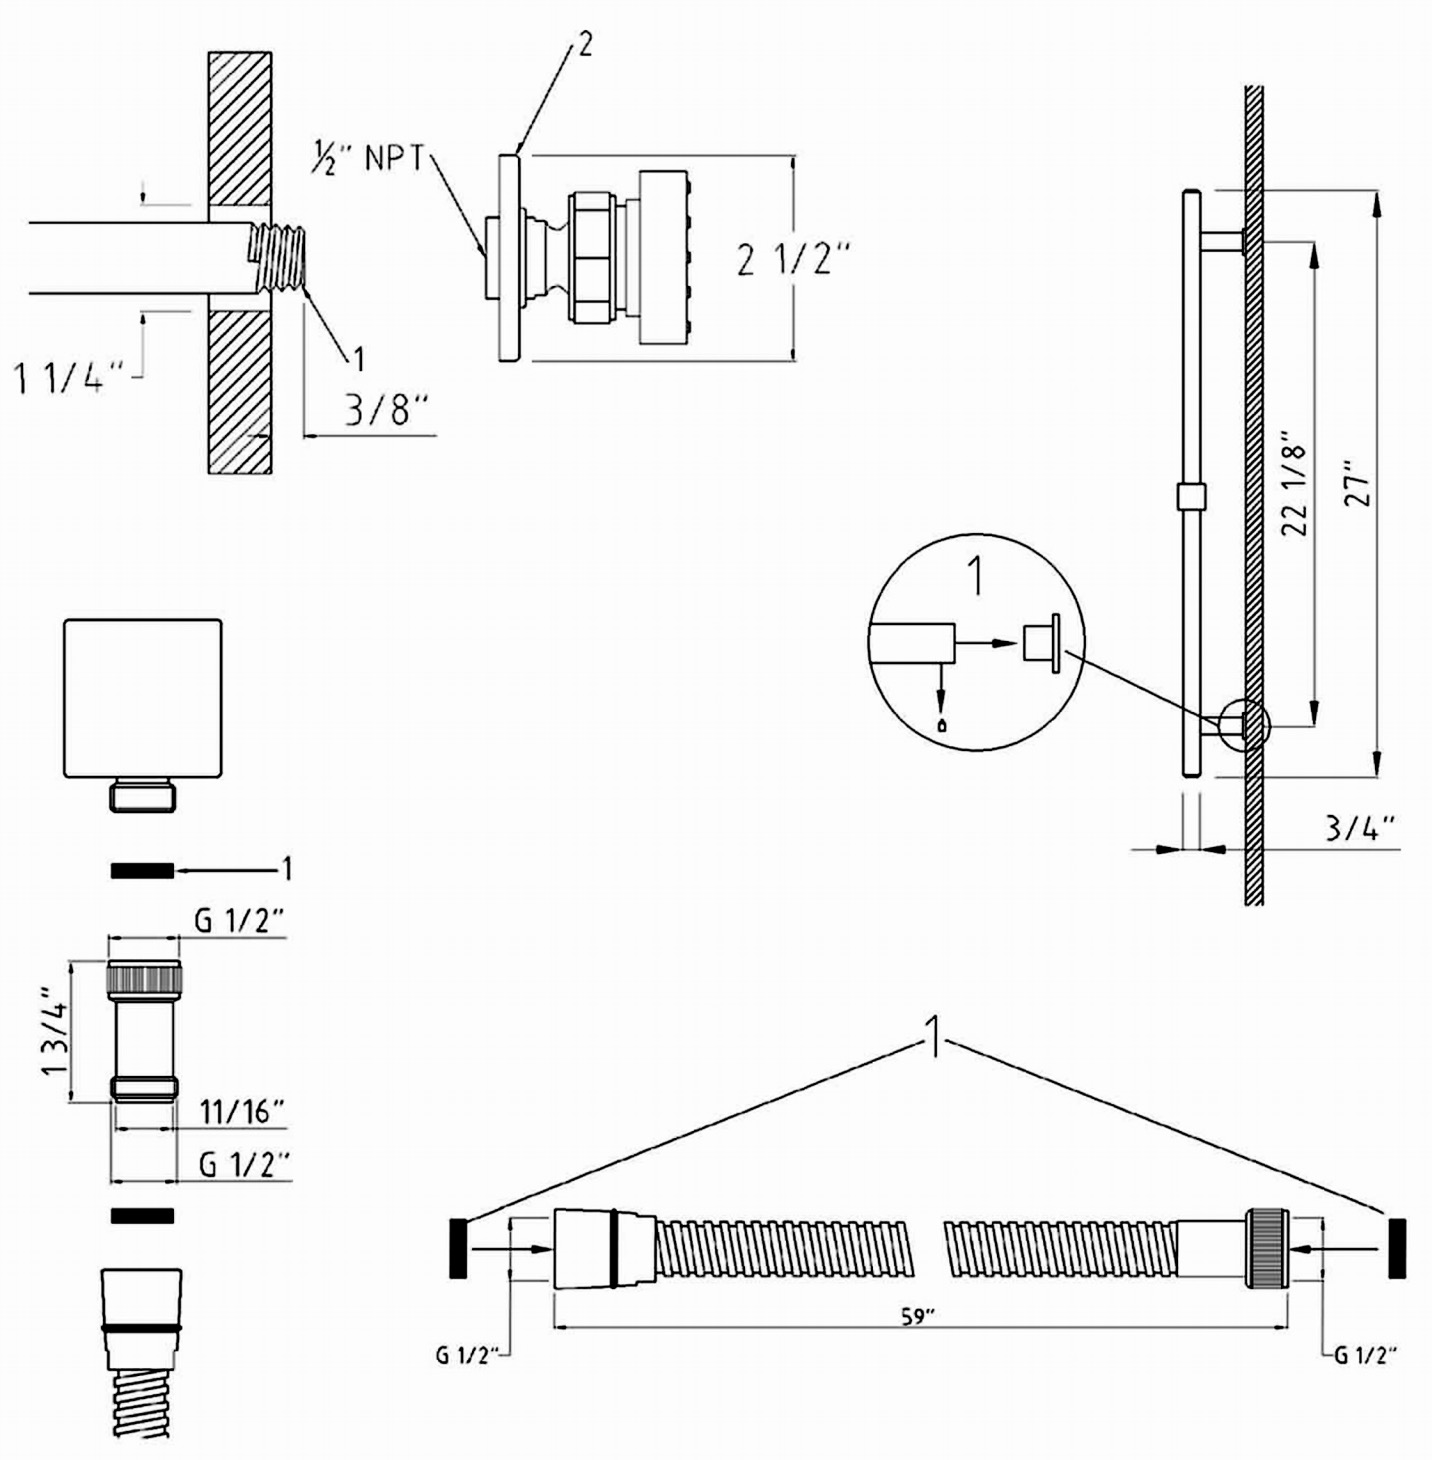
5. HOLE LOCATIONS FOR WALL MOUNT
Remove Front Cover (5A) from Wall Mount (5B). Use Wall Mount Screw Holes (5C) to place the desired location. Using a punch or awl, tap the screw hole locations. Holes must be vertically aligned.
6. ANCHOR INSTALLATION
Drill two 1/4 dia. Holes (6A). If installing into a studs drill two 1/8 dia. holes and do not use Anchors (6B). Insert Anchors (6B) into Holes (6A) and tap flush with wall.
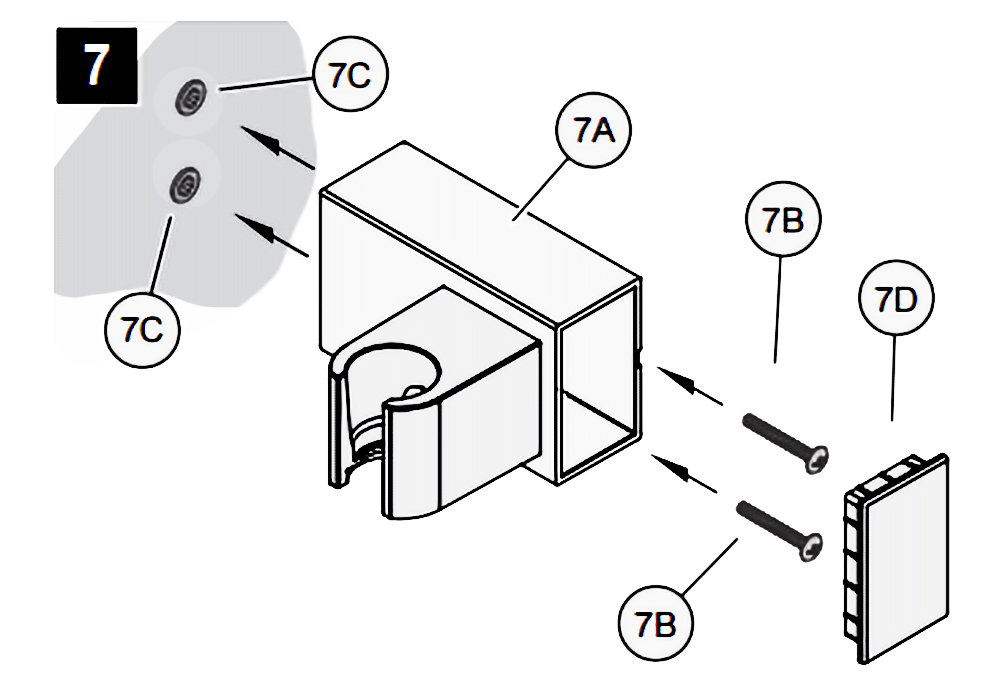
7. WALL MOUNT INSTALLATION
Place Wall Mount (7A) into wall and inset Mounting Screws (7B) through Wall Mount Holes (7C) and tighten until Wall Mount (7A) is flush with the wall. Do Not Over Tighten! Insert Front Cover (7D) into Wall Mount (7A)
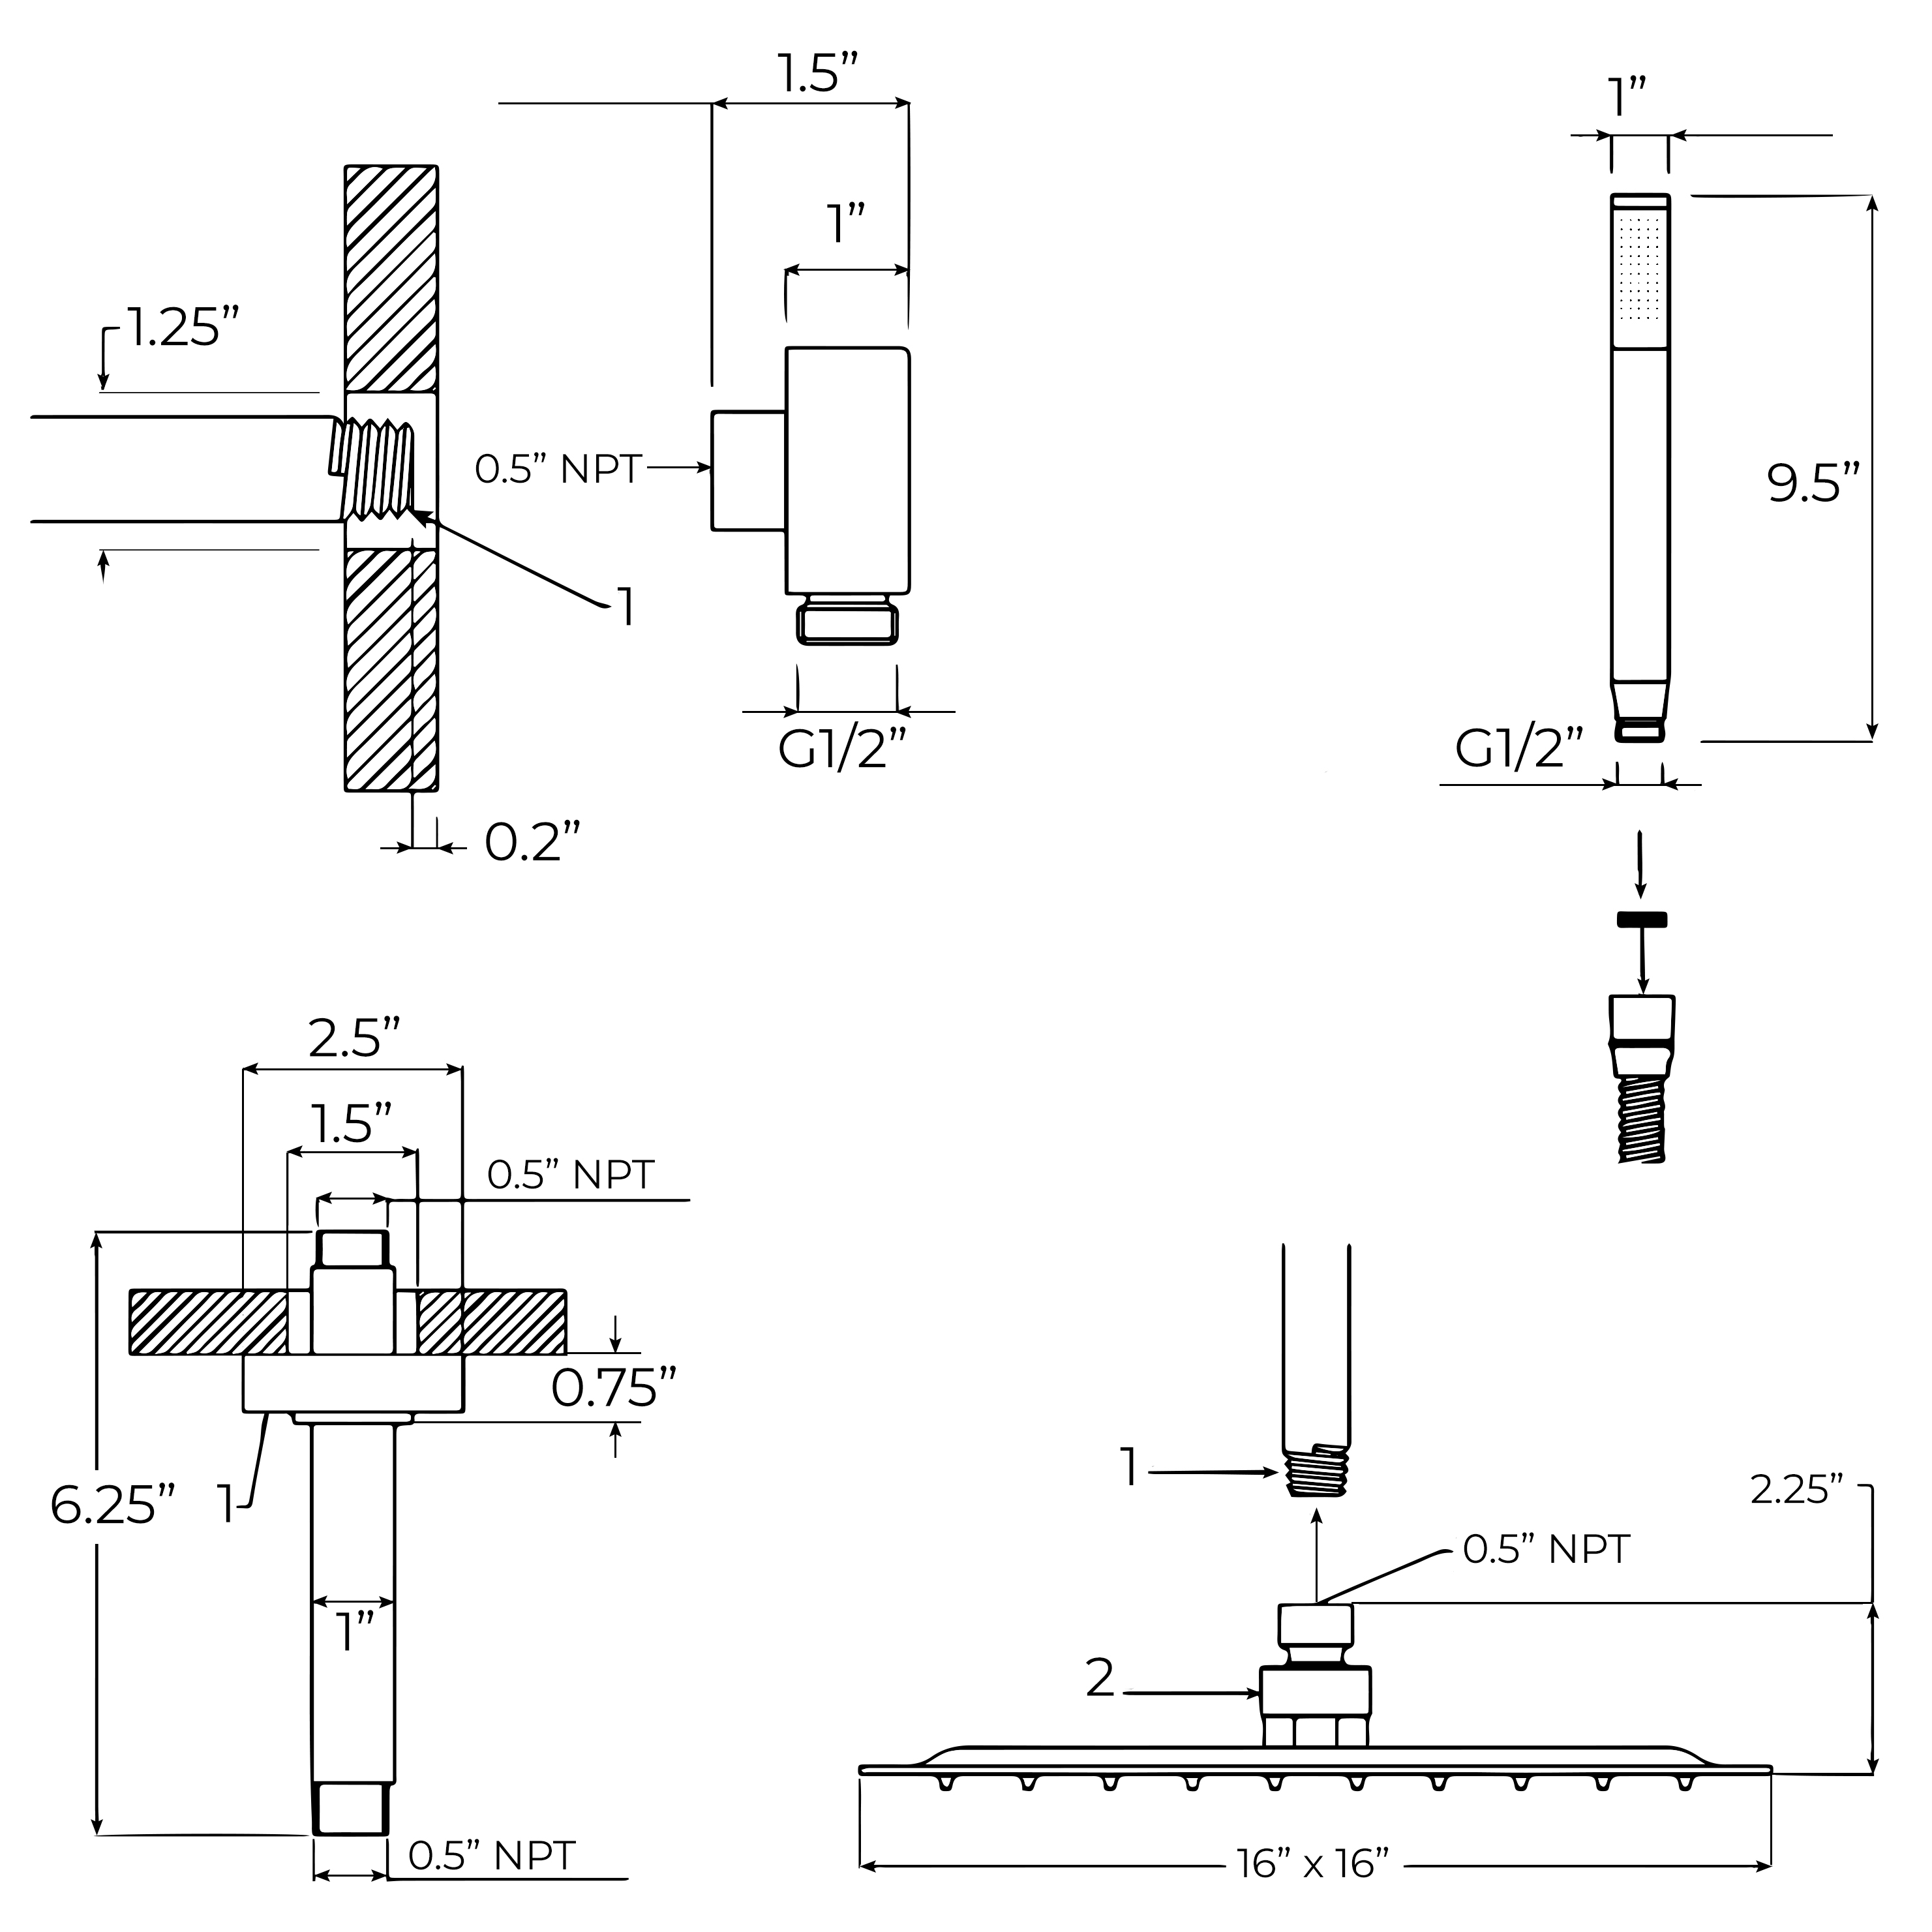
8. DROP ELBOW & HOSE INSTALLATION
Apply PTFE plumbers tape on both ends of Pipe Nipple (8A) (not included). Screw Pipe Nipple (8A) into the elbow inside the wall. The Pipe Nipple (8A) is to project 1/4 3/4 from the finished wall. Screw Drop Elbow (8B) onto Pipe Nipple (8A) and tighten until Drop Elbow (8B) is property positioned and flush to the finished wall.
Place Rubber Seal (8C) inside Hex Hose Fitting (8D). Connect Hex Hose Fitting (8D) into Drop Elbow Outlet (8E) by turning Hex Hose Fitting (8D).
9. UNIT STARTUP
Turn on hot and cold water supplies, and check all connections for leaks.
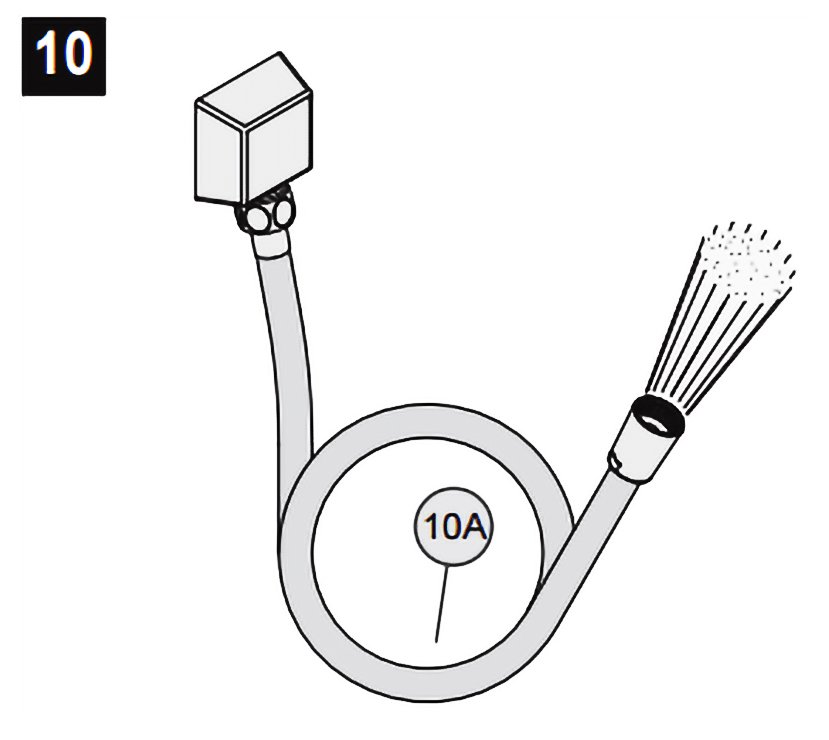
10. FINAL FLUSHING
For final flushing, turn the valve on and allow water to run through the Hose (10A) for several minutes. Allow water to run for several minutes until all foreign matter clears the line.
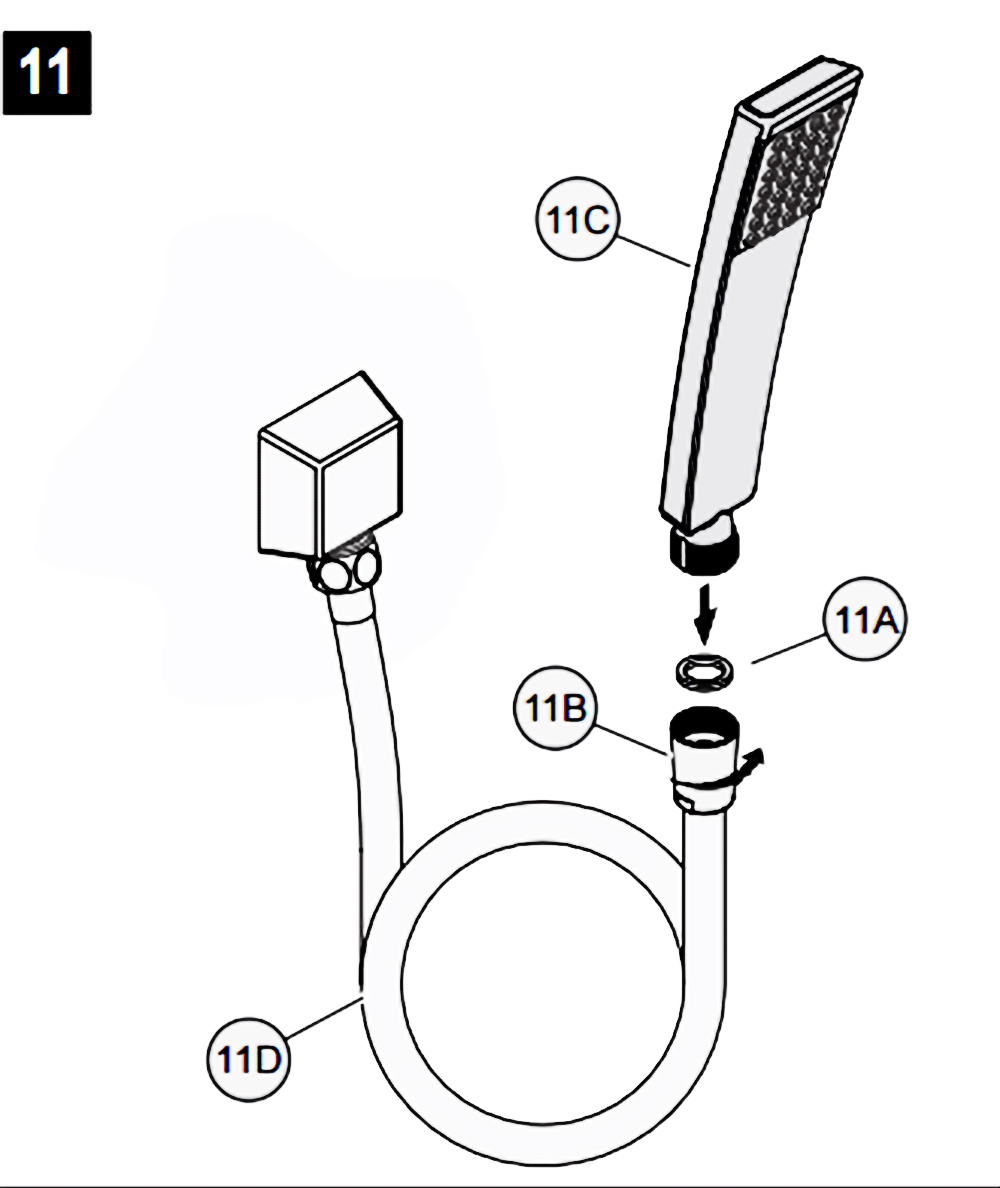
11. SHOWER ARM INSTALLATION
Place Rubber Seal (11A) inside Tapered Hose Fitting (11B). Conned Hand Shower (11C) to Hose (11D) by turning Tapered Hose Fitting (118) clockwise.
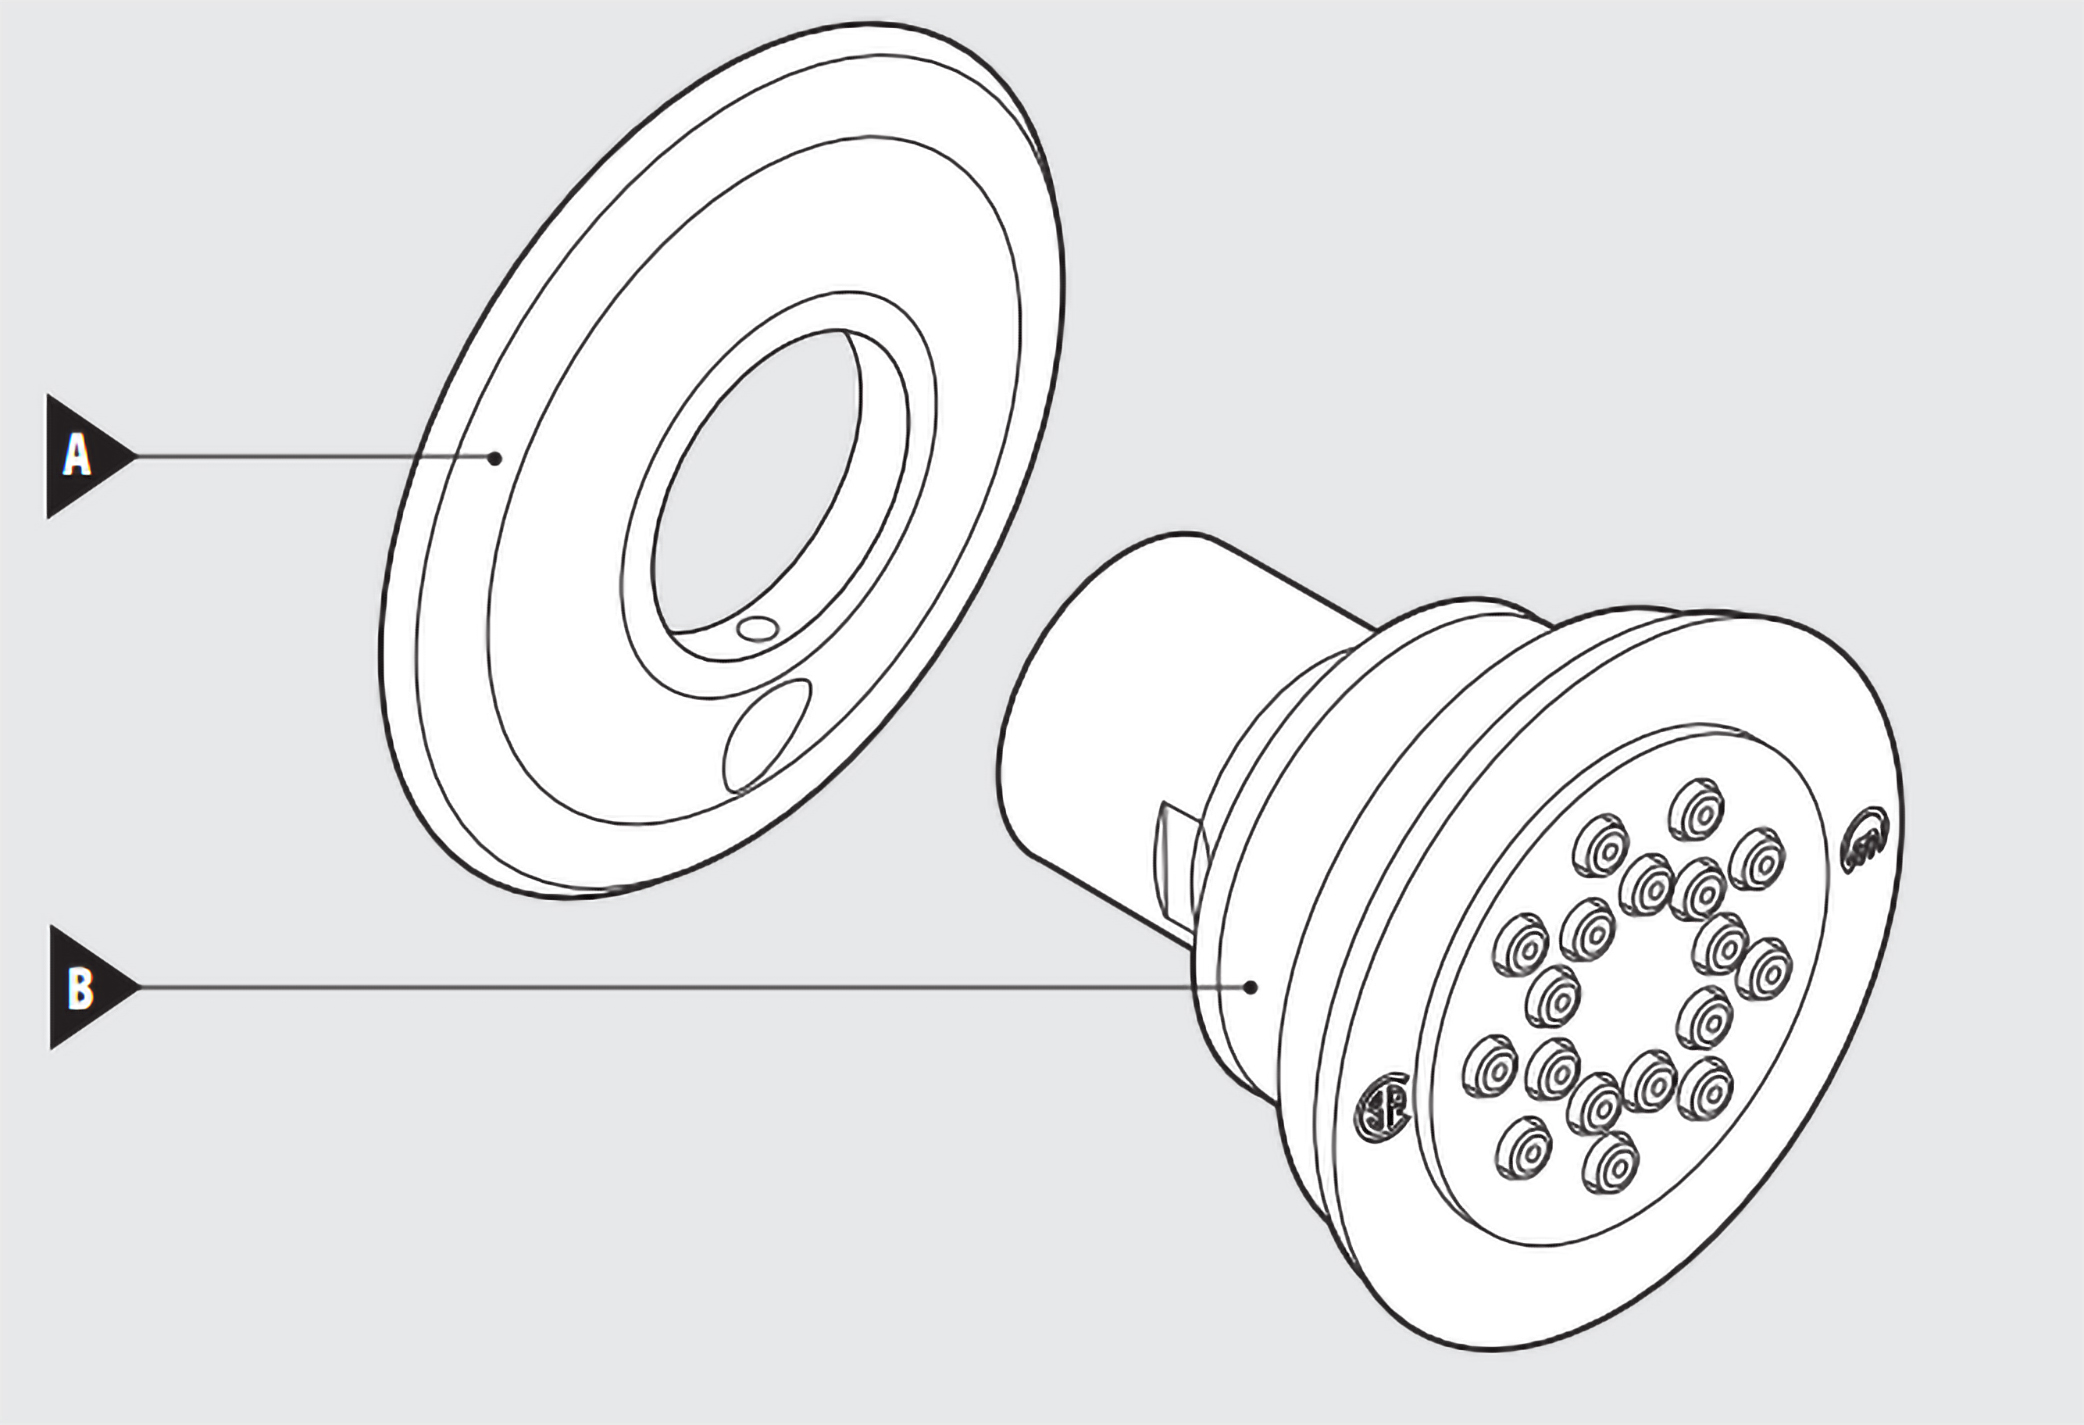
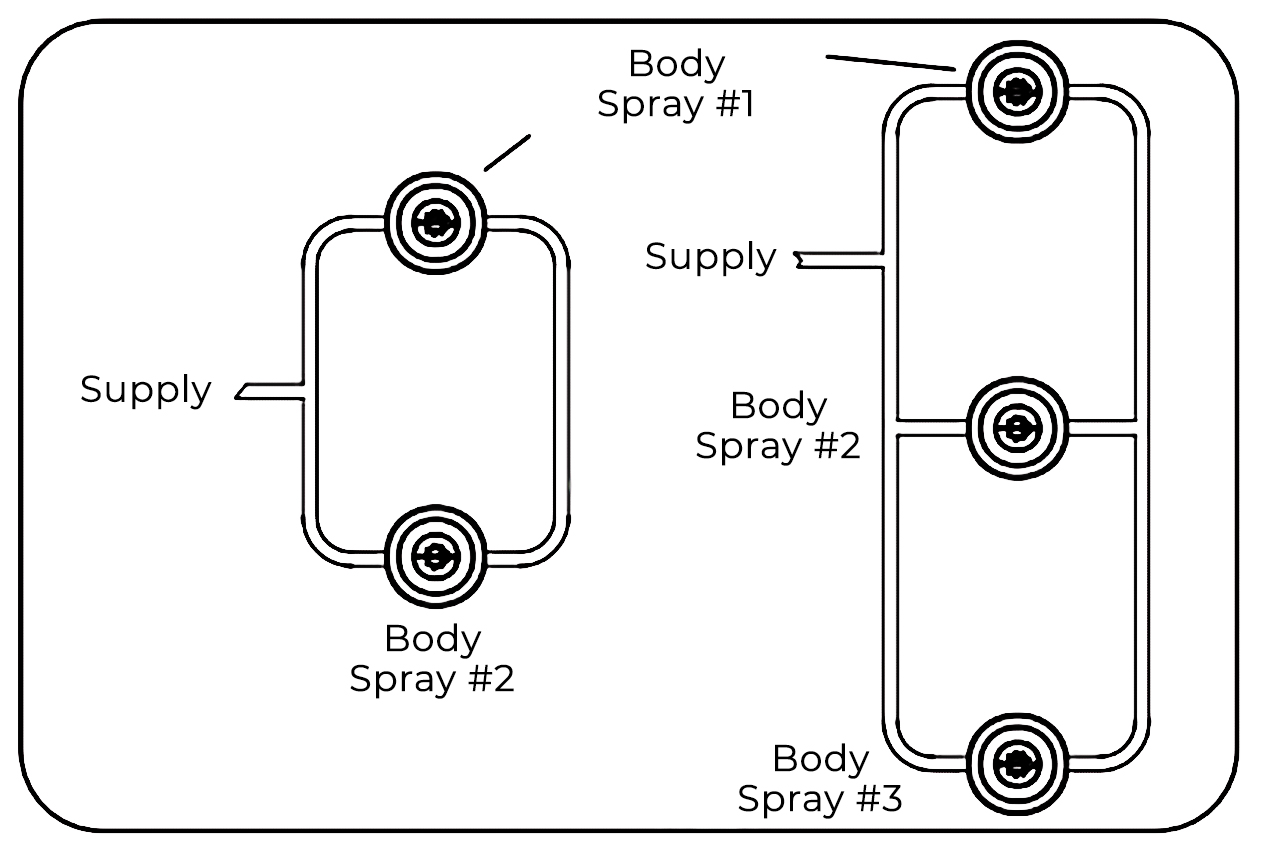
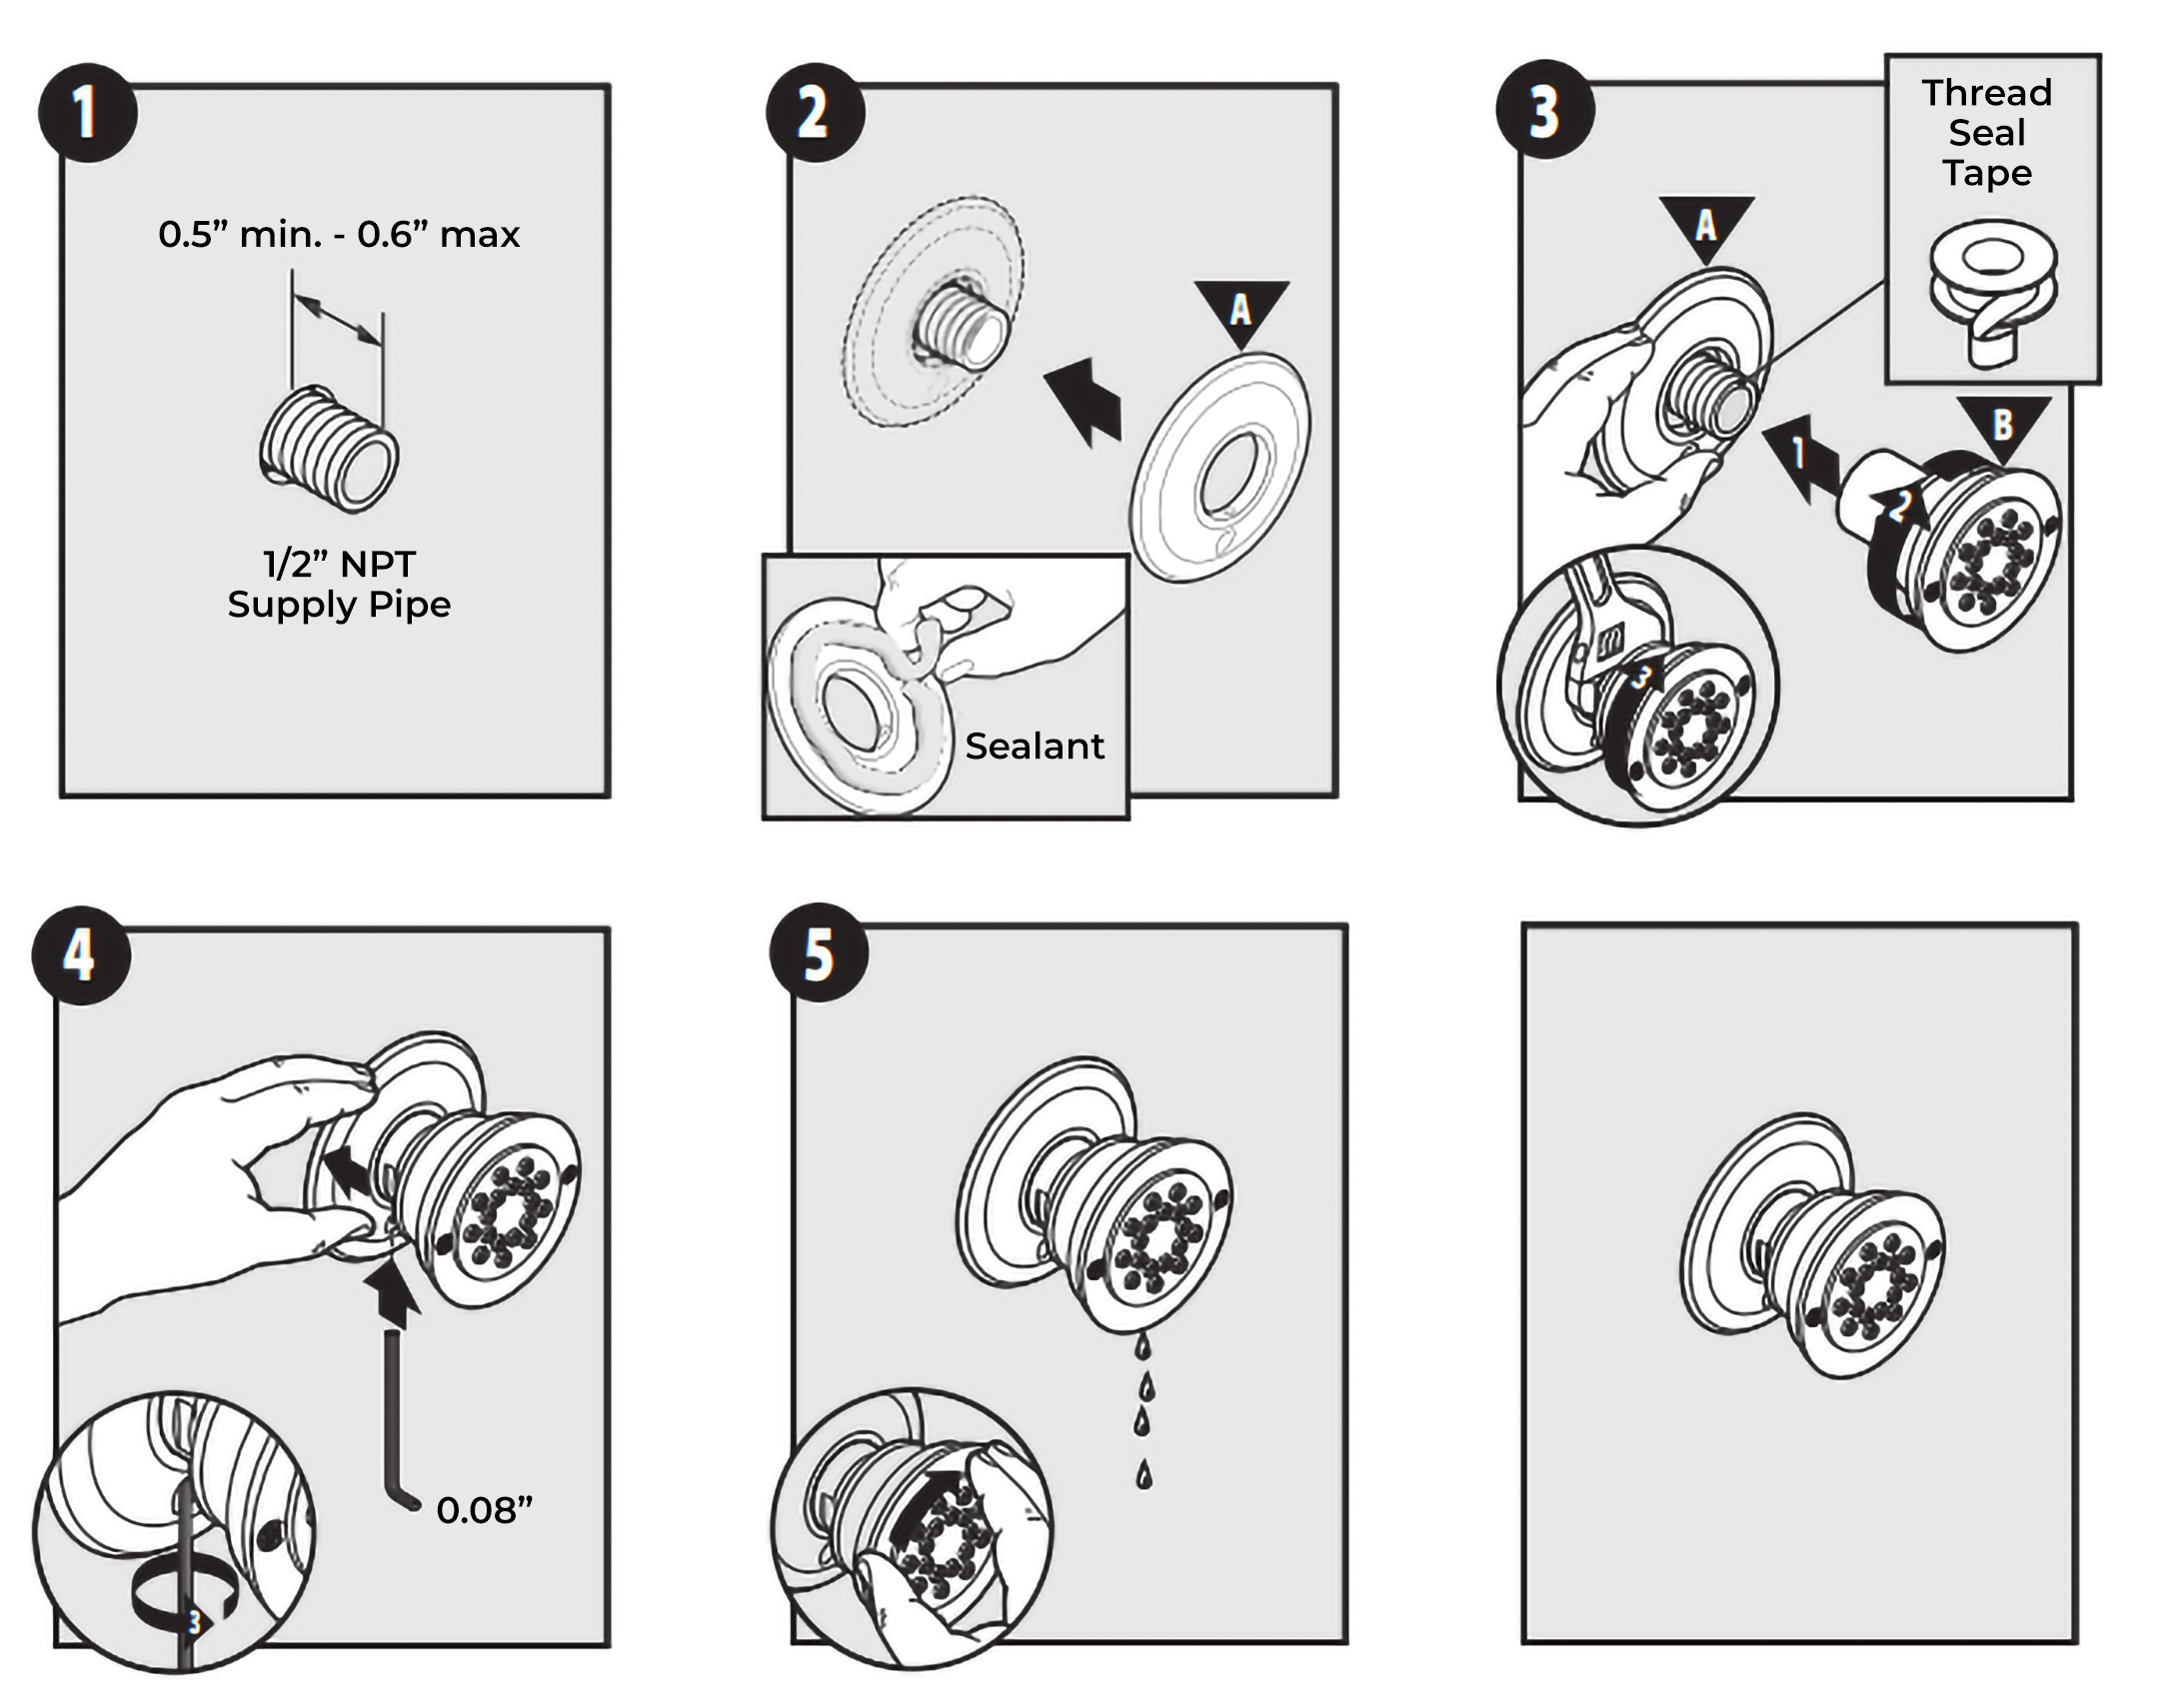
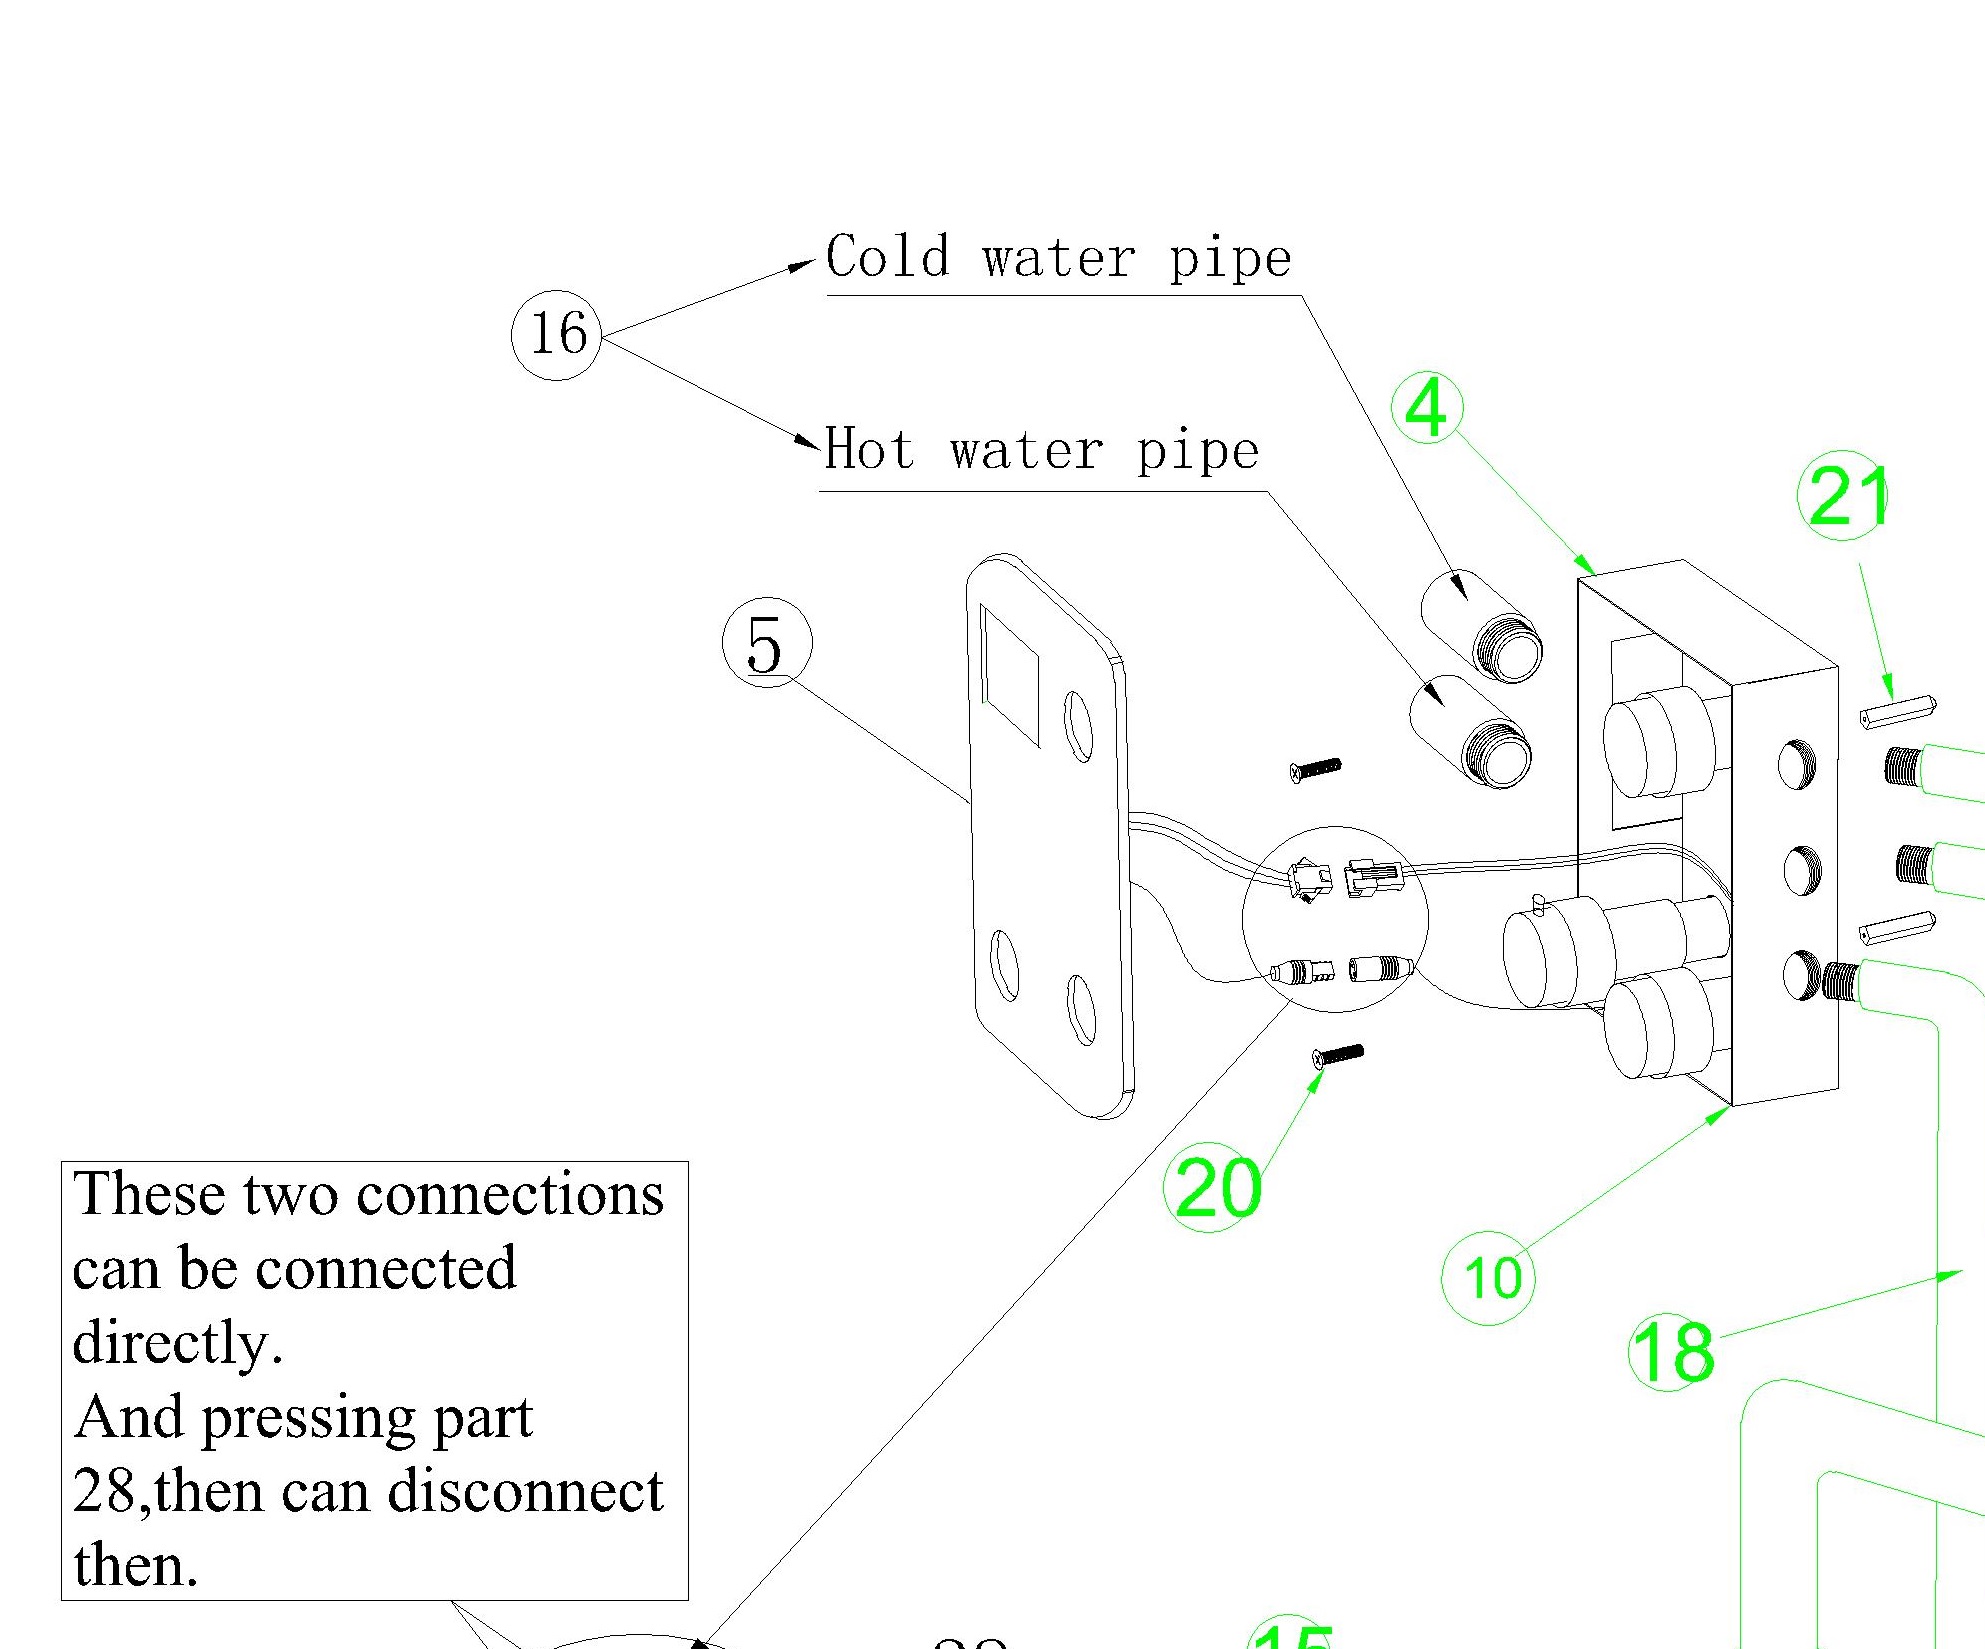
Body Spray Installation
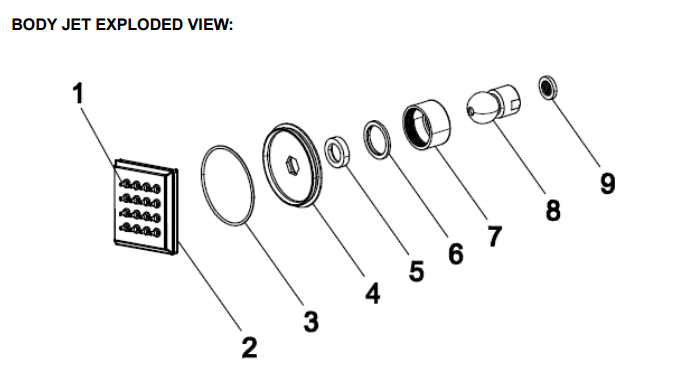
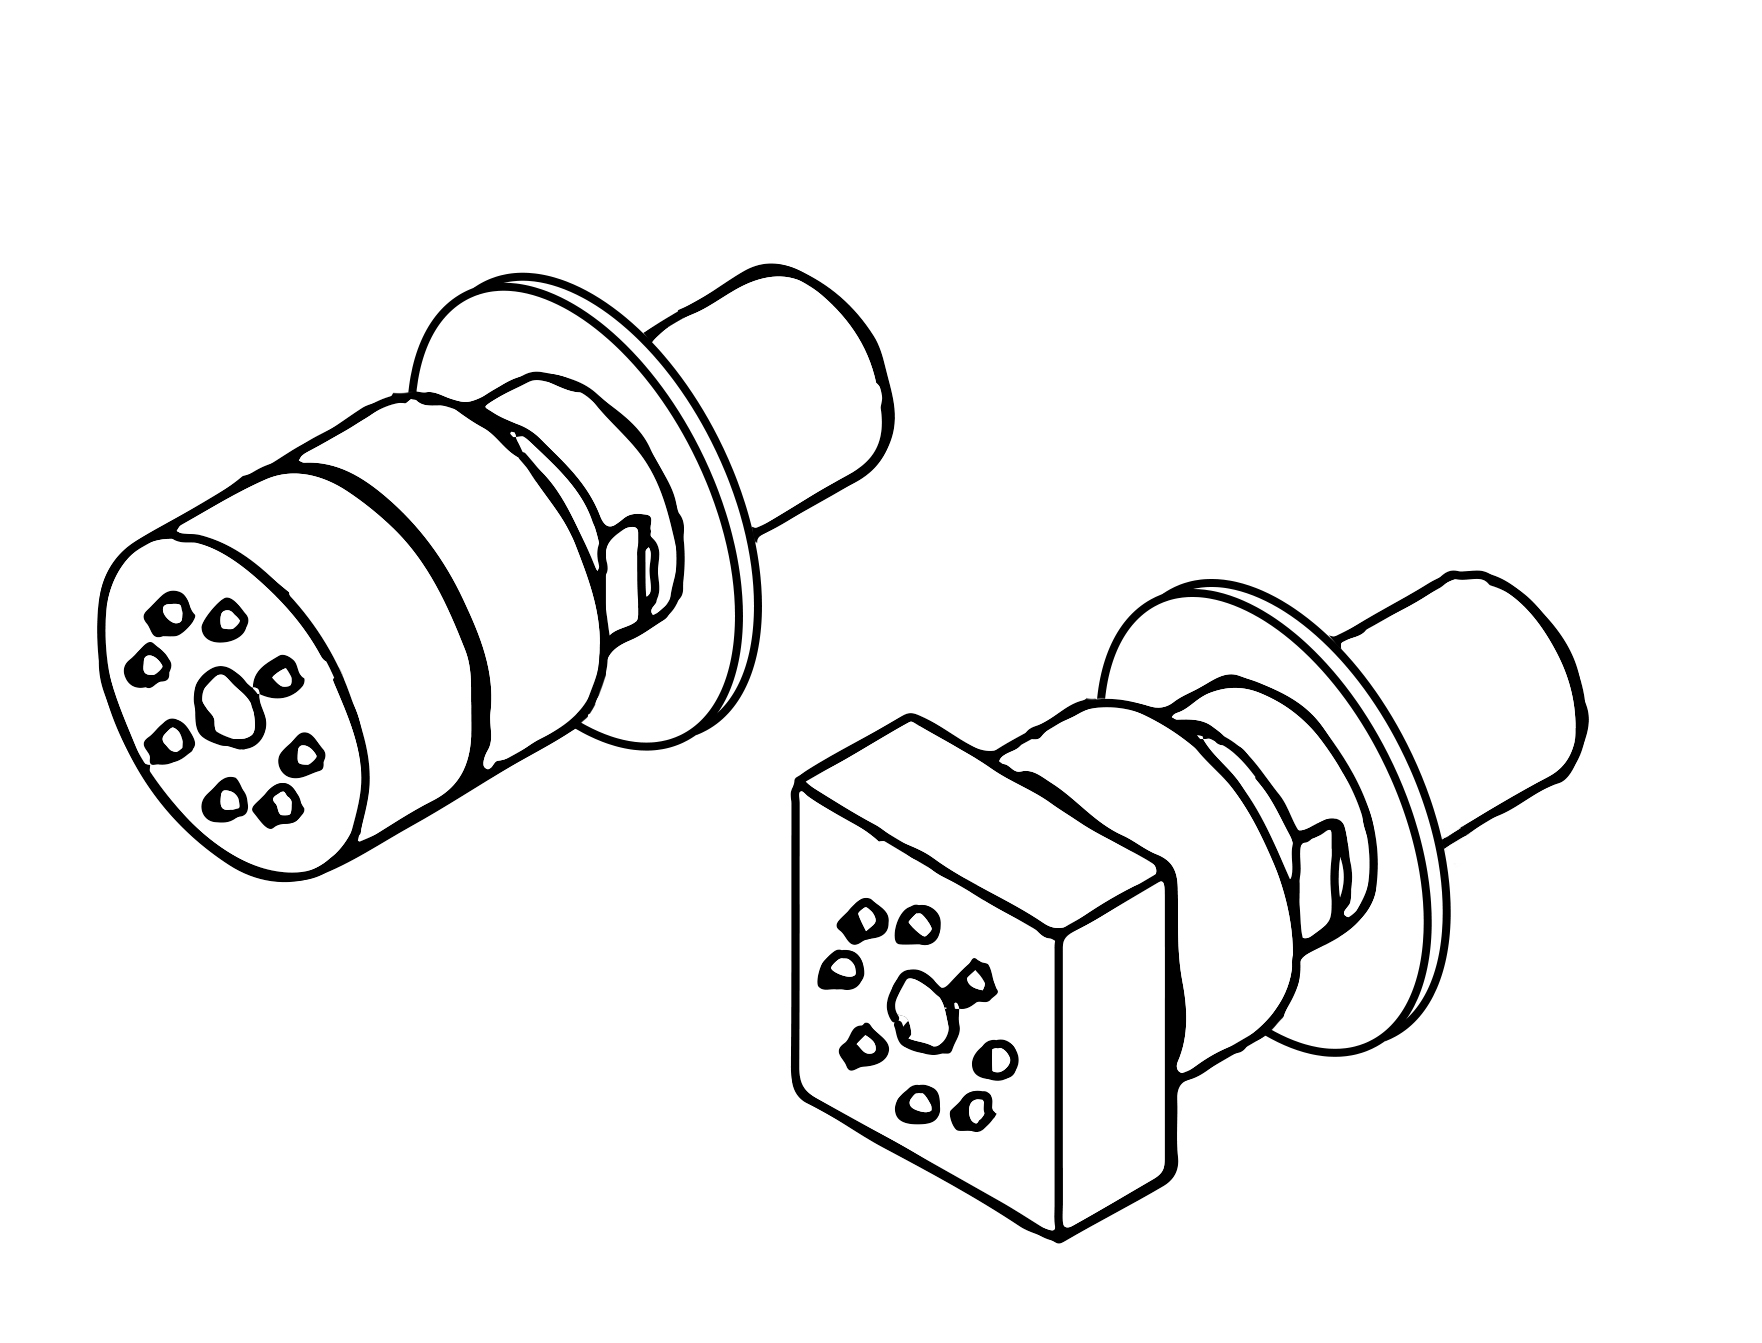
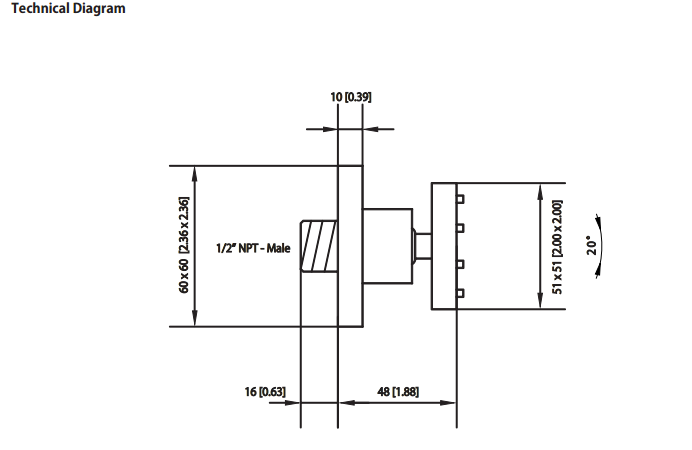
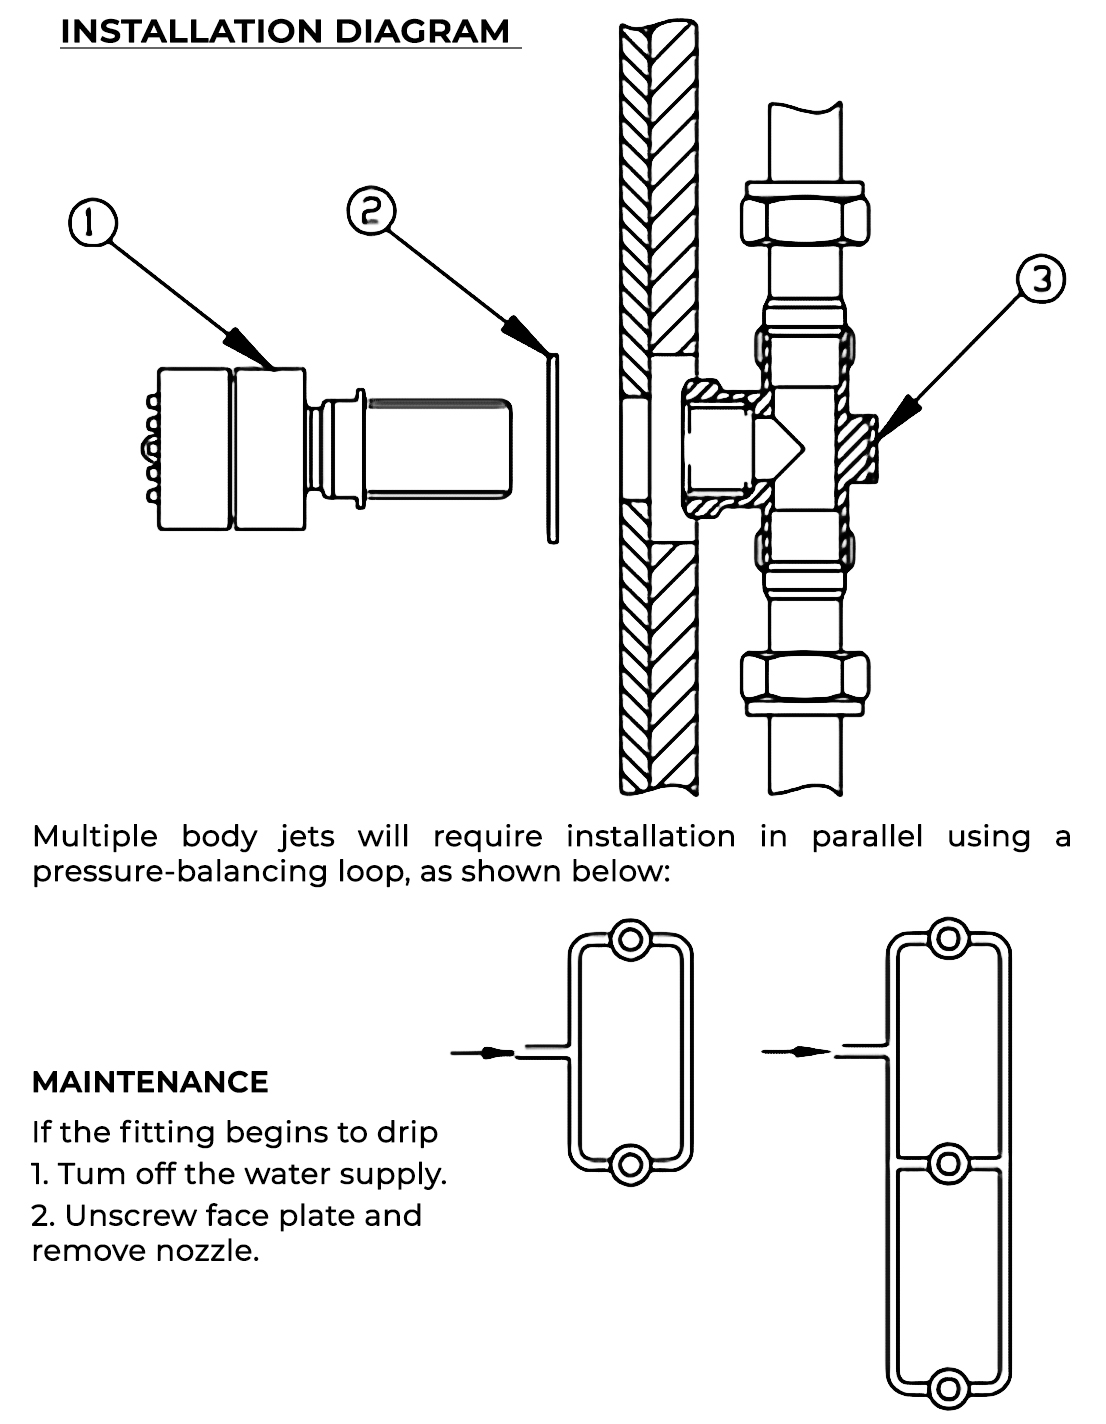
Multiple body jets will require installation in parallel using a pressure-balancing loop, as shown below:
MAINTENANCE
If the fitting begins to drip
1. Turn off the water supply.
2. Unscrew face plate and remove nozzle.
|