.jpg)
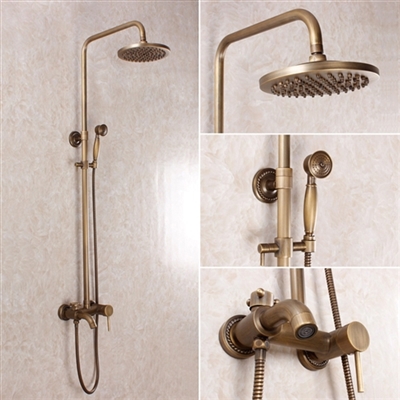
Taos Vintage Antique Bathroom Shower Set Installation
Taos Vintage Antique Bathroom Shower Set is the perfect choice for a bathroom that takes a classic yet minimalist approach to design. It has a streamlined look and appeal, and the wonderful and vintage antique finish sure adds a modern twist to the shower set. Aside from that, the shower mixer features laser printed dials which do not wear out easily and incorporates the latest ceramic disc technology for optimal performance. The handheld shower is just as great, with solid water pressure and well-designed grip for better handling as well as the faucet. If you are looking for a shower set that looks great and works great, with the added benefit of easy cleaning and maintenance, then the Taos Vintage Antique Bathroom Shower Set is definitely a great option.
Taos Vintage Antique Bathroom Shower Set Features:
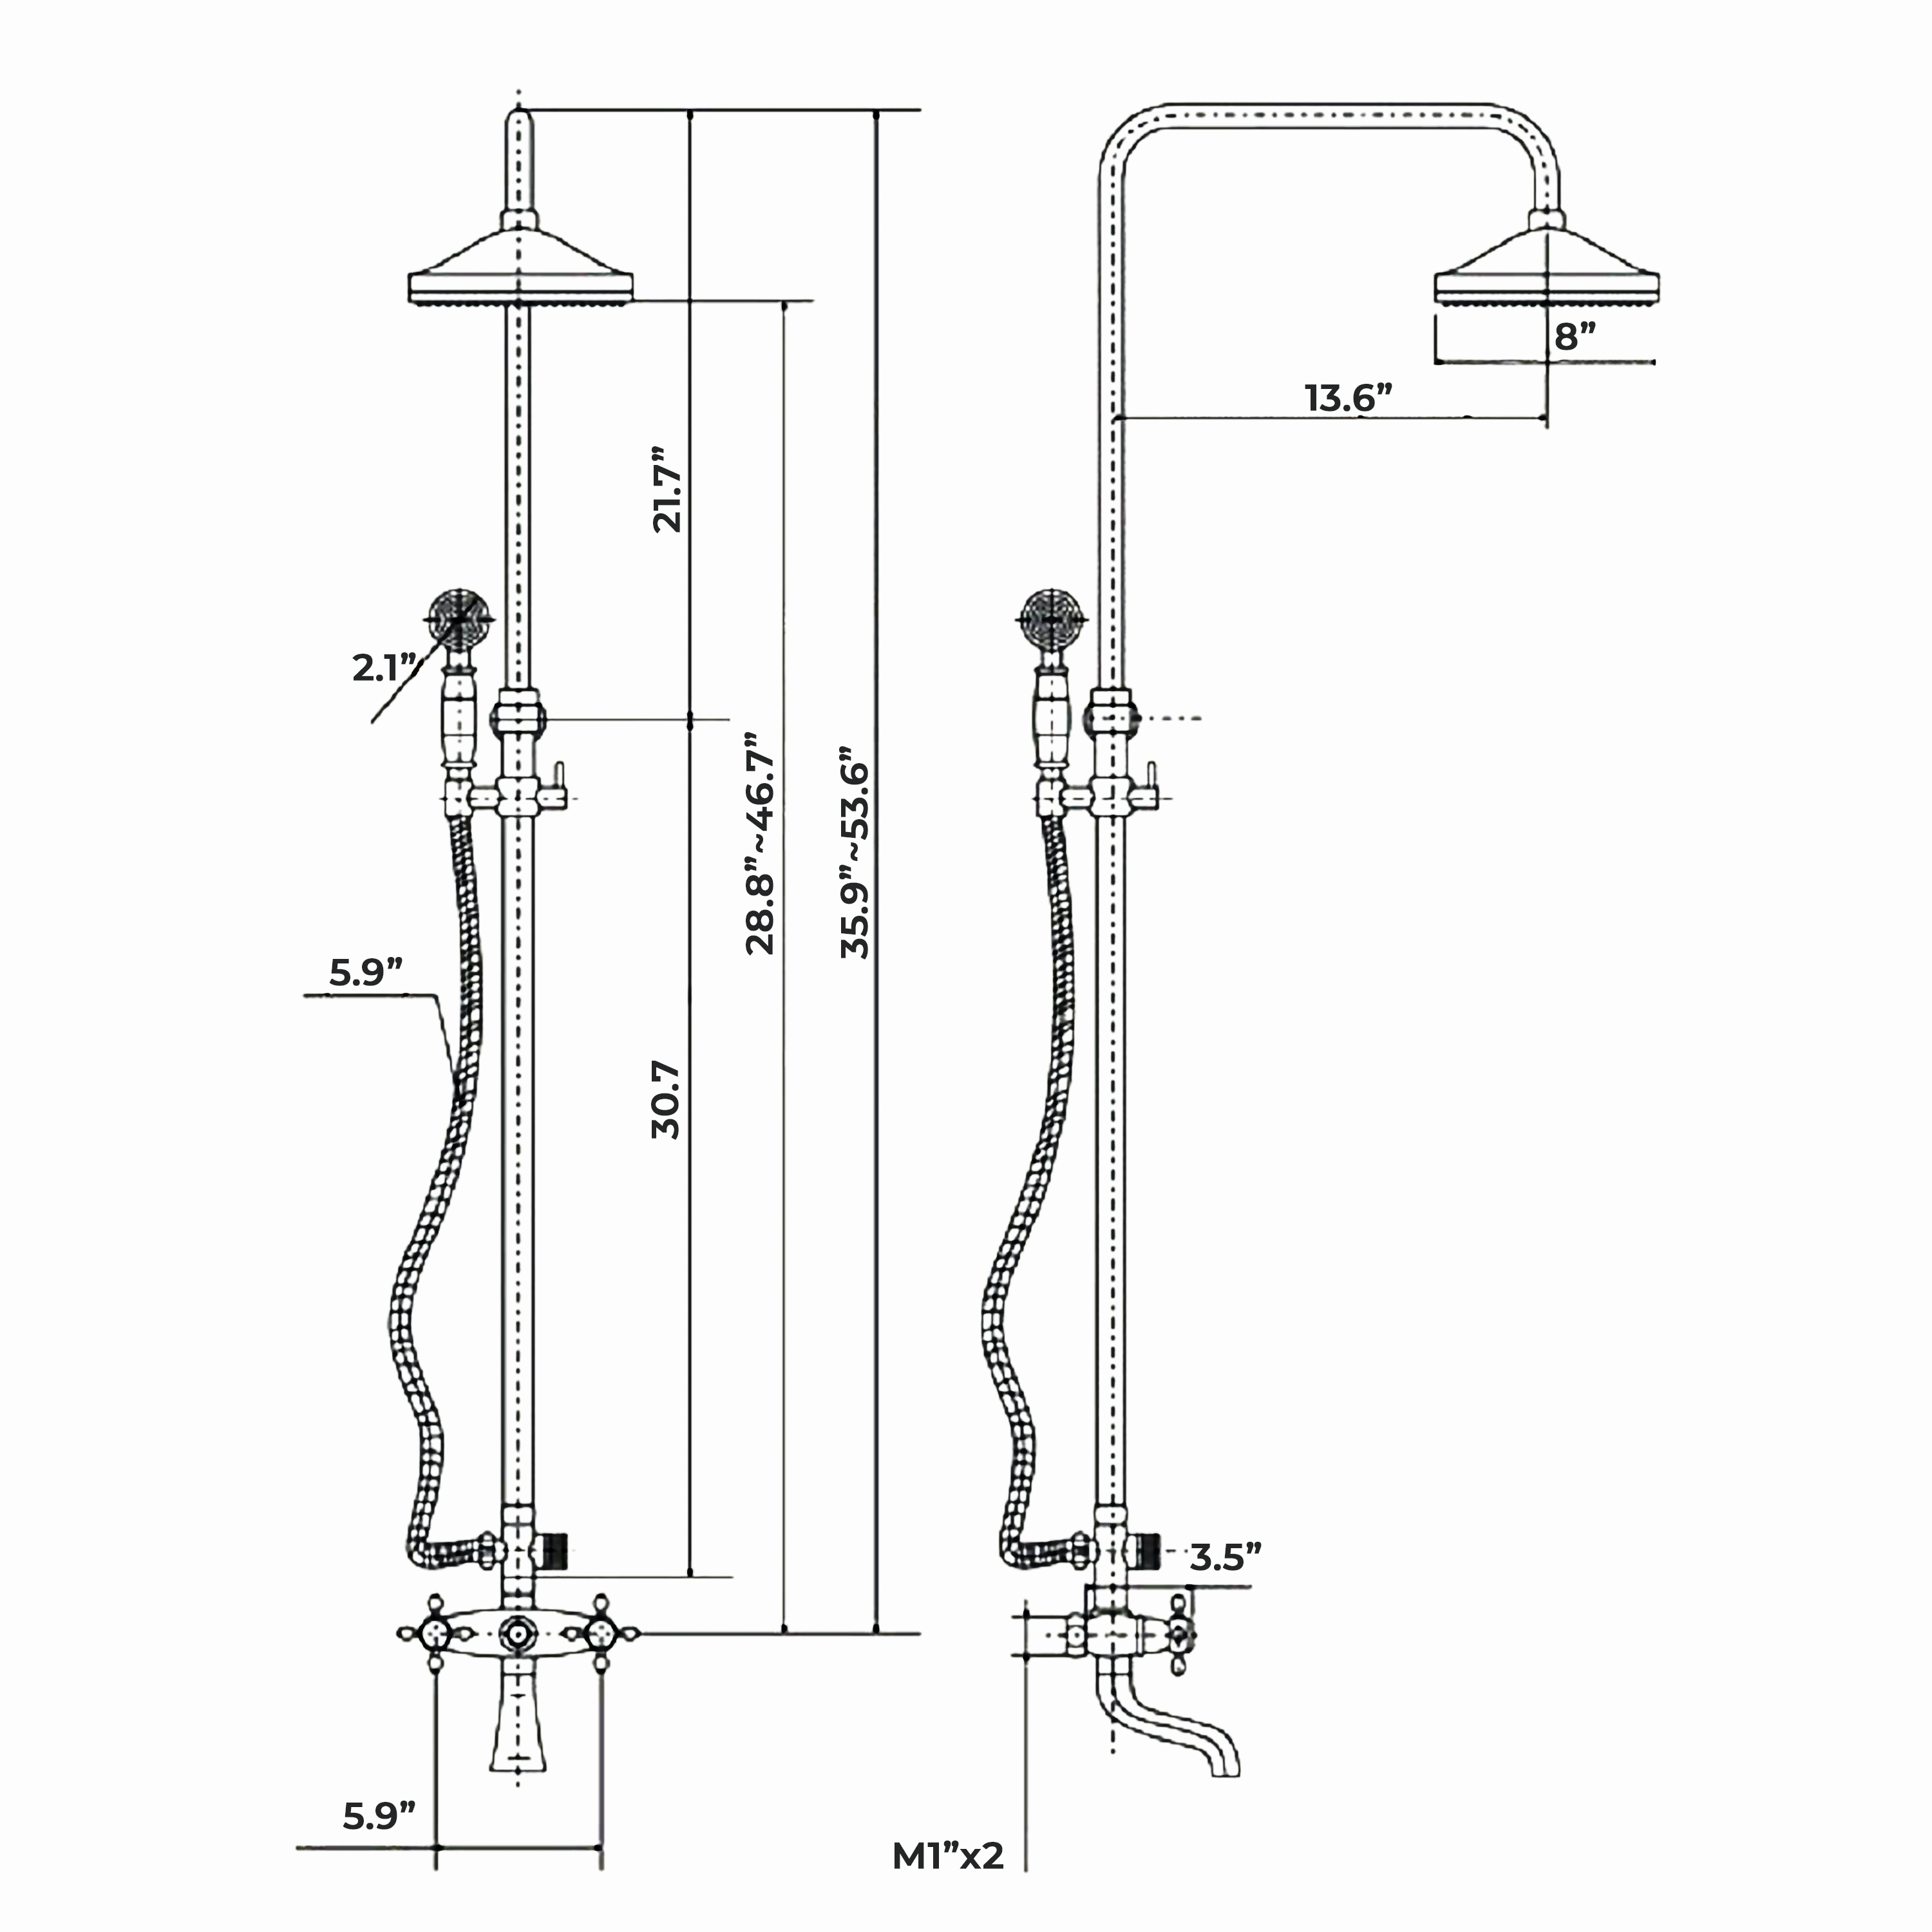
- Model Number: BS-BASS12
- Surface Finish: Antique
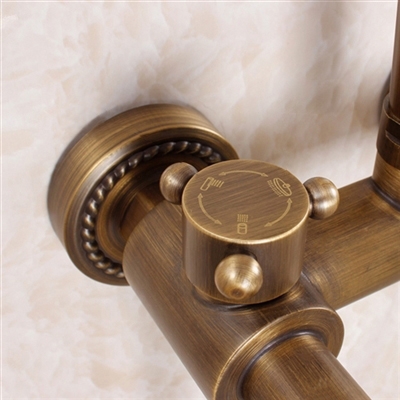
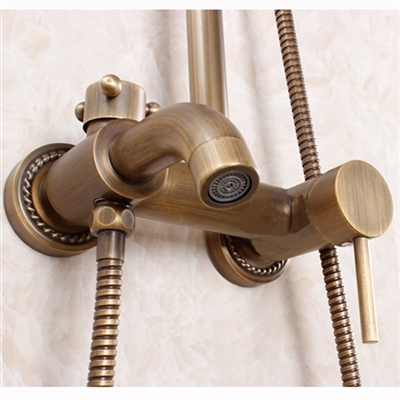
- Cold/Hot Water Control Type: Single Holder Dual Control
- Valve Core Material: Ceramic
- Style: Classic
- Number of Handles: Dual Handles
- Type: Bath & Shower Faucets, shower set
- Exposed Shower Faucet Feature: With Slide Bar
- Bath & Shower Faucet Type: Exposed Shower Faucets
|
|
BathSelect® Manufacturer Warranty Information
- Before you begin, please read the installation instructions below. Observe all local building and safety codes.
- Unpack and inspect the product for any shipping damages. If you find damages, do not install.
- Please note all showers must be installed by a professional and certified plumber otherwise warranty might be voided.
|
|
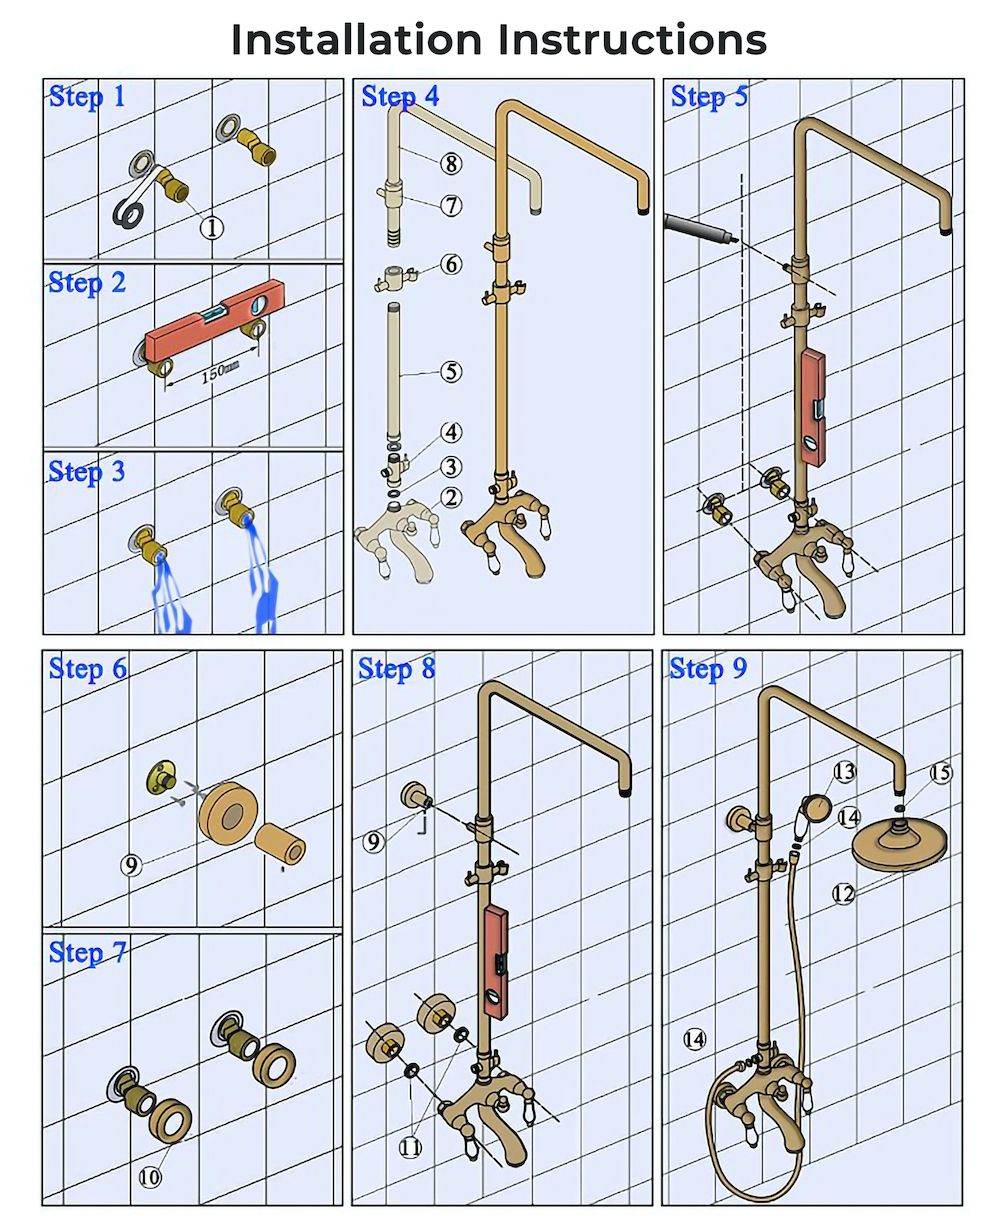
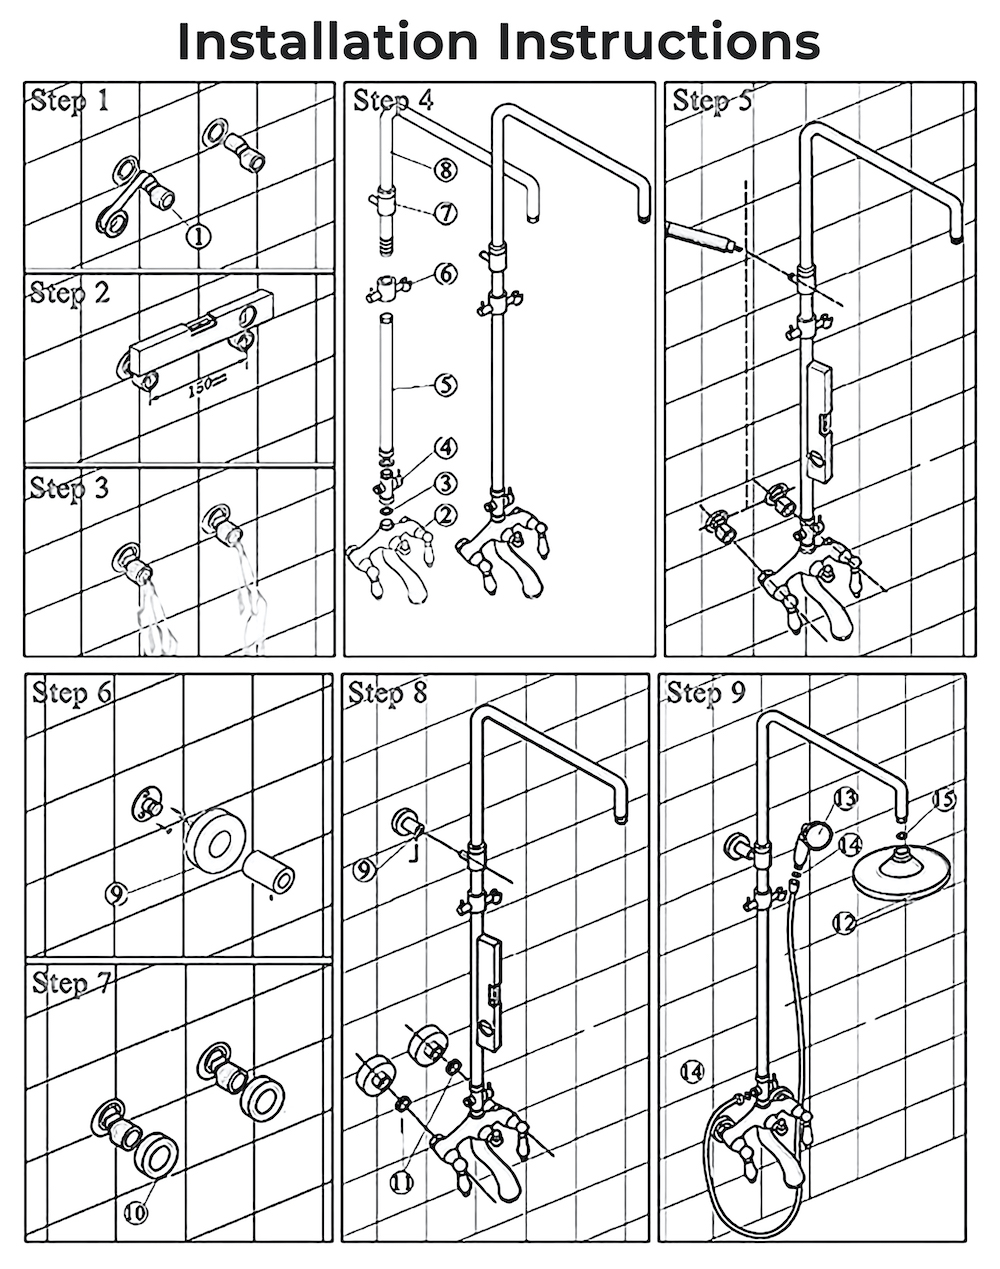
1. Brass Adapter
2. Faucet body
3.
Washers
4. Diverter
5. Shower bar
6. Hand shower holder
7. Shower bar bracket
8. Shower bar
9. Mounting base
10. Decoration cover
11. Rain shower head
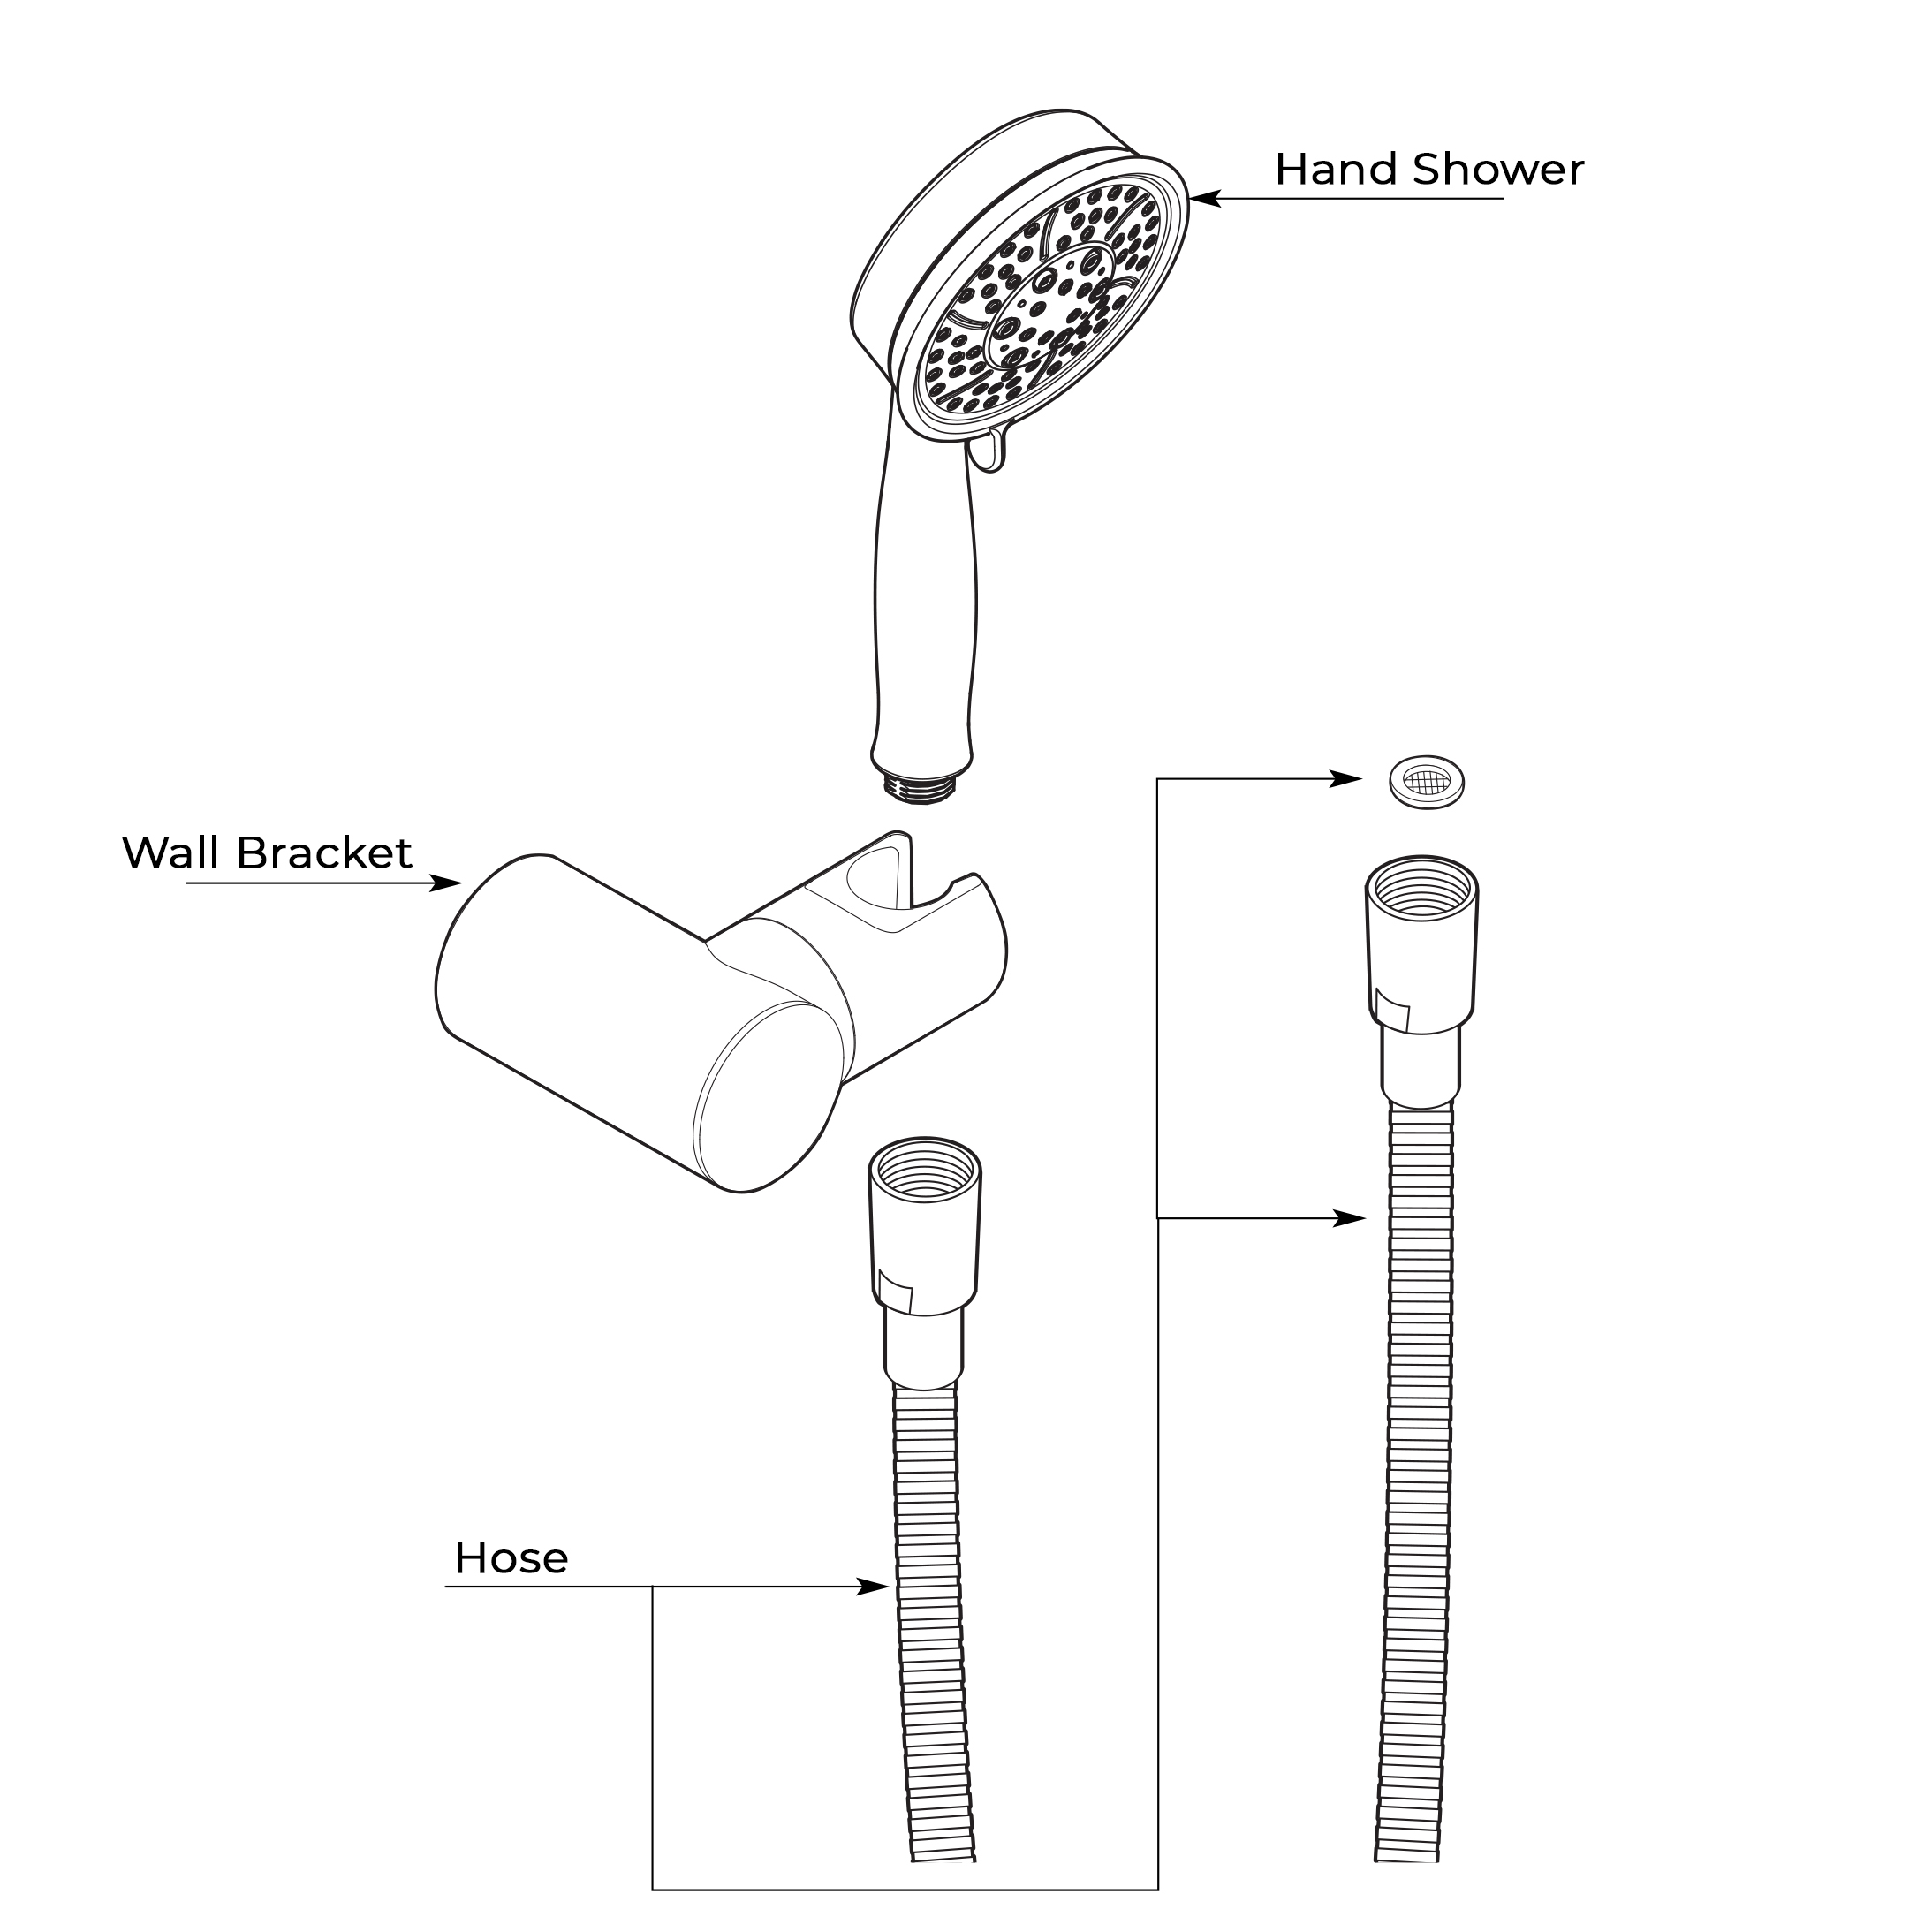
12. Handheld shower
Step 1: Connect the brass adapter provided to the water supply line.
Step 2: Adjust lever and distance to fit the faucet body.
Step 3: Turn the water valve on for a while to let the dust and impurities out.
Step 4: Assemble the shower set.
Step 5: Place a pre-assembled shower in the wall to find the proper position and then mark the mounting hole that needs to be drilled.
Step 6: Drill a hole for the upper part shower bar bracket, screw it.
Step 7: Place the decoration cover to the brass adapters.
Step 8: Install the pre-assembled shower to the connections.
Step 9: Connect shower hose, handheld shower, and rain shower head.
|