Installation Instructions for Regina Waterfall LED Bathroom Sink Faucet Square Handle
Regina Waterfall LED Bathroom Sink Faucet Square Handle
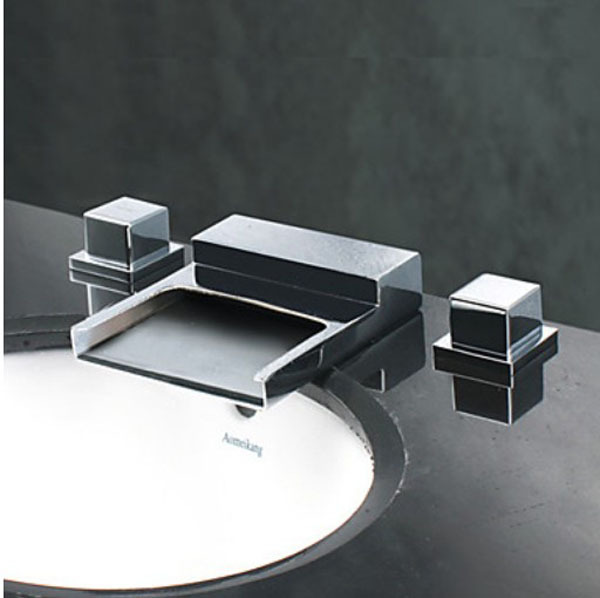
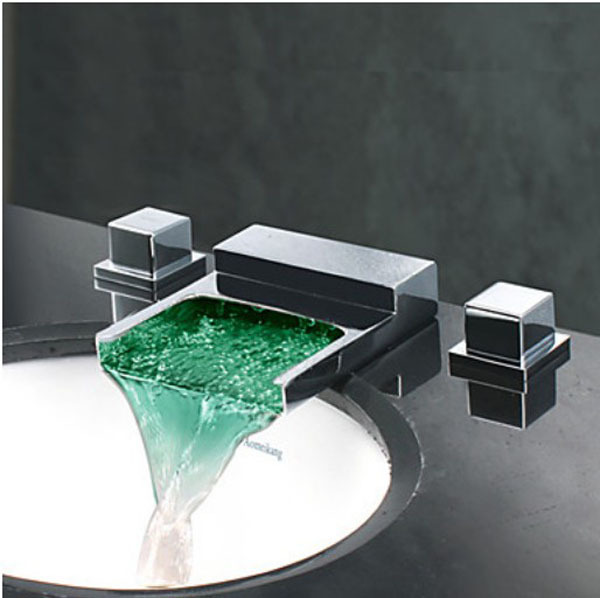
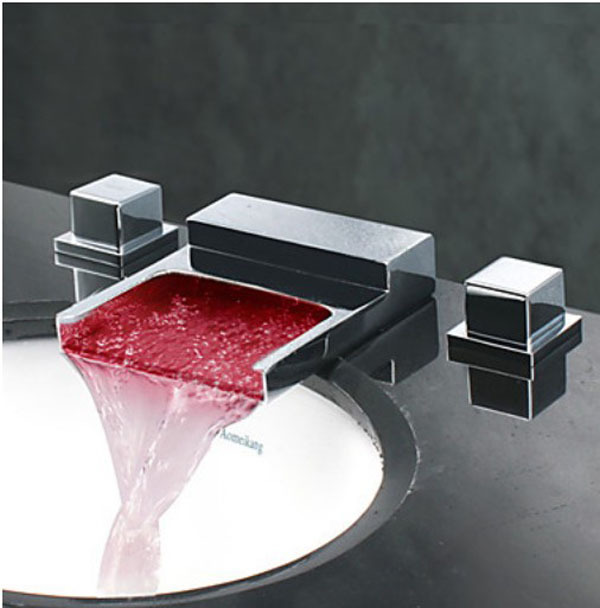
This is our Regina Waterfall LED Bathroom Sink Faucet, it is deck mount and has a Drip-free Seal. Inside led light will change color when water temperature will change. We gained high reputation with the good quality and best service from the customers. Perfect solution for bathroom. Certified by quality standards, no harm to human, water or environment. Easy to use and leak free. Extended durability ensured by solid construction, Stylish appearance. Self powered by water pressure-No battery or other electricity required. When water flows down, the LED will light instantly and automatically. LED works by water flow, LED changes according to water temperature.
Regina Waterfall LED Bathroom Sink Faucet Description:
Type: Bathroom Sink Faucet
Style: Contemporary
Feature: Waterfall, LED
Finish: Chrome
Handle: Square
Installation: Deck Mount
Faucet Mount: Three Hole
Number Of Handle: Dual
Hot And Cold Water: Yes
Body Material: Brass
LED Power Supply: Water Power
LED Colour: Multicolor, blue, green, red
LED turns green between: 0-30 degrees
LED turns blue between: 30-40 degrees
LED turns red between: 40-50 degrees
LED starts to blink between: 50-80 degrees
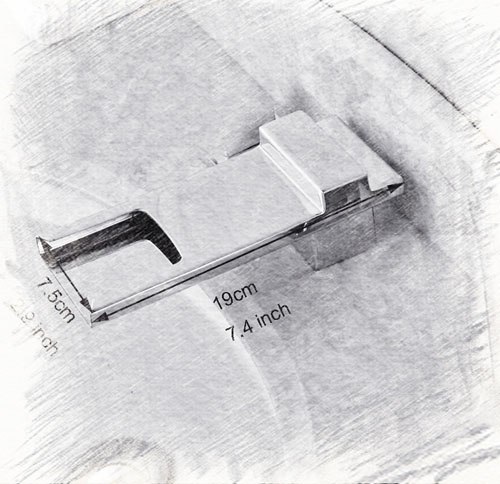
Product Dimension: 15.75in x 7.87in x 3.94in
Spout Height: 1.6"
Spout Length: 6.3"
Spout Width: 5.9"
|
|
BathSelect® Manufacturer Warranty Information
|
|
Before installing, read entire Widespread Faucet Installation Instructions. Observe all local building and safety codes.
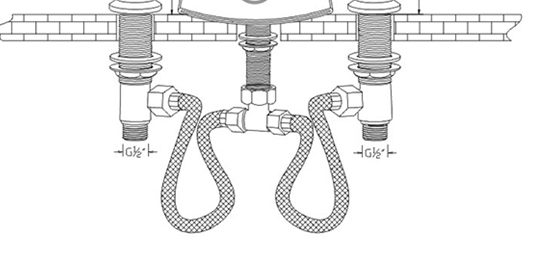
For the following Installation Instructions for your new Widespread Faucet, it is assumed that any old fixtures have been removed and any repairs or modifications to the water supply have been completed.
Unpack and inspect the product for any shipping damages. If you find damages. If you find damages, do not install it. Contact Customer Service at 800-500-9895. If you need assistance or have questions while installing your Widespread Faucet, contact Customer Service.
INSTALLATION
Install the rough-in valve body behind the finished wall. Attach the valve body to wood blocking between two wall studs with wood screws. Be sure that the rough-in valve is completely level, and connect to the main water supply.
- When the wall around the rough-in valve is finished, install your faucet trim.
- If your faucet spout is not assembled, assemble by connecting the threaded outlet to the faucet body. If your spout is already assembled move on to the next step.
- If your faucet features a decorative faceplate, secure the faceplate to the wall with silicone sealant before installing your handle and spout trim pieces. Make sure that the faceplate is properly aligned over the rough-in valve and perfectly straight. If your faucet does not feature a faceplate move on to the next step.
- If the decorative spout escutcheon is not attached, place the escutcheon on the body of the spout and install the spout over the spout shank. Screw the spout into place and press the escutcheon firmly against the finished wall.
- Tighten any set screws in the spout with the Allen wrench.
- Install the handle(s) and any necessary hardware and tighten the set screws with your Allen wrench. If rubber O-rings or sealing gaskets are included, Place between the handle body and wall to create a watertight seal.
- When your faucet installation is complete, turn on the water supply. Check to make sure that all connections are tight (no water should be leaking) and that the hot and cold supplies are working correctly. Turn the water on and allow the water to flow through the spout for approximately 60 seconds. Allow the sealant to cure for 24 hours before use.
|
|
|


