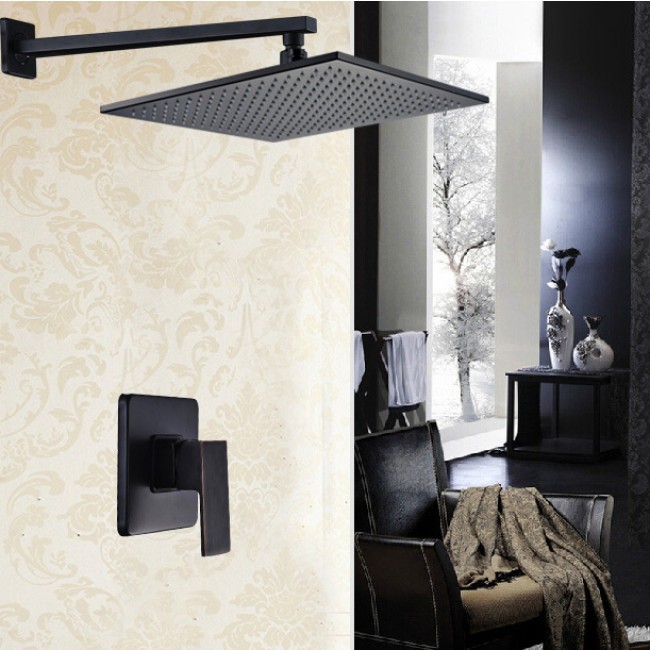
Installation Instructions for Oil Rubbed Bronze Finish 16" Single Handle Square Showerhead16" Oil Rubbed Bronze Shower Head Wall Mount / Ceiling Mount The lights will automatically turn on when water pressure is turned on The lights will dim and brighten when you lower and raise the pressure so you can set the perfect mood, water and light The shower head will automatically change colors according to the temperature of the water so you always know how the water will feel on your skin just by looking at it Modern Stylish Design Completely in Dark Oil Rubbed Bronze finish made to match or stand out from your other bathroom fixtures Comes with matching Oil Rubbed Bronze diverter/controller. This high quality modern shower head is made out of brass with Oil Rubbed Bronze finish, its made to last!! This shower set comes complete to enjoy (no other parts needed).
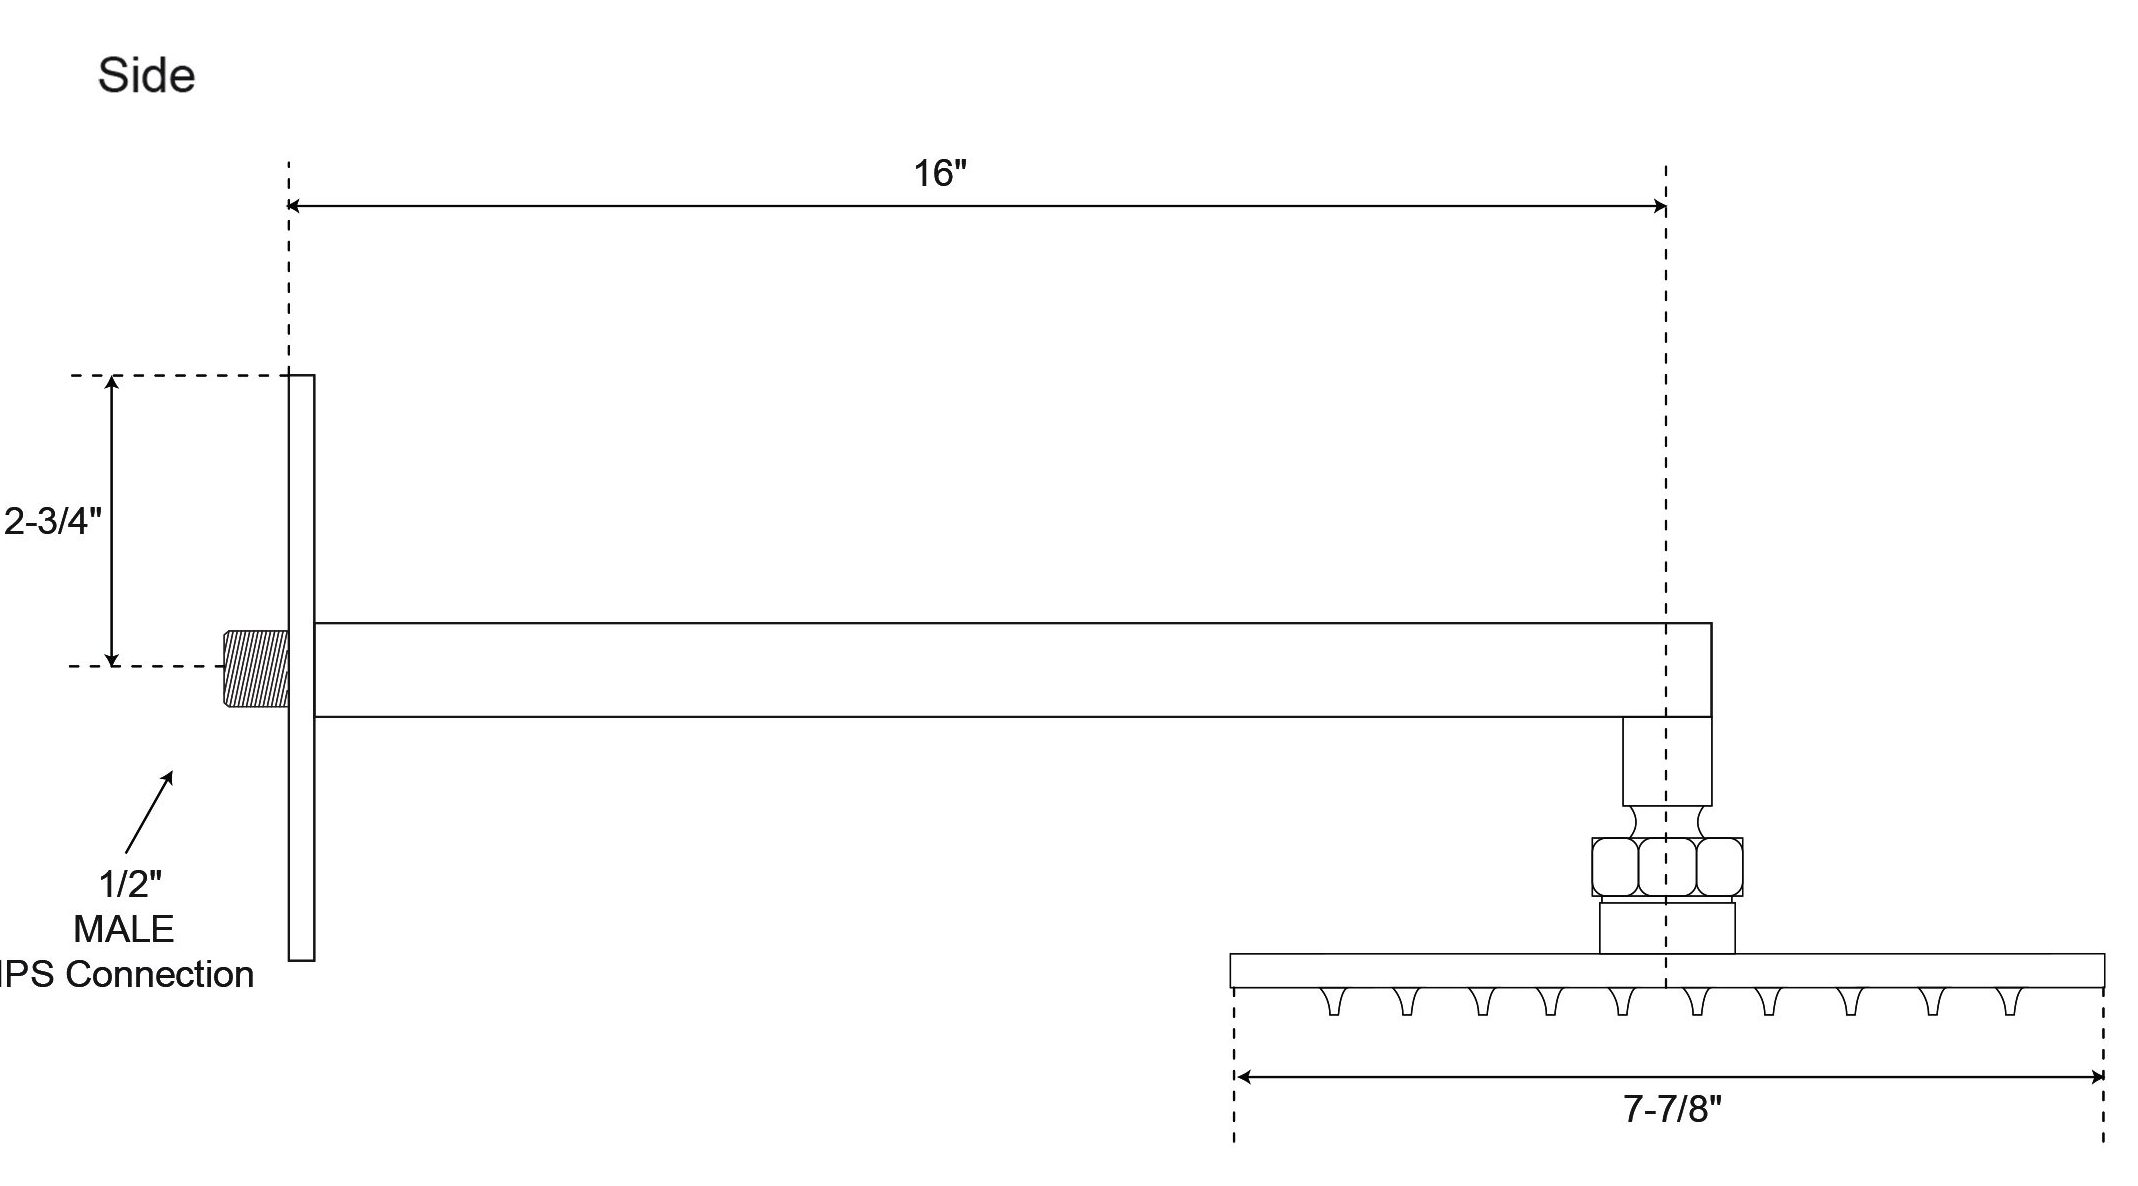
Oil Rubbed Bronze Finish Square Shower head Features:Showerhead Length : 16"
Showerhead Width : 16"
Material : Stainless Steel
Finish : Dark Oil Rubbed Bronze
Style : Contemporary Rain Shower
Mount Method : Wall or Ceiling Mount
Connection : 1/2" US standard (included)
Shower Arm : Wall or Ceiling Mount
Shower (purchased separately)
|
|
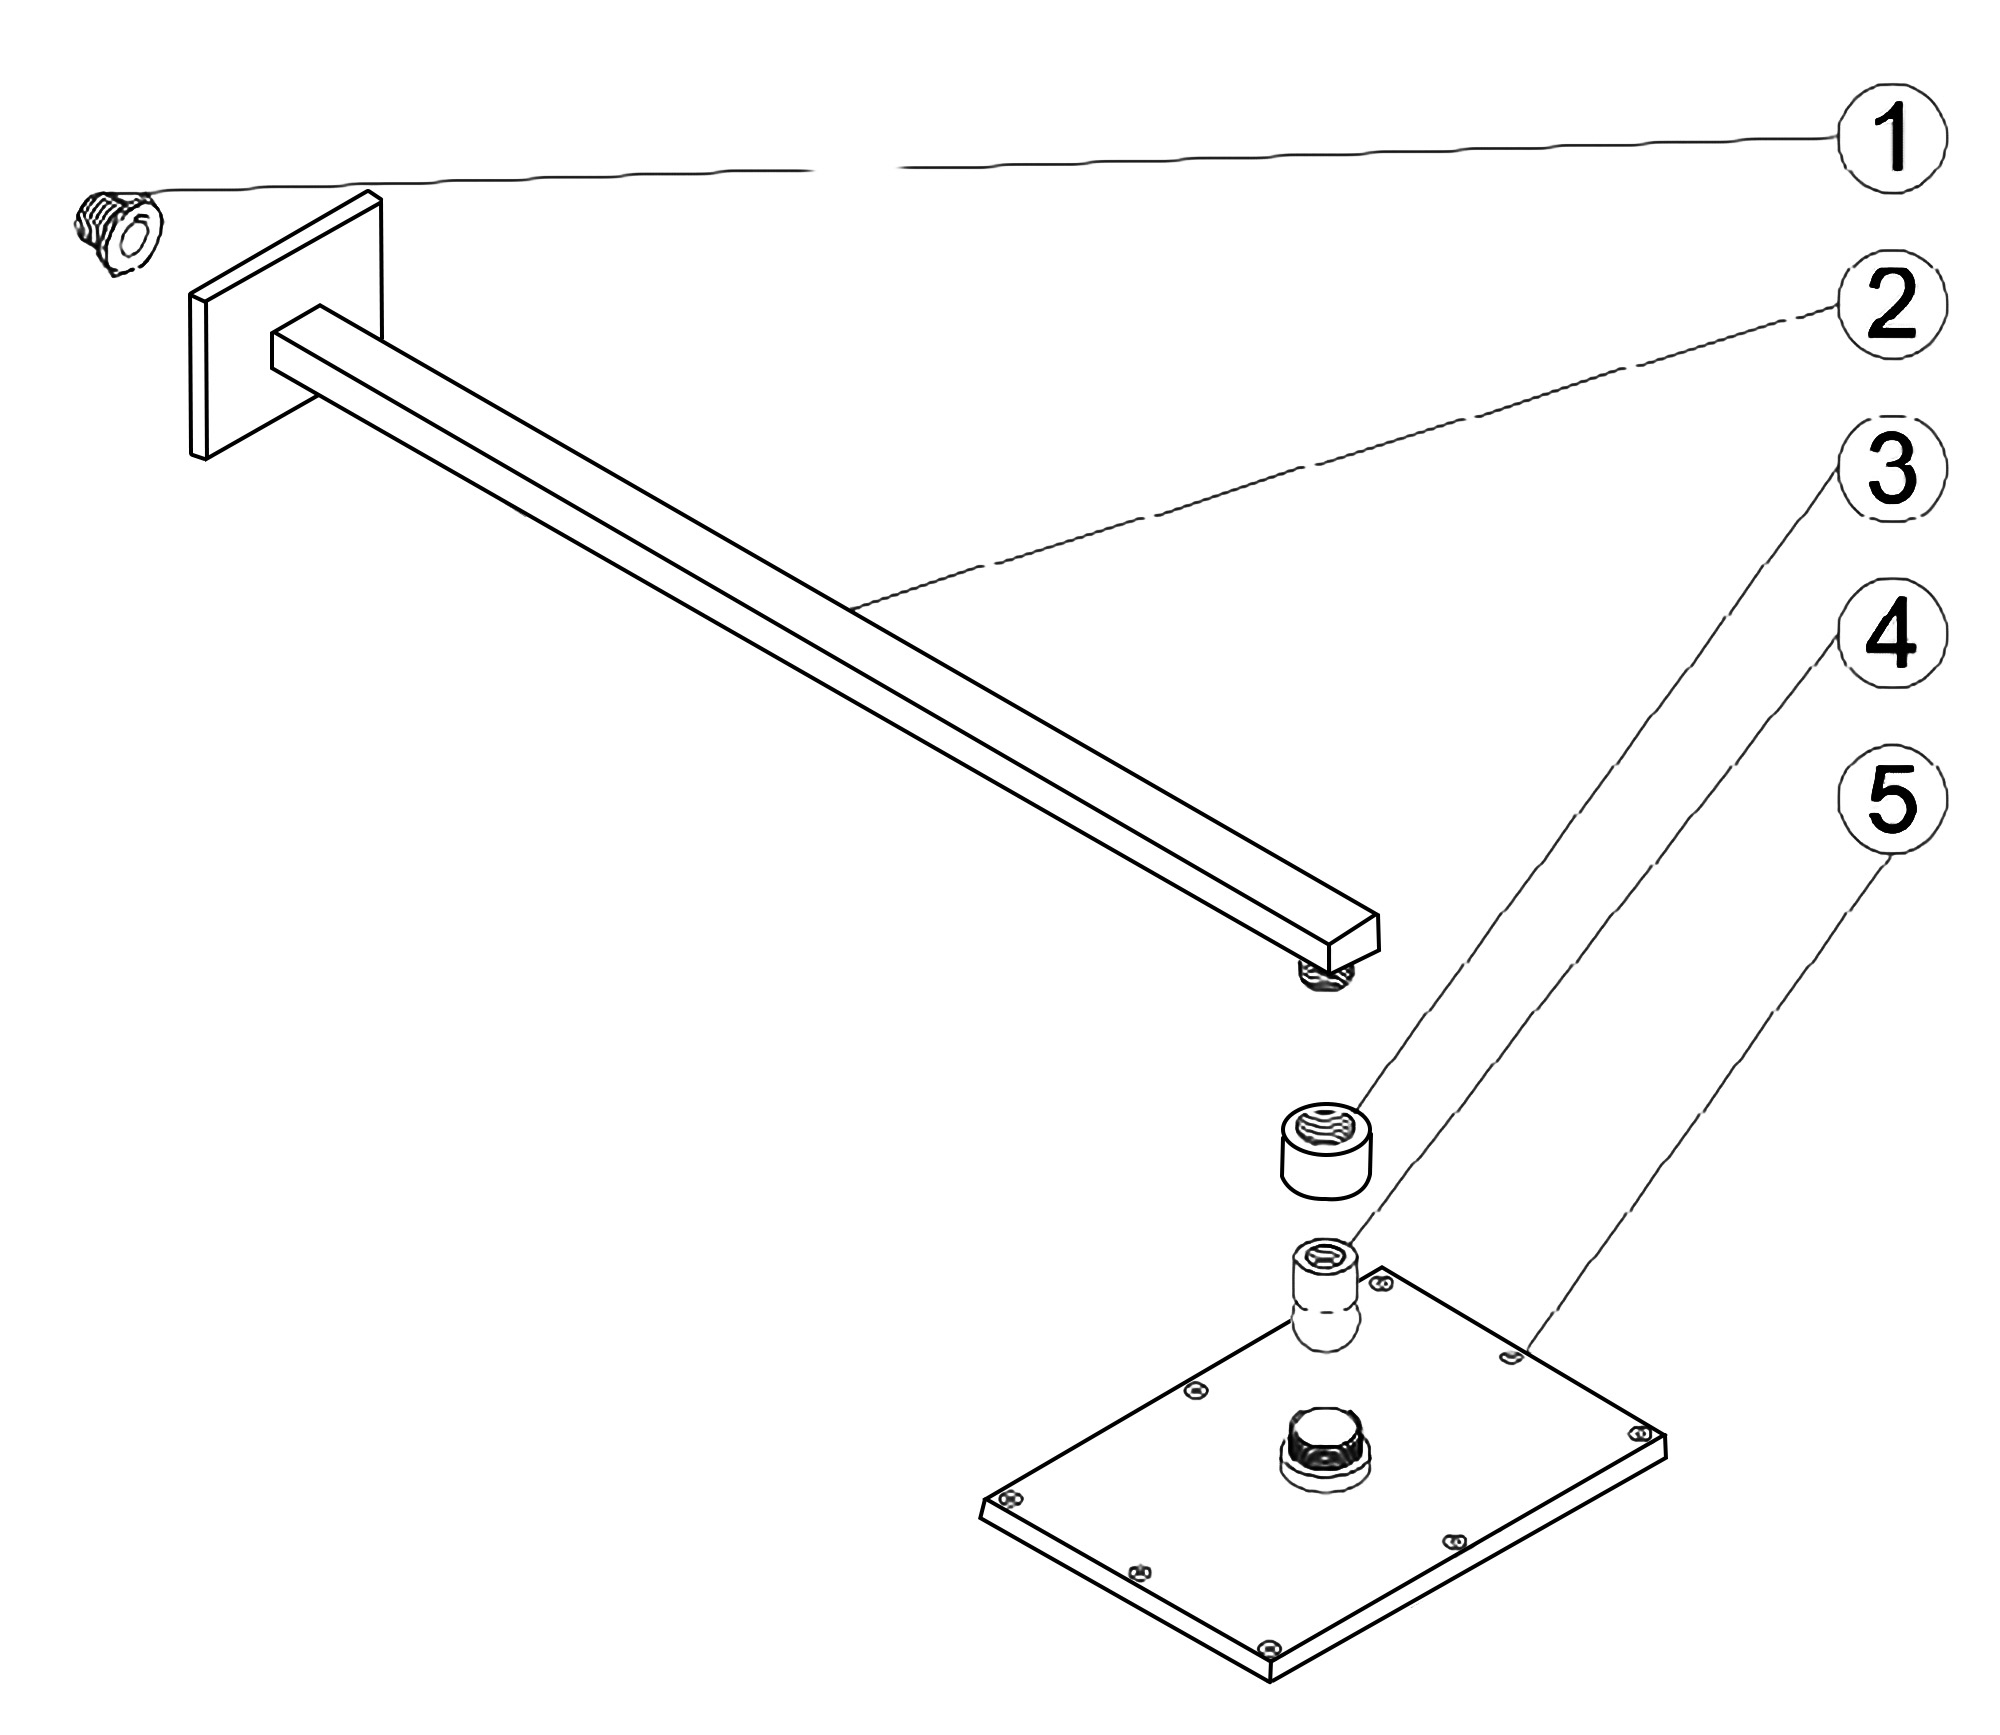
How to install:
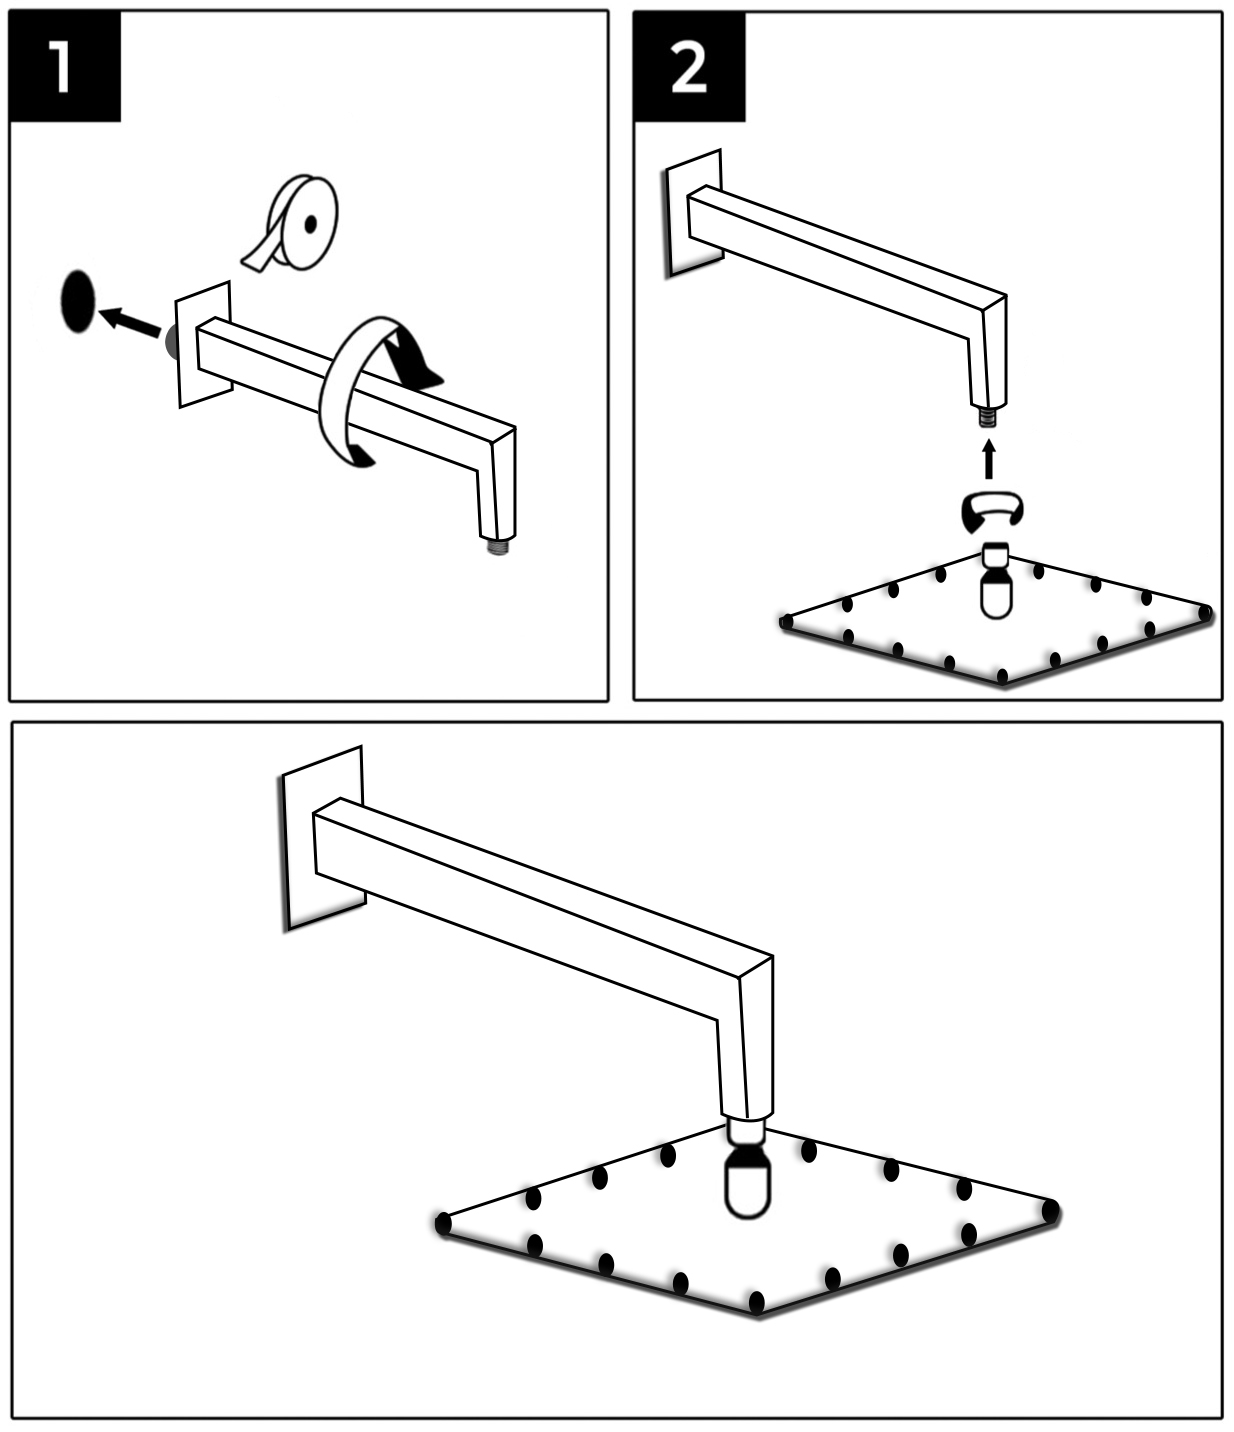
Step 1: Use masking tape on the chrome pipe to protect the finish from being scratched when using wrenches or pliers. Use either vise grips and a pair of pliers, or a pipe wrench and pliers to remove the old shower head.
Step 2: Replace the Teflon tape on the end of shower pipe to prevent leaking.
Step 3: Put on the new head according to the manufacturers instructions.Remove the masking tape and you are ready for a shower. To know more about how to install, please refer installation instruction inside of the package of products.
BathSelect® Manufacturer Warranty Information
- Before you begin, please read the installation instructions below. Observe all local building and safety codes.
- Unpack and inspect the product for any shipping damages. If you find damages, do not install.
- Please note all showers must be installed by a professional and certified plumber otherwise warranty might be voided
Shower Head Installation
No tools required, ½ connector fits standard sized shower plumbing.
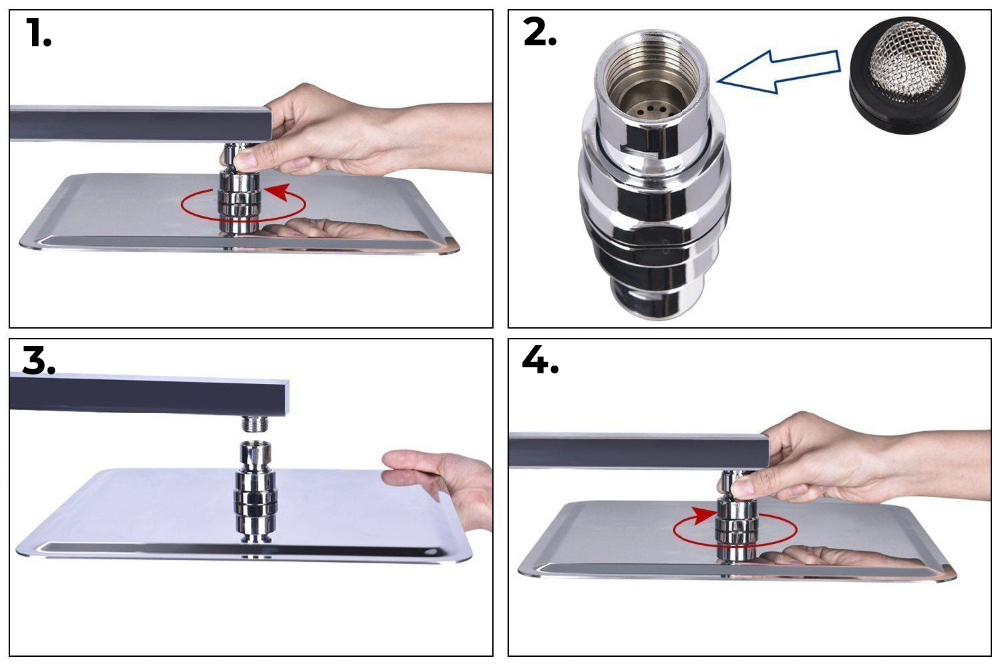
- Use your hands counter clockwise to unscrew the old showerhead and removed it.
- Take out the showerhead, make sure the shower filter is placed in the connector.
- Ensure the showerhead full horizontal alignment wall mounted shower arm thread.
- Use your hands clockwise to tighten showerhead.
Shower Mixer Installation
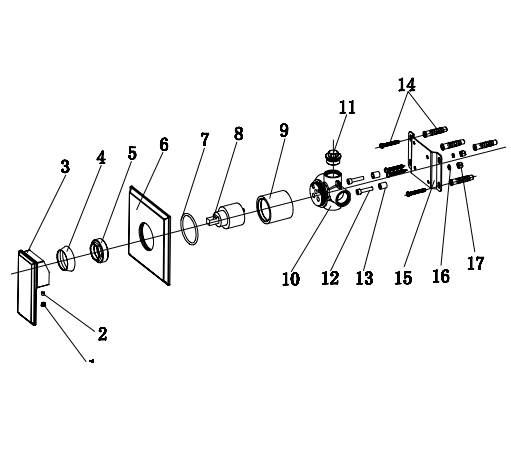
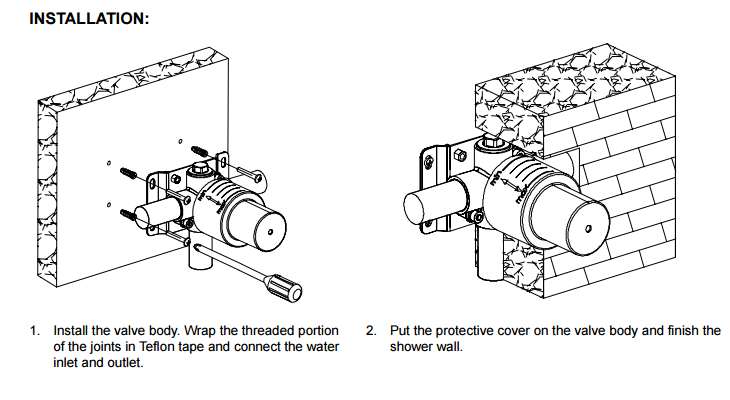
1. Install the valve body. Wrap the threaded portion of the joints in Teflon tape and connect the water inlet and outlet.
2. Put the protective cover on the valve body and finish the shower wall.
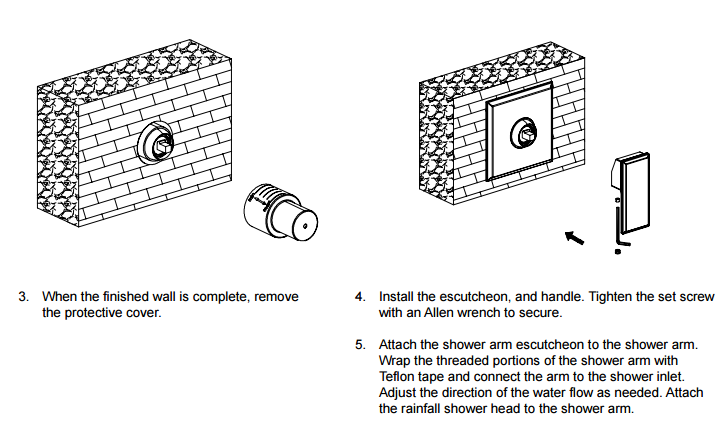
- When the finished wall is complete, remove the protective cover.
- Install the escutcheon, and handle it. Tighten the set screw with an Allen wrench to secure.
- Attach the shower arm escutcheon to the shower arm. Wrap the threaded portions of the shower arm with Teflon tape and connect the arm to the shower inlet. Adjust the direction of the water flow as needed. Attach the rainfall showerhead to the shower arm.
|


