Installation Instructions for LED Rainfall Recessed thermostatic Ceiling Mount Shower Head
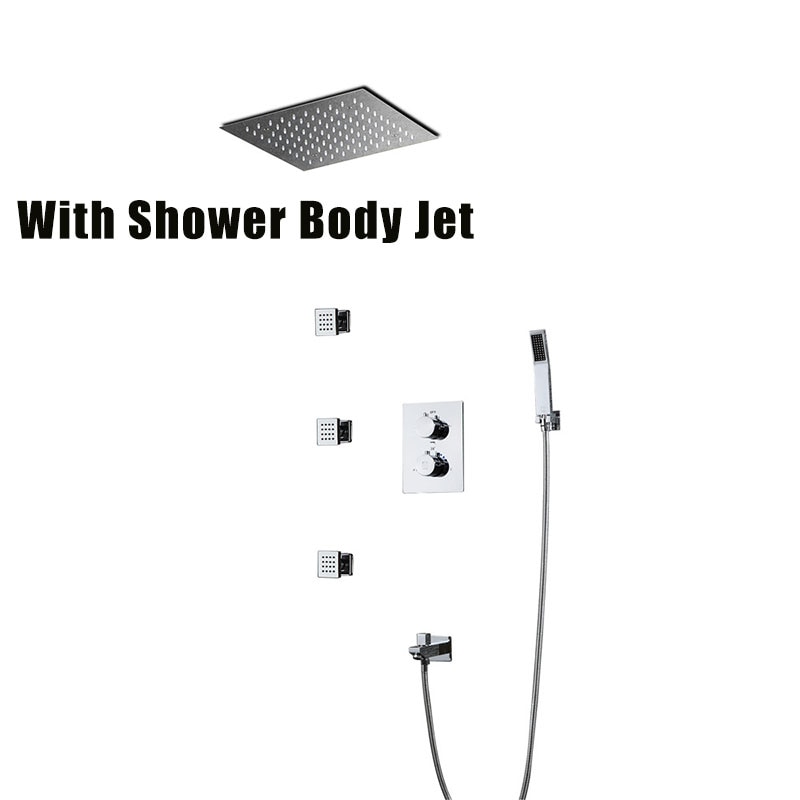
Maine Contemporary Remote LED Rainfall Thermostatic Recessed Ceiling Mount Shower Head with Body Jet and Hand Shower in Chrome Finish
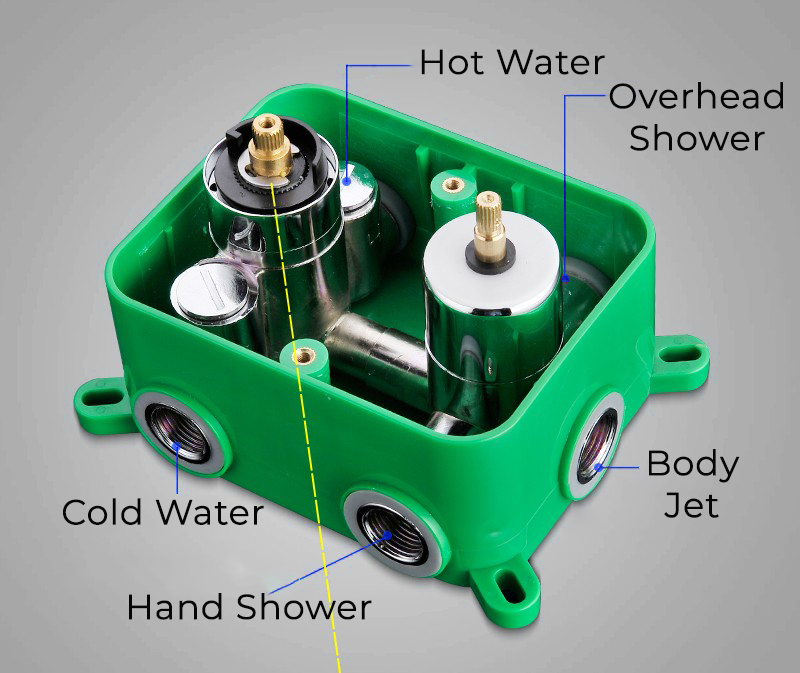
This is a Thermostatic 64 color LED shower that can be controlled using a remote control that pair with a pressure-balancing valve, which maintains your desired water temperature during pressure fluctuations. Solid stainless steel construction with a chrome finish and a ceramic valve core material for long durability that will upgrade your bathroom with a modern and cool look. The Showerhead and jet have a rainfall function where you can experience the true feeling of rain. You can install the rain shower head and handheld showerhead and body jets where you like just depend on the position of concealed water pipe.
LED Rainfall Thermostatic Ceiling Flush Mount Shower Head with Shower Body Jet and Hand Shower Features
- Brand Name: BathSelect
- Model number: BS9748
- Valve core material: Ceramic
- Type: With water jet and handheld showerhead
- Size : 11.8"-15.7" (301-400mm)
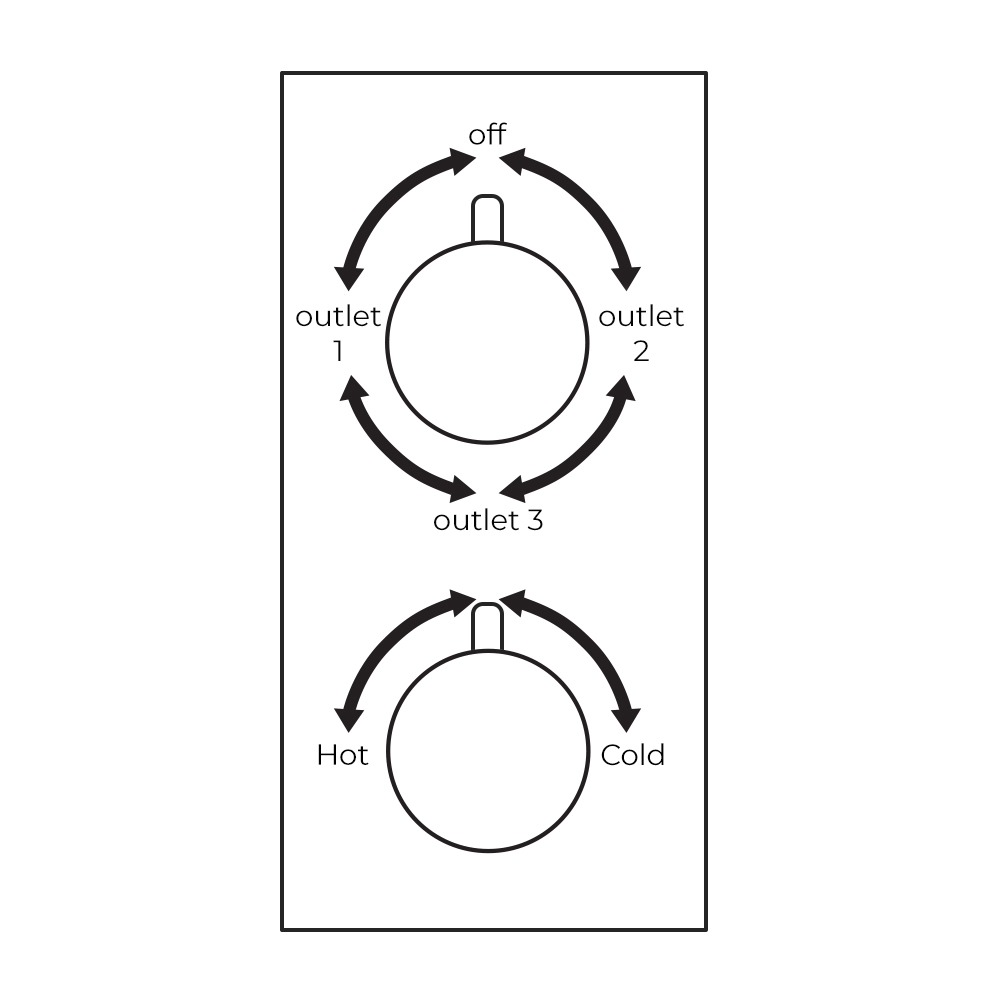
- Cold / hot water control type: Double handle double control
- Finish: Chrome Finish
- Shower Head Size: 11.8" * 11.8" (300 * 300mm)
- LED Light: Need to Connect Power
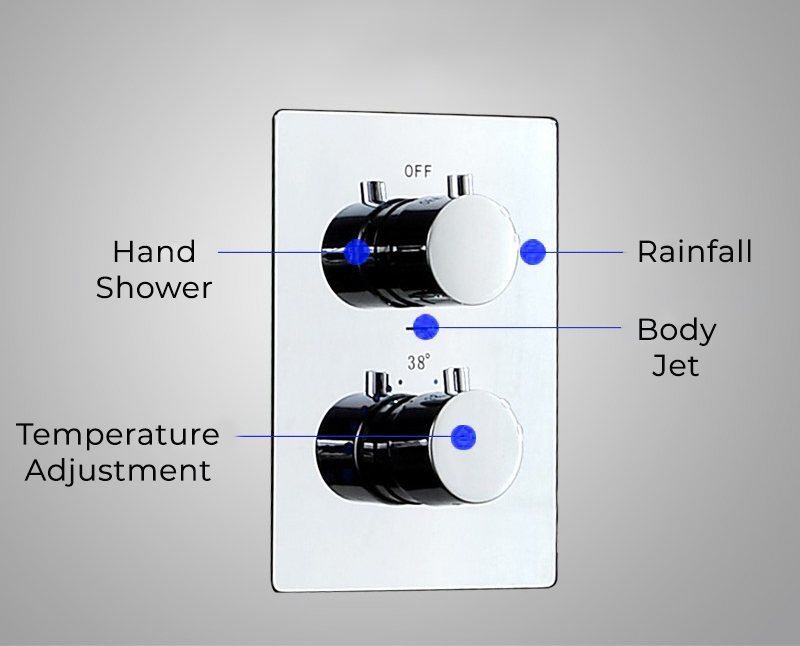
- Shower Body Jet: 2 Inch, Rainfall Function
- Shower Faucets : 3 Functions
- Minimum water pressure requirement: 0.3MPA
- Water Flow: 5L-21L / min
- Style : Contemporary
- Handle number: Double handle
- Function: Thermostatic
- Install: Embedded Flush Mount Ceiling Mount
- LED Light Color: Remote Control LED Light
- Shower Valve: Thermostatic Control
|
|
BathSelect® Manufacturer Warranty Information
- Before you begin, please read the installation instructions below. Observe all local building and safety codes.
- Unpack and inspect the product for any shipping damages. If you find damages, do not install.
- Please note all showers must be installed by a professional and certified plumber otherwise warranty might be voided.
shower
Recessed Shower Head Installation
Step 1
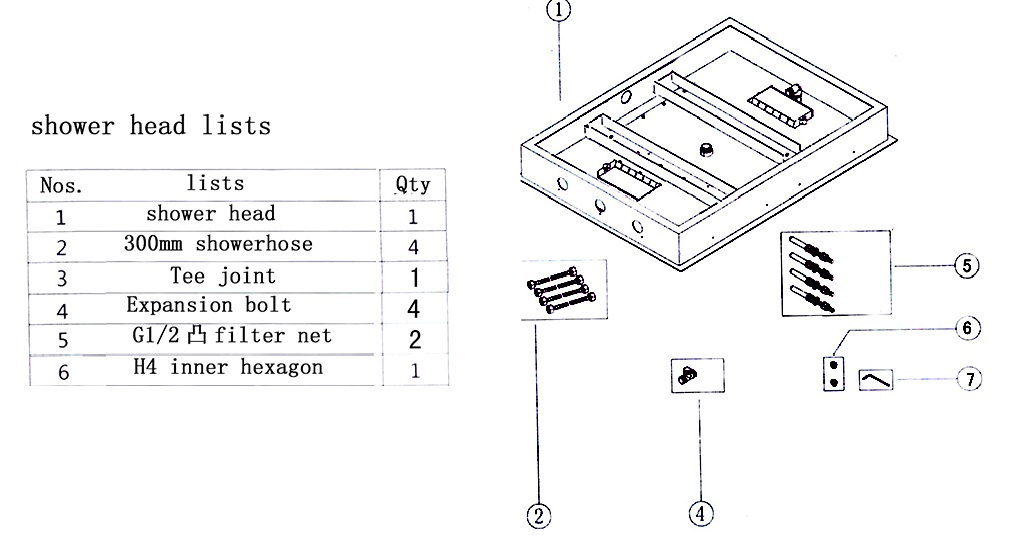
|
shower
|
Step 2
|
shower
|
|
|
Step 3
|
|
Step 4
|
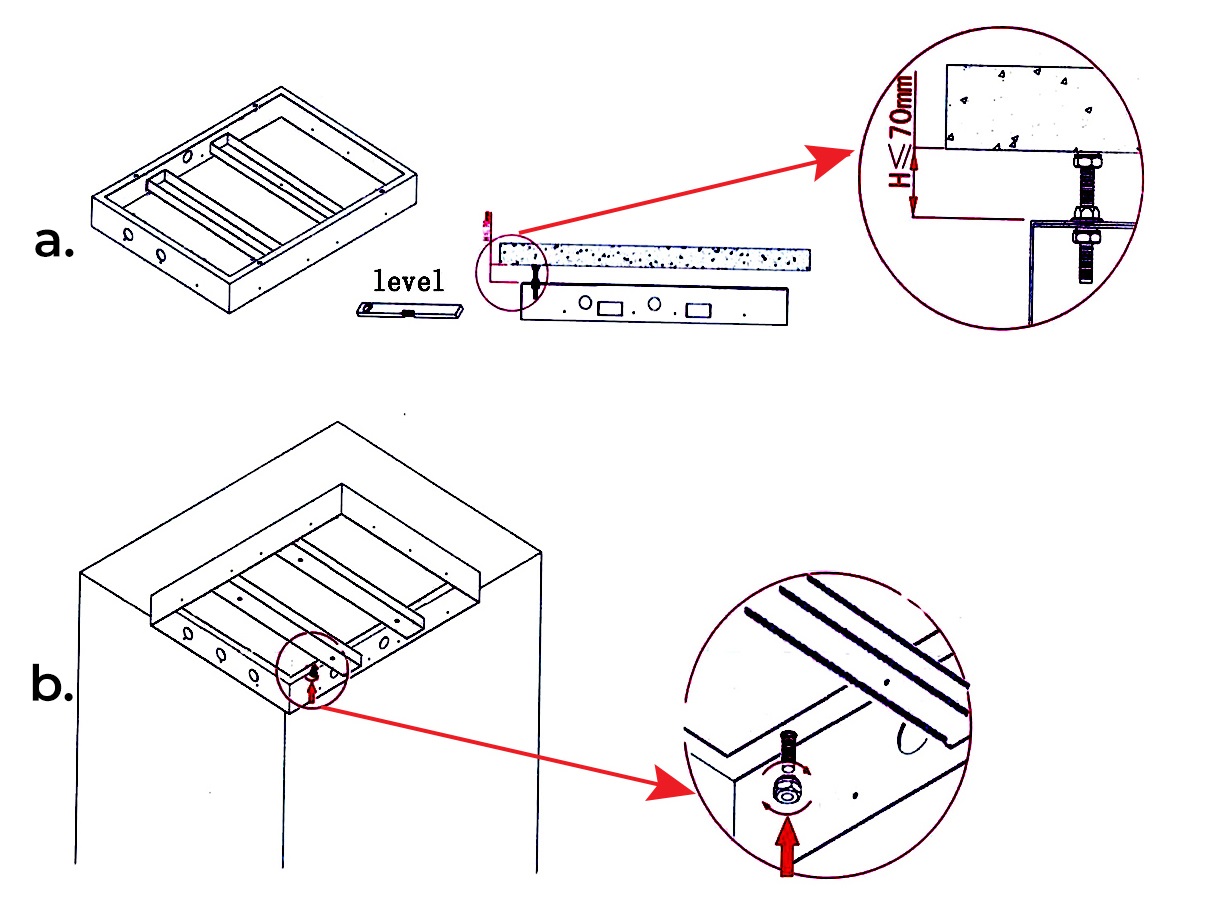
Step 1: According to the dimensions and shape of the mounting bracket, determine the bracket location to be installed in the ceiling.
Attention
1. Open packages, check all the goods whether everything is ok.
2. Check the size of the connector and the thread size of the water pipes connector in the wall.
3. Clean the water pipes before installing them.
4. At least 2 water electricians to install the showerhead.
5. Pay attention to the water temperature, not over 70 degrees.
6. Water pressure: 0.05 MPA - 0.5 MPA.
7. Adapter is 100-265 V to 12 V, insurance device rated current less than 30 MA.
Step 2: According to the four mounting holes on the mounting bracket, use Electric drill play mounting holes.
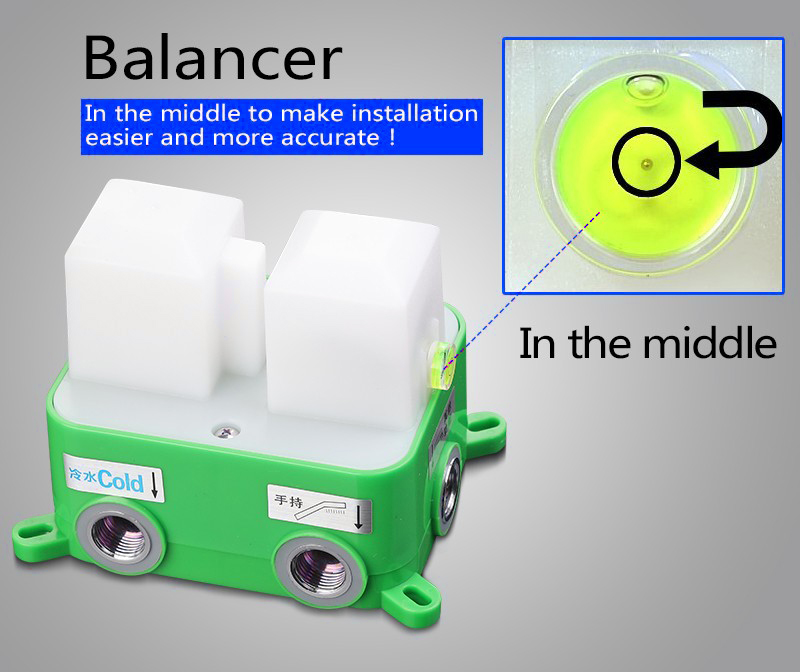
a) Through the two hexagonal nuts adjust the distance between the mounting bracket and the ceiling, and keep the mounting bracket on the level.
b) Use explosion screw fixed mounting bracket on the ceiling, pay attention to the explosion screw can adjust the height, and use level adjust the mounting bracket to level.
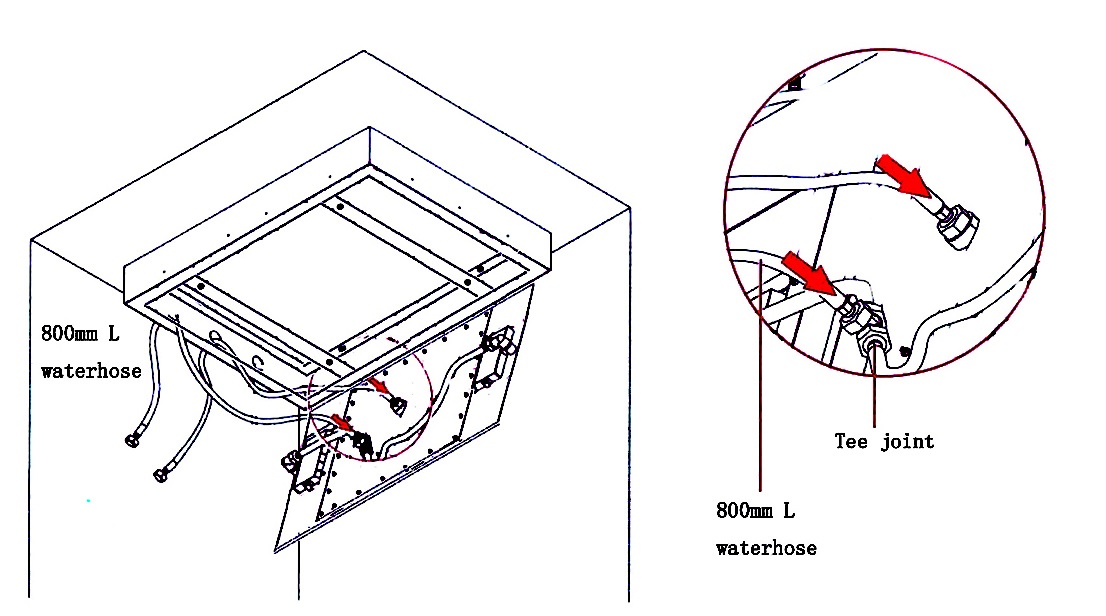
Step 3: Connect 1 pcs water hose to 1 Tee Joints and G1/2, G1/2 joint in the middle, then put another side of the shower hose through the hole of shower head size.
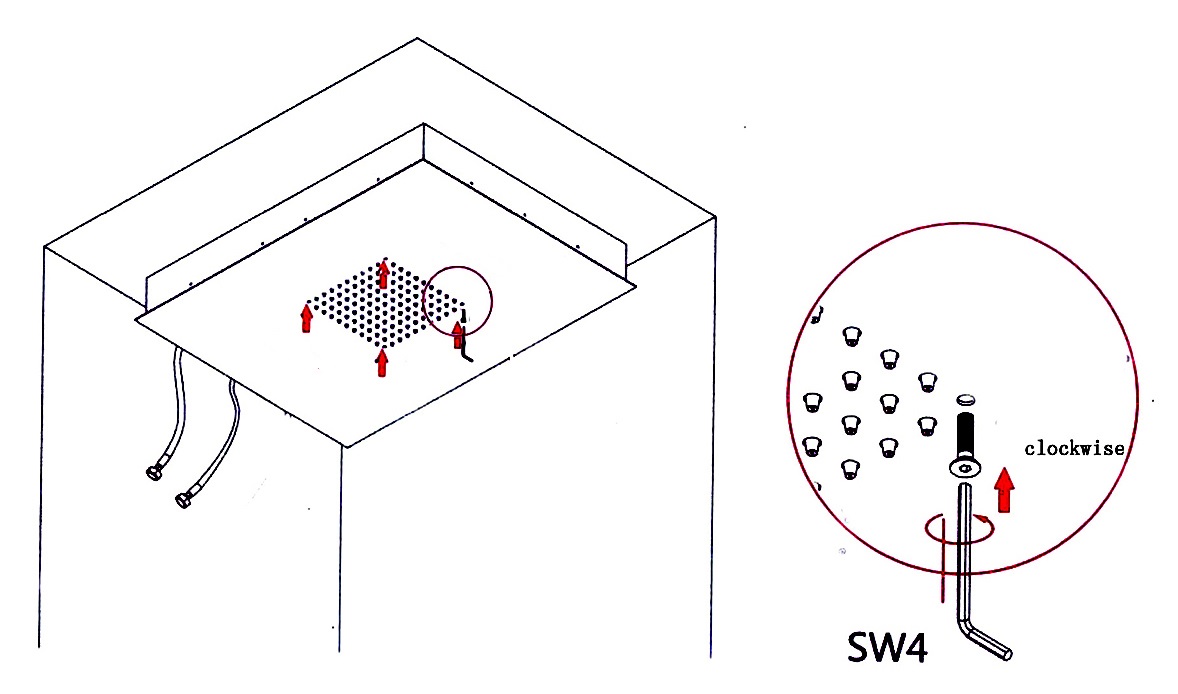
Step 4: Install the decorative panel, use SW4 hexagon wrench tighten 4 screws.
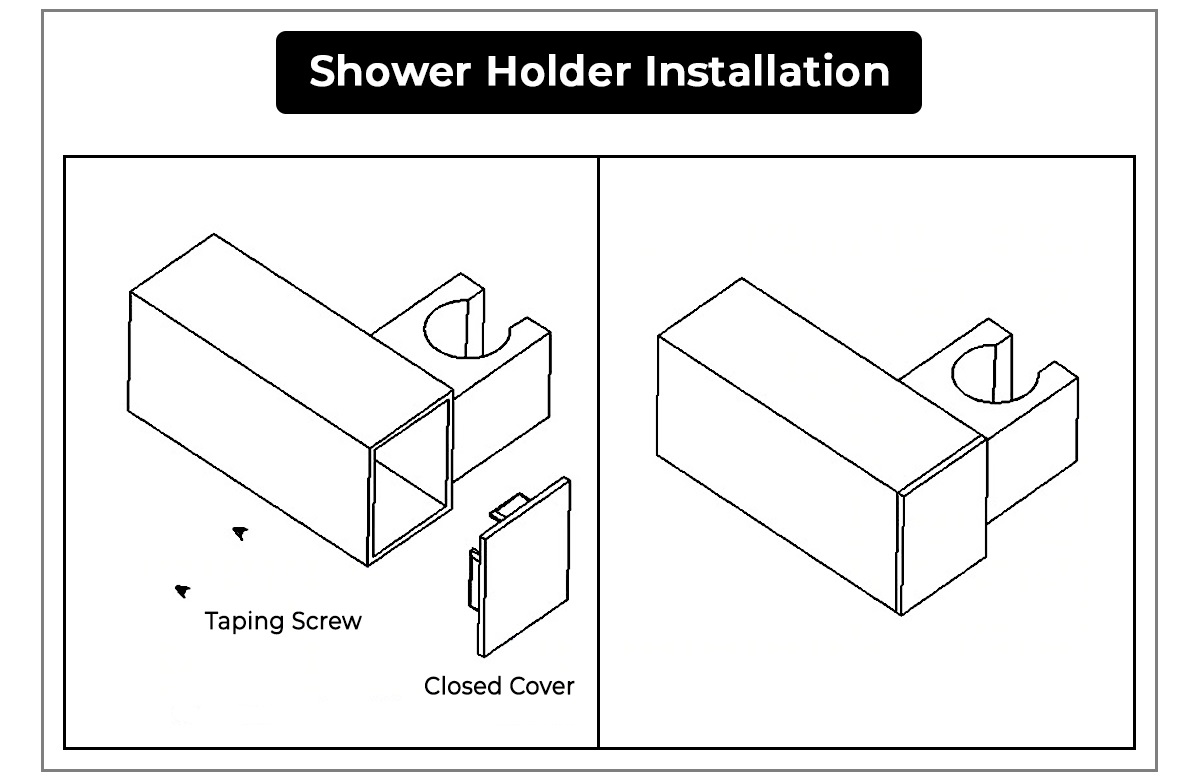
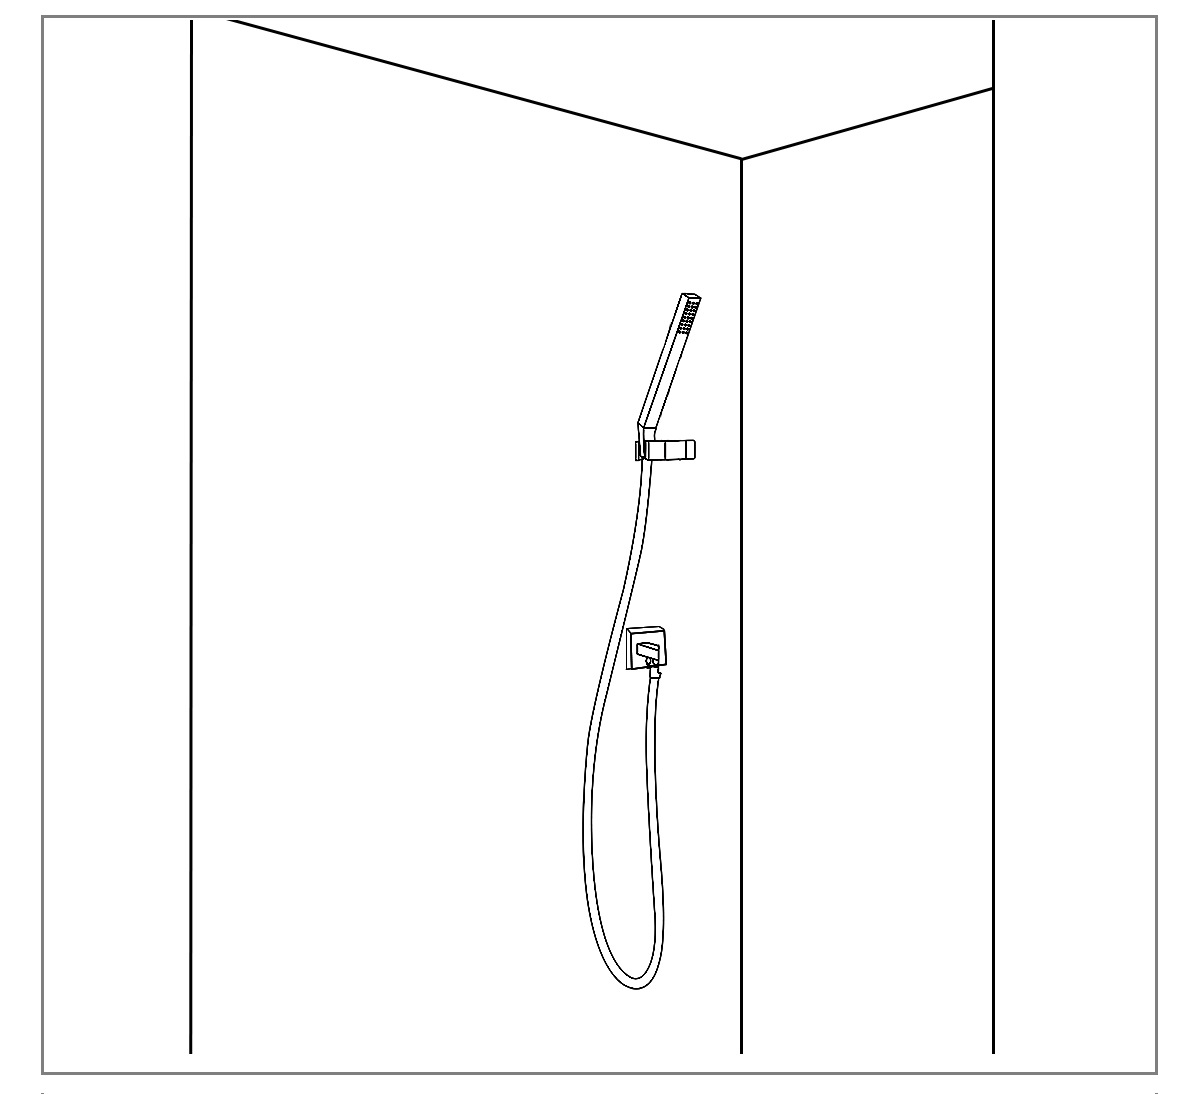
Shower Holder Installation
Step 1
|
shower
|
Step 2
|
|
|
1. Open the closed cover of the shower holder and take out the screws.
2. Drill two holes size 6mm on the wall according the hole position of the shower holder. Use a hammer to break 2 plastic wall plug into two holes. Tighten the screws with the plastic wall plug and locking with the shower holder. Then install the closed cover.
3. Connect the shower hose with water outlet connection part and hand shower. Plug the hand shower in the shower holder.
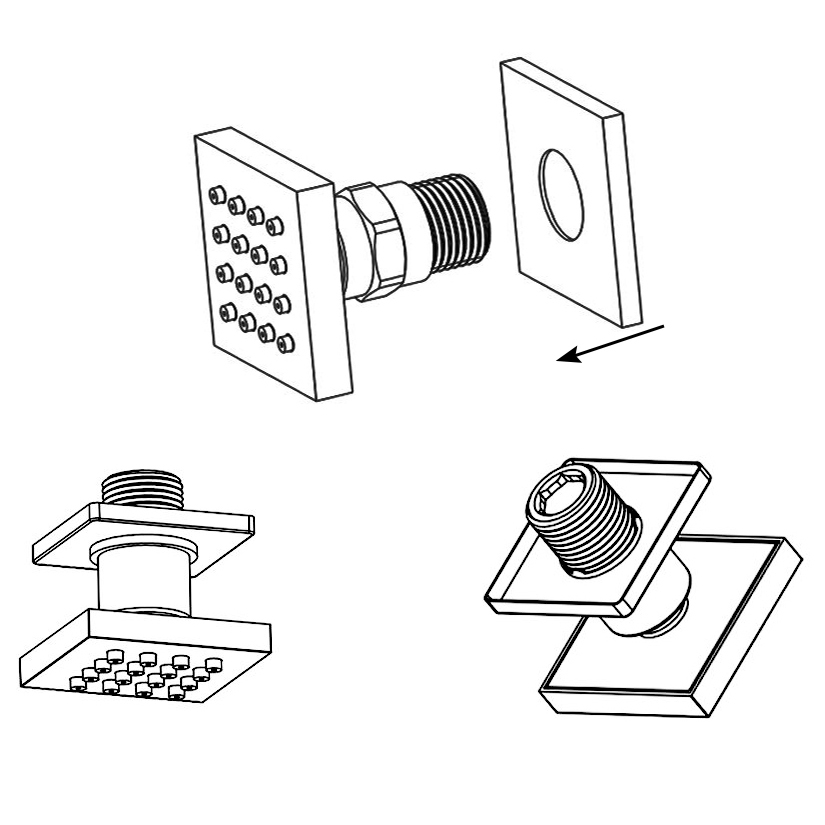
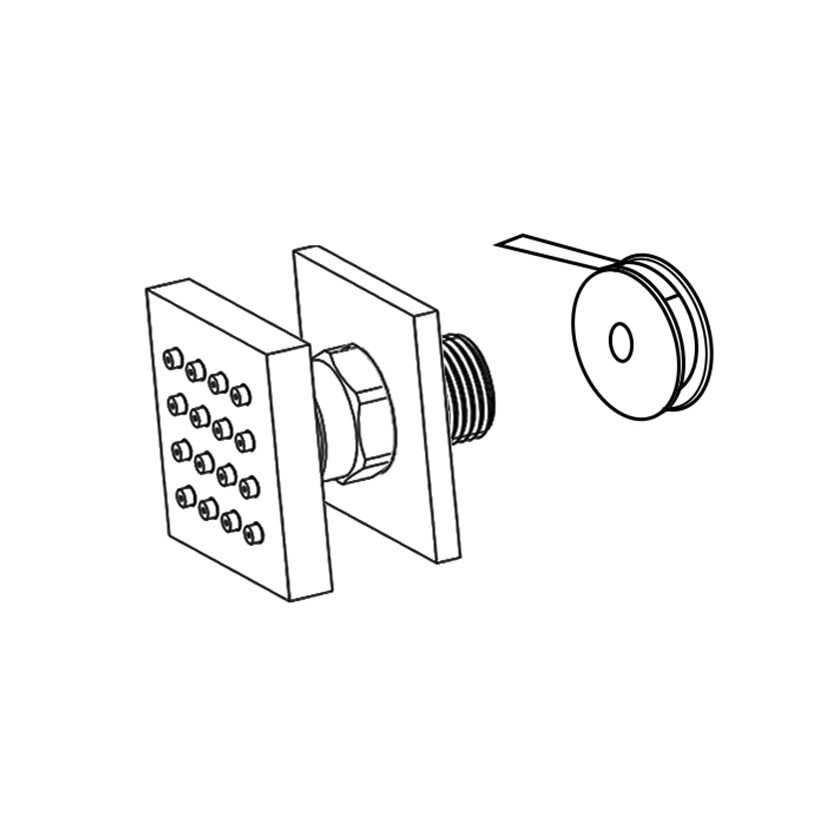
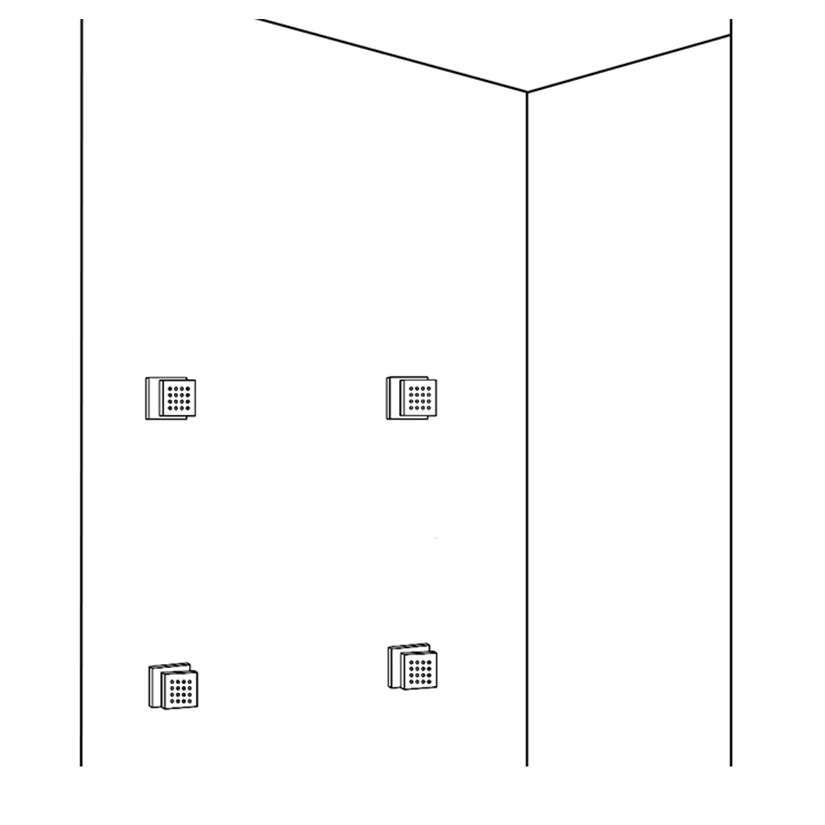
Shower Body Jets Installation
|
Step 1:
|
|
Step 2:
|
|
Step 3:
|
|
Body
Sprays
|
|
Body
Sprays
|
|
|
Set the decorative cover on the body jet.
|
|
Roll the raw material belt in the thread screws.
|
|
Use a wrench to tighten 6 body jets on
the water outlet holes in a clockwise direction.
|
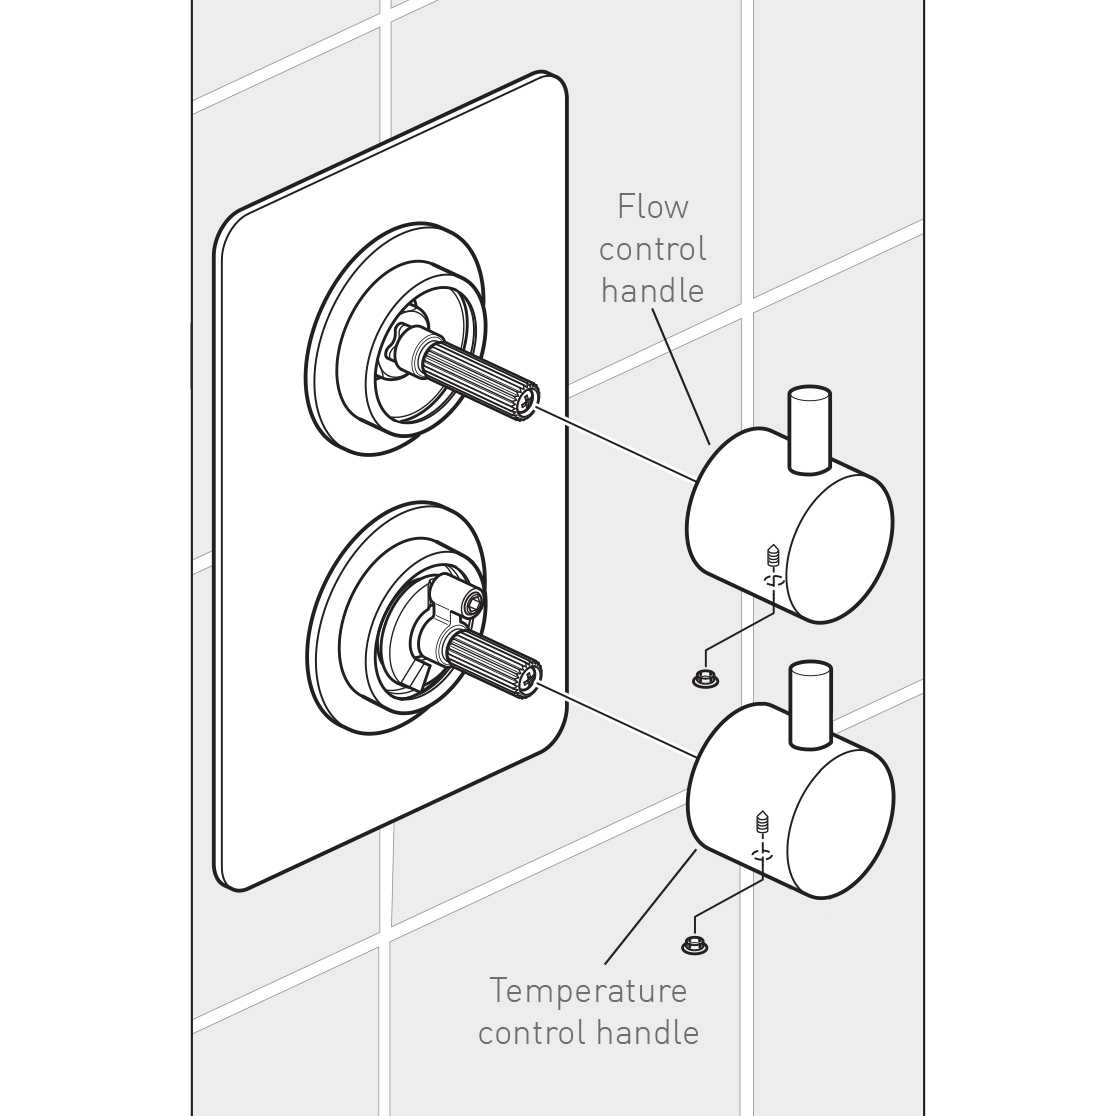
Shower Mixer Installation
Step 1
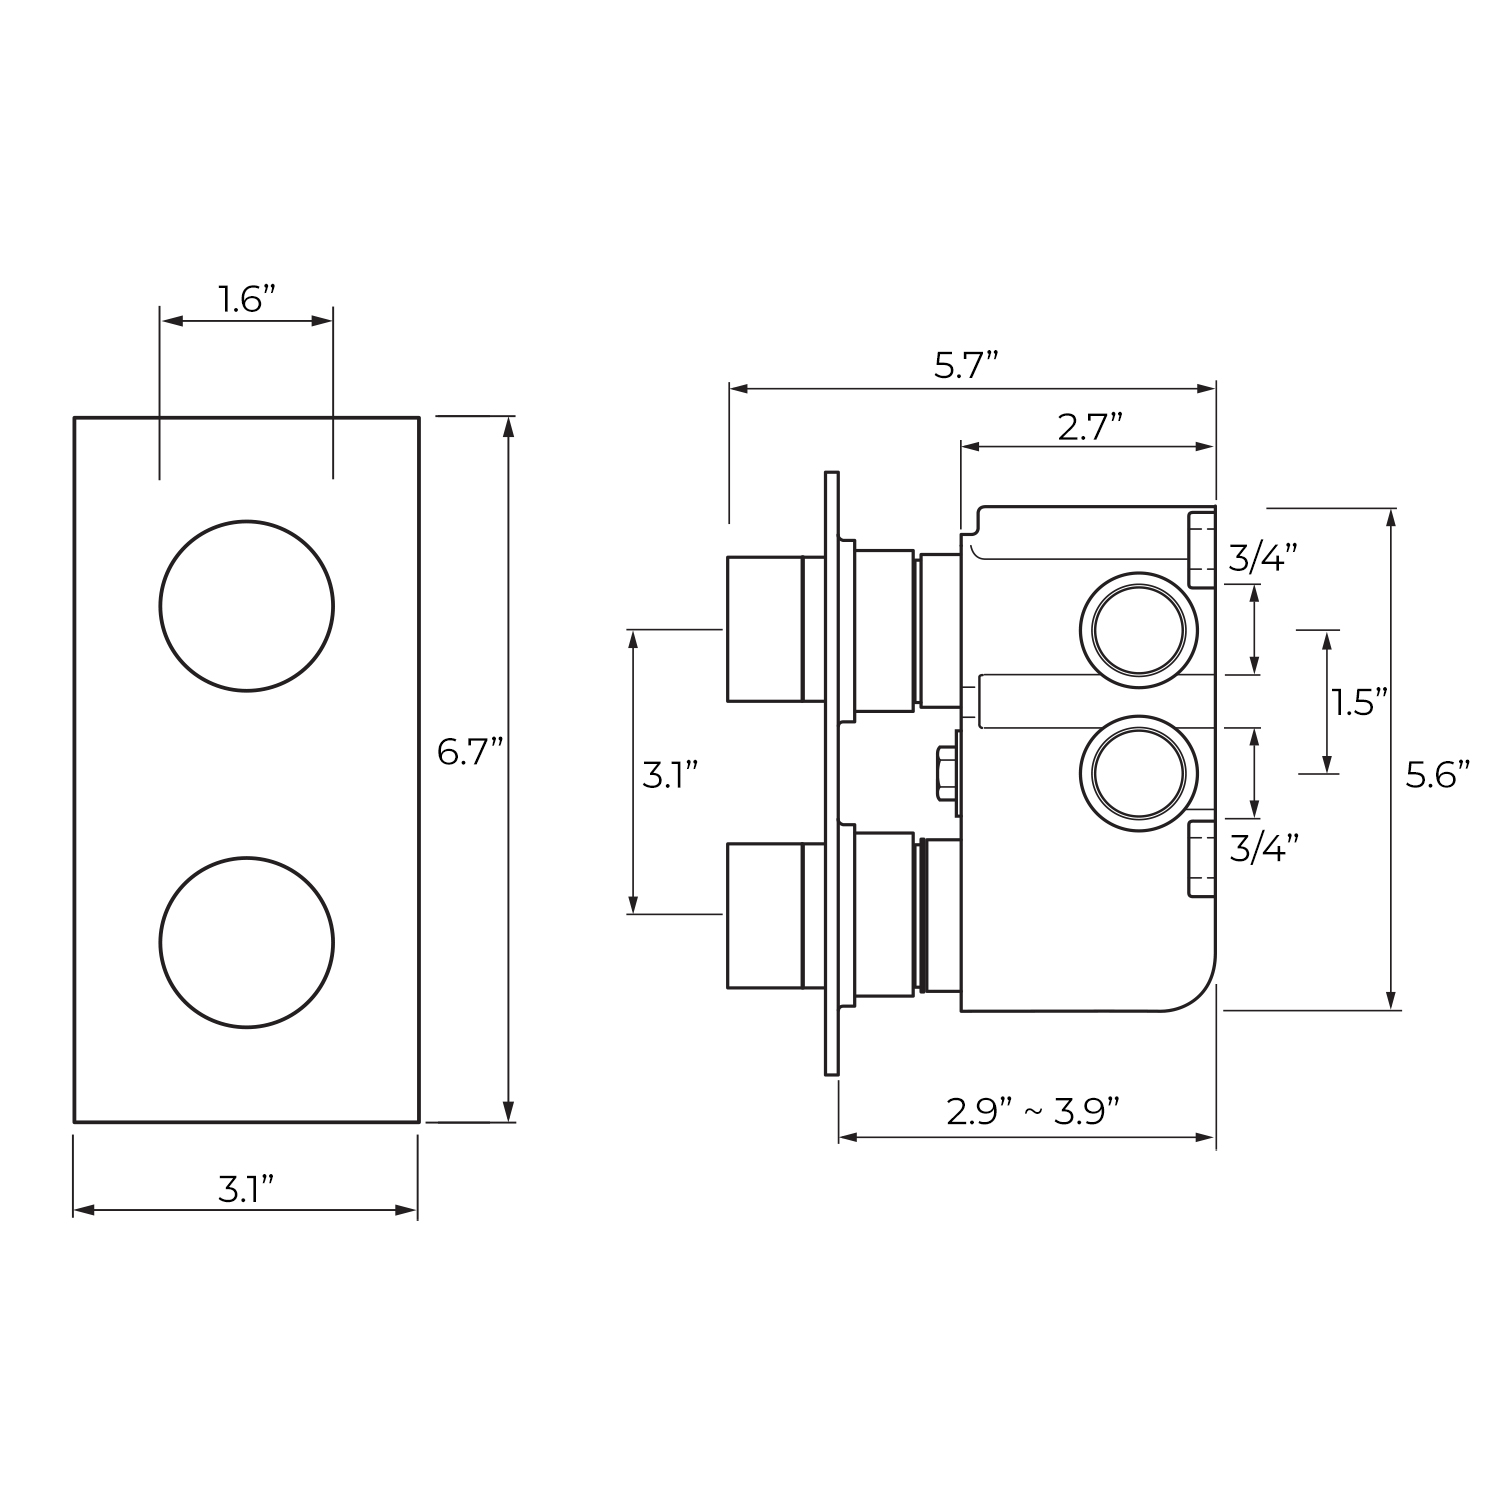
|
shower
|
Step 2
|
shower
|
Step 3

|
Step 4
|
|
Step 5

|
|
Step 6
|
|