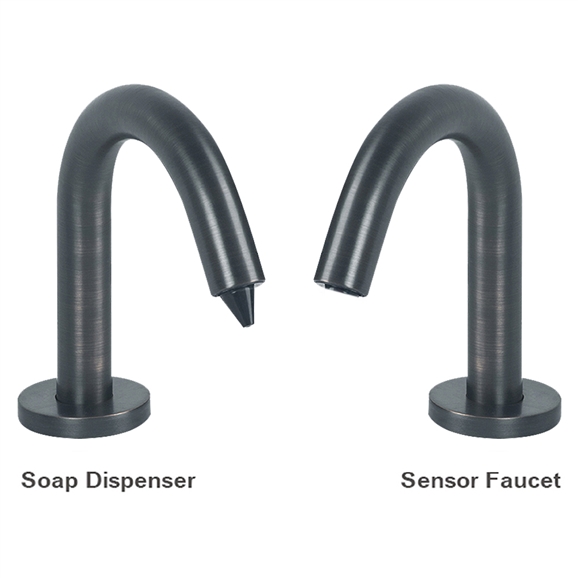
Installation Procedure
Main water supply (Hot/Cold)
Make sure that main water supply feeds are switched OFF before removing any existing tap or before you begin sensor tap installation process. Also make sure you have the correct and adequate water pressure before proceeding.
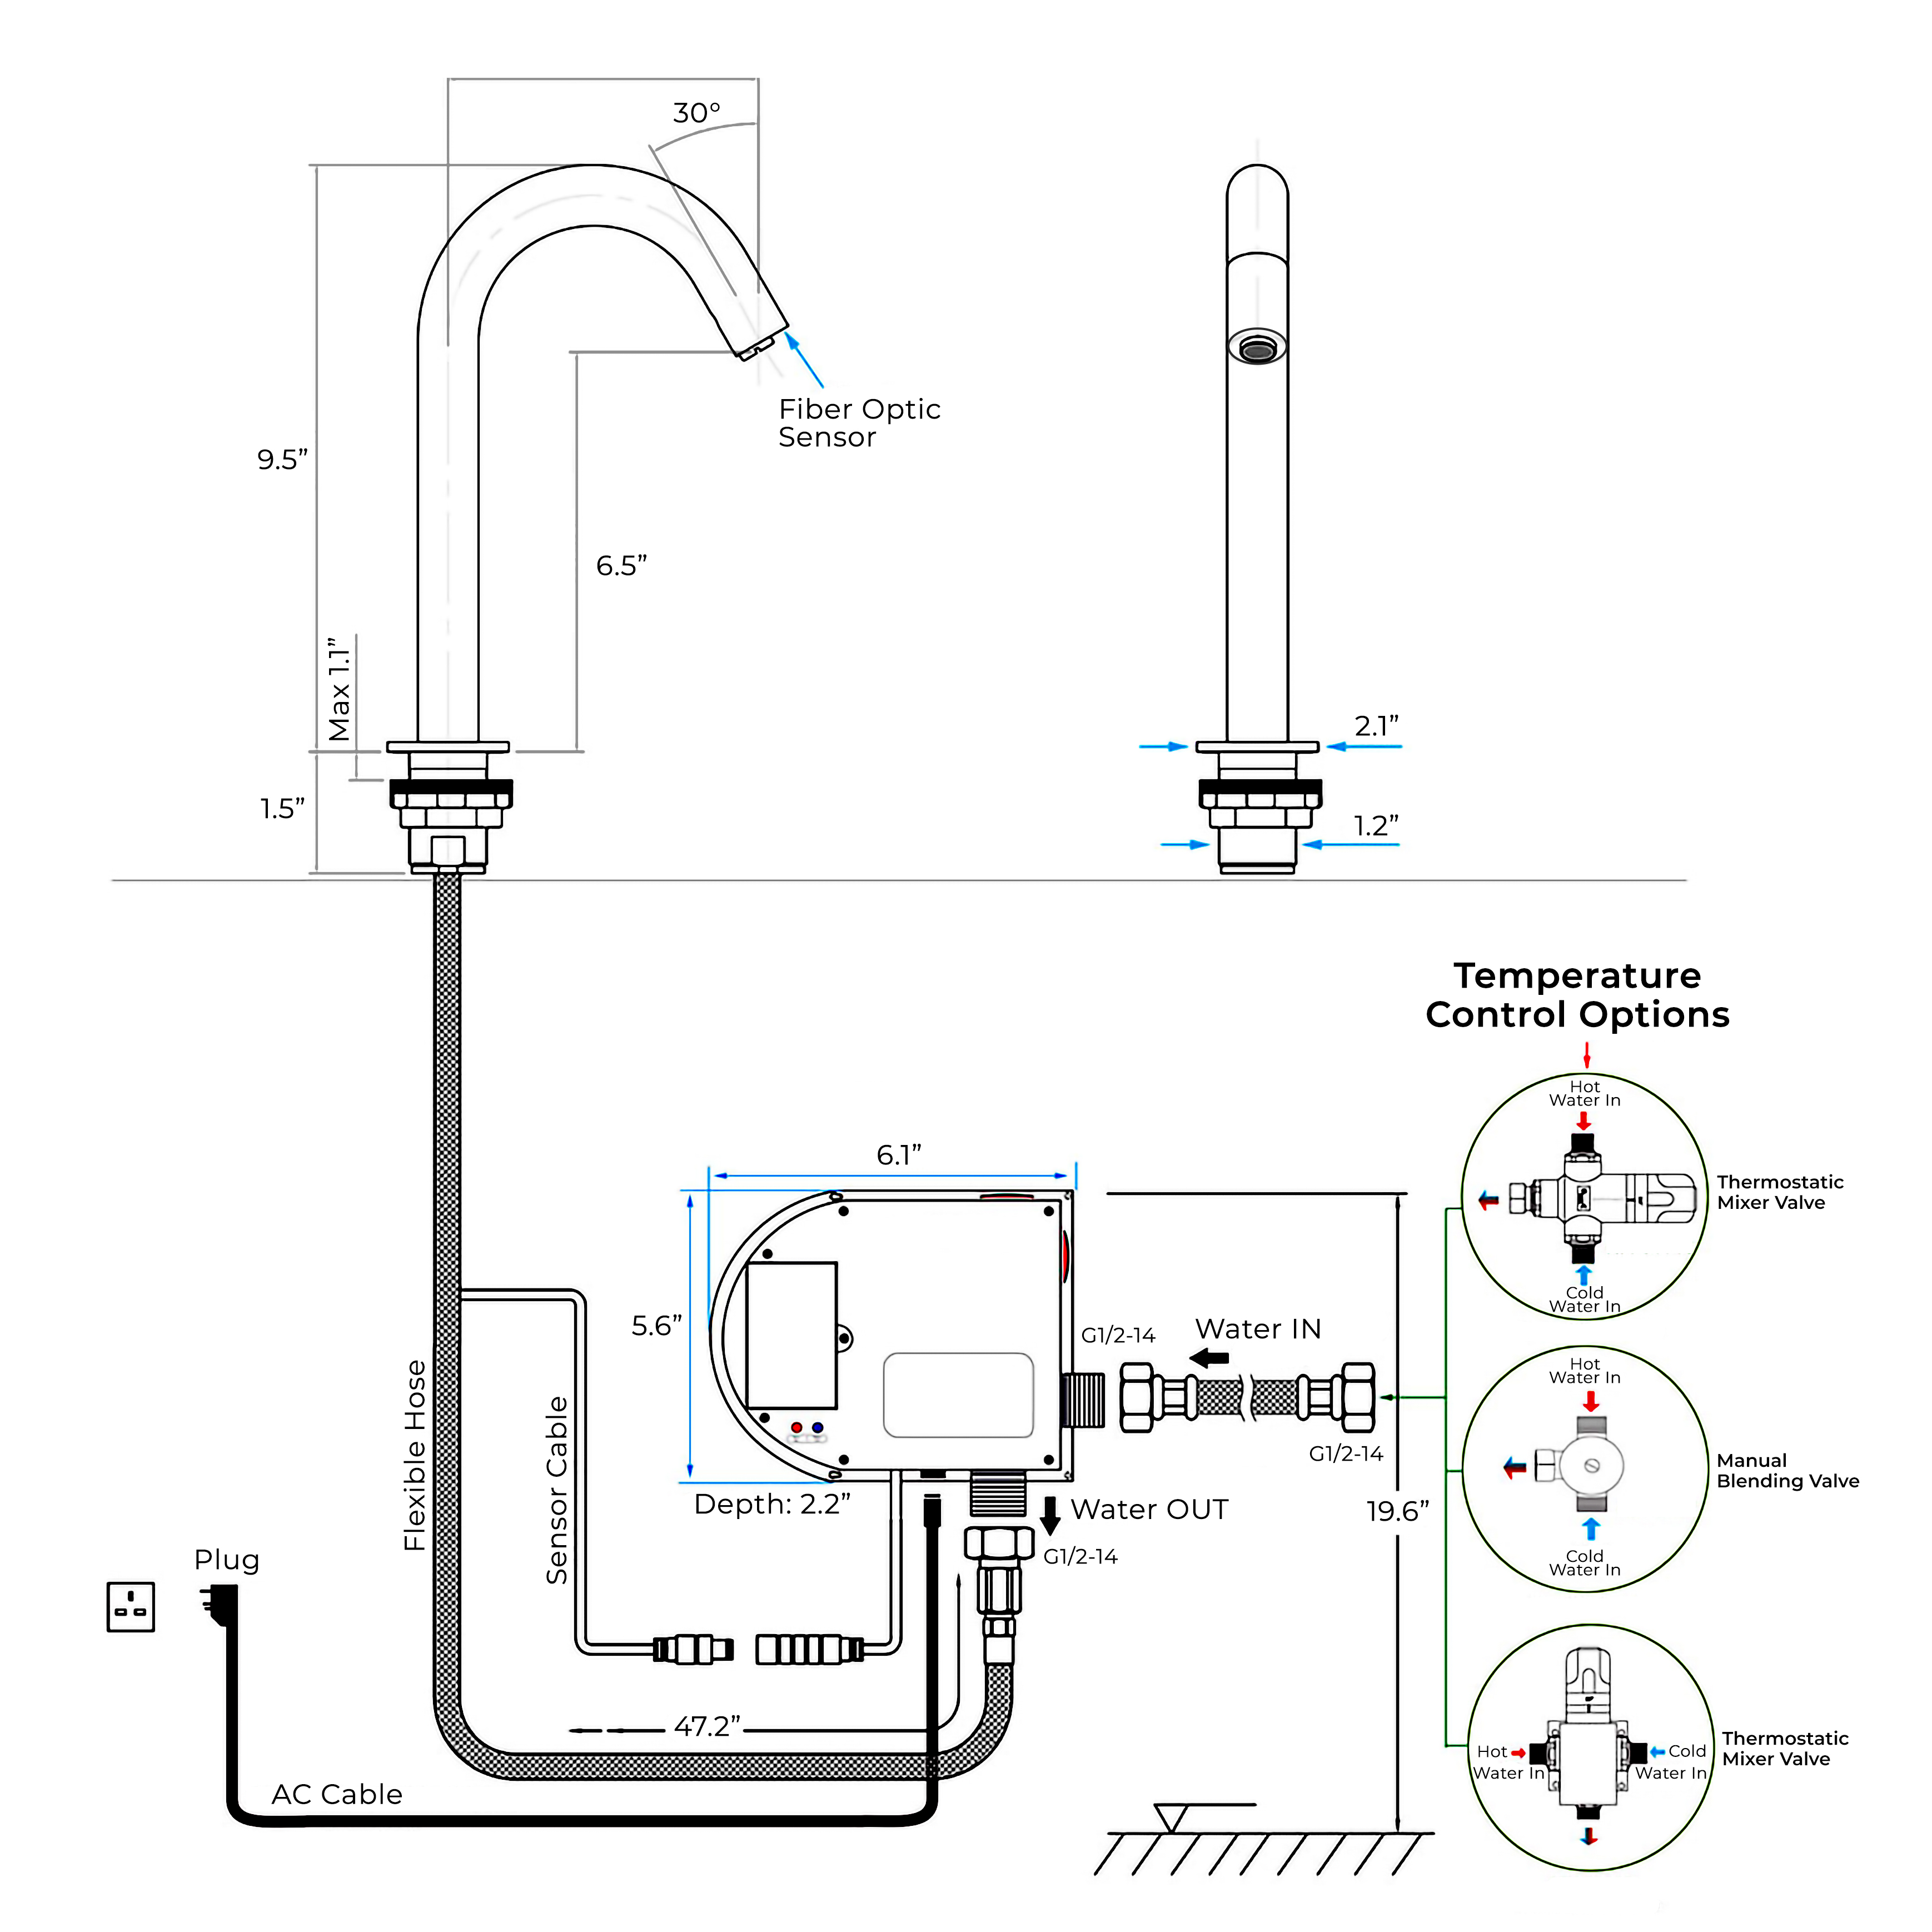
Step 1: Take the sensor tap and connect the flexible hose(s) supplied to the base of the tap and tighten firmly. Feed the flexible hose and sensor signal cable through the hole on the basin/worktop.
Step 2: Securely mount the sensor tap to your required position on the worktop or basin. Using the fittings provided, tighten the sensor tap to the worktop or basin firmly (from underneath)
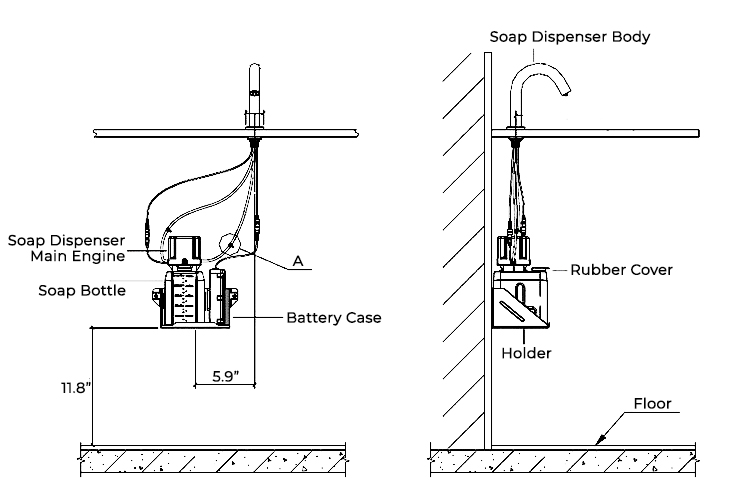
Step 3: Mount the control box (if supplied) underneath the sink using the screws provided. Make sure its mounted high enough for the flexible hose (coming from sensor tap) to reach it.
Step 4: Connect the flexible hose from sensor tap to the control box marked Water OUT.
Step 5: Connect the HOT and COLD sensor tap flexi cable directly to HOT and COLD main water supply and check for leaks. Please make sure you use any filters/non-return valves provided. Finish installation process, otherwise continue below.
Other sensor tap models with a control box:Connect main water supply (HOT/COLD supply) to the control box connection point marked Water IN.
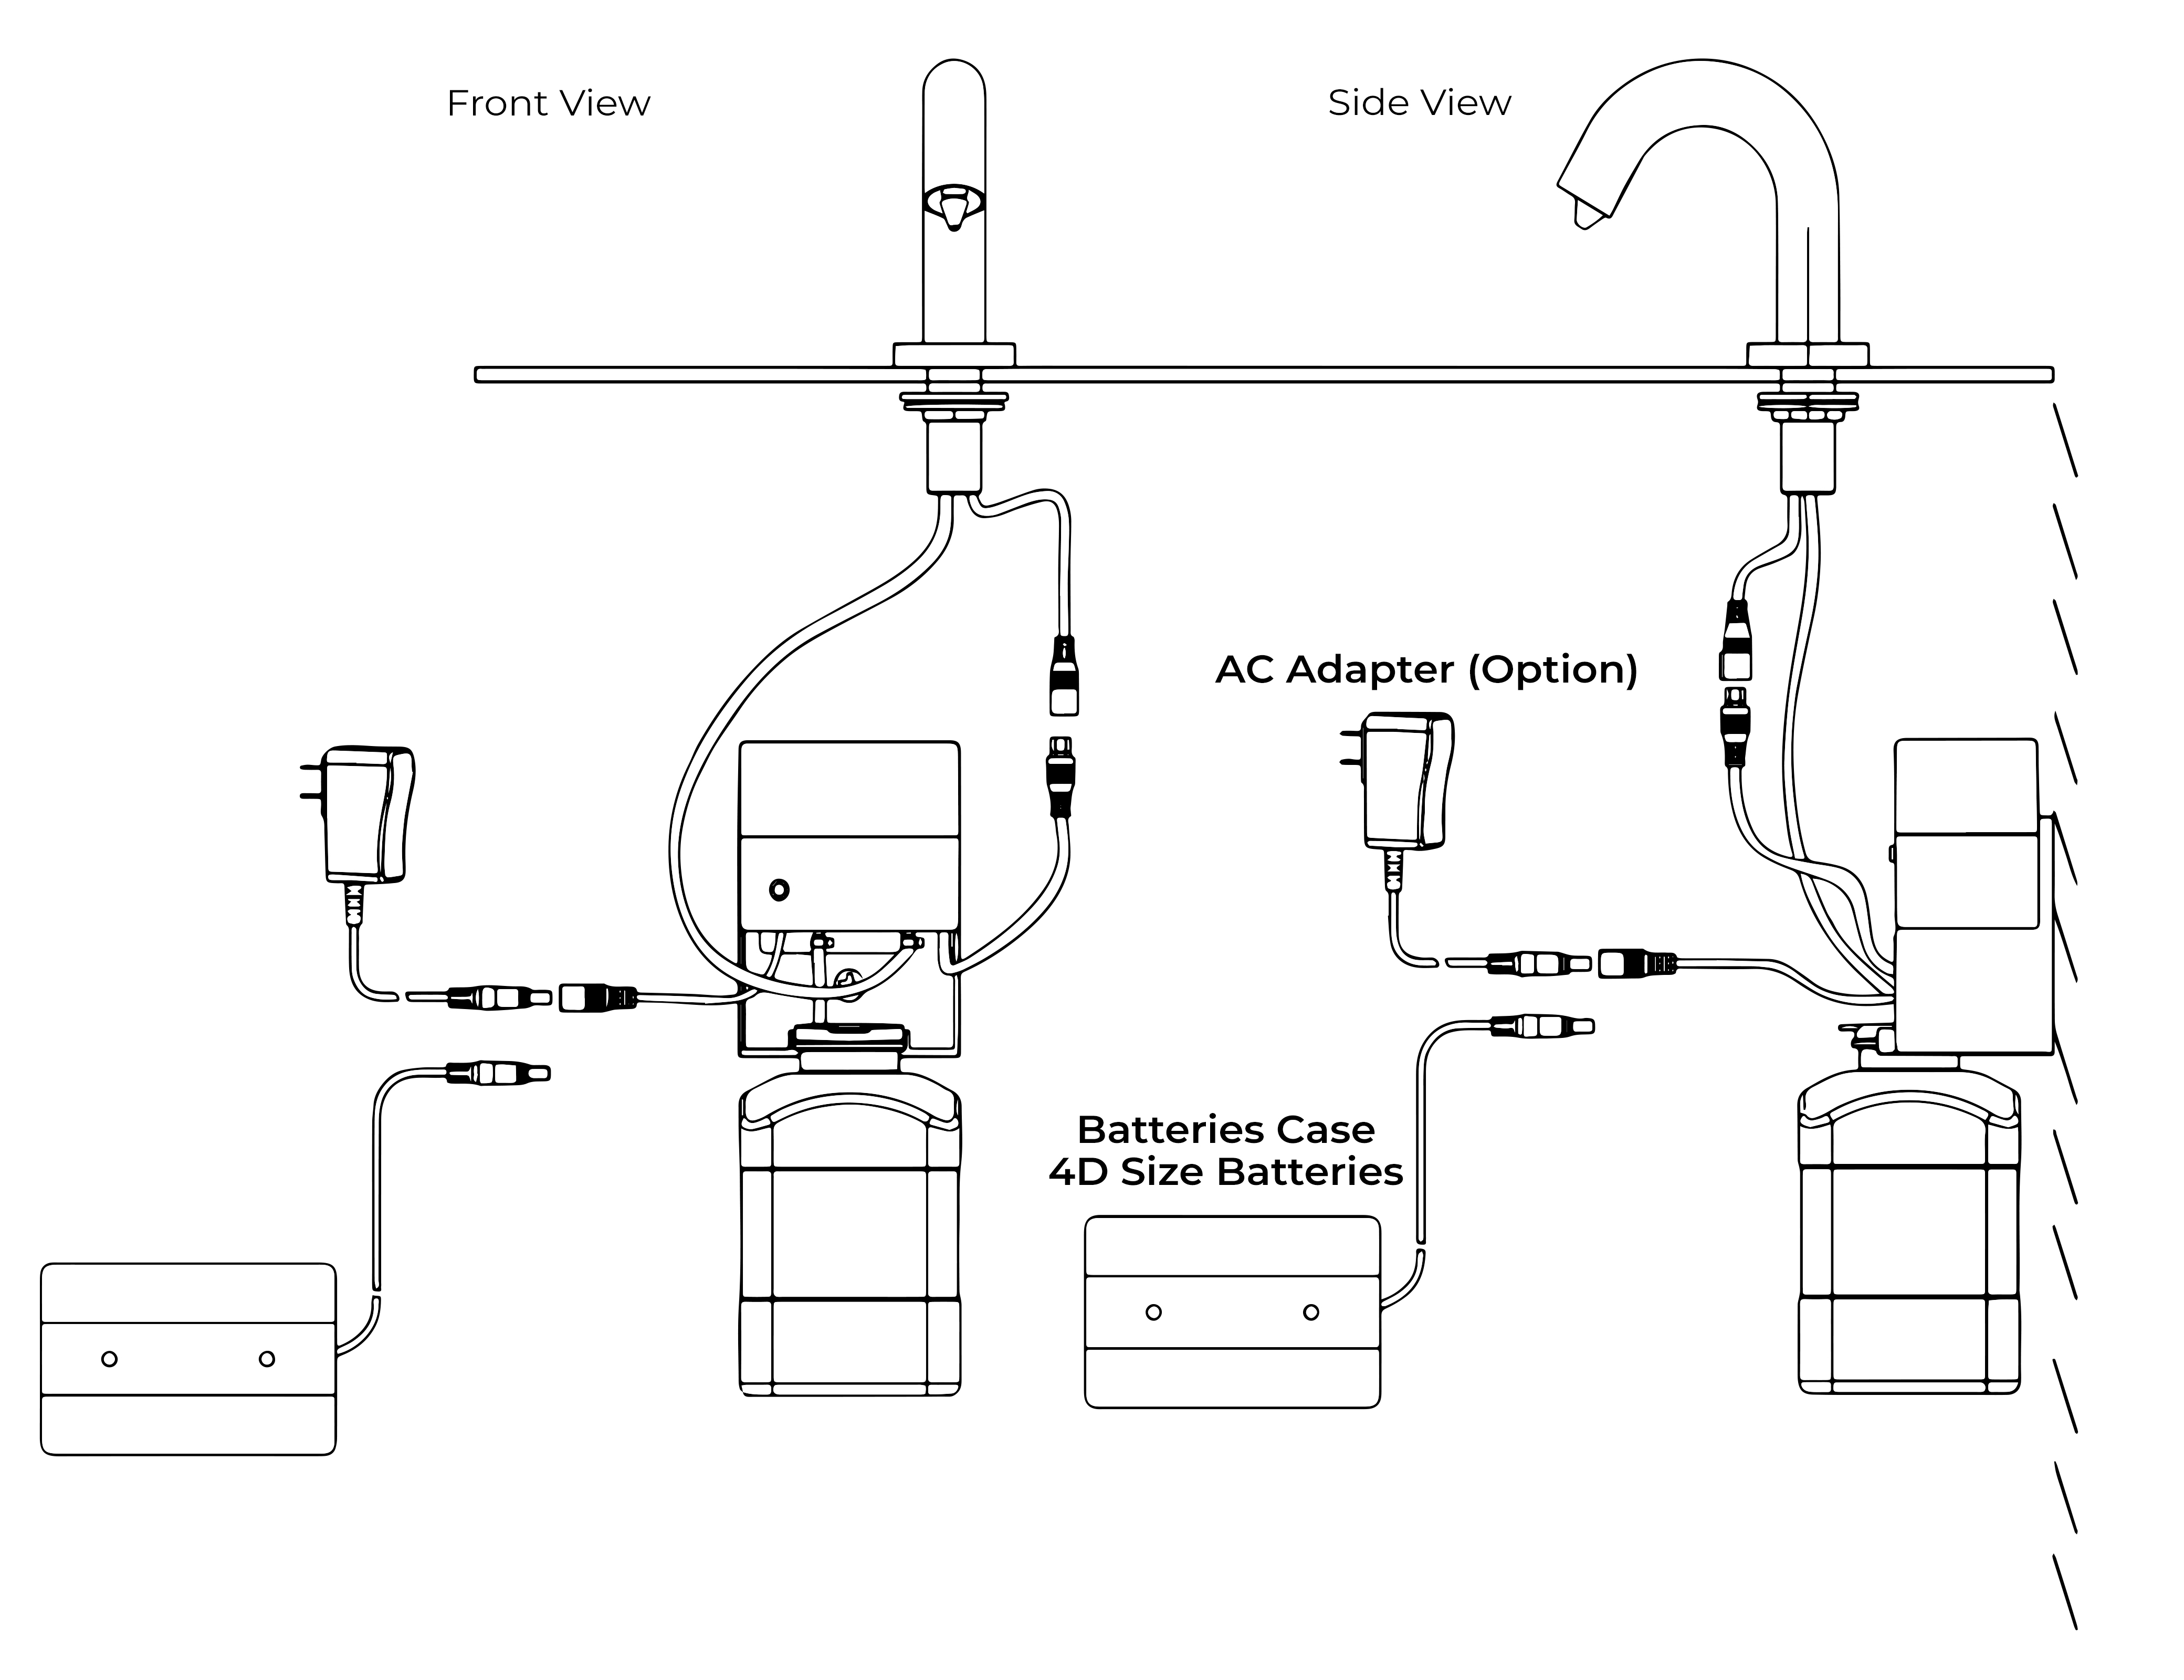
Step 6: Connect Main AC power supply.
Step 7: Connect the sensor wire cable to the control box, and switch ON the main water supply feeds.
NOTE
Check for leaks, and make sure all the connections are connected properly.
The installation process is now complete, and sensor tap is now ready to use.