Installation Instructions for Bravat Gold Infrared Automatic Electronic Commercial Faucet
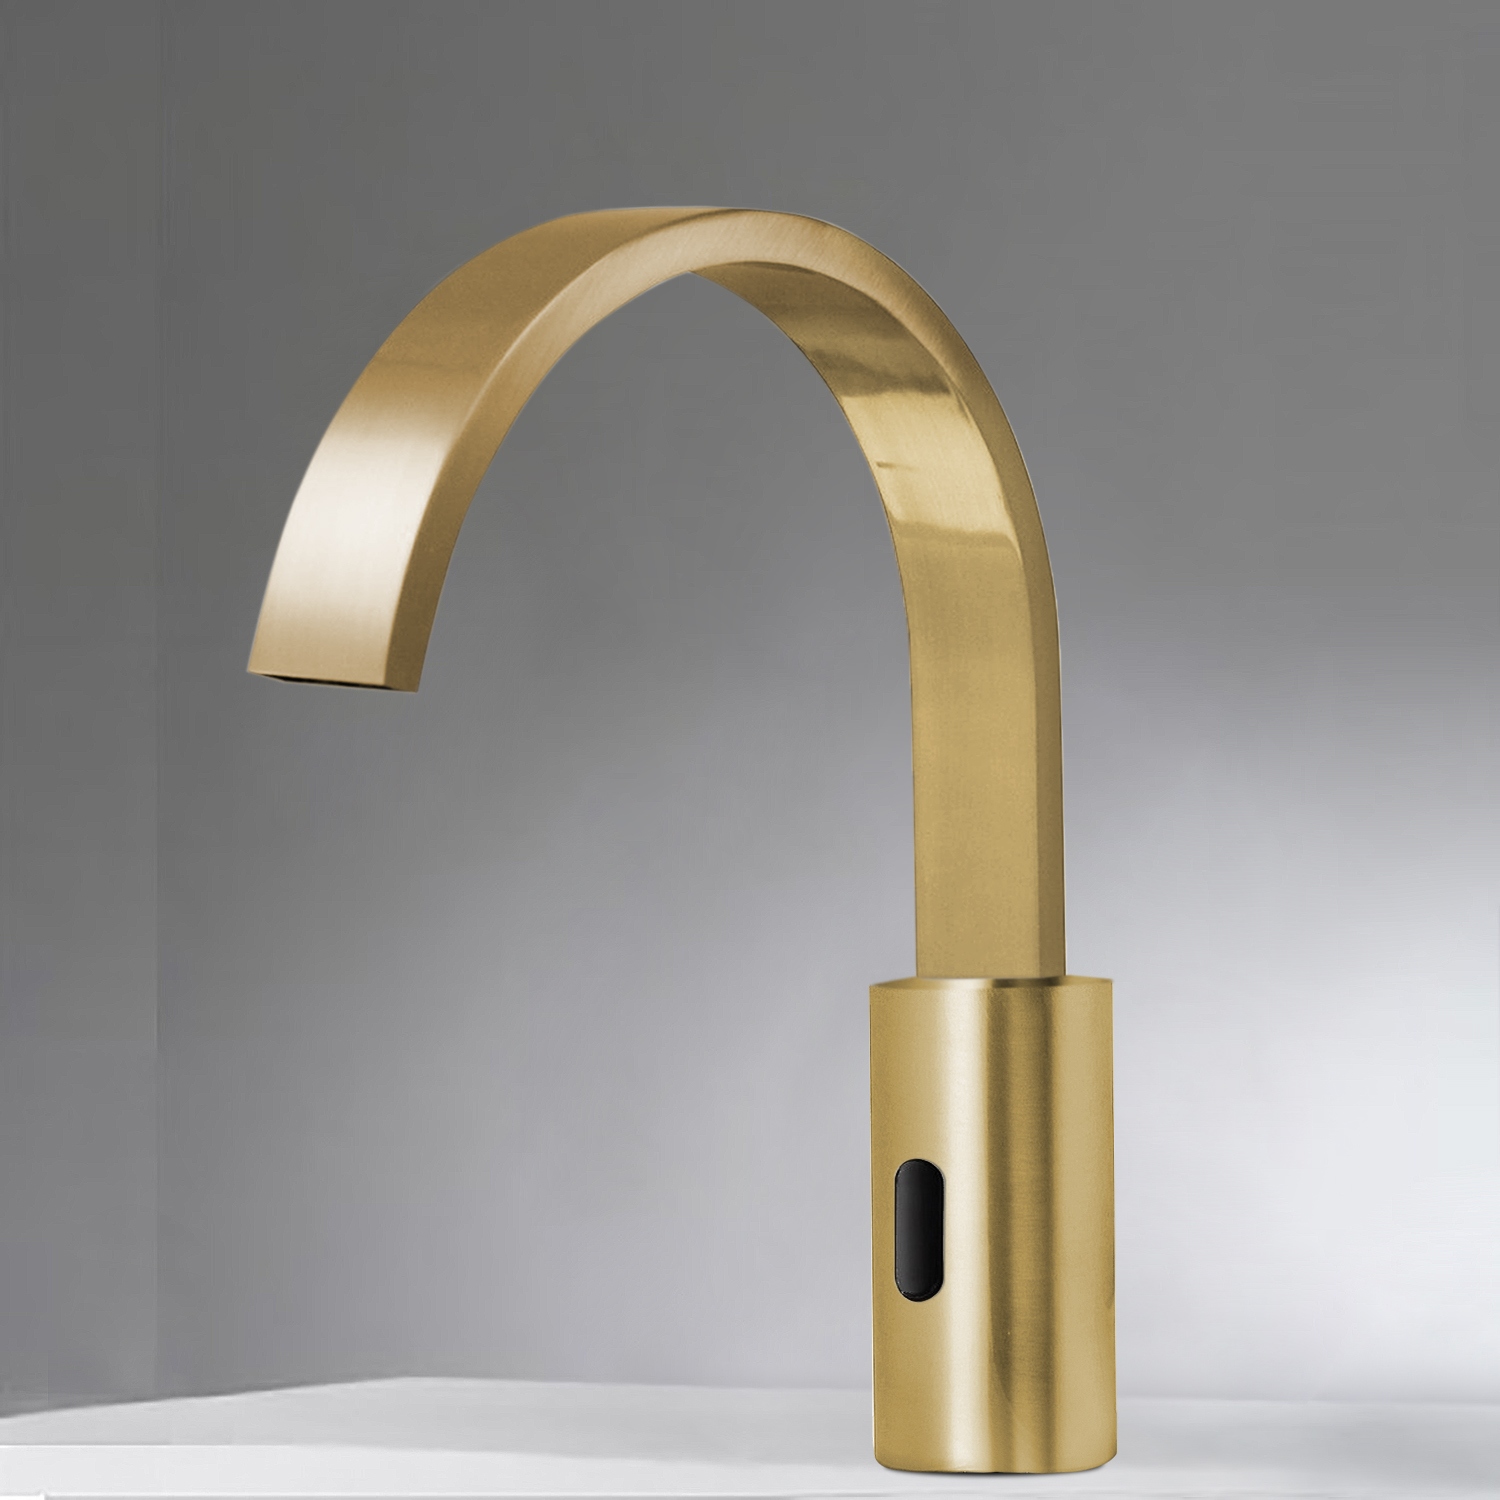
Bravat Gold Sensor Commercial Faucet| This sensor faucet from Bravat brings a new element of design and cost-effectiveness into every bathroom it is installed. The cylindrical base, the infrared sensor, the elegant curve and the Gold finish exudes a stylish and contemporary appeal that is perfect for the modern bathroom. Aside from the voguish design, the Bravat Infrared Electronic Faucet is built with solid brass to ensure its longevity - which is why the manufacturer confidently packs it with a ten years warranty. The infrared sensor is sure to work all the time, releasing water only if there is an object within its range and automatically shutting water flow after preset time. This greatly decreases the amount of water wasted from leaving the tap on. The infrared sensor battery is guaranteed to work up to three years. The energy saving architecture of this electronic sensor faucet ensures you will be able to enjoy this touch-free electronic faucet for years and years to come. Minimize waste of water, by using the automatic faucet. Immediately reduces water waste by eliminating unnecessary and unattended water flow. Uses 4AA Alkaline Batteries (purchase separately).Water Pressure: 0.5 - 7.0 KGS/cm, 10-125 psi. Ideal for commercial use applications in public restrooms, restaurants, office building, public facilities, hospitals. Fits all standard US plumbing. | |  | | |
|
| Features: | sensor | | - Sensor faucet complete motion detection operation.
- Sensitive Sensor with Infrared AI Smart-Chip
- Factory set to 30-second Auto Shutoff (can be adjusted).
- Water Pressure: 0.5 - 7.0 KGS/cm, 10 - 125 psi
- Solid Brass Construction, Gold Finish
- Easy to Install - Instructions Included
- Water resistant solenoid enclosure
- Advanced energy saving design for long lasting battery life
- Comes complete with Hoses & Accessories
- Power Supply: AC110V And DC6V (batteries not included)
- AC/DC power option.
- ADA Compliant.
- Easily can be installed in new or retrofit applications.
- Durable Vandal-Resistant Brass Body;
- Ideal for commercial use applications in public restrooms, restaurants, office building, public facilities, hospitals. Fits all standard US plumbing.
- Intelligent: with its micro-computer controlling its action,
- The faucet will self adjust best detection zone as per the color and shape of lavatory
- Flashing light indicator; a diagnostic indicators for power up, low battery, and solenoid function.
- Meaning of the codes are described in the installation instructions.
- Convenient to maintain; with built-in strainer to prevent sundries from entering the solenoid valve and the strainer is easy to clean
- Faucet can be mounted to any sink surface.
- Bravat Gold Infrared Automatic Electronic Commercial Faucet
- Batteries life 8,000 cycles per month and with enough water pressure is approx 5 year service life of the batteries.
- Adjustable sensing range; while the factory range is set about 4"to 5"from the sensor, it can be adjusted.
- Usage: Commercial / Residential
|
| 
| |
| |
Important Note:
Before you begin, please read the installation instructions below. Observe all local building and safety codes.Unpack and inspect the product for any shipping damages. If you find damages, do not install.Please note all showers must be installed by a professional and certified plumber otherwise warranty might be voided. | |
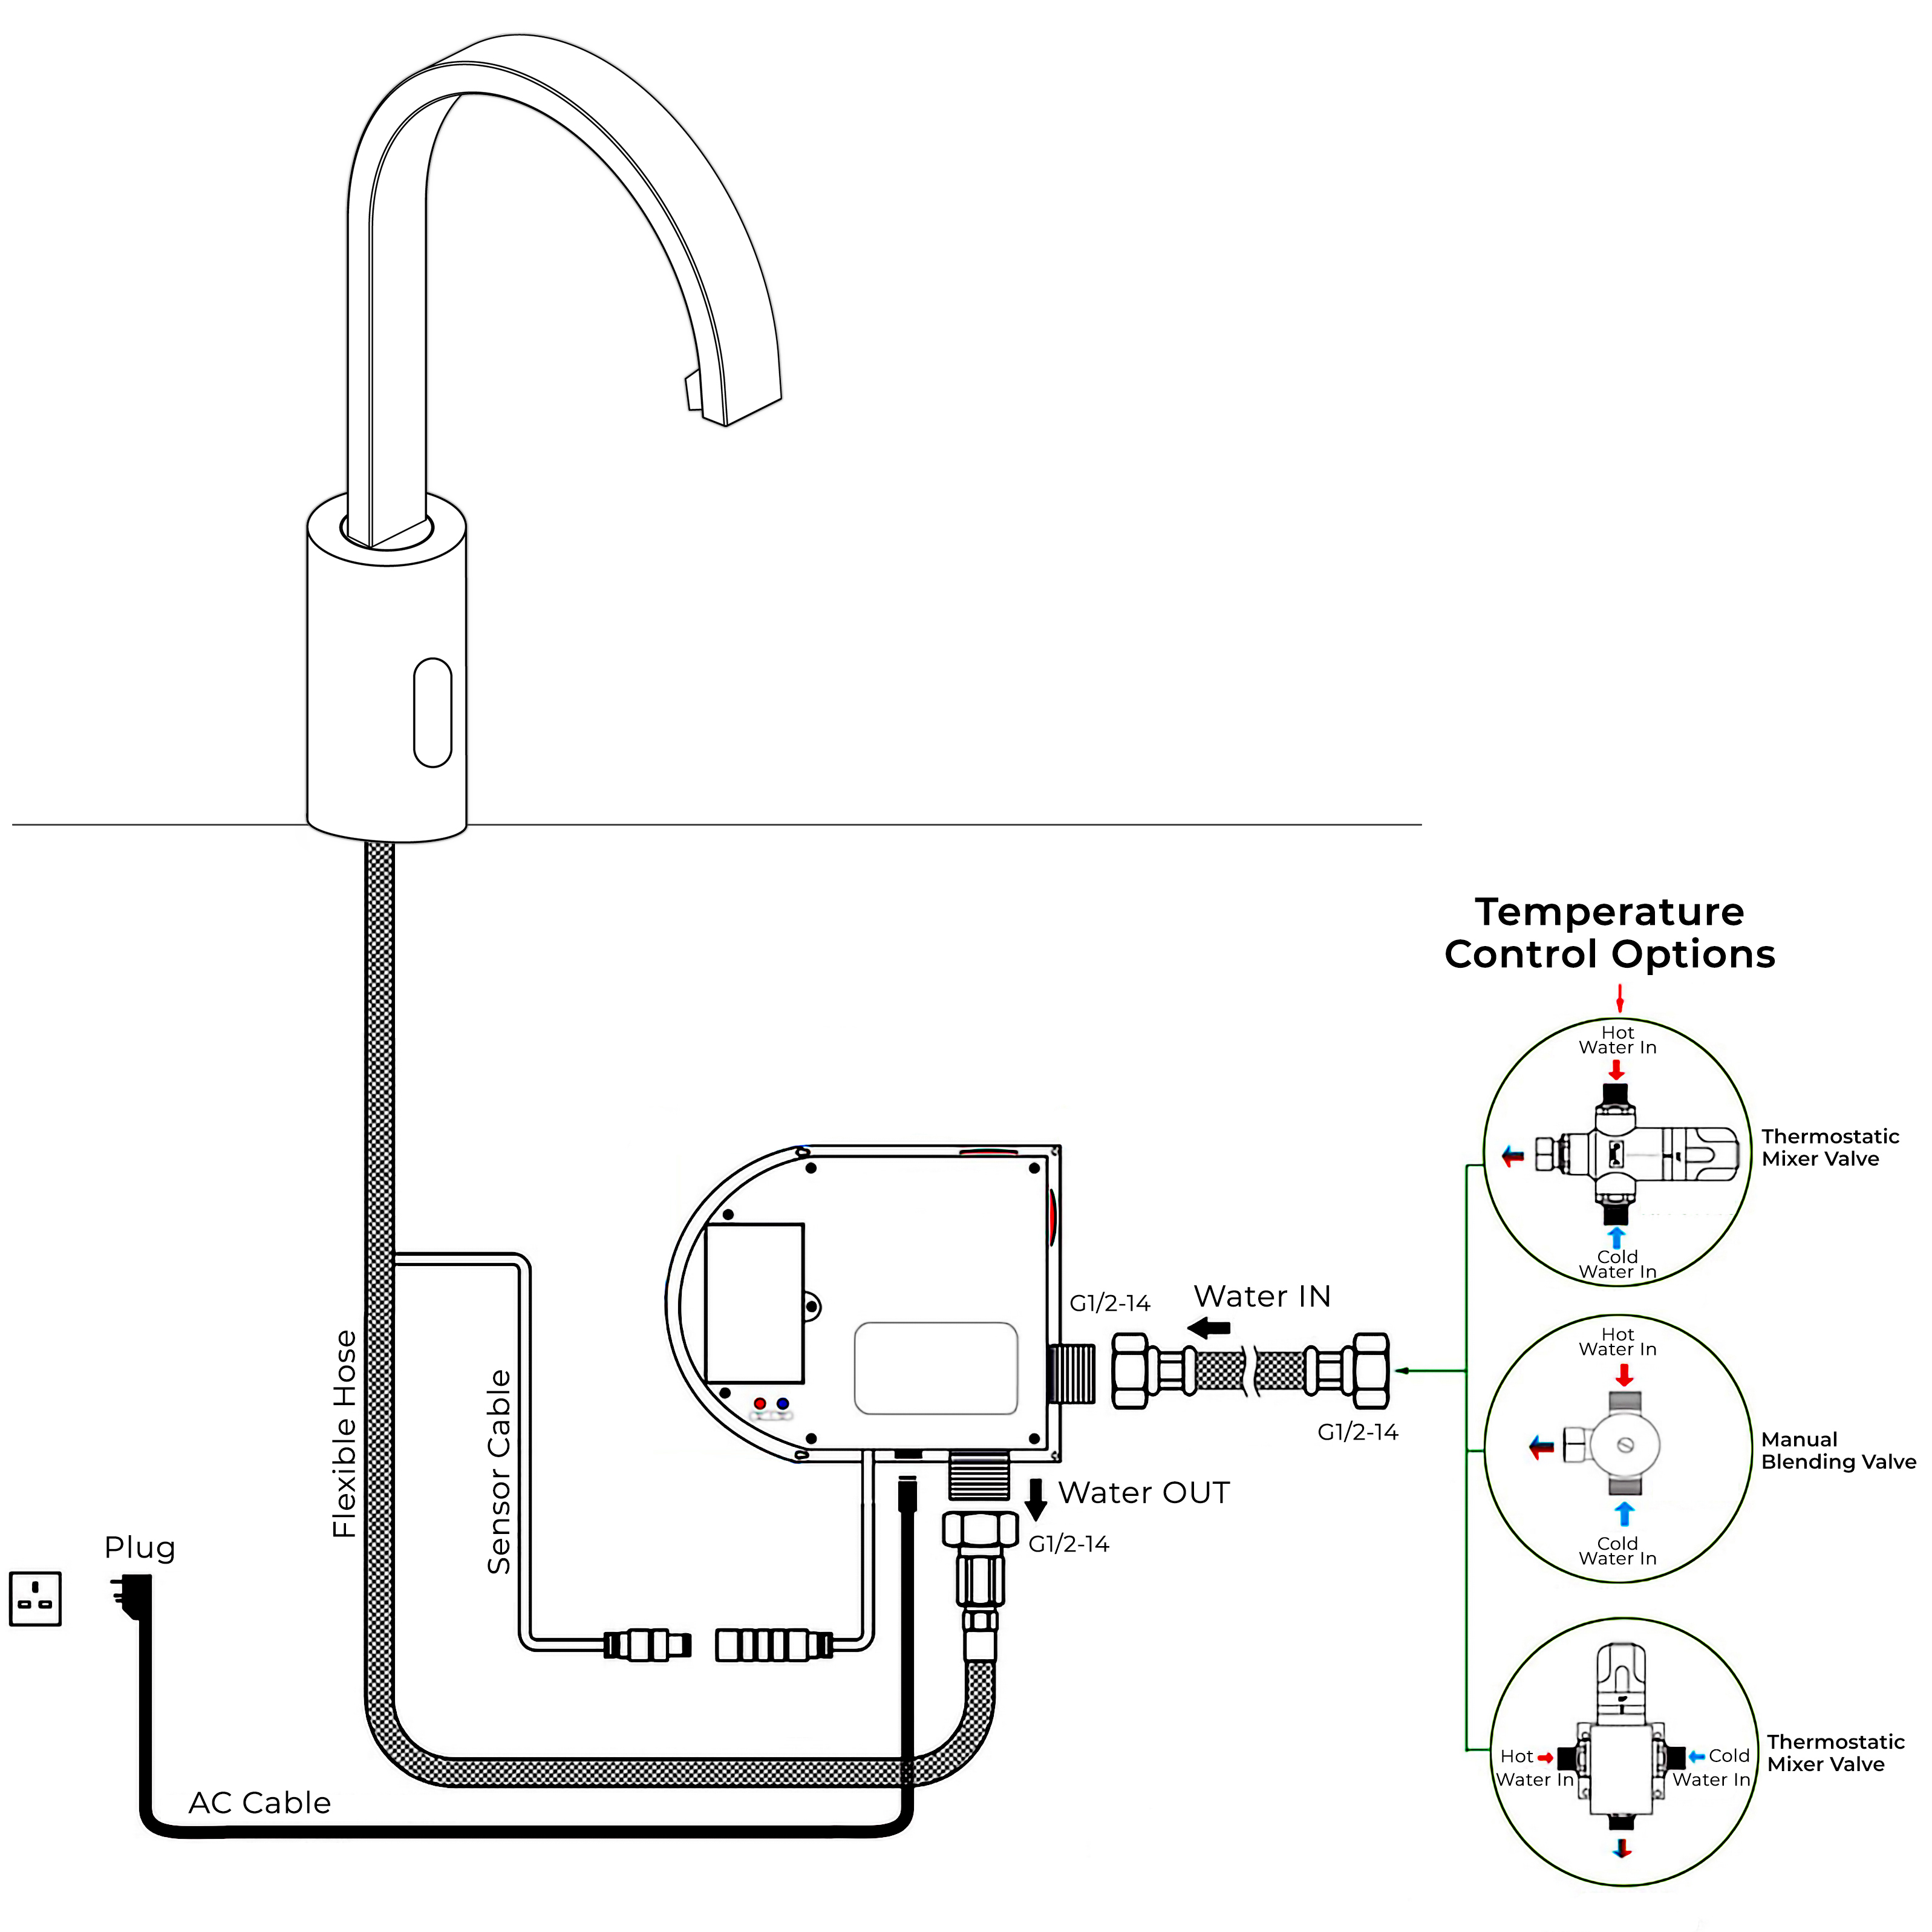
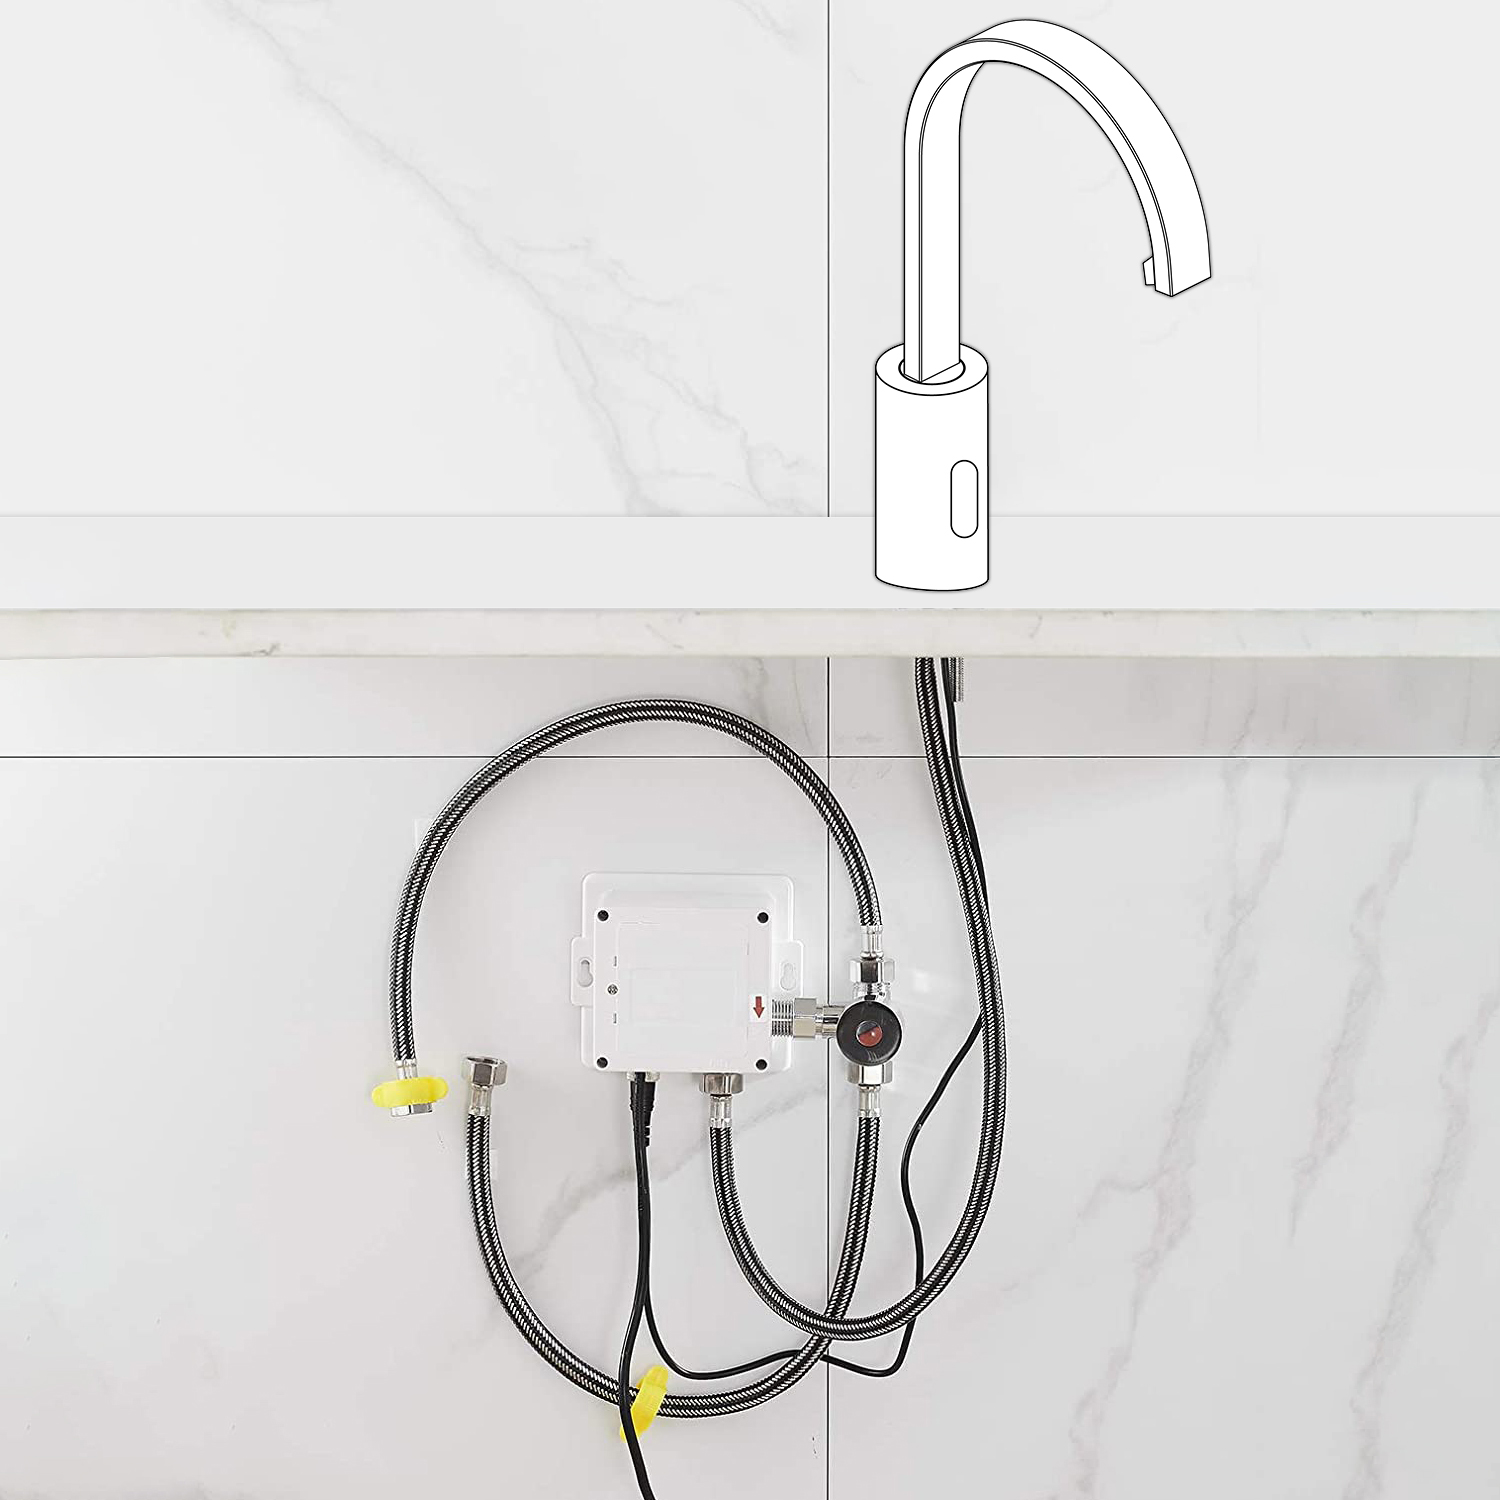
Sensor Faucet Installation Instructions
| Step 1: | | Step 2: | 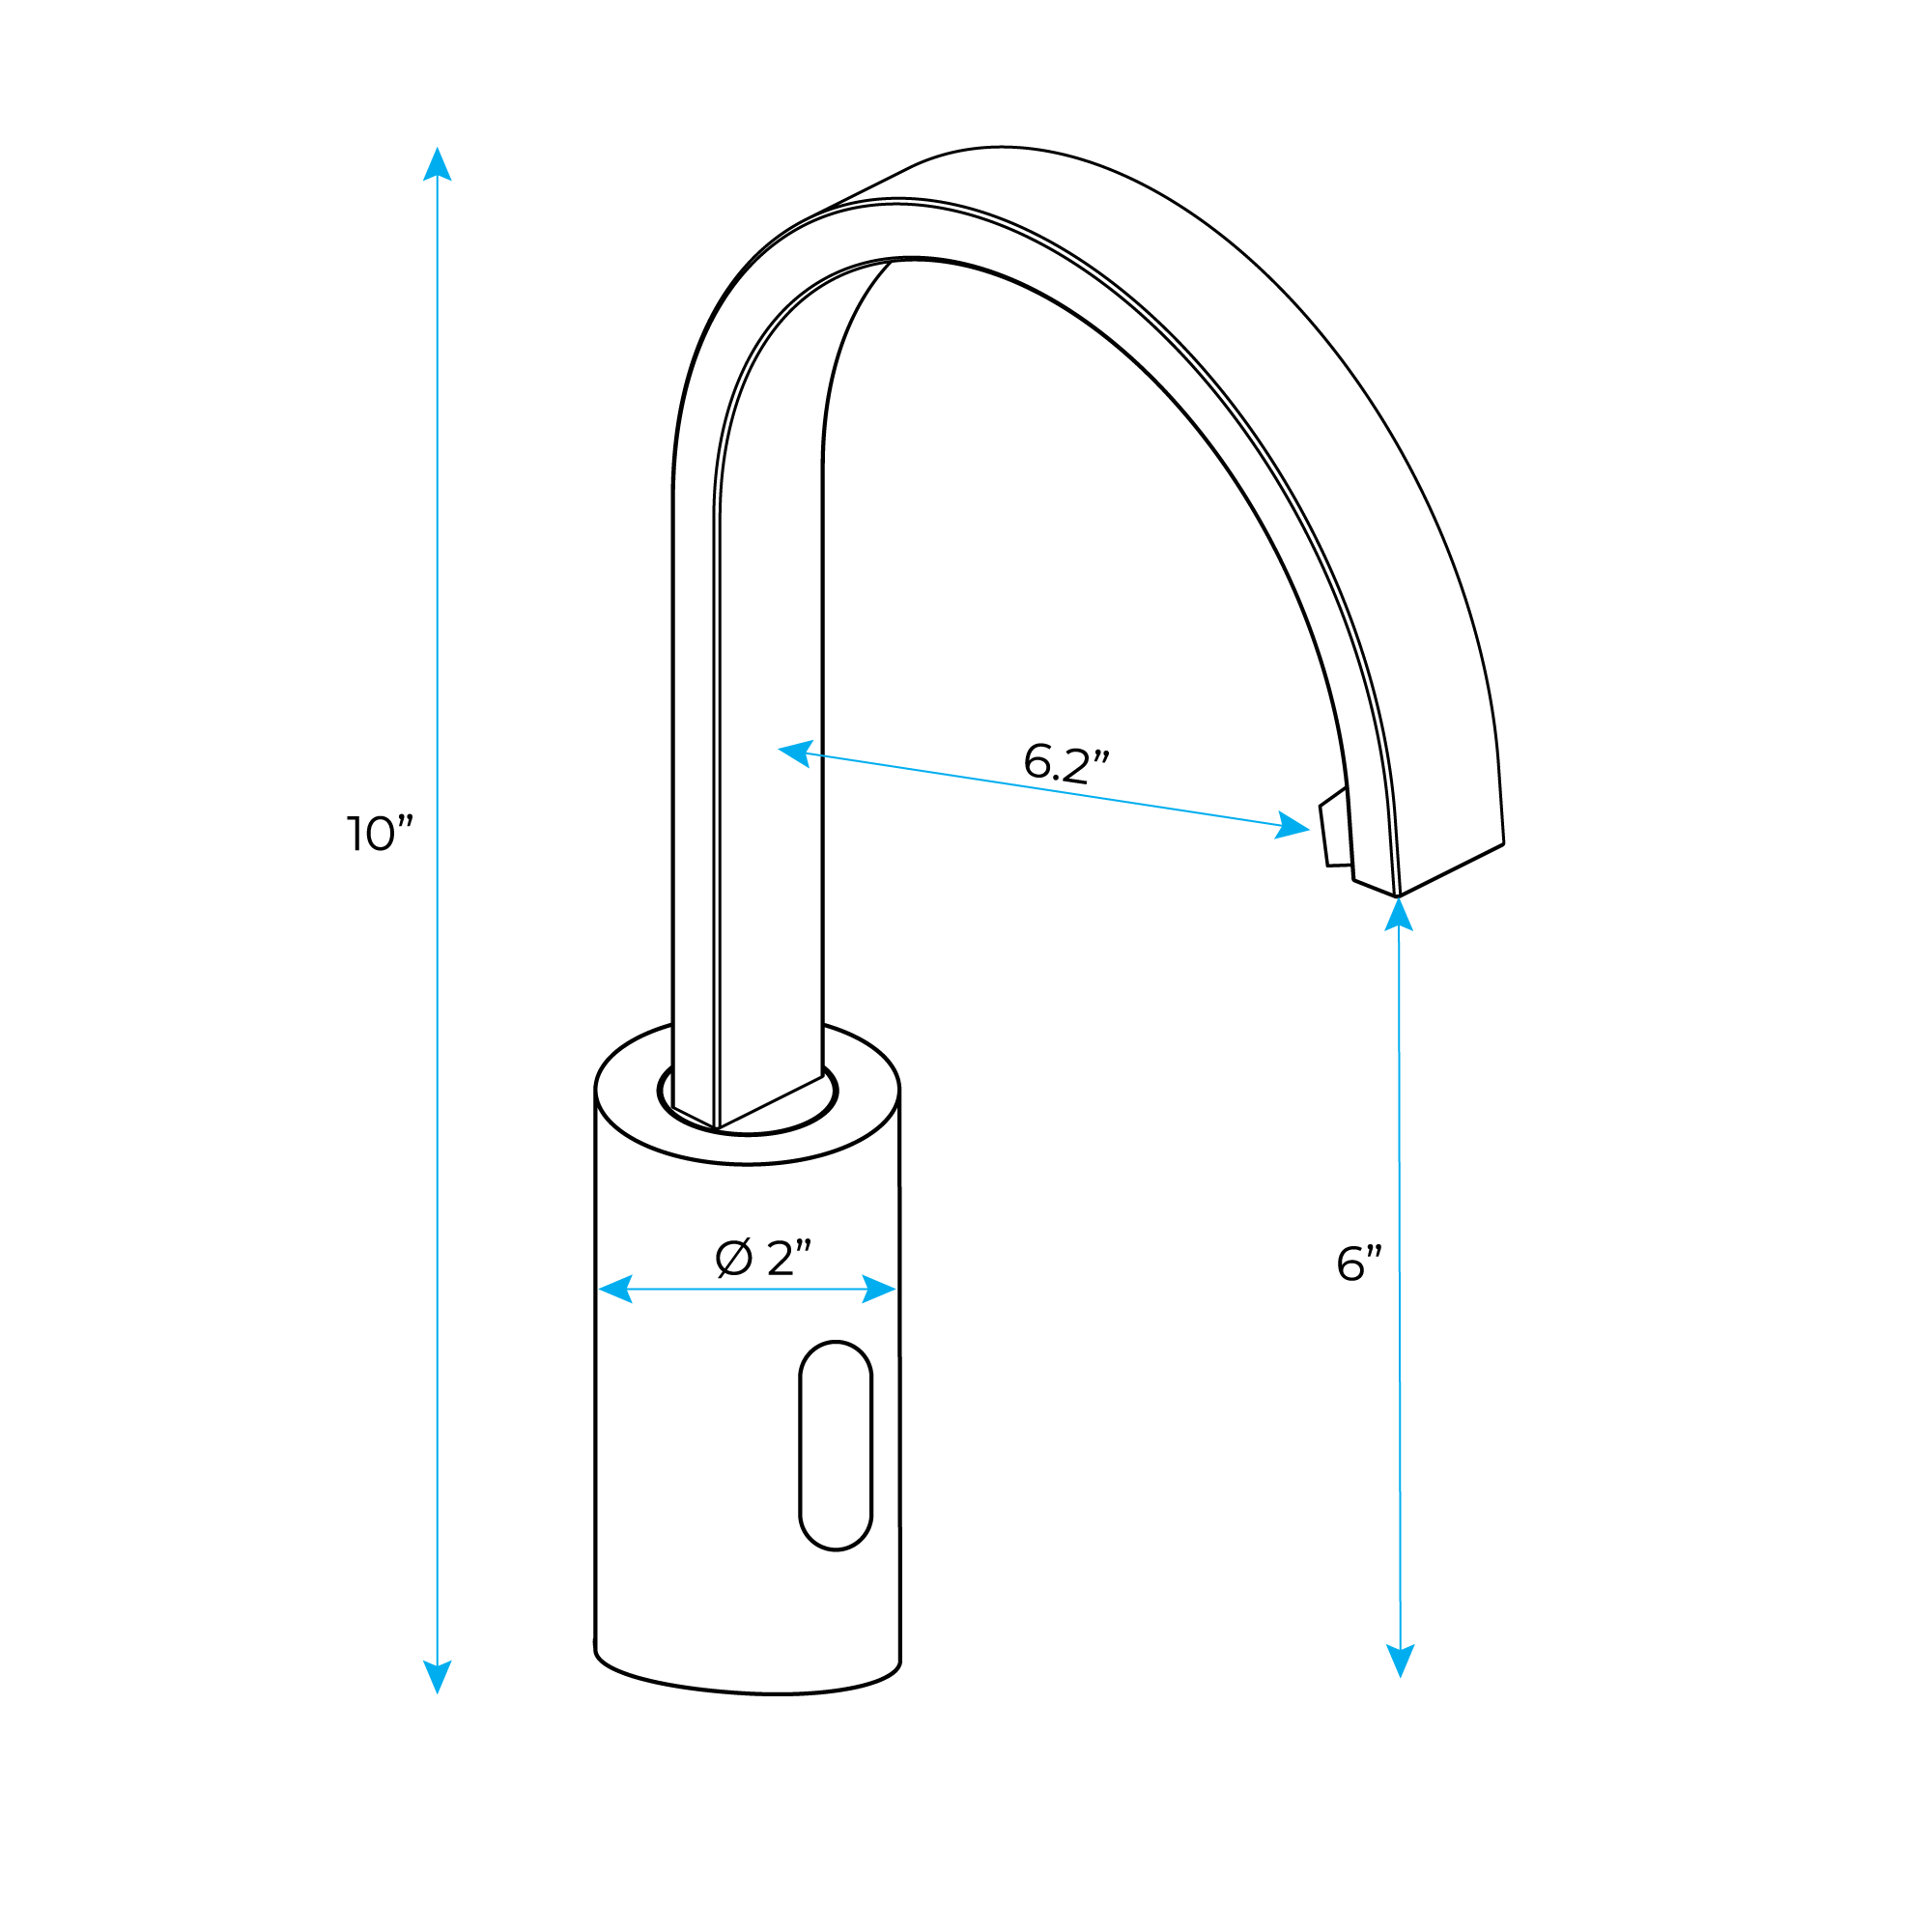 | sensor | 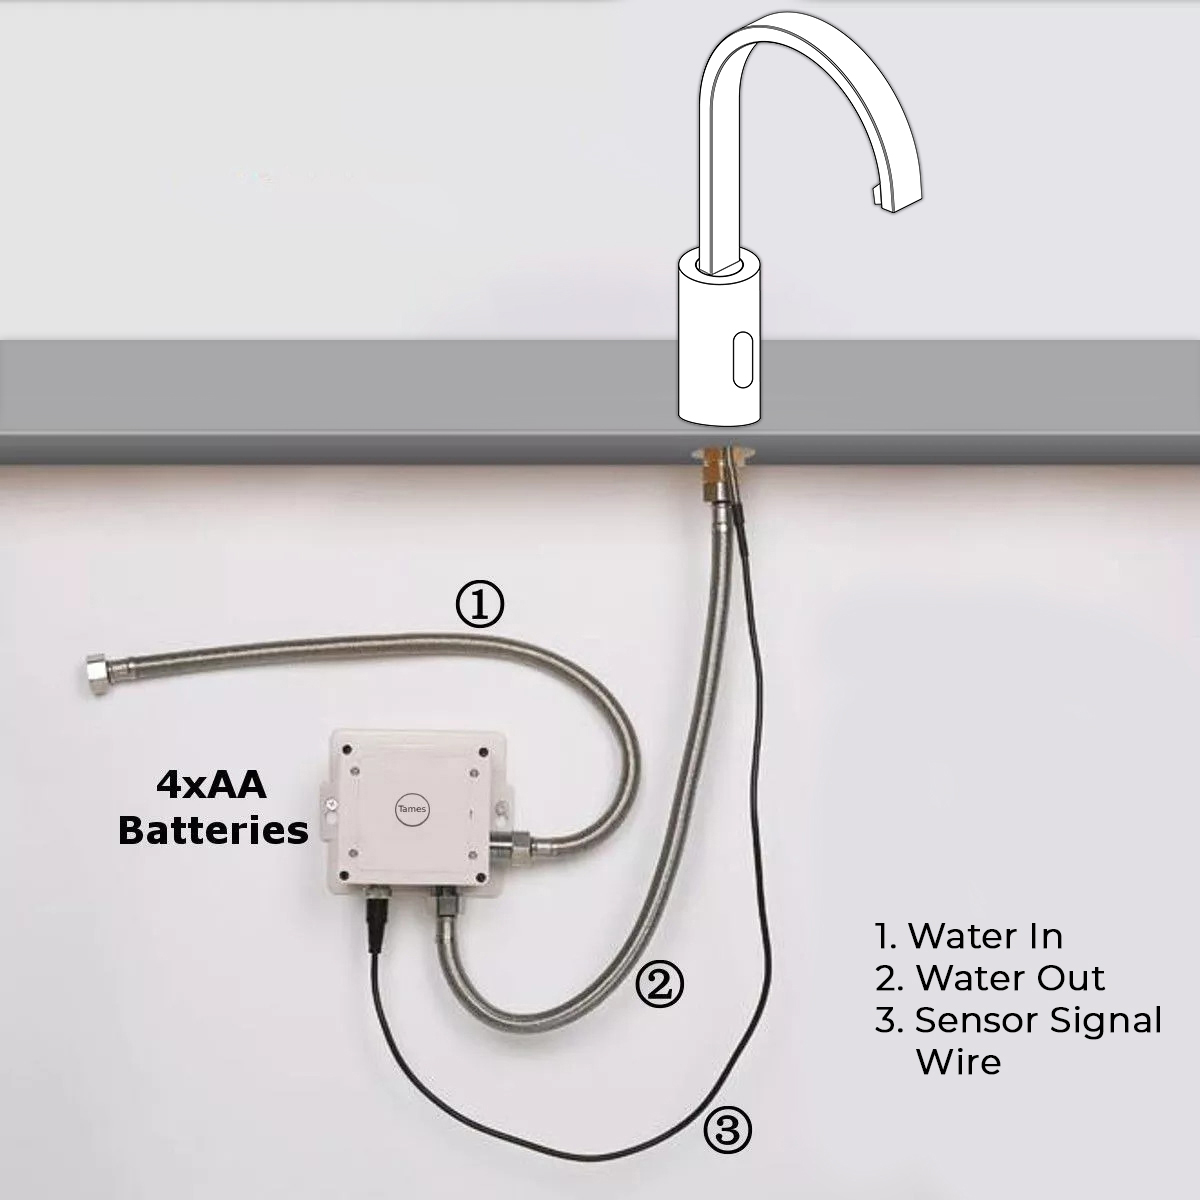 |
| |
| | Step 3: (Hot & Cold Connection) | | Step 4: | 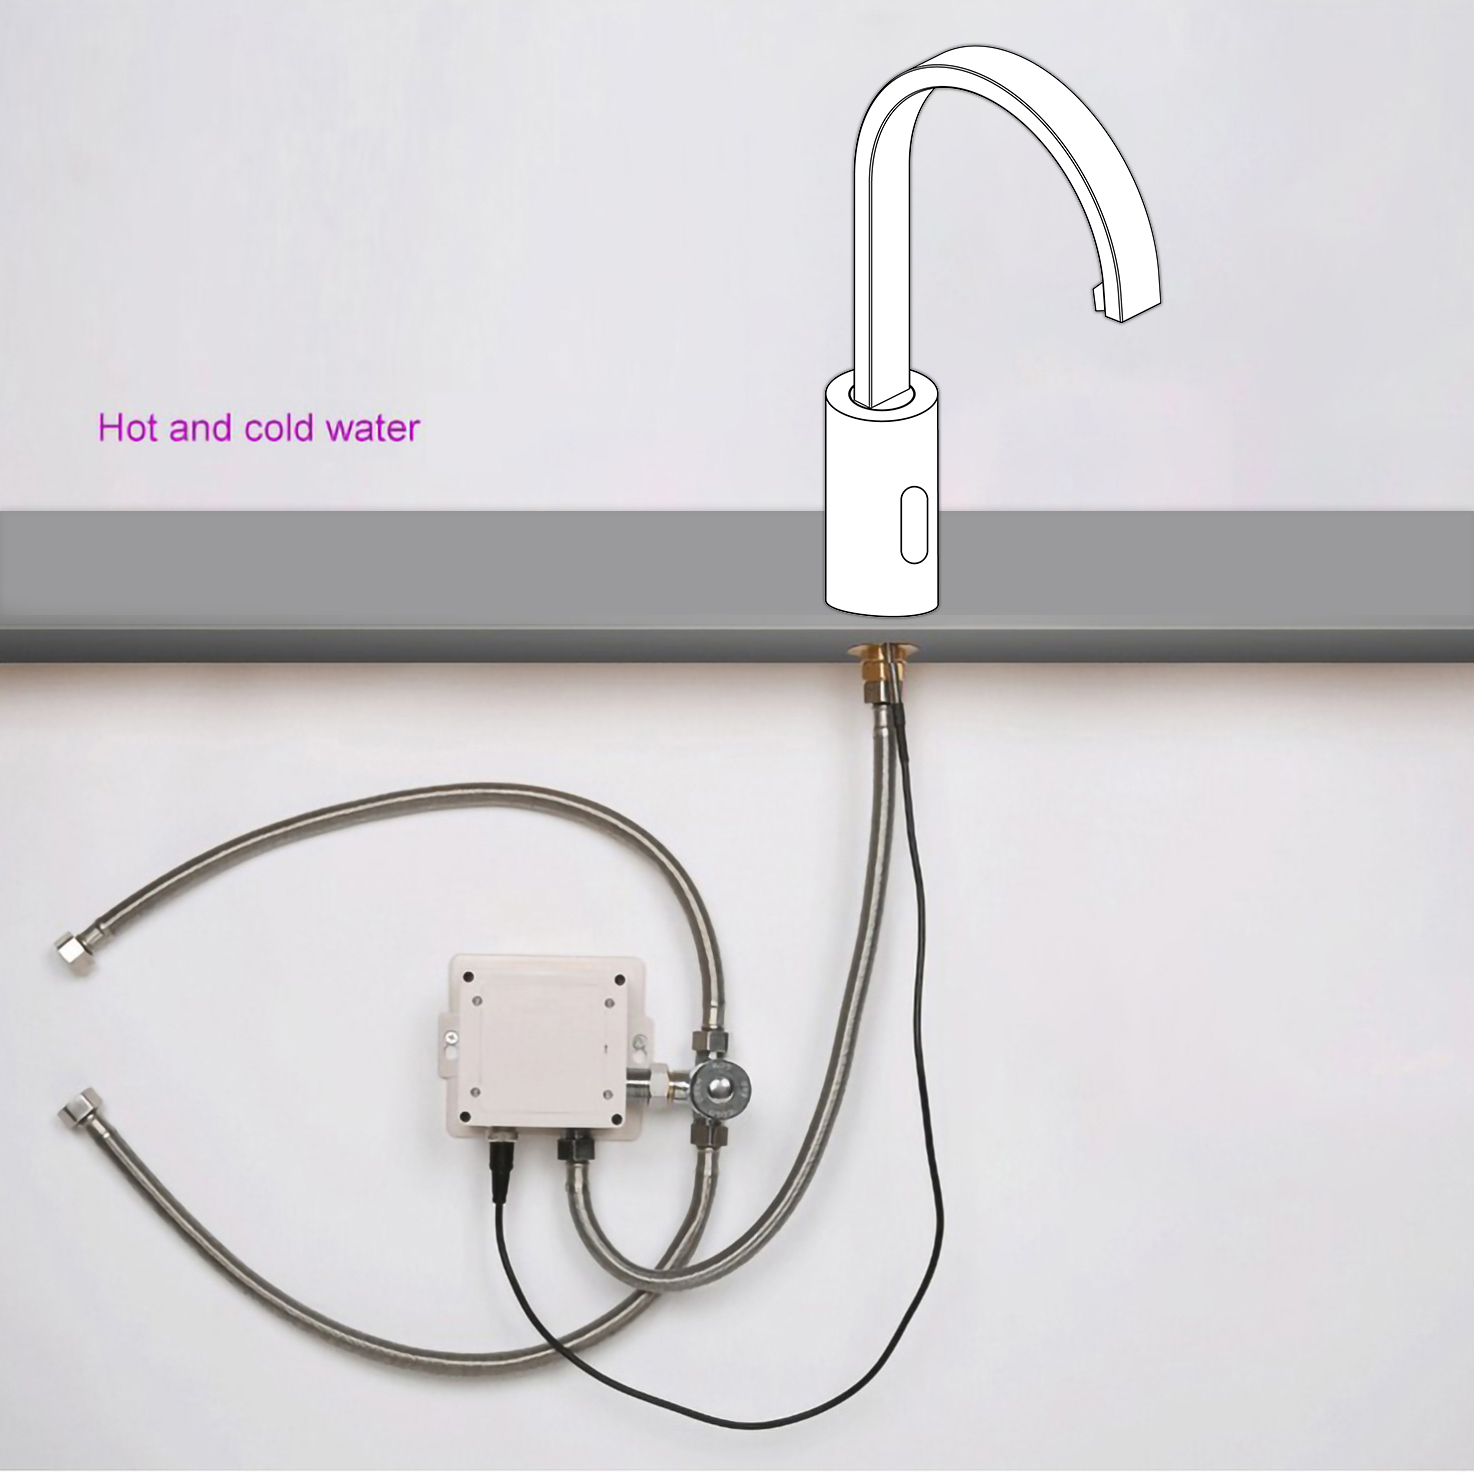 | |  |
| |
| | Step 5: | | Step 6: |  | | 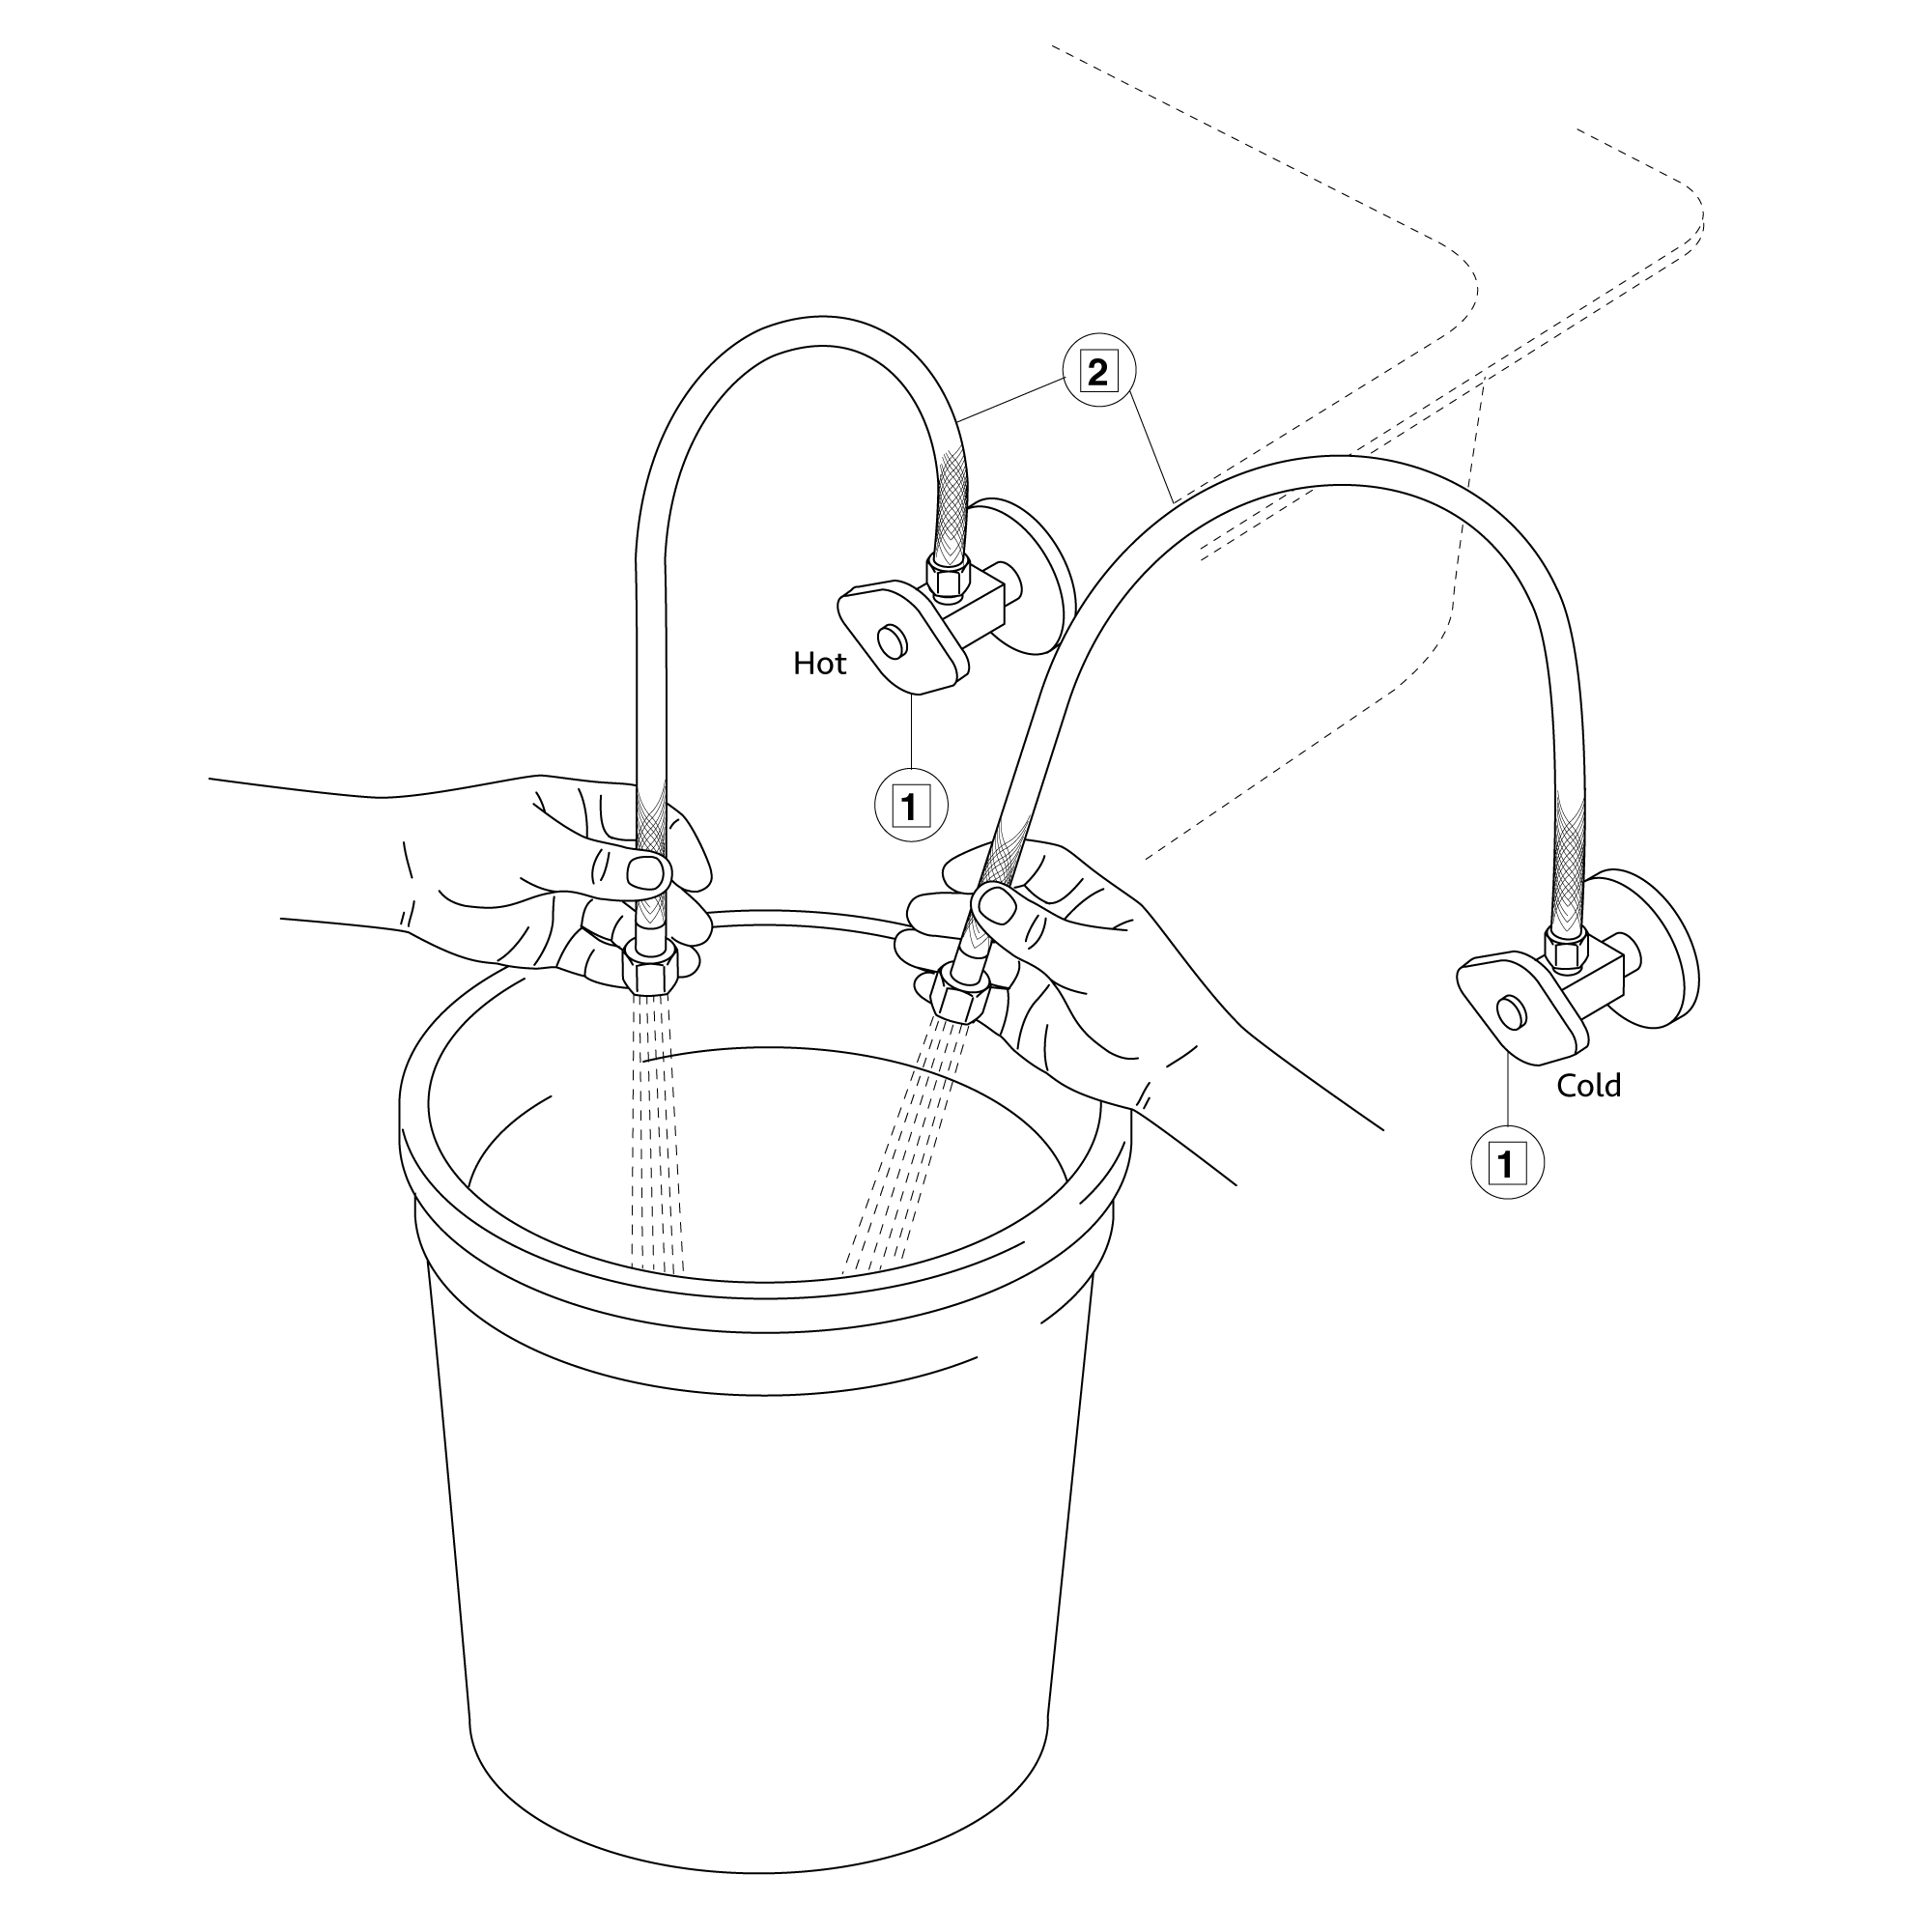 |
| |
| | Step 7: | | Step 8: Hot & Cold Regulator | 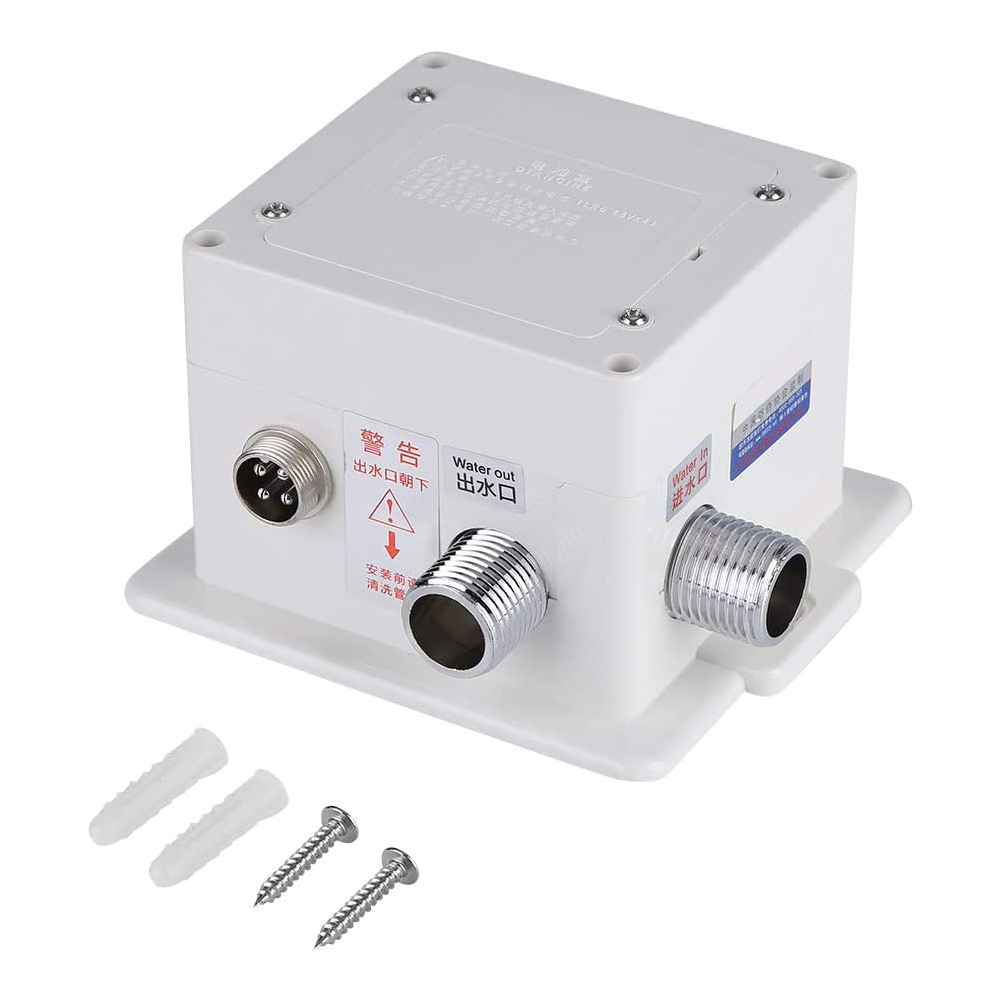 | | 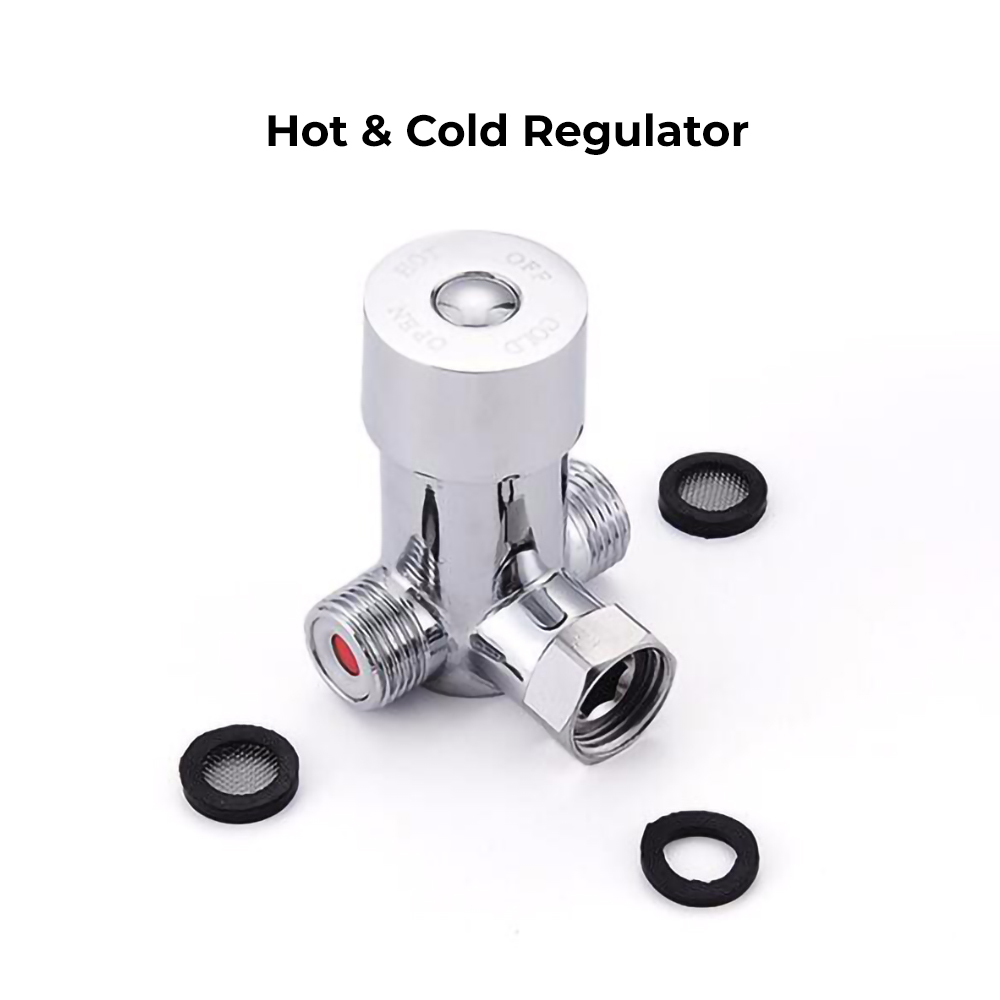 |
| |
| | Step 9: | | |  | | | | | | | | |
1. Screw the hose into the corresponding screw-hole of the faucet body. Fix the o-ring into the bottom groove of the faucet body.
2. Insert hose, threaded pipe and data cable through the drilled hole of the countertop. Put rubber washer and metal washer onto the threaded pipe, screwing in mounting nut. Adjust the faucet body correctly and tighten the mounting nut with screws.
3. Install the control box to the wall and fix it with screws.
4. Add the rubber washer and screw supply elbow to the control box.
5. Add rubber washers and connect water lines to the hot and cold inlets of the supply elbow. Then connect the hose to the water outlet and insert data cable into the control box and plugin.
6. Make Connections to water supplies. Turn on hot and cold water supplies and flush water lines into a container for one minute. Important: This flushes away any debris that could cause damage to internal parts.
7. Connect waterlines to angle stops. Turn on the angle stops and check for leaks (DO NOT TURN FAUCET ON).
8. Turn the faucet on for 1 minute to flush any debris. | | | | | |
|
|
|