Black Stainless Steel Rainfall Shower Panel Installation
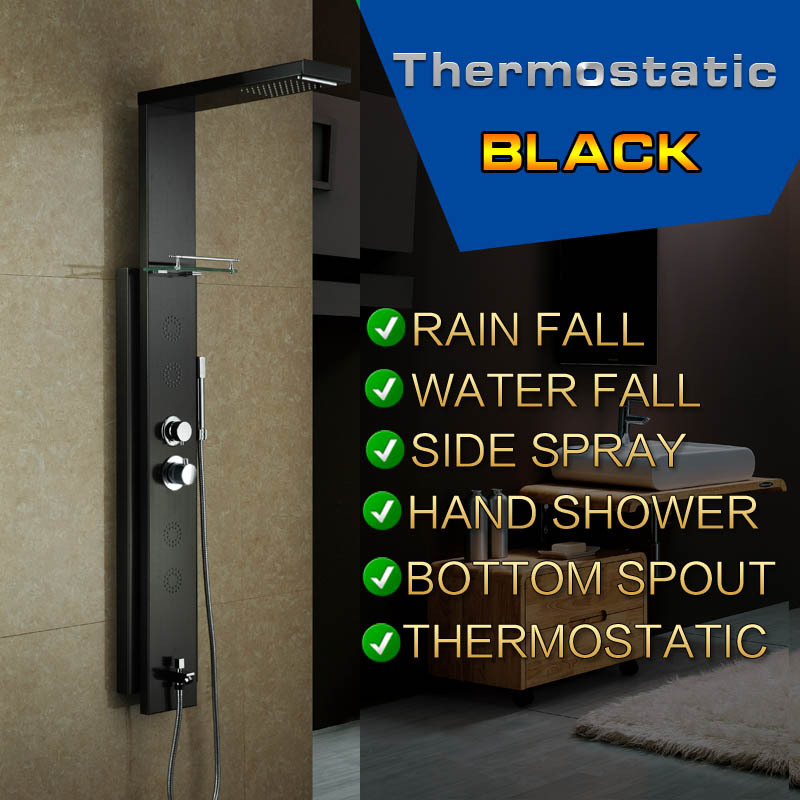
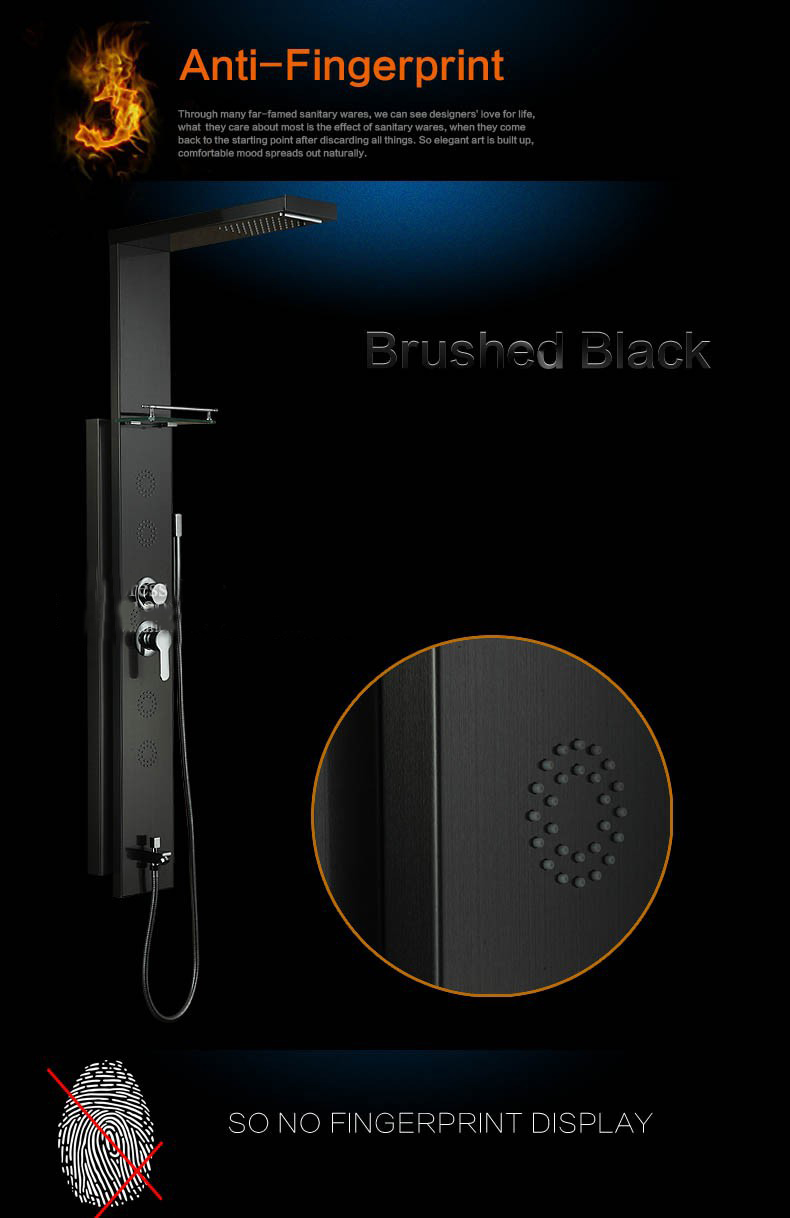
Enjoy a unique shower experience with a single shower head. Relieve tension with powerful massaging jets.Creates maximum pulsation force for an amazing and powerful shower massage.This rain style massage shower panel system with full body shower jet is a multi functional shower panel that offers everything needed for a delightful shower experience. This will make your bathroom look elegant with it's sleek ultra-modern design.The result is a clean, sleek and high-end design which is not commonly seen in shower panels.Get an incredibly satisfying, high-performance shower experience. Appreciate the classic styling, multiple settings, and variety of finishes. The result is a clean, sleek and high-end design which is not commonly seen in shower panels. This shower panel will not only enhance the look of your shower space, it will transform your everyday shower with uniquely satisfying, relaxing and enjoyable experience! It comes complete with accessories and installation instructions.
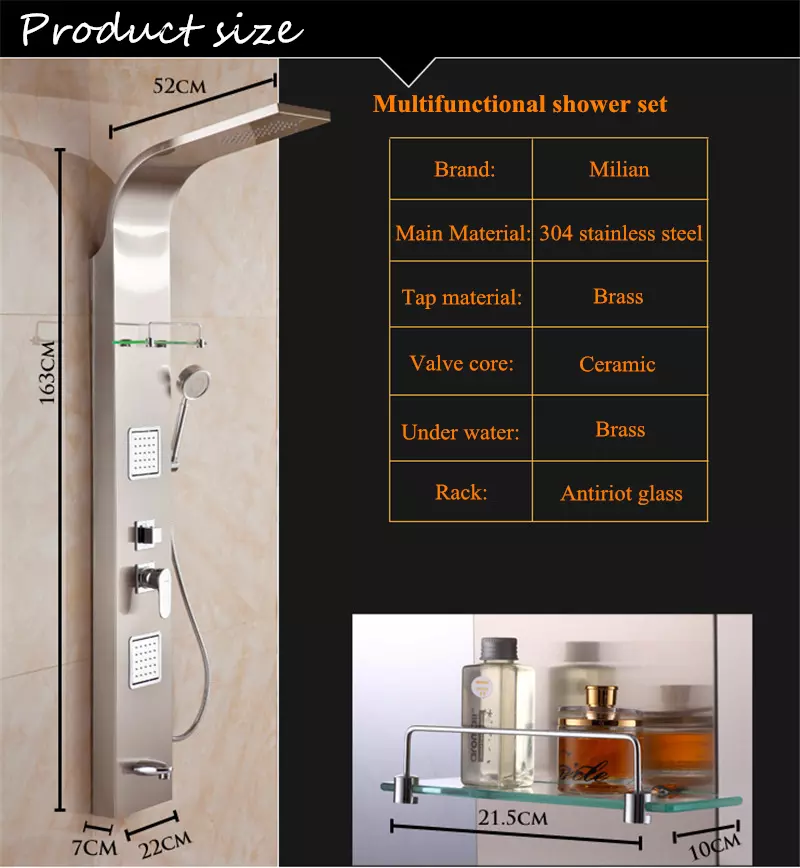
Shower Panel specifics
|
Type
|
Shower Panel
|
|
Brand Name
|
FontanaShowers
|
|
Cold/Hot Water Control Type
|
Auto-Thermostat Control
|
|
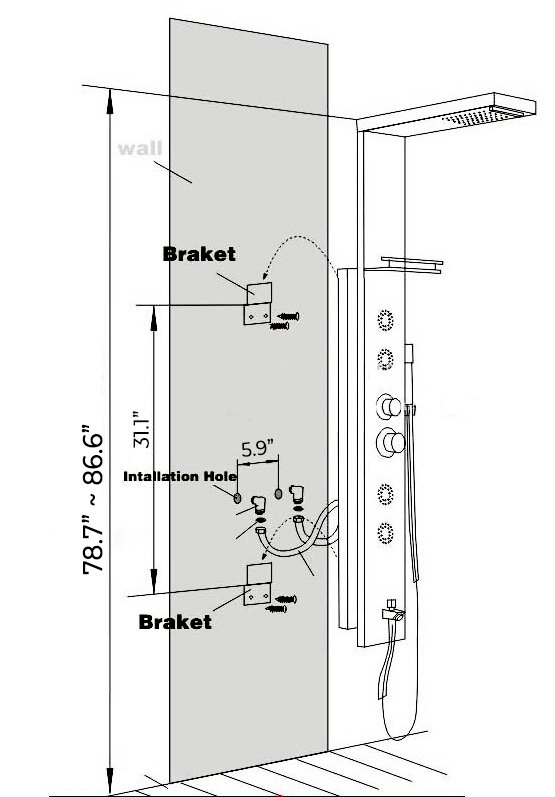
Size
|
See Drawing Details
|
|
Style
|
Contemporary
|
|
Number of Handles
|
Triple Handles
|
|
Surface Treatment
|
Brushed
|
|
Type
|
Fixed Support Type
|
|
Valve Core Material
|
Ceramic
|
|
Surface Finish
|
Stainless Steel
|
|
Bath & Shower Type
|
Exposed Shower
|
|
Feature
|
Thermostatic Faucets
|
|
Installation Type
|
Wall Mounted
|
|
Model Number
|
BST6113BK
|
|
|
BathSelect® Manufacturer Warranty Information
|
|
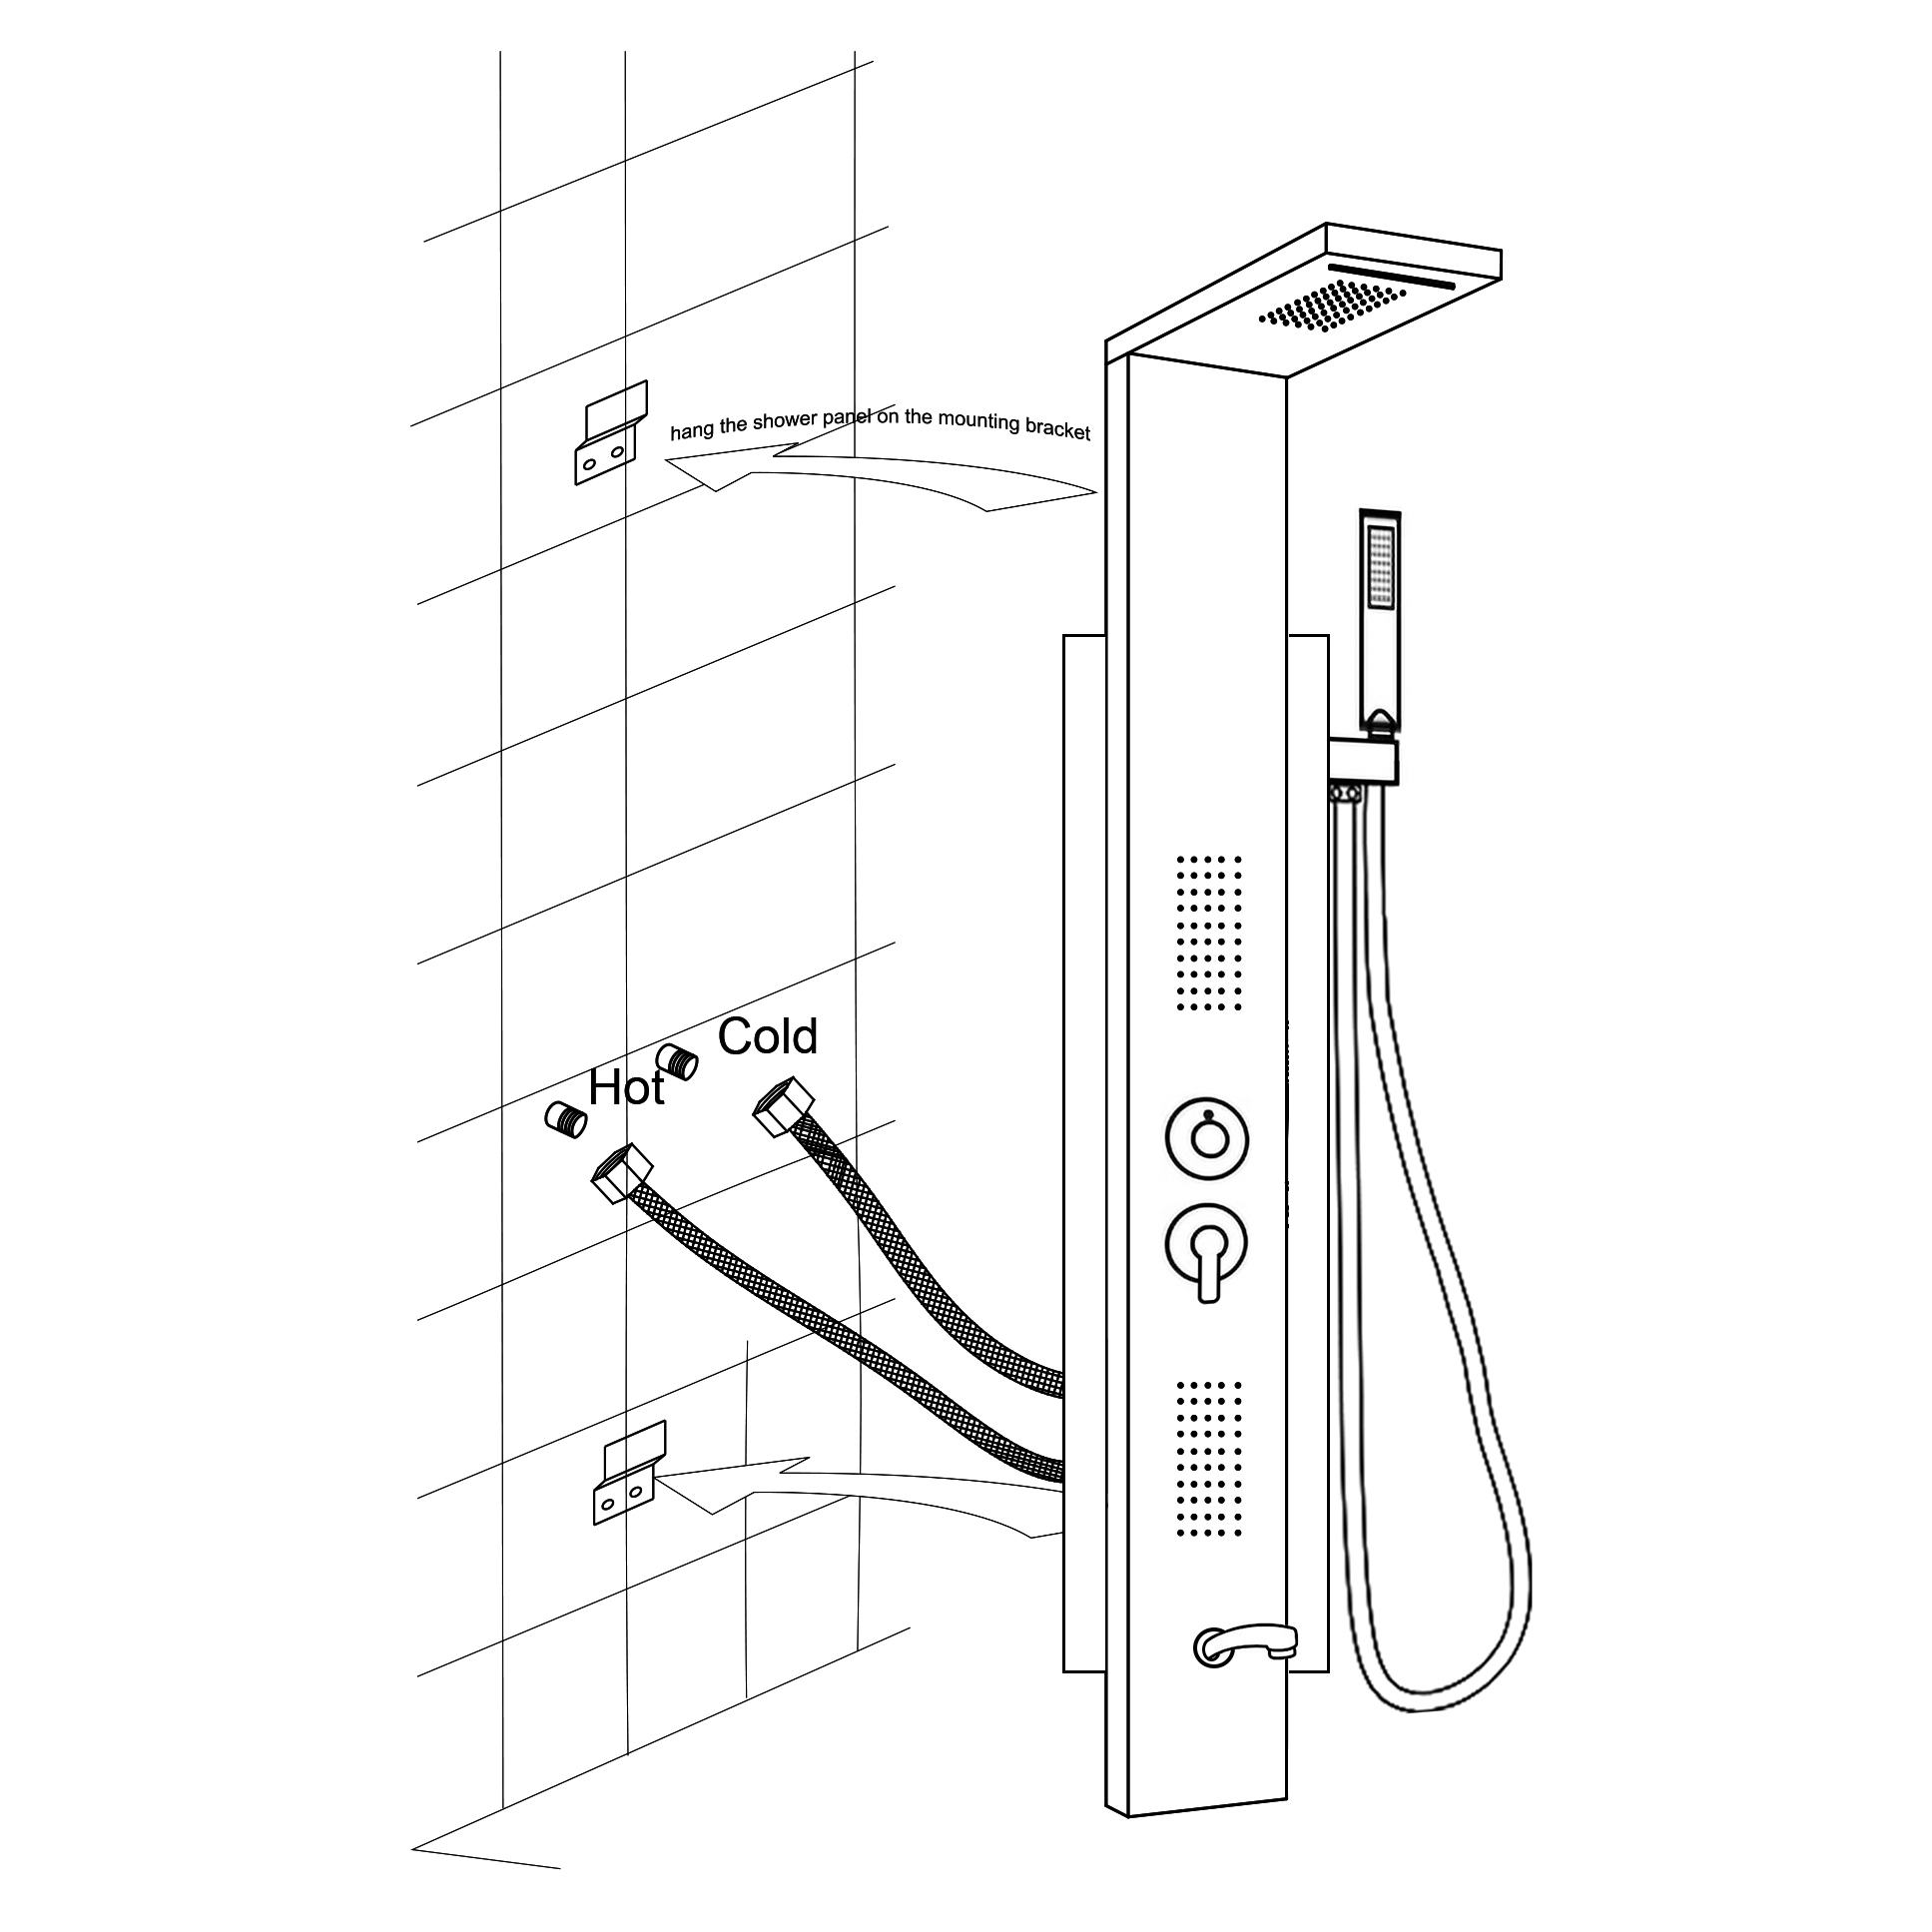
- In order to install this shower panel, a simple understanding of plumbing techniques will be necessary. Please contact a professional plumber if you are unfamiliar with plumbing techniques or require assistance.
- Separate cold and hot water supply lines. This shower panel replaces any mixing valve you are currently using.
- Remove the shower panel and locate the position of the mounting brackets. Take measurements and then transfer those brackets to the location of the wall. Mark the center point of the location of the mounting brackets.
- Using a drill, attach wall mounting brackets with the included hardware. An extra set of hands may be required for the following steps. Lift and locate the hot and cold water lines on the shower panel.
- Connect the hot and cold water supply lines to the flexible hoses. Be sure to use the included washers. It is recommended a 3/8″ right angle connection be installed to better route the flexible hoses.
- Once connected, lift the entire shower panel and hook it to the wall using the mount brackets. There are two types of mounting brackets used for our shower panels.
- Check if the unit is leveled. Test out all shower functions including the water temperature to finish the installation. If your water temperature is either too hot or too cold, please check the hot and cold water lines. The connection many by reversed (Cold and hot).
- Complete the installation by using a silicone sealant around the perimeter of the shower panel. Your installation is now complete.
|
|
|


