Billa Recessed Solid Brass Color Changing LED Rain Shower Head with Mixer and Adjustable Body Jets
|
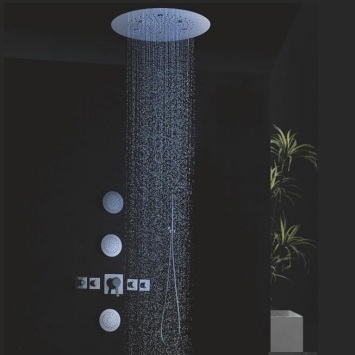
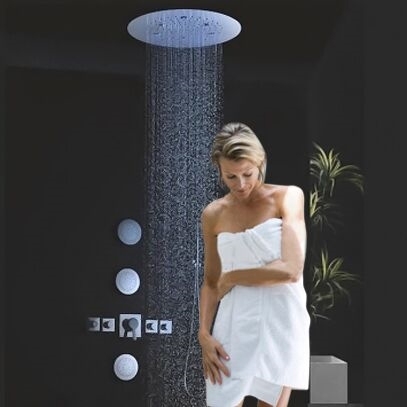
Turn on the fun in your shower just by turning on the water, the LED lights will automatically light up and set the mood. They will even change colors automatically based on the water temperature. All this with no batteries, everything is self-powered by a built in dynamo that takes advantage of the water pressure to create the energy to light the bulbs.
|
Billa Recessed Solid Brass Color Changing LED Rain Shower Head Features:
- This high tech rain shower head powers the LED lights using a built in hidden dynamo
- The lights will automatically turn on when water pressure is turned on
- The lights will dim and brighten when you lower and raise the pressure so you can set the perfect mood, water and light
- The shower head will automatically change colors according to the temperature of the water so you always know how the water will feel on your skin just by looking at it
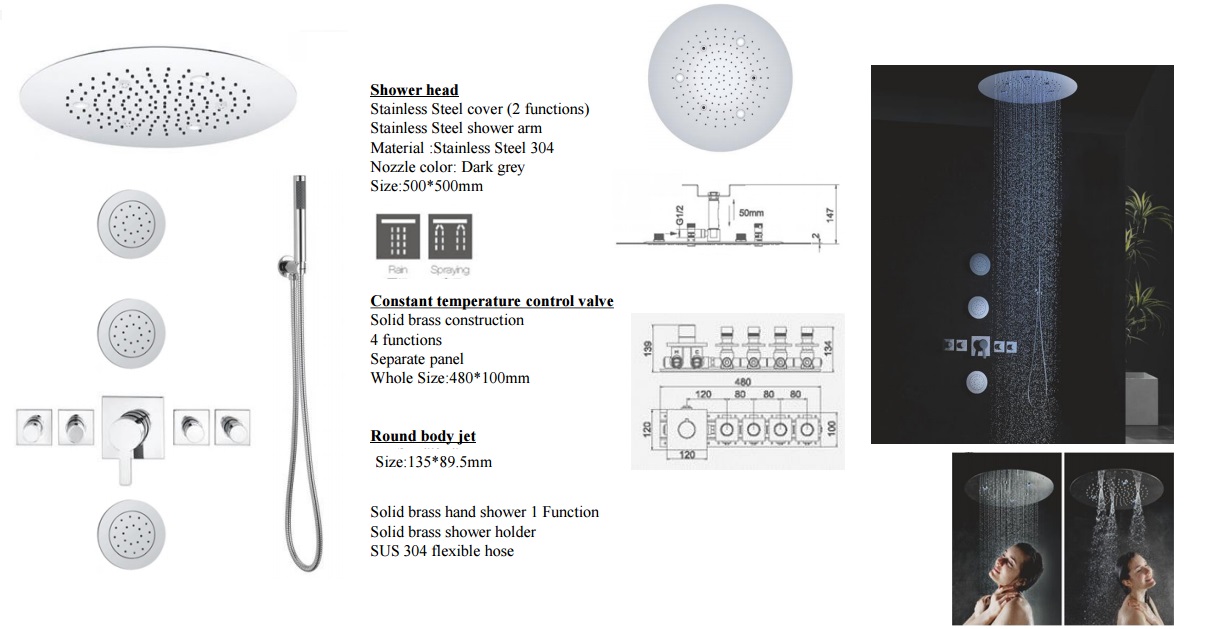
- Comes with solid brass mixer
- Comes with a set of 6 adjustable solid brass body sprays
- Comes with Hand Held shower
- Never be scalded again by entering a shower that is just too hot
- The threading is universal so it will fit any standard shower head by simply unscrewing the old one by hand and attaching the new one.
- Modern stylish design made to match or stand out from your other bathroom fixtures
- High quality this modern shower head is made out of stainless steel, so its made to last!
- The flow rate is 2.5 GPM
|
|
Technical Specs
|
Material
|
Solid Brass
|
|
Finish
|
Available in Chrome
|
|
Style
|
Contemporary Rain Showerhead
|
|
Style
|
LED Water Fall
|
|
Showerhead Width
|
Avialable in 20"
|
|
LED Power Source
|
Water Flow
|
|
Showerhead Style
|
Contemporary Rain Shower
|
|
Mount Method
|
Wall or Ceiling
|
|
Connection
|
1/2" US standard (included)
|
|
|
BathSelect® Manufacturer Warranty Information
Installation Instructions for Billa Recessed Shower Head Shower System Color Changing Water Powered Led Shower with Adjustable Body Jets
- Before you begin, please read the installation instructions below. Observe all local building and safety codes.
- Unpack and inspect the product for any shipping damages. If you find damages, do not install.
- Please note all showers must be installed by a professional and certified plumber otherwise warranty might be voided
|
|
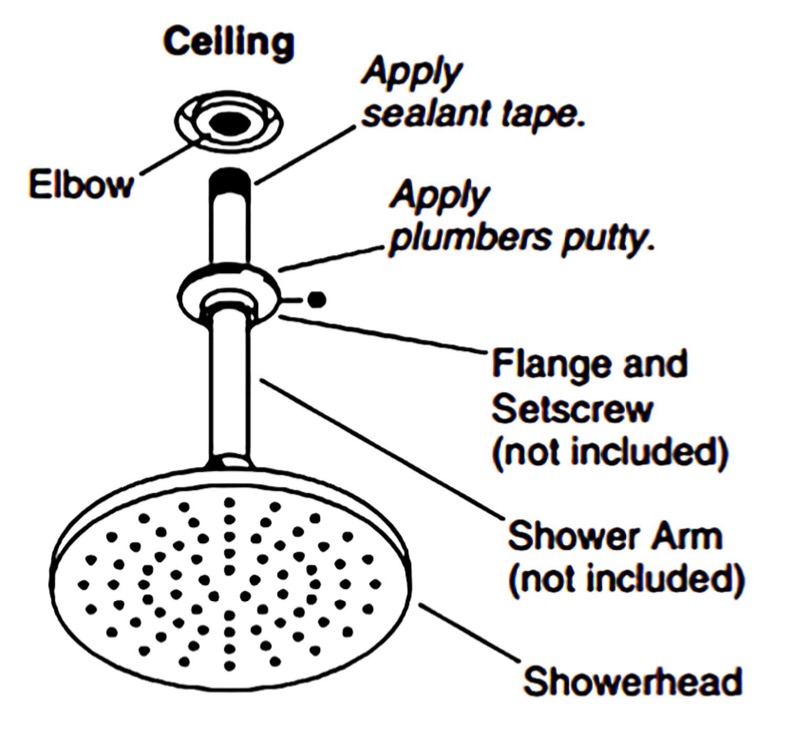
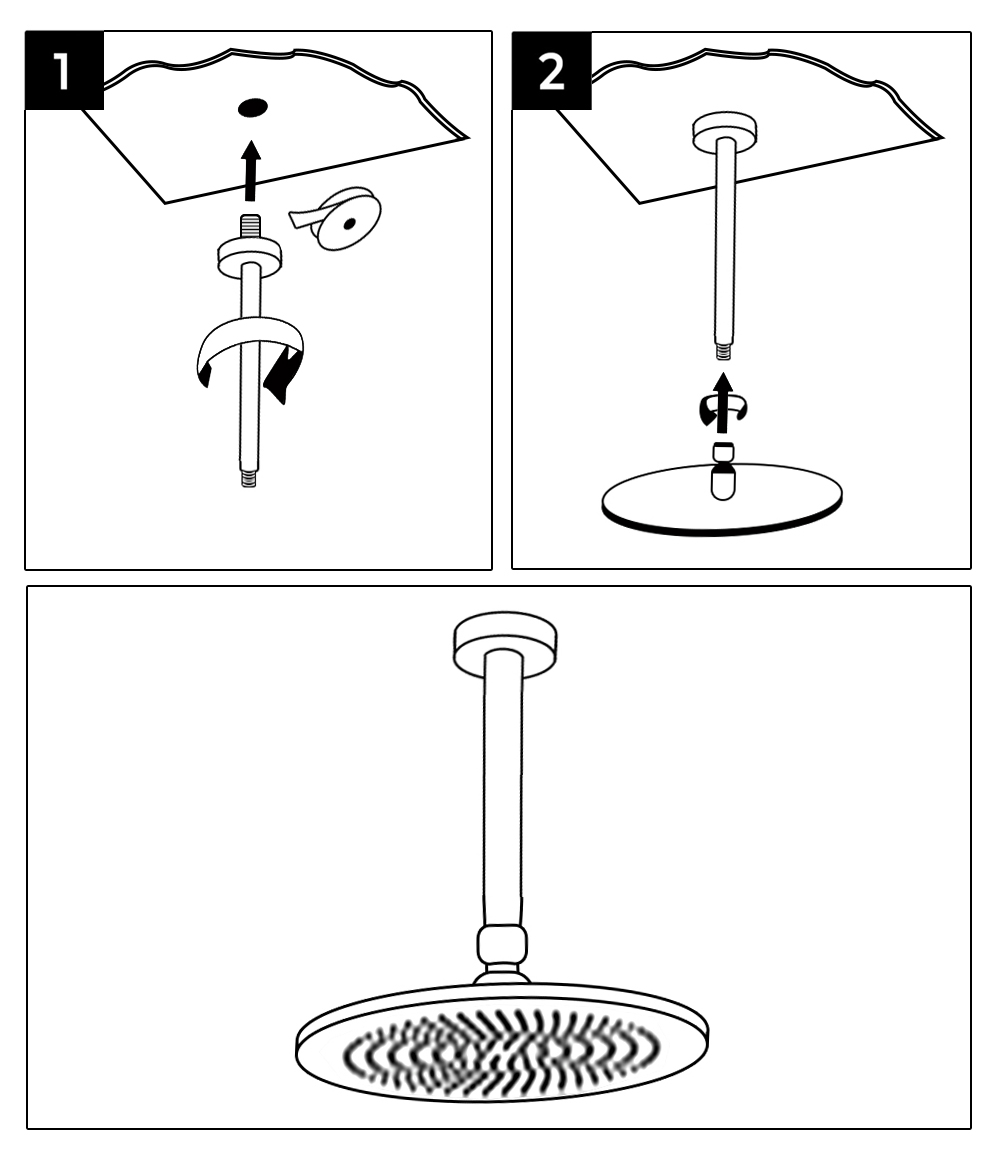
Ceiling Shower Head Installation
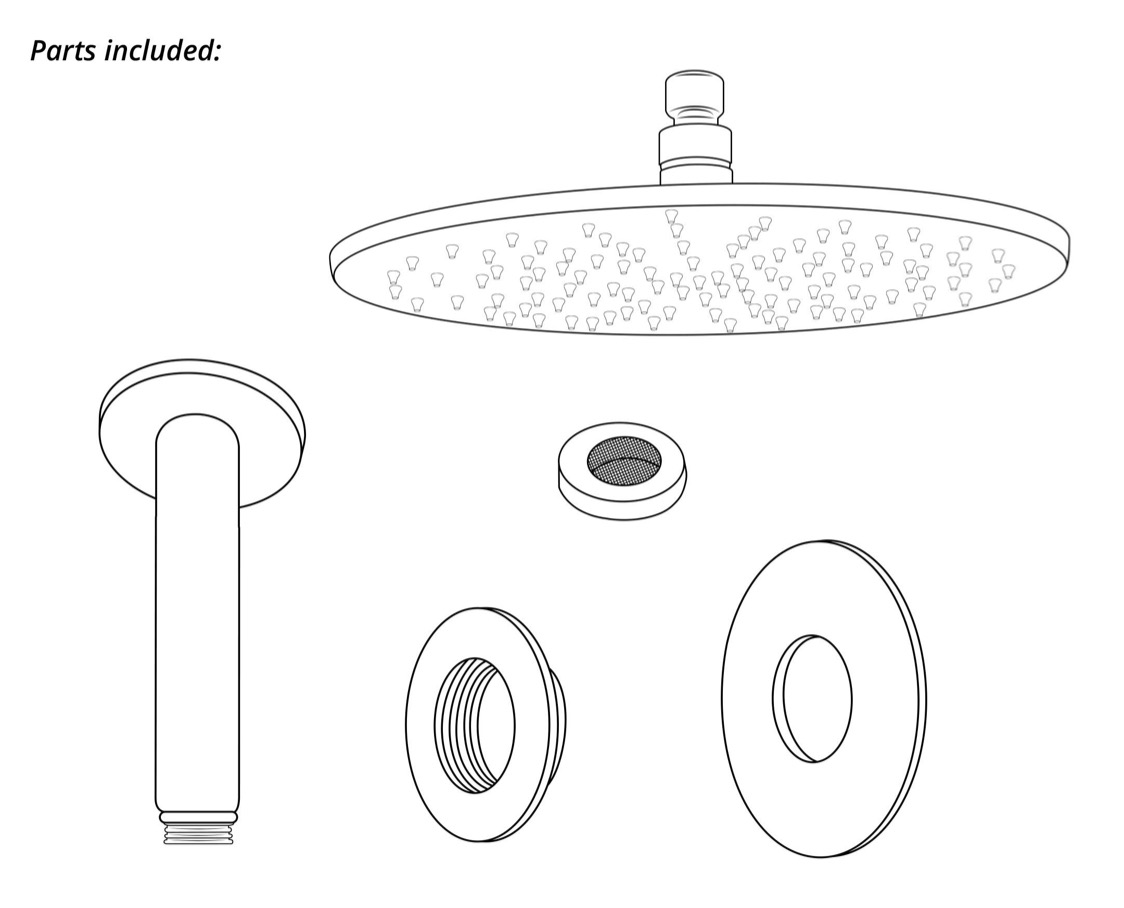
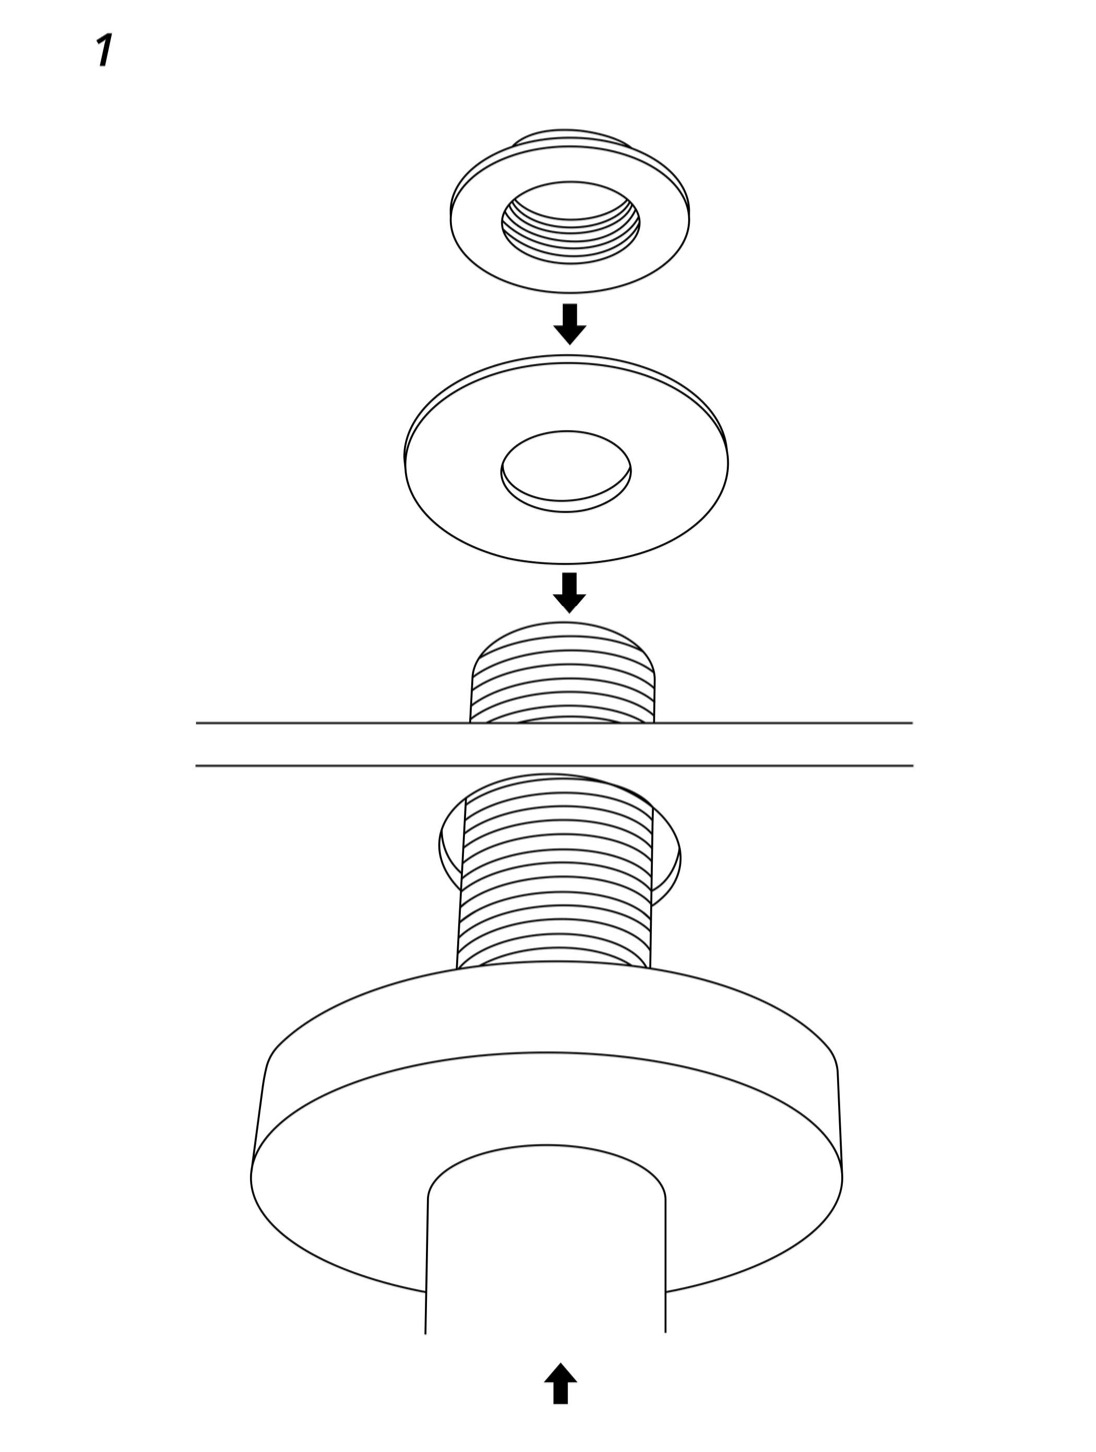
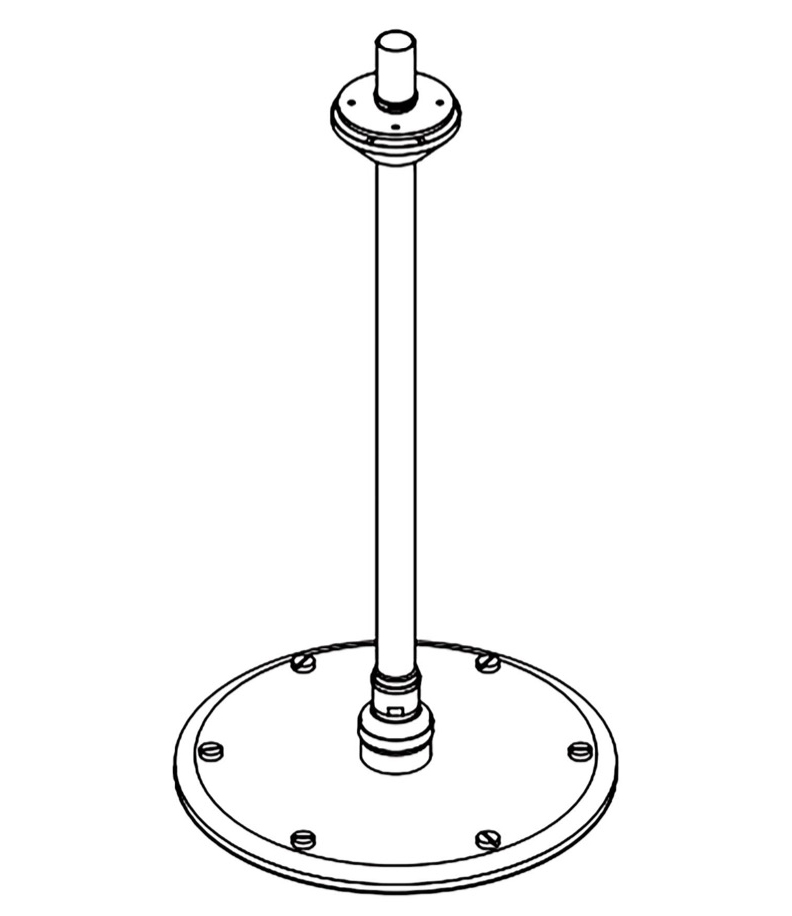
1.Ceiling arm mounting plate
2. Olive
3. Locking nut
4. Ceiling trim
5. Ceiling arm
6. Emily fixed showerhead
7. Fixing screws and wall plugs (not shown)
|
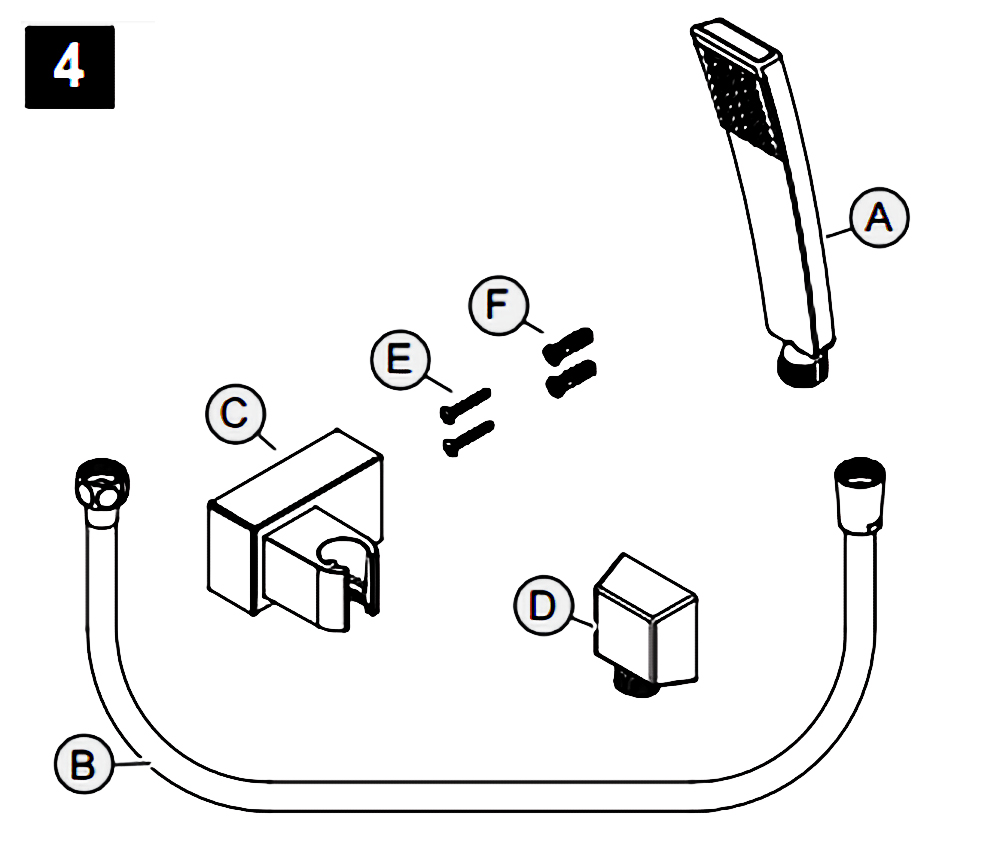
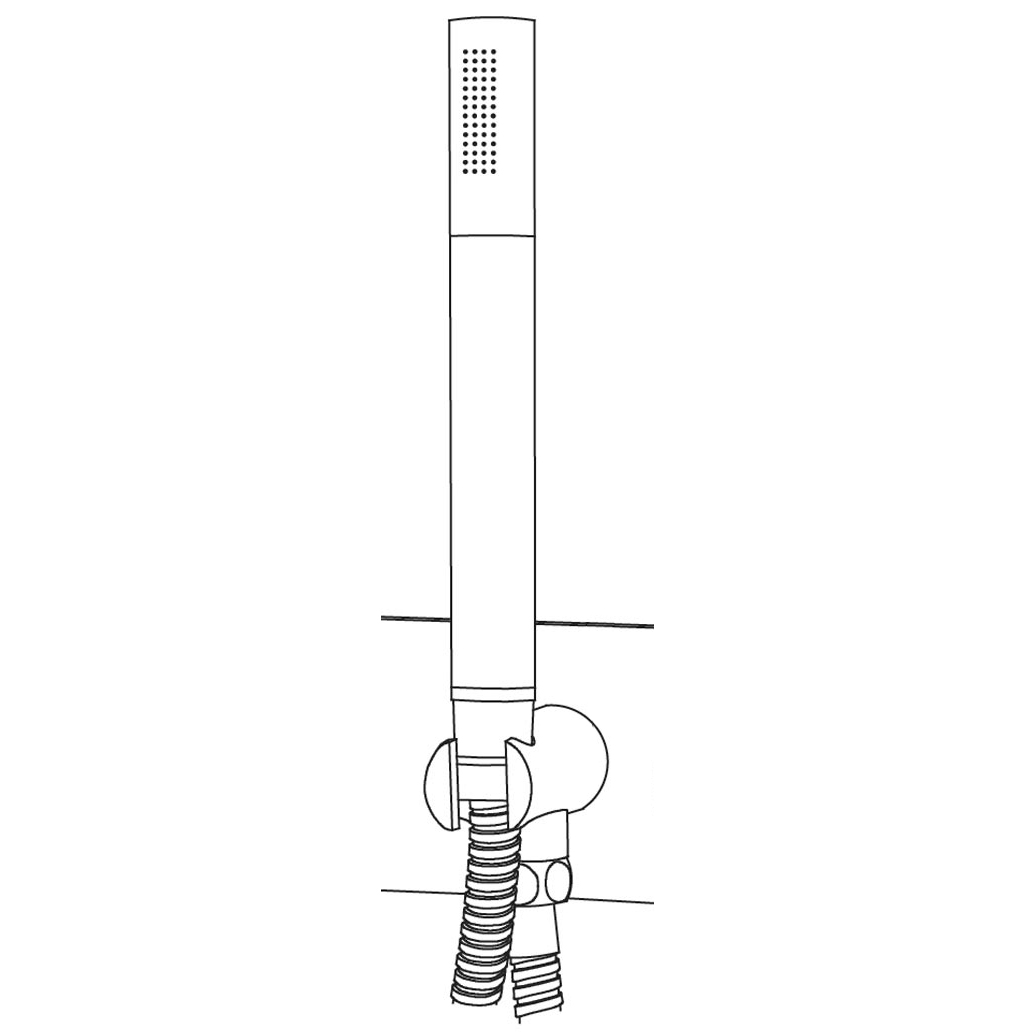
Hand-Held Shower Instructions
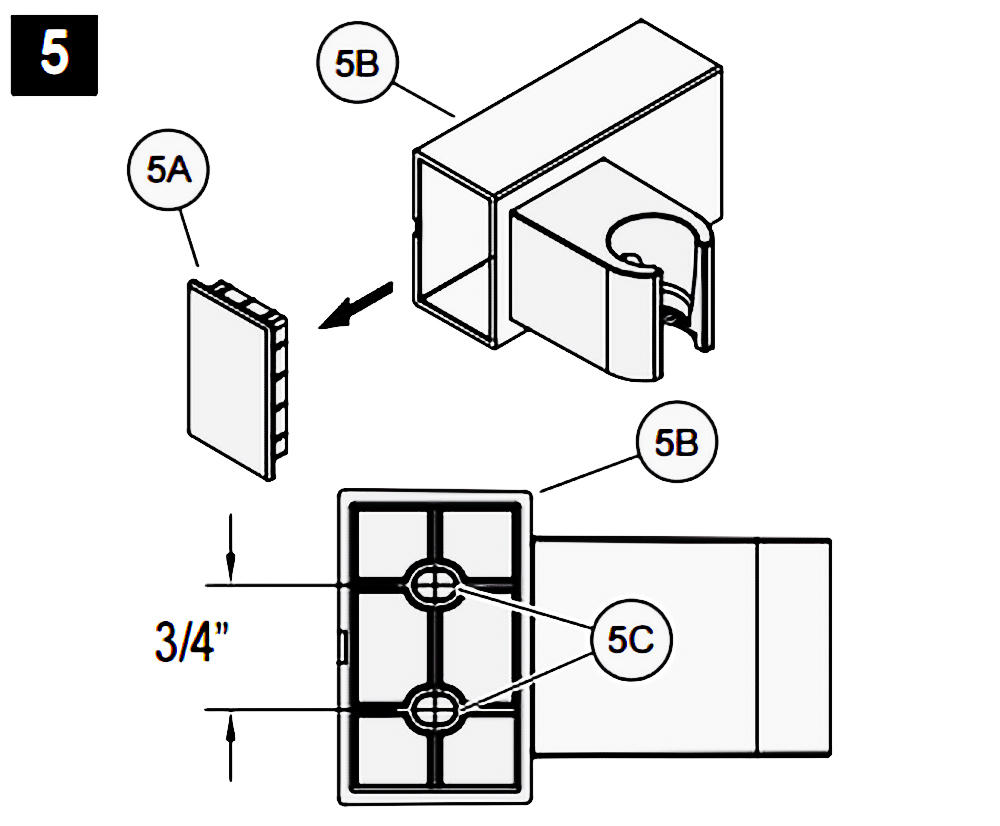
5. HOLE LOCATIONS FOR WALL MOUNT
Remove Front Cover (5A) from Wall Mount (5B). Use Wall Mount Screw Holes (5C) to place the desired location. Using a punch or awl, tap the screw hole locations.
Holes must be vertically aligned.
6. ANCHOR INSTALLATION
Drill two 1/4 dia. Holes (6A). If installing into a studs drill two 1/8 dia. holes and do not use Anchors (6B). Insert Anchors (6B) into Holes (6A) and tap flush with the wall.
7. WALL MOUNT INSTALLATION
Place Wall Mount (7A) into wall and inset Mounting Screws (7B) through Wall Mount Holes (7C) and tighten until Wall Mount (7A) is flush with the wall.
Do Not Over Tighten! Insert Front Cover (7D) into Wall Mount (7A)
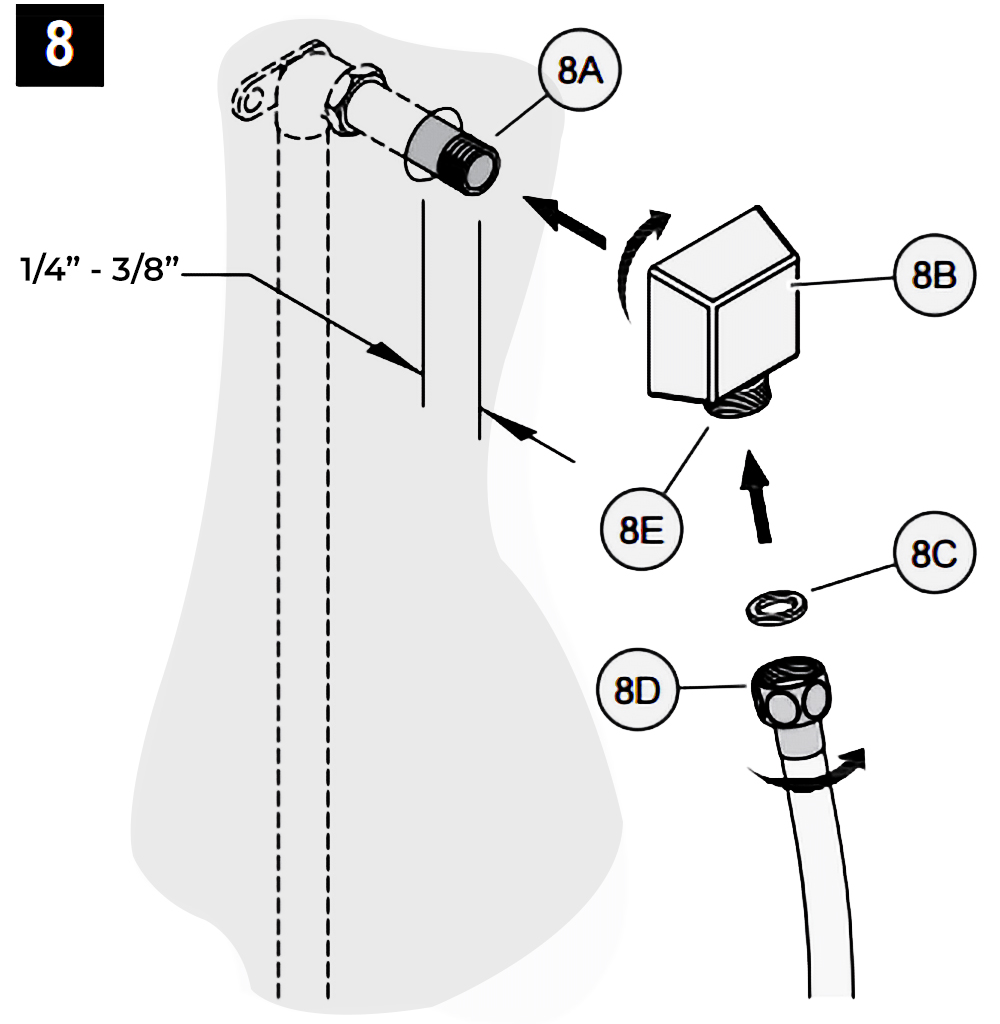
8. DROP ELBOW & HOSE INSTALLATION
Apply PTFE plumbers tape on both ends of Pipe Nipple (8A) (not included). Screw Pipe Nipple (8A) into the elbow inside the wall.
The Pipe Nipple (8A) is to project 1/4 3/4 from the finished wall. Screw Drop Elbow (8B) onto Pipe Nipple (8A) and tighten until Drop Elbow (8B) is property positioned and flush to the finished wall.
Place Rubber Seal (8C) inside Hex Hose Fitting (8D). Connect Hex Hose Fitting (8D) into Drop Elbow Outlet (8E) by turning Hex Hose Fitting (8D).
9. UNIT STARTUP
Turn on hot and cold water supplies, and check all connections for leaks.
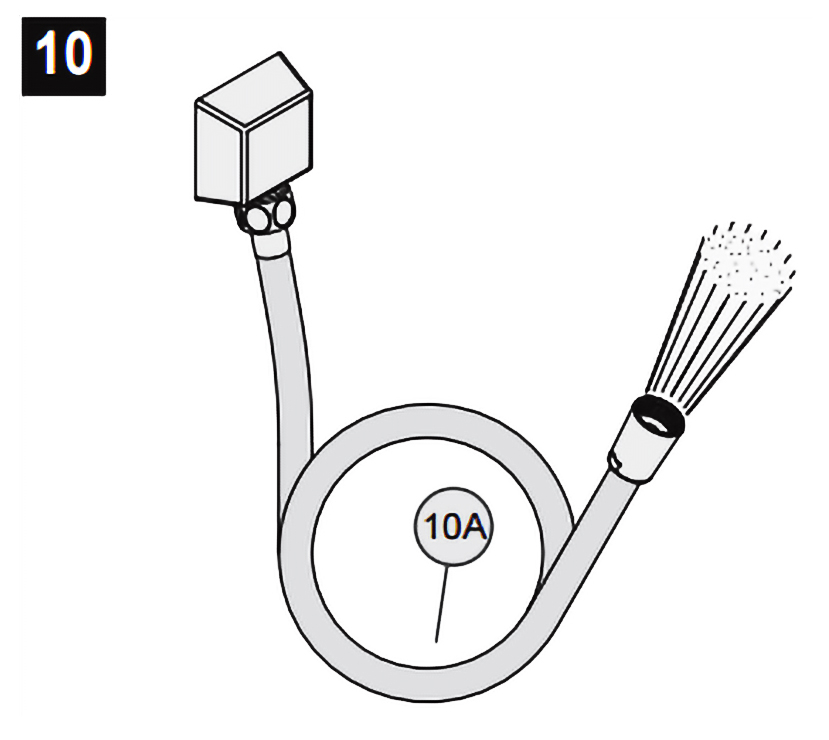
10. FINAL FLUSHING
For final flushing, turn the valve on and allow water to run through the Hose (10A) for several minutes.
Allow water to run for several minutes until all foreign matter clears the line.
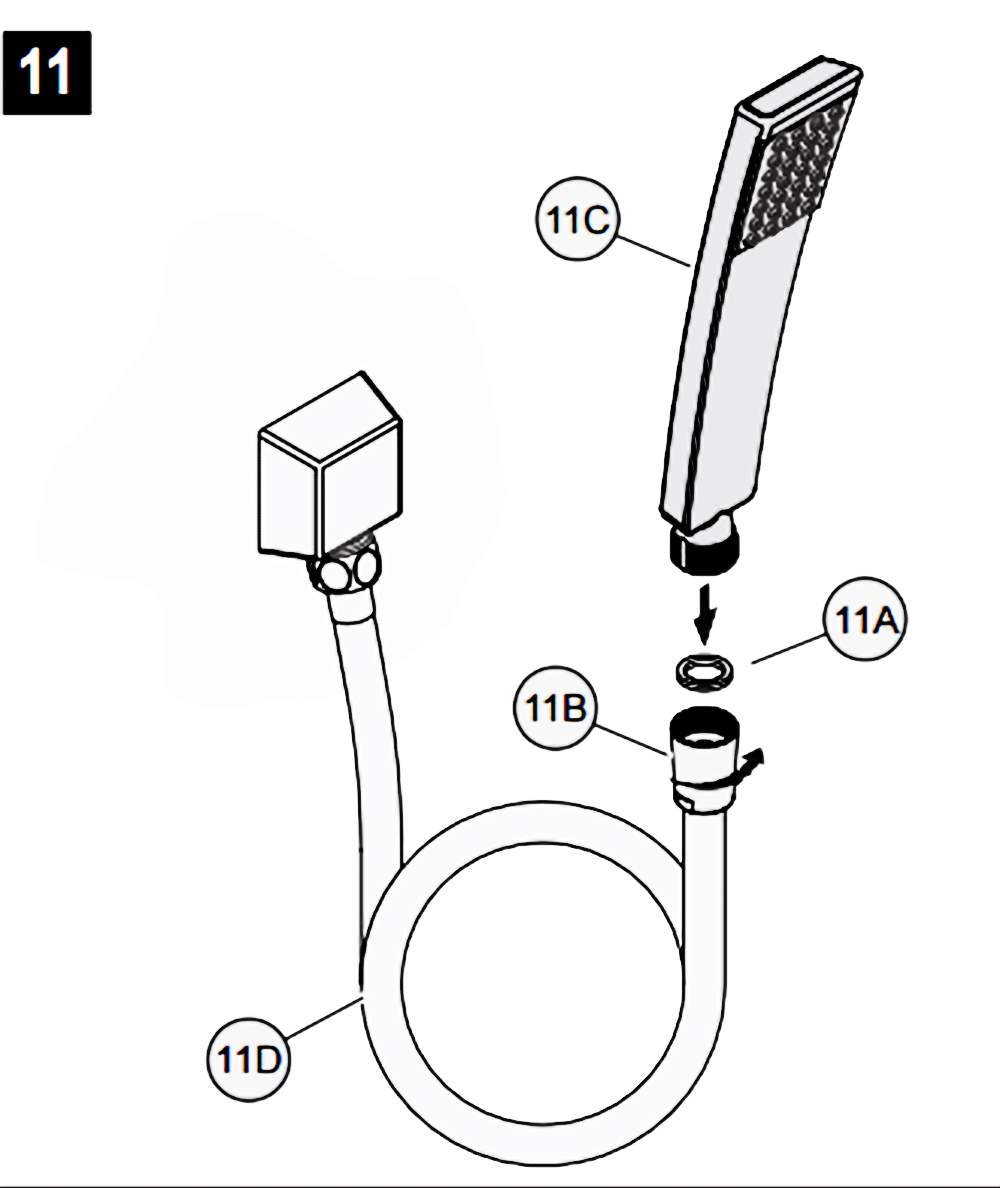
11. SHOWER ARM INSTALLATION
Place Rubber Seal (11A) inside Tapered Hose Fitting (11B). Conned Hand Shower (11C) to Hose (11D) by turning Tapered Hose Fitting (118) clockwise.
Body Jet Installation
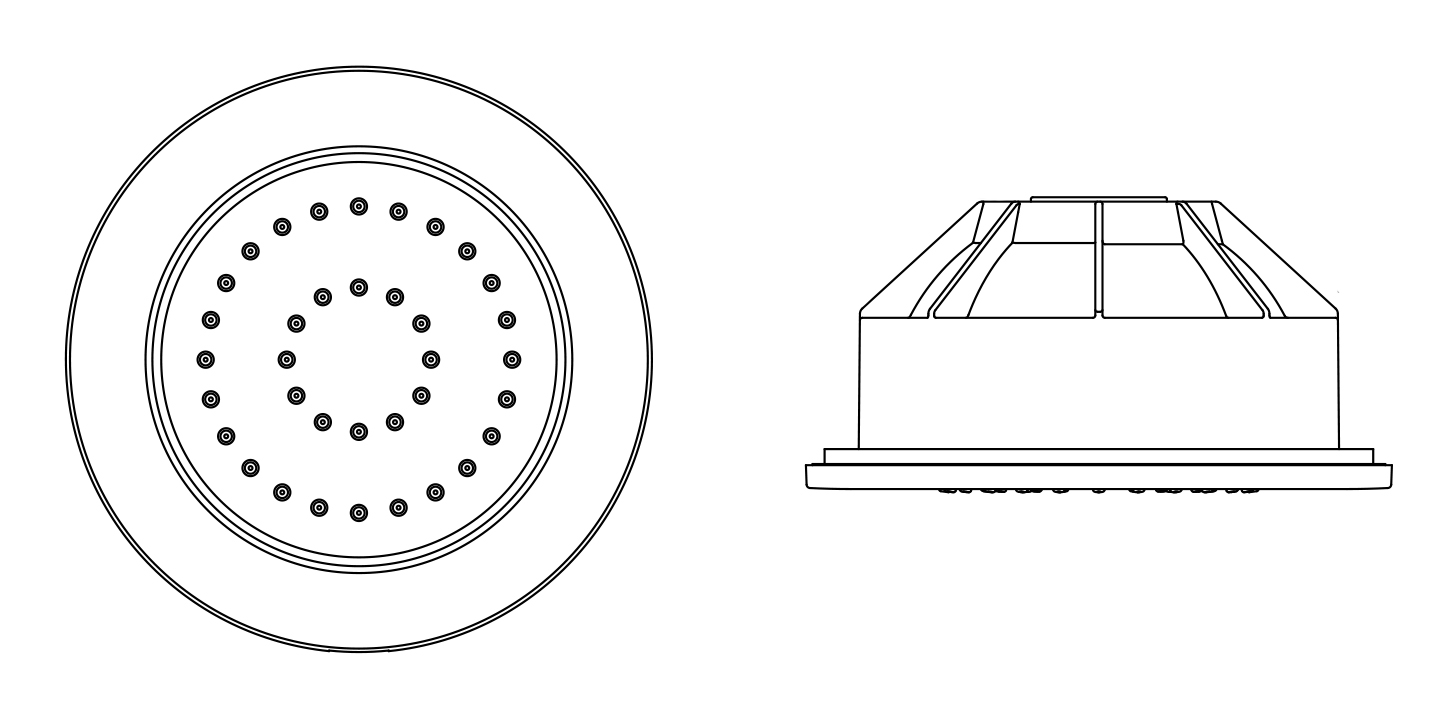

1. To revolve the nozzles and 4 sets M4 screws by counterclockwise rotation, and then take out nozzles and panel.
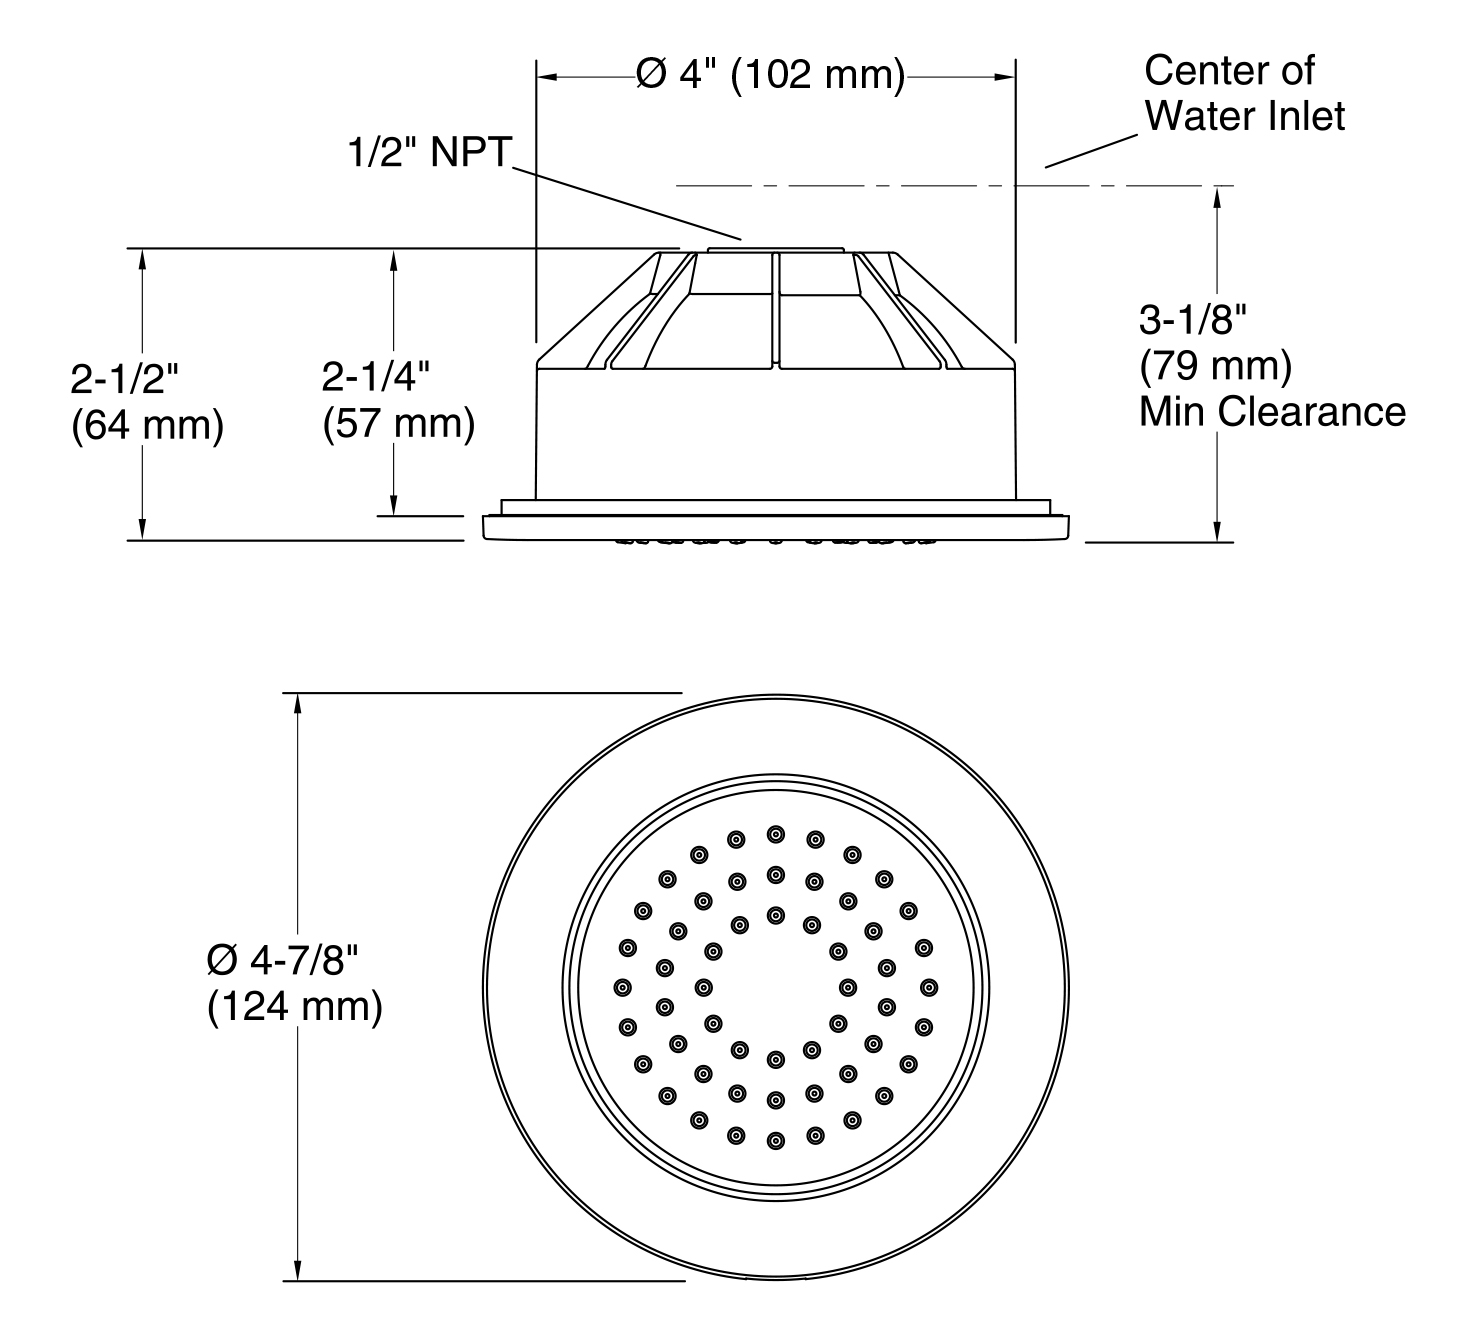
2. According to the using situation, to dig a concealed hole in the right position, the size is bigger than 5.3" x 5.3",
the depth of the opening wall is 3.1" - 3.5" distance the tile end.
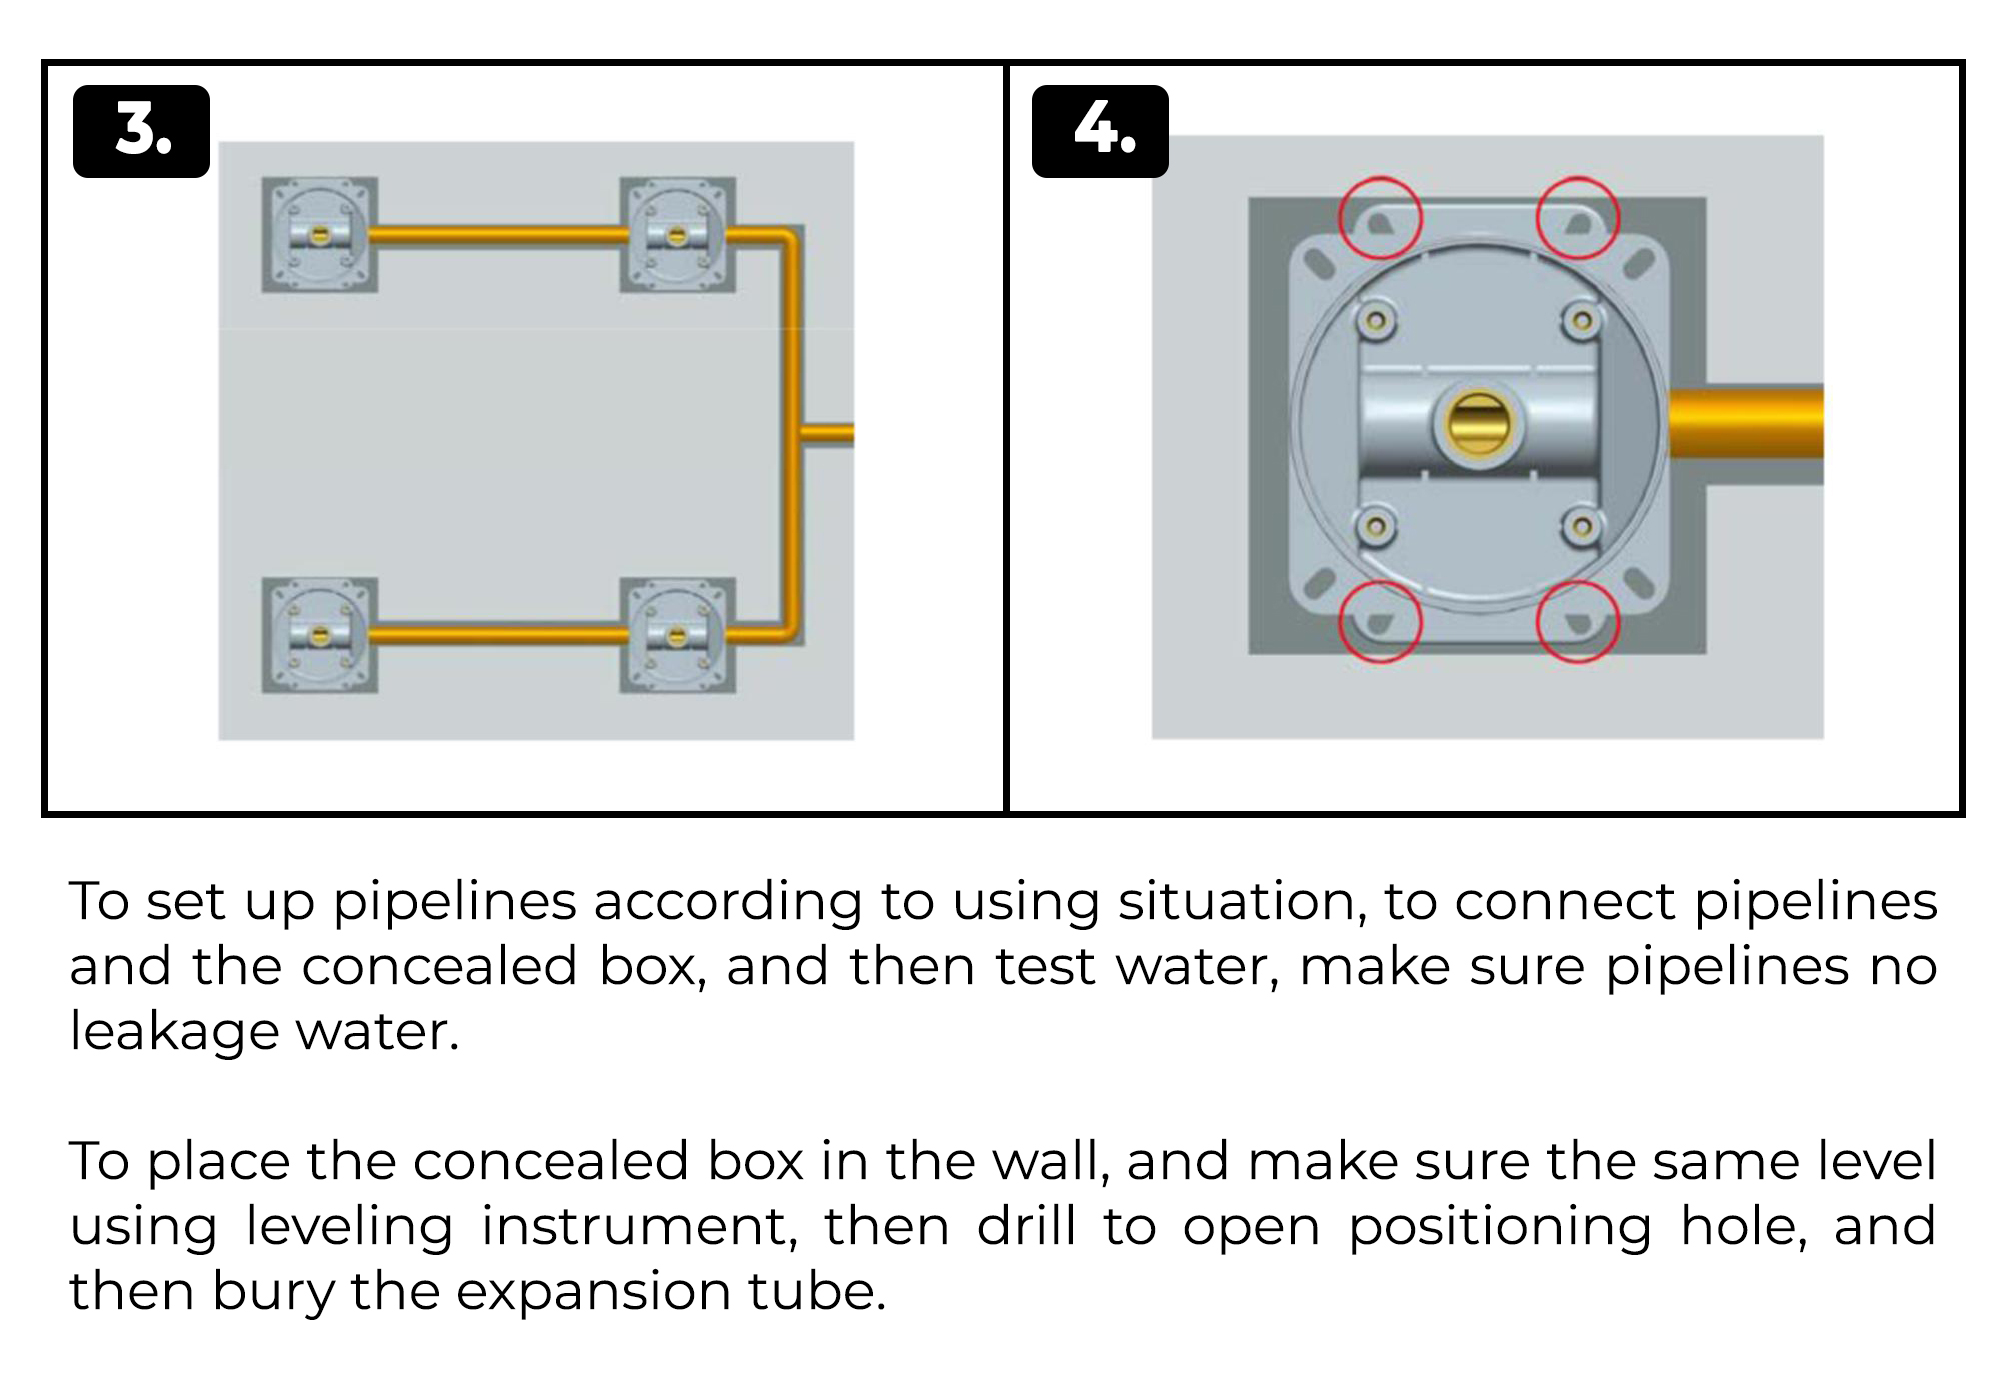
3. To set up pipelines according to using situation, to connect pipelines and the concealed box, and then test the water, make sure pipelines no leakage water.
4. To place the concealed box in the wall, and make sure the same level using leveling instrument, then drill to open
a positioning hole, and then bury the expansion tube.
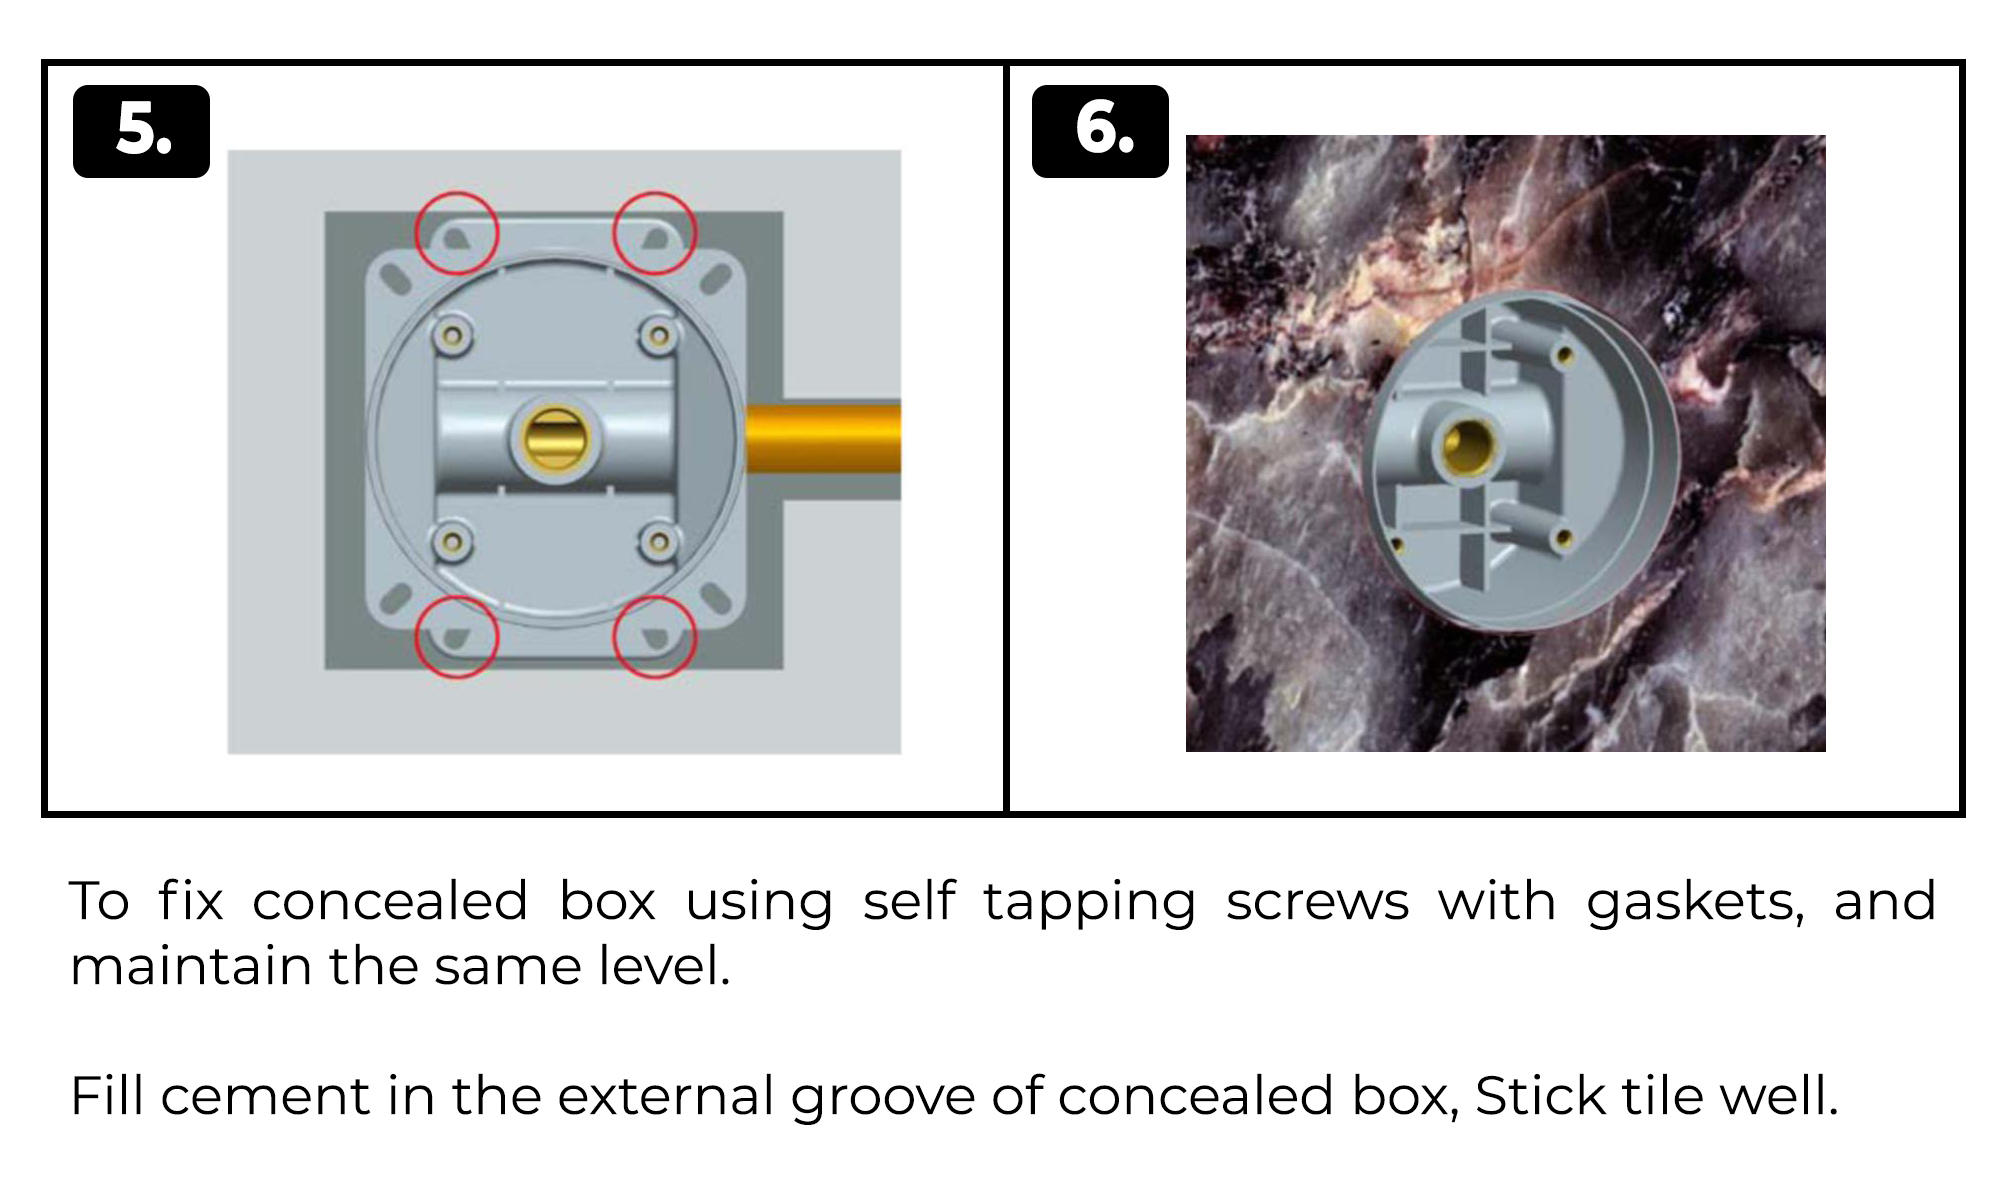
5. To fix concealed box using self-tapping screws with gaskets, and maintain the same level.
6. Fill cement in the external groove of the concealed box, Stick tile well.
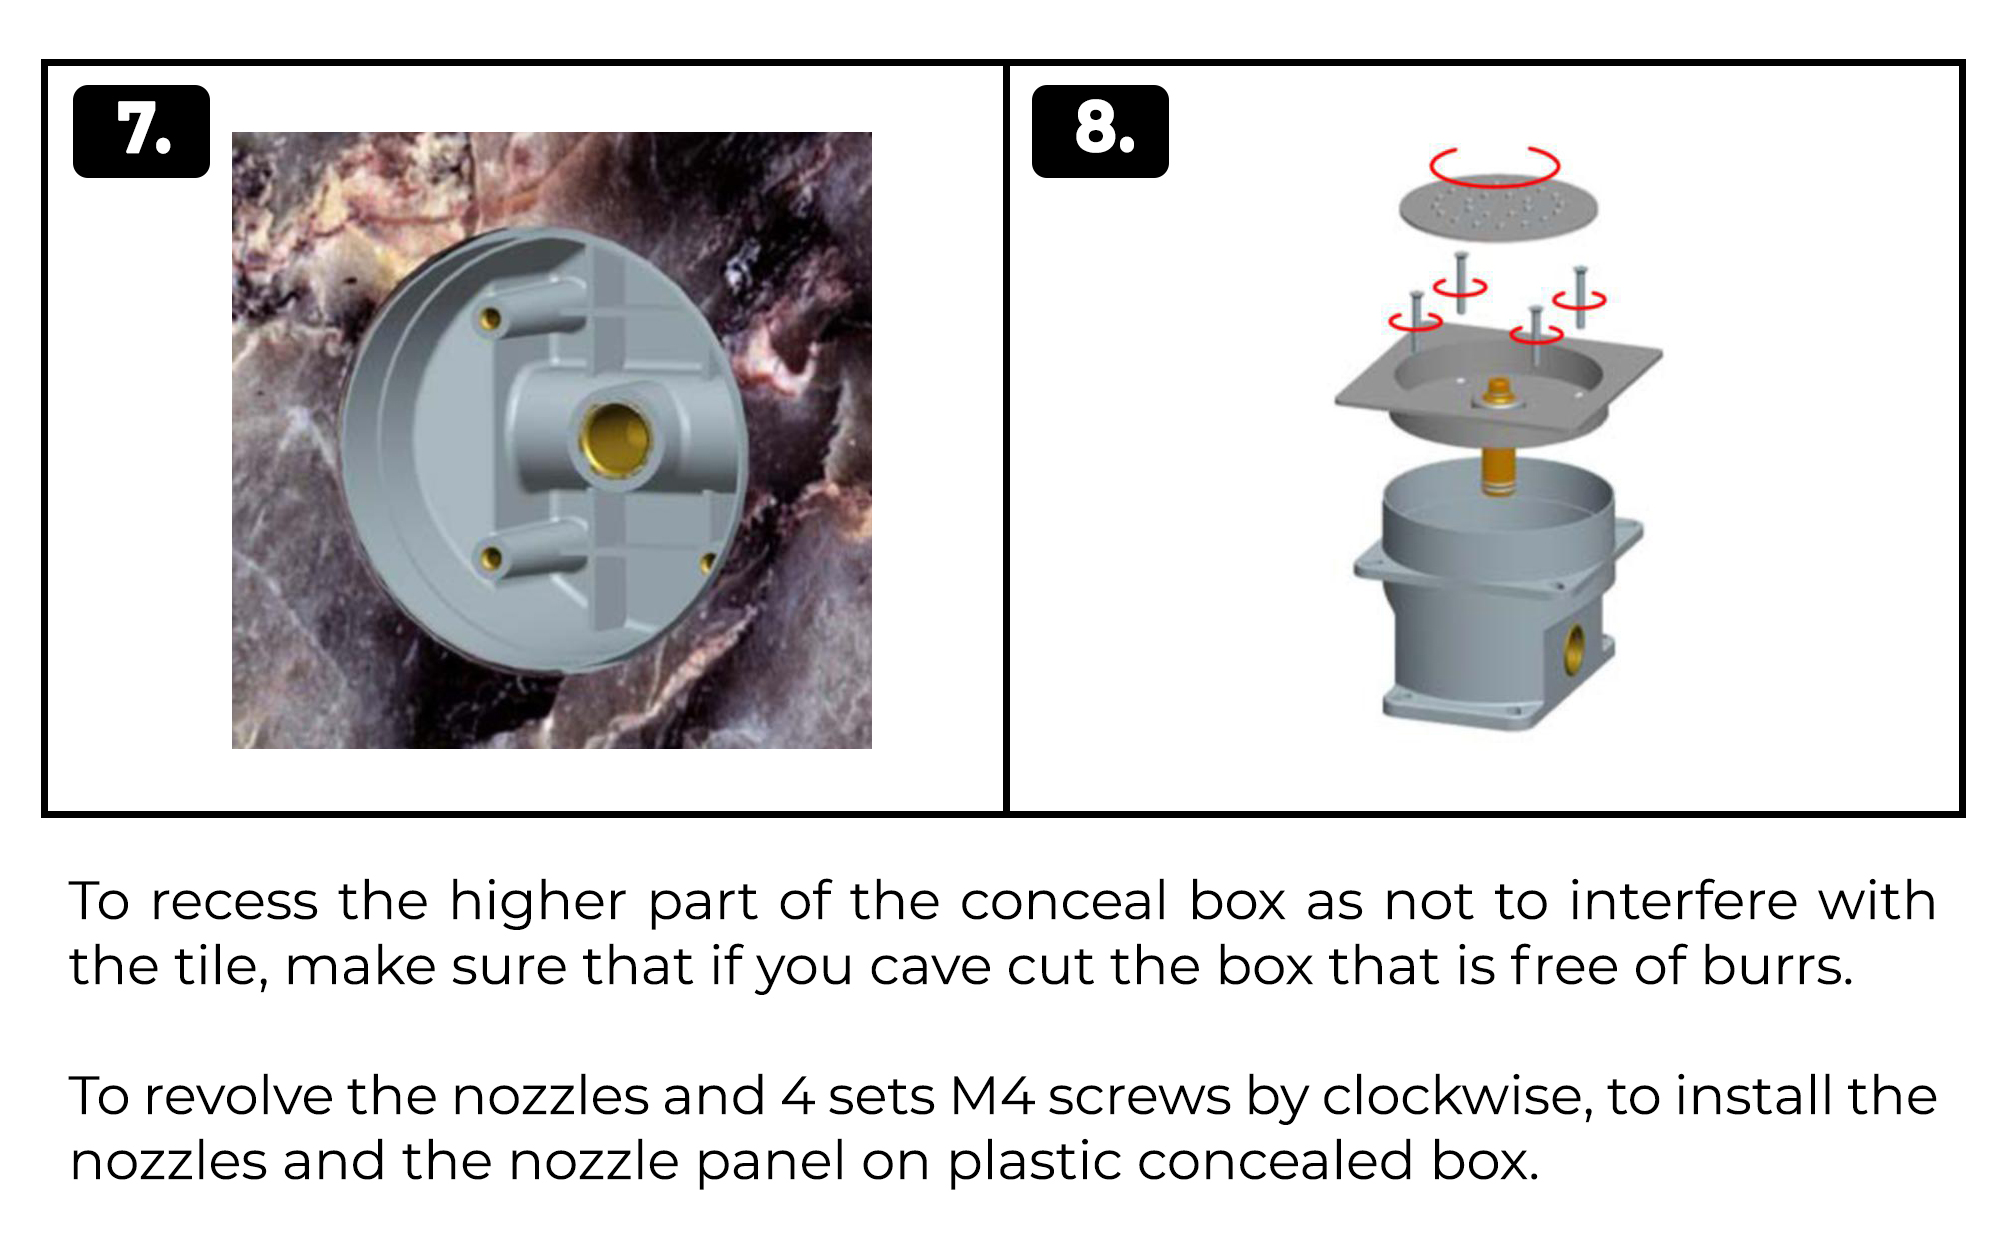
7. To recess the higher part of the conceal box as not to interfere with the tile, make sure that if you cave cut
the box that is free of burrs.
8. To revolve the nozzles and 4 sets M4 screws by clockwise, to install the nozzles and the nozzle panel on the
plastic concealed box.
|