Home > Installation Instructions BathSelect Melun Exposed Brushed Gold Wall Mounted Round Rainfall Shower System

How to install BathSelect Melun Exposed Brushed Gold Wall Mounted Round Rainfall Shower System

Installation Instruction for BathSelect Melun Exposed Brushed Gold Wall Mounted Round Rainfall Shower System

BathSelect Melun Brushed Gold Exposed Rainfall Shower System

The BathSelect Melun Brushed Gold Exposed Wall Mounted Round Rainfall Shower System is specially designed for those people who like to keep things simple but still want to enjoy the pleasure of luxury. The set includes both a square rainfall showerhead, a handheld showerhead and faucet, everything in a beautiful brushed gold finish. Made from high-quality brass, Brushed Gold finish to create a bright, highly reflective, beautiful metallic look. Effortlessly provides superior water pressure even in low pressure. This is one of the simplest products we offer, yet indispensable when it comes to installing a brand new shower. It comes complete with accessories and installation instructions.

BathSelect Brushed Gold Exposed Wall Mount Round Rainfall Shower System Features:
  • Brand Name: BathSelect
  • Model Number: BST10252
  • Function Type: Exposed Shower Set
  • Style: Contemporary
  • Shower Head Feature: Rainfall Shower Head
  • Installation Type: Exposed Wall Mount
  • Surface finish: Brushed Gold
  • Material: Brass
  • Number of Handle: Single Handle
  • Connection: G1/2 Standard
  • Concealed Mixer valve: Hot and Cold
  • Hose Length: 1.5m
  • Hose Material: Stainless Steel
  • Flow Rate: 2.5 GPM
BathSelect Melun Exposed Brushed Gold Wall Mounted Round Rainfall Shower System

BathSelect® Manufacturer Warranty Information BathSelect Product Warranty
Before you begin, please read the installation instructions below. Observe all local building and safety codes.
  • Unpack and inspect the product for any shipping damages. If you find damages, do not install.
  • Please note all showers must be installed by a professional and certified plumber otherwise warranty may be voided.

Shower
installation

Shower Body Jets Installation Instructions

Step 1: Step 2:
shower bar


Step 3: Step 4:


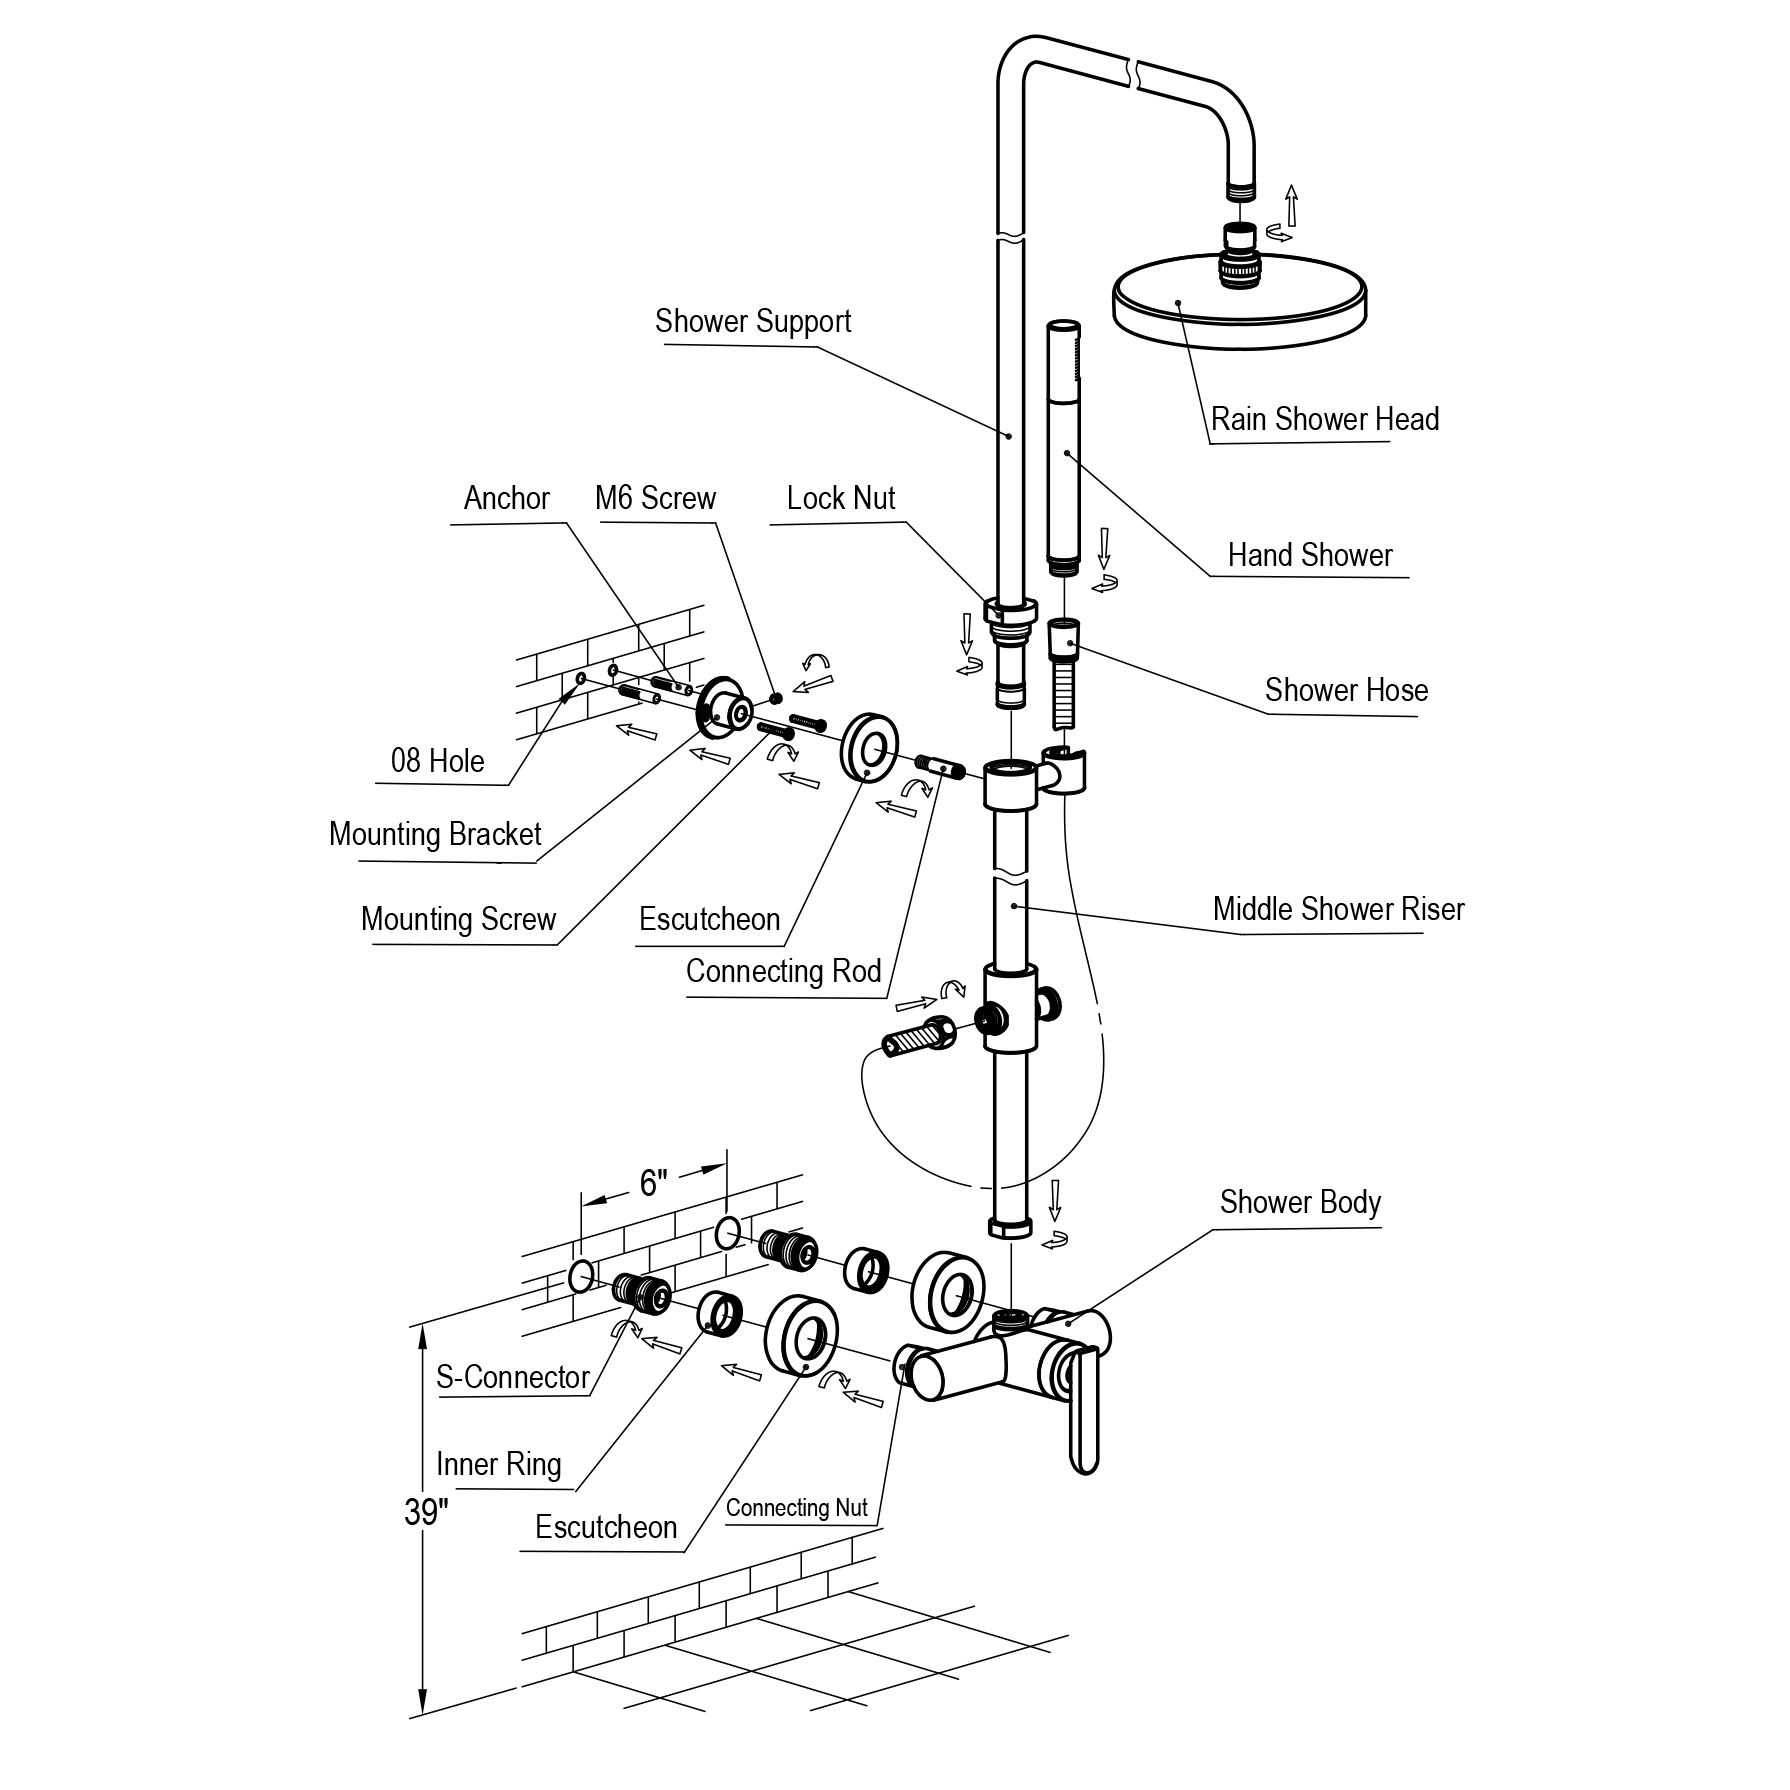
1. As specified in diagram, attach the shower base to the hot and cold water supply pipes in the wall.
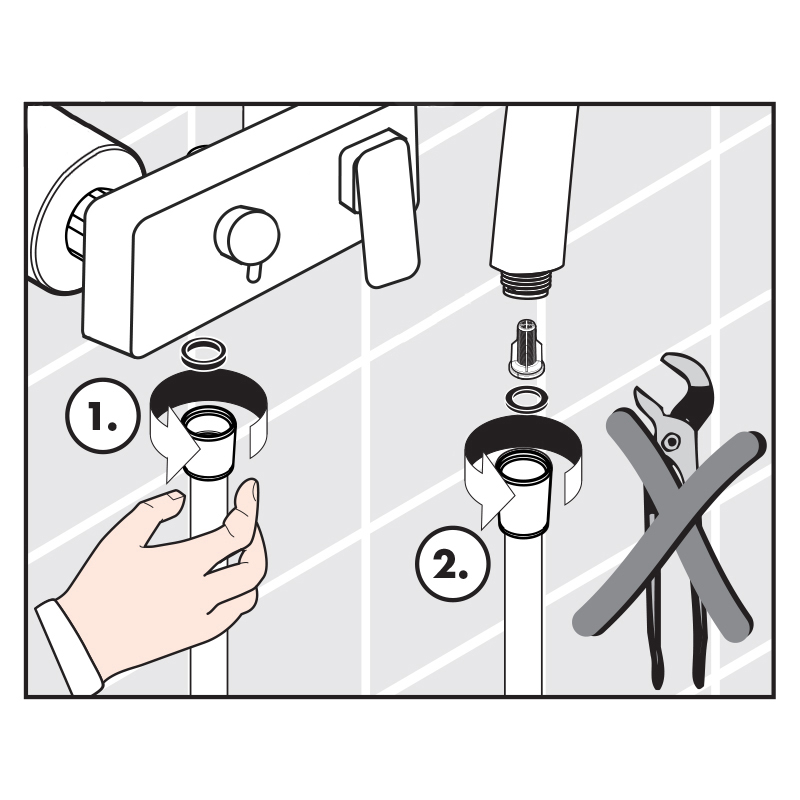
2. Wrap the S-connectors with Teflon tape, and thread the connectors onto the supply pipes. Tighten with your adjustable wrench.
3. Use a level to verify the connectors are aligned properly. Adjust as necessary.
4. Thread the inner rings onto the S-connectors, keeping the threaded portion facing outward. Place the escutcheons on the inner rings with the horn mouth facing inward, and push them against the wall.
5. Attach the connecting nuts to the S-connector, and tighten.
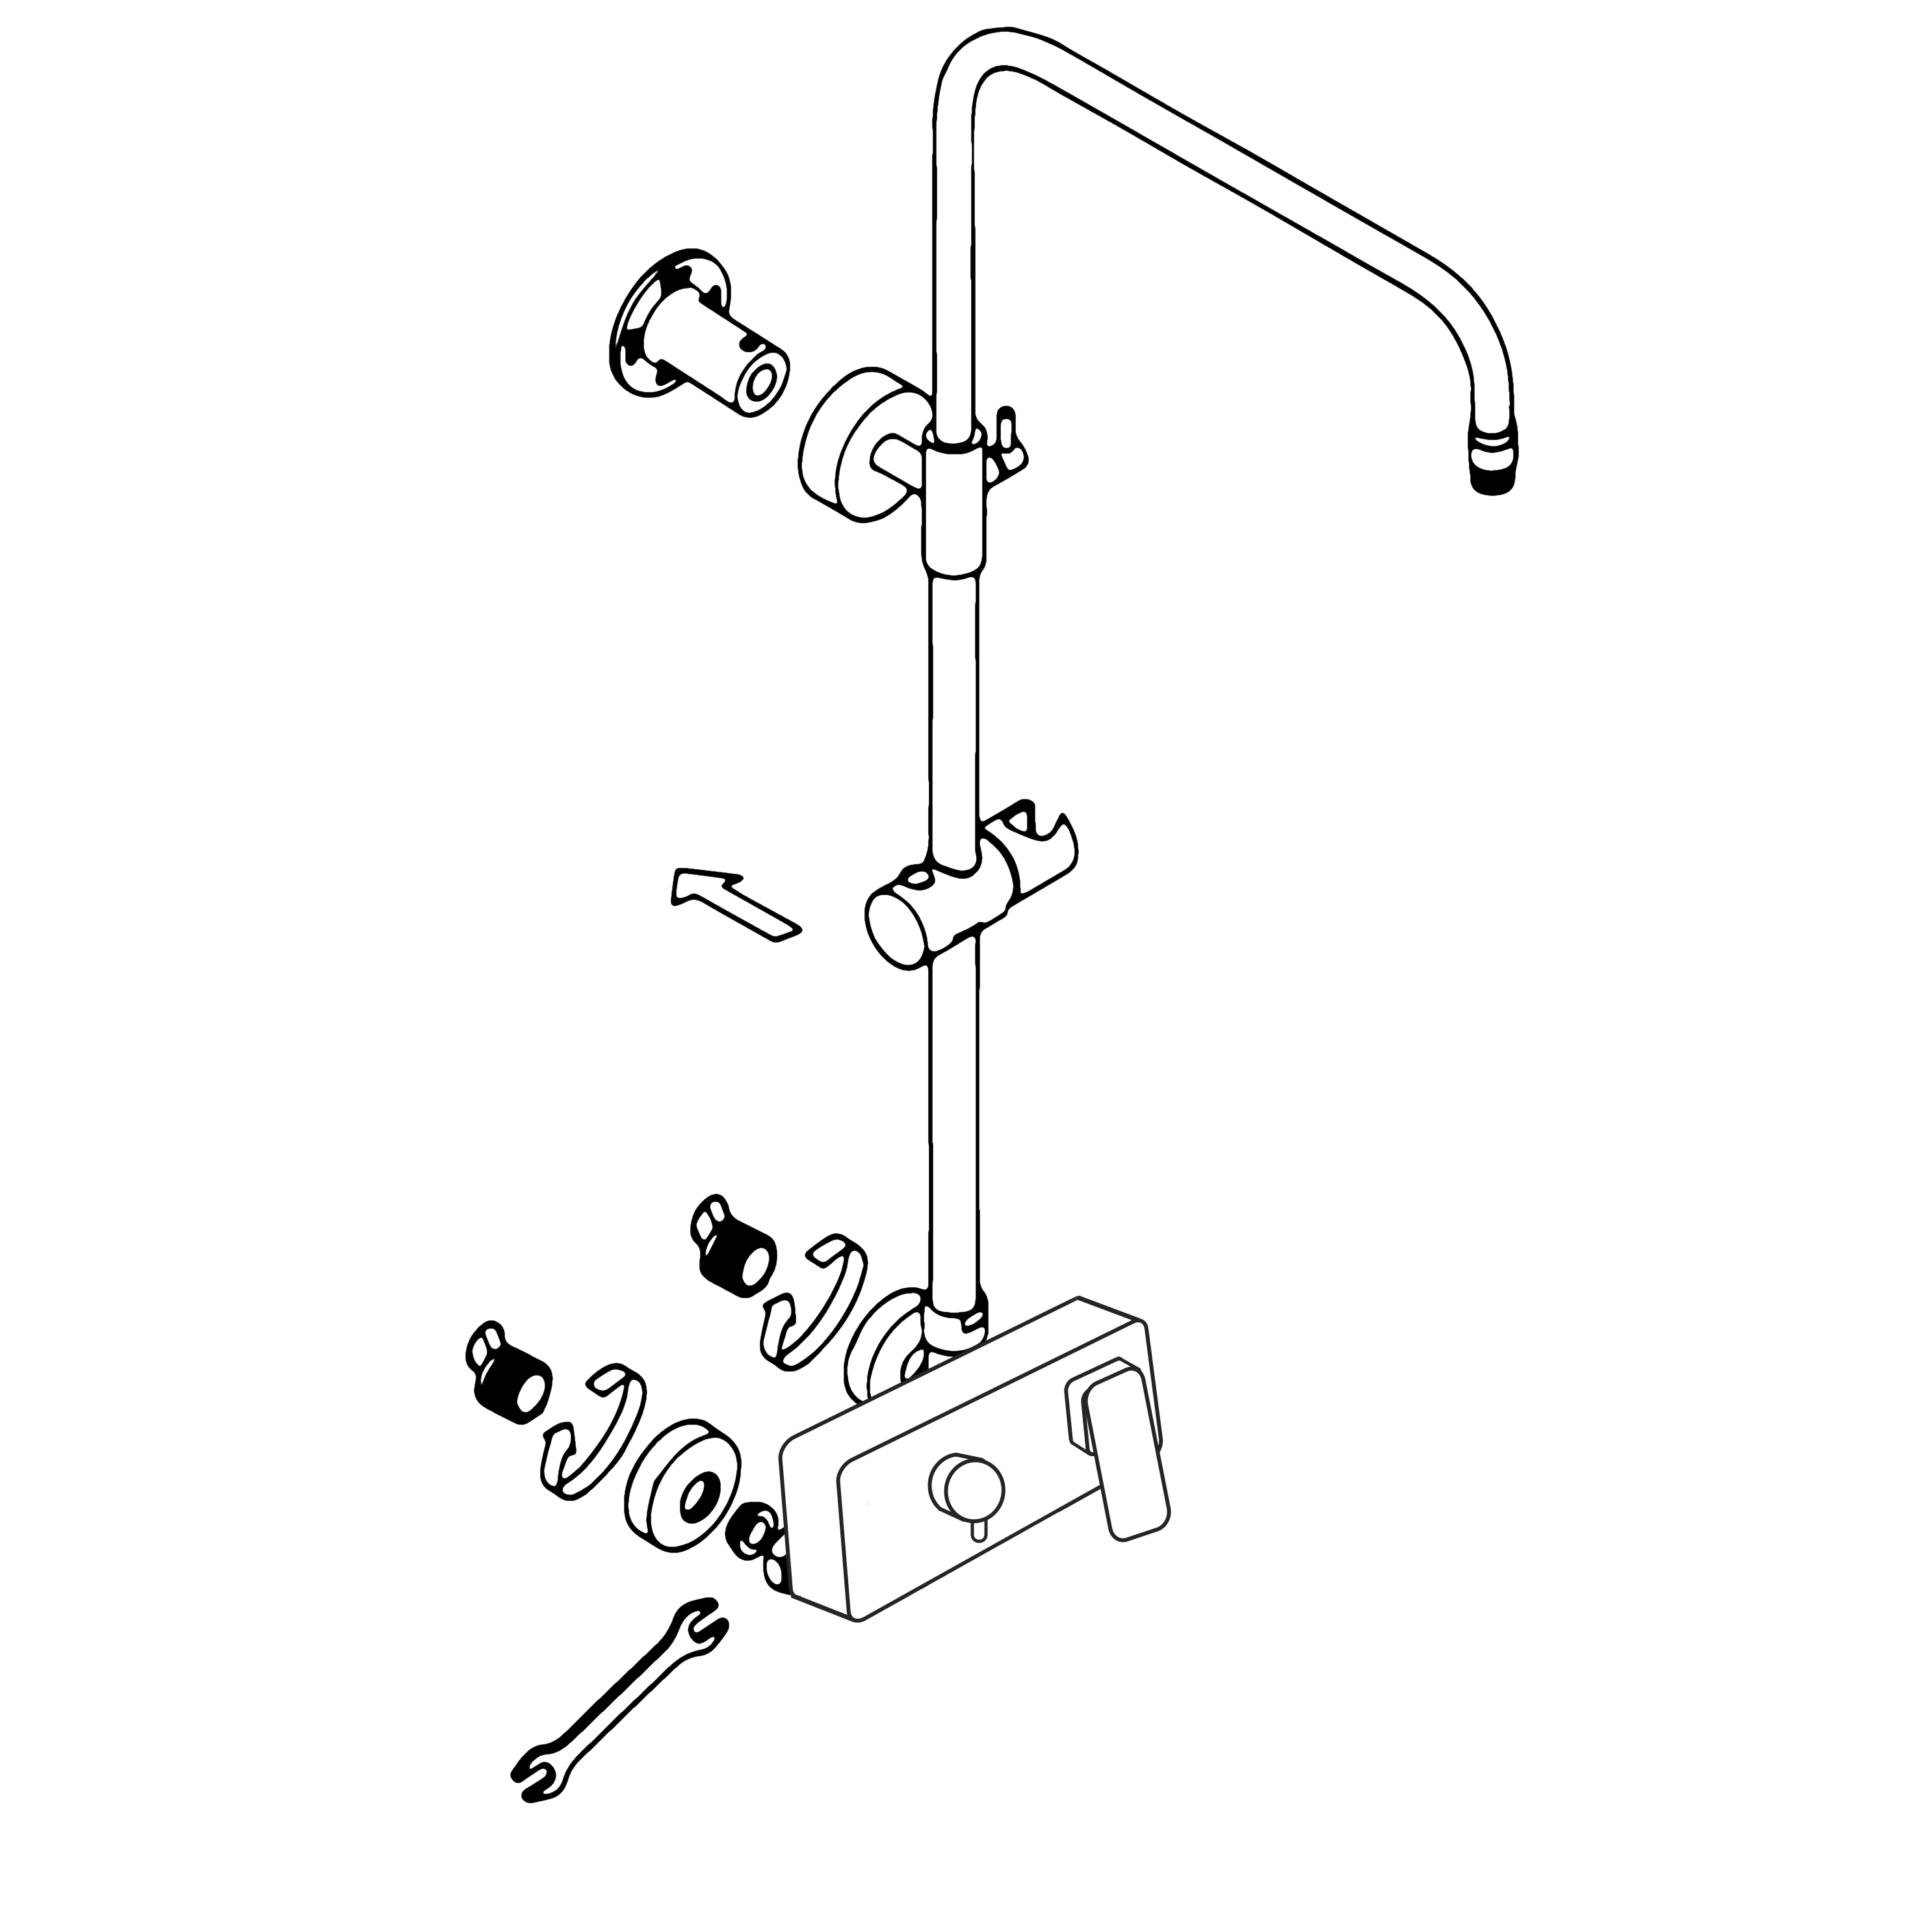
6. Attach the connecting rod to the middle shower riser. Hold the mounting bracket in place in the desired mounting location.
7. Attach the middle shower riser to the shower body. Use a level to very that the shower riser is in the proper location. When all pieces are properly aligned, mark the location of the mounting bracket on the wall.
8. Remove the middle shower riser, and drill two 08 holes at the locations marked in the previous step. Insert the wall anchors. Attach the mounting bracket to the wall with mounting screws. Attach the escutcheon to the mounting bracket.
9. Attach the shower support and the middle shower riser. Connect the bottom of the riser to the shower body and the top of the riser to the mounting bracket. Tighten the M6 screw to secure.
10. Thread the shower head onto the shower support. Tighten the locking nut and shower head to secure.
11. Connect the hand shower and shower hose.


BathSelect Ancient Round Antique Rainfall Wall ShoweBathSelect Ancient Round Antique Rainfall Wall Shower Head Installation Instructions Head Installation Instructions