How to install BathSelect Bologna Chrome Finish Body Spray Jets
Installation Instruction for BathSelect Bologna Chrome Finish Body Spray Jets
BathSelect Bologna Chrome Finish Body Spray Jets
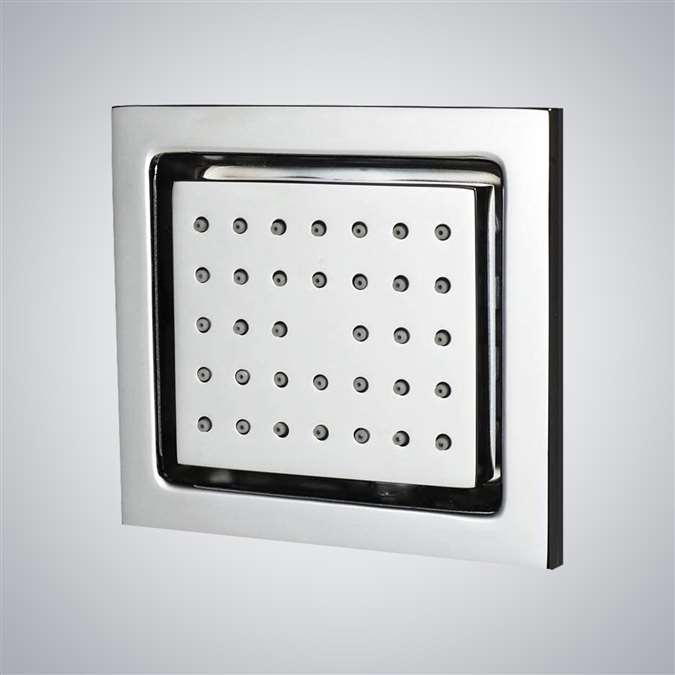
The BathSelect body spray Jets is a modestly designed shower system that goes well with conventional as well as modern shower décor. While you take a shower using it, you understand how comforting shower feels. Featuring a wide coverage spray along with self-clean spray nozzles, it provides you a showering experience unmatched! High-quality brass is used to manufacture this shower system with a durable finish, while the spray units are flexible enough to fit any angle that guarantees a wide coverage spray area, thereby letting you enjoy a relaxing shower. The 34-nozzle spray face is enclosed by a sophisticated escutcheon and can adjust to any desired angle. Install it on the wall or ceiling of your shower and experience a wonderful shower.
BathSelect Bologna Chrome Finish Body Spray Jets Features:
|
Brand Name: BathSelect
Model Number: BZ-5603
Type: Shower Add-Ons
Finish: Chrome, Brushed Nickel
Material: Solid Brass
Temperature: range 20 - 50 deg C.
Rotatable: 45 degrees to the left or right
Feature: Easy-To-Clean Silicone Nozzle
Jet Shape: Square
Flow Rate: 2.5 GPM
Installation Method: Wall Mount
Dimensions: 5 x 2.8 x 5 inches
|
|
BathSelect® Manufacturer Warranty Information 
Before you begin, please read the installation instructions below. Observe all local building and safety codes.
- Unpack and inspect the product for any shipping damages. If you find damages, do not install.
- Please note all showers must be installed by a professional and certified plumber otherwise warranty may be voided.
|
Shower
installation
|
|
|
|
Shower Body Jets Installation Instructions
|
Step 1:
|
|
|
|
Step 2:
|
|
|

|
Body
|
Spray
|
Installation
|
|
|

|
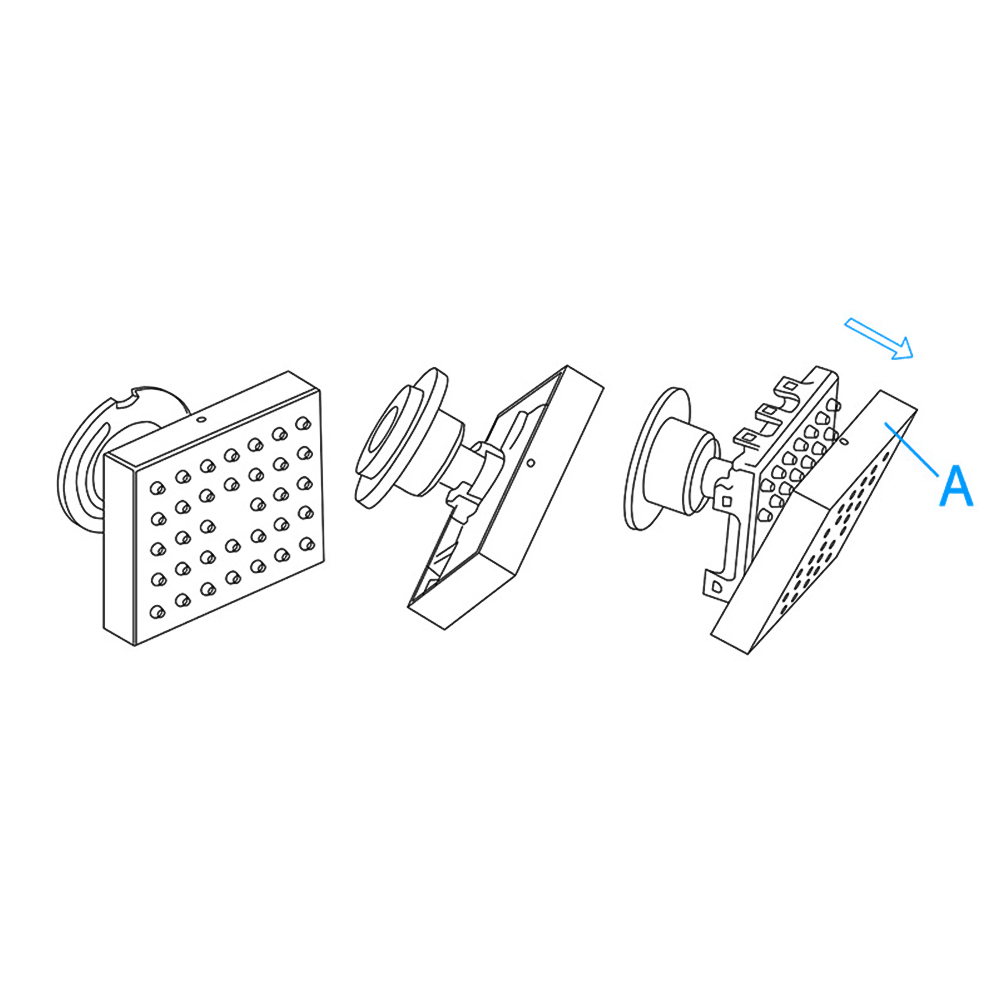
Remove the decorative plate (A) out of the body.
|
|
|
|
Remove the screws from the outlet face (B) and connector body (C) with the Allen key (D).
|
|
|
|
Step 3:
|
|
|
|
Step 4:
|
|
|
|
|
|
|

|
|
|
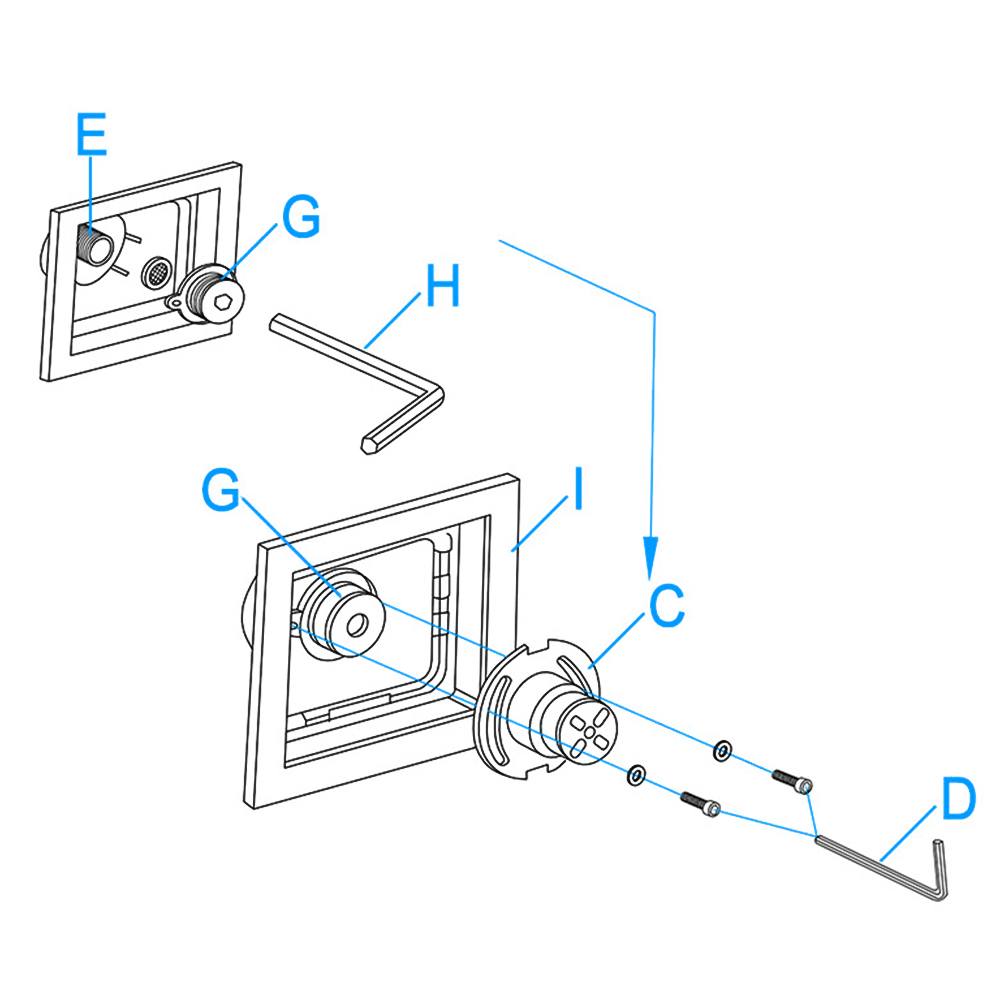
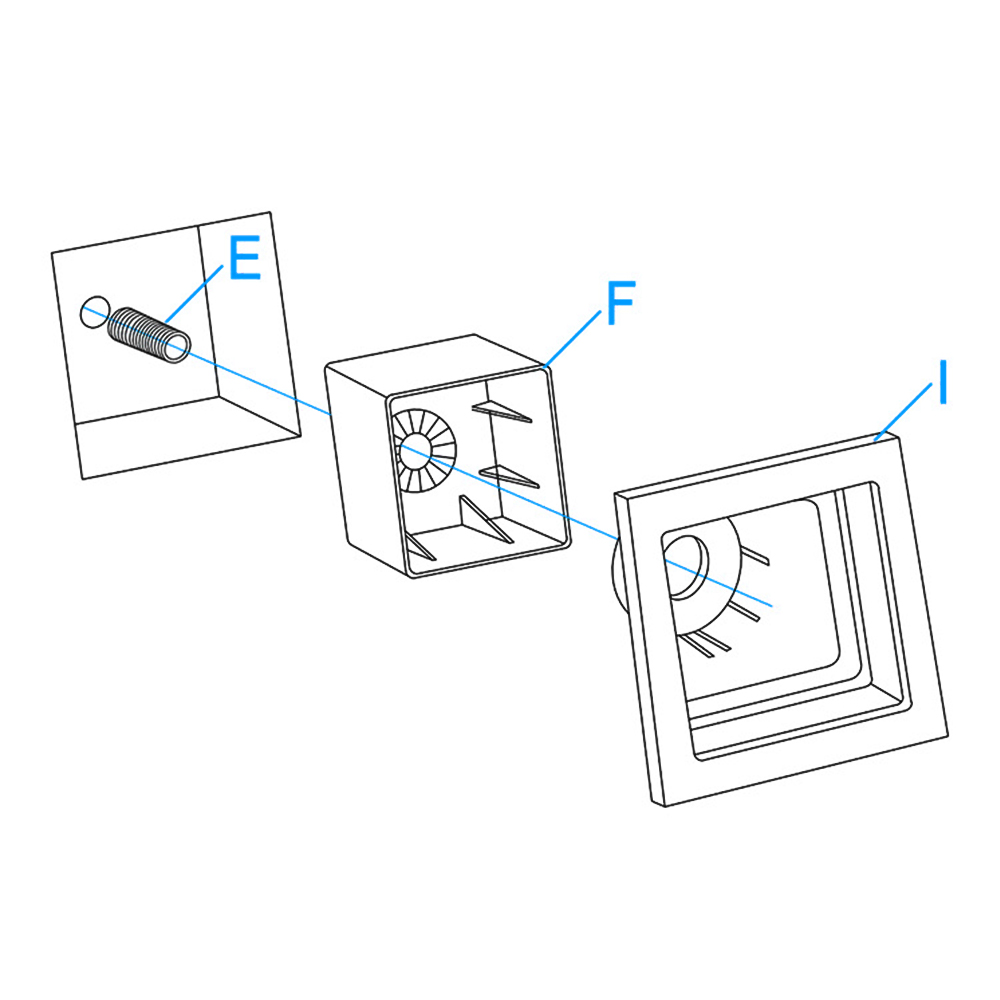
Screw the threaded pipe (E) to the water supply fittings. Push the plastic box (F) into the wall through the threaded pipe (E). Then, install the decorative plate (I) into the plastic box (F). Make sure the position is correct according to the diagram.
|
|
|
|
Screw the connector (G) into the threaded pipe (E) with the Allen key (H). Install the connector body (C) to the connector (G). When finish installation, please check to make sure the connection is completed. Then, fix the screws into the body (C) with Allen key (D) and make sure the body (C), connector (G) and decorative plate (I) are tightened. Make sure the one side with the bulge is in the top position.
|
|
|
|
|
|
|
|
|
|
|
Step 5:
|
|
|
|
Step 6:
|
|
|

|
|
|
|

|
|
|
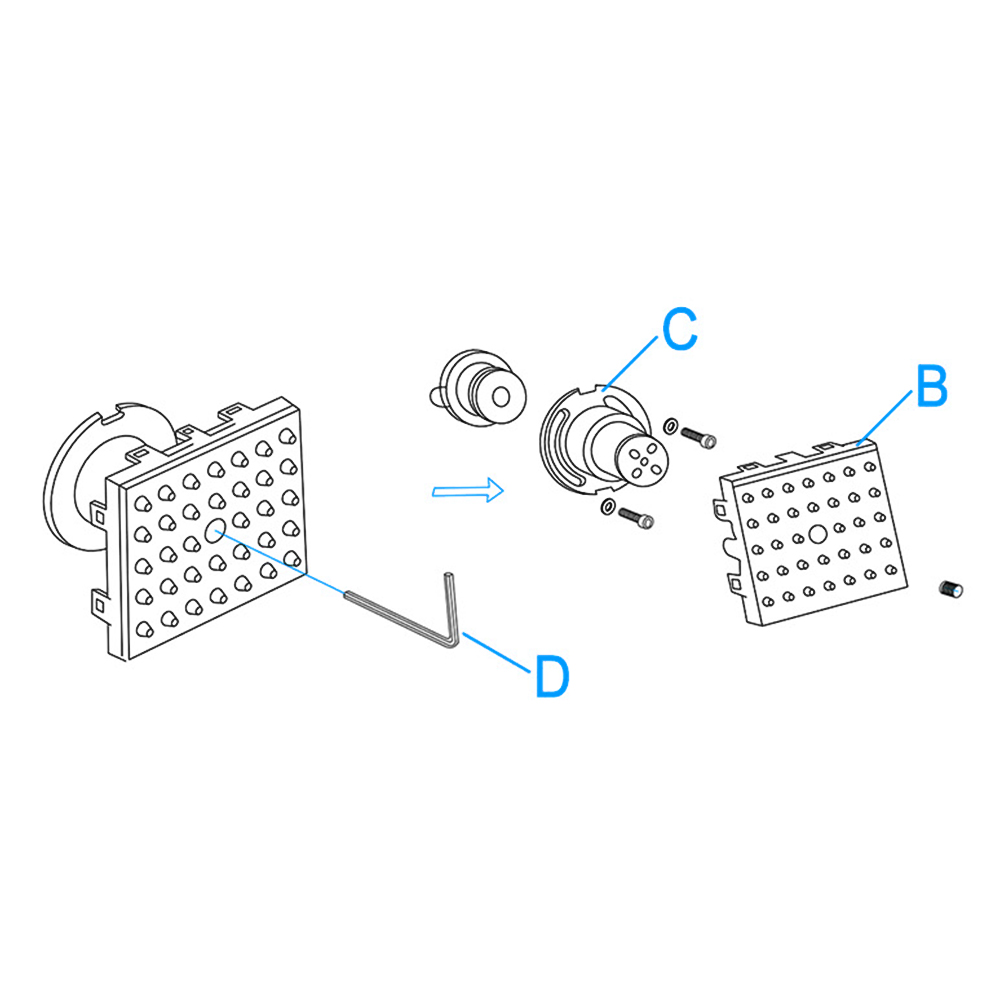
Install the outlet face (B) to the body (C). Make sure the connection of body (C) and outlet face (B) are completed. Tighten the screw through the outlet face (B) into the body (C) with the Allen key (D).
|
|
|
|
Install the decorative plate (A) into the outlet face (B) tightly. Make sure the hole and the raised dot are in the correct position when you push the decorative plate (A) into the outlet face (B).
|
|
|
|
|
|
|
|
|
|
|
|
|
|
|
|
|
|
|
|
Instructions
|
|
|
Body jets should be arranged in your system to provide the necessary spray outlets to suit the application.
1. Identify all components and check for completeness, particularly before arranging fitting.
2. Depending on the application the body jet can be panel mounted using a backnut (not supplied) or set into the wall on rigid pipe work. If panel mounting care should be taken to ensure connection can be made after securing with the backnut.
3. Connect body jet to pipe work using recommended ½ BSP connections (not provided) with thread sealing compound where necessary.
Note: - Before finishing wall turn on water supplies to check both correct system function and for leaking from joints/connections.
4. Complete wall finish.
|
|

|
|
|
|
|
Massage Showers & Jetted Body Showers
Why settle for raindrops falling when you can have them coming from all directions? These shower jets can be rotated so you can point them wherever you please. When it comes to new bathroom upgrades, we offer shape, finishes, and styles that you've looking for. Give your bathroom an elegant glance with sink faucets and fixtures. This is one of the trendiest finishes across decor styles in the bathroom. It comes super seal technology inside, capable of delivering superior performance with solid construction for long durability that will upgrade your bathroom with a modern and cool look for a long period of time.
One of the main benefits of a body jet shower system is that it helps invoke the benefits of hydrotherapy. It produces various effects that benefit the body in different ways.
1. Relief from muscle pain and relaxing effect
2. Heal and Rehabilitate injured muscles
3. Pressure Point Relief
4. Refresh after a long day
Since the water jets can be positioned individually and are adjustable, they can be targeted at specific muscle groups of the body to soothe and massage specific areas, thus providing effective relief from muscle pain. As well, since flowing water has a soothing effect, being targeted by body jets helps your body release endorphins which act as a natural pain reliever.
Whether you shower as a way to get energized for the morning, or as a way to wind down after a long day at work, a Shower System with Jets creates an amazing spa-like experience.
Shower Body Sprays are basically small, side-mounted showerheads that are attached at strategic points on the wall. Body sprays in the shower are most often found in multiples of 2, 3, or 4, and be installed on the same, or opposing walls. Regardless of where the spray heads are placed, body sprays are normally plumbed as a group.
|
|
|
|
|
|