Installation Instruction For Widespread Waterfall Faucet BSY-8013
Widespread Waterfall Faucet
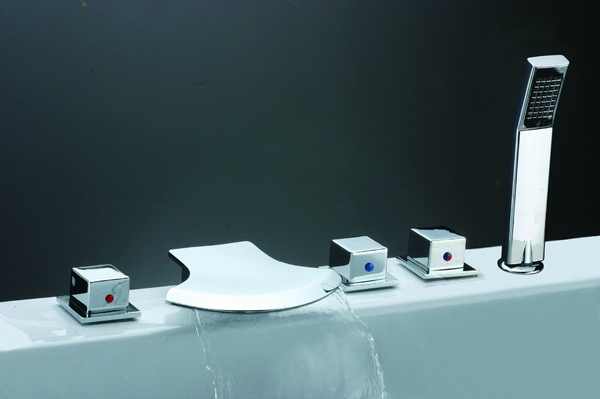
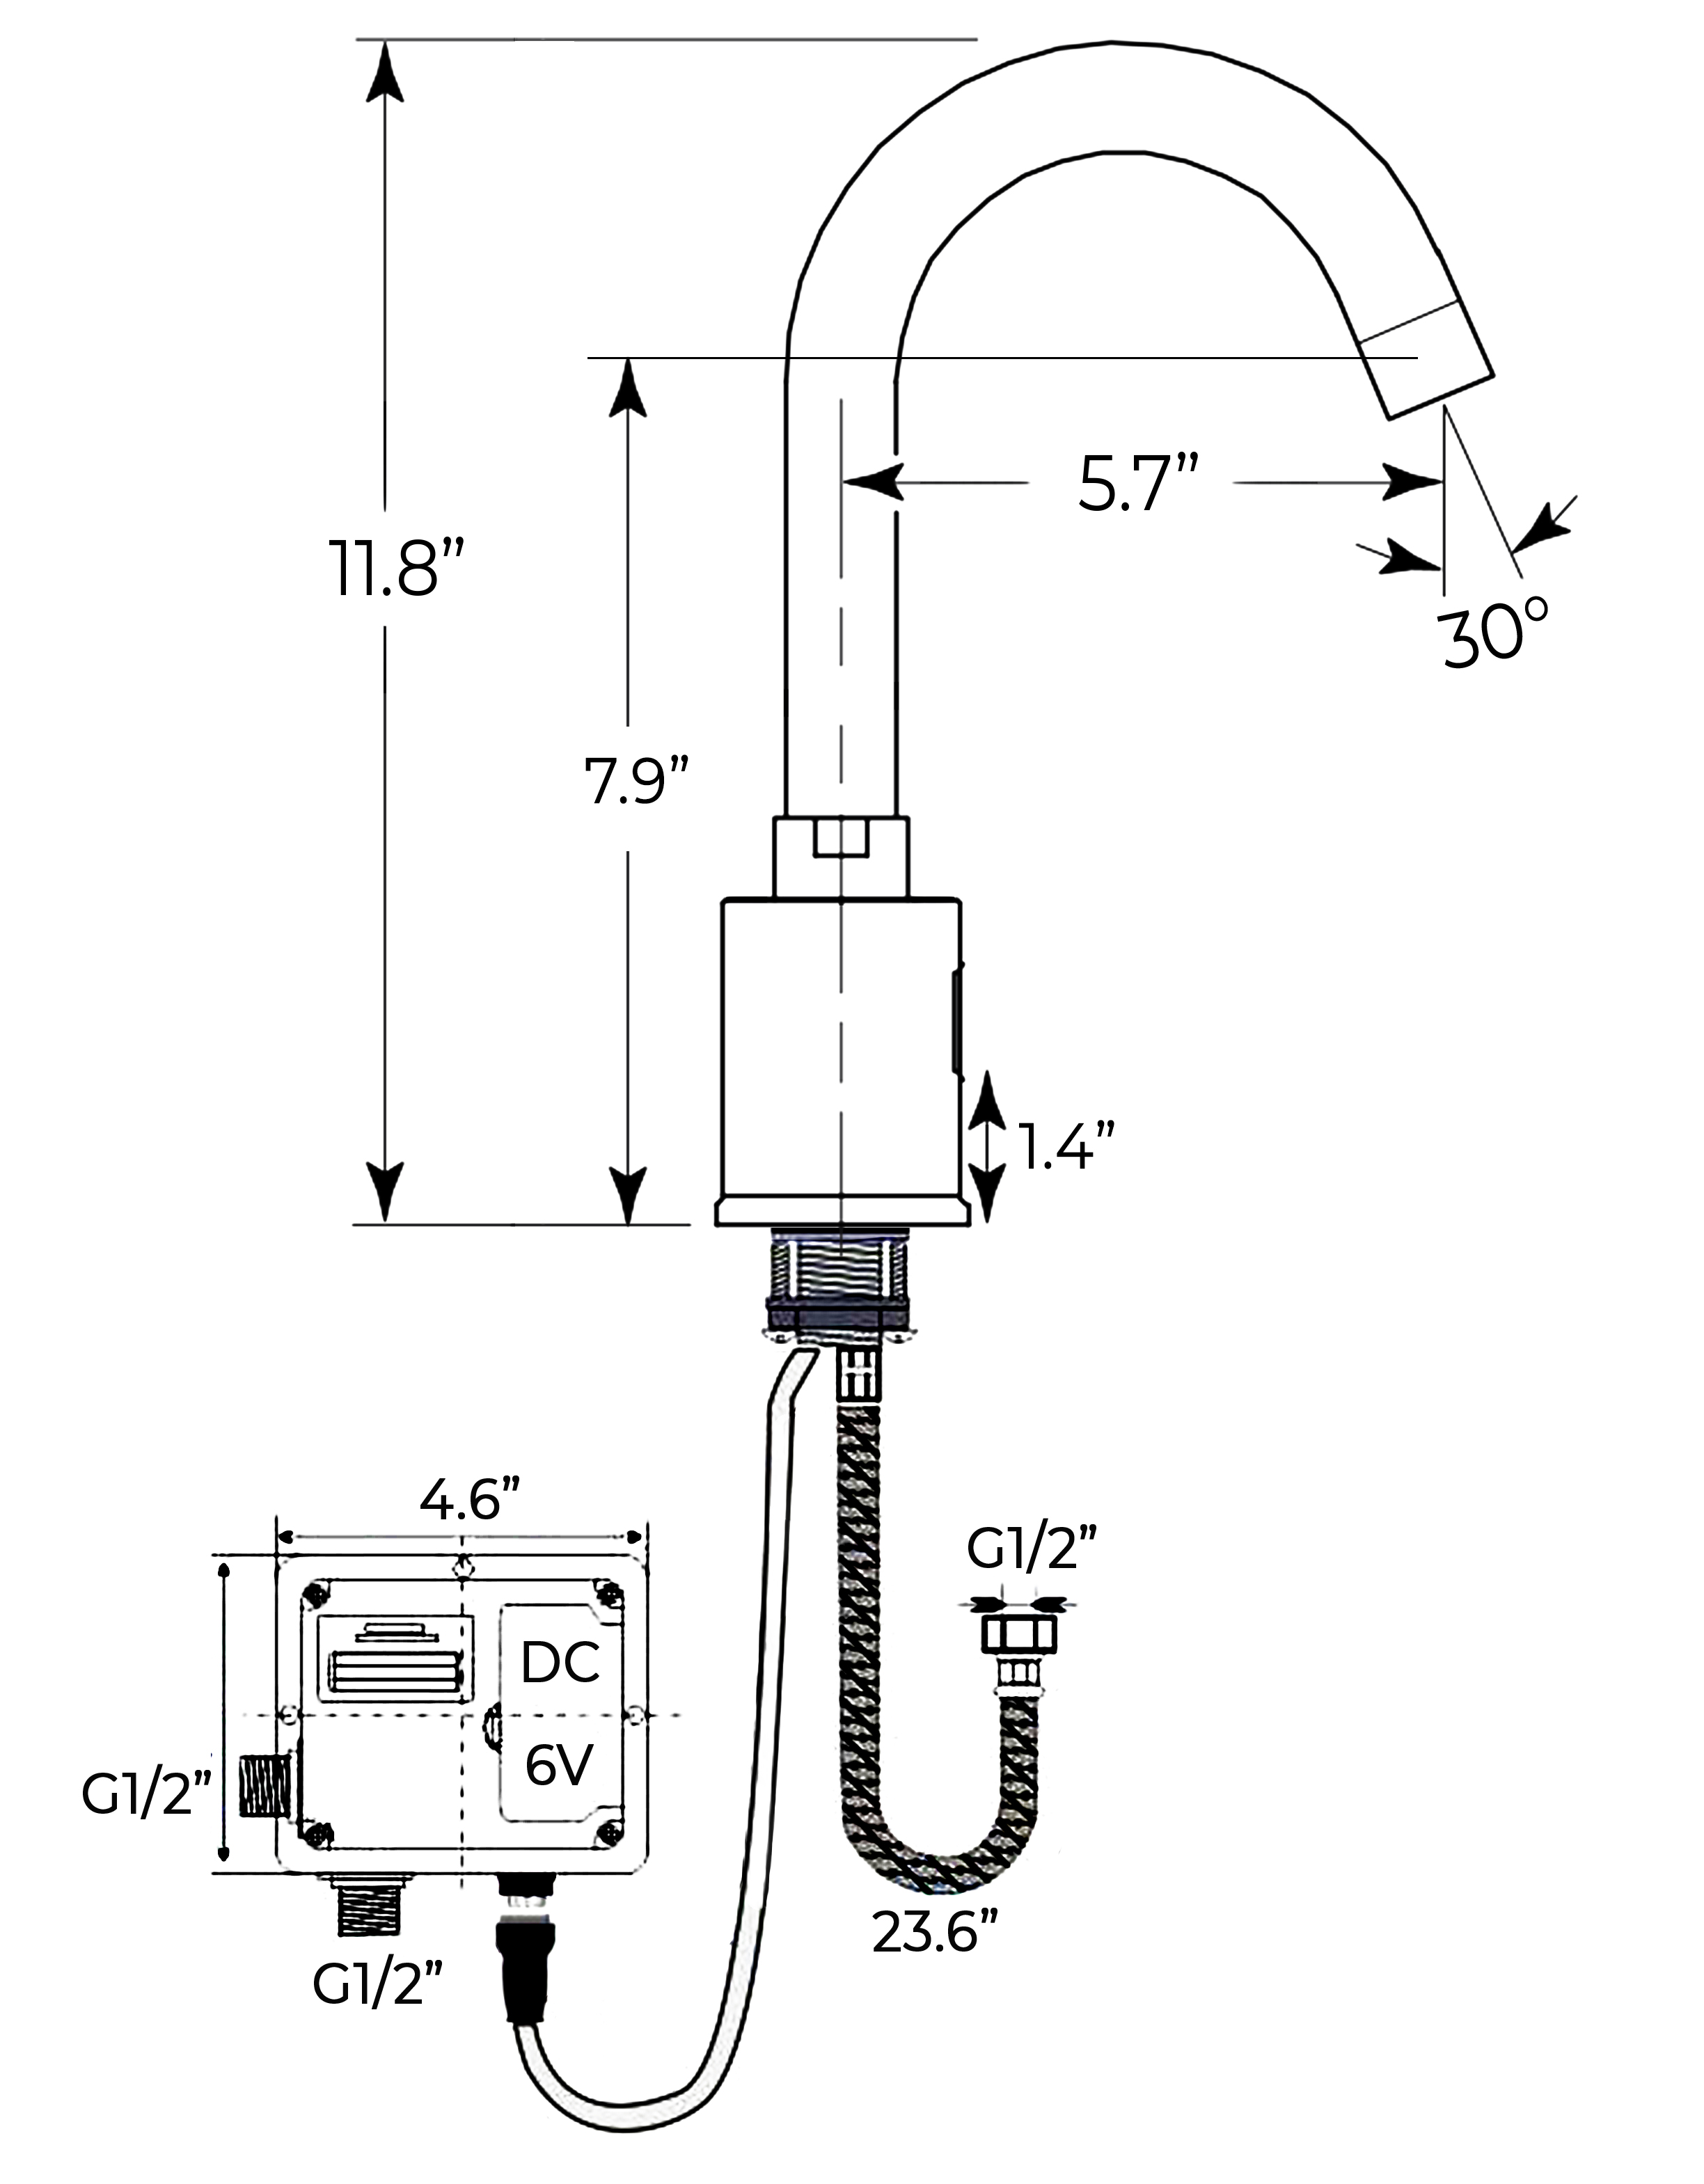
This bathtub faucet is different from similar models due to the wide spread of the spout. It looks amazing together with the three square handles and the matching hand held shower. The polished chrome finish always makes this set a clever choice for modern bathrooms. Only the best materials have been used: the valve is made of solid brass, the spout is in stainless steel and the valve core material is ceramic, for improved functionality and long lasting life time. It comes complete with mounting accessories and installation instructions.

Triple Handles Chrome Widespread Waterfall Faucet (BSTY-8013)
- Type:Bath & Shower Faucets
- Valve Core Material:Ceramic
- Bath & Shower Faucet Type:Deck-Mount B & S Faucets
- Surface Finish:Chrome
- Style:Contemporary
- Number of Handles:Triple Handles
- Surface Treatment:Polished
- Finish:Chrome polished
- Suitable Place:Bathtub
- Type:Waterfall Bath Tub Faucet
- Working Pressure:0.1-2.0Mpa
- Spout Material:Stainless steel(sus304)
- Valve Material:Brass
- Certificate:CE,ROHS
- Flow Rate : 1.8 GPM
Deck Mount Chrome Waterfall faucet For Bathtub
Fitting parts:
- A hand shower
- A waterfall faucet with triple handles
- Cartridge: Lifetime >500, 000 times for both open and close
- Two 30cm-long and one 50cm-long stainless steel flexible hose.
- 1 x Installation Instruction
- Plating layer:Chrome polished (Ni>=15um Cr>=0.2um, multilayer Finish process)
- Leak Resistance:Passed the leak tests repeatedly to avoid the leak, even at high pressure up to 1.6Mpa
|
|
BathSelect® Manufacturer Warranty Information
|
|
INSTALLATION INSTRUCTIONS
Before installing, read entire Widespread Faucet Installation Instructions. Observe all local building and safety codes.
For the following Installation Instructions for your new Widespread Faucet it is assumed that any old fixtures have been removed and any repairs or modifications to the water supply have been completed.
Unpack and inspect the product for any shipping damages. If you find damages, do not install. Contact Customer Service at 1-800-856-(Bath)2284. If you need assistance or have questions while installing your Widespread Faucet, contact Customer Service.
We recommend consulting a professional if you are unfamiliar with installing bathroom fixtures. Signature Hardware accepts no liability for any damage to the floor, walls, plumbing or for personal injury during installation.
TOOLS AND MATERIALS:
- Adjustable Wrench
- Silicone Sealant
- Damp Cloth
INSTALLATION
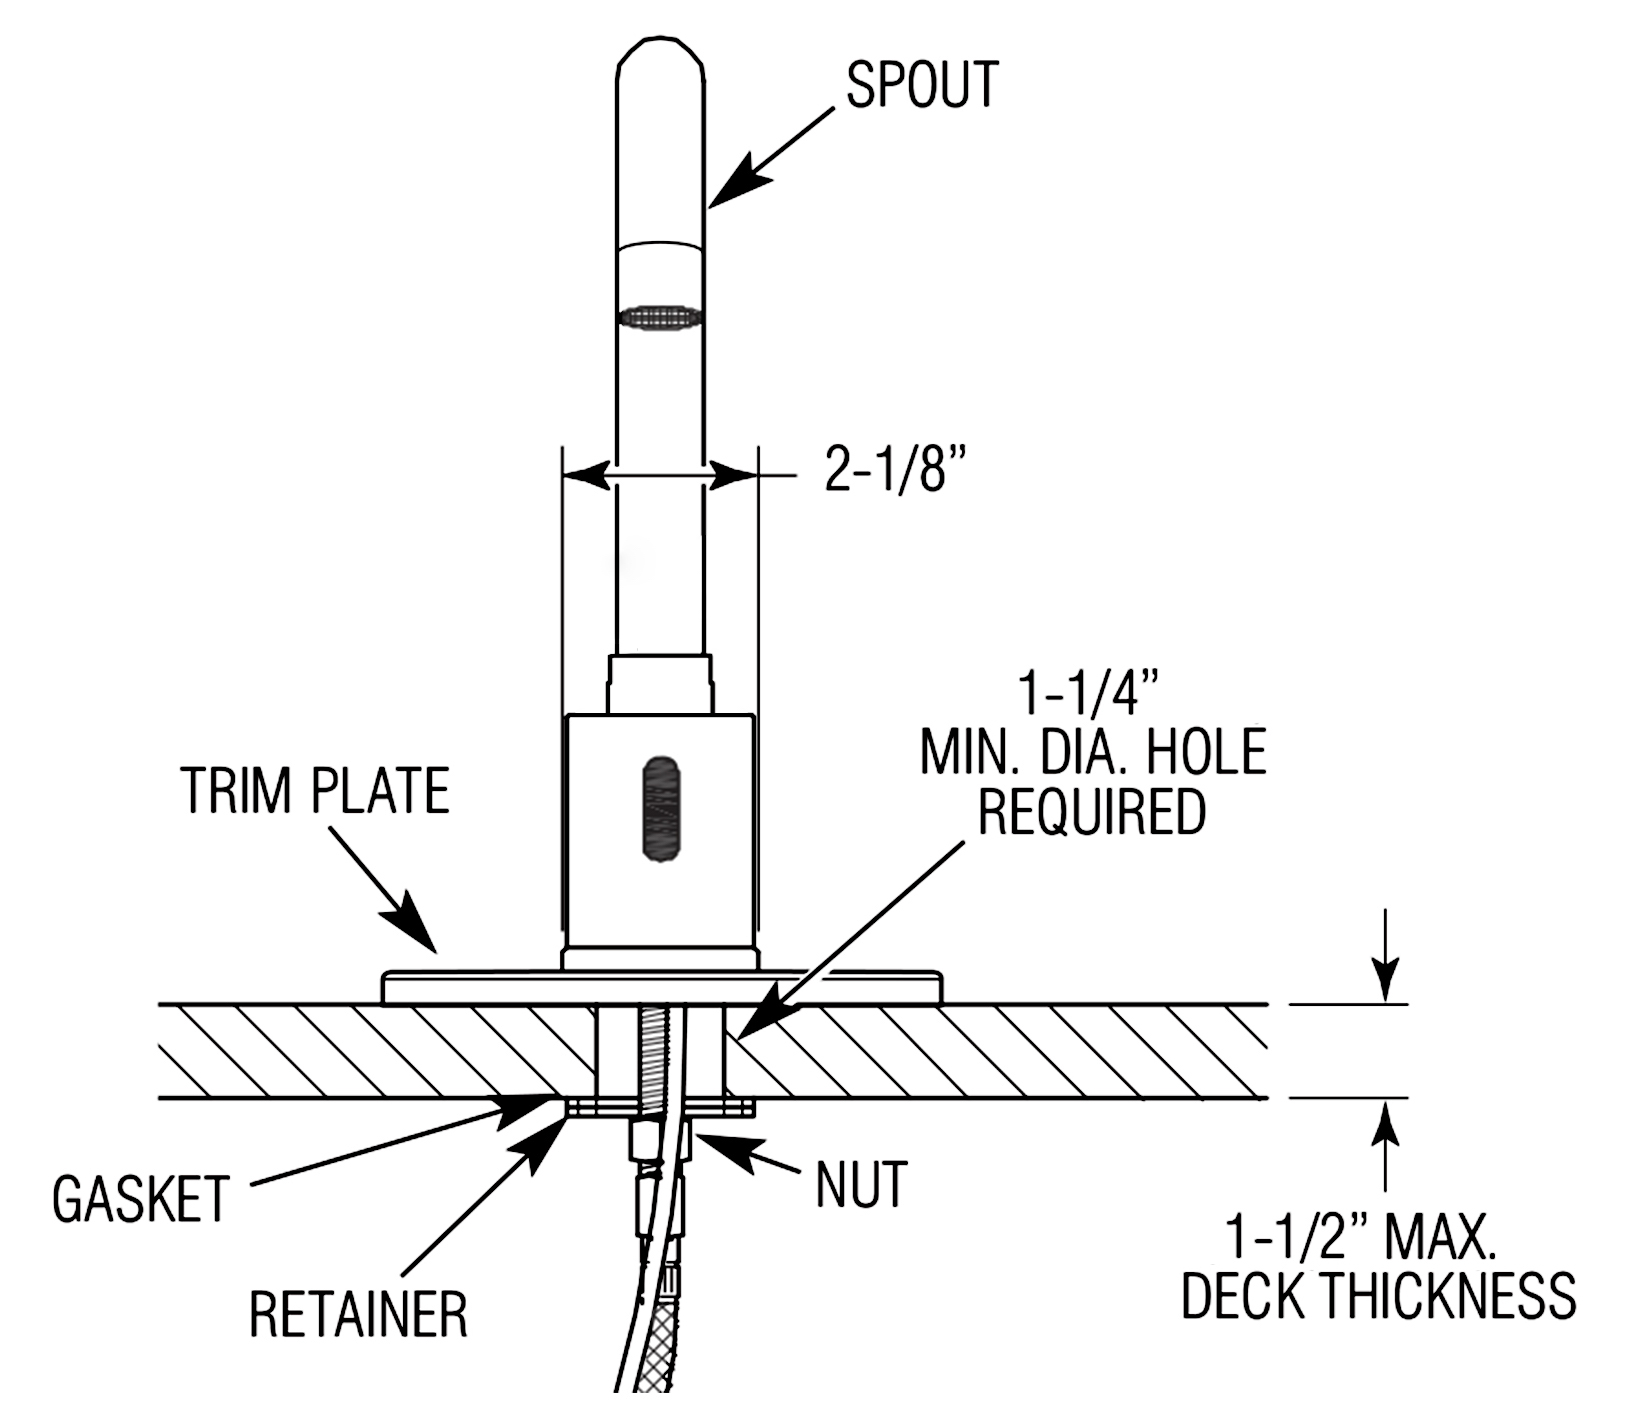
- If your faucet comes with the brass T attached to the faucet body, unthread and remove the T and associated hardware.
- Thread the silver mounting washer and rubber sealing gasket on the faucet body.
- Apply a bead of silicone sealant to the underside of the spout, or faucet base, and thread through the center mounting hole.
- Thread the mounting hardware and brass T onto the spout pipe and hand-tighten to secure.
- Check to make sure the faucet is properly aligned and adjust as needed. When the faucet is in the proper position, finish tightening mounting hardware with your adjustable wrench. Tip: Make sure that the T outlets are aligned at an angle to allow maximum clearance for water connections.
- Wipe away any excess sealant around the faucet base using your damp cloth.
- Assemble the handles by screwing the lock nuts down to the end of the handle bodies. If handles are assembled move on to step 8.
- Insert the handle bodies up through the mounting holes. Thread the plastic slip washers and rubber sealing gaskets onto the handle bodies to secure.
- Hand tighten to attach the hot and cold flexible water feed tubes to the handle bodies and brass T. Give a ¼ turn with pliers or wrench, but dont over tighten. (Hot water is always on the left and cold water is always on the right.) Curve tubes as necessary to ensure there are no kinks or knots.
- Place the handle assemblies on the handle bodies. Make sure that both handles are in the OFF position and tighten the set screw on the top or side of the handle with Allen wrench (provided).
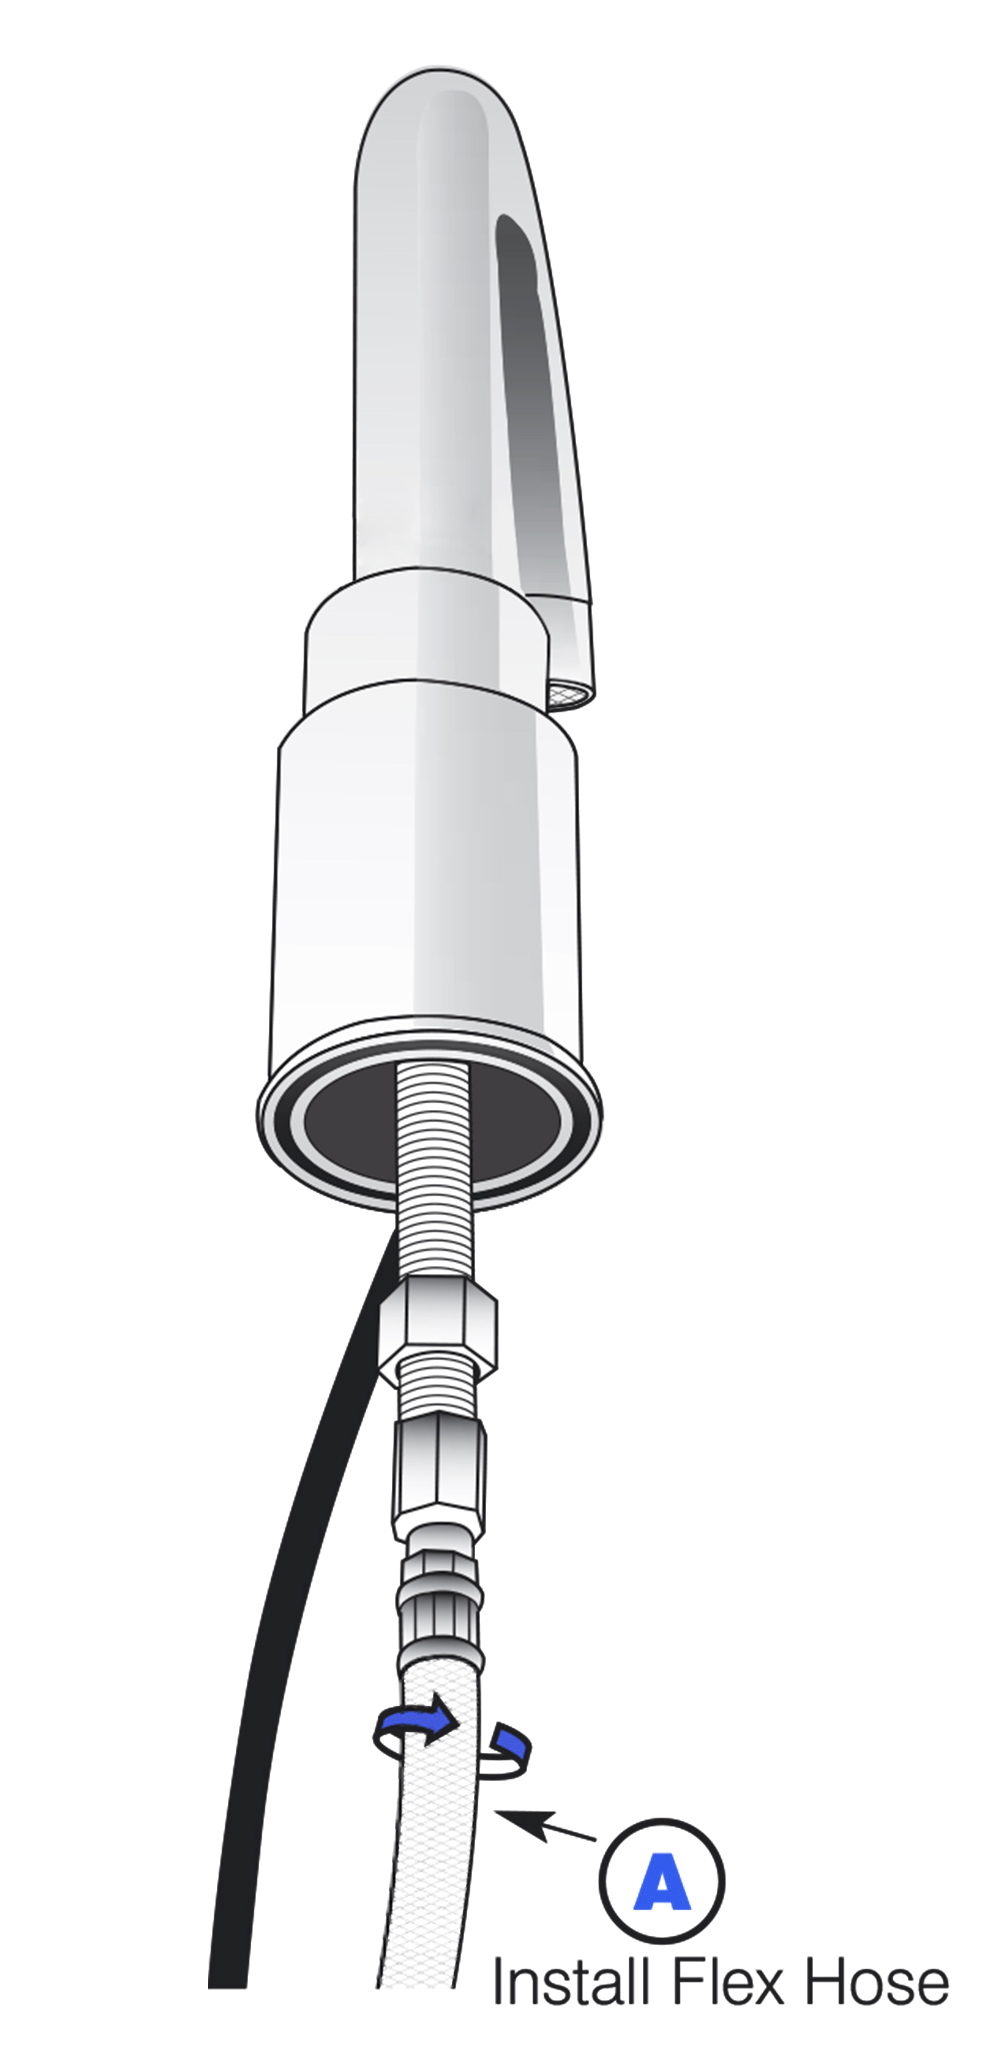
- Connect the main water supply to the faucet body.
- To install the new pop-up drain, apply a bead of silicone sealant to the underside of the drain flange and place in the mounting hole. If there is no pop-up drain, move on to step 16.
- Thread the lock nut onto the drain pipe and tighten with your adjustable wrench.
- Wipe away any excess sealant around the drain using your damp cloth.
- Push the pop-up rod down through the faucet body. Attach the pop-up rod to the pivot rod with the extension rod. Adjust the rods so that the drain stopper opens and closes properly.
- Attach the P trap to the drain pipe and wall drain fitting and tighten the lock nuts.
- When your faucet installation is complete, turn on the water supply. Check to make sure that all connections are tight (no water should be leaking) and that the hot and cold supplies are working correctly. Turn the water on and allow the water to flow through the spout for approximately 60 seconds.

|


