Home > Royal Multi Color Water Powered Led Shower with Adjustable Body Jets and Mixer Installation Instruction
Installation Instruction For Royal Multi Color Water Powered Led
Shower with Adjustable Body Jets and Mixer


Royal Multi Color Water Powered Led Shower with Adjustable Body Jets and Mixer


Decorative cover
Screws
Pipe 1
Pipe 2
Screw
Bolt
Nut
Water Inlet Pipe

Hole size on ceiling
1. Drawing the line on the ceiling according to above specification
Decorative Cover
Pipe 1
2. Connect pipe 1 with decorative cover
3. Drill the holes on the ceiling according to above hole specification and install 4 pipes.
4. According right drawing, install four-pipe 2 into pipe 1. Put the screw bolts through the hole on the side to lock pipe 2 with pipe 1.


5. As the right drawing shown, install four-pipe 2 on the head shower.
6. After fixing the showerhead on the ceiling, connect the shower hose with 2 water inlet on the showerhead back cover. The other end connect with the water outlet pipe in the wall.


5.
As the right drawing is shown, install four-pipe 2 on the head shower.
6. After fixing the showerhead on the ceiling, connect the shower hose with 4 water inlet on the showerhead back cover. The other end connects with the water outlet pipe in the wall.


Remarks: Ceiling mounted shower head come with fixing bar installation
1. Draw size on ceiling
2. Install fixing bar on ceiling.


3. Install fixing bar on the shower head.


4. Put shower head bar on ceiling fixing bar.
The showerhead installation is now complete.


Hand-Held Shower Instructions


5. HOLE LOCATIONS FOR WALL MOUNT

Remove Front Cover (5A) from Wall Mount (5B). Use Wall Mount Screw Holes (5C) to place the desired location. Using a punch or awl, tap the screw hole locations. Holes must be vertically aligned.


6. ANCHOR INSTALLATION

Drill two 1/4” dia. Holes (6A). If installing into a studs drill two 1/8” dia. holes and do not use Anchors (6B). Insert Anchors (6B) into Holes (6A) and tap flush with the wall.


7. WALL MOUNT INSTALLATION

Place Wall Mount (7A) into wall and inset Mounting Screws (7B) through Wall Mount Holes (7C) and tighten until Wall Mount (7A) is flush with the wall. Do Not Over Tighten! Insert Front Cover (7D) into Wall Mount (7A)


8. DROP ELBOW & HOSE INSTALLATION

Apply PTFE plumbers tape on both ends of Pipe Nipple (8A) (not included). Screw Pipe Nipple (8A) into the elbow inside the wall. The Pipe Nipple (8A) is to project 1/4” – 3/4” from the finished wall. Screw Drop Elbow (8B) onto Pipe Nipple (8A) and tighten until Drop Elbow (8B) is property positioned and flush to the finished wall.

Place Rubber Seal (8C) inside Hex Hose Fitting (8D). Connect Hex Hose Fitting (8D) into Drop Elbow Outlet (8E) by turning Hex Hose Fitting (8D).


9. UNIT STARTUP

Turn on hot and cold water supplies, and check all connections for leaks.


10. FINAL FLUSHING

For final flushing, turn the valve on and allow water to run through the Hose (10A) for several minutes. Allow water to run for several minutes until all foreign matter clears the line.


11. SHOWER ARM INSTALLATION

Place Rubber Seal (11A) inside Tapered Hose Fitting (11B). Conned Hand Shower (11C) to Hose (11D) by turning Tapered Hose Fitting (118) clockwise.


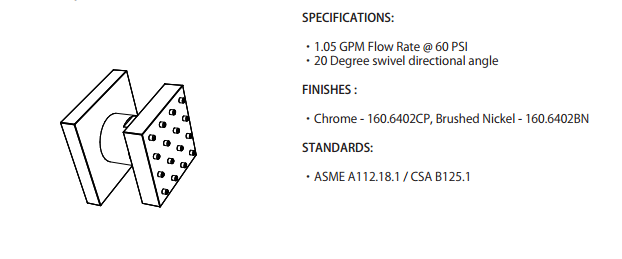
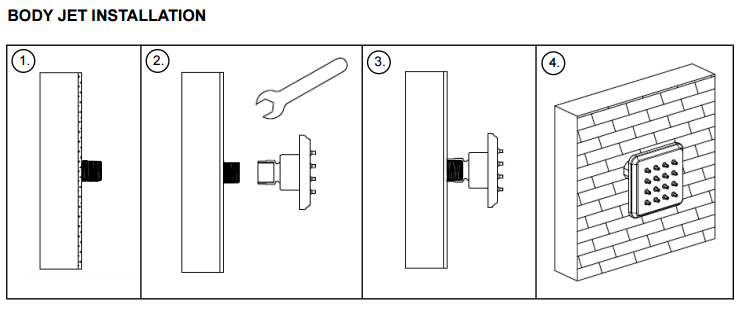
Body Jets Installation

1. Set the decorative cover on the body jet.

2. Roll the raw material belt in the thread screws.

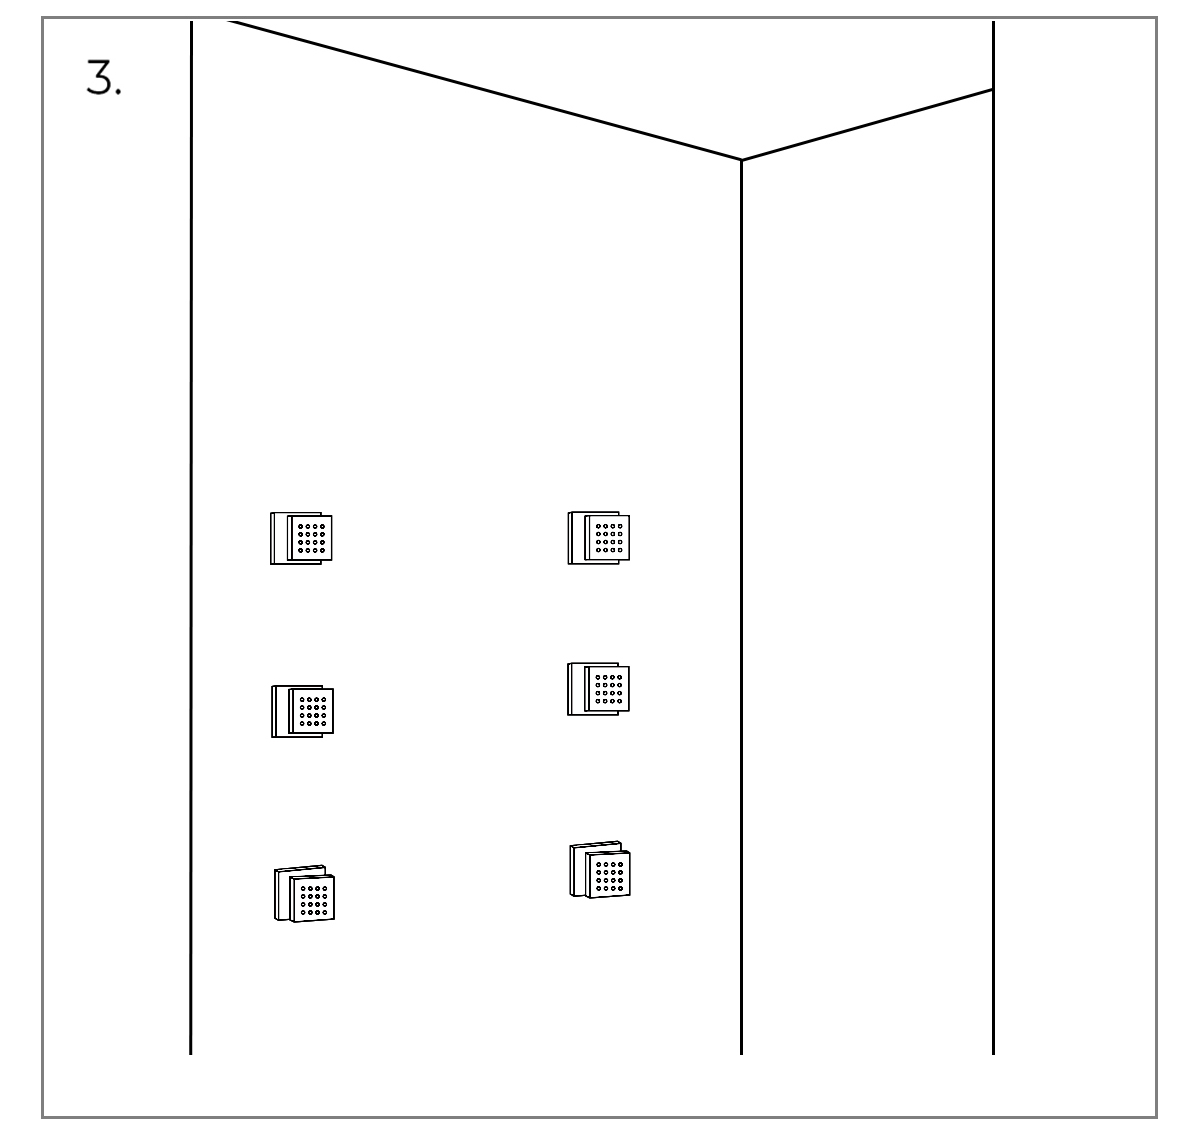
3. Use a wrench to tighten 6 body jets on the water outlet holes in a clockwise direction.


Mixer Installation


A.


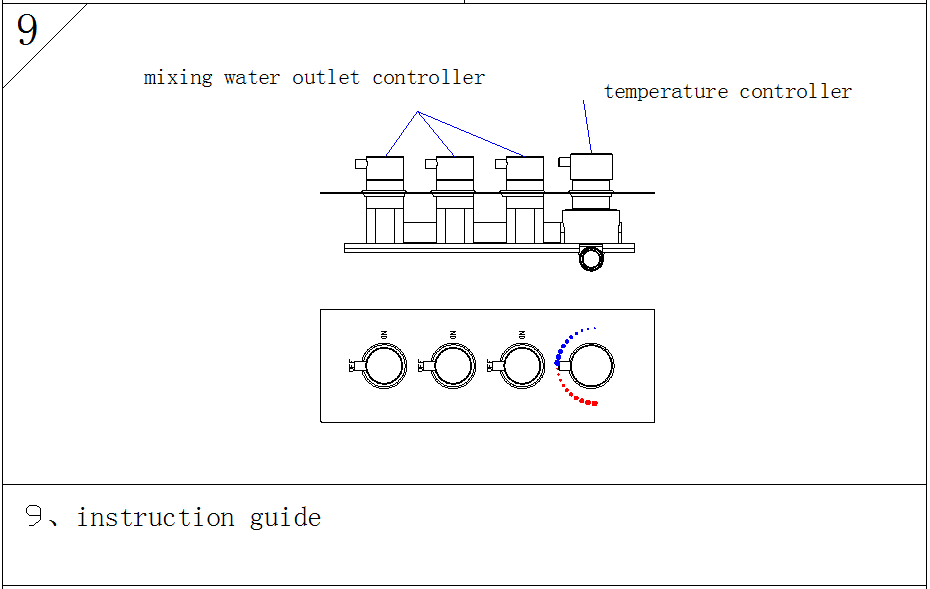
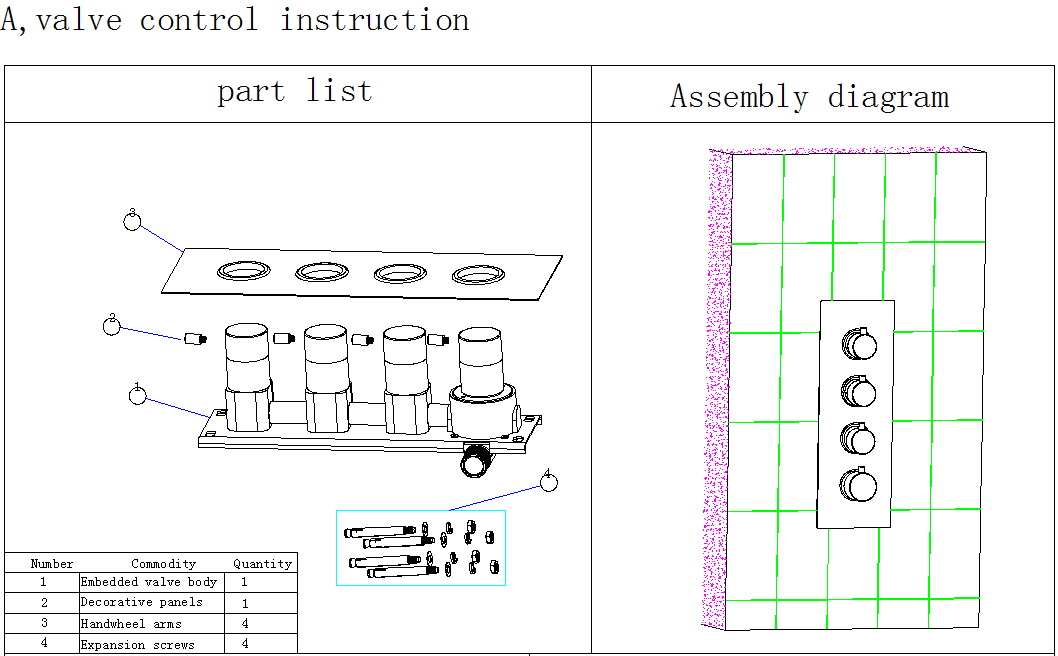
Valve Control Installation

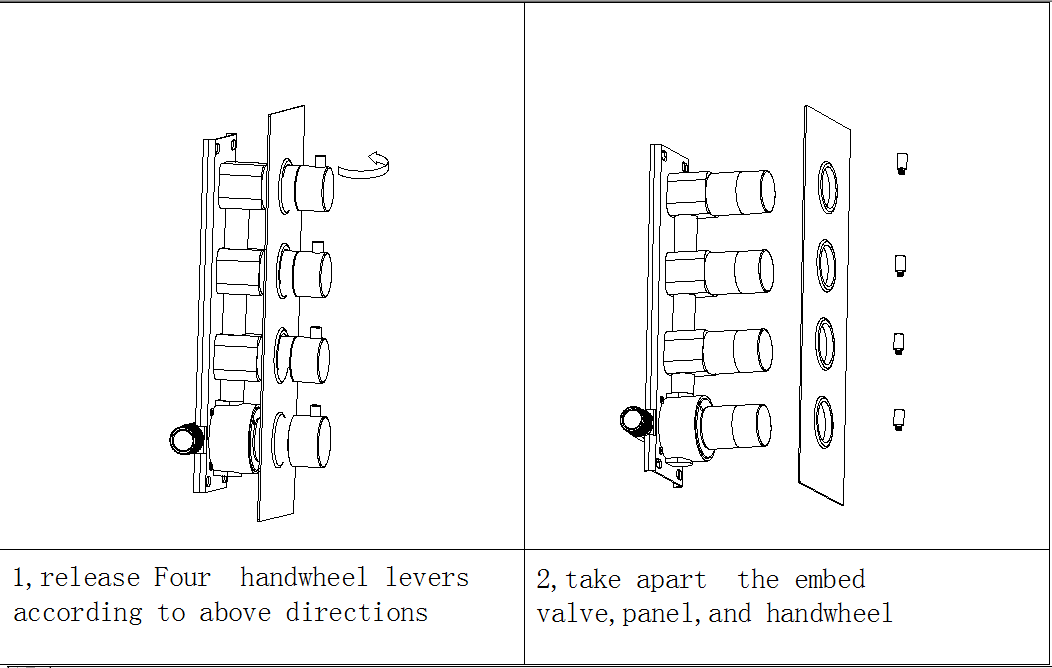
a. Release 4 handwheel levers according to the above directions.
b. Take apart the embed valve, panel, and handwheel.
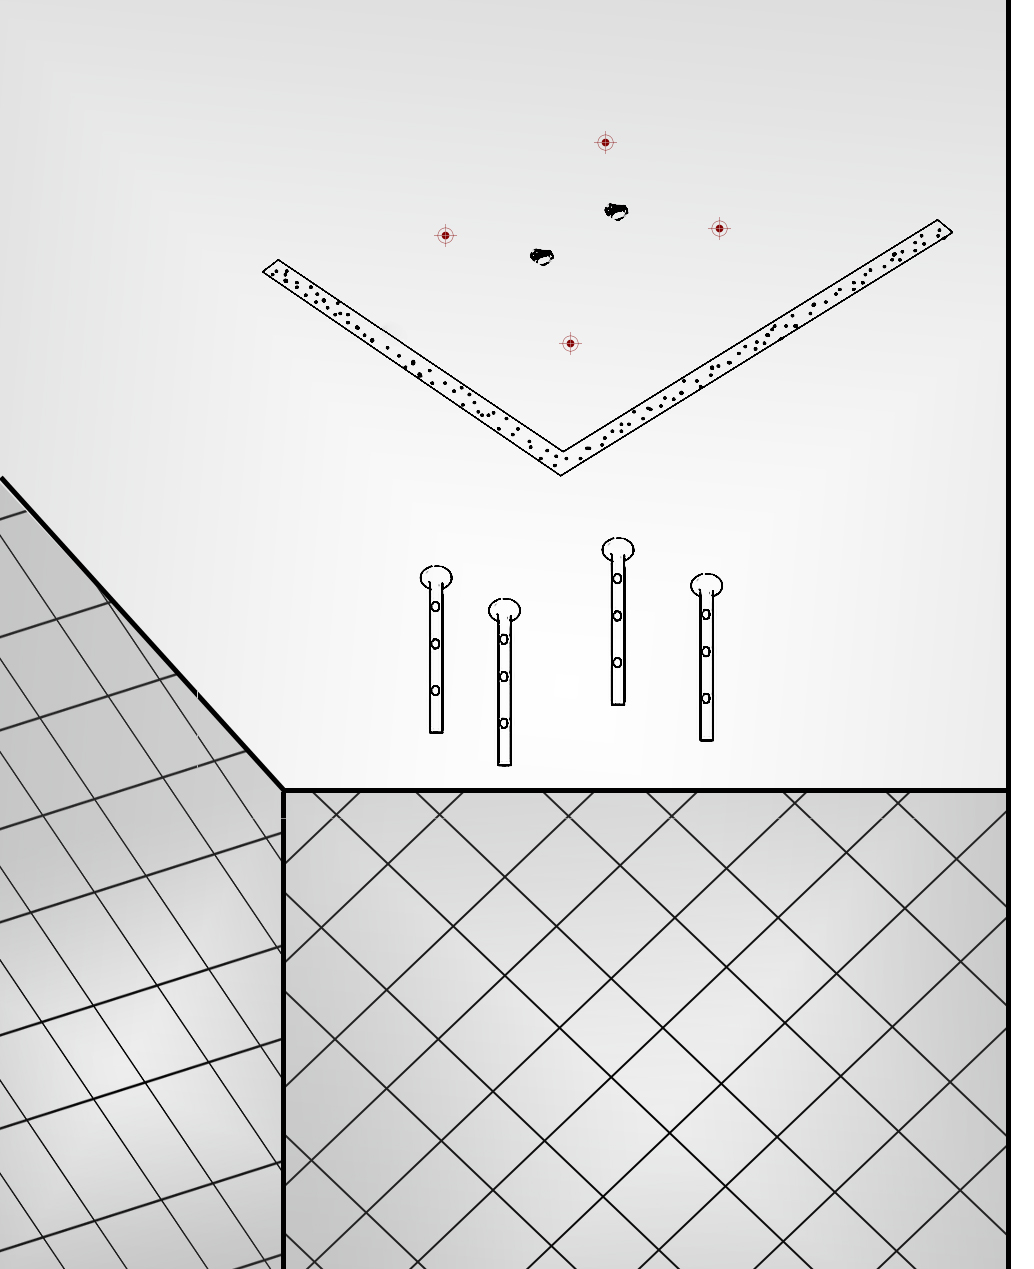
1. Dig the embed space for the pipe on the wall according to the specification of the valve.
2. Dig 4 holes according to the position of the screws.
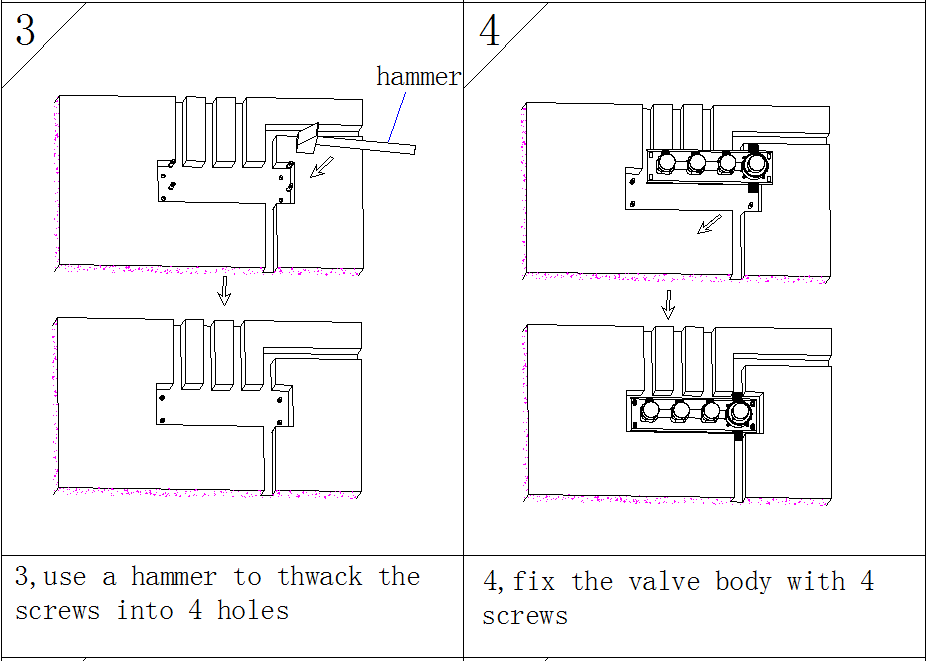
3. Use a hammer to thwack the screws into 4 holes.
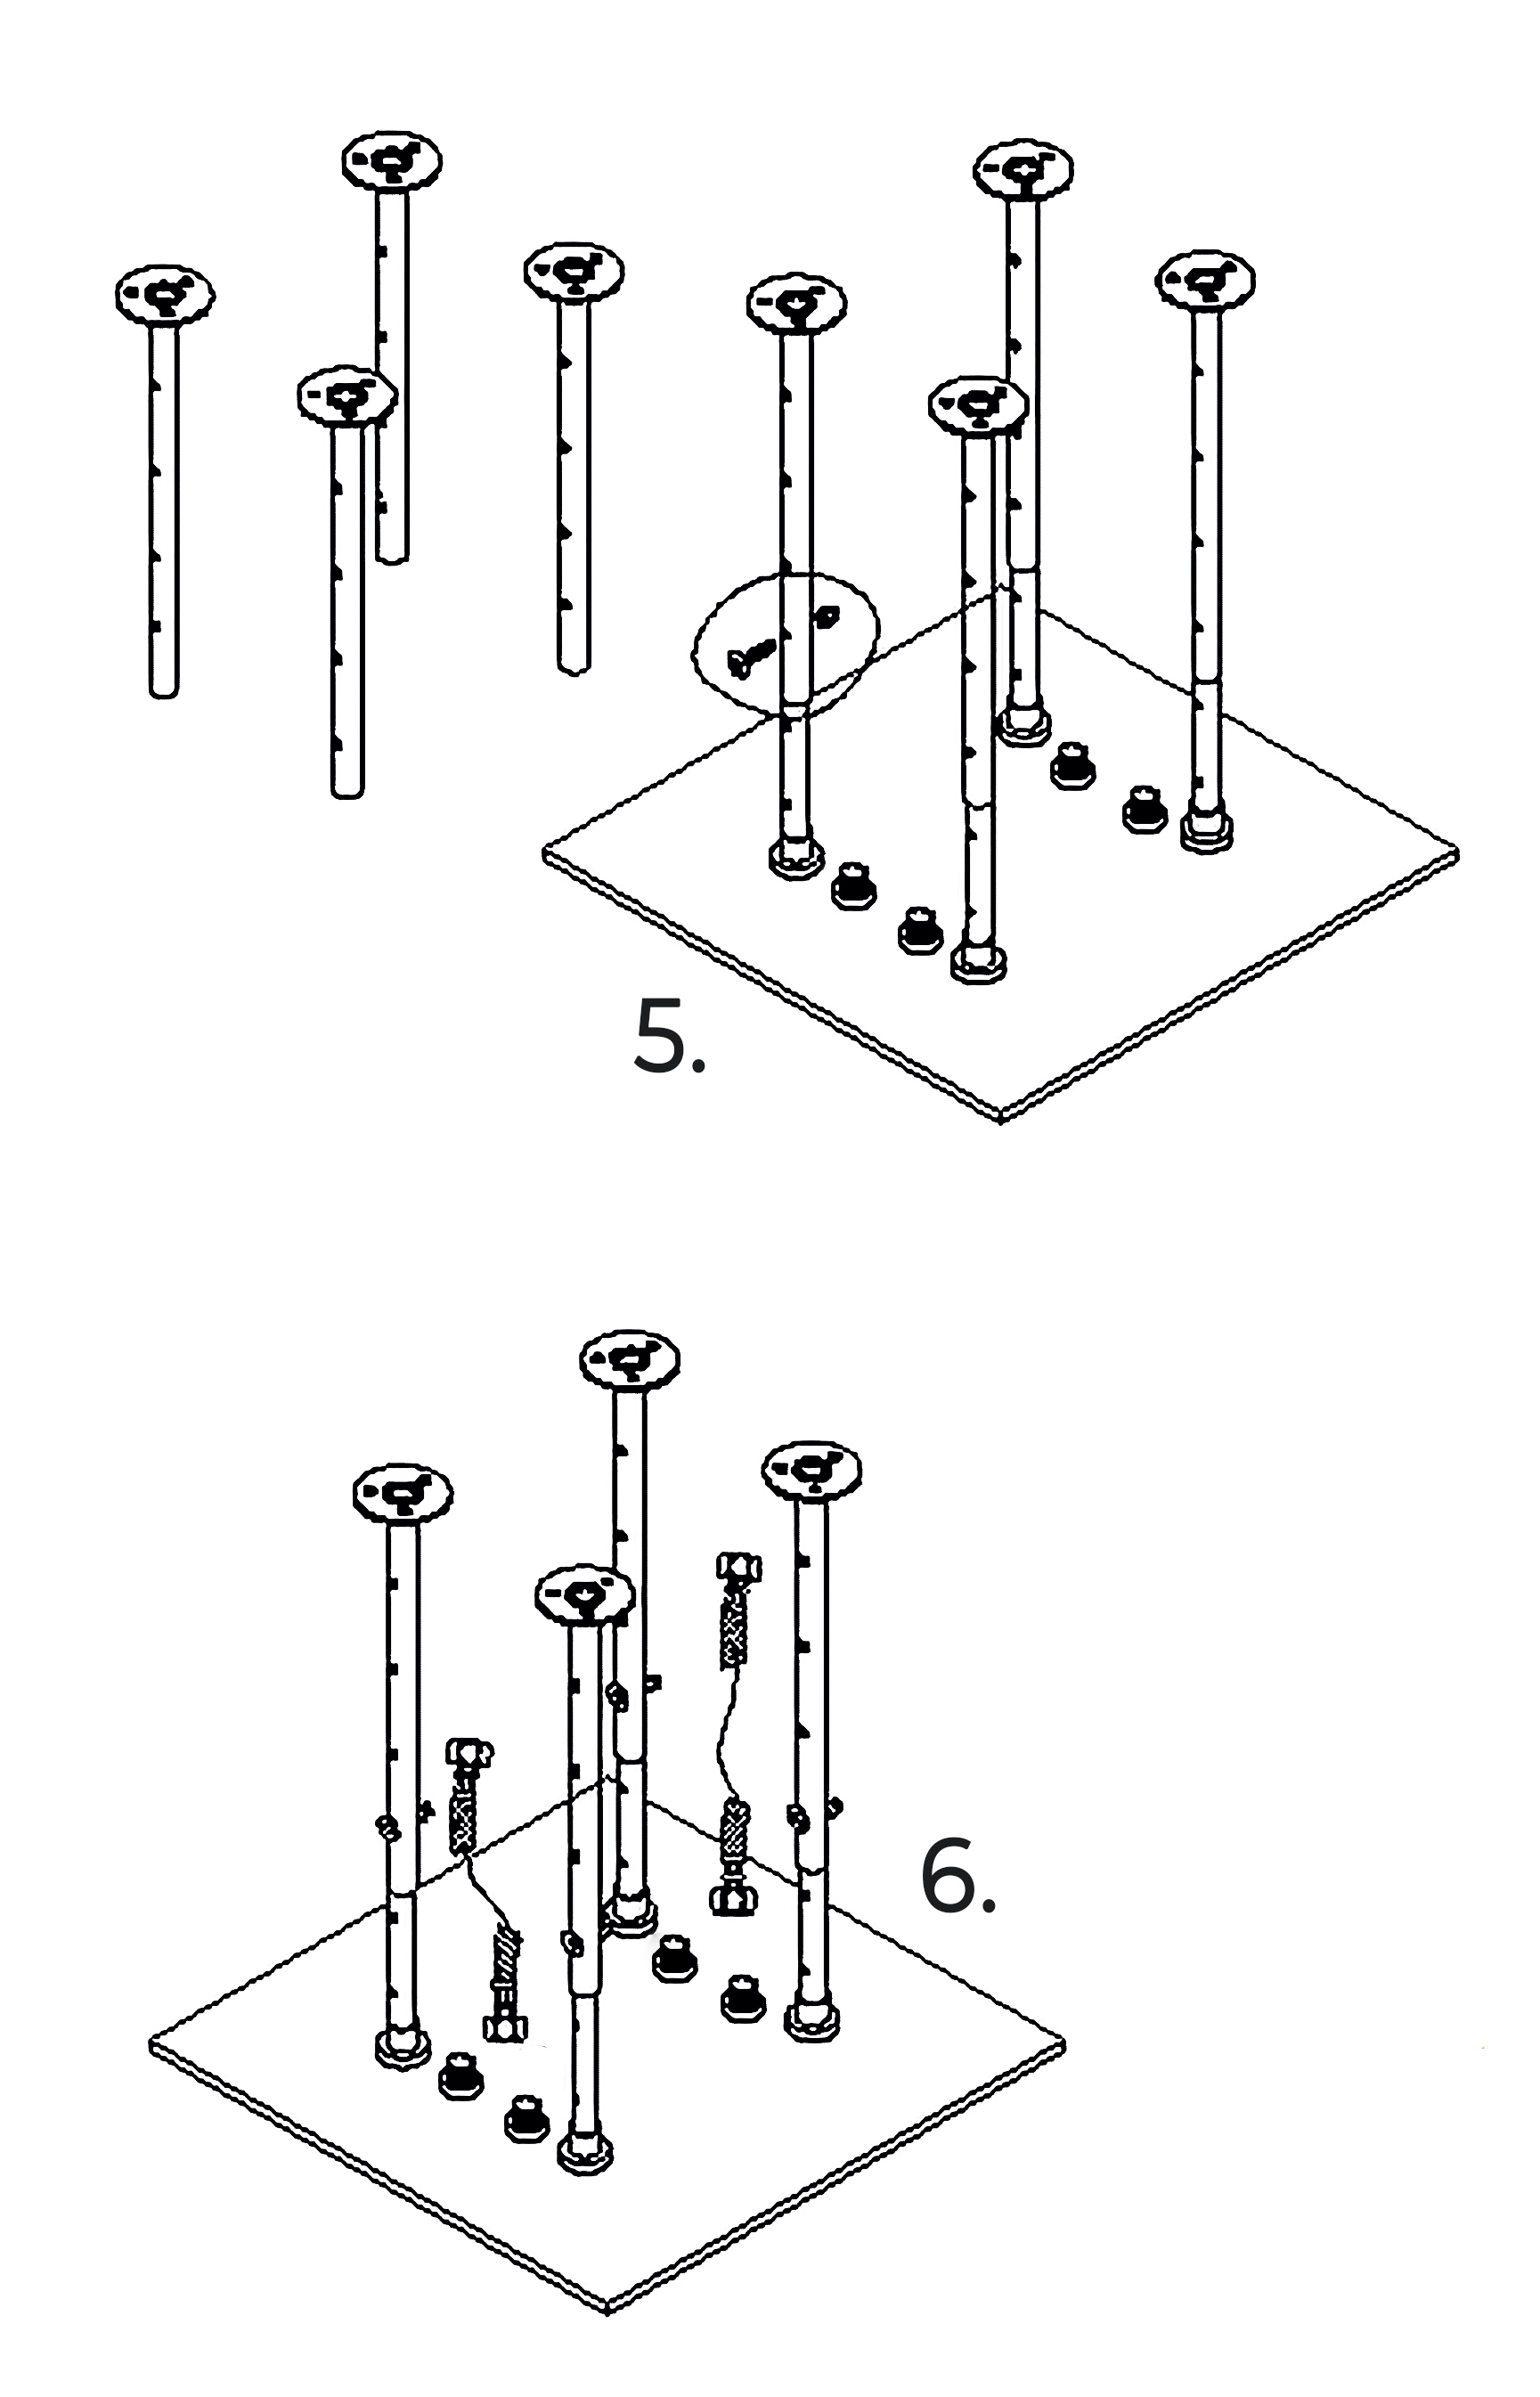
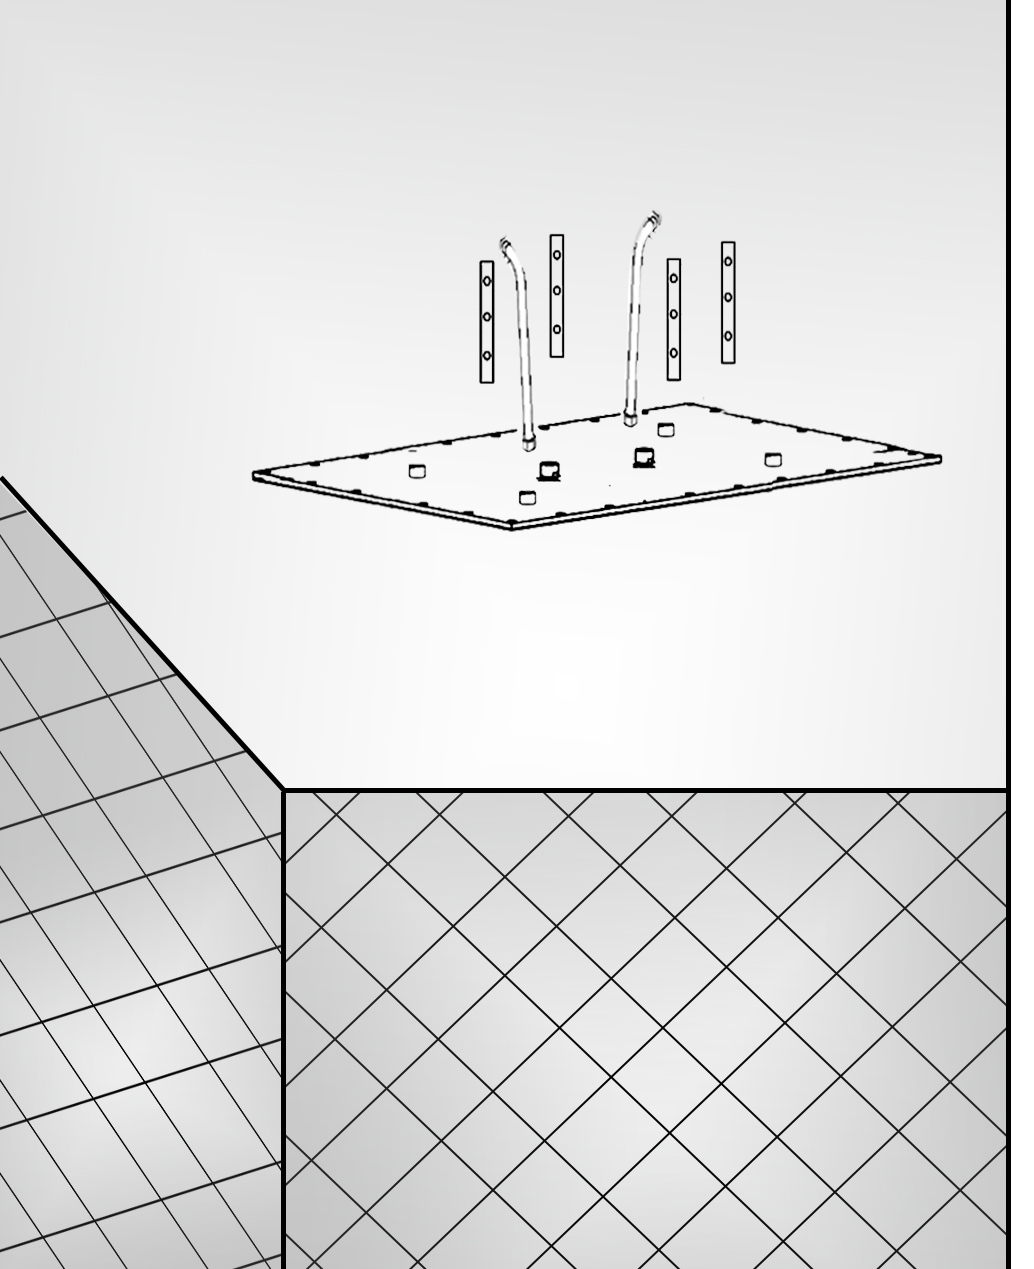
4. Fix the valve body with 4 screws.
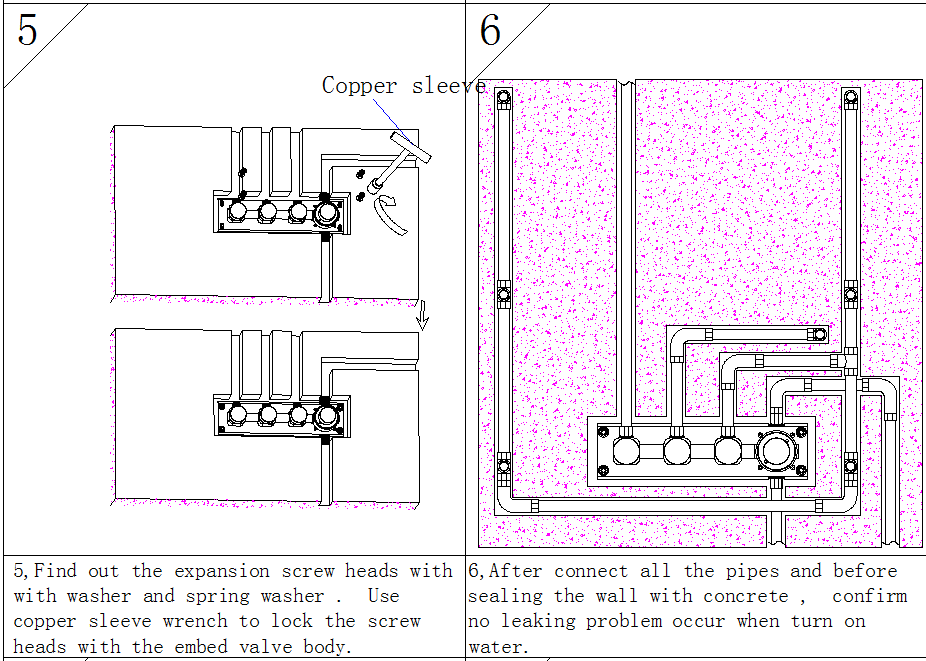
5. Find out the expansion screw heads with washer and spring washer. Use copper sleeve wrench to lock the screw heads with the embed valve body.
6. After connecting all the pipes and before sealing the wall with concrete, confirm no leaking problem occur when you turn on the water.
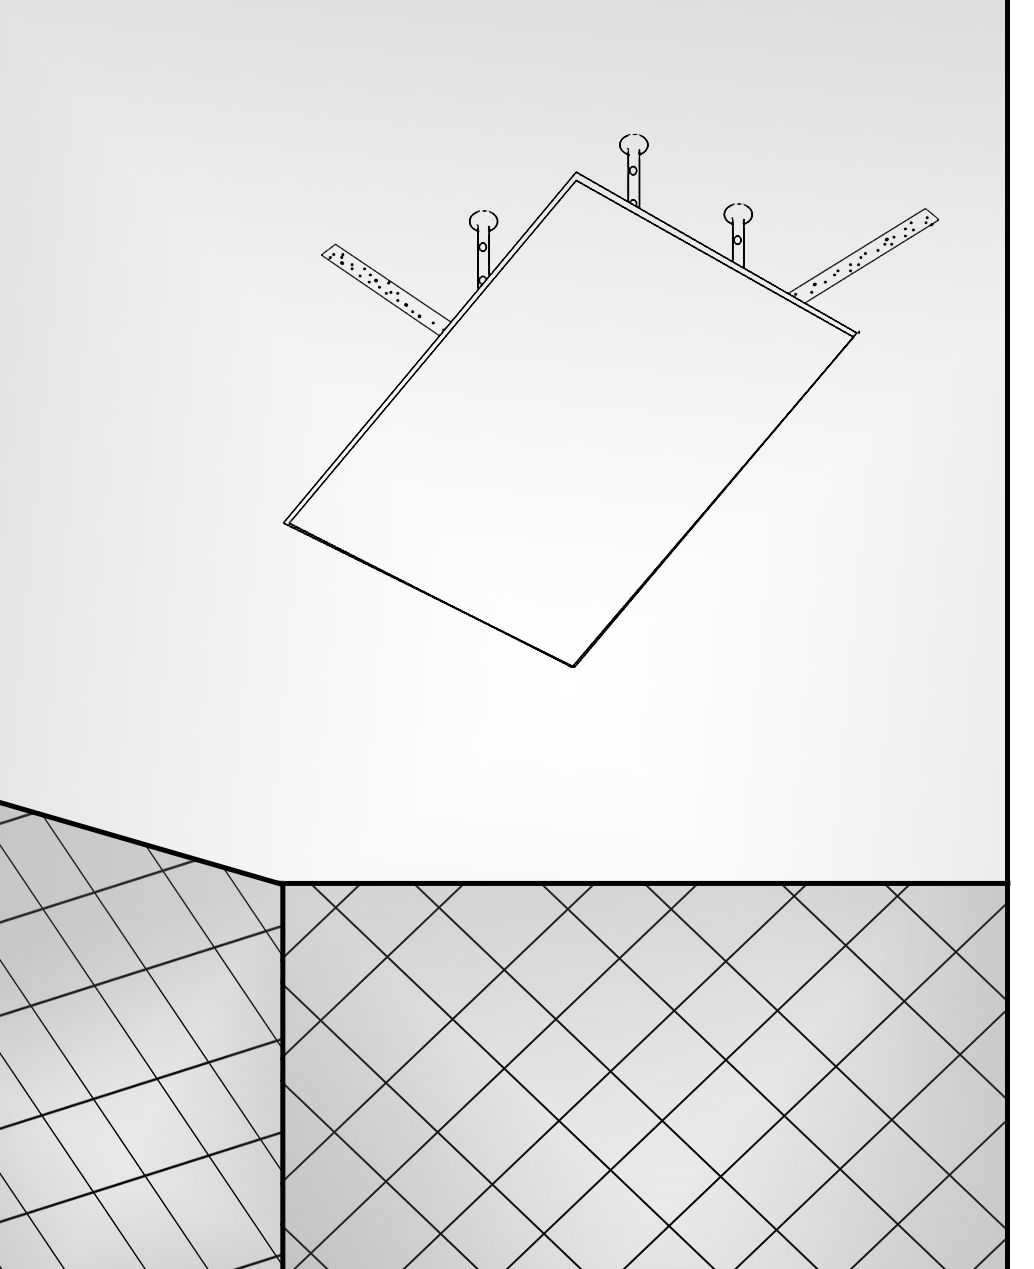
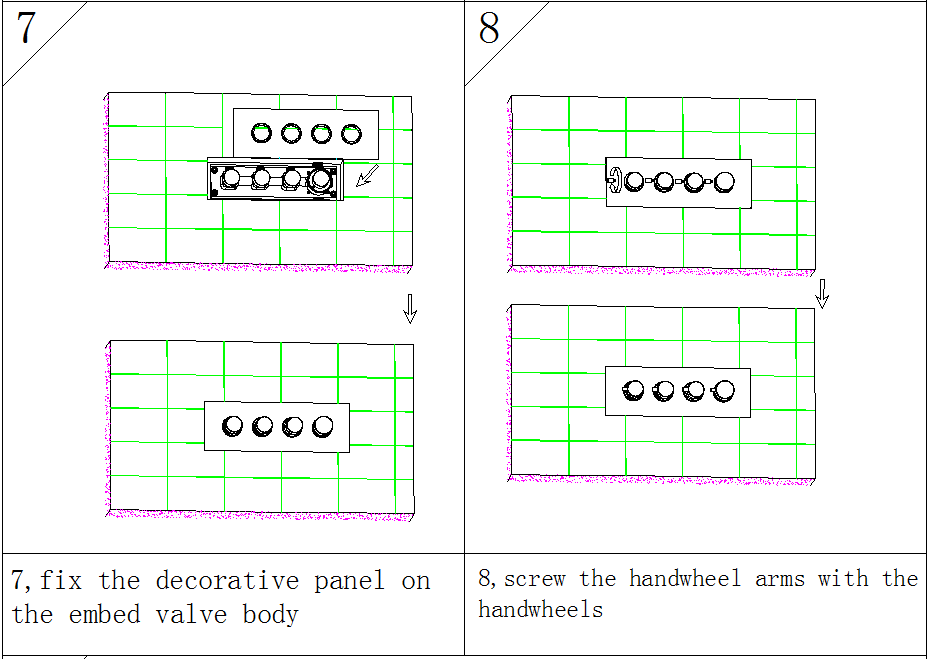
7. Fix the decorative panel on the embed valve body.
8. Screw the handwheel arms with the handwheels.