Installation Instruction For Monaco Luxury Polished Gold Solid Brass Bathtub Faucet
Monaco Luxury Polished Gold Solid Brass Bathtub Faucet Set W/ Ceramics Hand Shower Sprayer
An important item in our luxury
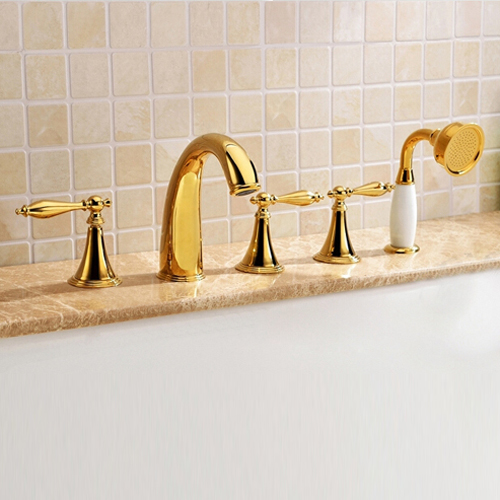
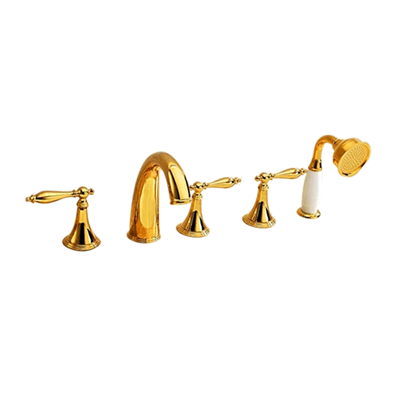
bathtub faucet set range is our Monaco model. The gold finish recommends it for sophisticated modern bathrooms. It is a five-piece bathroom set with a spout that stands out in a beautiful white and gold combination, three handles and a handheld shower. It is deck mount and its ideal for making perfect first-time impressions on your guests. The body and spout are made of brass, while the valve core material is ceramic for best performance and long-lasting. It comes complete with accessories and installation instructions.
Monaco 5 Piece Luxury Gold Faucet Set:
- Brand Name: BathSelect
- Model Number: BS-NUF12786
- Type: Bathtub Faucet Set
- Cold/Hot Water Control Type: Dual Holder Dual Control
- Style: Contemporary
- Number of Handle: Triple Handle
- Surface Treatment: Polished
- Type: Fixed Support Type
- Valve Core Material: Ceramic
- Installation Type: Deck Mount
- Surface Finish: Gold
- Flow Rate: 1.3 GPM
|
|
BathSelect® Manufacturer Warranty Information
|
|
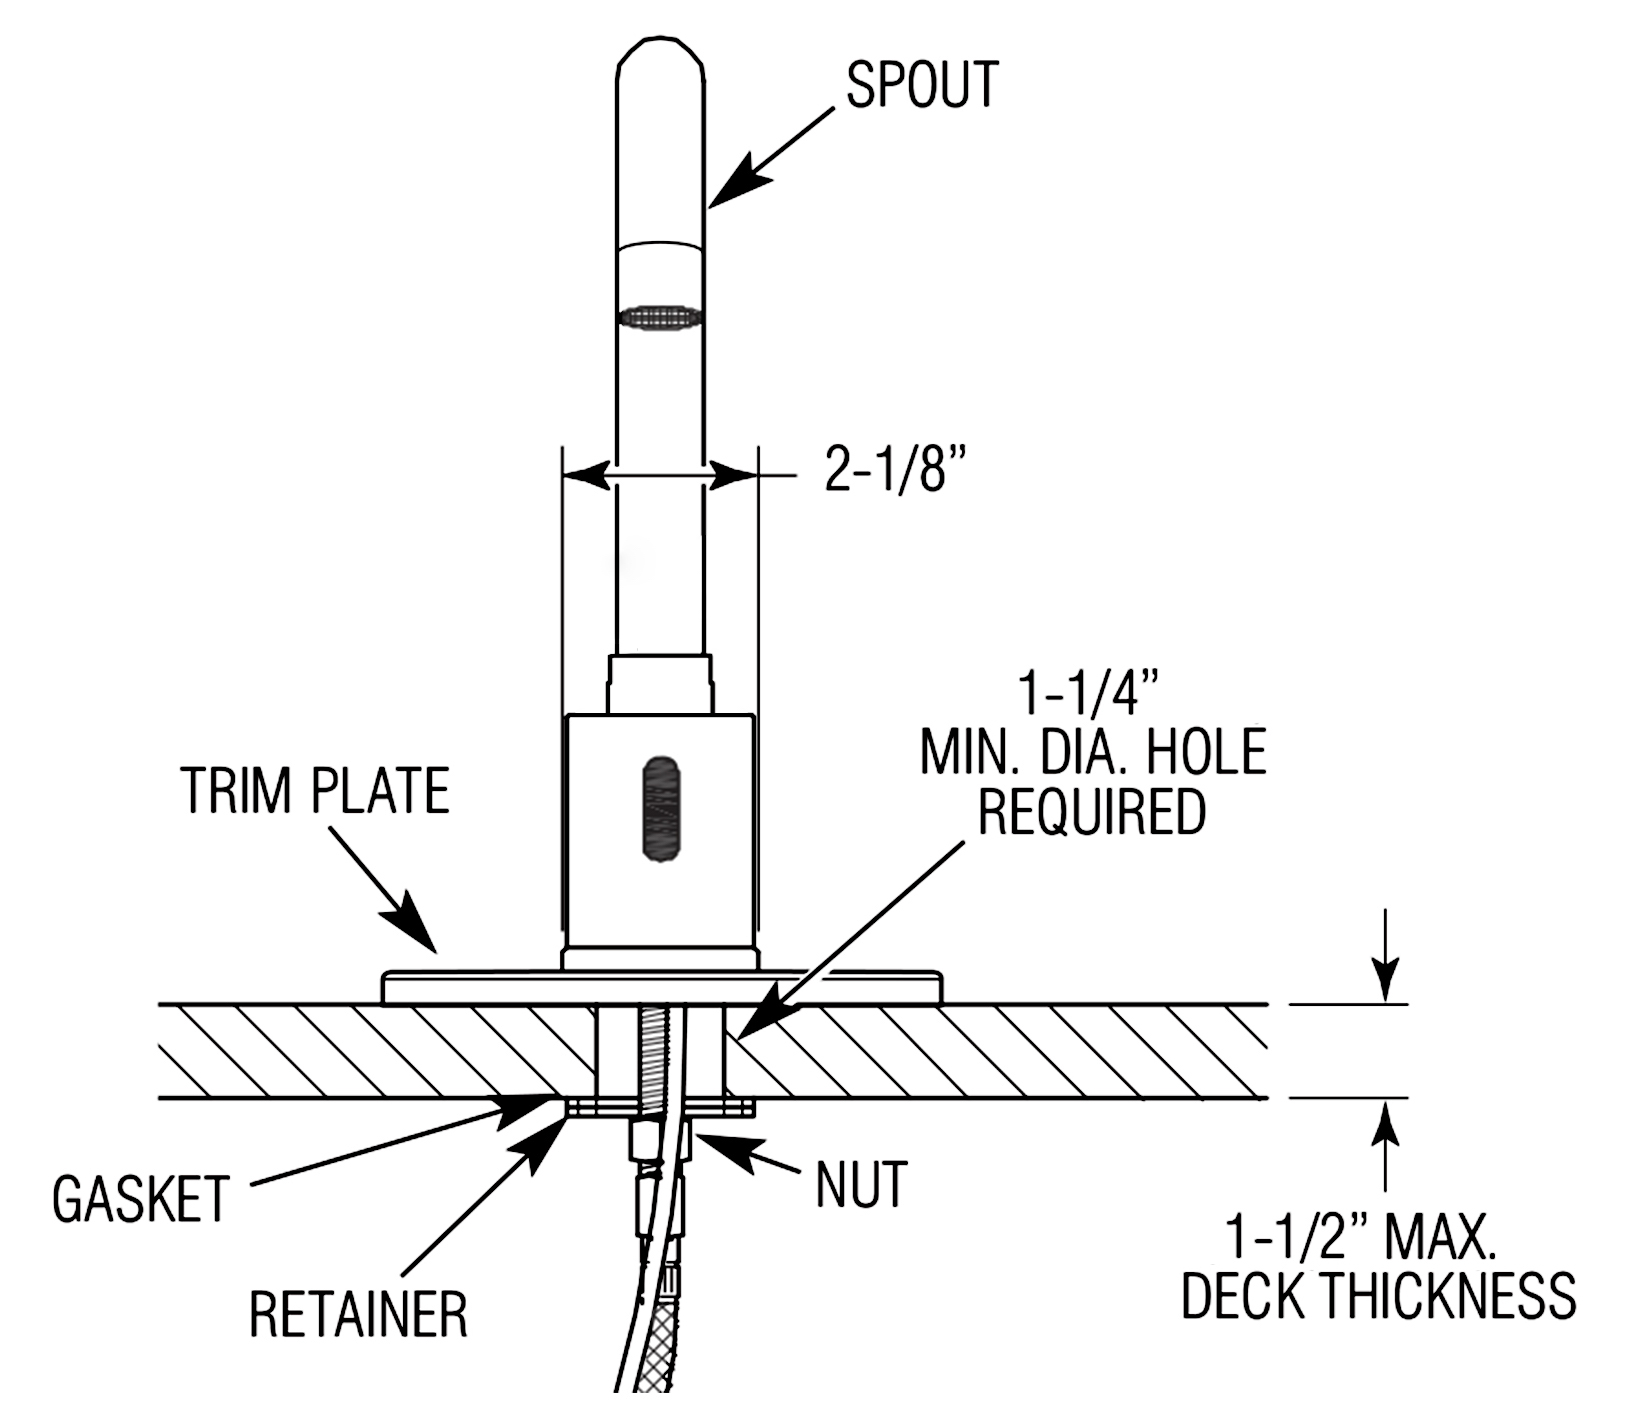
INSTALLATION INSTRUCTIONS
TOOLS AND MATERIALS:
Adjustable Wrench, Basin Wrench , Allen Wrench (provided)
INSTALLATION
1. If your faucet comes with the brass T attached to the faucet body, unthread and remove the T and associated hardware.
2. Thread the mounting washer and rubber sealing gasket on the faucet body and thread the faucet body through the center mounting hole.
3. Thread the mounting hardware and brass T onto the body and hand-tighten to secure.
4. Check to make sure the faucet is properly aligned and adjust as needed. When the faucet is in the proper position, finish tightening mounting hardware with your adjustable wrench.
5. Disassemble the handle bodies. You may need to remove set screws located on the side of the handles with the provided Allen wrench.
6. Insert the handle bodies up through the mounting holes. Secure the handle assemblies to the handle bodies. Make sure that the rubber sealing gasket is between the handle and the mounting surface to ensure a watertight seal.
7. With both handles in the OFF position, tighten the set screw on the top or side of the handle with the Allen wrench
8. Attach the hot and cold flexible water feed tubes to the handle bodies and brass T. (Hot water is always on the left and cold water is always on the right). Curve tubes as necessary to ensure there are no kinks or knots.
9. Connect the main water supply to the faucet body.
10. If your faucet features a hand shower and diverter, follow steps 6-8 listed above and attach the water feed tubes accordingly.
11. After all, connections have been made, turn on the water supply, check to make sure that all connections are tight (no water should be leaking) and that the hot and cold supplies are working correctly. Turn the faucet on and allow the water to flow through the spout for approximately 60 seconds. If you have a hand shower, divert the water to the hose and allow the water to flow through the hose for an additional 60 seconds.
|


