Installation Instructions

Head Shower Installation
· Decorative cover
· Screws
· Pipe 1
· Pipe 2
· Screw
· Bolt
· Nut
· Water Inlet Pipe
|
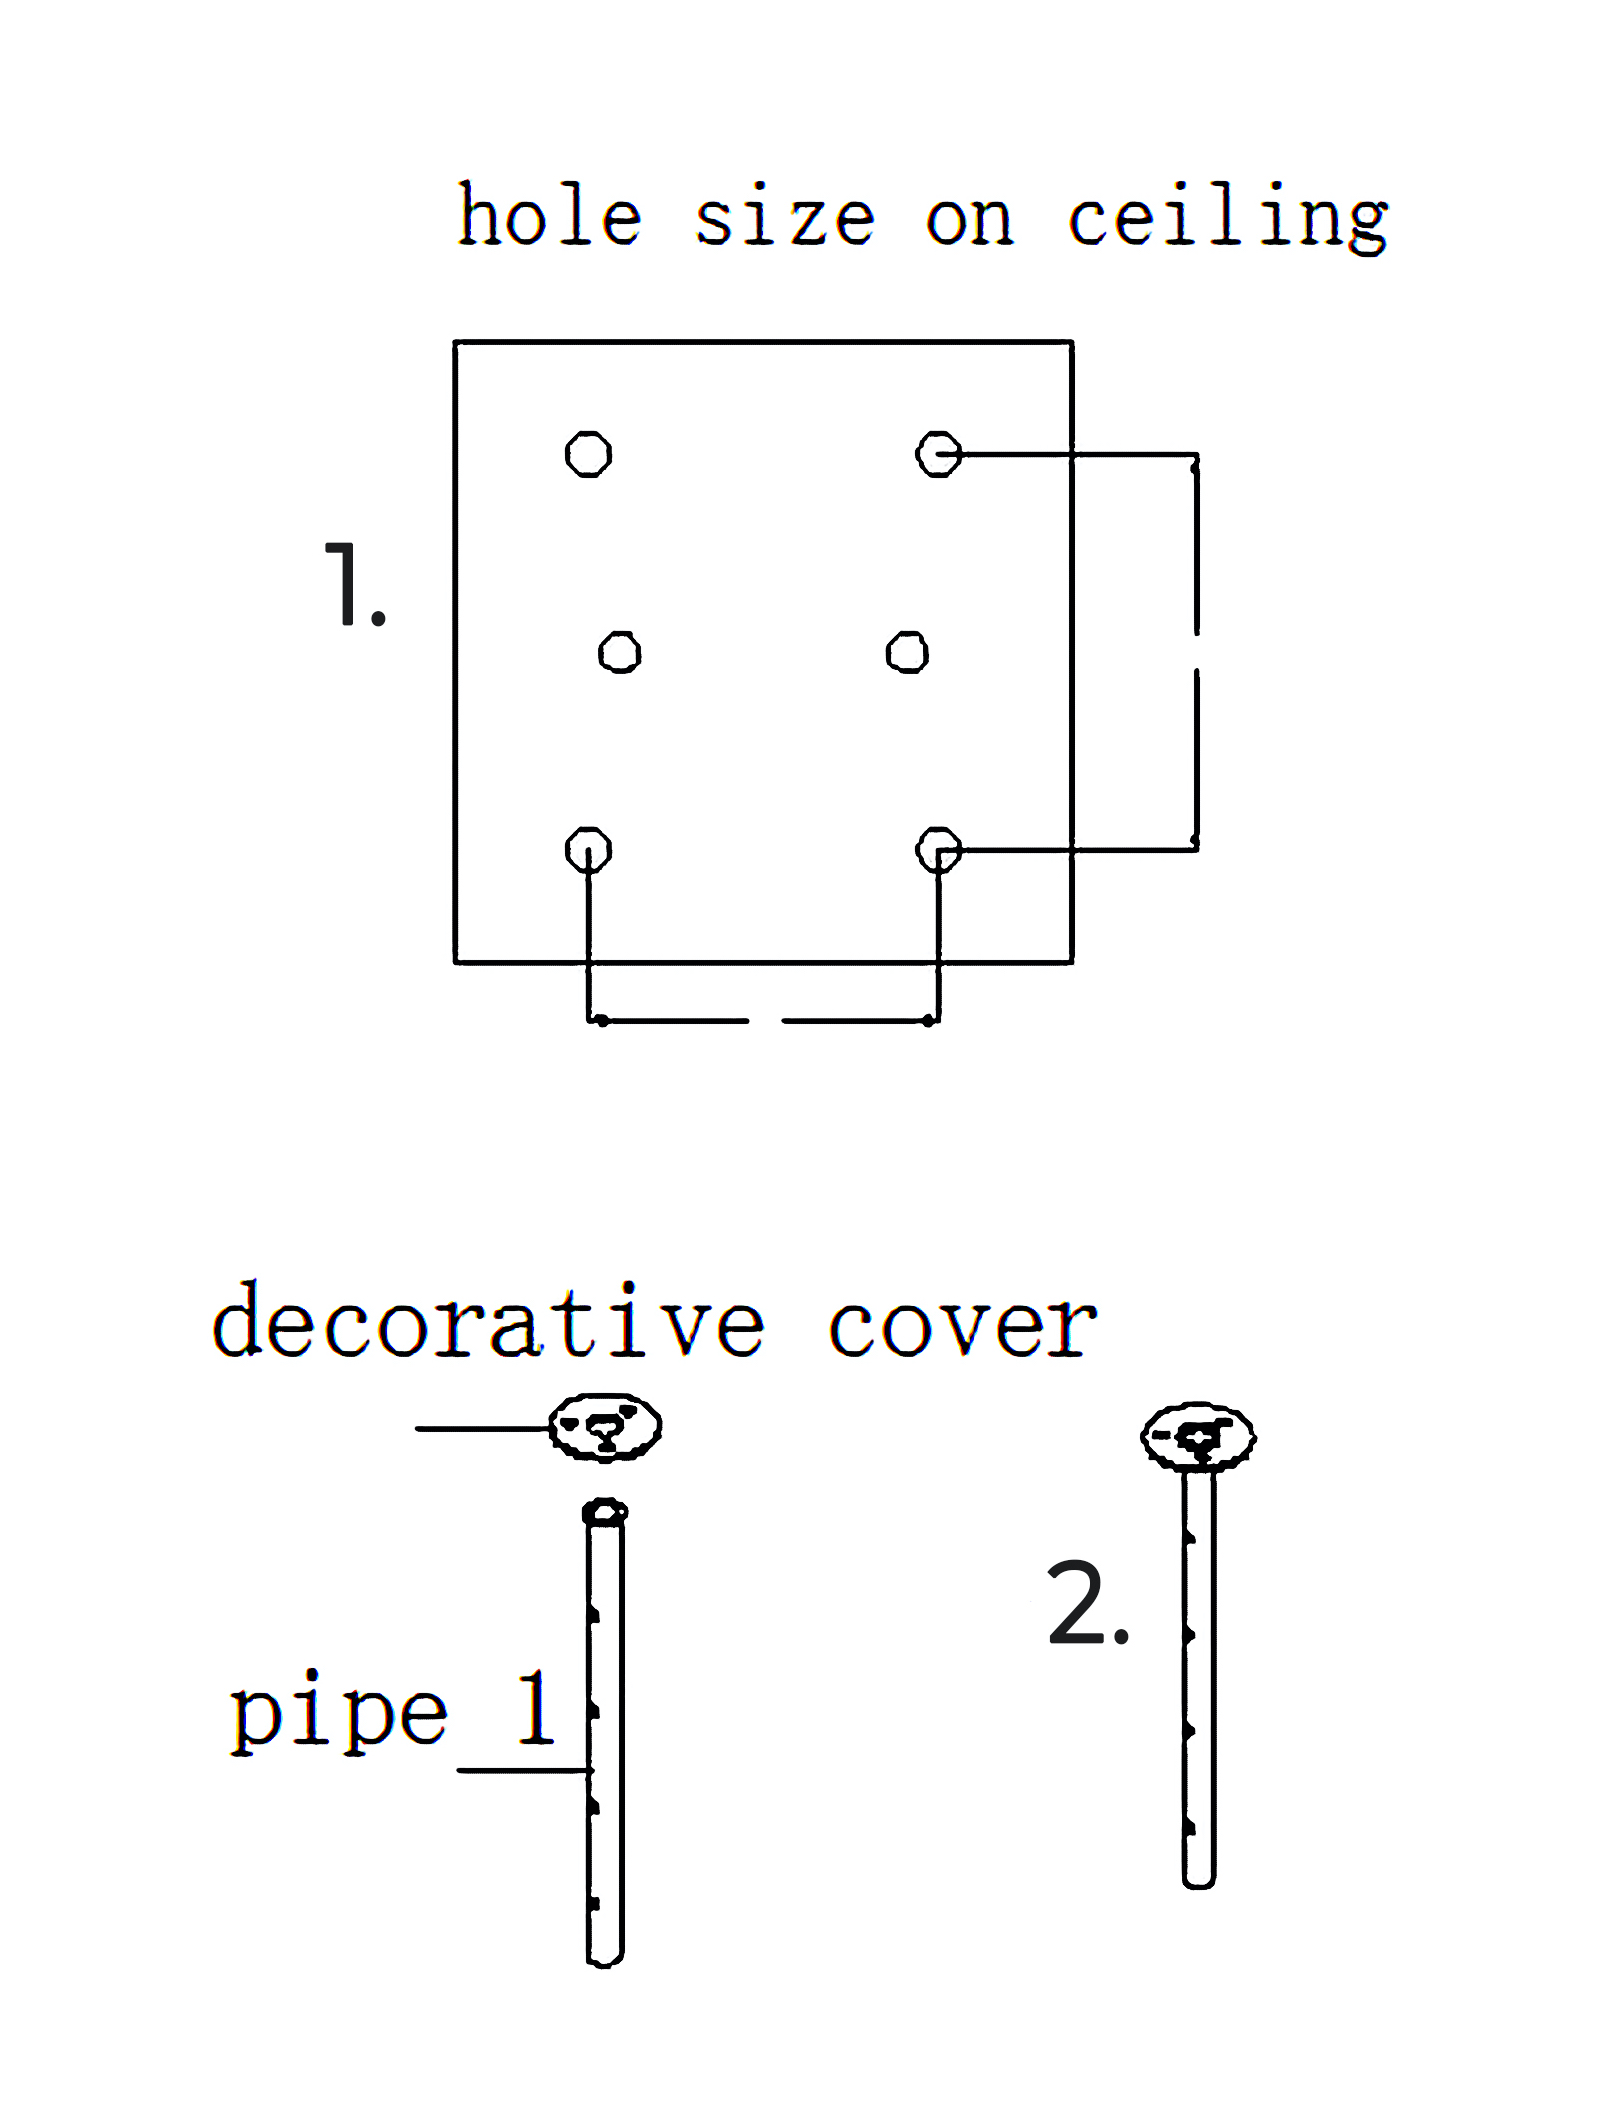
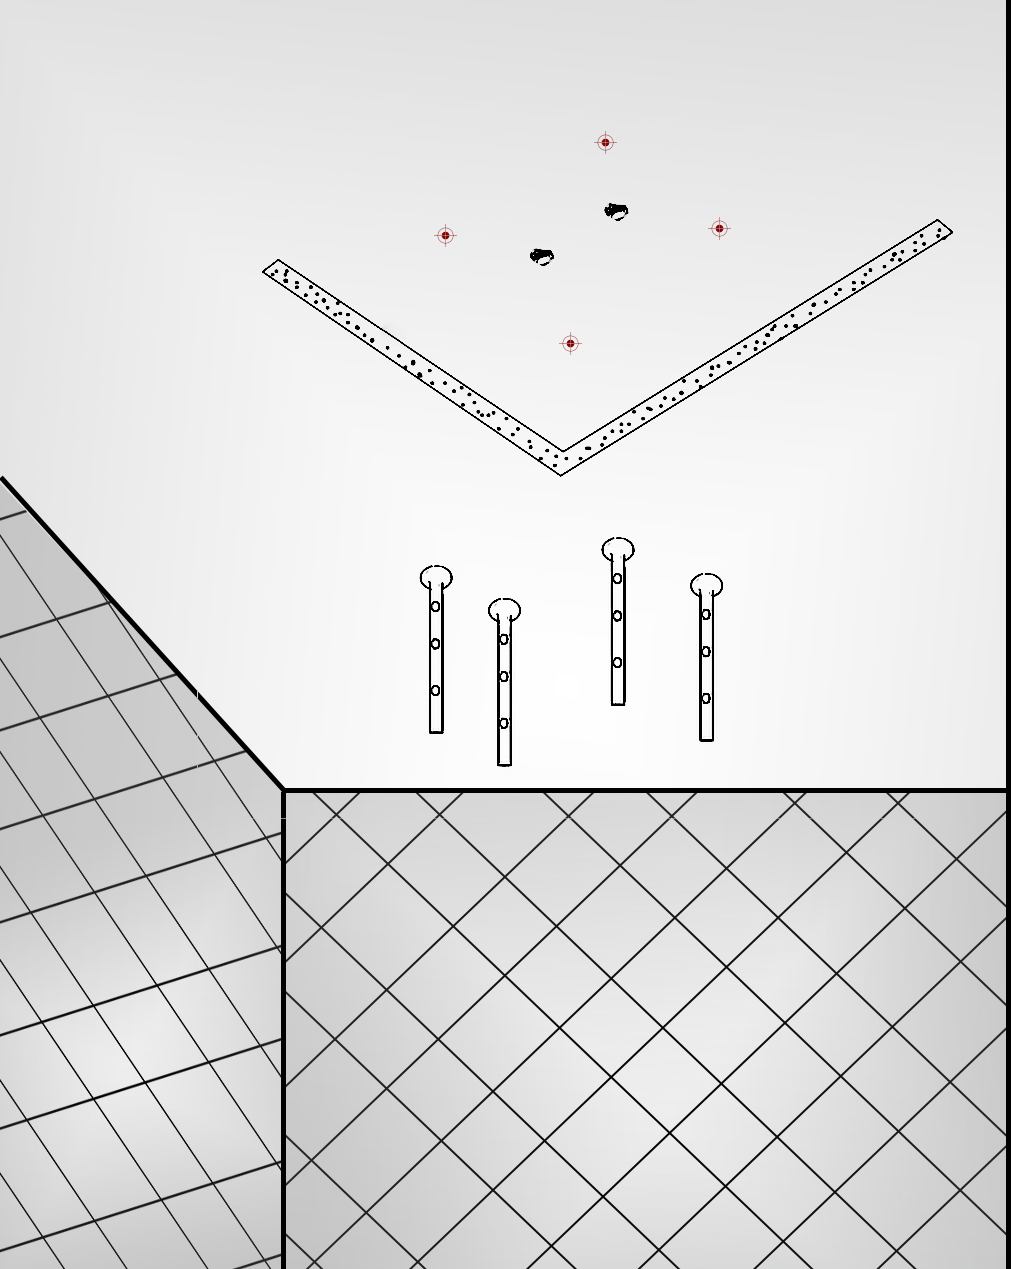
hole size on ceiling
1. Drawing the line on the ceiling according to the above specification
· Decorative Cover
· pipe 1
2. connect pipe 1 with decorative cover
|
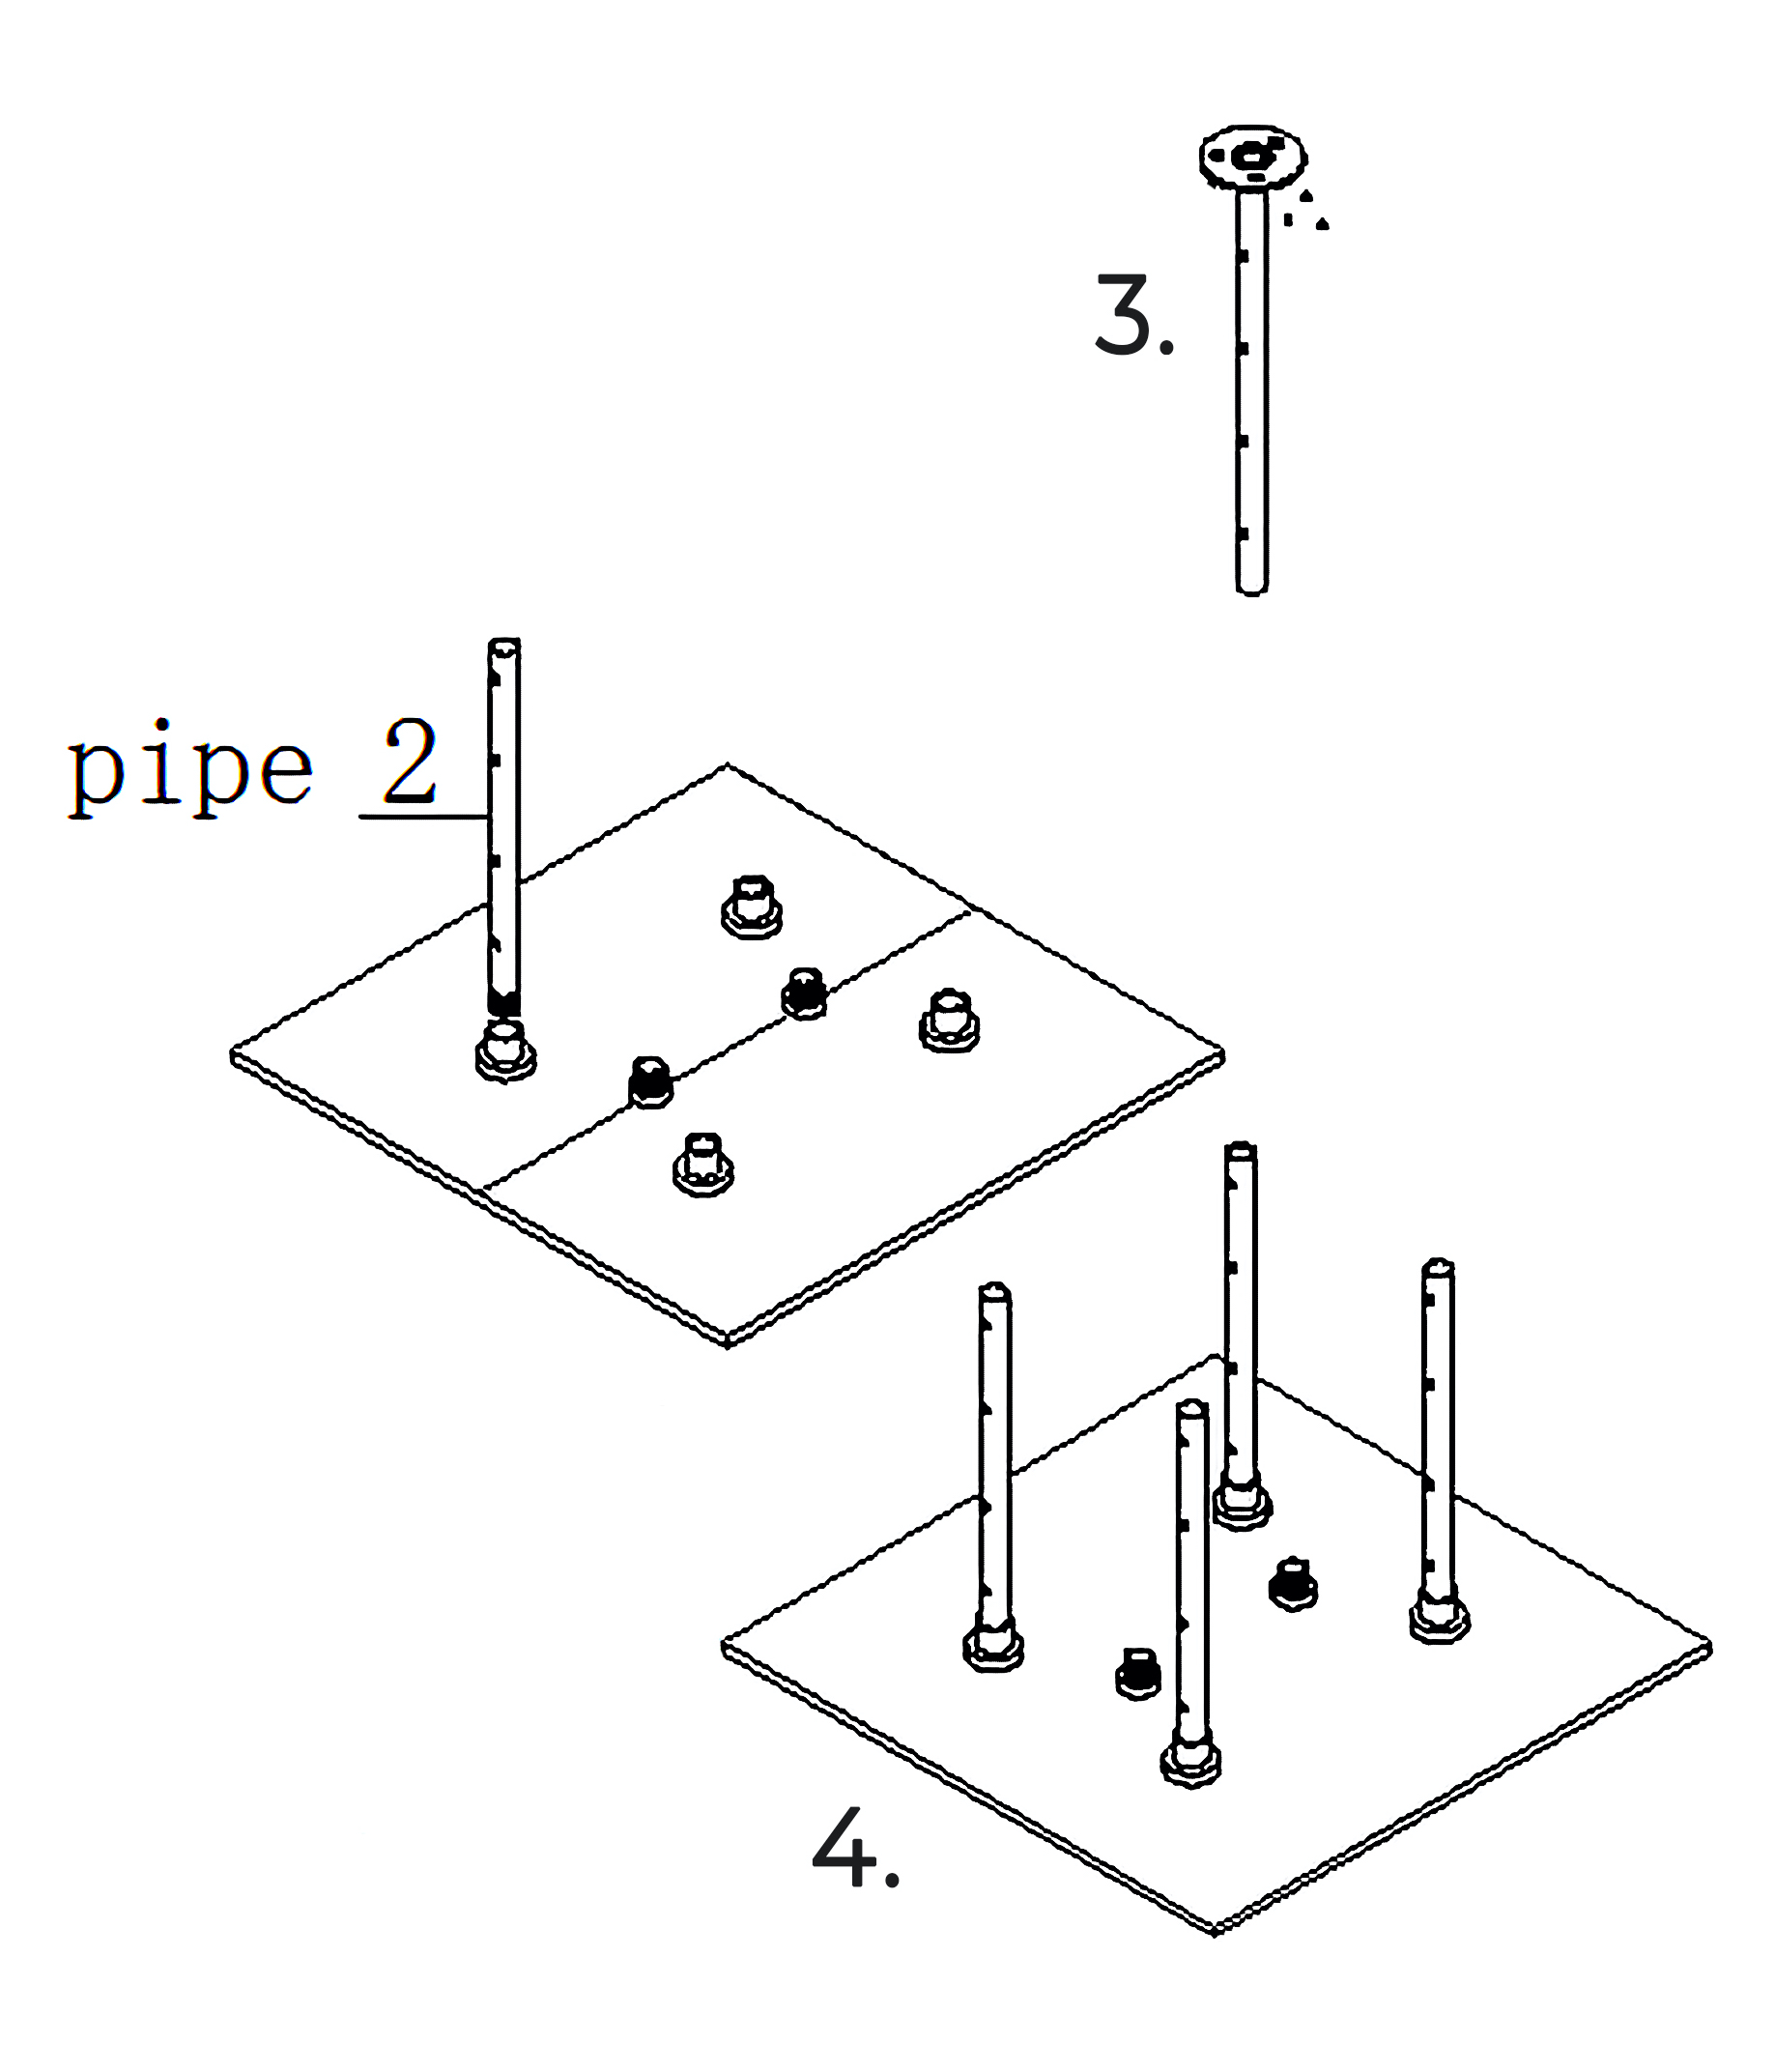
3. Drill the holes on the ceiling according to the above hole specification and install 4 pipes.
4. According to the right drawing, install four-pipe 2 into pipe 1. Put the screw bolts through the hole on the side to lock pipe 2 with pipe 1.
|

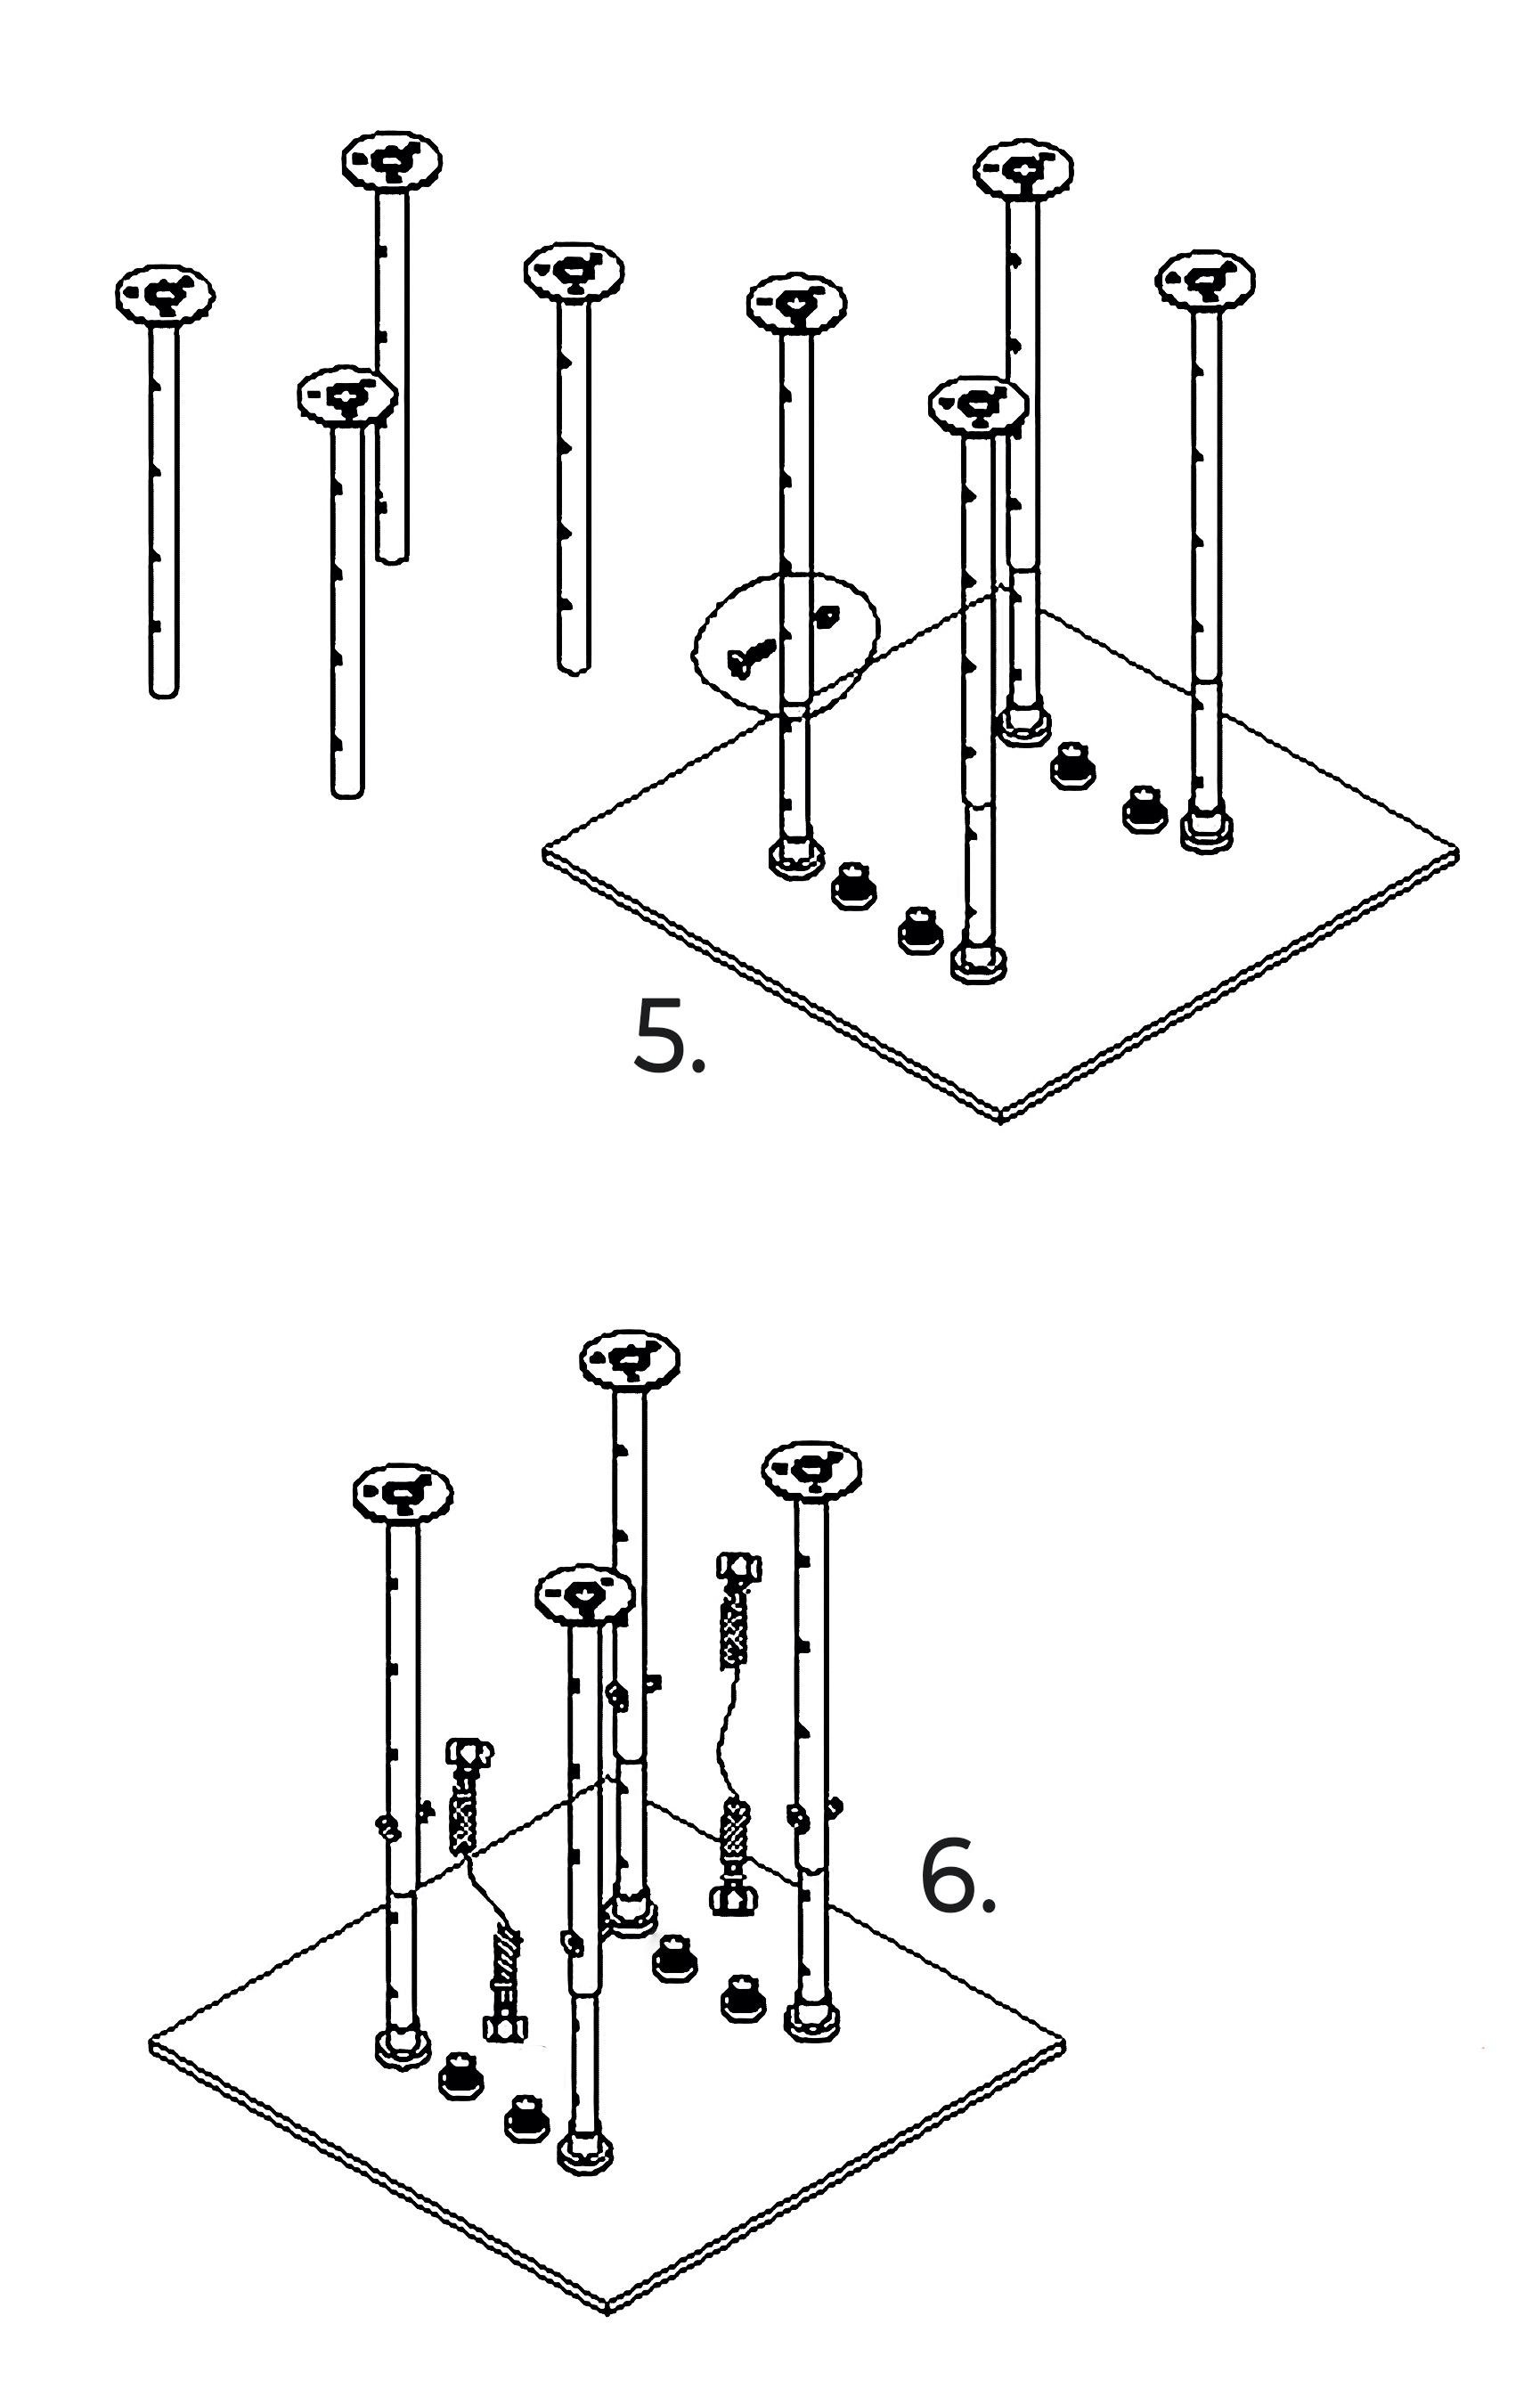
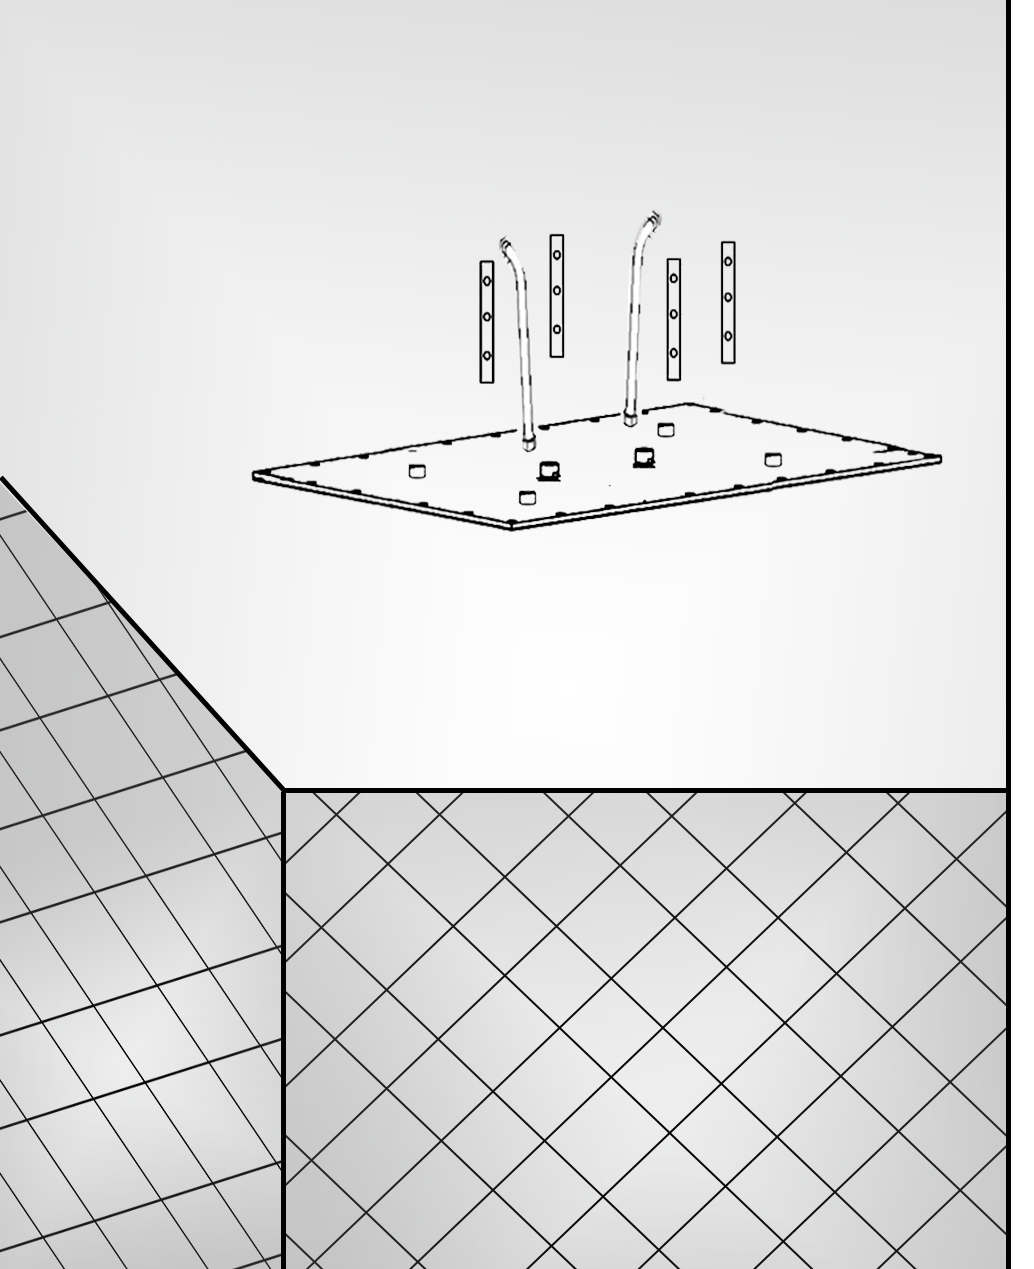
5. As the right drawing is shown, install four-pipe 2 on the head shower.
6. After fixing the showerhead on the ceiling, connect the shower hose with 2 water inlet on the showerhead back cover. The other end connects with the water outlet pipe in the wall.
|
|
|
Remarks: Ceiling mounted shower head
come with fixing bar installation
1. Draw size on ceiling
2. Install fixing bar on ceiling
3. Install fixing bar on shower head
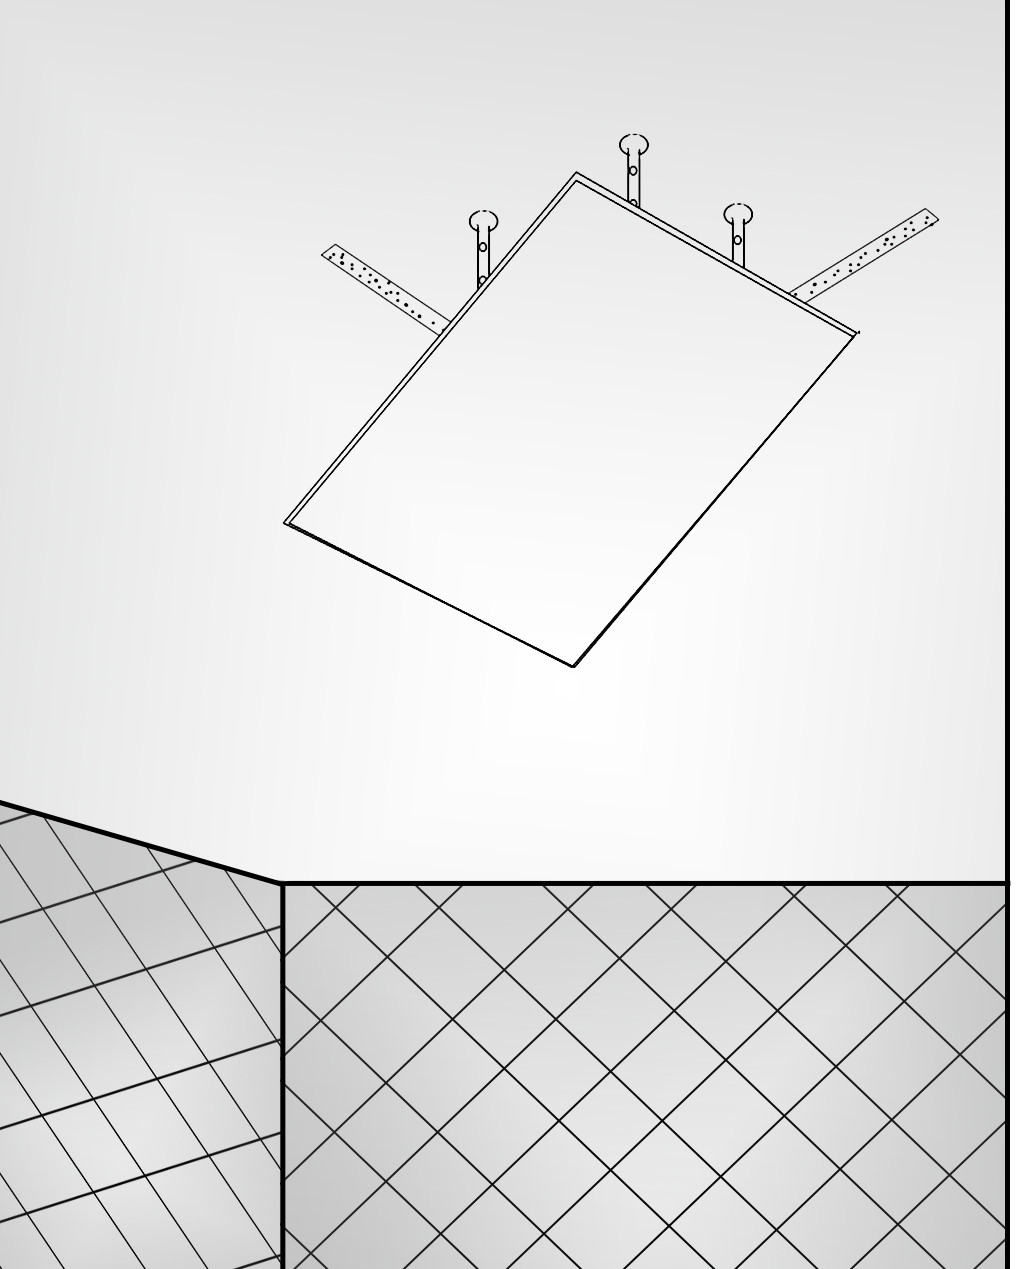
4. Put shower head bar on ceiling
fixing bar.
The showerhead installation is now
complete.
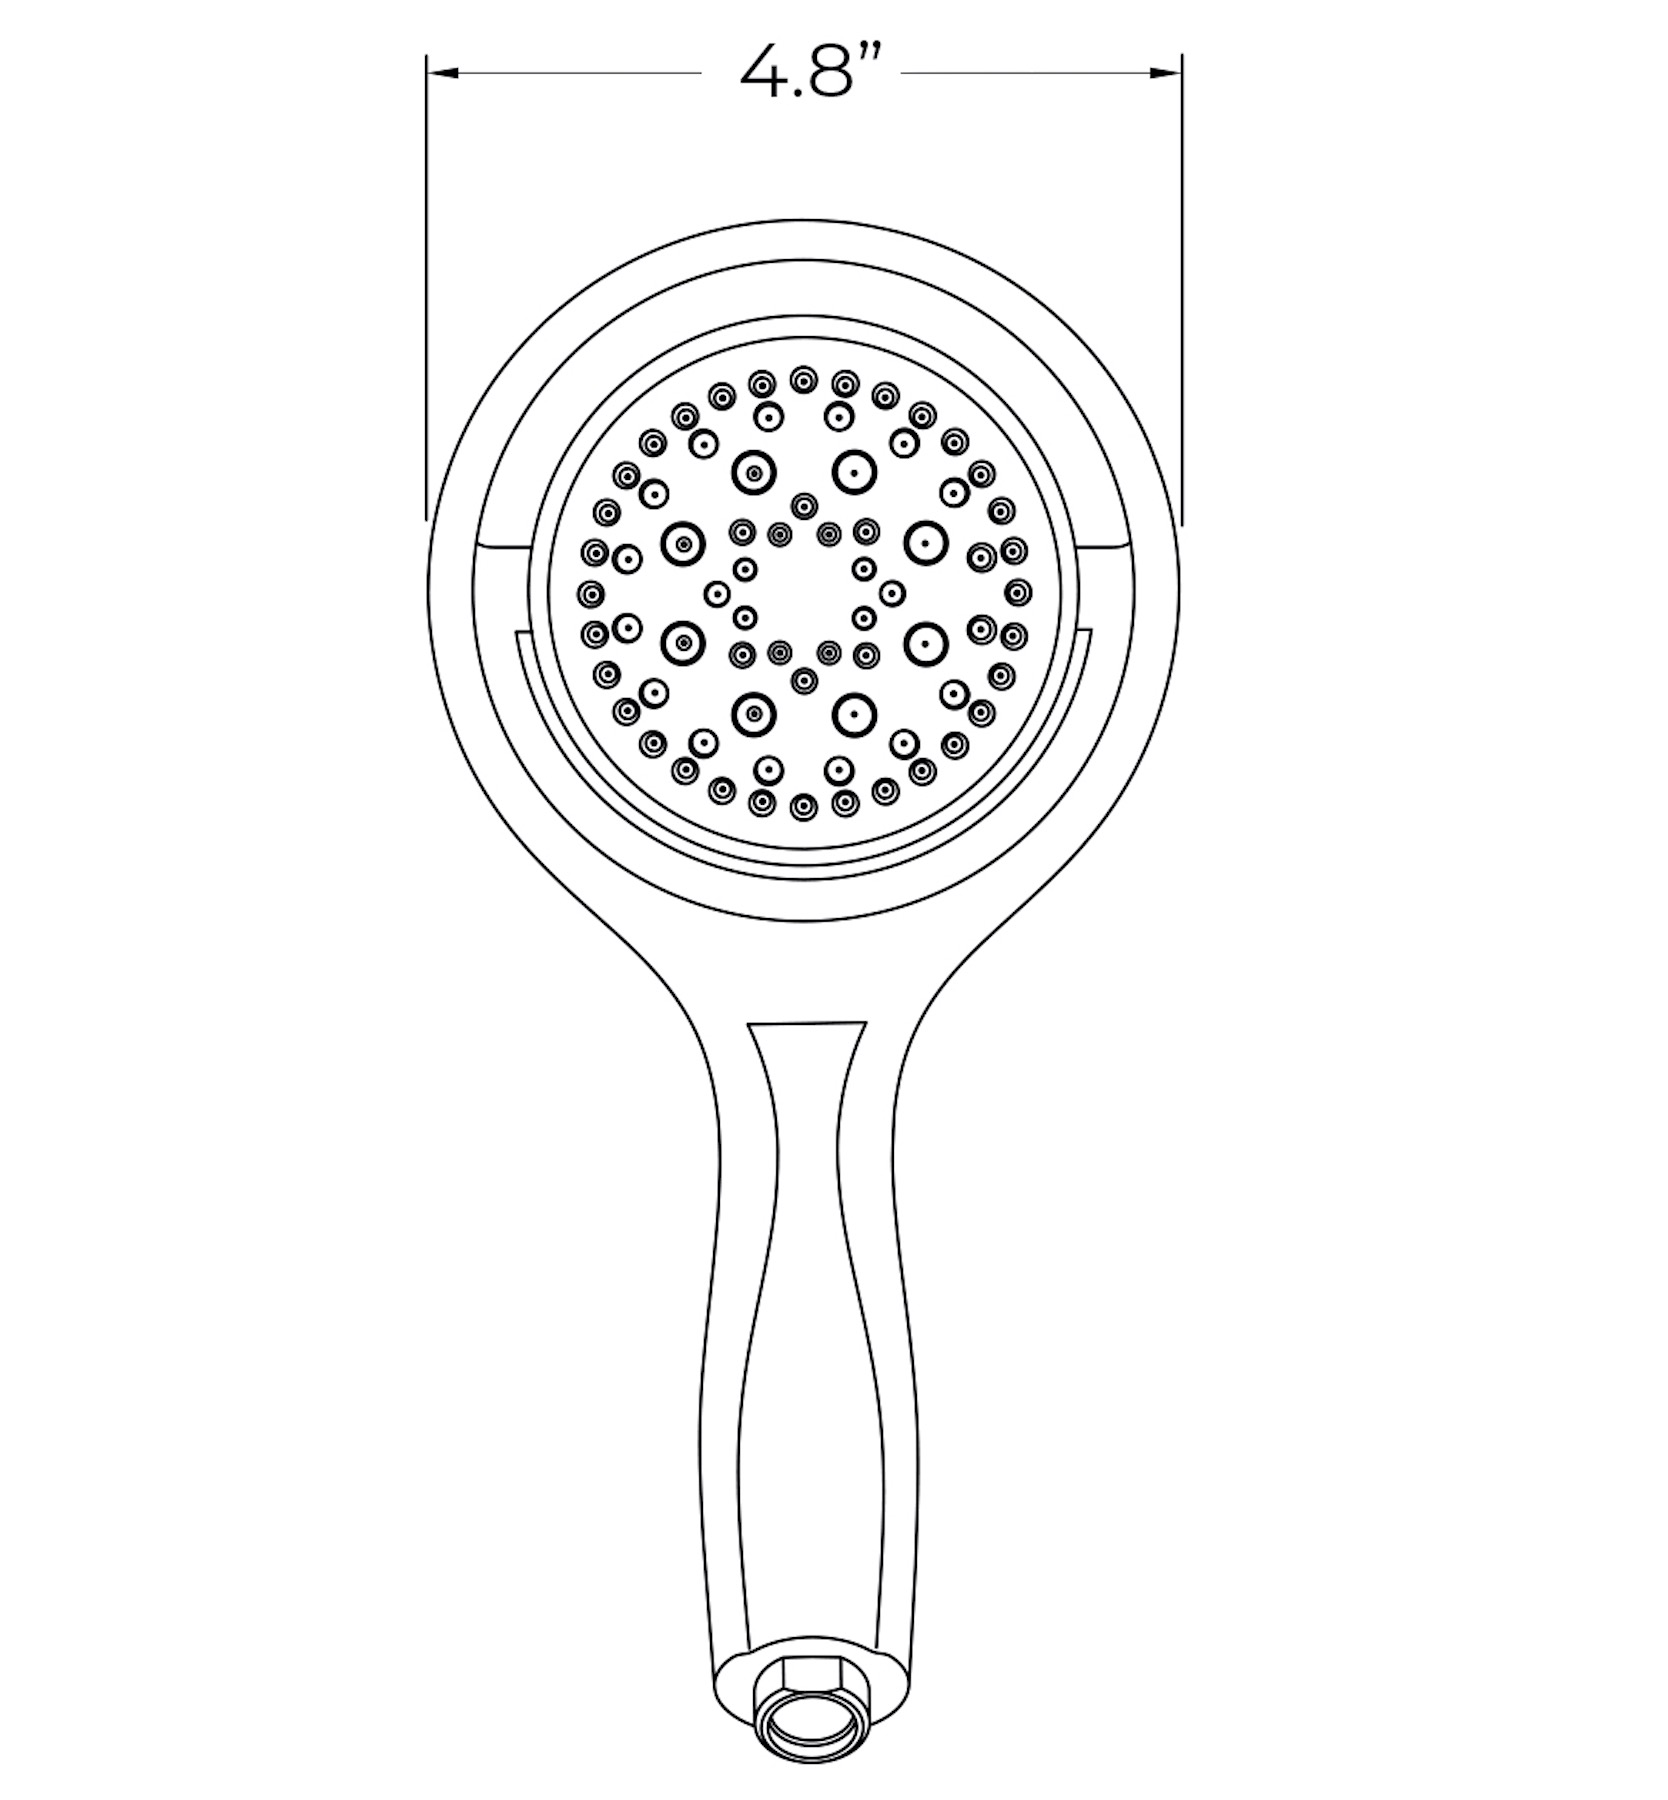
Hand Held Shower Installation
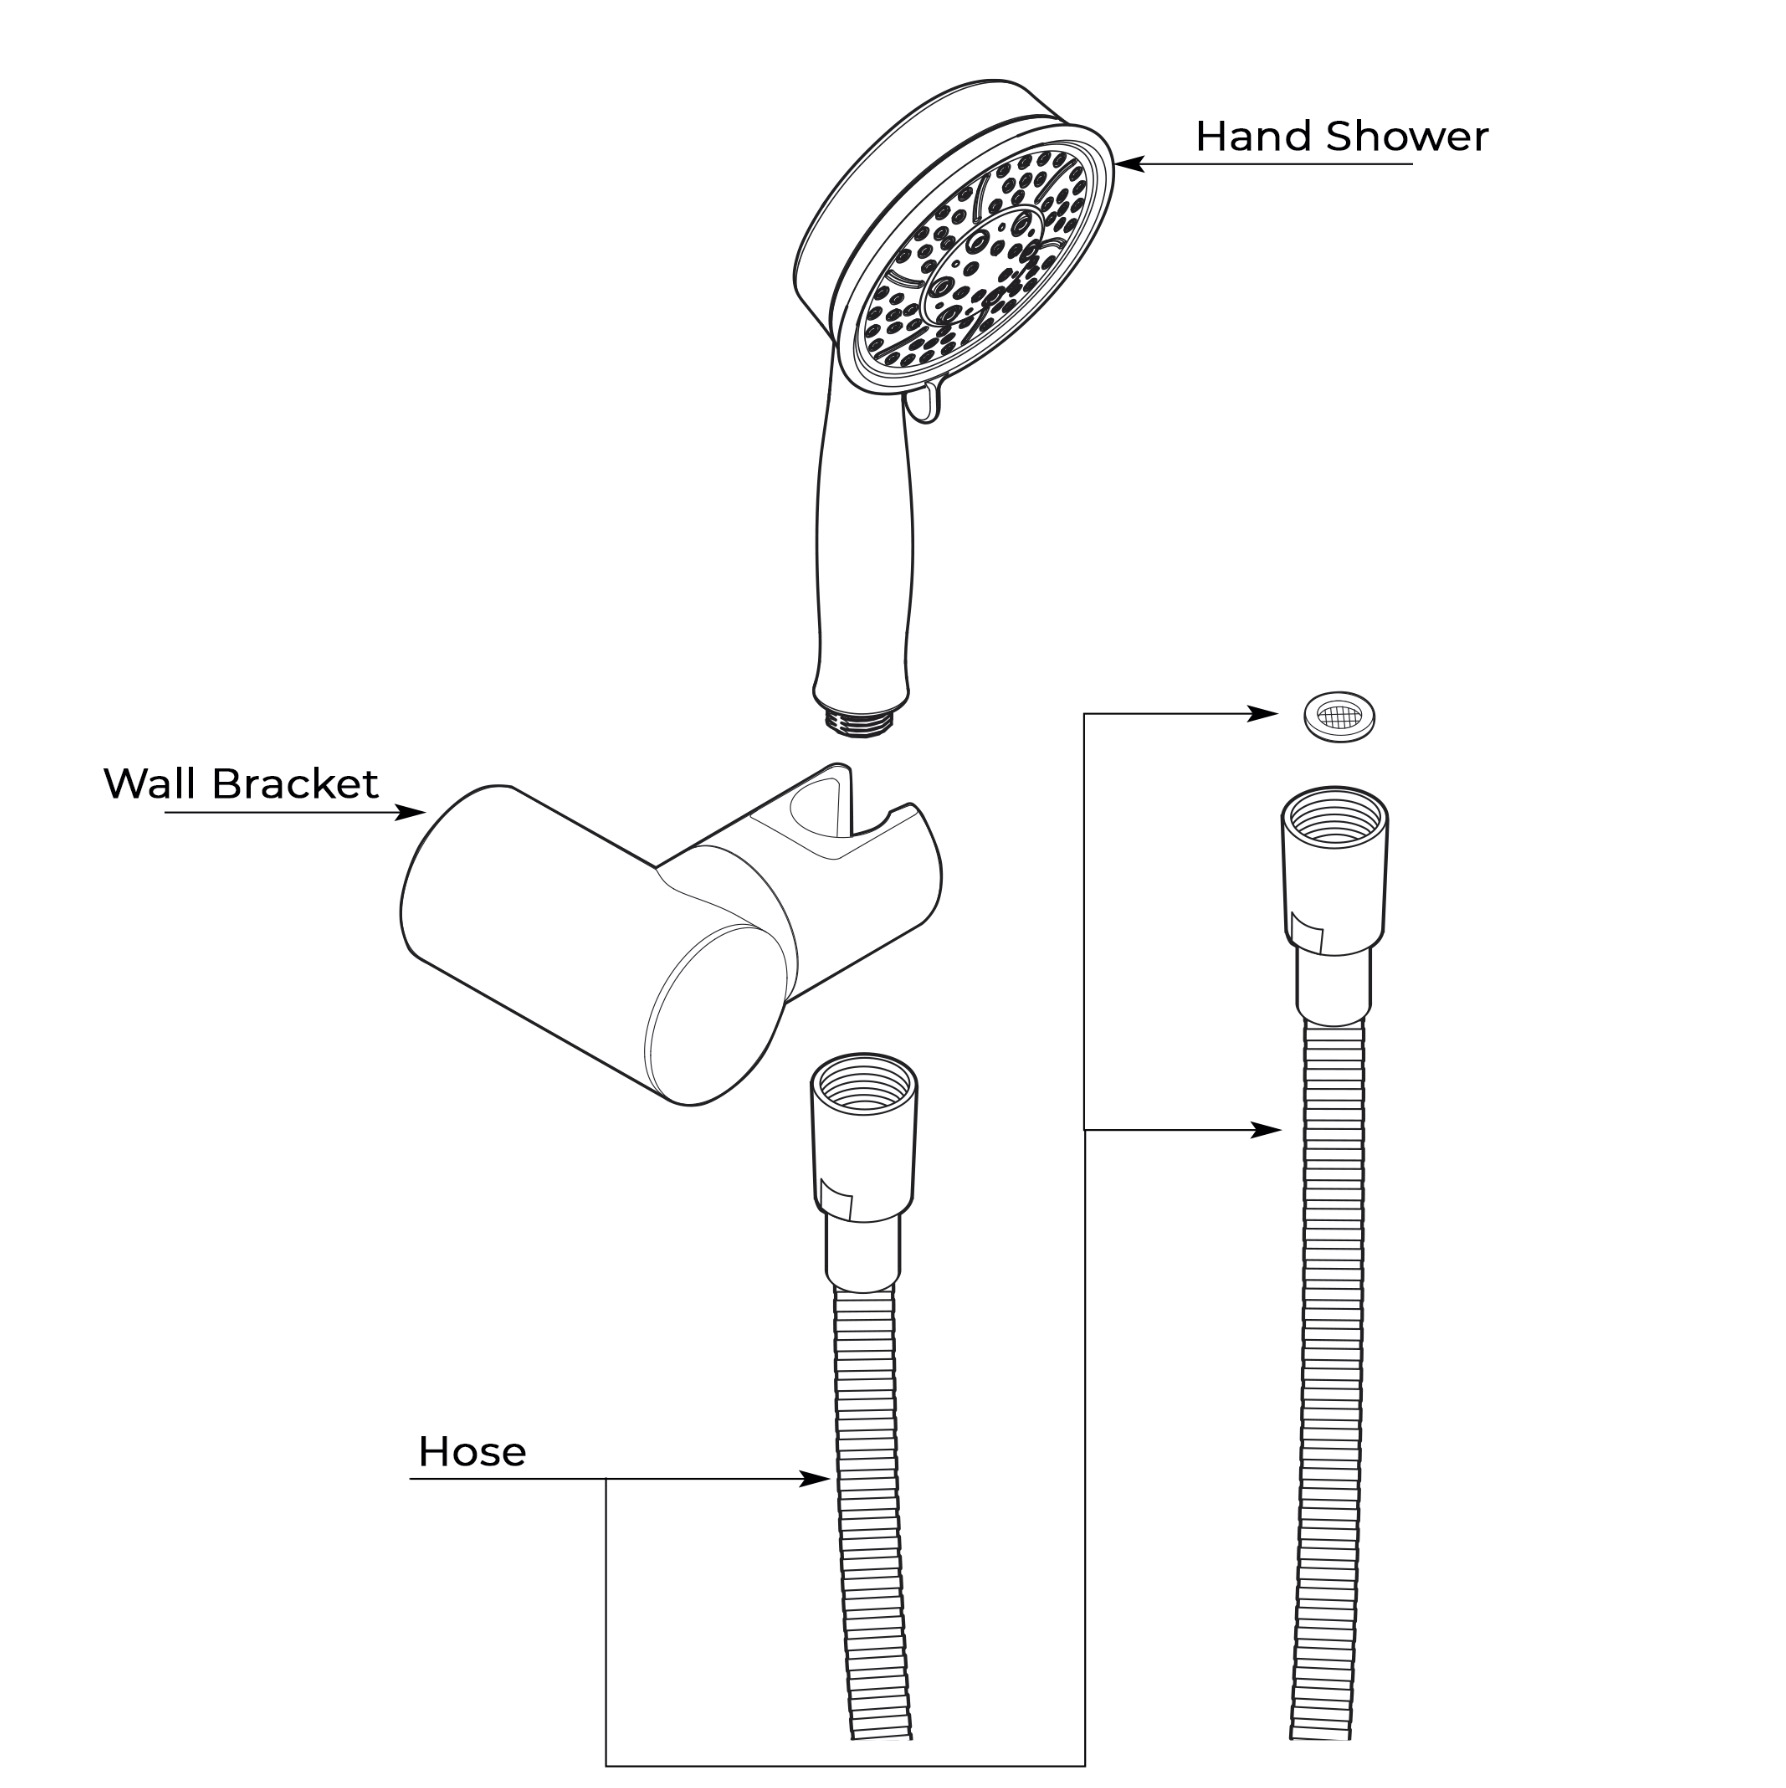
Parts List
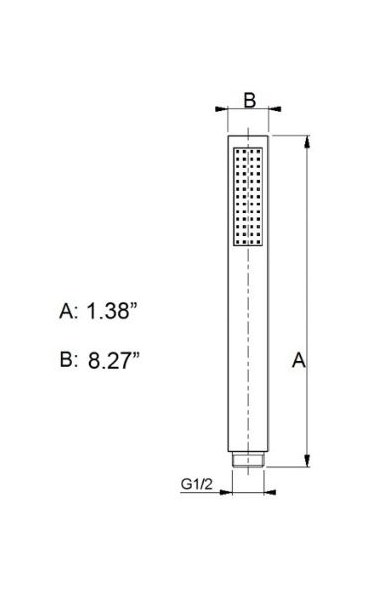
A. Hand Shower
B. Wall Anchors (x2)
C. Screws (x2)
D. Wall Bracket
E. Cap
F. Hose
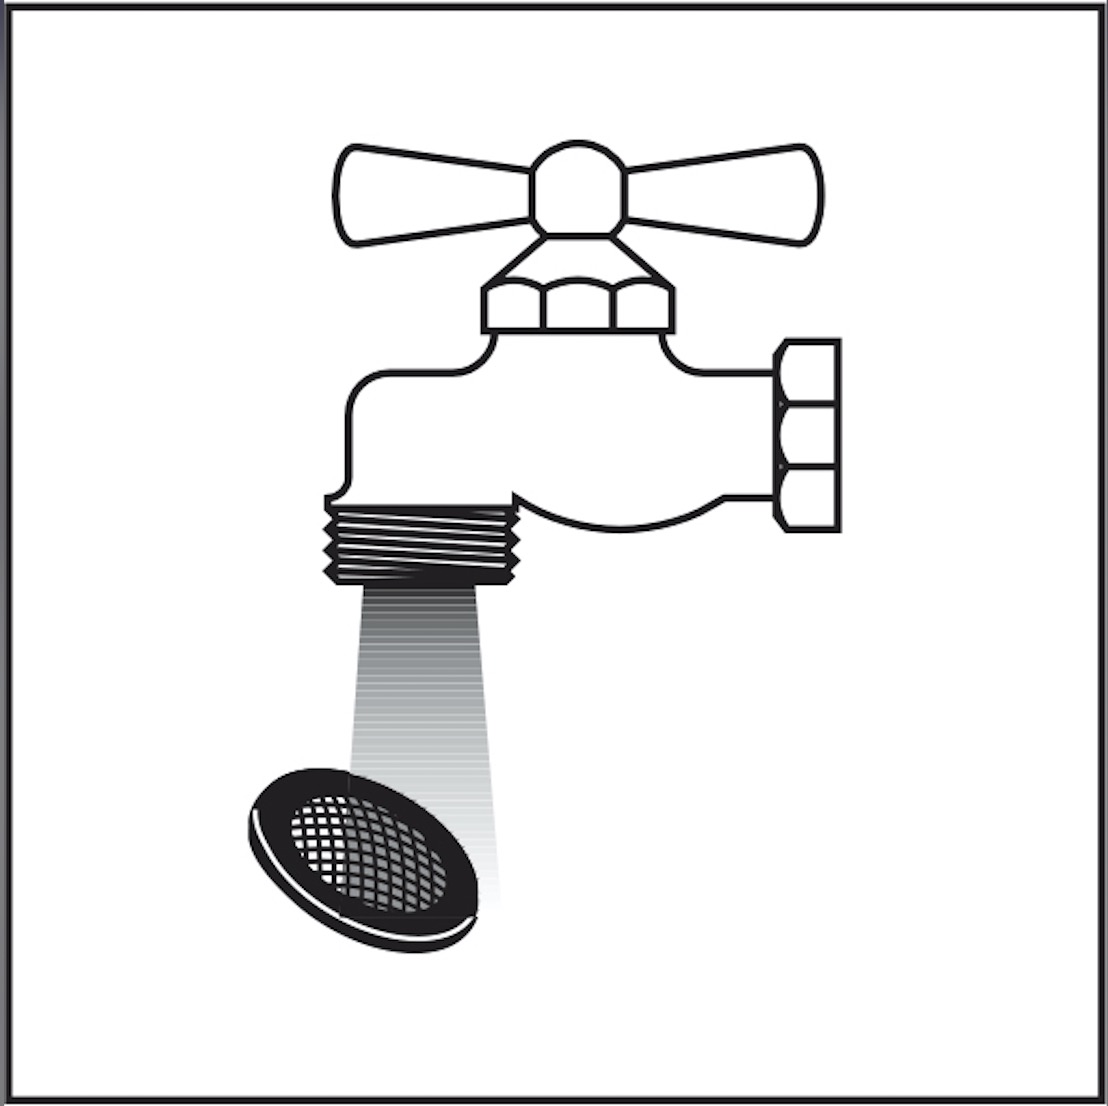
G. Screen Washer
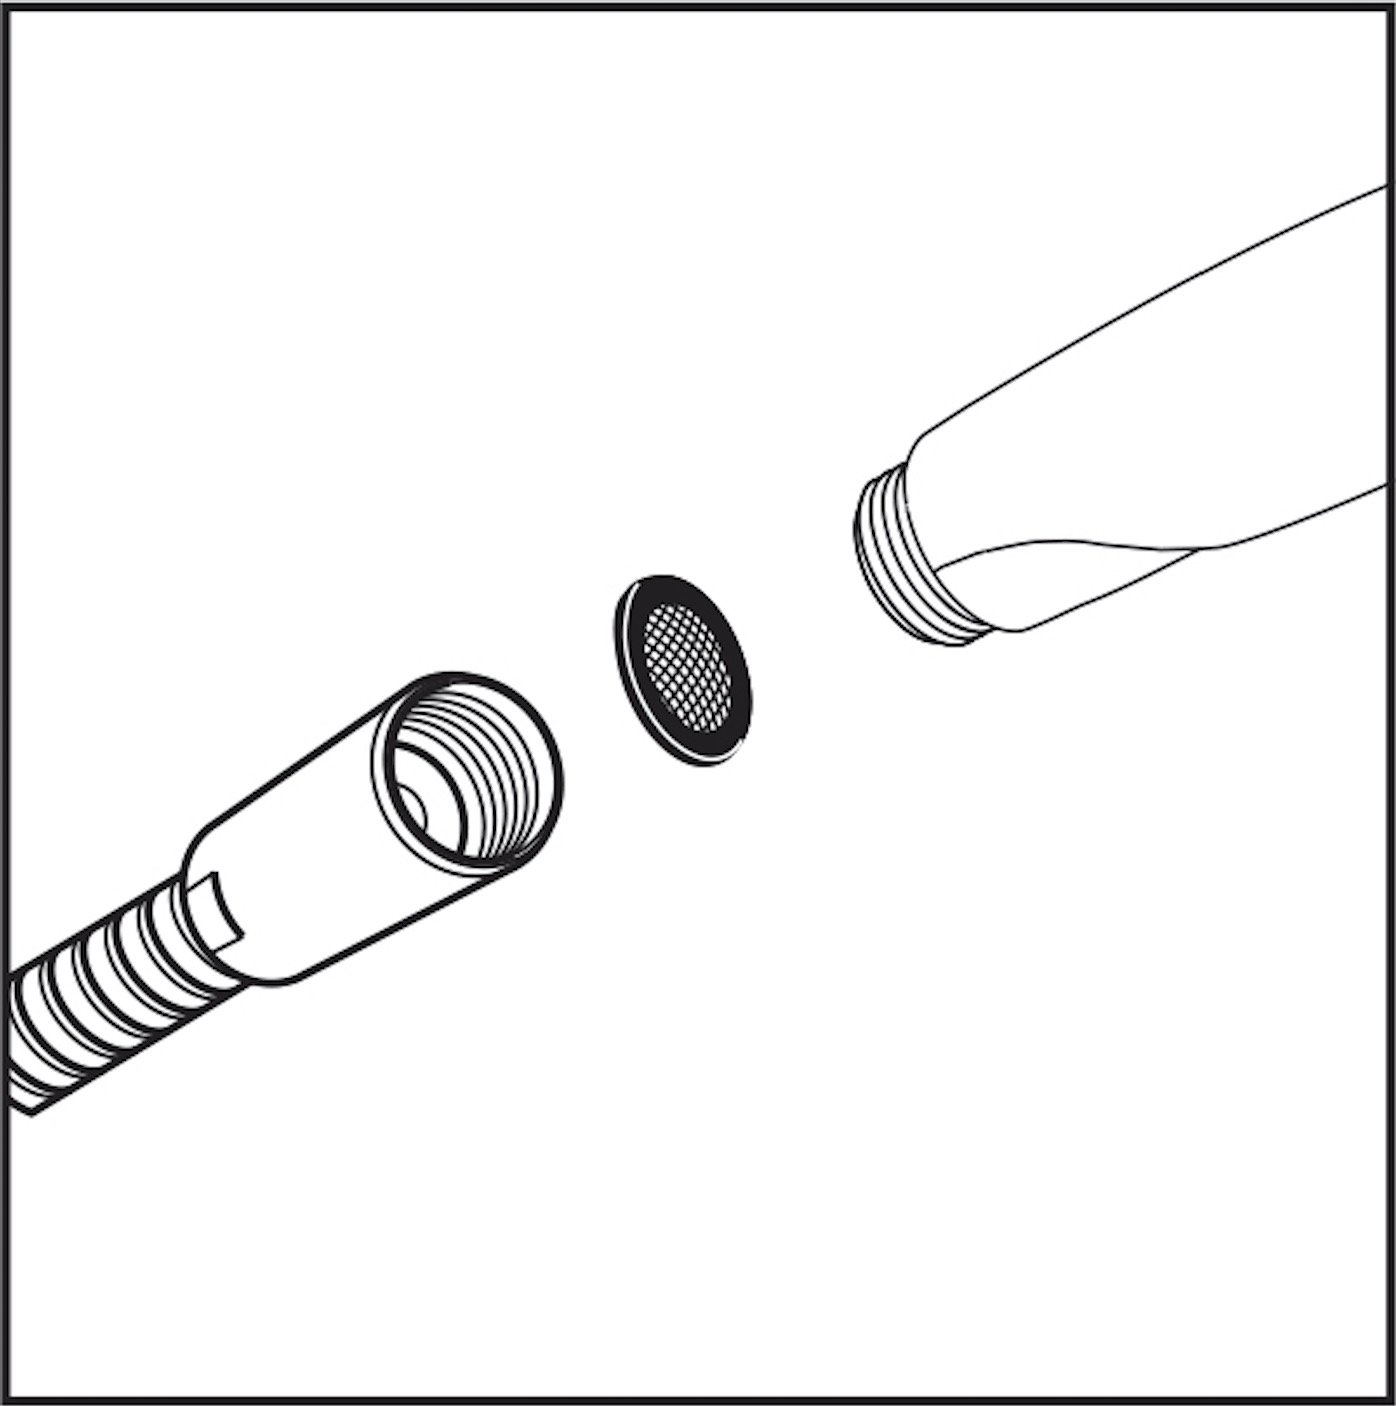 Place the screen washer in the end of the handshower hose. Screw the hose to the handshower. Place the screen washer in the end of the handshower hose. Screw the hose to the handshower.
If the flow of water becomes noticeably less, remove and clean the screen washer.
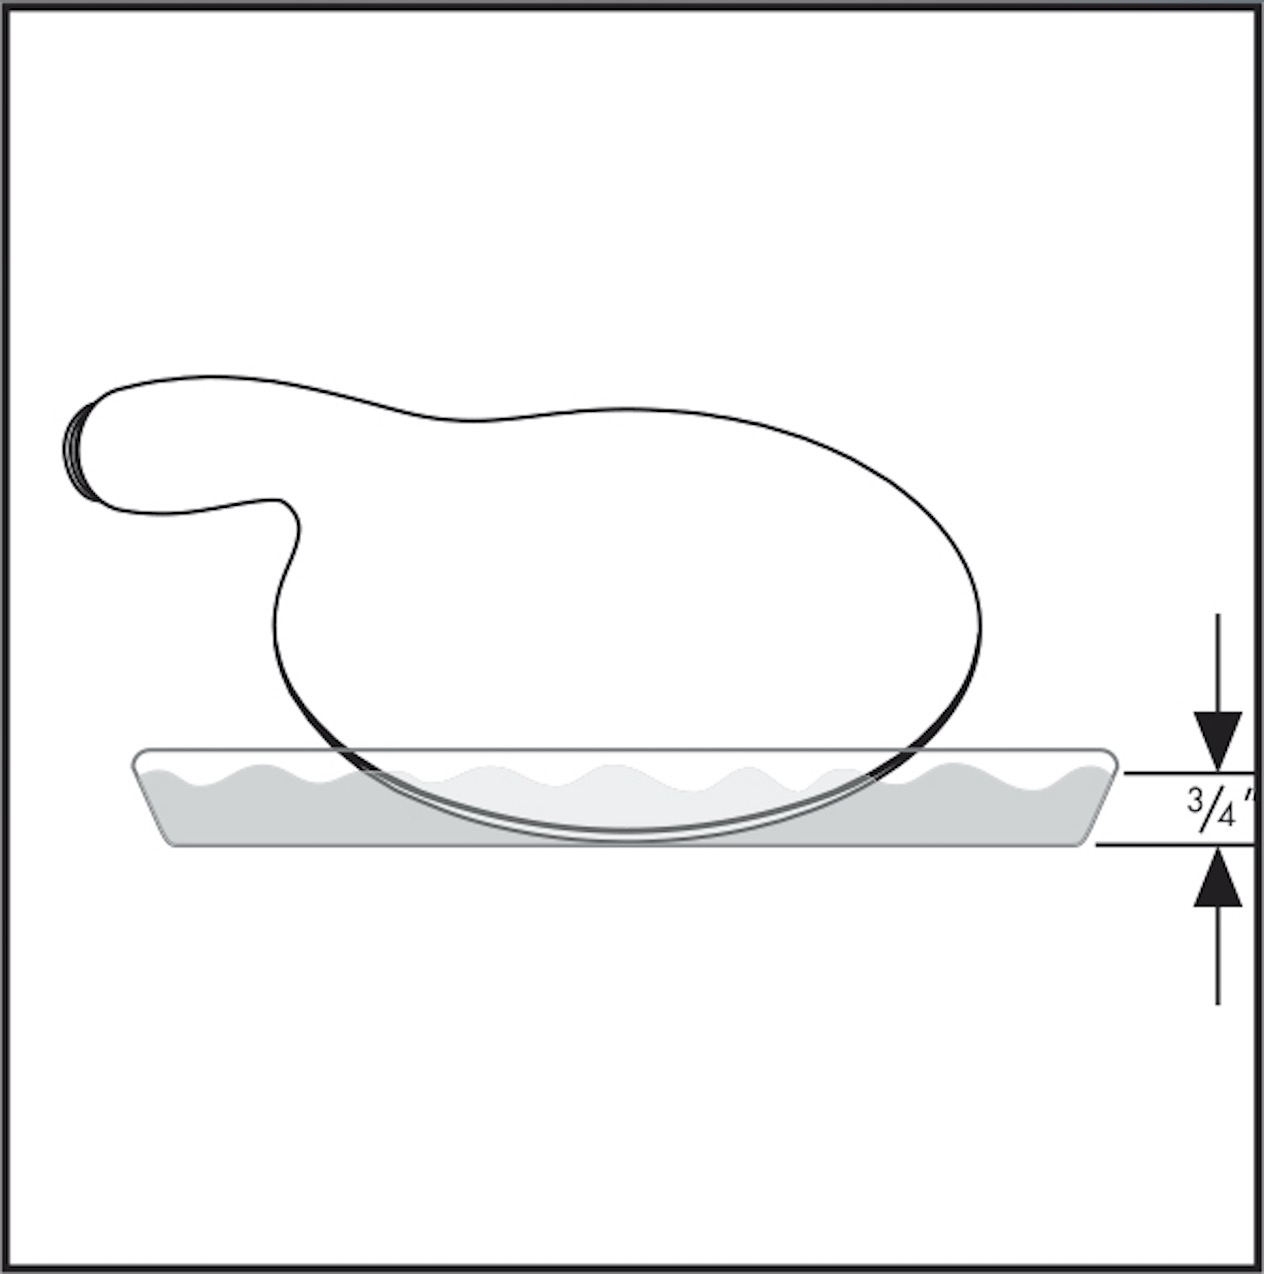
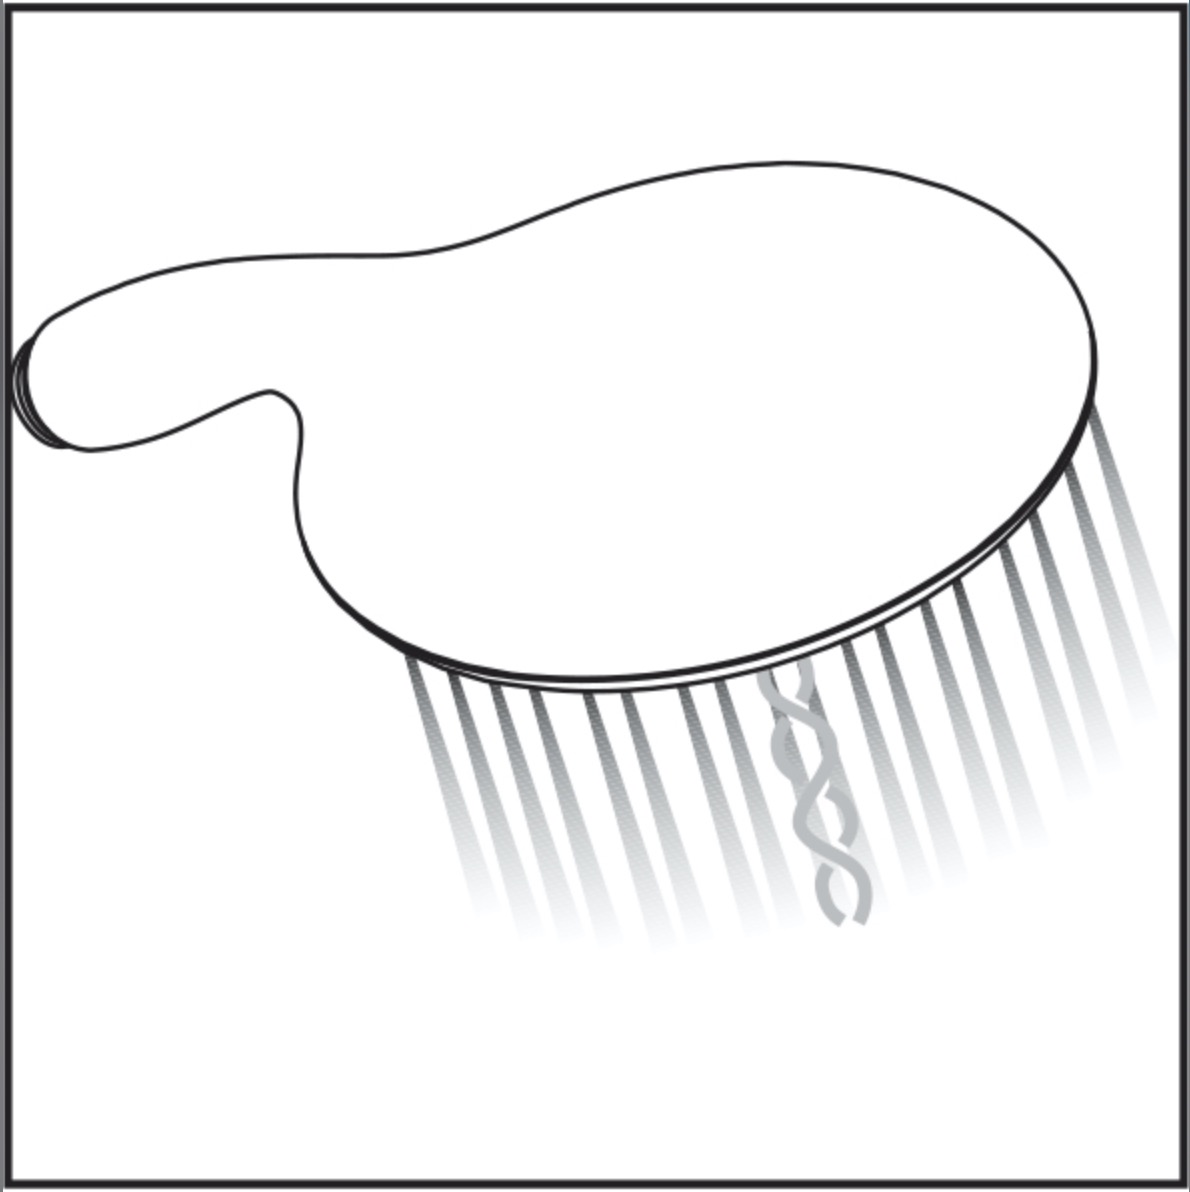
Scale Removal
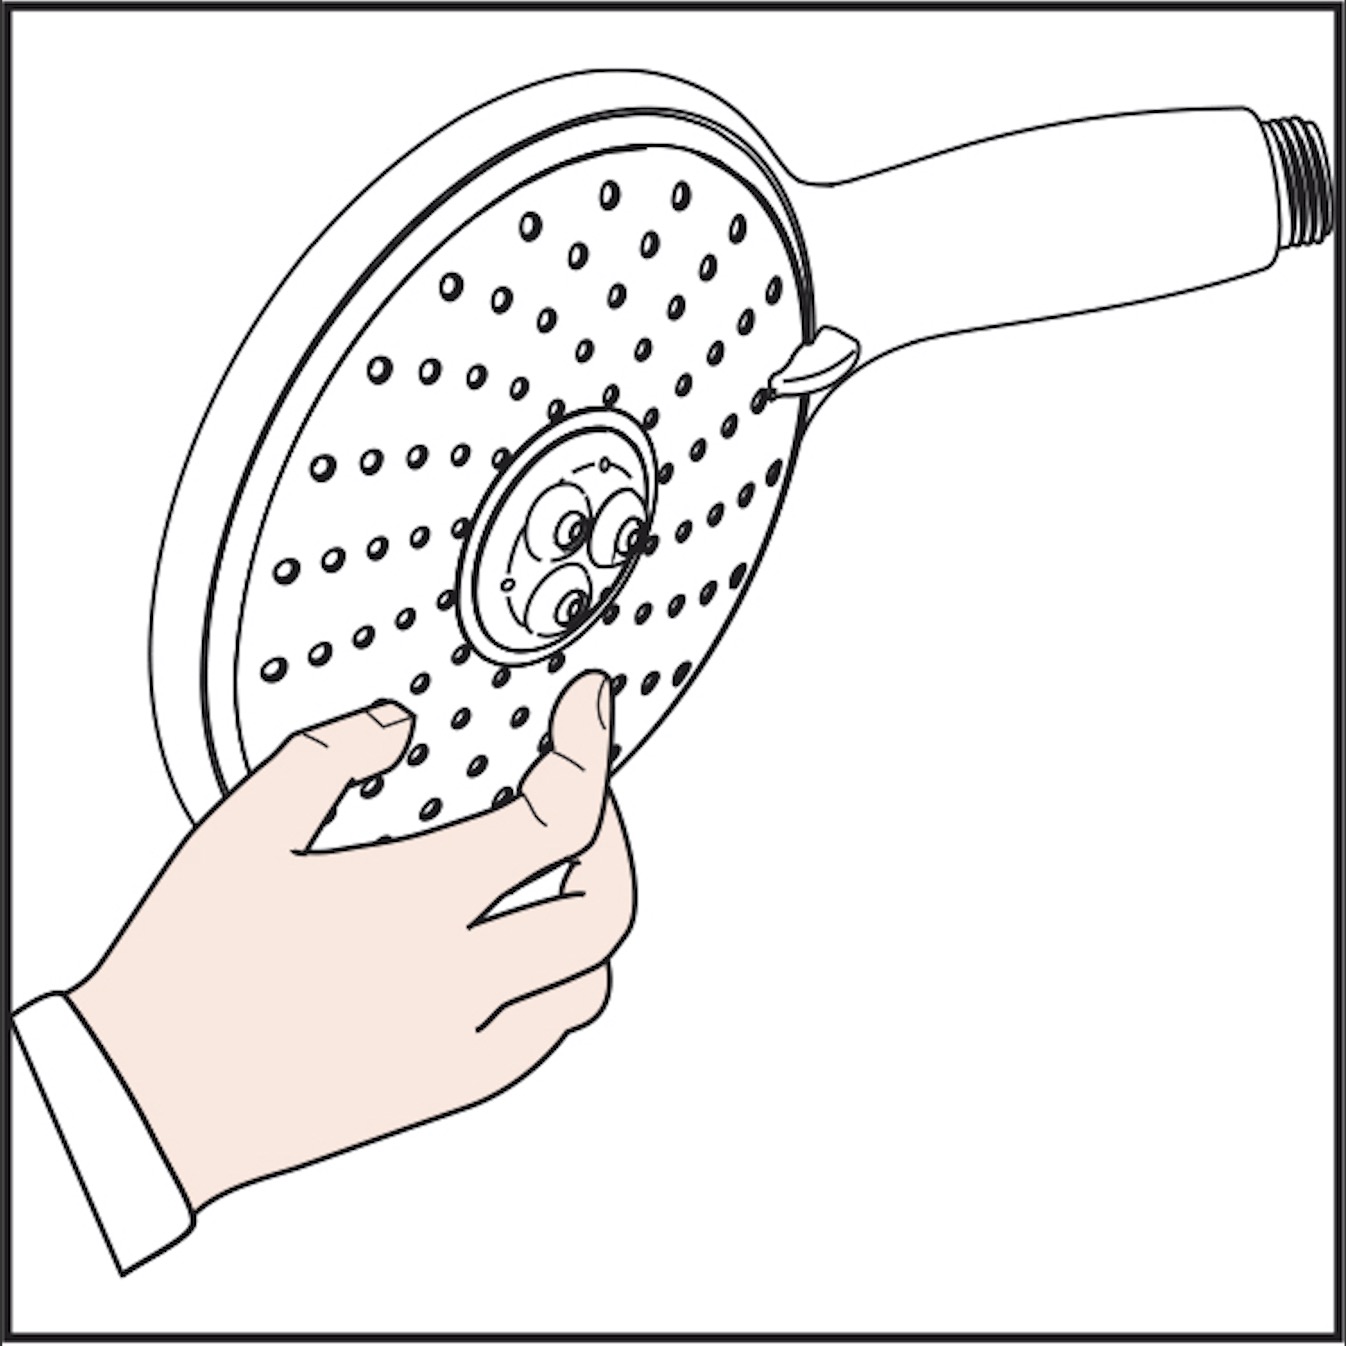 The handshower incorporates the cleaning system. If scale deposits are noticed in the spray channels, turn the water on lightly and rub the spray channels with a finger or a sponge.
If scale deposits are noticed on the spray face, pour about 3/4" of a commercial scale remover into a shallow dish. Dilute the remover according to the label instructions.
Soak only the spray face in the solution for the amount of time specified on the label.
Rinse the handshower with clear water.
Reinstall the handshower. Turn on the water and al-low the handshower to flush for at least one minute.
 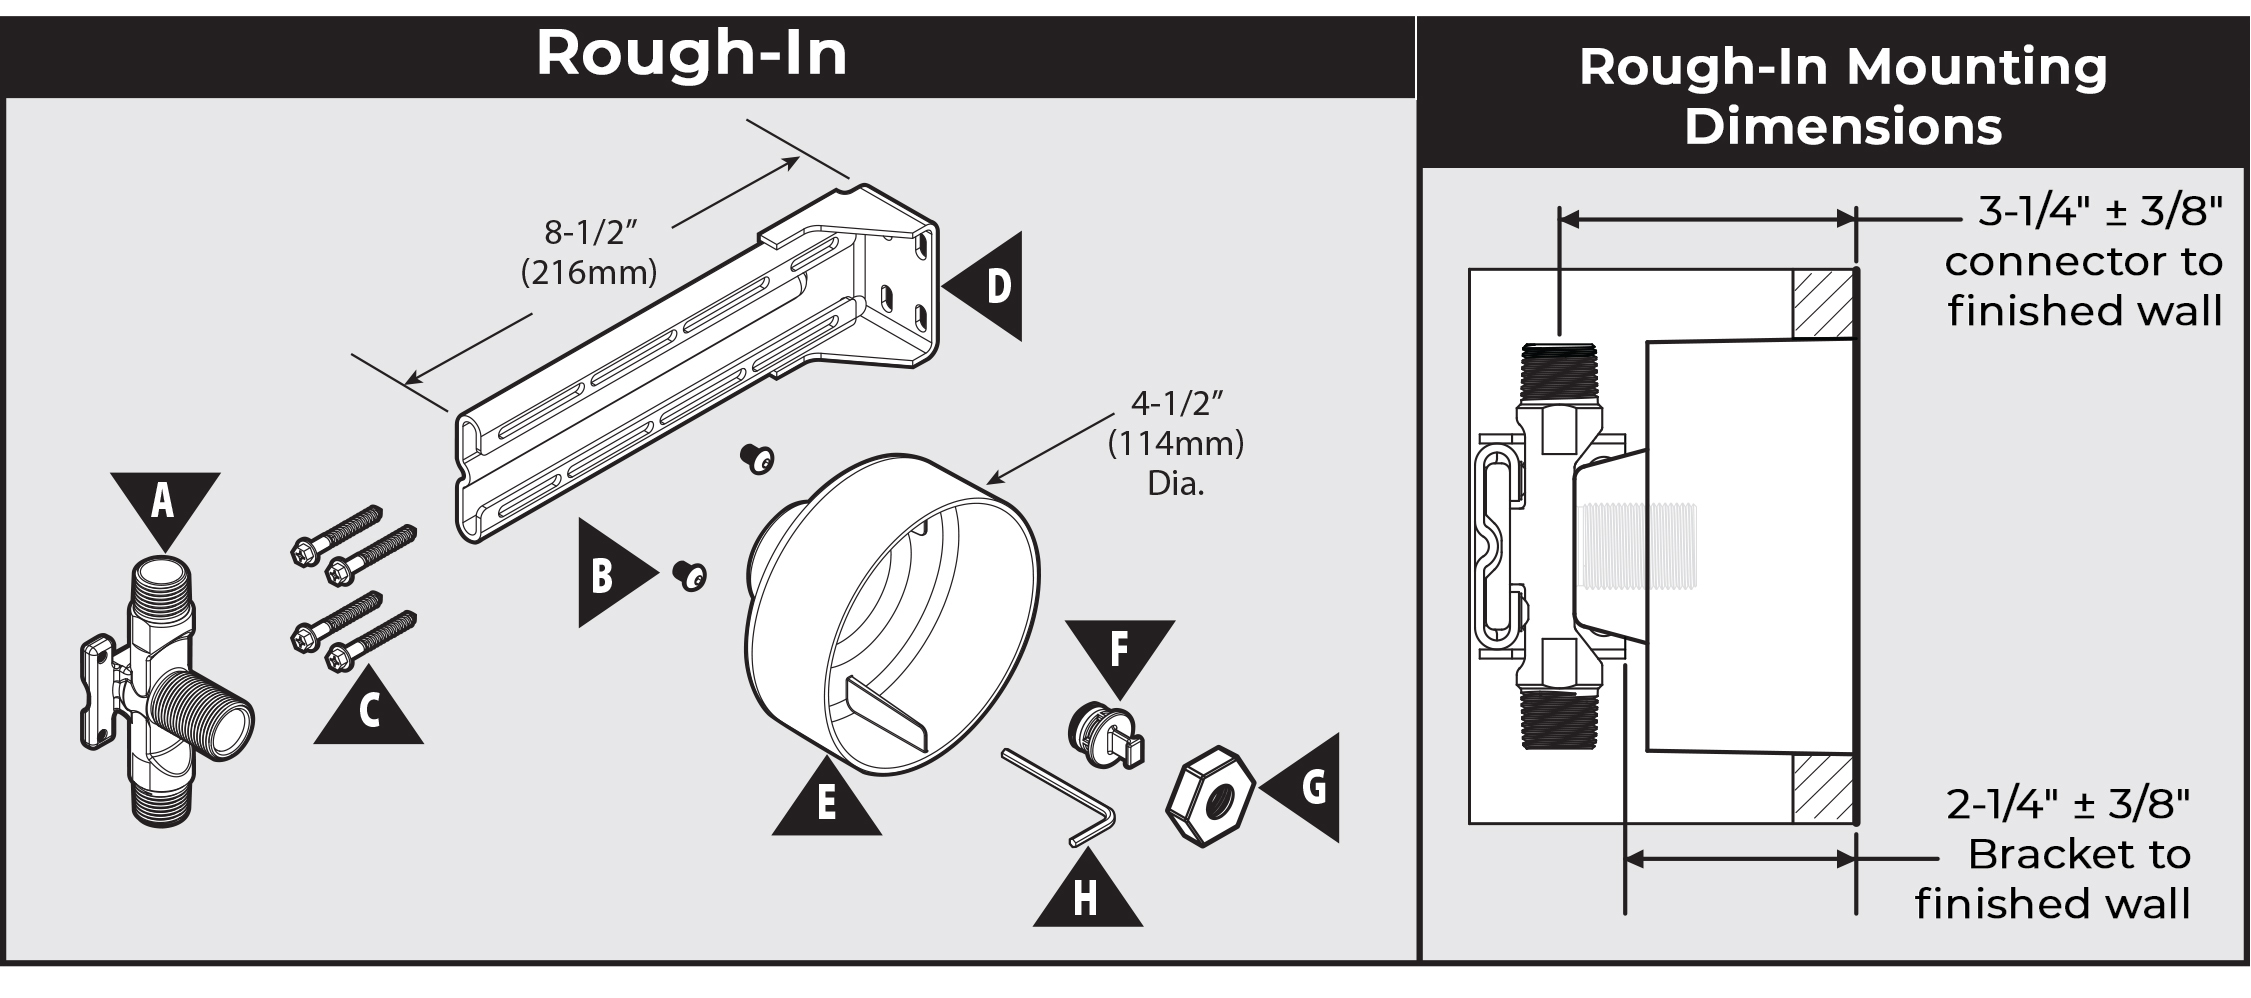
Parts Lis
|
A.Connector
B.Connector Screws (x2)
C.Bracket Screws (x4)
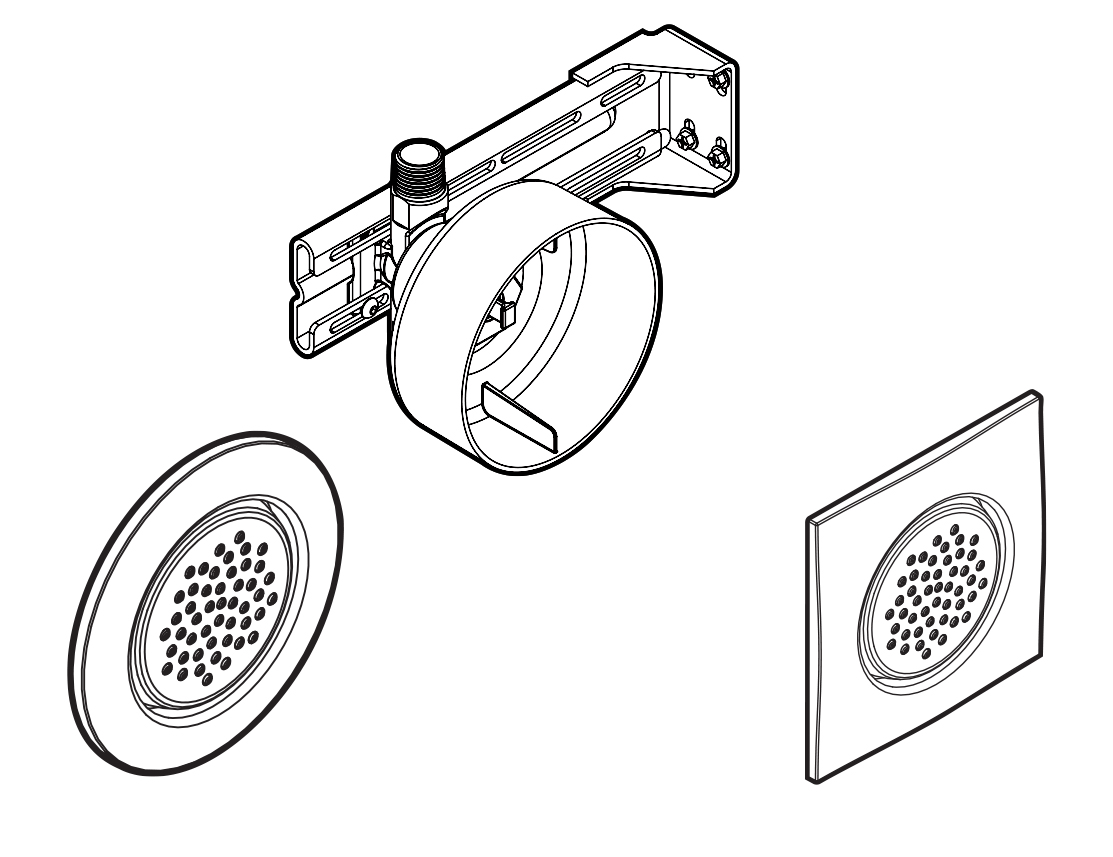
D.Bracket
E.Plaster Guard
F.Test Plug
G.Test Plug Nut
H.1/8" Hex Wrench
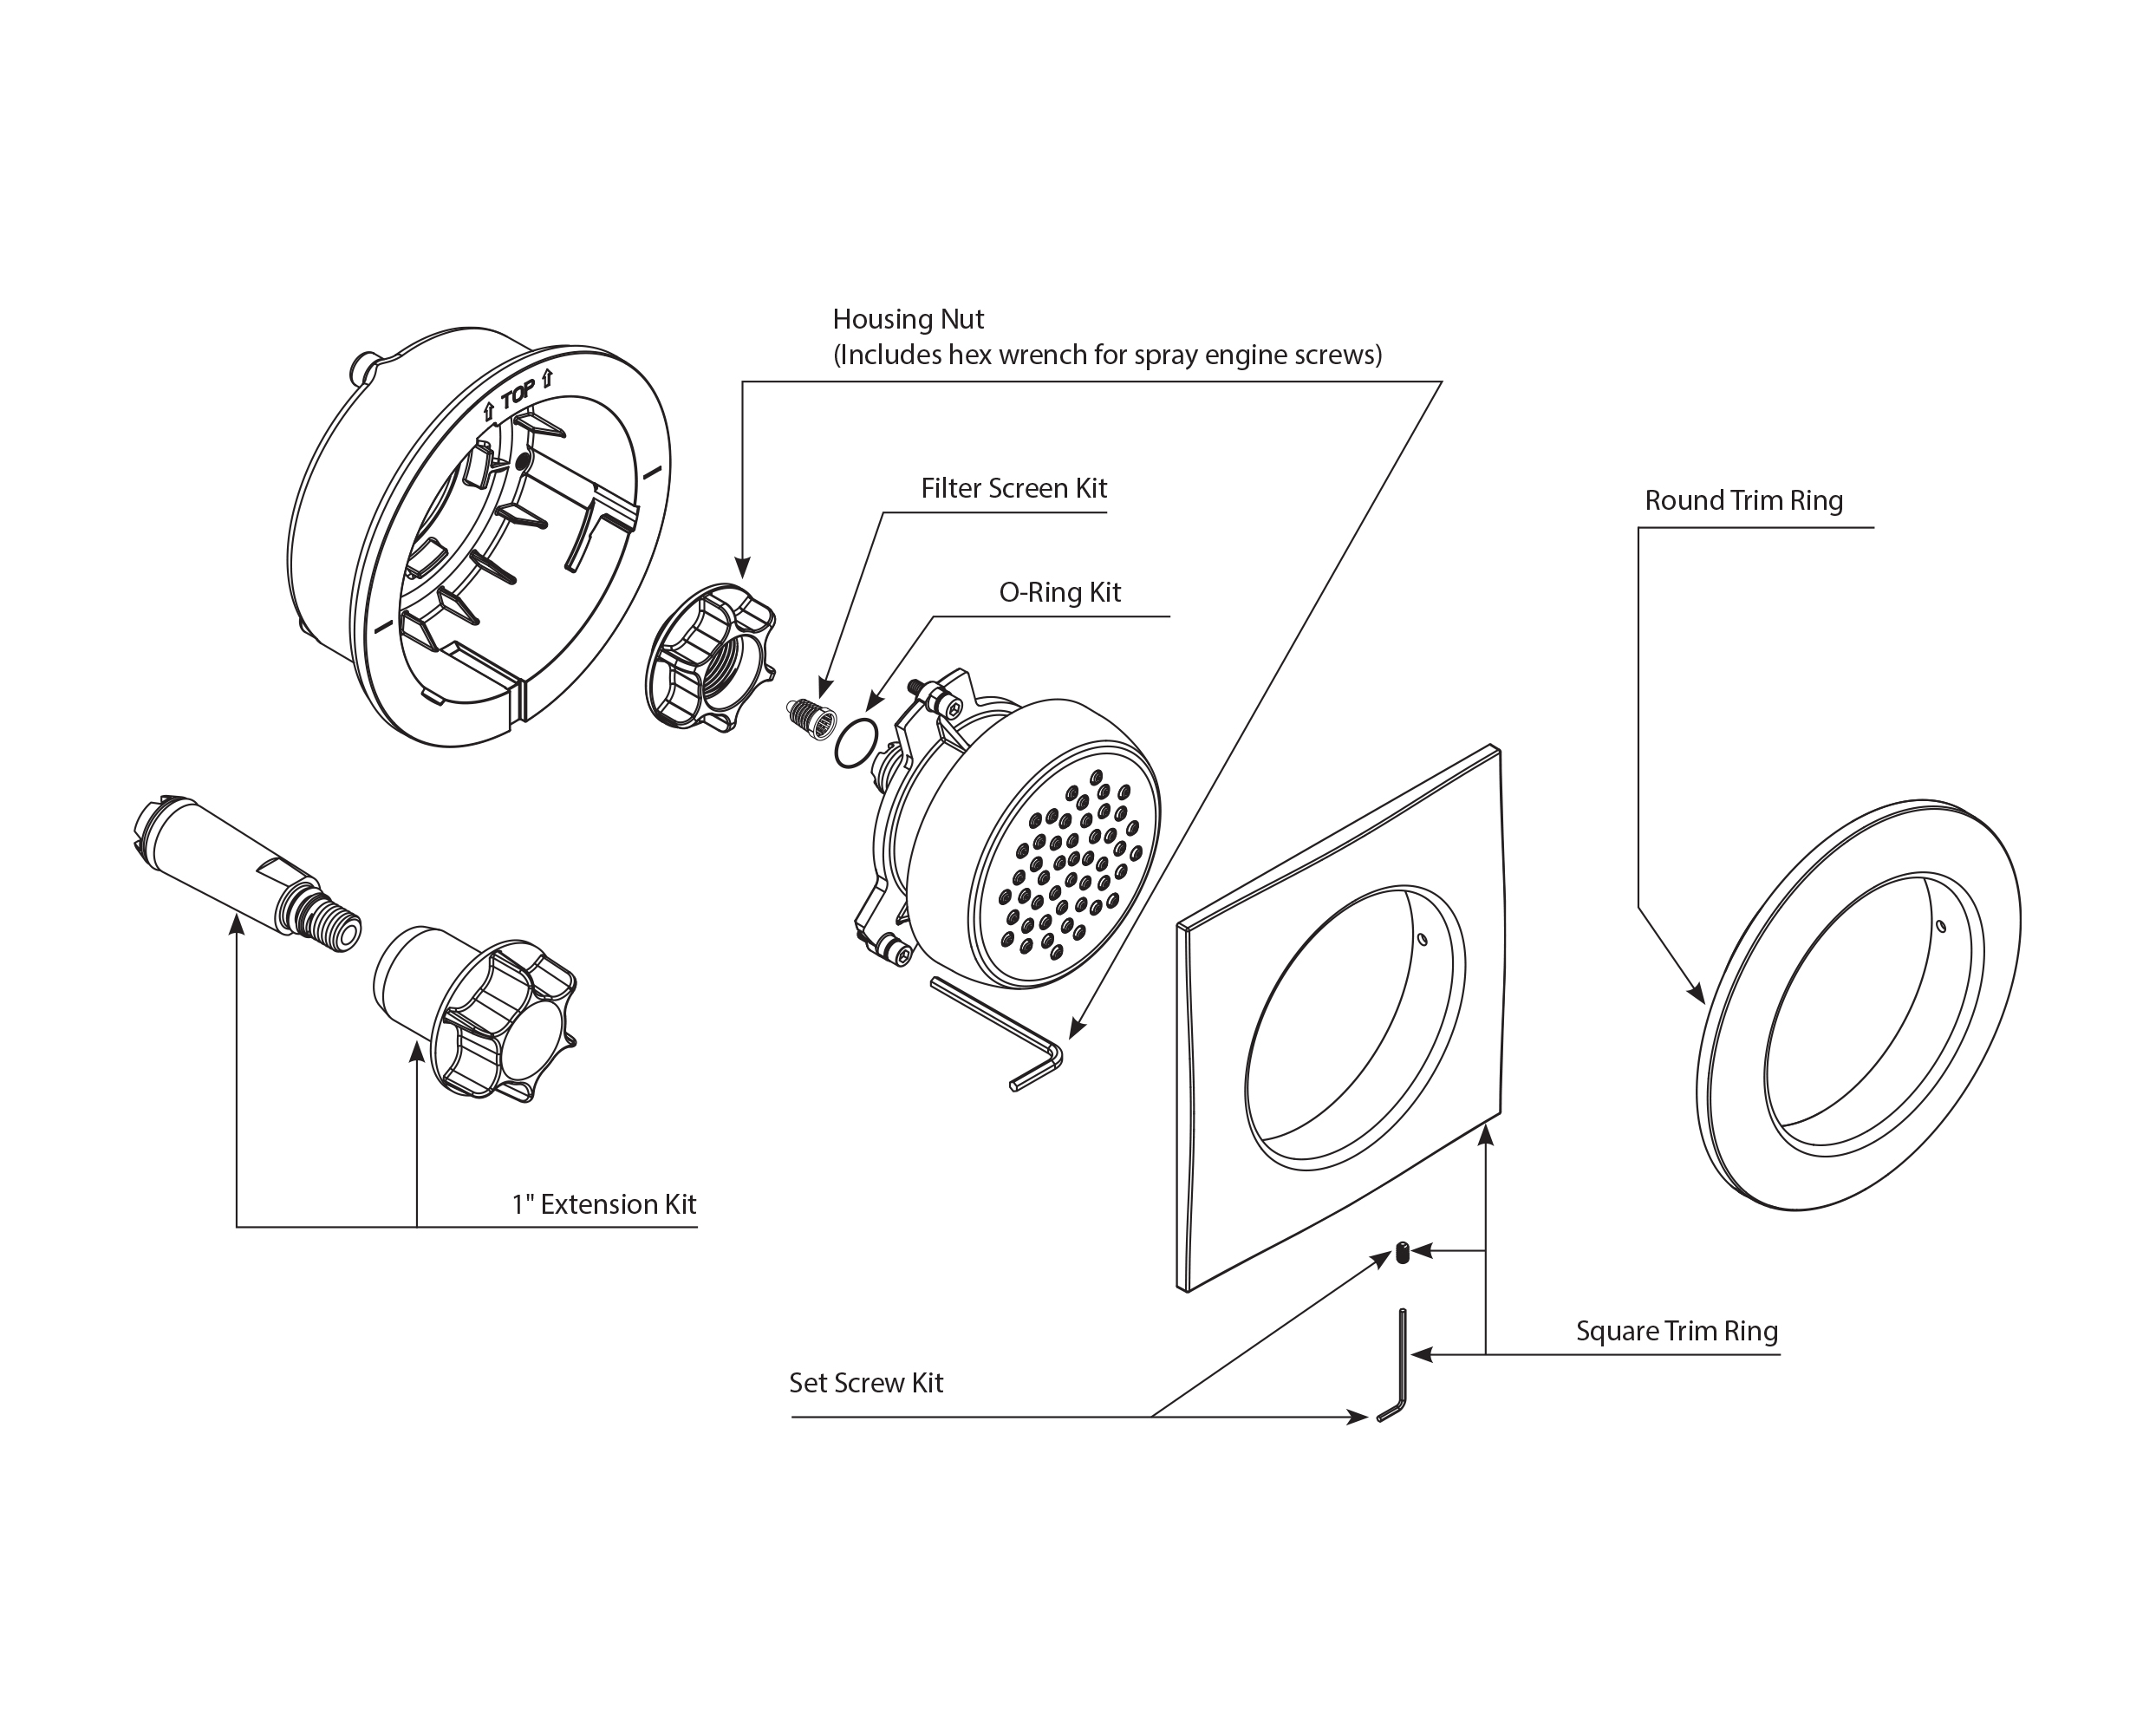
I.Housing
|
J.Housing Nut
K.Spray Assembly
L.Grease Packet
M.Trim Ring-Square
N.Trim Ring-Round
O.Set Screw
P.9/64" Hex Wrench
Q.1/16" Hex Wrench
R.Filter
|
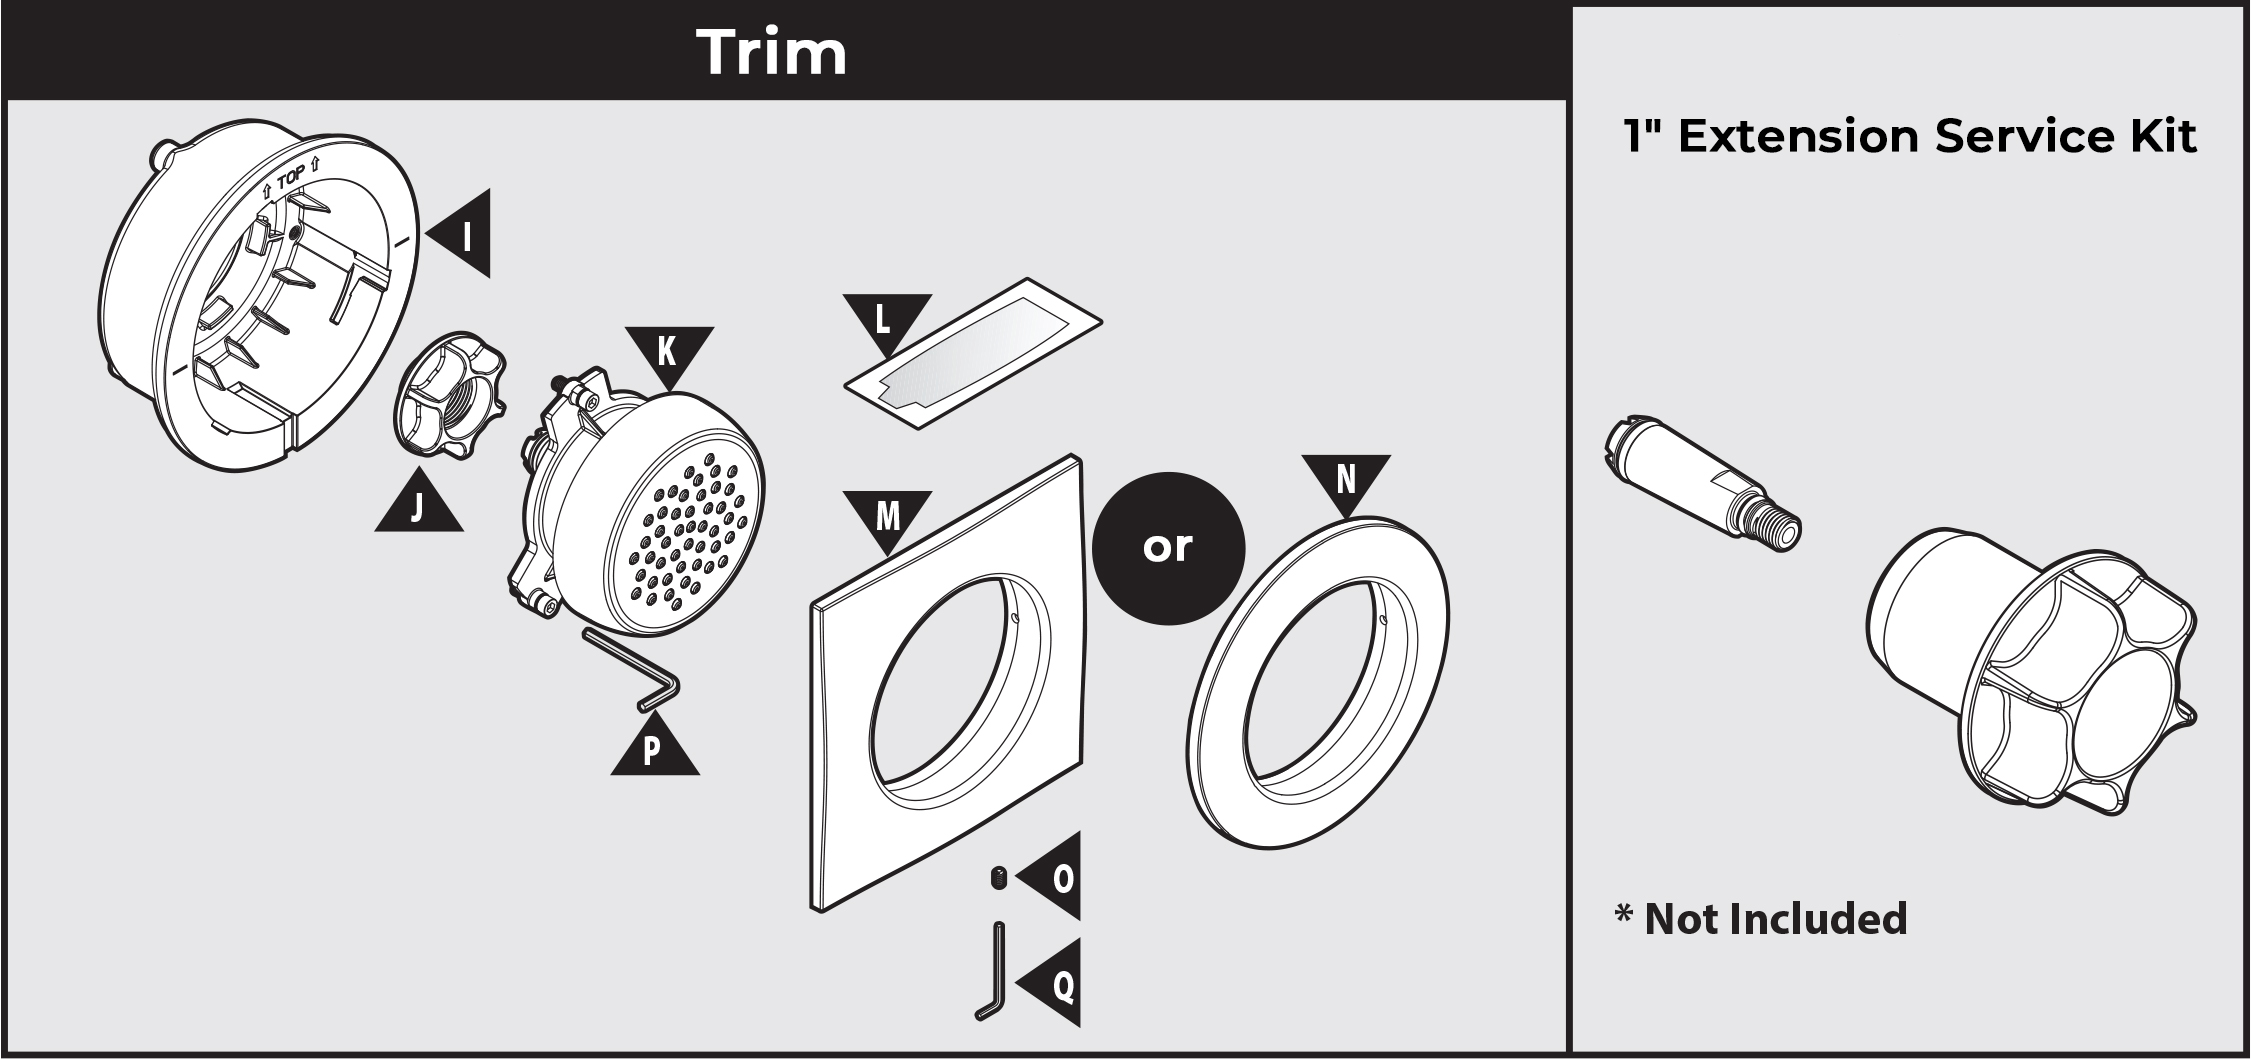
1" Extension Service Kit
* Not Included
Rough-In Installation
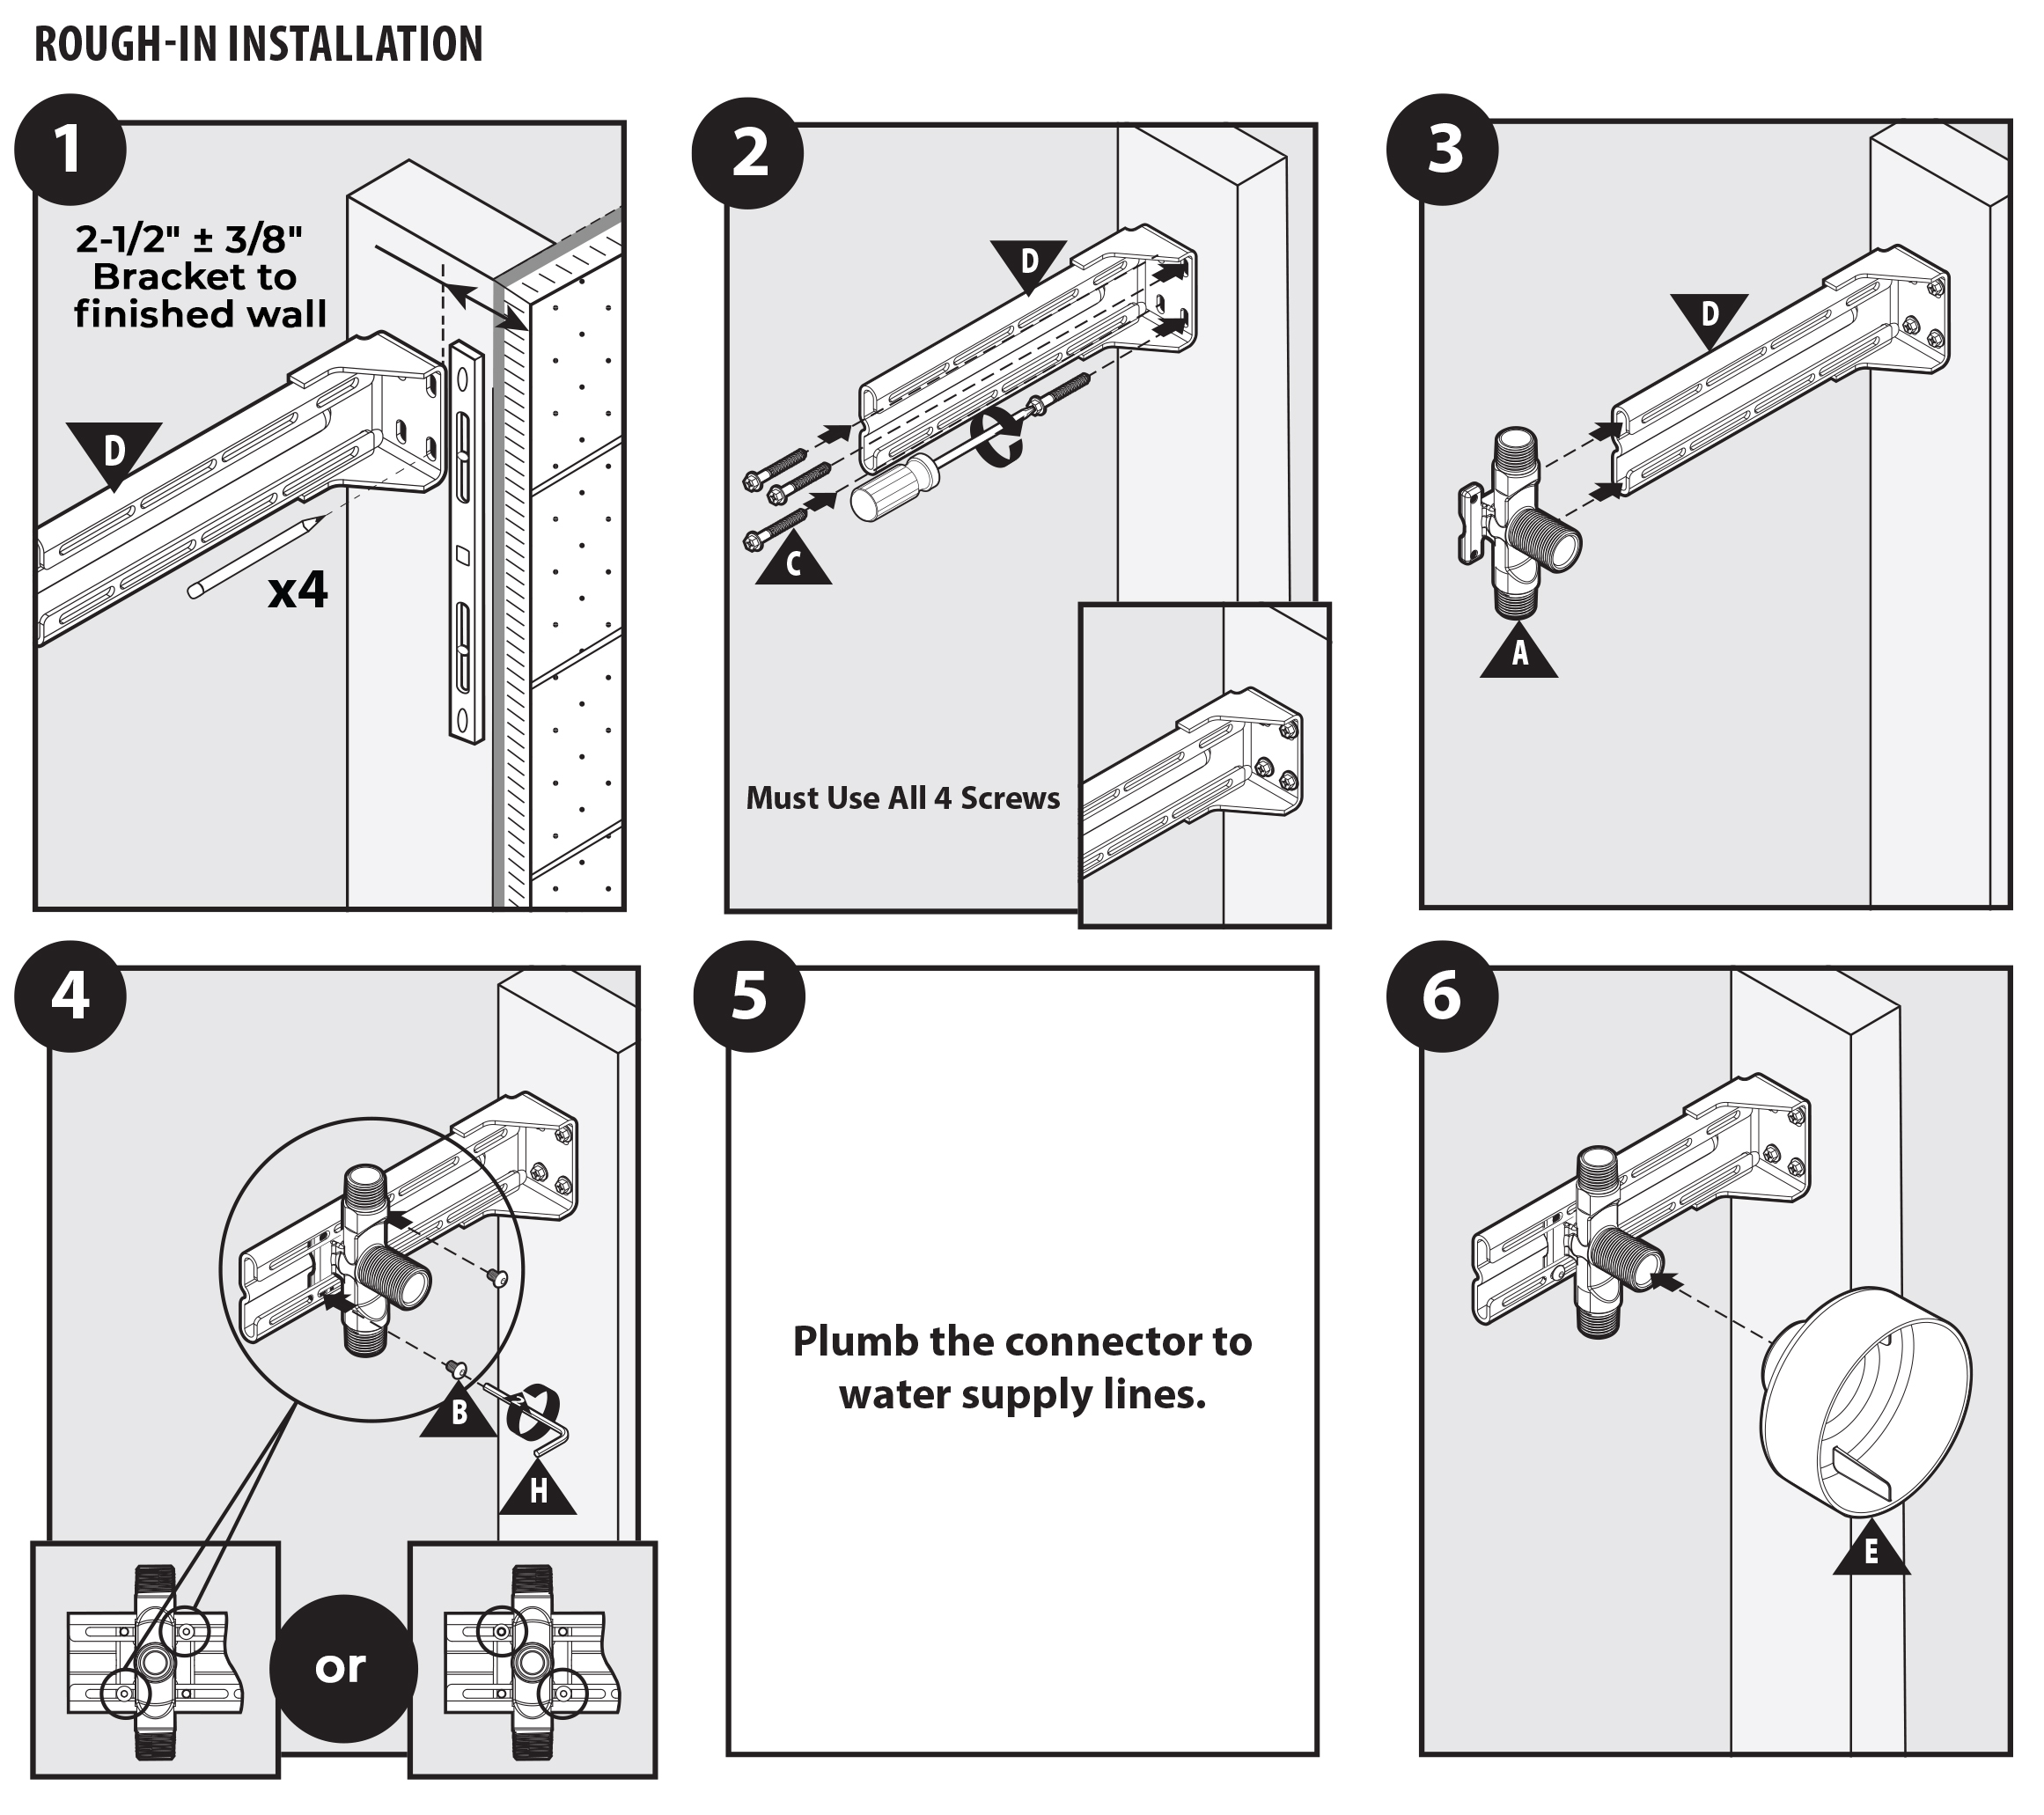
5. Plumb the connector to water supply lines.
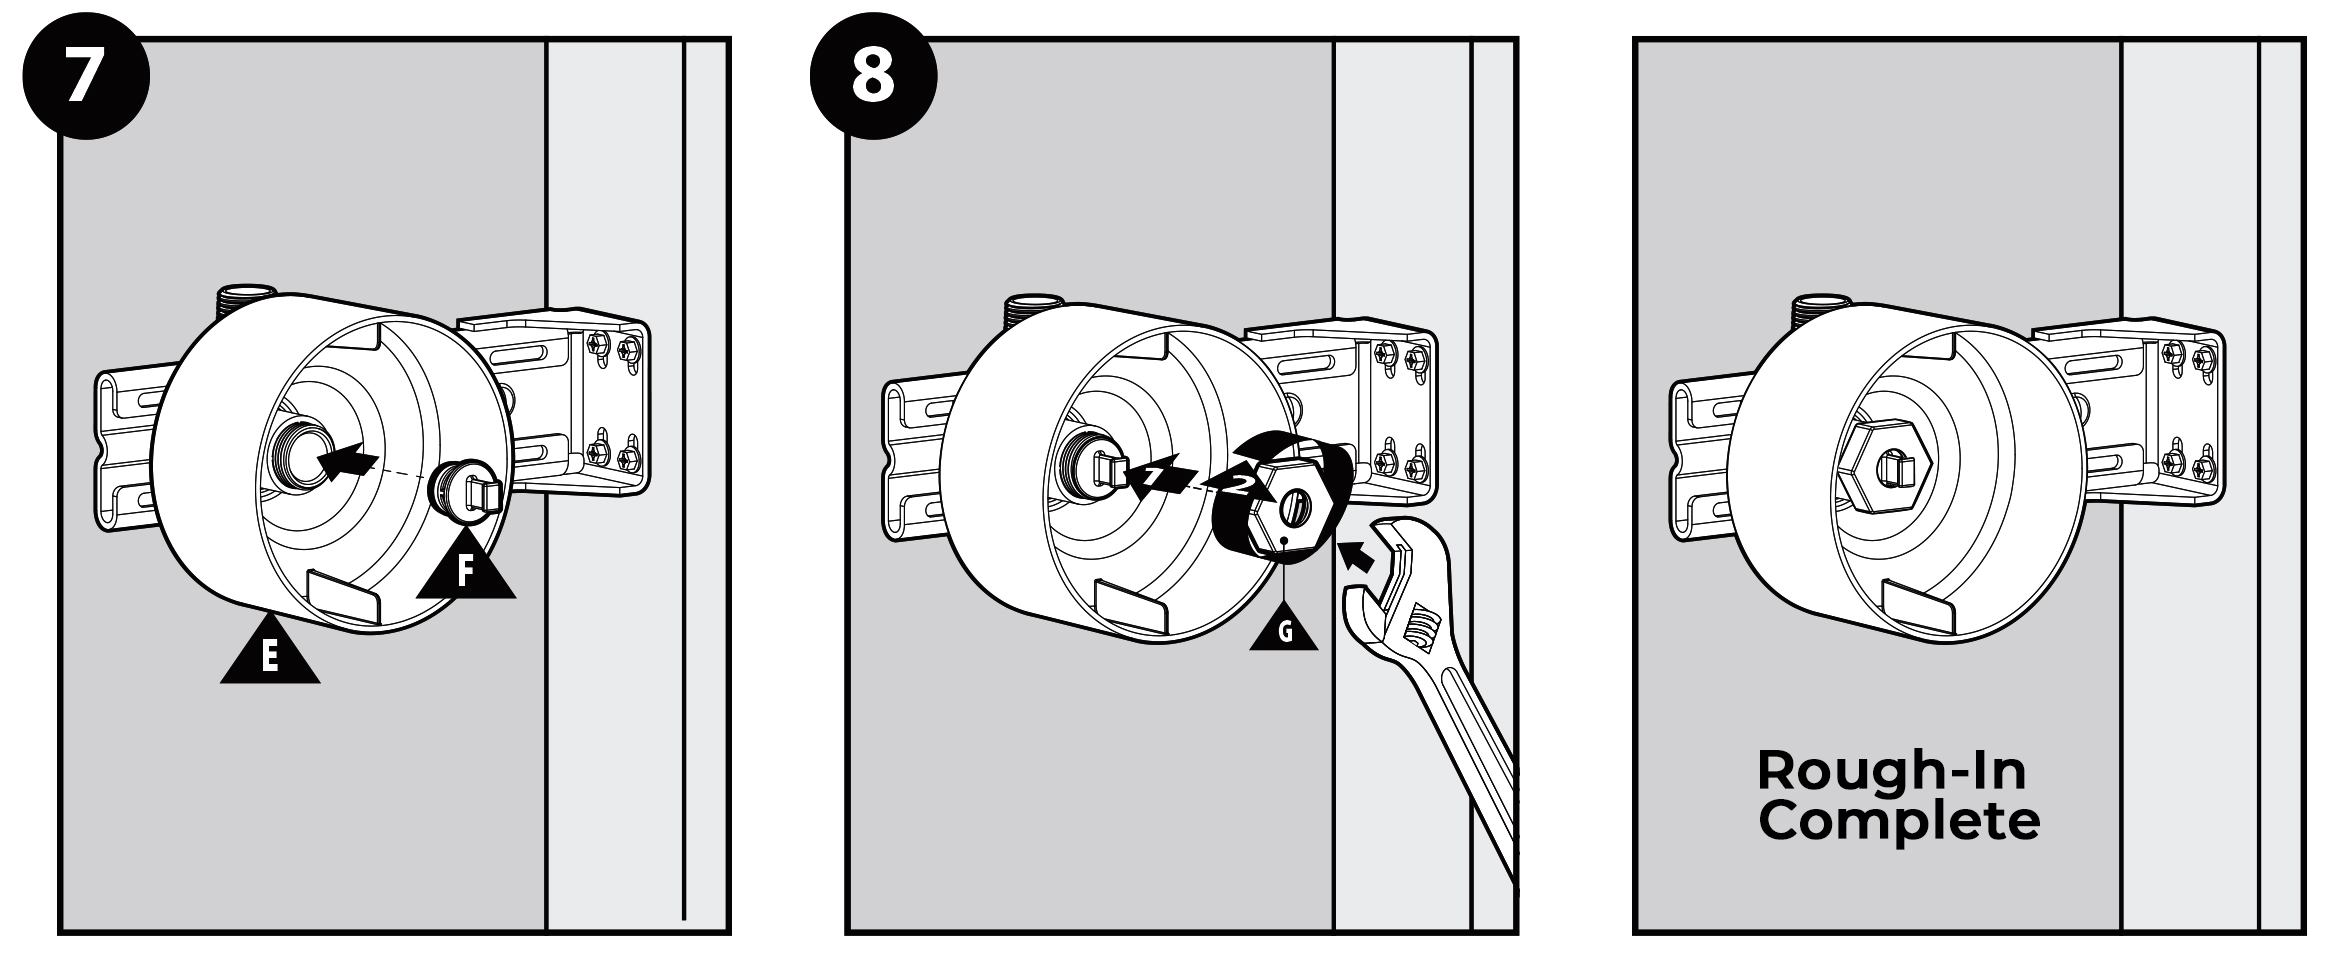
Rough-In Complete
Trim Installation
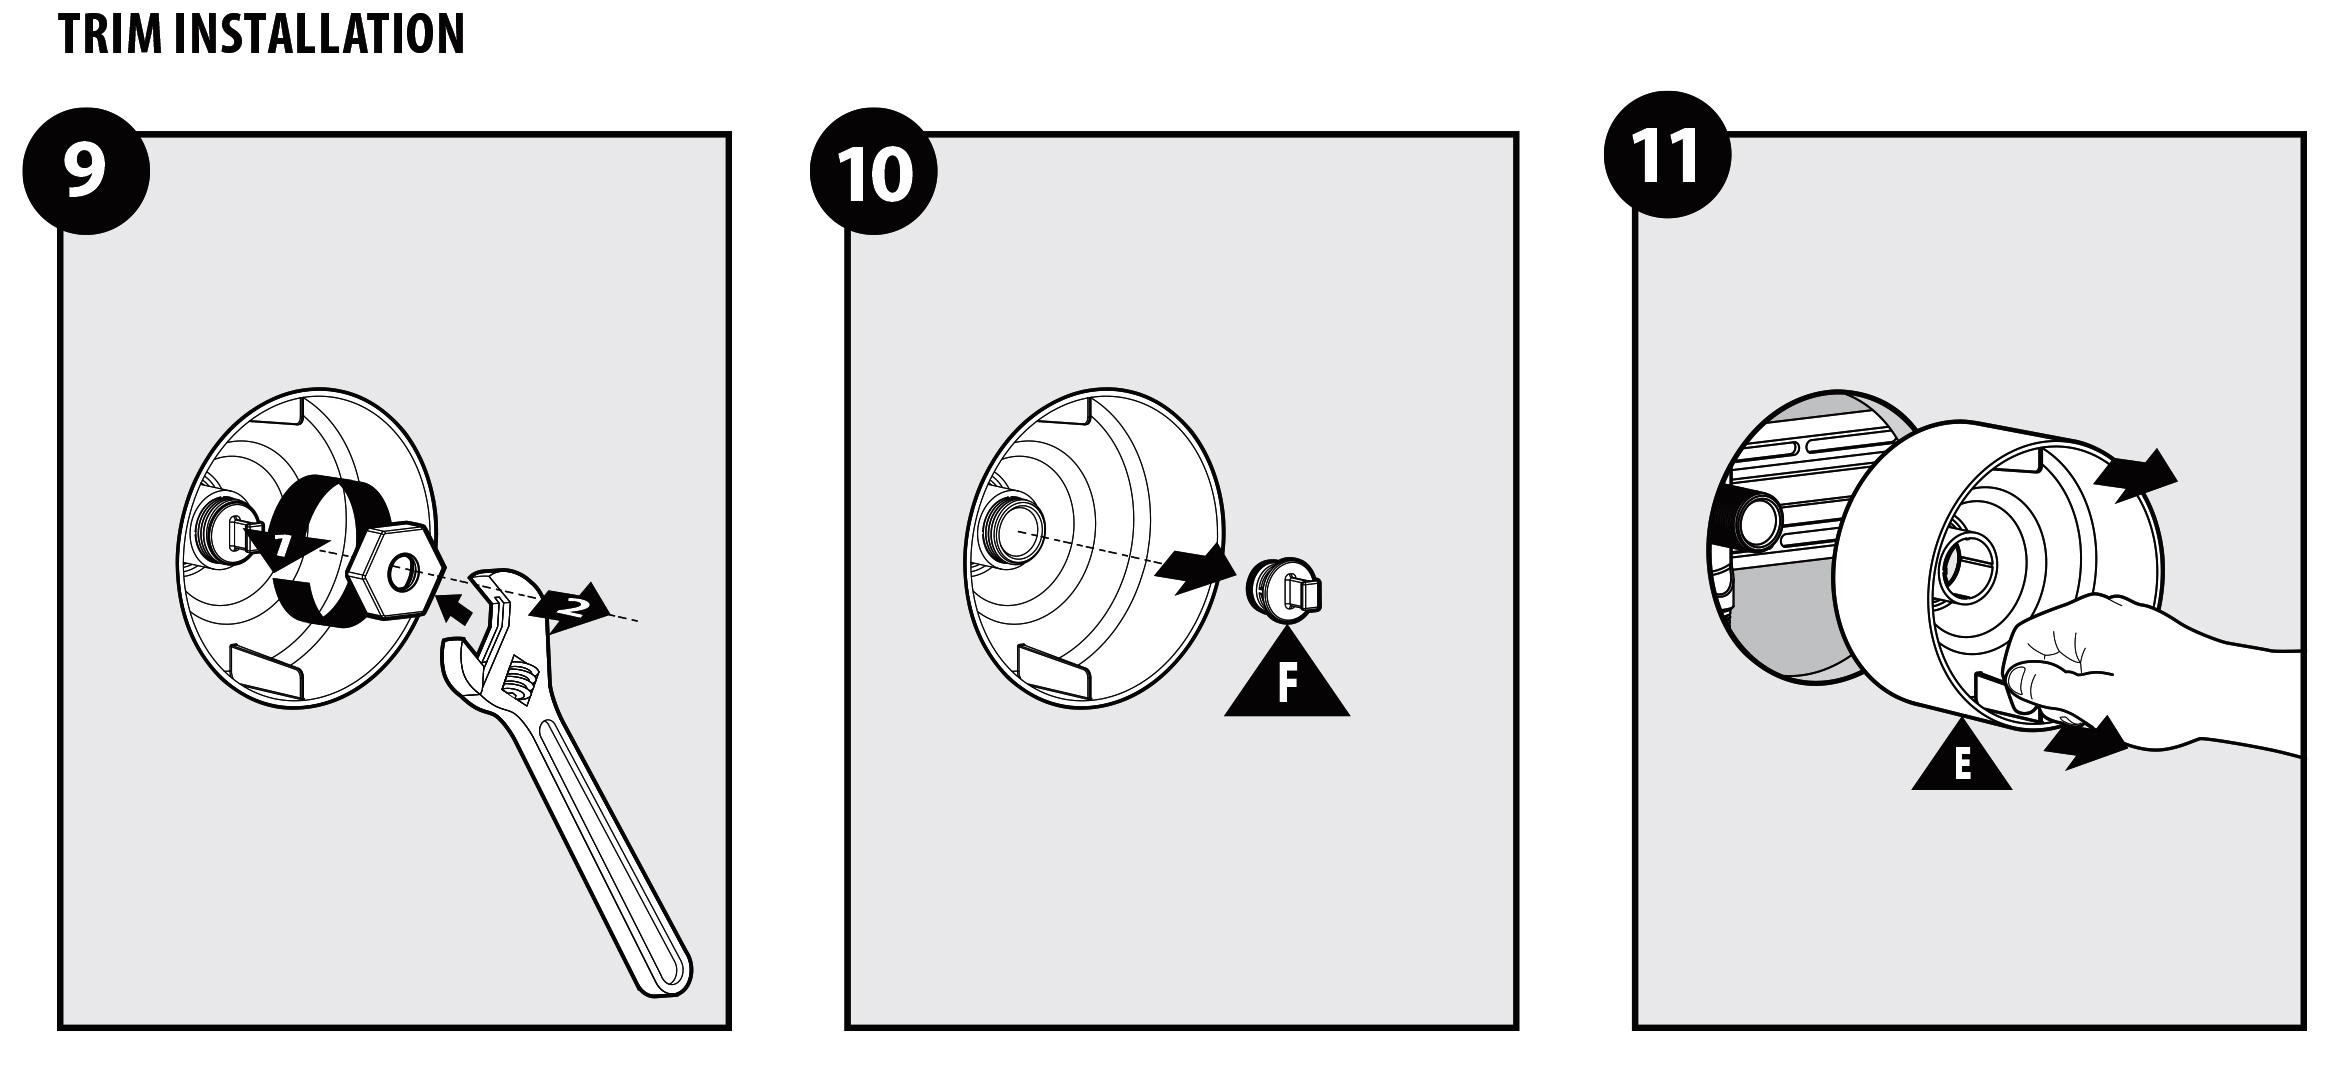 
12. If distance is less than or equal to 2-1/8" (54mm), proceed to step 13. If distance is greater than 2-118", order 1" extension kit.
13 (A). Tighten housing nut (J) until housing (I) is secure and does not spin on wall.
14. Flush system before next step.
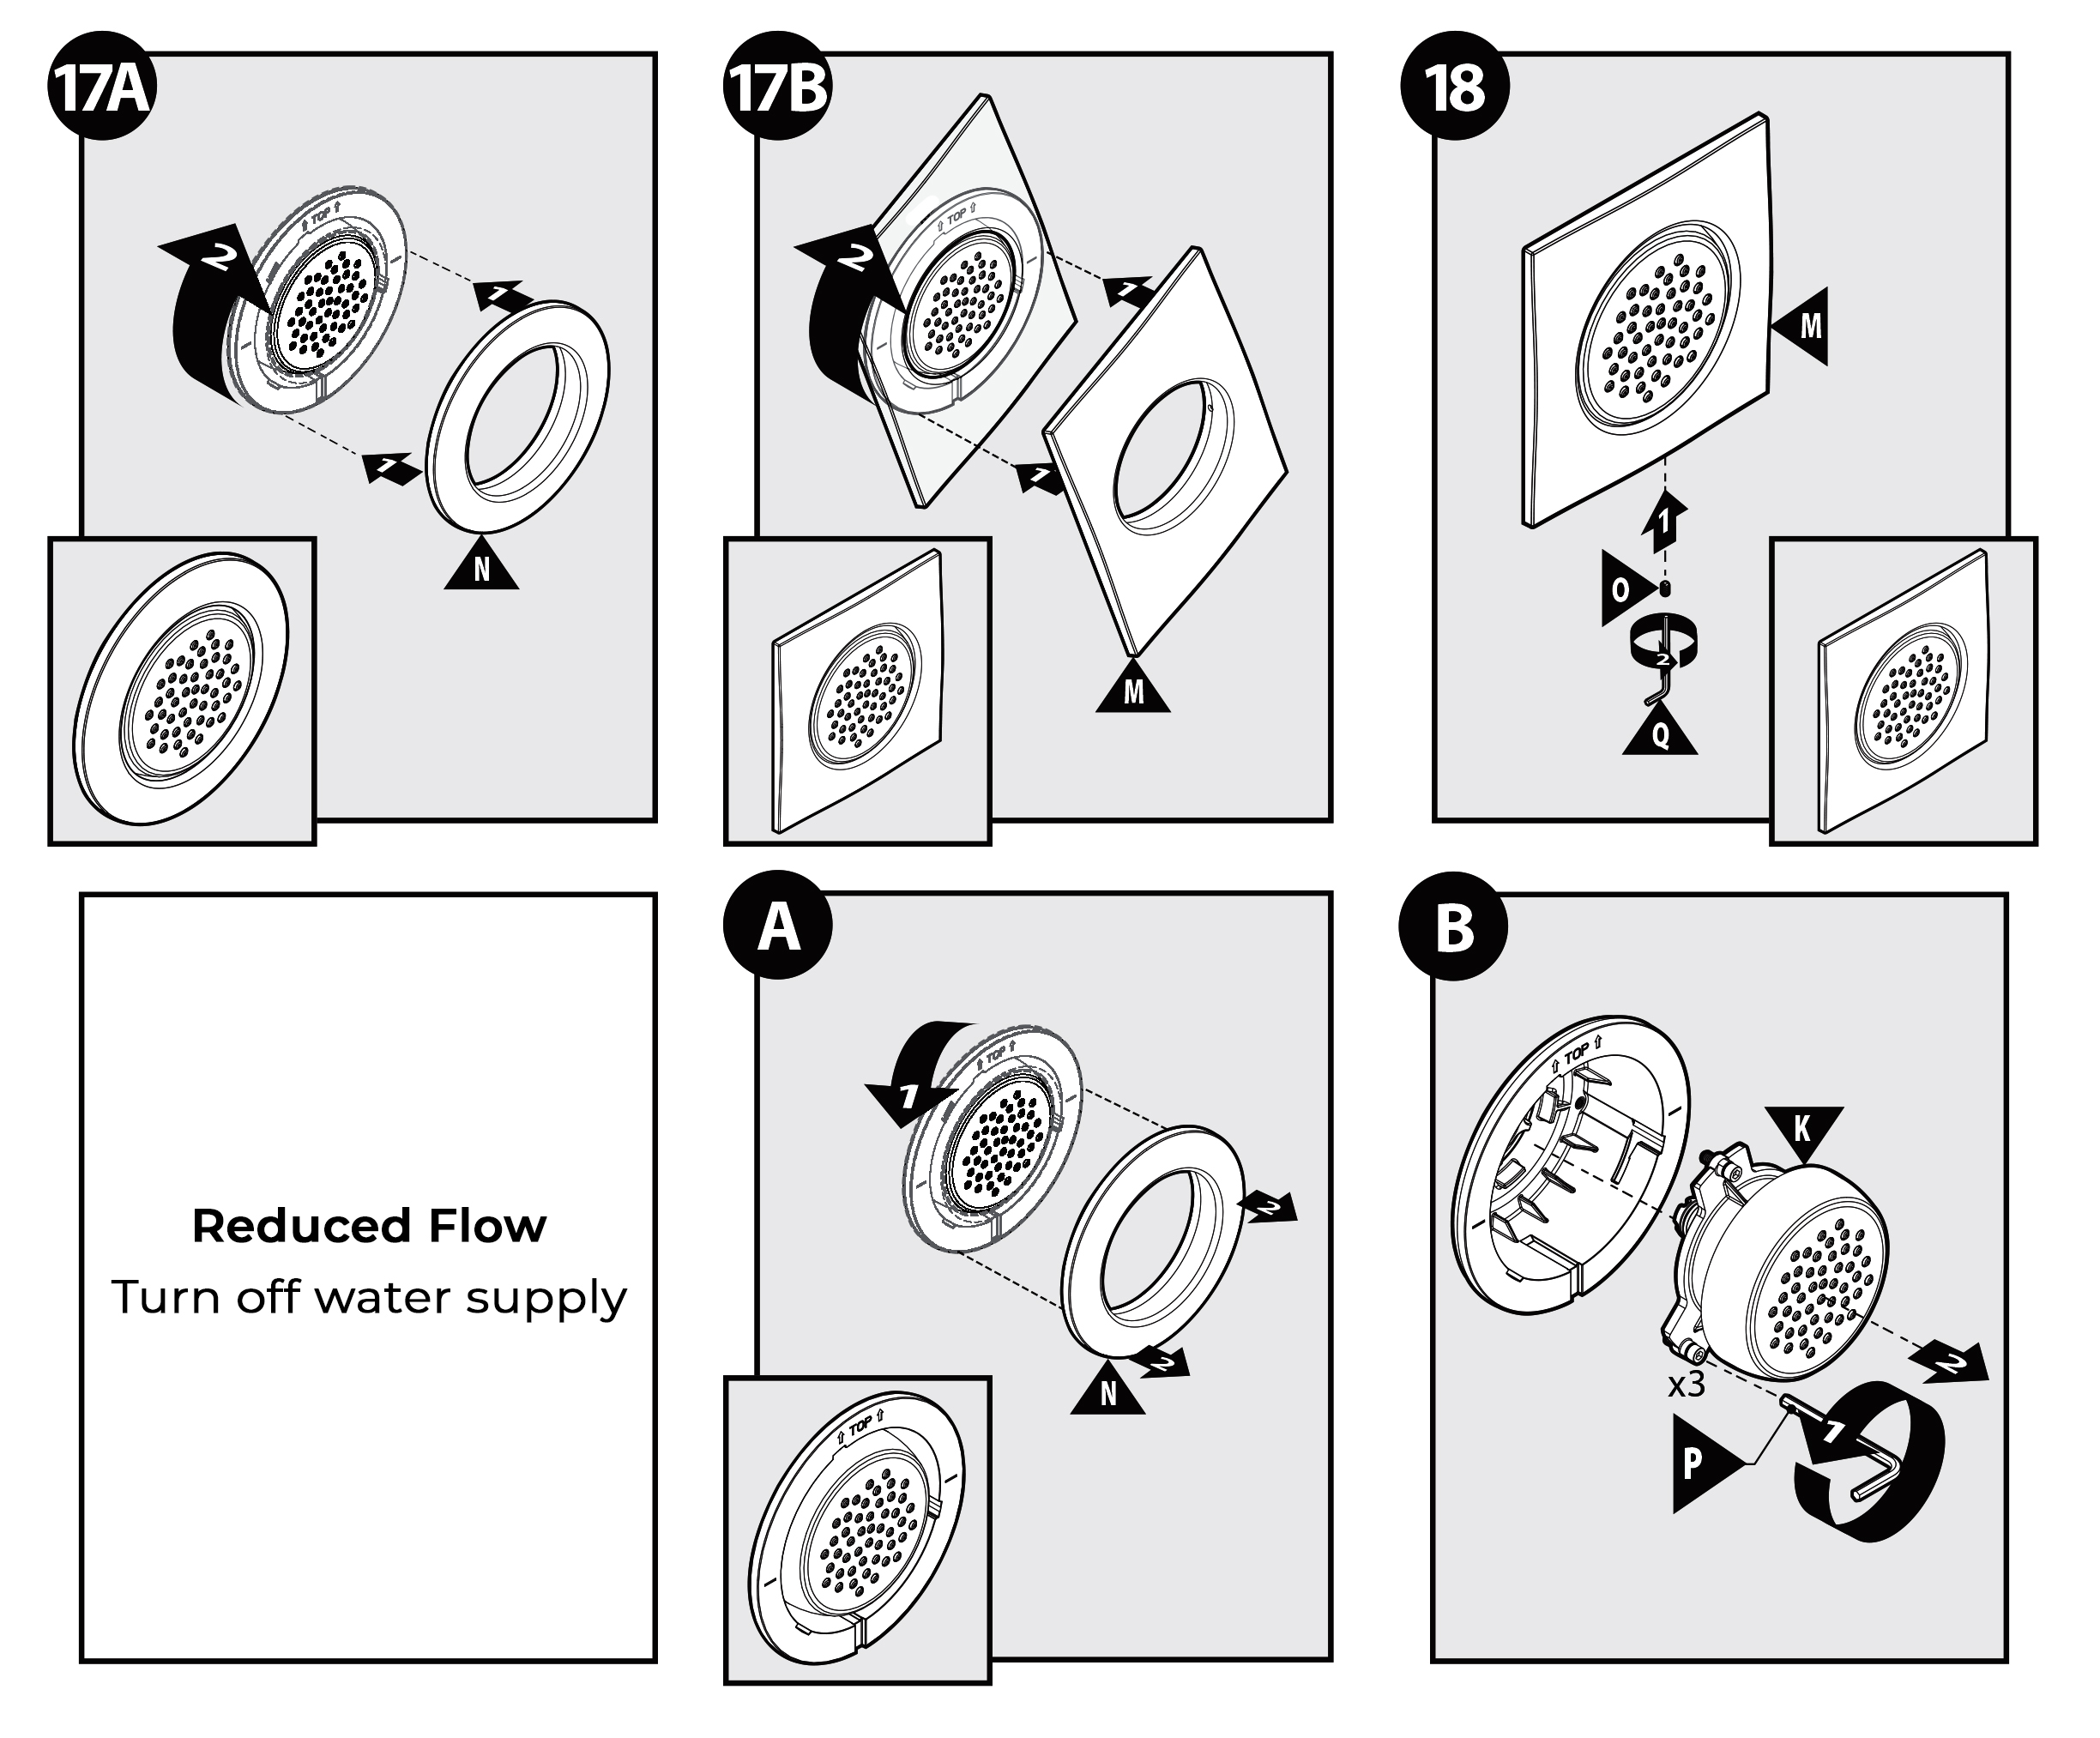 Reduced Flow Turn off water supply 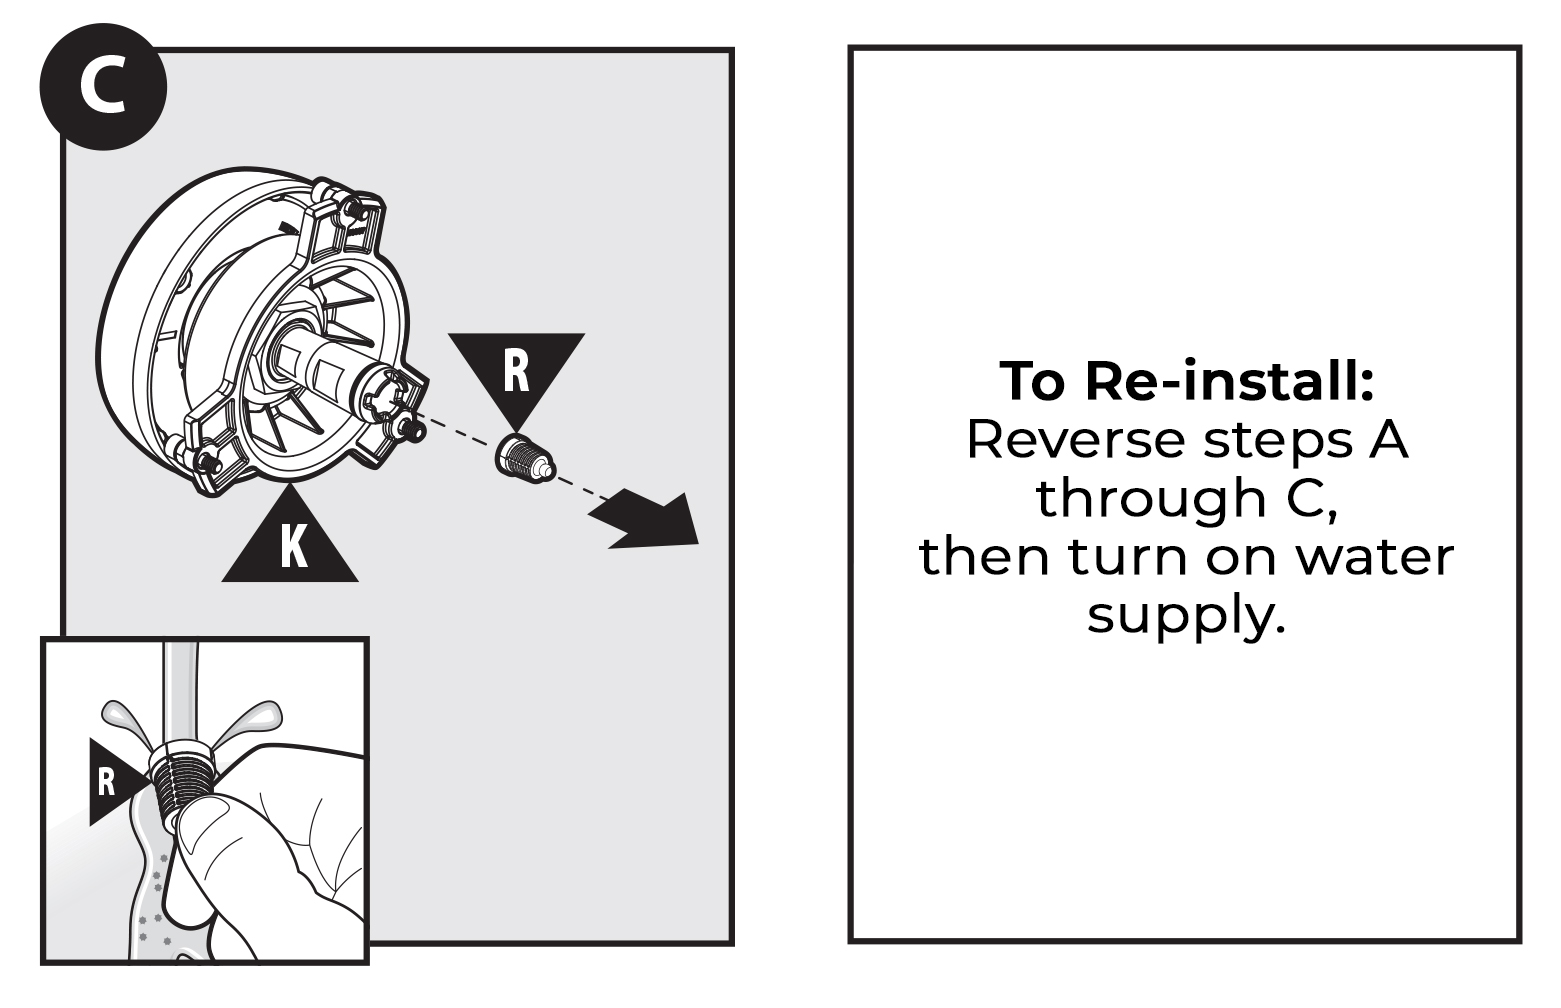 To Re-install: To Re-install:
Reverse steps A through C,
then turn on water supply.
Digital Controller Installation
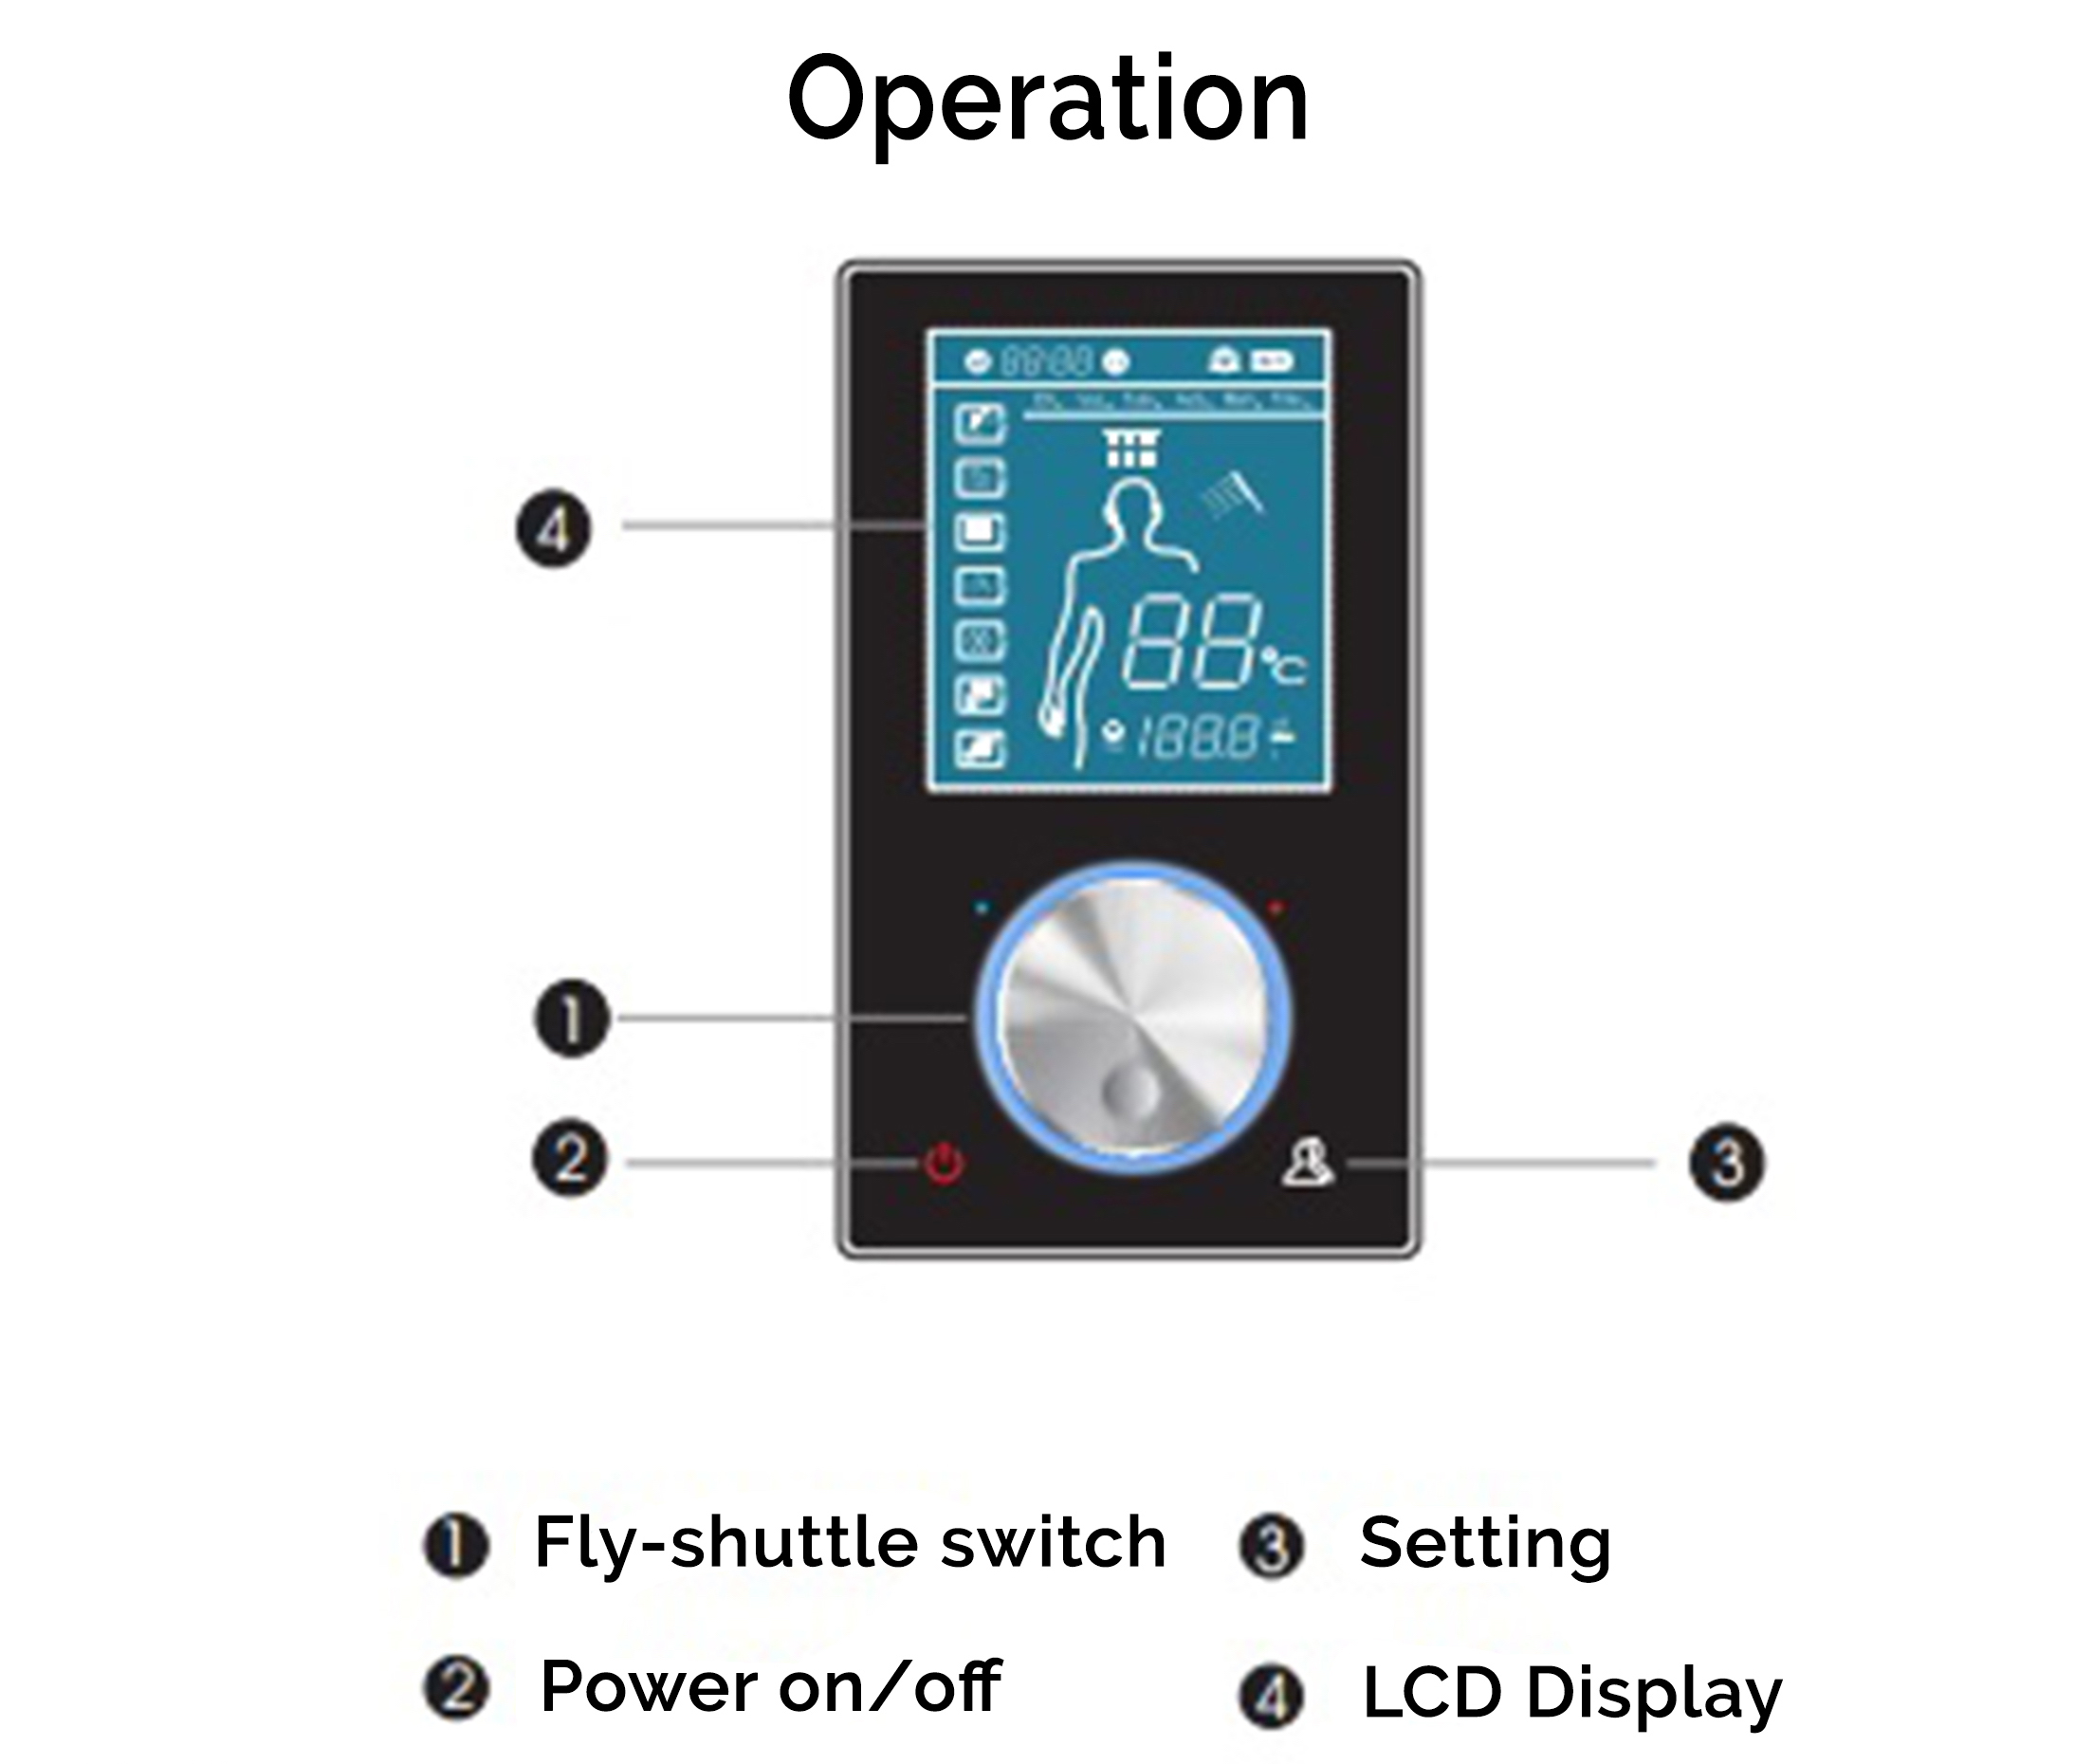
Operation
·
Fly-shuttle switch
·
Setting
·
Power on/off
·
LCD Display
|
|
|