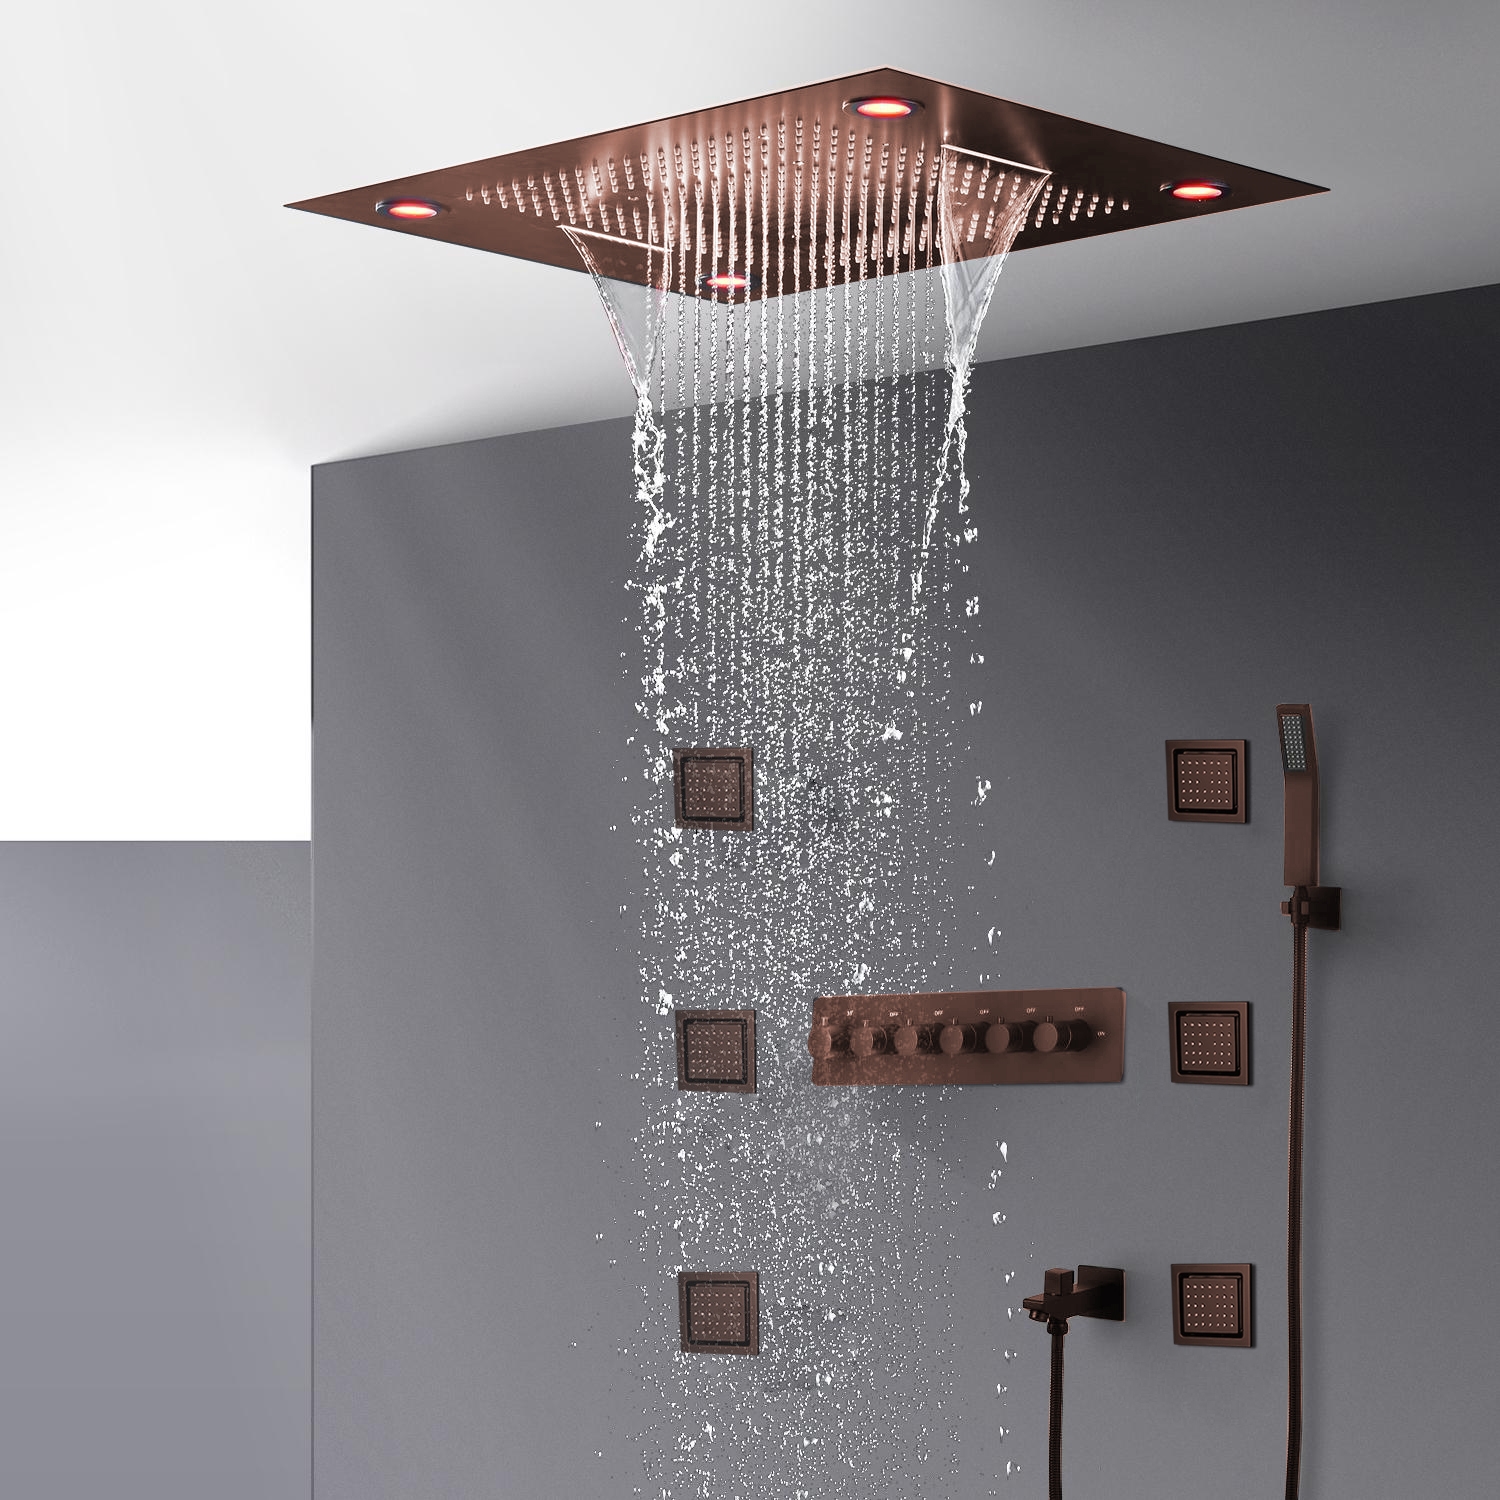
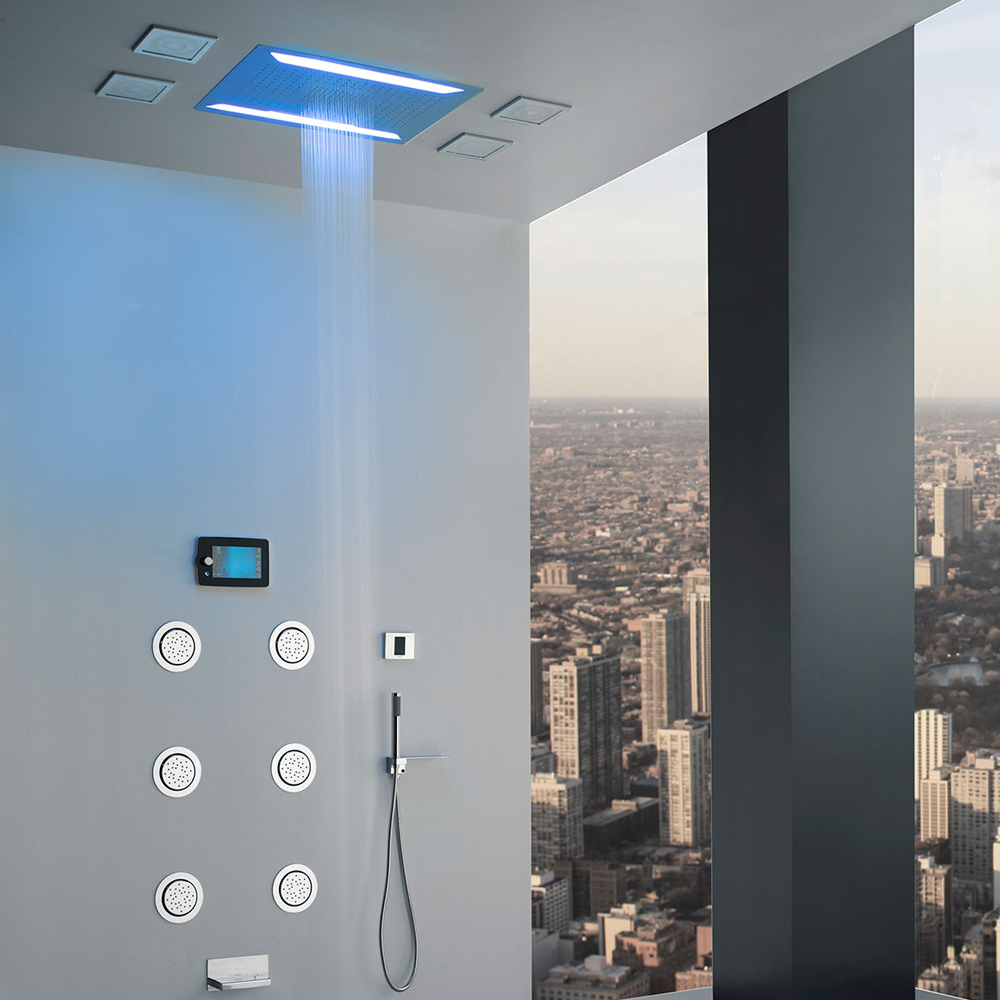
How to Install BathSelect Romantic Environment LED Showerhead With Stress-Free Body Jet & Hand Held Shower | BS9640J
Important Note:
Before you begin, please read the installation instructions below. Observe all local building and safety codes.
Unpack and inspect the products for any shipping damages. If you find damages, do not install.
Please note all products must be installed by a professional and certified plumber otherwise warranty might be voided.
|
|
Shower Head Installation Instructions
| Step 1: | | Step 2: | | 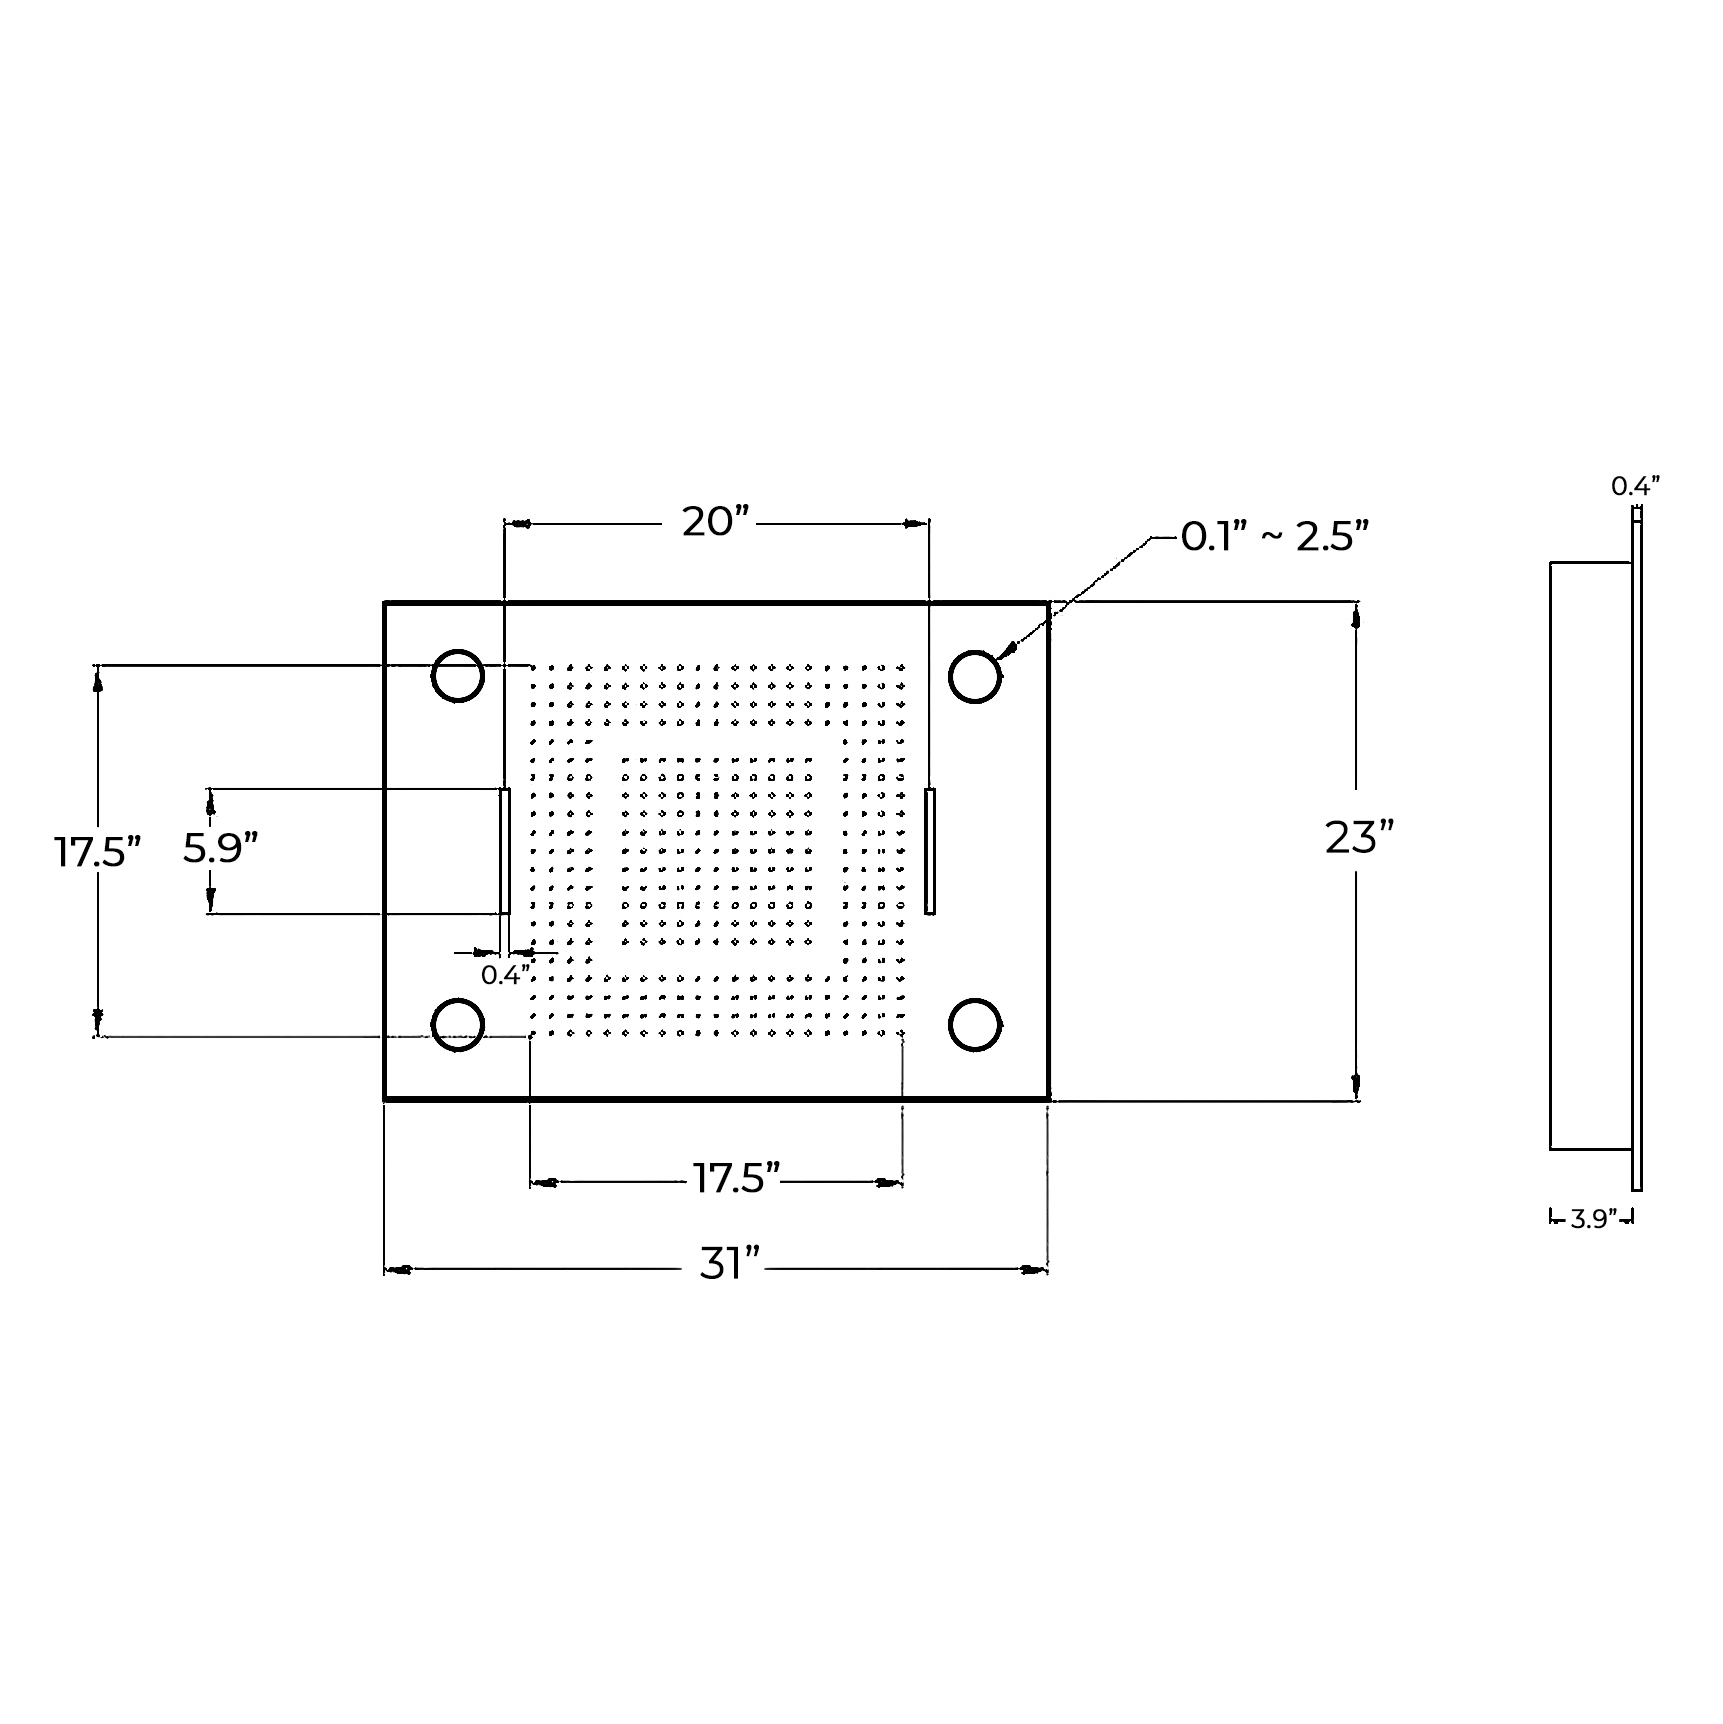 | shower | 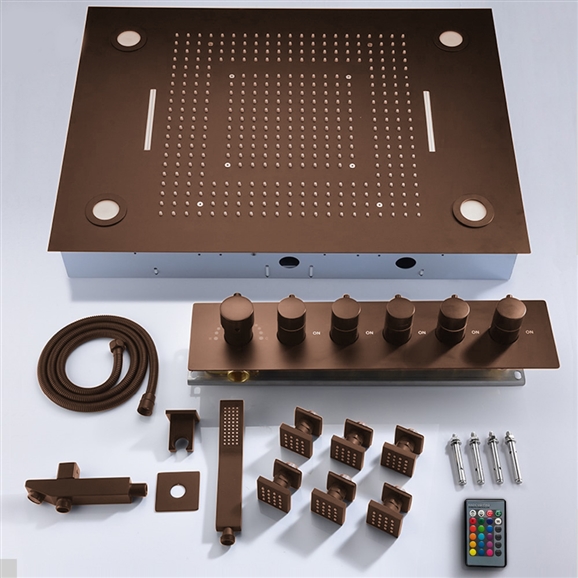 |  | | LED Shower Head Installation Instructions | | | | | Step 3: | | Step 4: | | 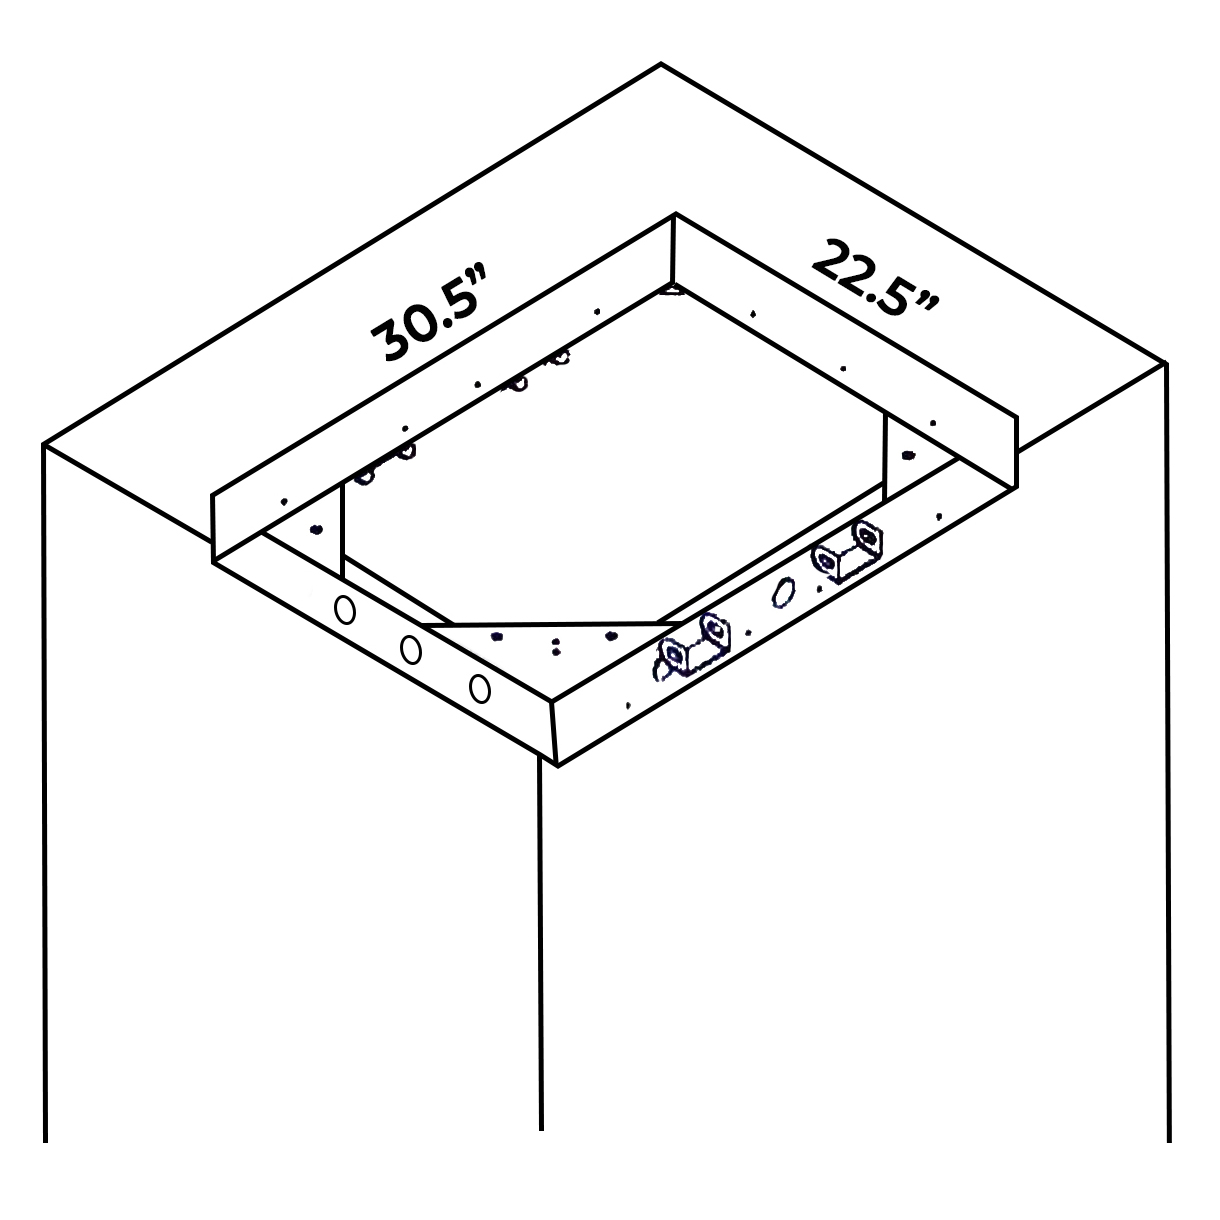 | |  | | | According to the dimensions and shape of the mounting bracket, determine the bracket location to be installed in the ceiling. | | According to the 8 mounting holes on the mounting bracket, use an Electric drill to make the mounting holes. | | | Shower Head Installation Instructions | | | | | Step 5: | | Step 6: | | 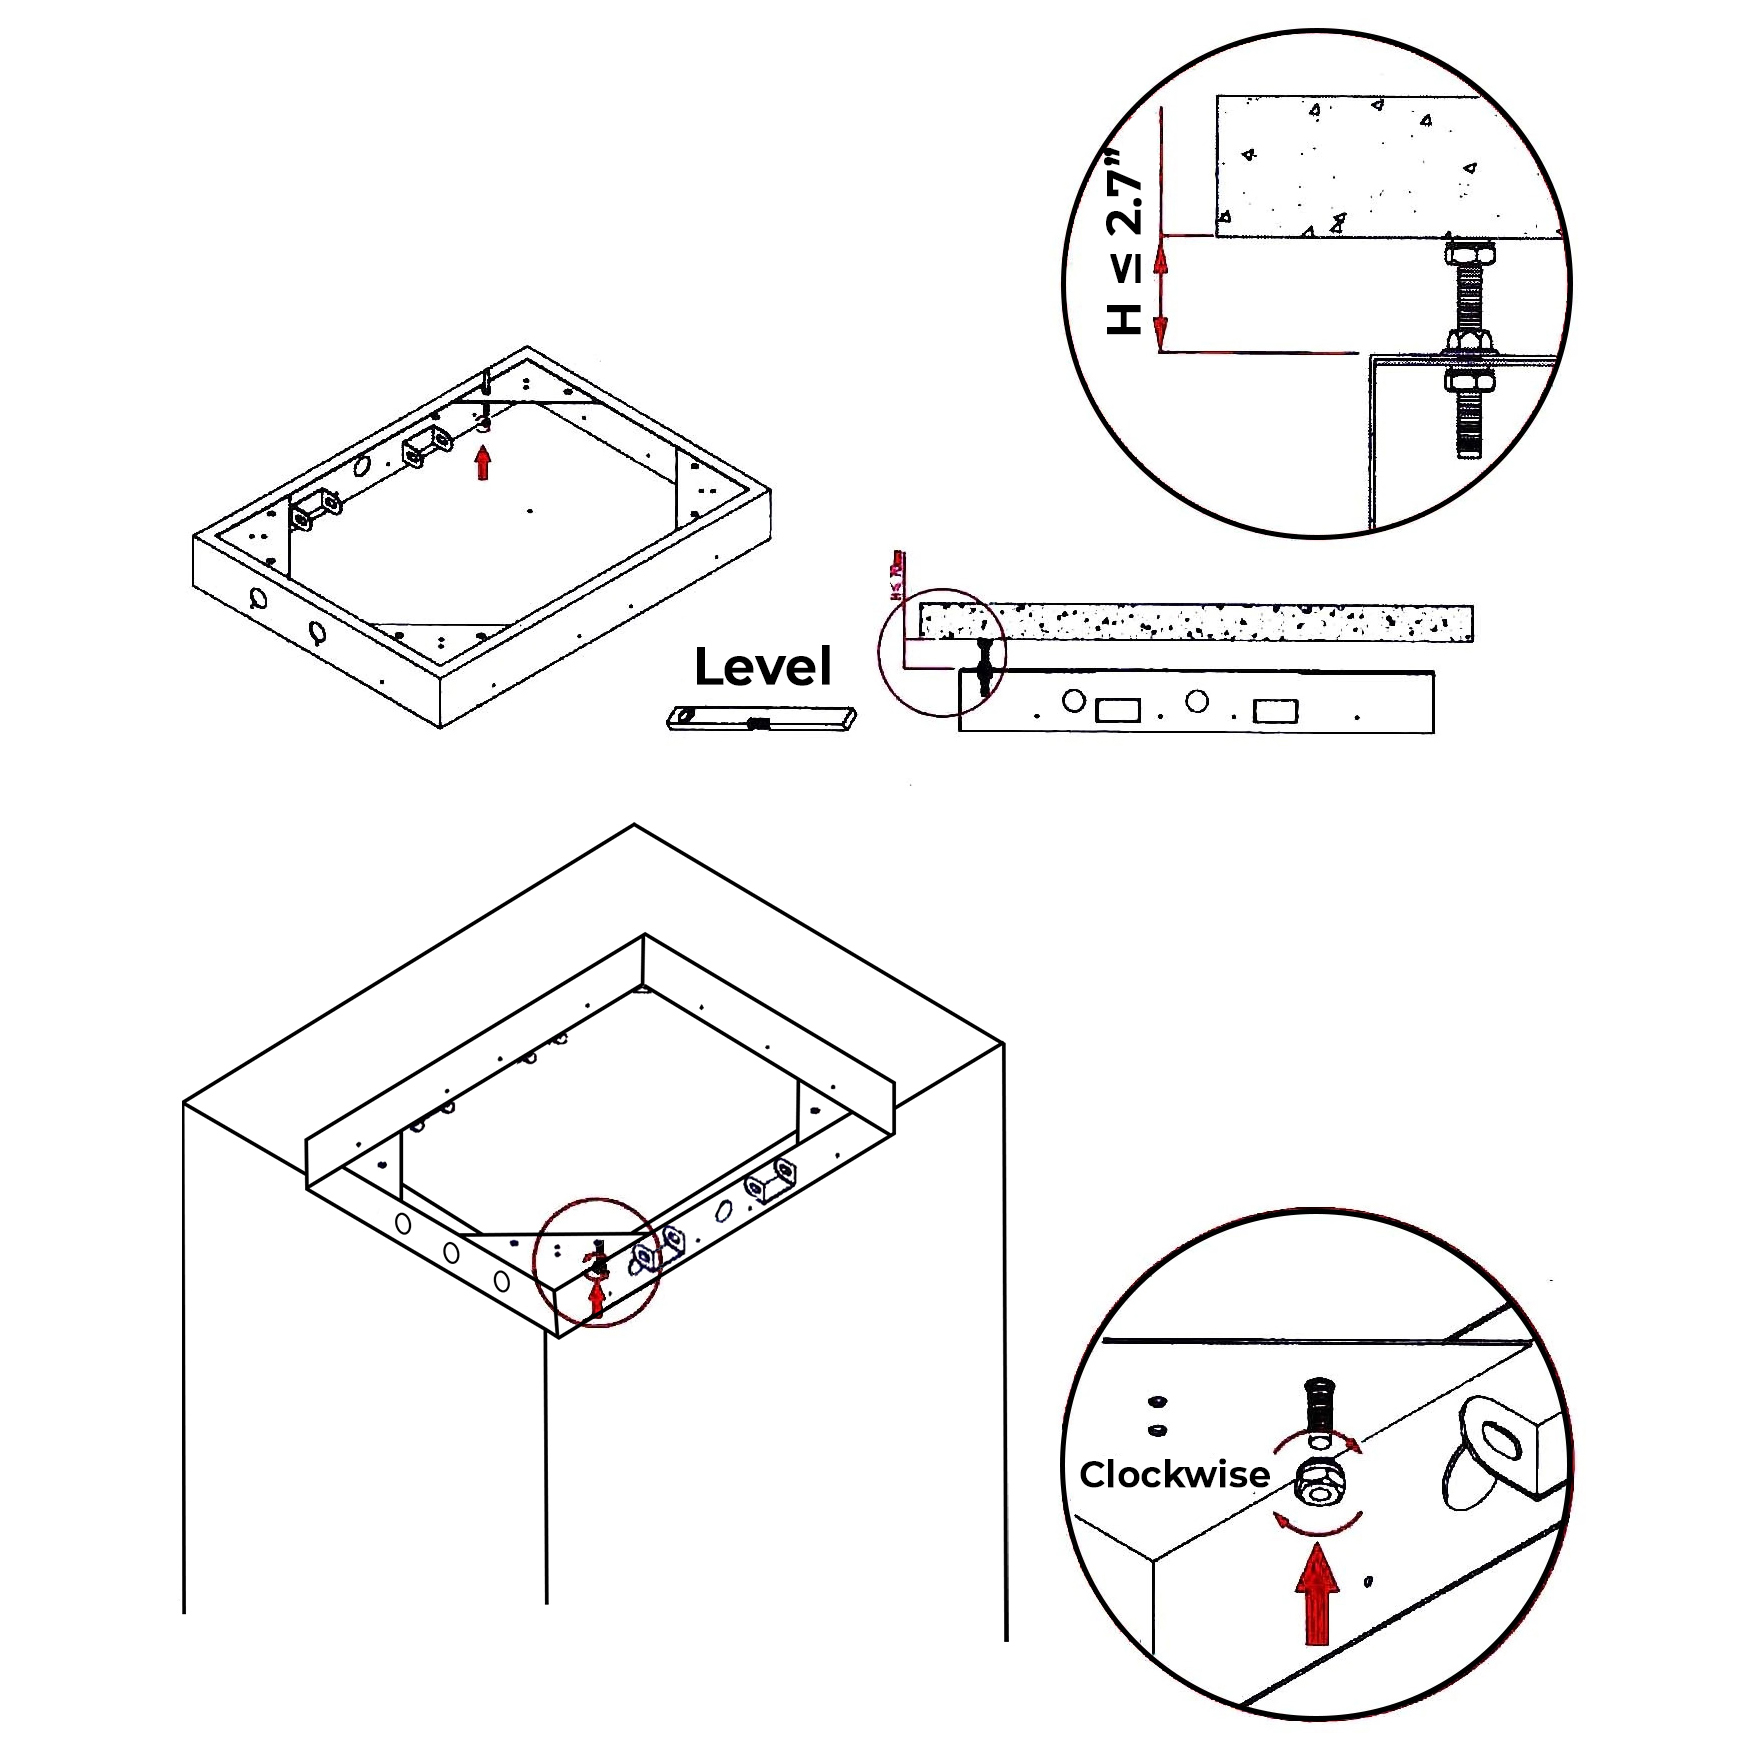 | | 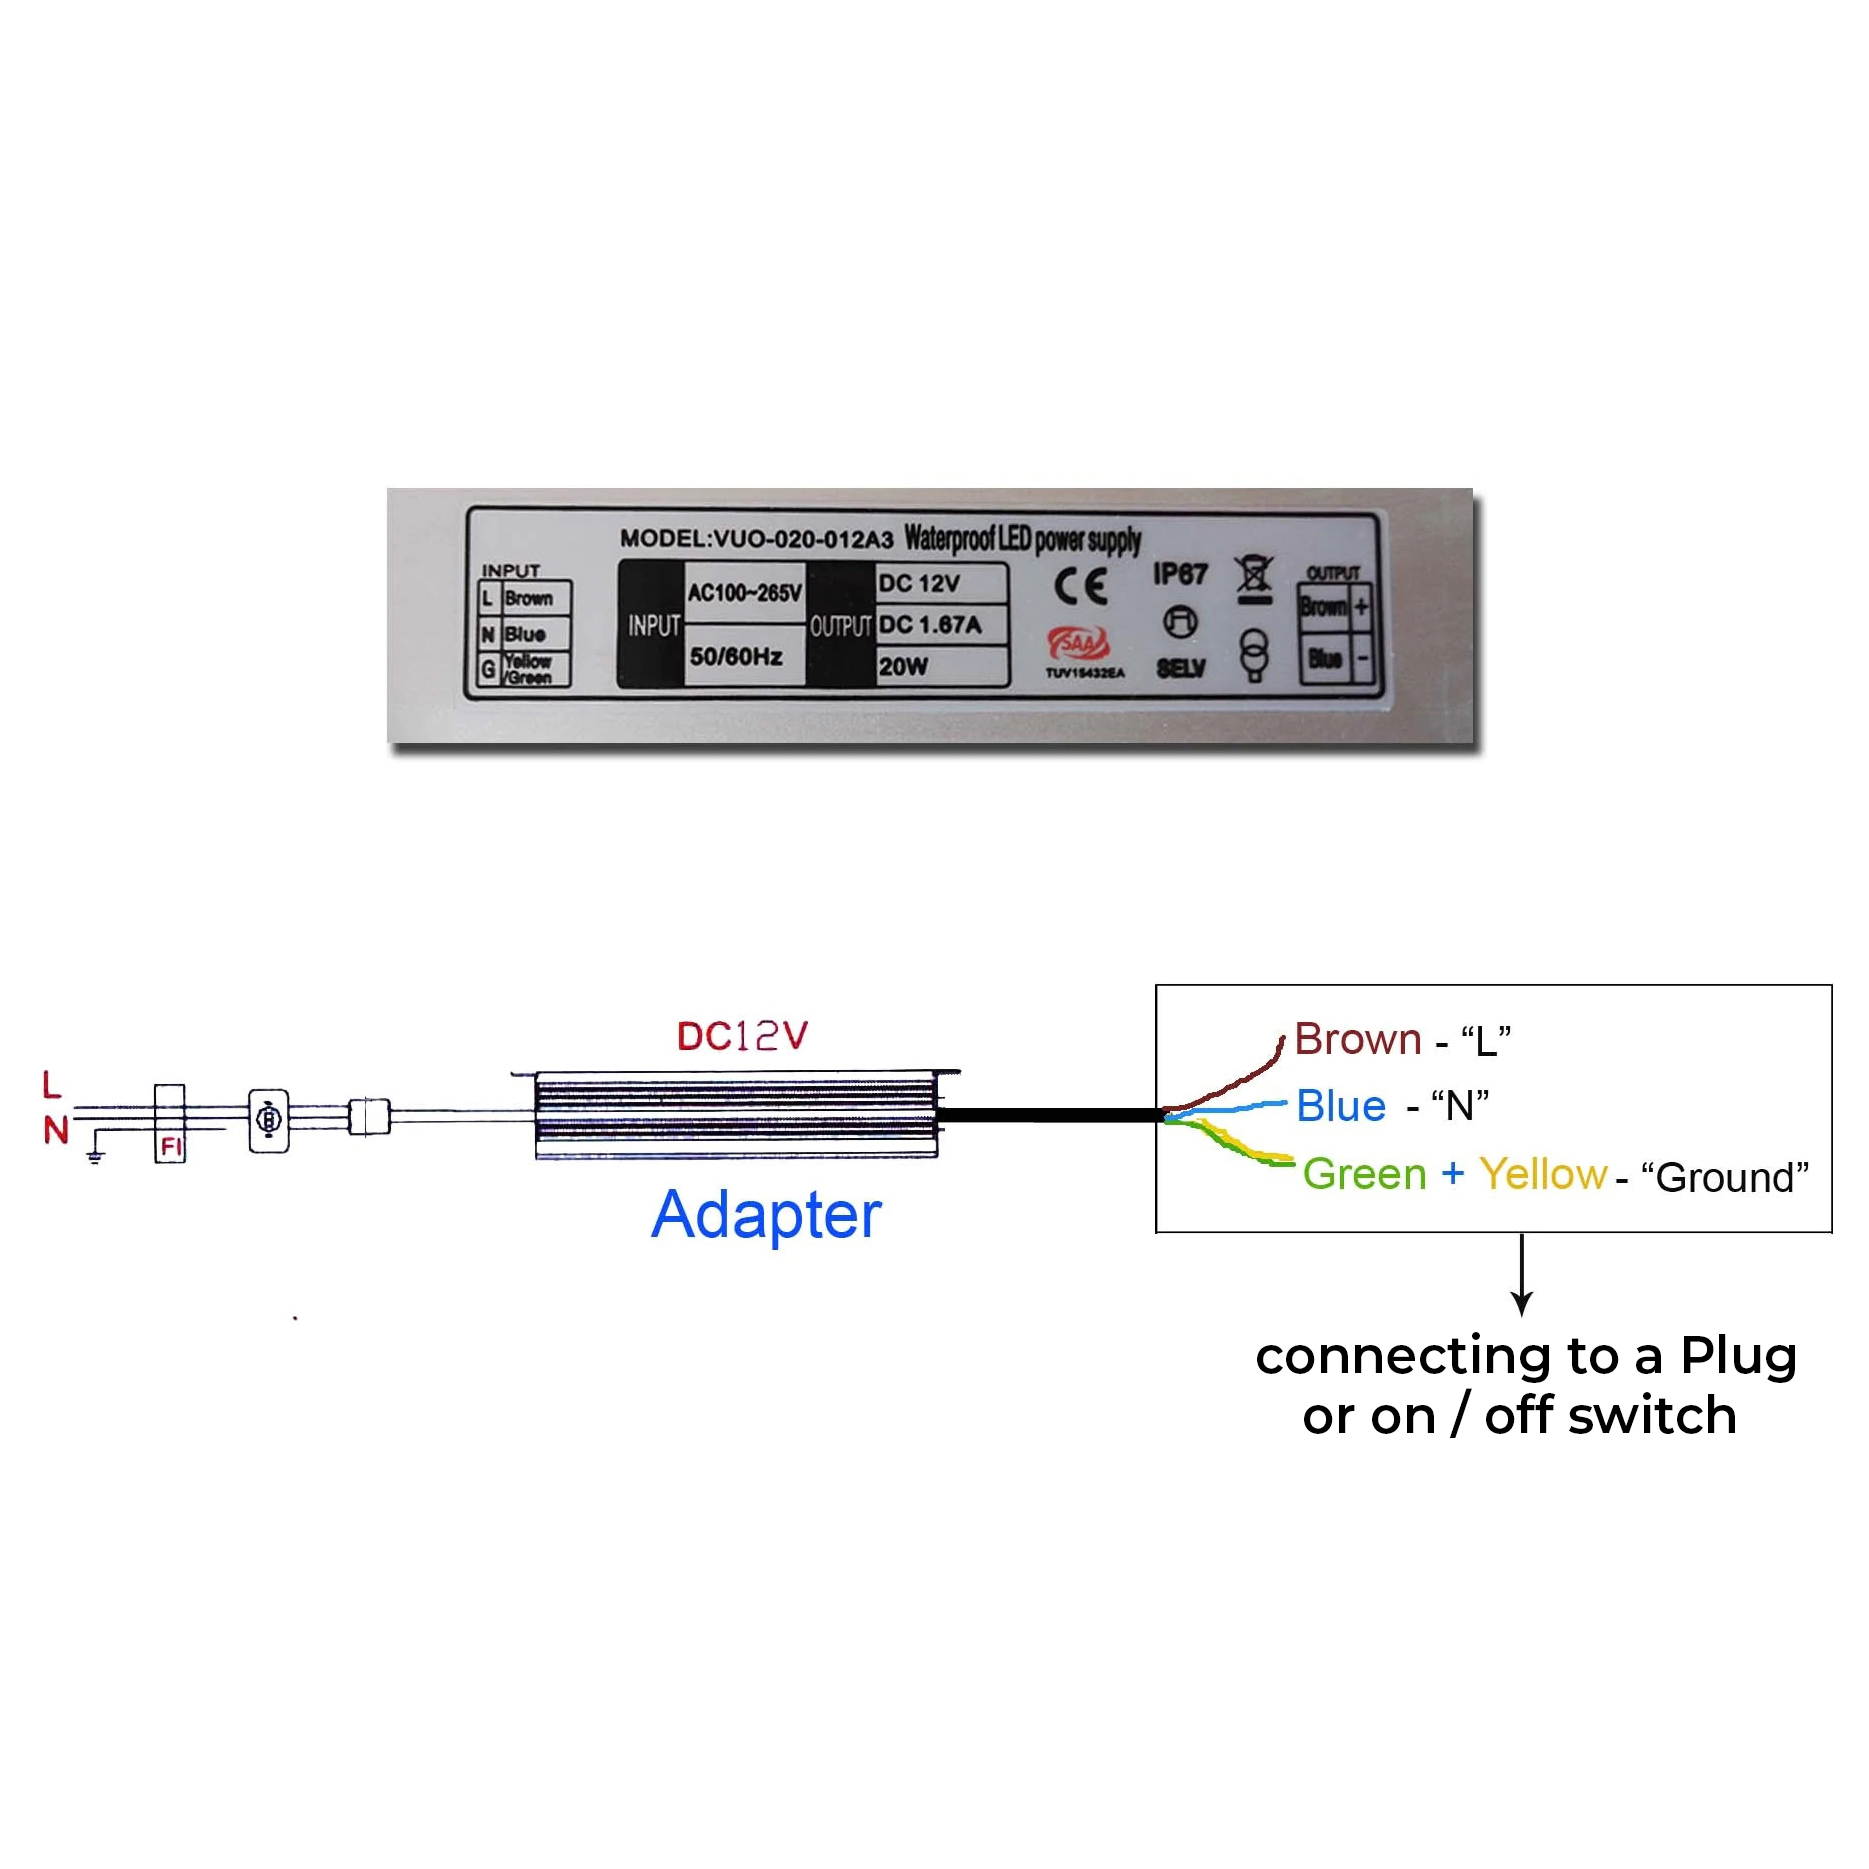 | | Using the two hexagonal nuts adjust the distance between the mounting bracket and the ceiling, and keep the mounting bracket on the level.
Use an explosion screw to fix the mounting bracket on the ceiling, pay attention to the explosion screw, it can adjust the height and use level tool to adjust the mounting bracket to reach level.
| | Connecting Circuits
| | | Shower Head Installation Instructions | | | | | Step 7: | | Step 8: | | 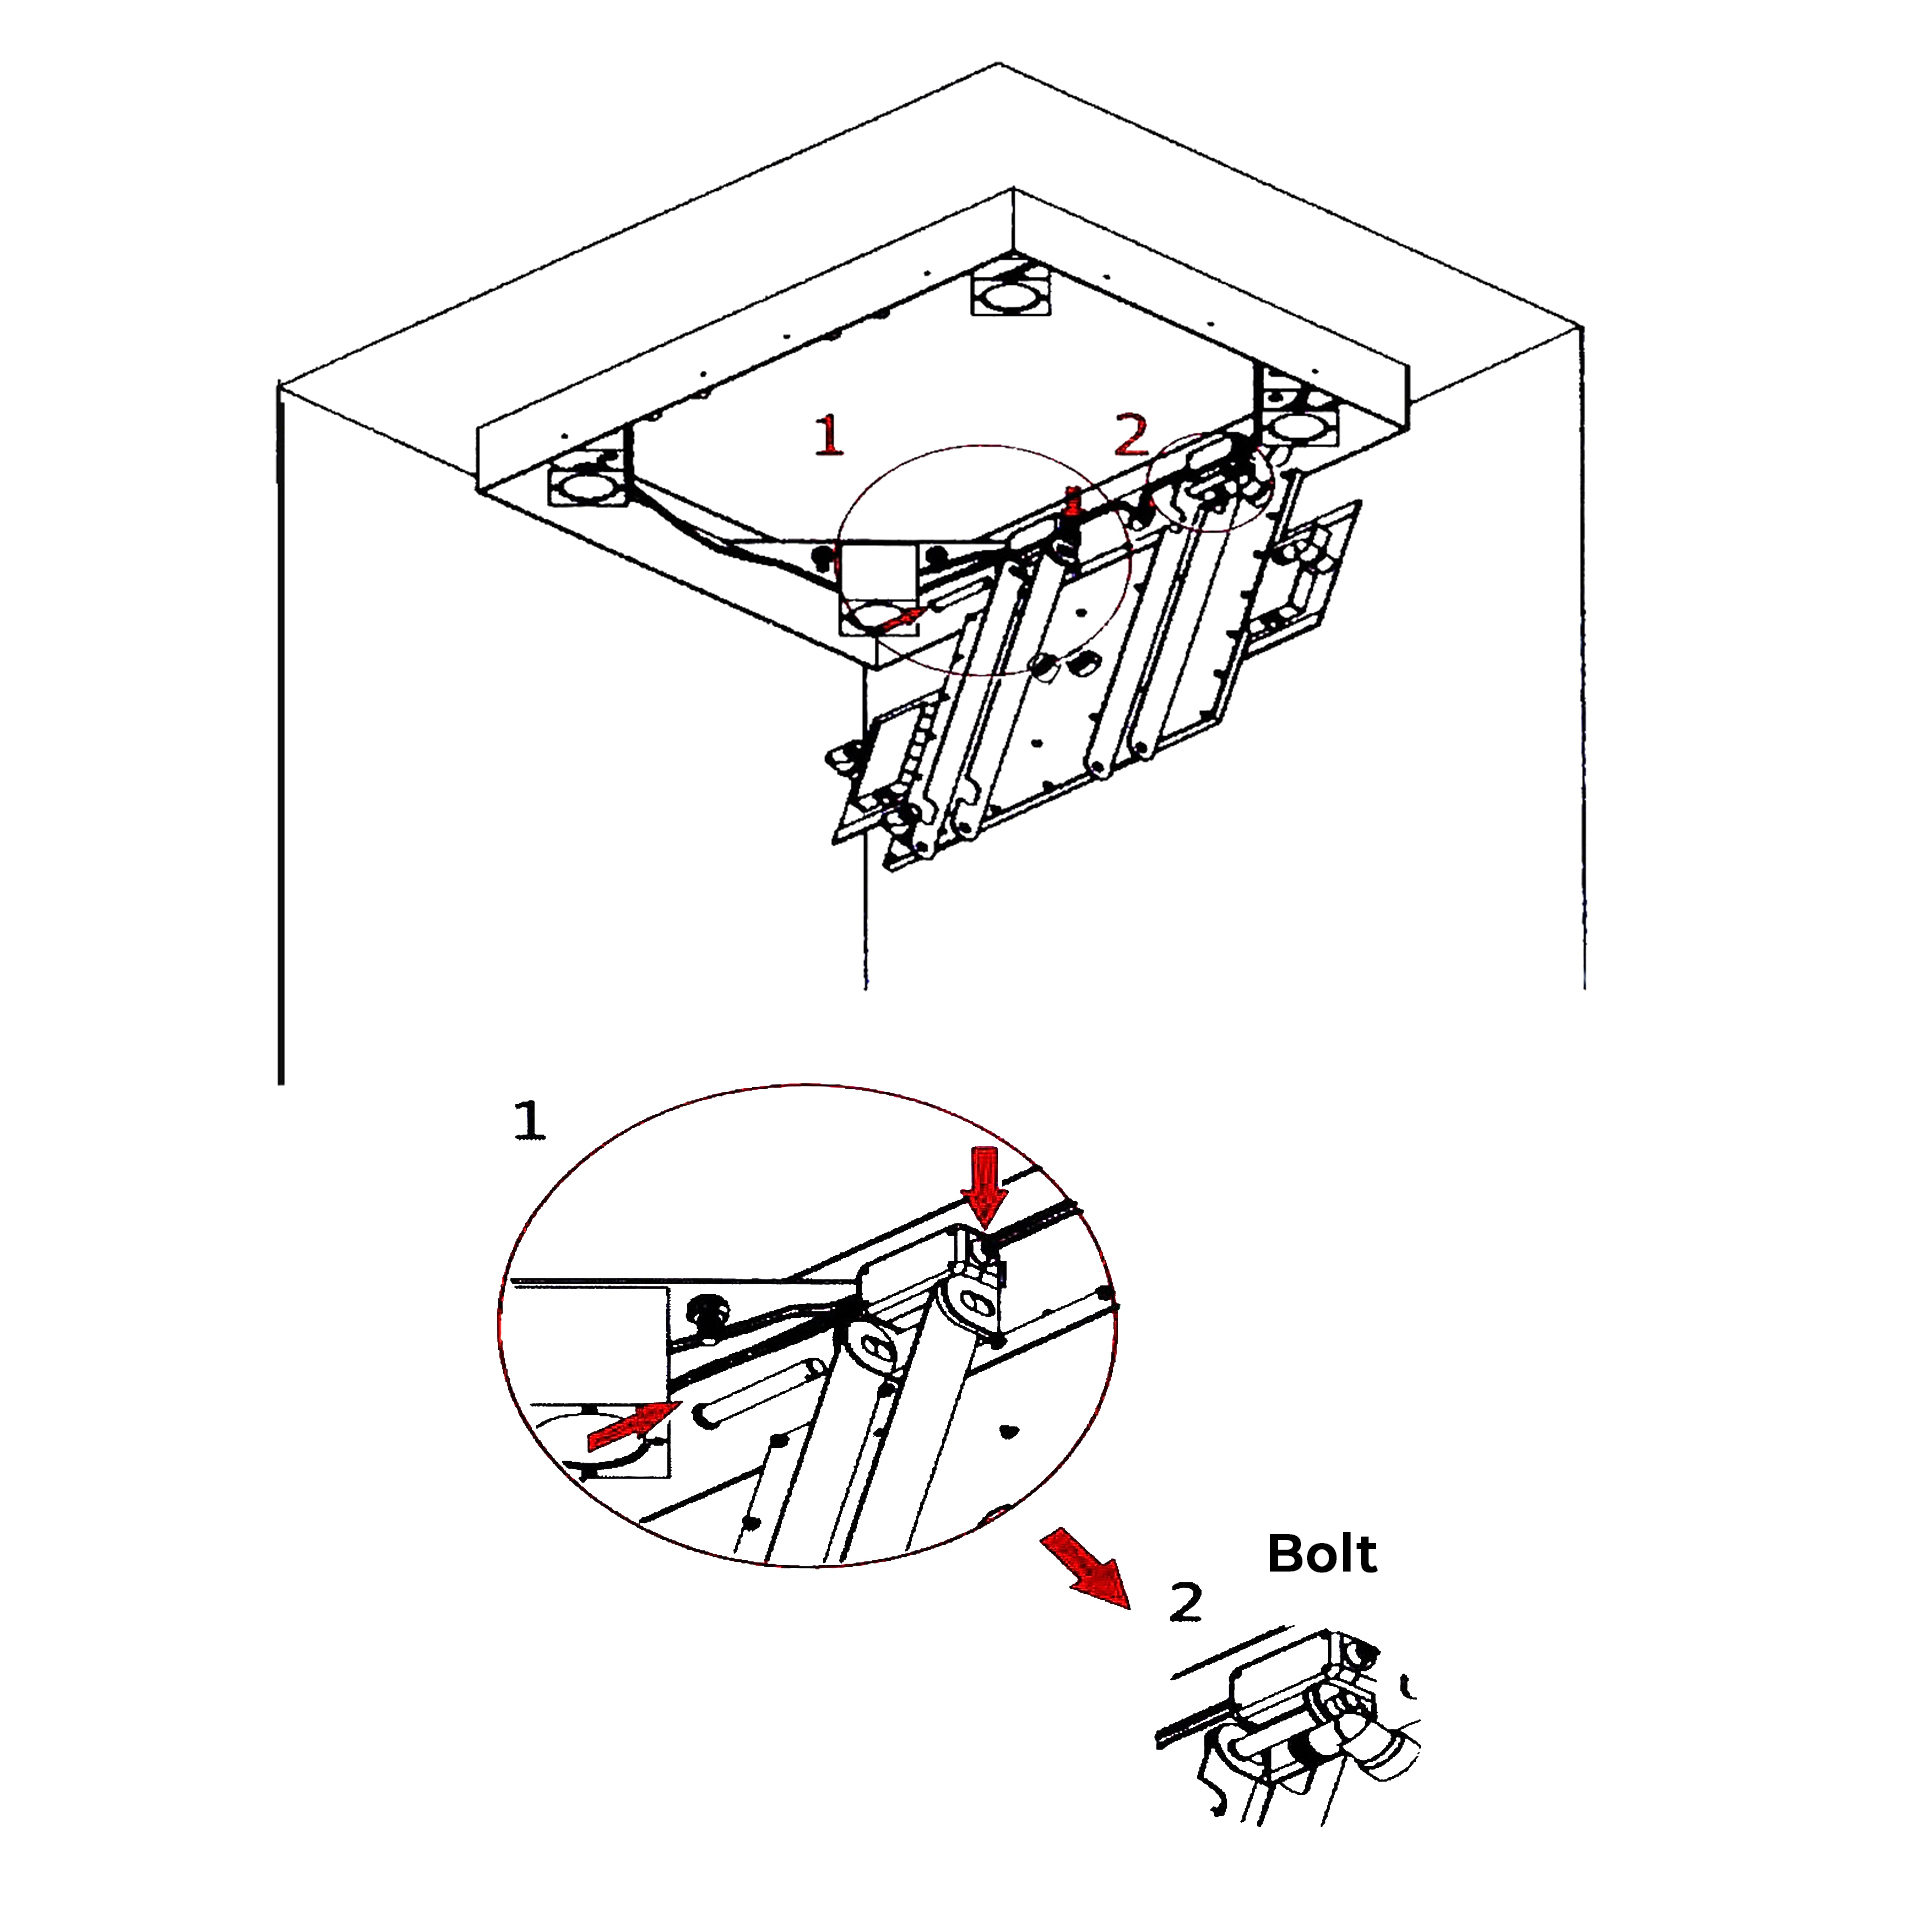 | |  | | According to the chart shows: Raise the showerhead, Aim at the hole of the bolt, plug the bolt.
| | Use a Phillips screwdriver screw out the upper cover 4 screws, open the plastic waterproof boxes.
Note: The same color line docking, brown line for line, the blue line is zero line. Use a Phillips screwdriver screw out the screws in plastic waterproof box wiring position, then put the fork terminal line connected, then fix it with a Phillips screwdriver.
| | | Shower Head Installation Instructions | | | | | Step 9: | | Step 10: | | 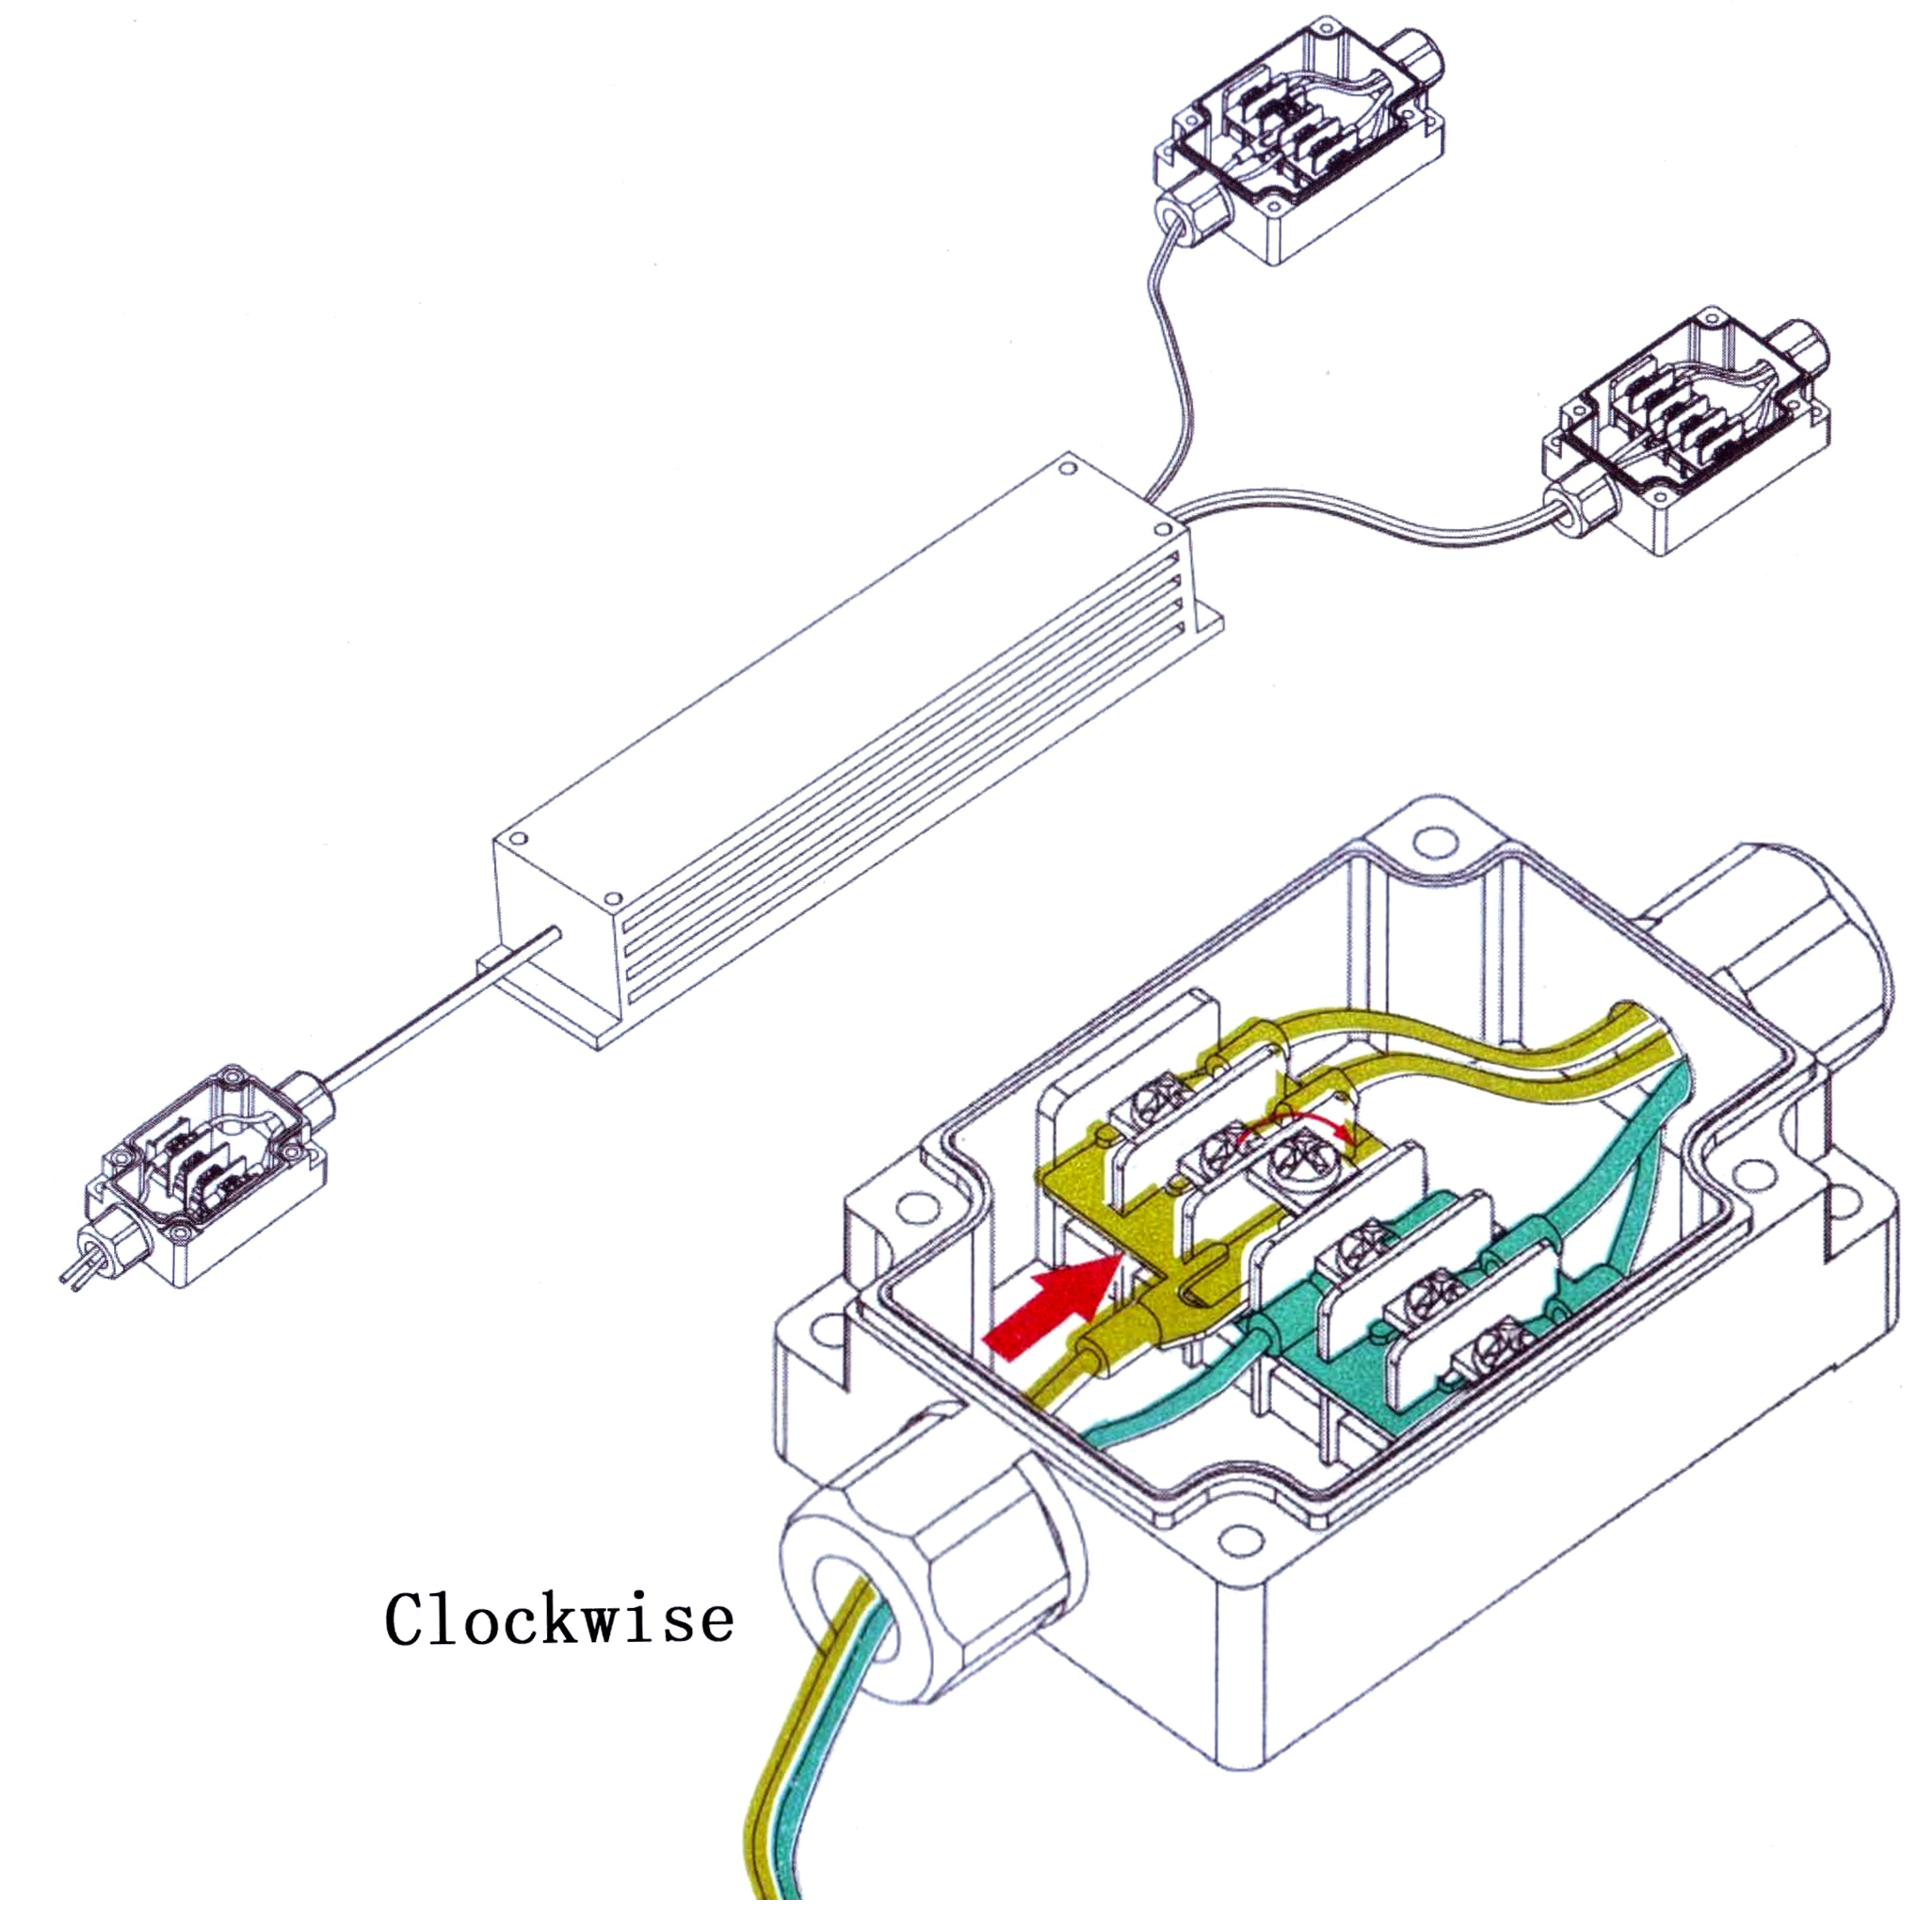 | |  | | | According to the circuit diagram as shown in step 5, then connect plastic waterproof case, please note that the same color of the wire when connecting circuit to docking. | | Connecting water hoses and Tee joints and then connect the water hoses to the water inlet pipe connector.
| | | LED Shower Head Installation Instructions | | | | | Step 11: |
|
|


Luxury Shower System
Designer Brand Shower Systems
BathSelect specializes in crafting bespoke shower systems and designer bath fixtures, offering a wide array of options to enhance your bathroom ambiance. Whether you seek luxurious shower setups, orbital designs, MultiColor LED showers, sleek Aluminum sets, Rio themes, waterfall features, or contemporary styles, we provide chic solutions tailored precisely to your needs. Our team of design mavens assists you in choosing and specifying the ideal shower systems, ensuring a perfect fit. We're dedicated to delivering top-notch bathroom fixtures blending comfort, reliability, and premium craftsmanship.
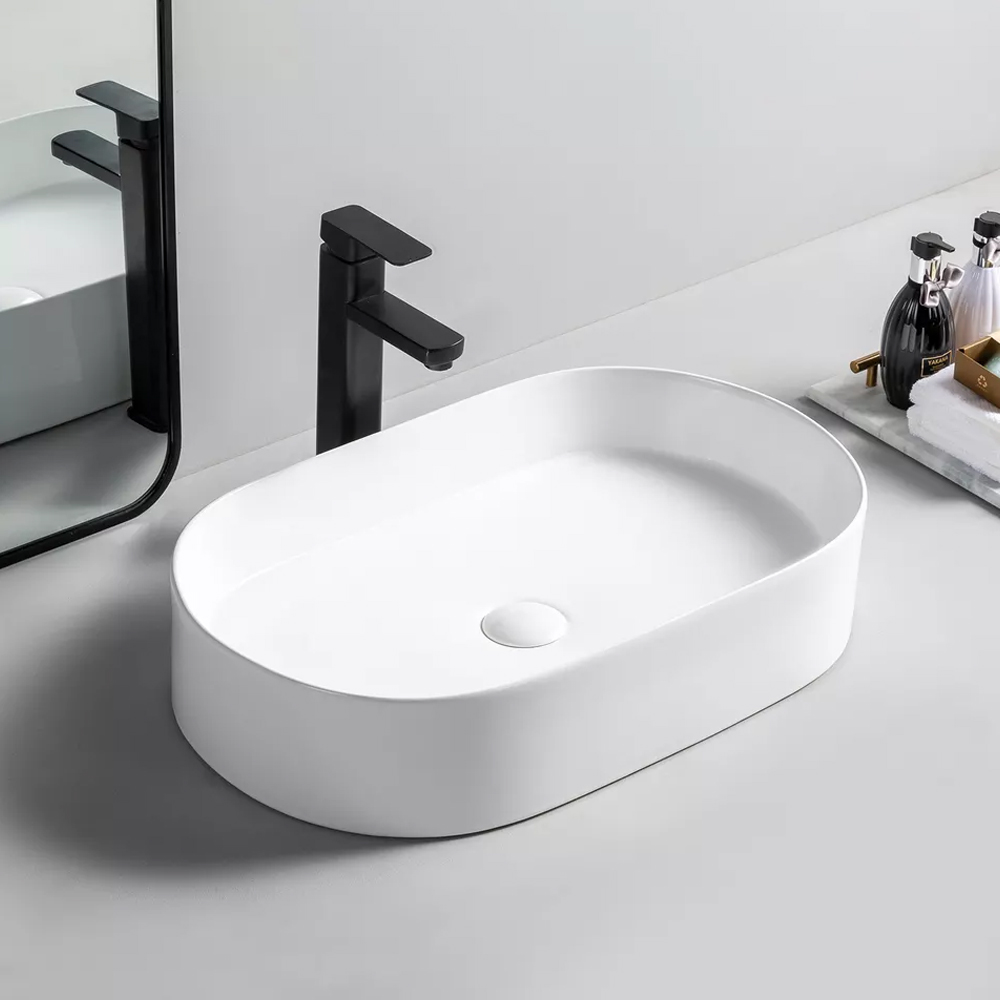
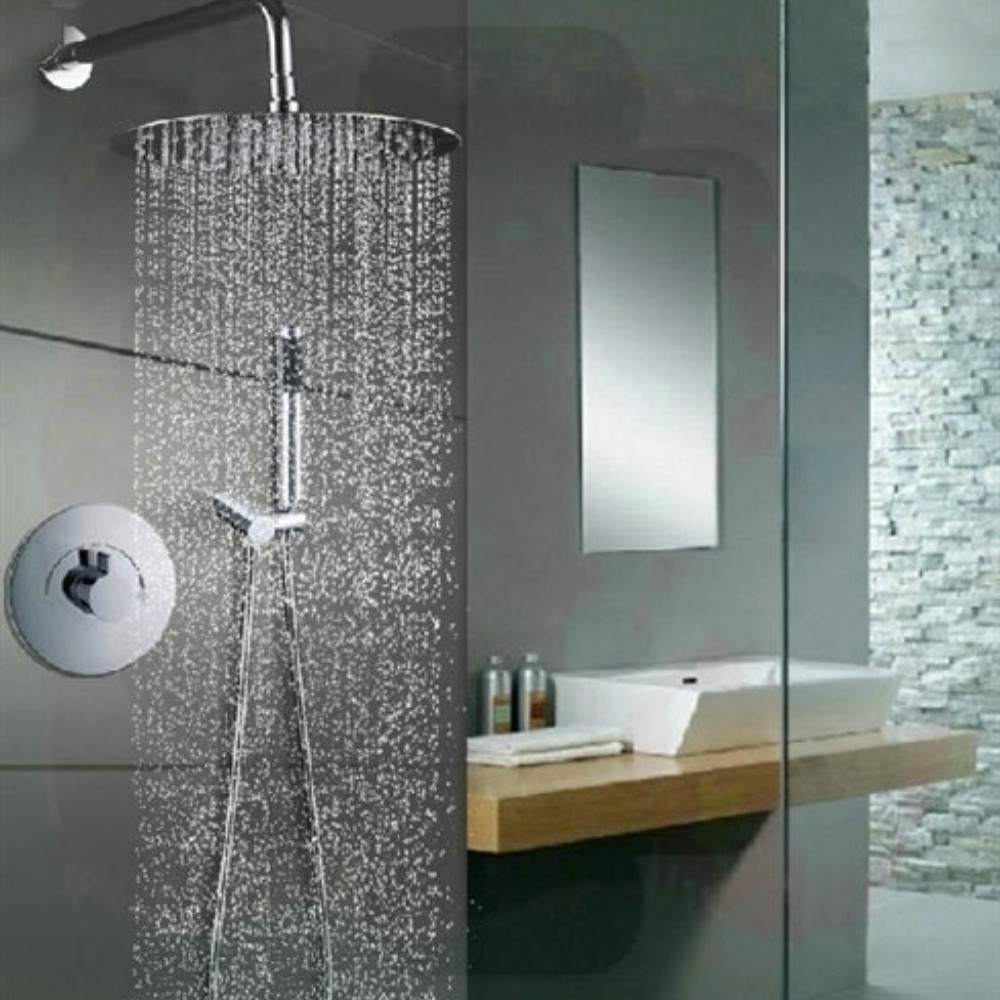
Our product lineup spans Massage Showers, Touchless Sensor Faucets, LED Showers, Smart & Digital Showers, Body Massage Shower Jets, Shower Heads, Steam Shower Rooms, Modern Bath Vanity Sets, and Bath Accessories, showcasing cutting-edge bathroom technology. Embracing diversity, we cater to varied tastes with trending fixtures. Our commitment to customer satisfaction ensures a seamless shopping experience with easy checkout and swift delivery. Choose BathSelect for courteous treatment and exceptional service, guaranteeing your satisfaction at every turn.
|
|

|
|
|
|

About BathSelect
BathSelect, a USA company with a rich history spanning more than three decades, with
over 30 years of experience in creating luxurious and technologically advanced bathroom
fixtures and accessories. The company stands at the intersection of functionality and
innovation, offering a diverse array of products that cater to both commercial and
residential spaces. Among offerings are sophisticated showerheads that range from
thermostatic systems to cutting-edge, voice-controlled smart showers equipped with digital
interfaces.
For those looking to add a touch of allure, the we specialize in captivating LED
showerheads. We provide high-grade touchless faucets and automatic soap dispensers designed
to handle high traffic with ease. The line of bathtubs includes both freestanding and
drop-in models, available in various styles and dimensions to suit any interior.
Additionally, we offer smart LED mirrors embedded with advanced technology, perfect for
enhancing hospitality settings. Whether your focus is on state-of-the-art technology or
timeless elegance, FontanaShowers commits to elevating the quality and upscale of bathroom
space excelling in the design and production of premium bathroom fixtures and accessories,
blending functionality with innovation.
Learn more
Who We Are?
BathSelect specializes in producing high-quality bathroom fixtures and accessories that
combine style with functionality. Our extensive range includes touchless faucets available
in various designs, finishes, and with diverse features such as voice-activated controls,
smart technology, LED lighting, and temperature regulation. Known for their exceptional
quality and durability, our touchless faucets are a preferred choice for commercial
applications. These touchless are architect and designer top picks, often specified by
top-name architectural firms who value the reliability of Fontana touchless faucets.
Their sleek and modern design seamlessly complements a wide range of bathroom styles while
providing a hygienic handwashing solution, making them especially appealing for public
restrooms and commercial settings. We offer automatic soap dispensers, which are both
eco-friendly and durable choices for commercial bathrooms. With a strong reputation for
quality products and excellent customer service, we became a well-recognized brand in the
bathroom fixture industry. No wounder architects often choose our products, particularly our
touchless faucets & soap dispensers, due to their trust in the brands reliability and
product quality. Our focus remains on producing top-quality bathroom fixtures and
accessories that seamlessly blend style and functionality.
Learn more
|
|
|