Home > How to install 20" Large Shower Head With 4 Way Mixer, Body Massages Jets & Hand Shower

How to Install Leo Contemporary Style Chrome Finish Rain And Waterfall Shower Head With 3 Way Mixer And Handheld Shower | BST10176


BathSelect Large Shower Head With 3 Way Mixer & Hand Shower

Our BathSelect Large Shower Head is one of the Best & Unique Shower Heads available in the market at an extremely competitive price range. The Shower Head is 20" Square in Shape and have a Chrome Finish. The Shower Set comes a with a Hand shower & 6 Body Massage Jets. This Contemporary Styled Shower Set comes with a 4 Way Mixer which allow 4 Way Mixing and have a Hand Shower.

Features:
  • Type : Shower Set
  • Style : Contemporary
  • Feature : Thermostatic Shower Set
  • Valve Core : Ceramic
  • Installation : Ceiling Mount
  • Surface Finish : Chrome
  • Material : 304 Stainless Steel and Brass
  • Function : Rainfall + Mist
  • Water Pressure : 0.25-0.5MPA
  • Water Flow : 14-25 L/Min
  • Shower Arm : Include 4 Arms
  • Valve : 4 Way Thermostatic
showerLeo Contemporary Style Chrome Finish Rain And Waterfall Shower Head With 3 Way Mixer And Handheld Shower

Important Note:

  • Before you begin, please read the installation instructions below. Observe all local building and safety codes.
  • Unpack and inspect the product for any shipping damages. If you find damages, do not install.
  • Please note all showers must be installed by a professional and certified plumber otherwise warranty may be voided.

  • Shower Head Installation Instructions

    Size:


    Step 1: shower head Step 2:
    Open the top cover and drill according to the marked position.
    1. Mark by the position of the four holes.
    2. Take care to avoid wires and pipes to prevent damage.
    3. Be sure to confirm that the four holes are on the same horizontal line.


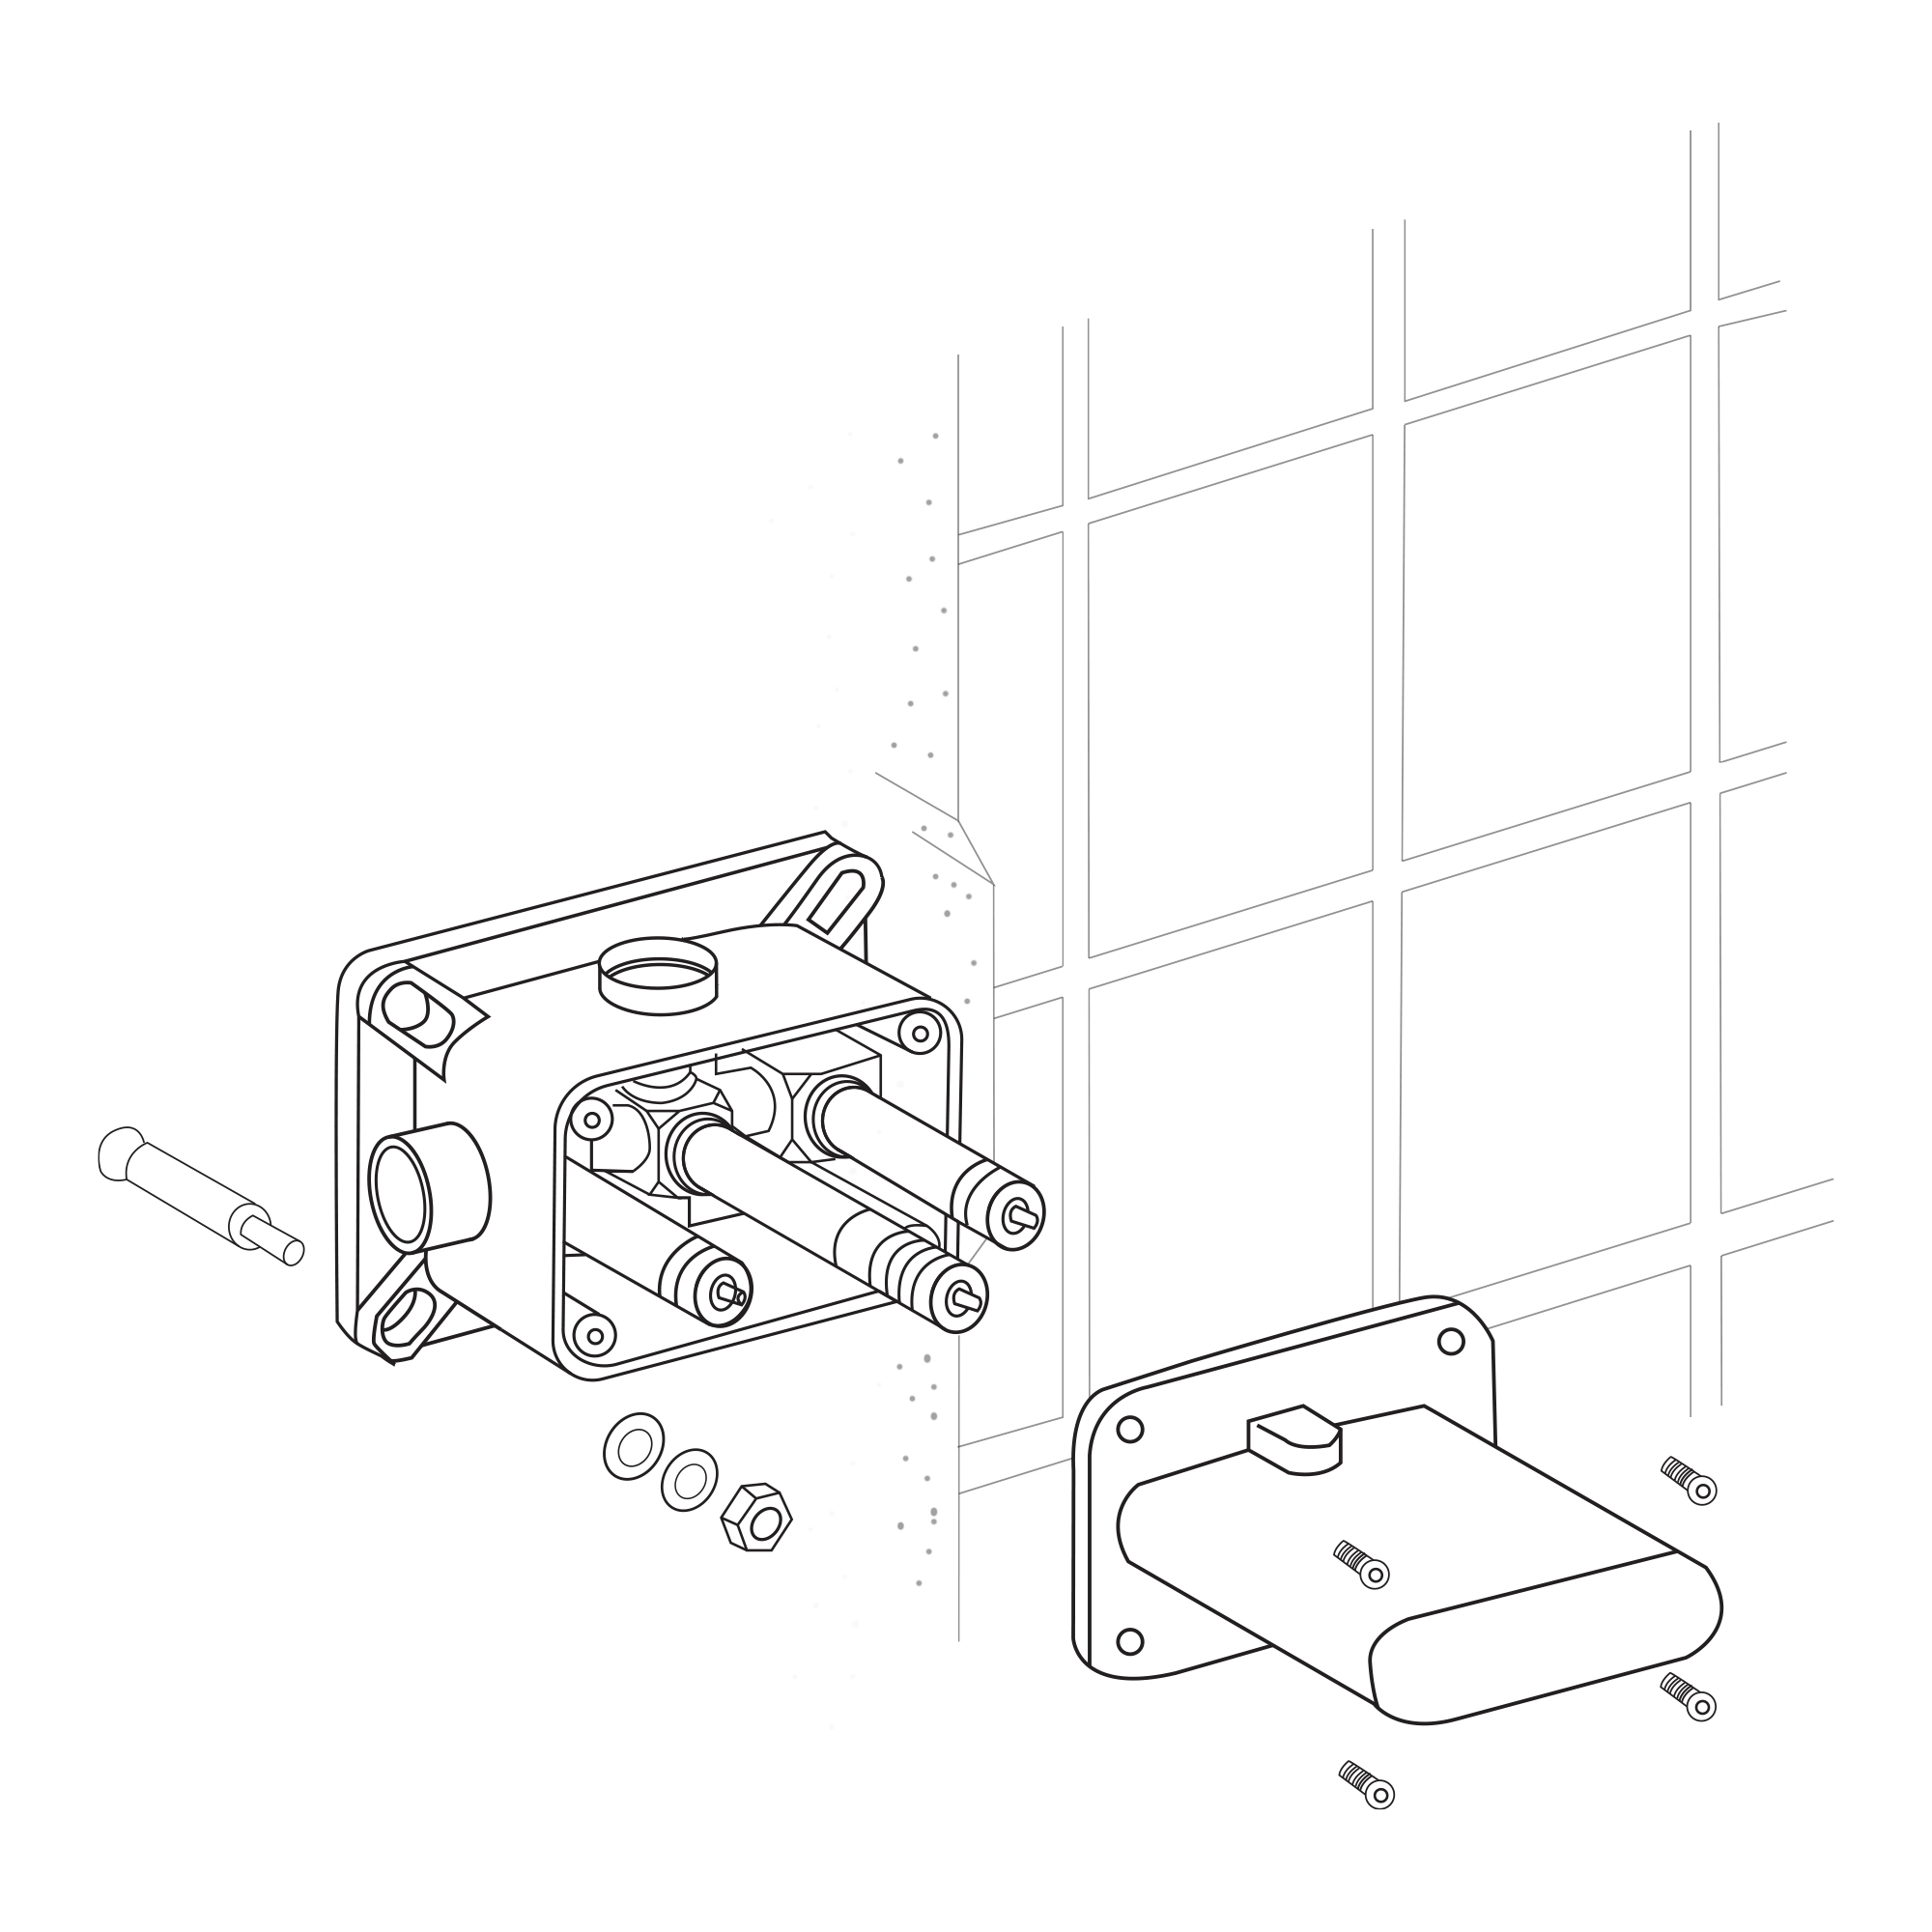
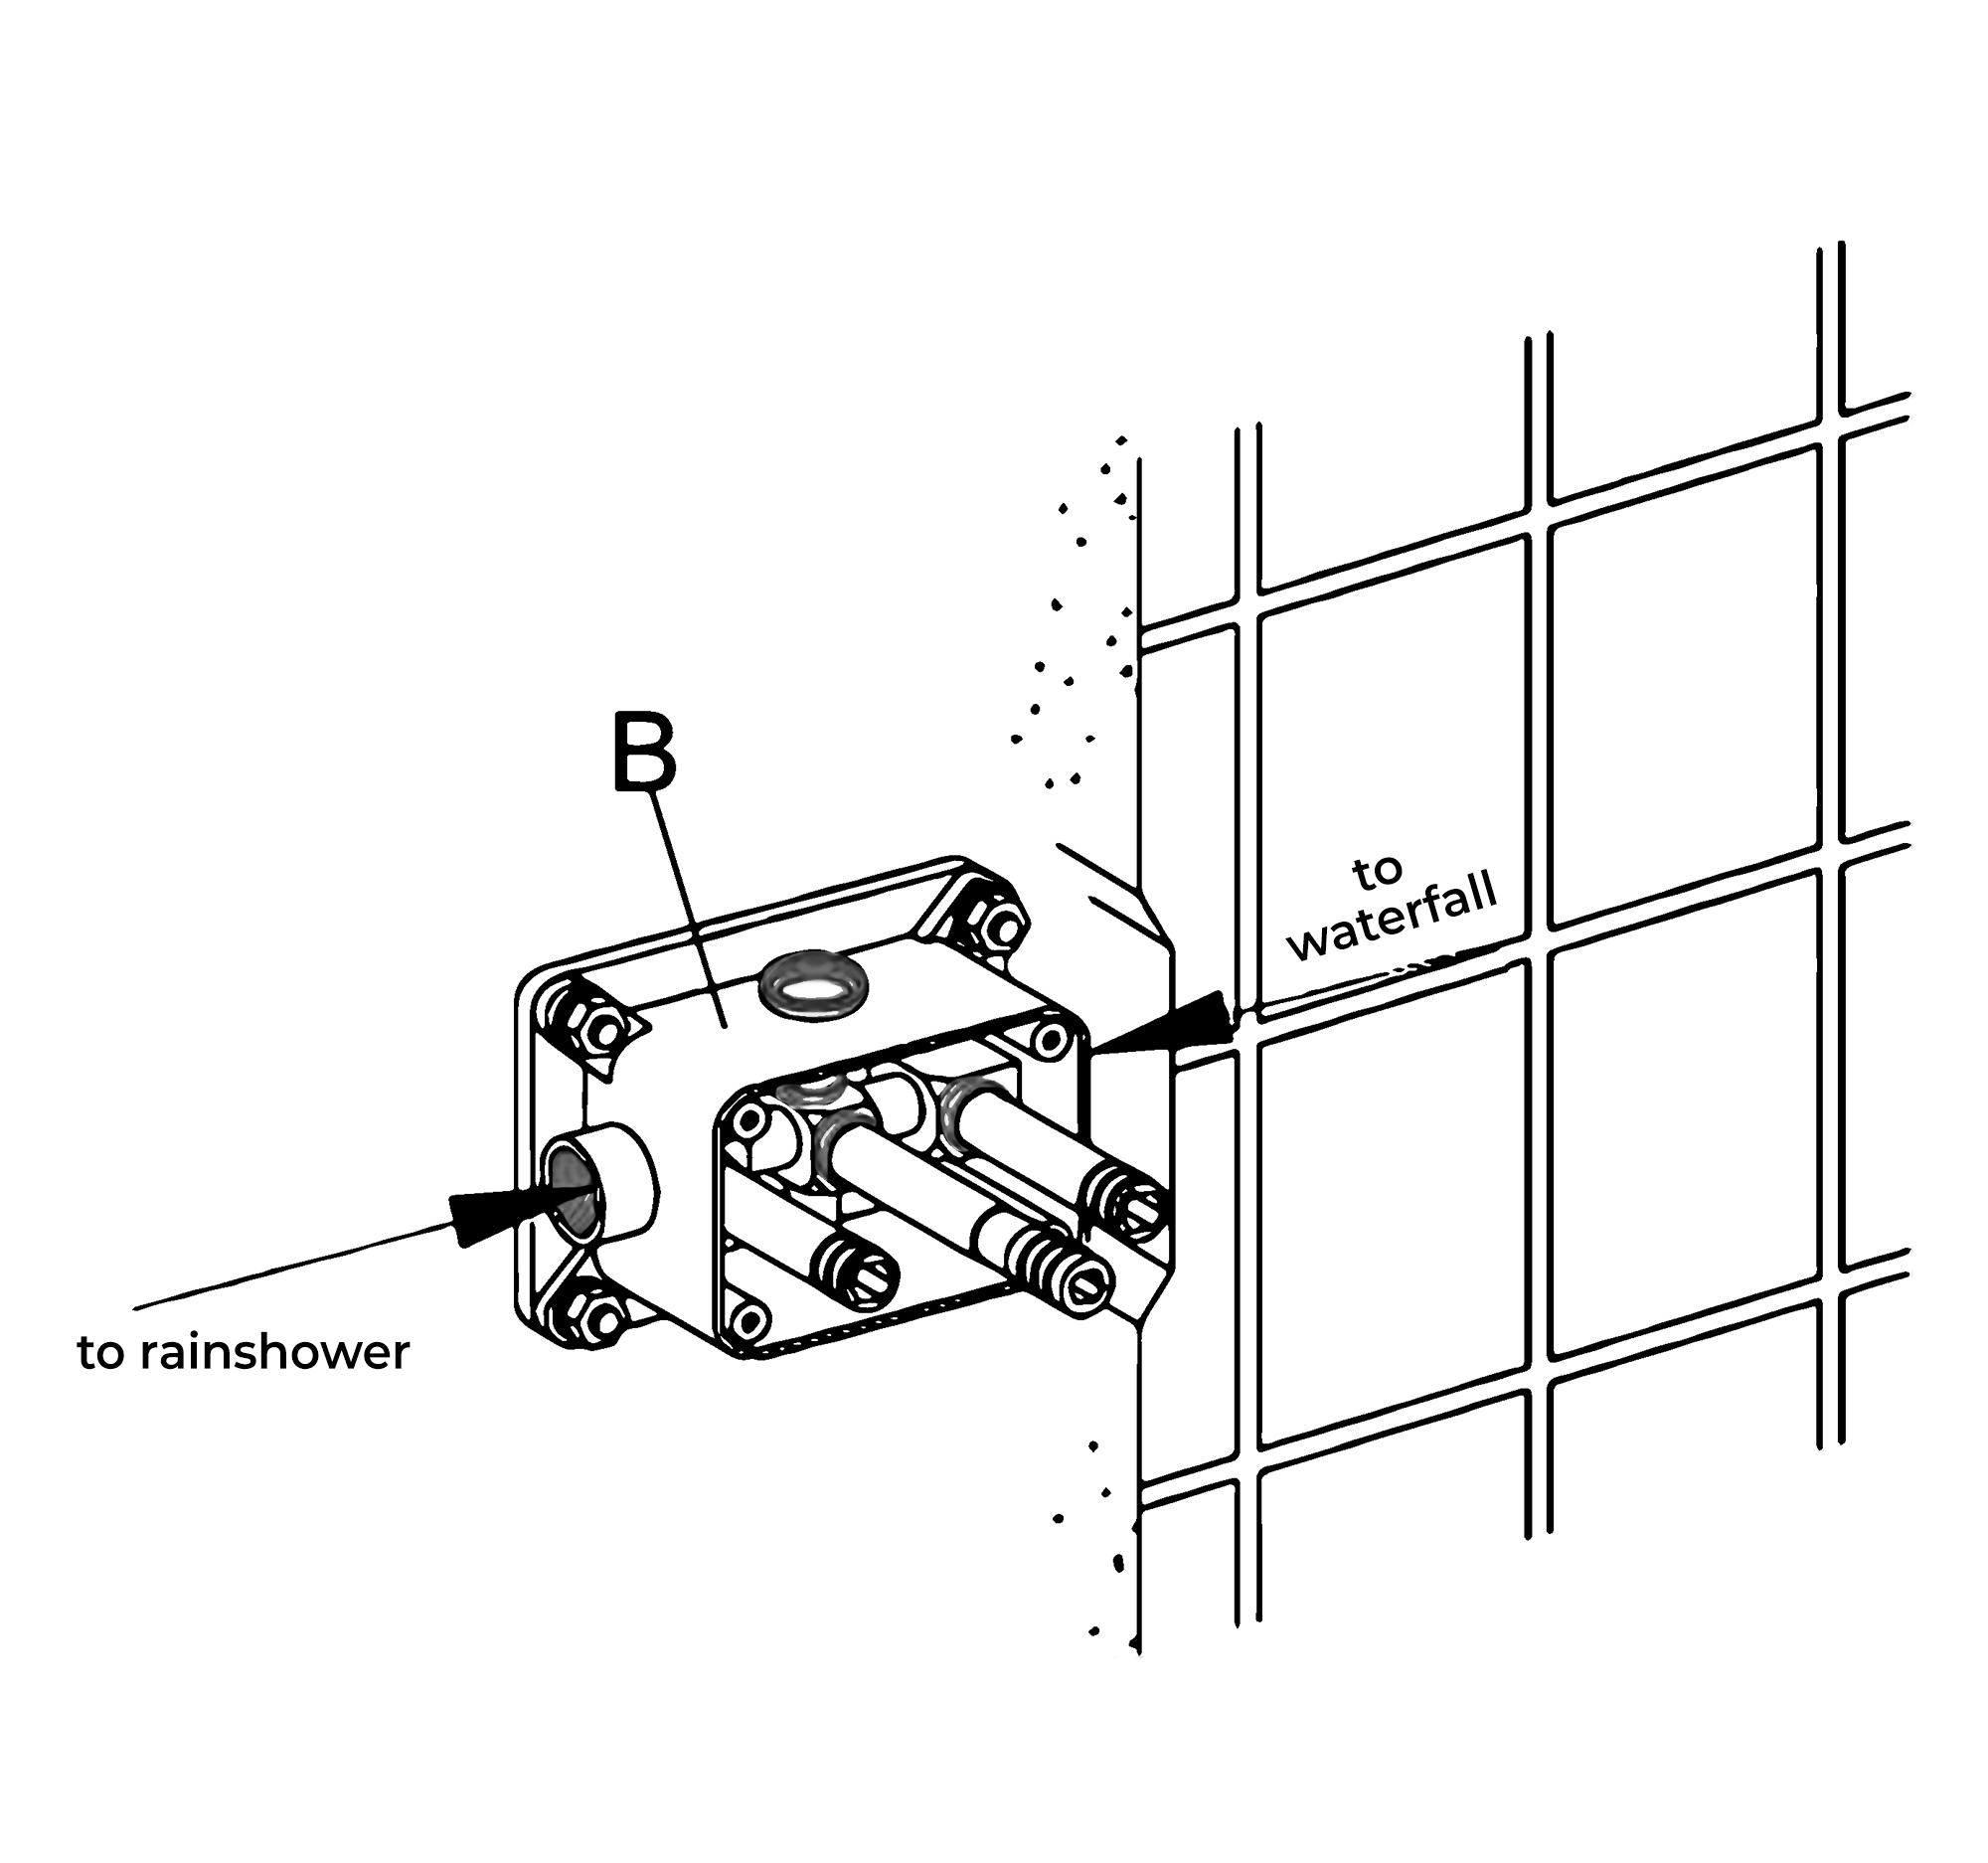
    Remove the protective cover (F). Mark the positions and drill holes to suit the anchors (A). Install the anchors (A) and fix the rough-in valve (B) into the wall with screws. Use a level to ensure that the rough-in valve (B) is straight and level. (Important: Flush the water supply to remove any dirt and debris before installing the valve body).
    Shower Head Installation Instructions
    Step 3: Step 4:
    Wrap Teflon tape around the pipe threads and connect water supply lines and in-wall pipes (not included) as desired to the rough-in valve (B). Turn on the water supply and open the cartridge to check for leakage. Then put on the protective cover and finish the wall surrounding the valve. (Note: Test the water pressure after the pipe connections have been made and before the finished wall material is installed). Two inlet fittings are connected to the pipe joint of the wall; then the nut, expansion screw, and inlet pipe are connected.


    Shower Head Installation Instructions
    Step 5: Step 6:
    Reinstall the top cover.
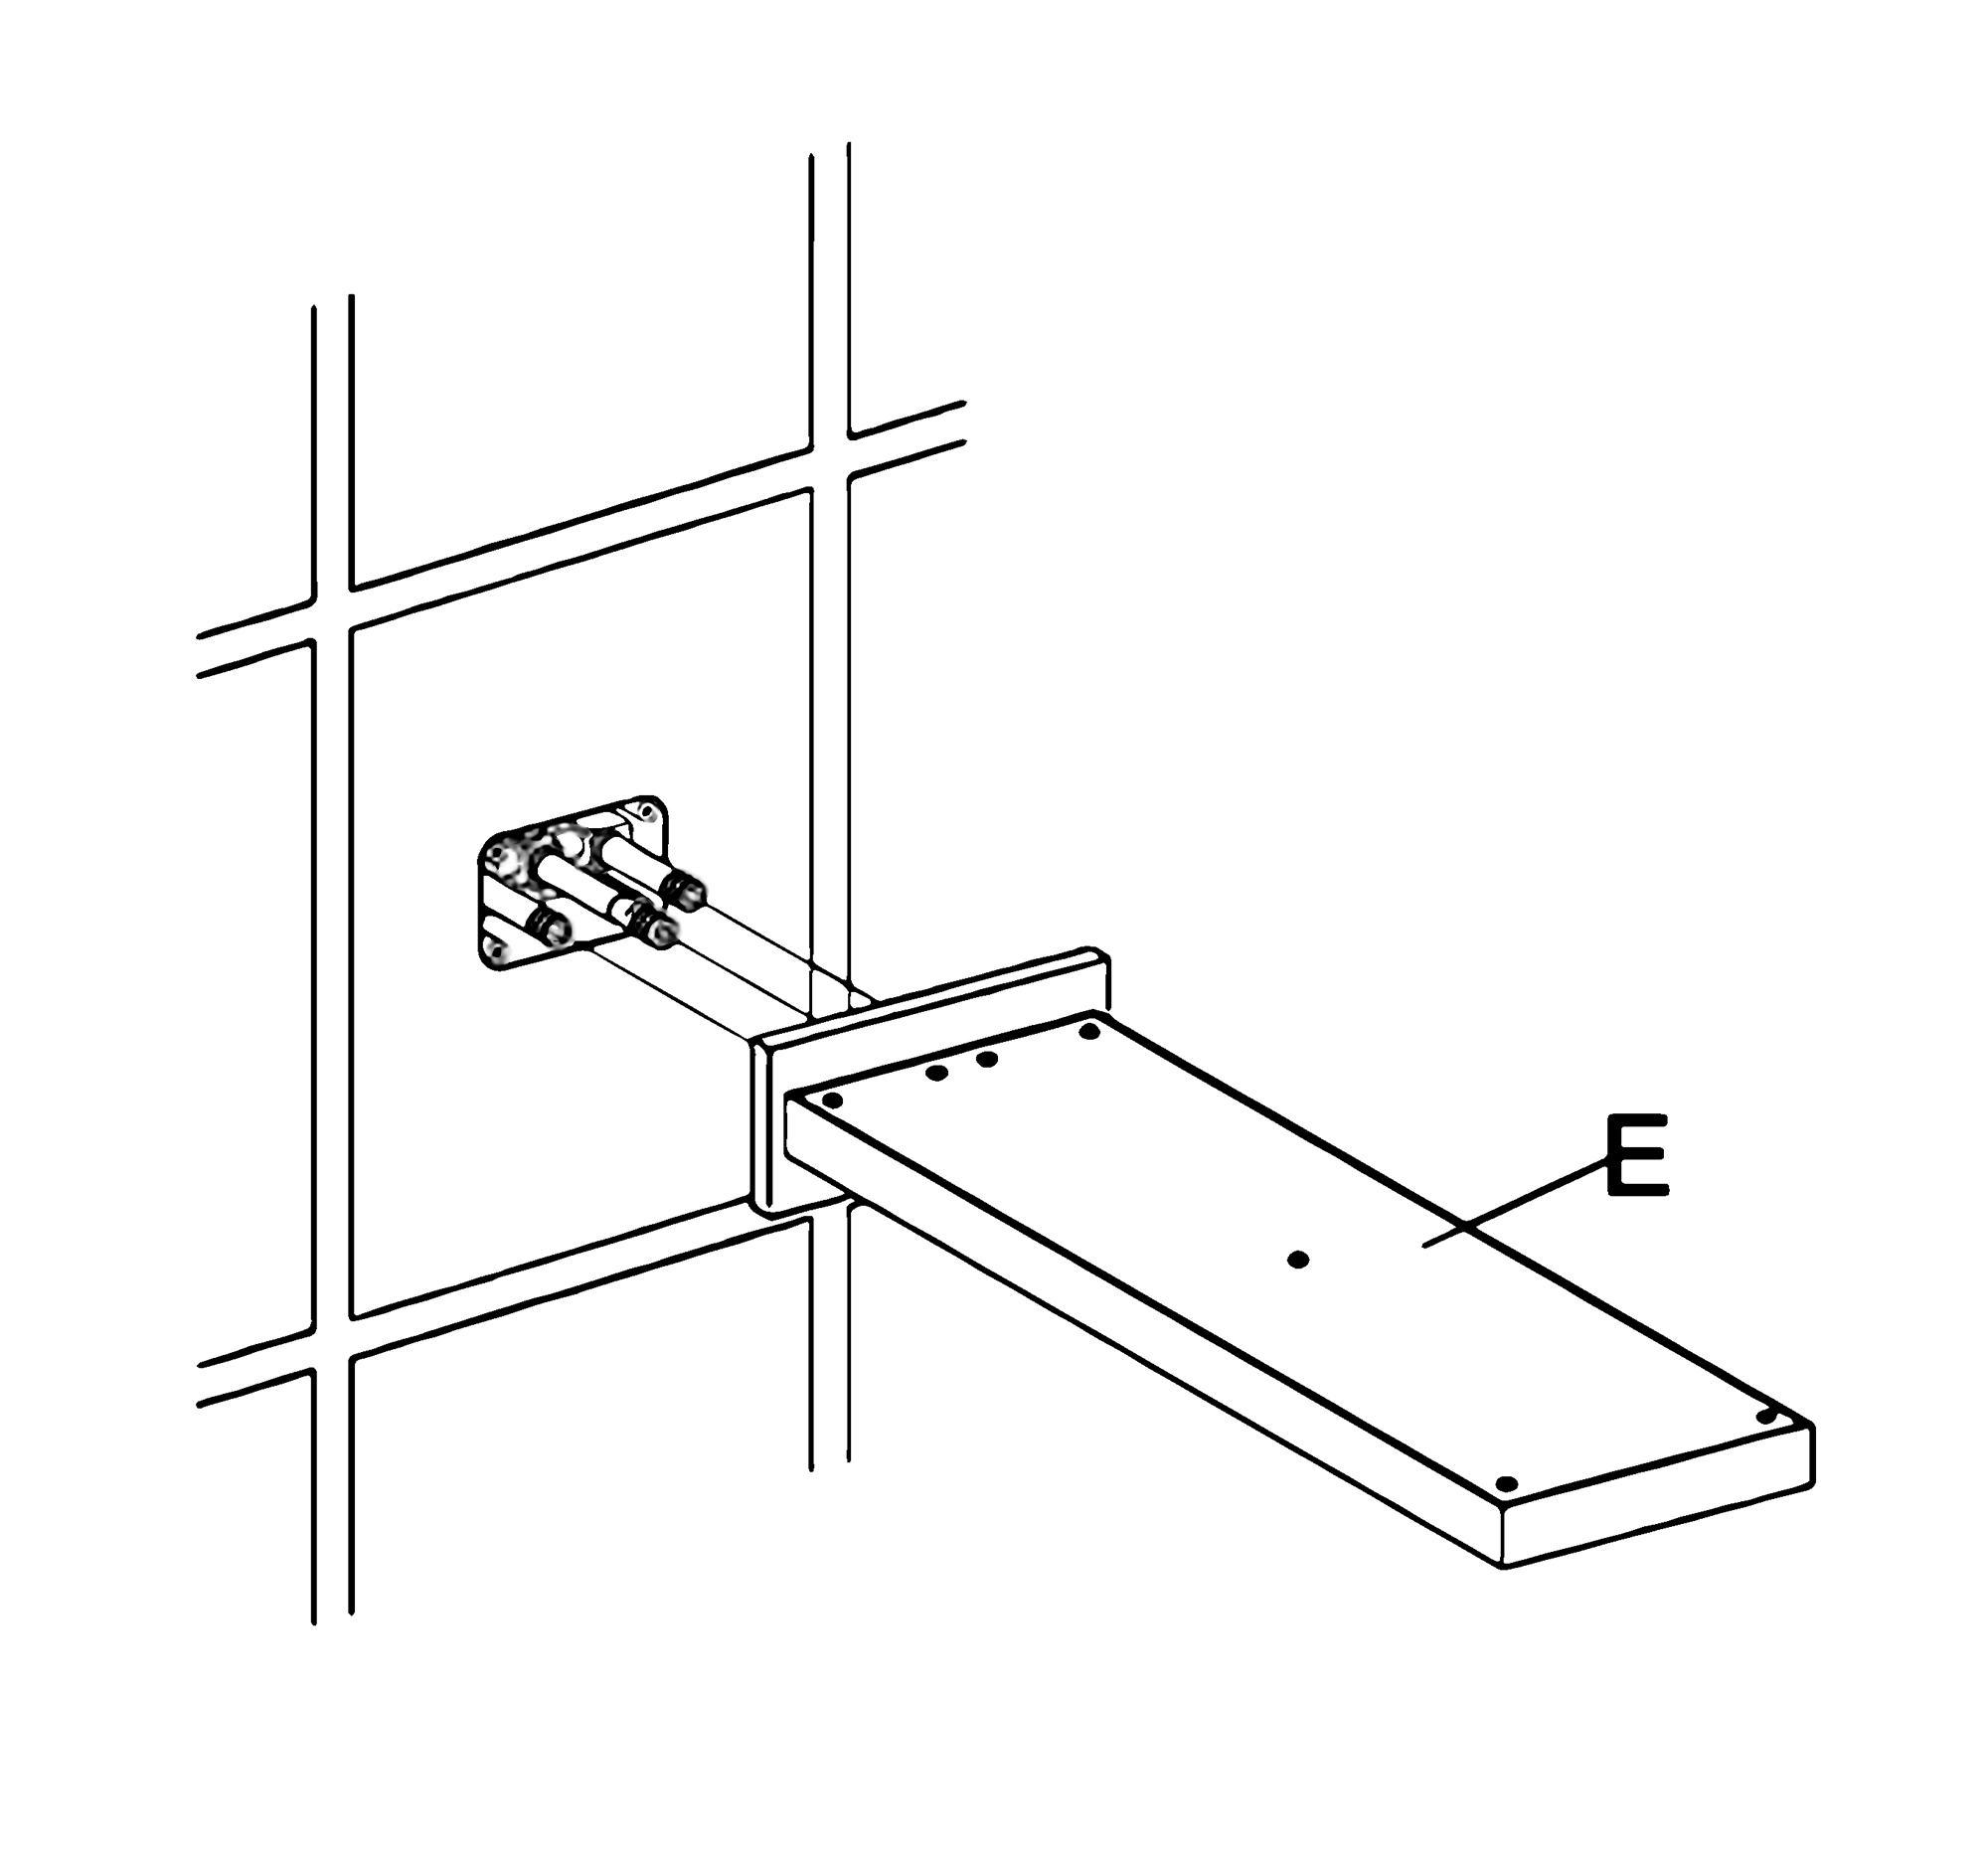
    Fix the escutcheon (D) to the showerhead (E) with screws (C).
    Shower Head Installation Instructions

    Step 7: Step 8:

    Remove the protective cover when the finished wall is completed. Then, install the showerhead (E) and press it against the finished wall.


    Waterfall
    Rainfall


    Hand Held Shower Installation Instructions

    Step 1: Step 2:
    Hand
    Held
    Shower

    Handheld Shower
    Step 3:

    BathSelect Ancient Round Antique Rainfall Wall ShoweBathSelect Ancient Round Antique Rainfall Wall Shower Head Installation Instructions Head Installation Instructions
    Skip to content