| Step 1: | | | Step 2: | |
 | Mixer | Valve |  |  |
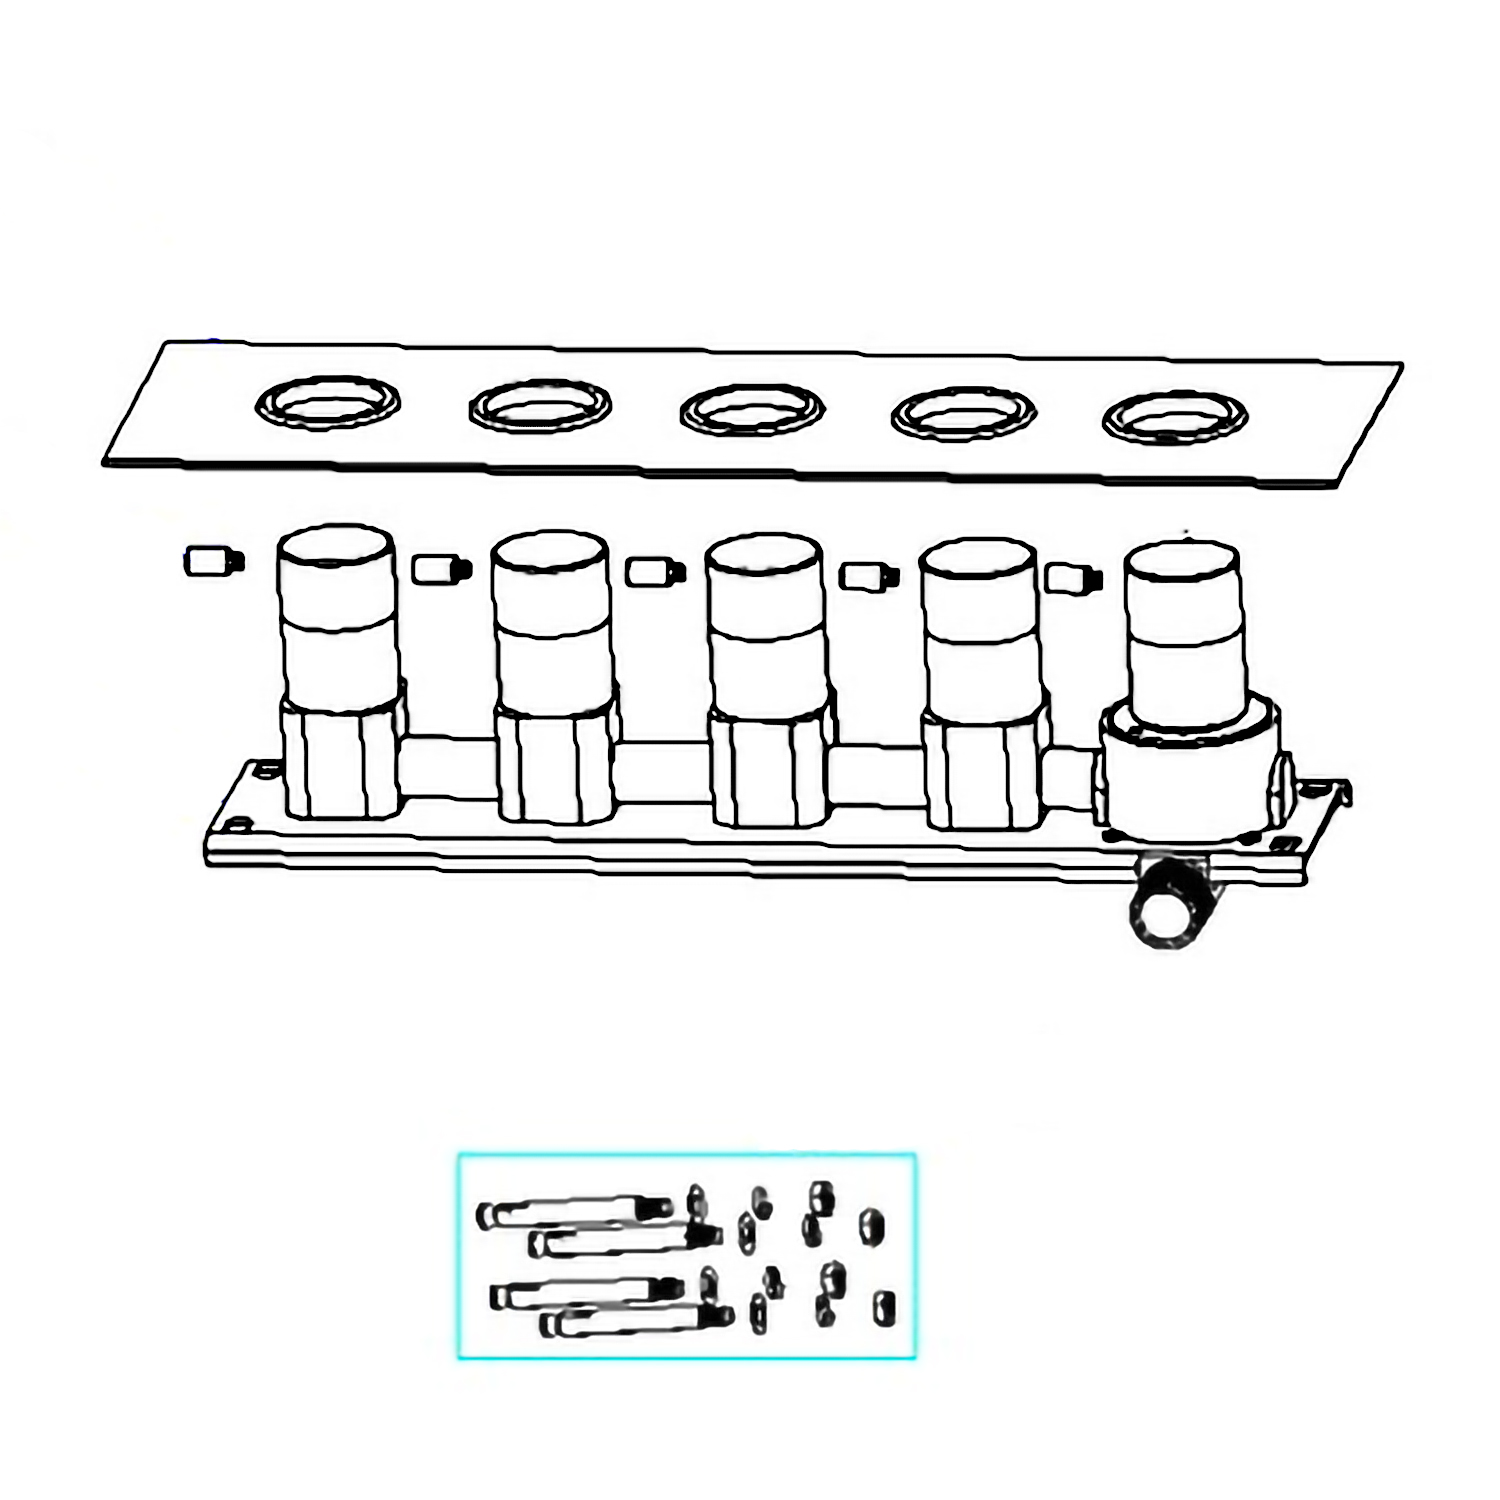
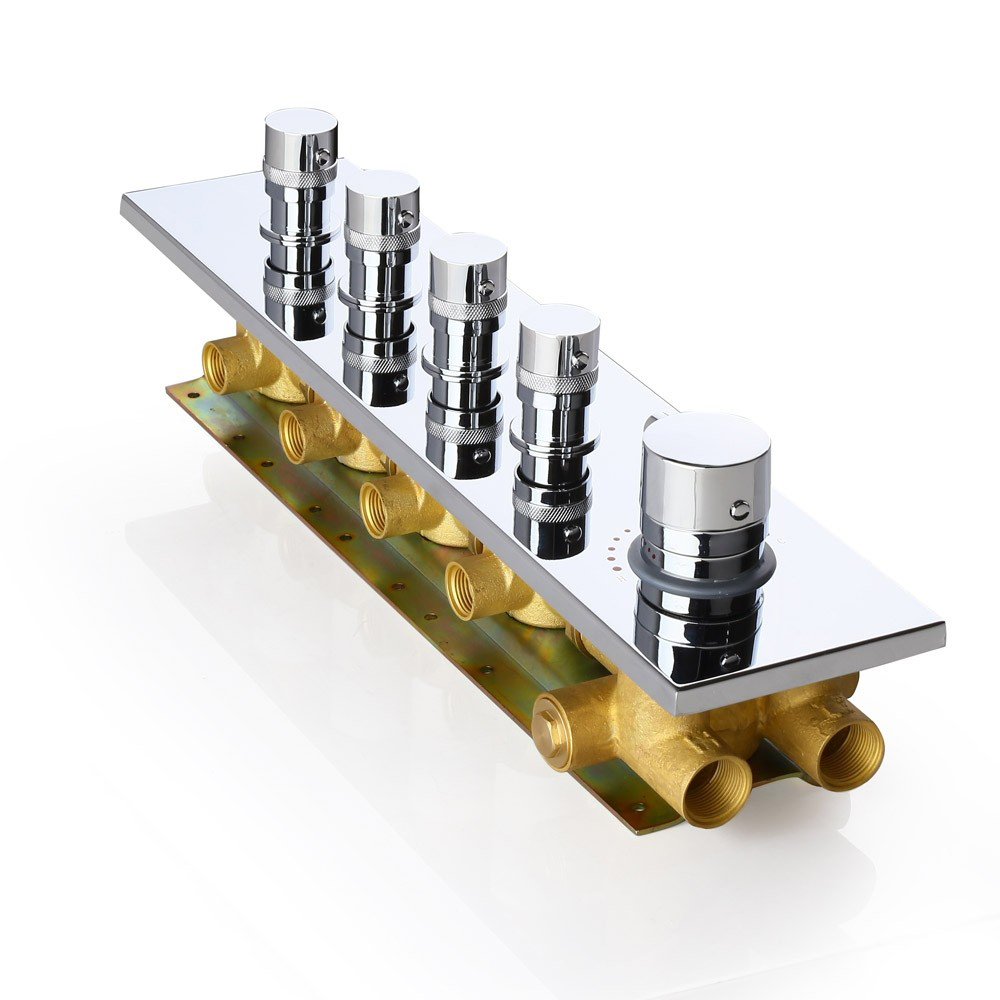
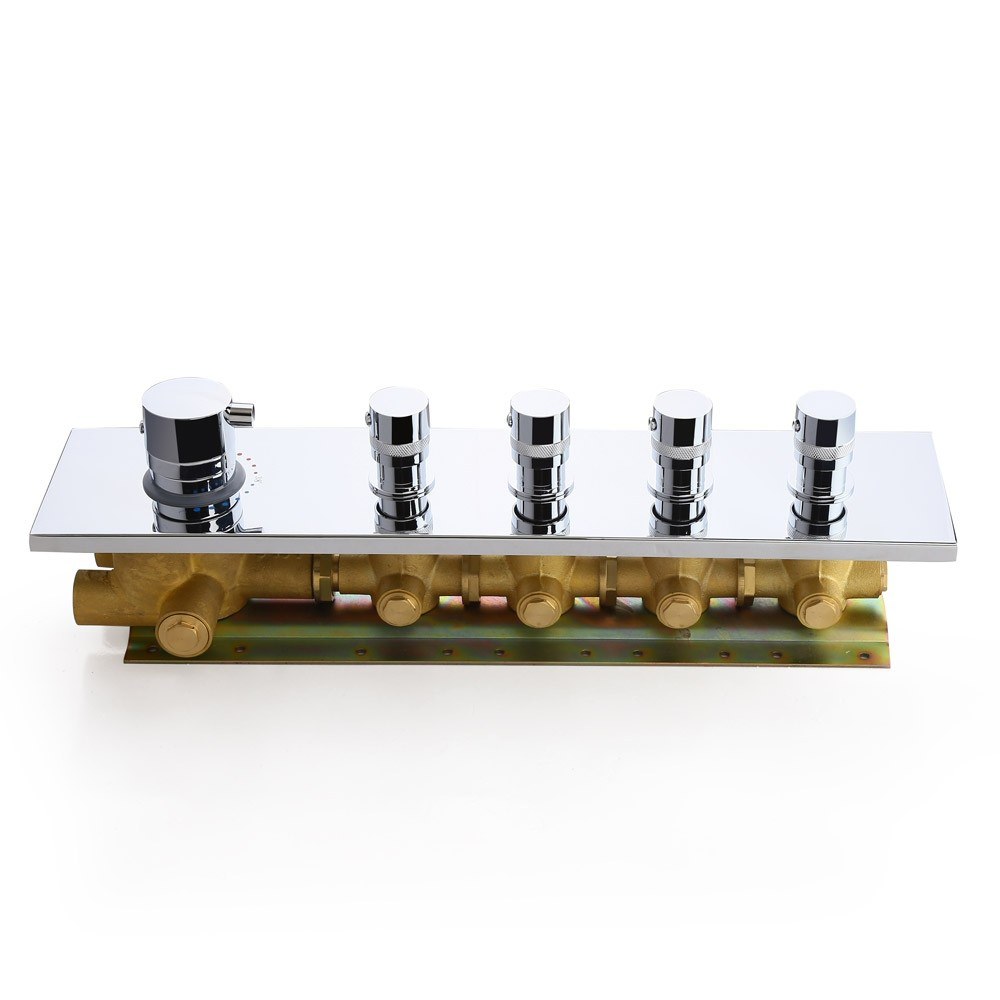
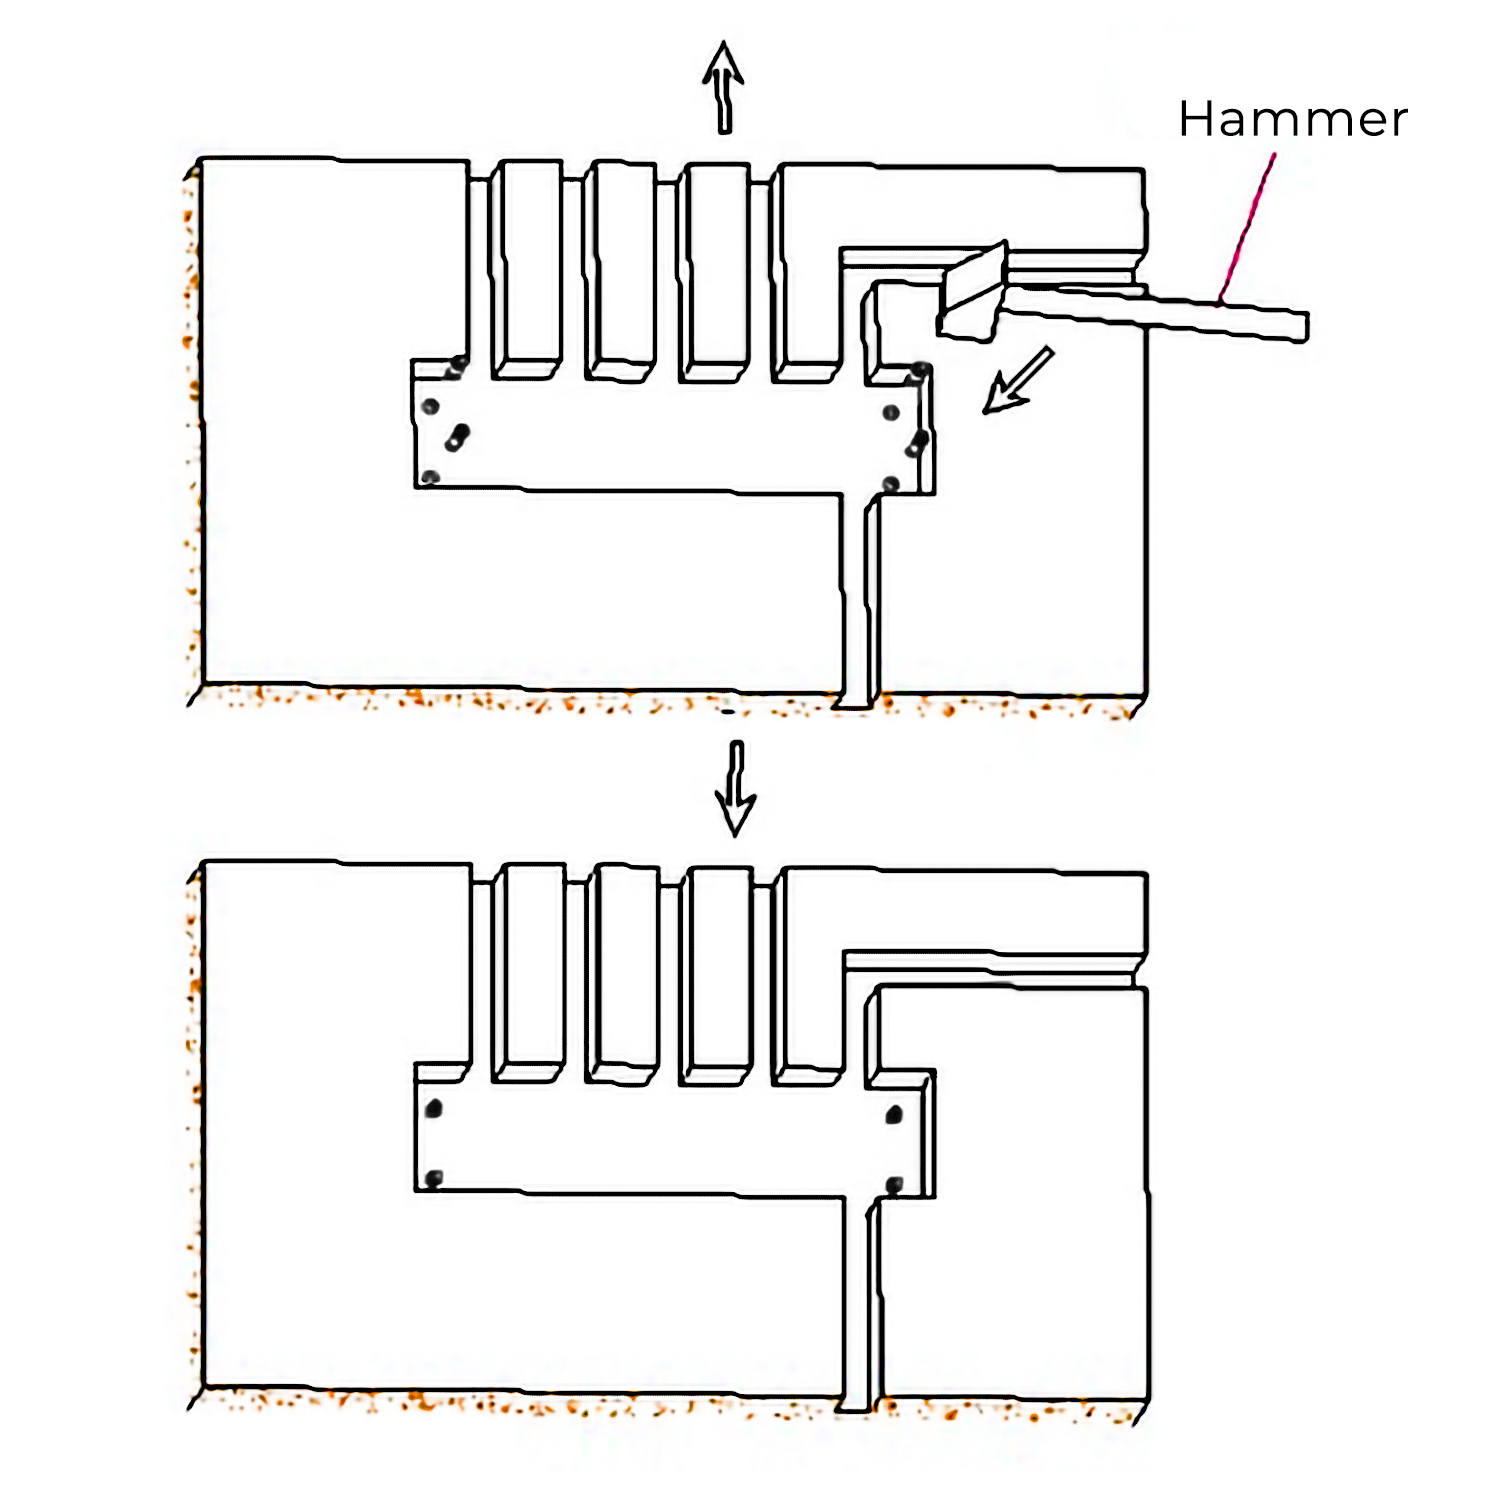
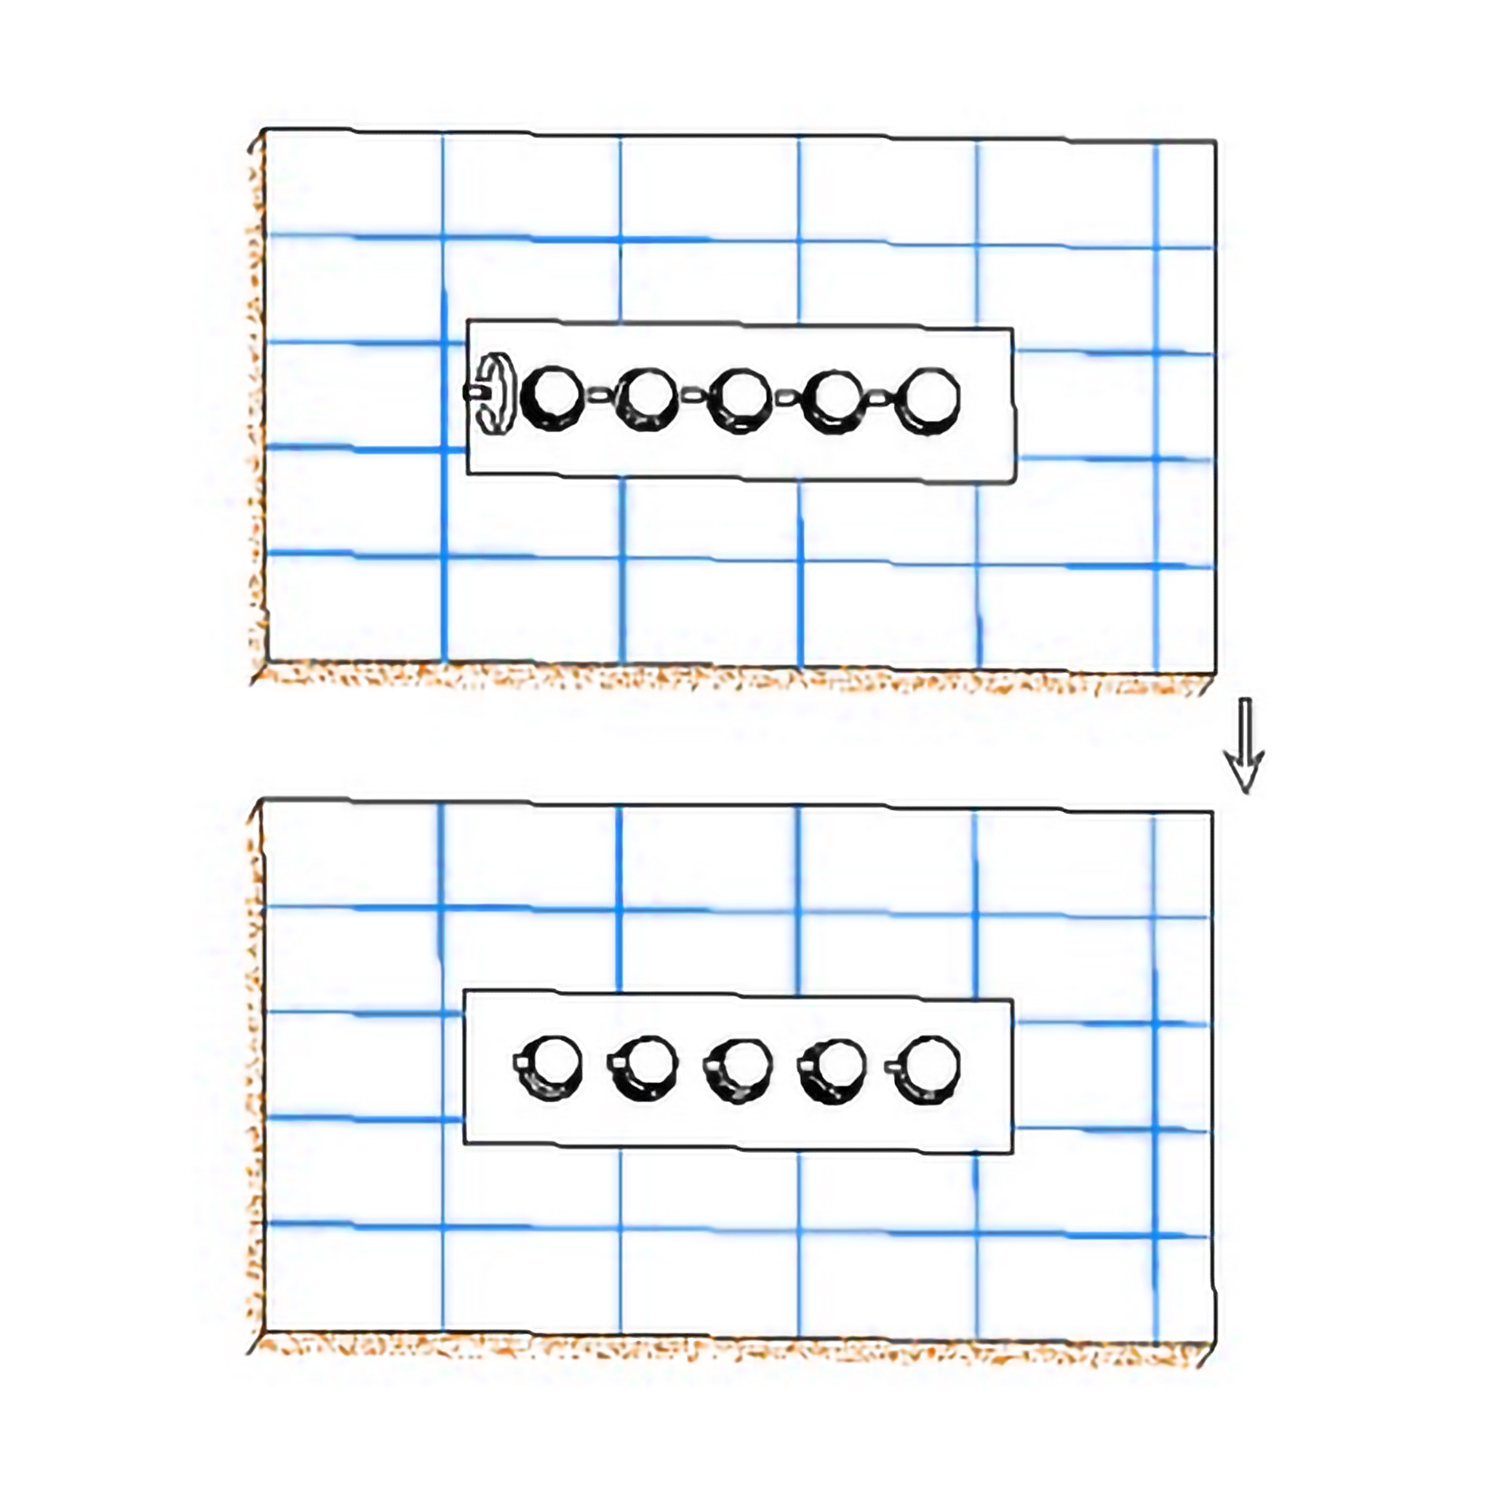
| | | Release 4 handwheel levers according to the above directions.
Take apart the embed valve, panel, and handwheel.
| |
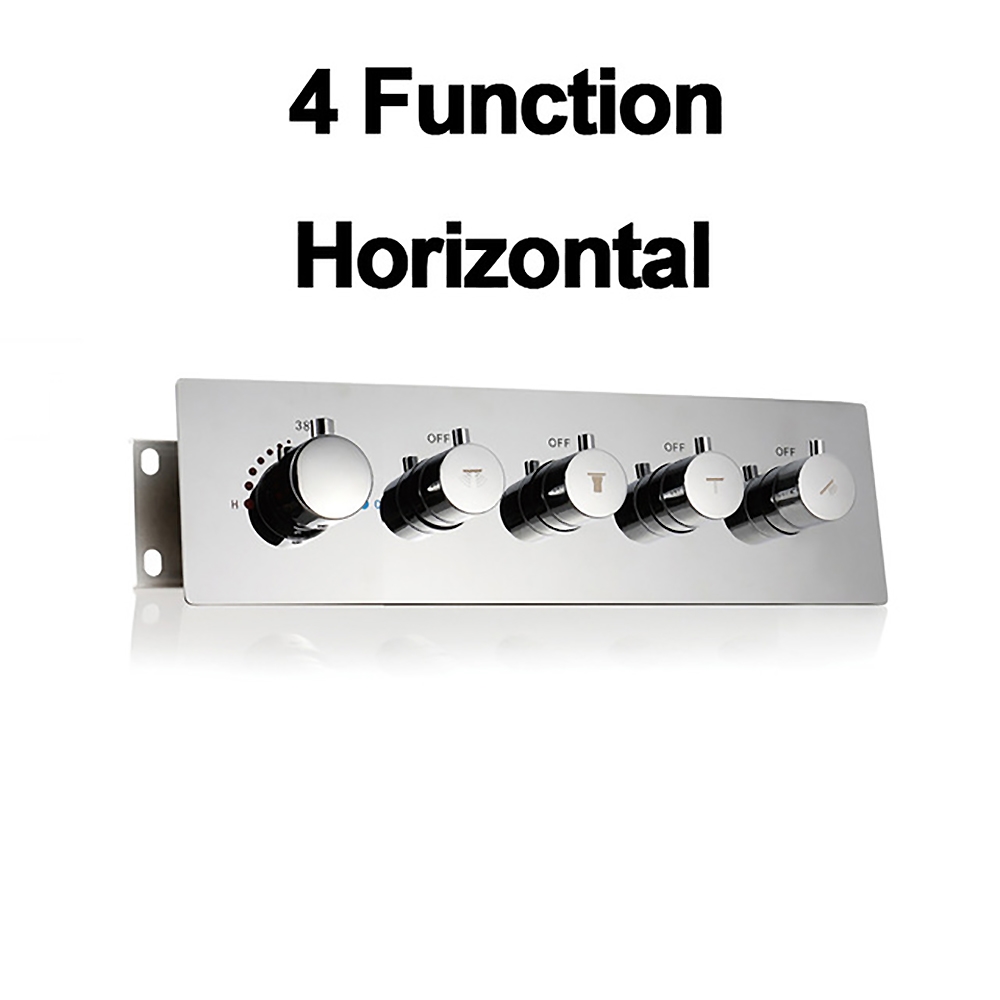
Mixer Control Valve Installation Instructions
| | | | |
| Step 3: | | | Step 4: | |
 | | |  |
|
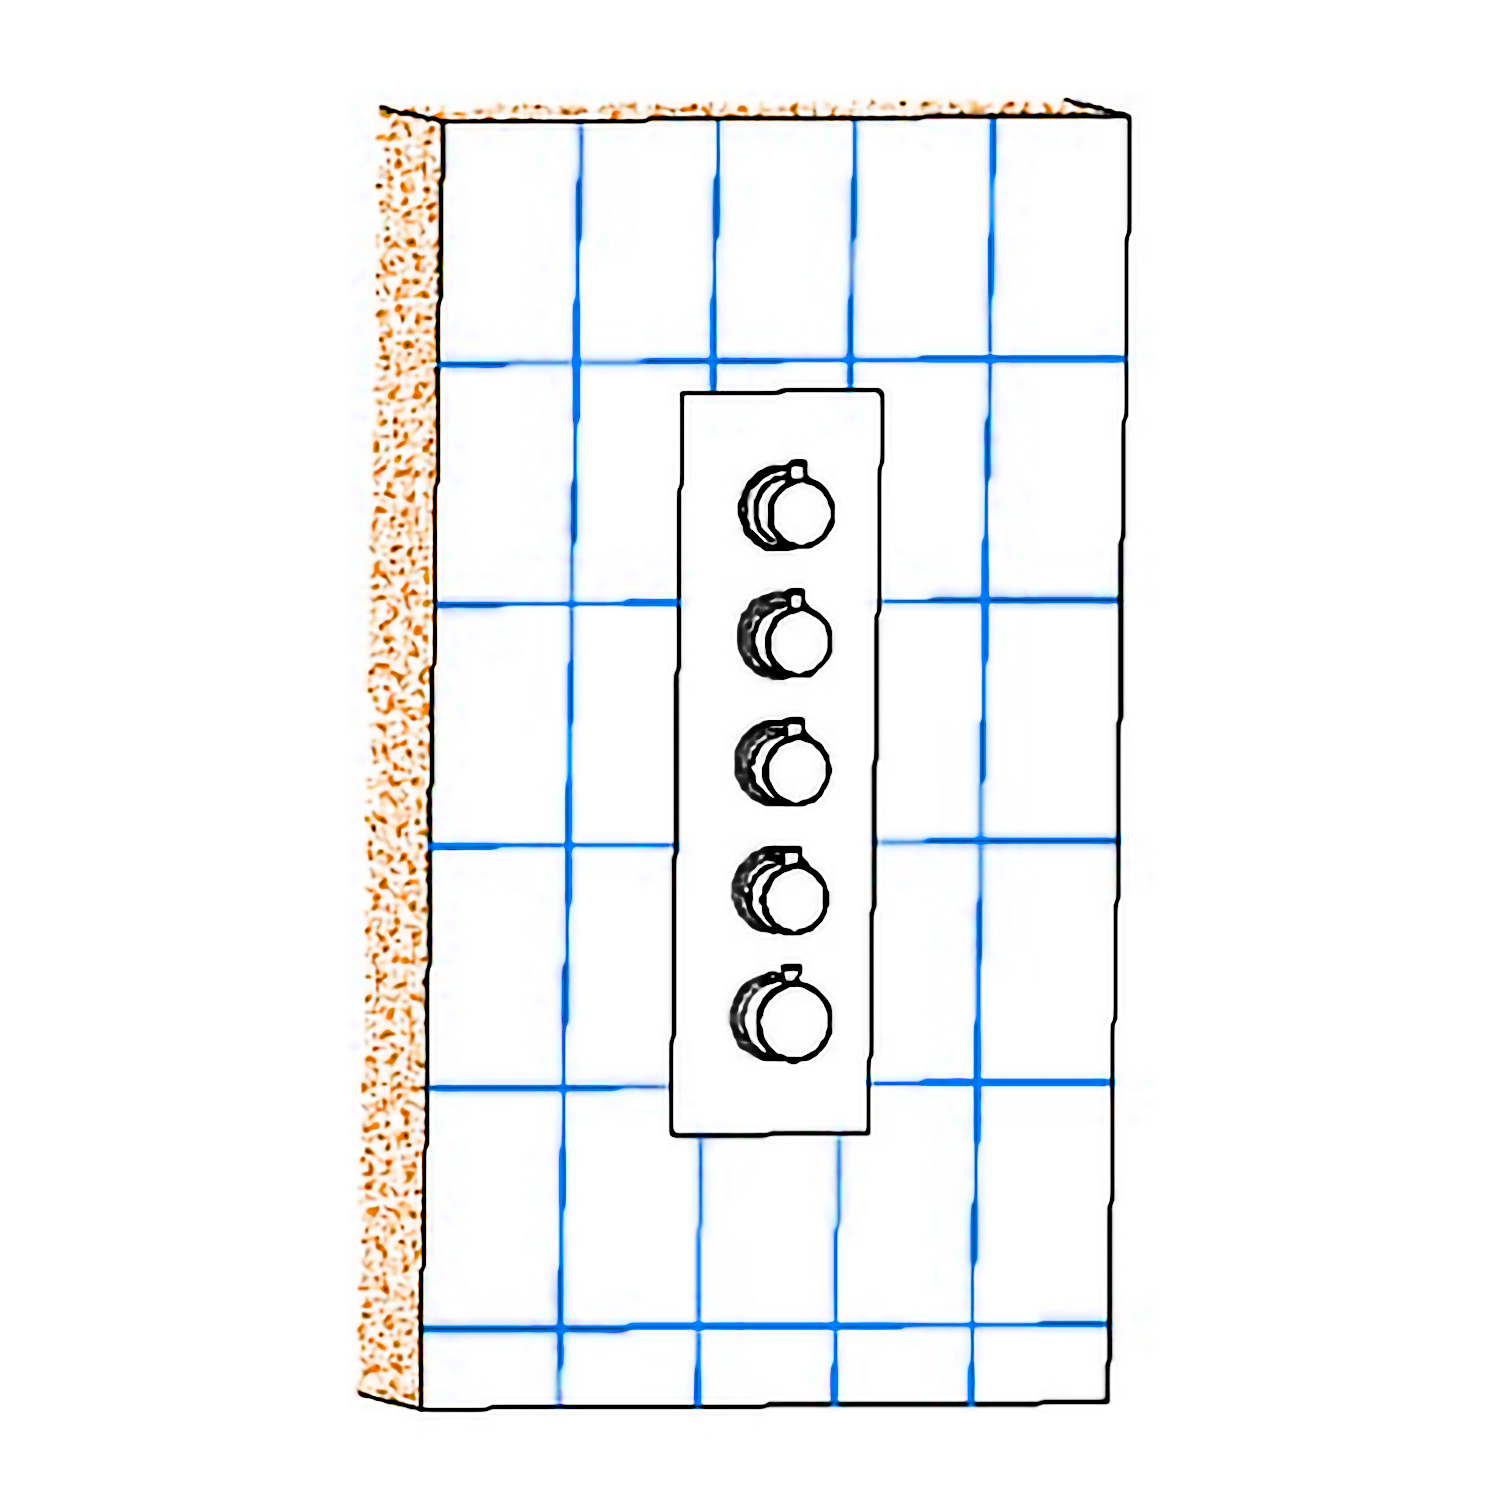
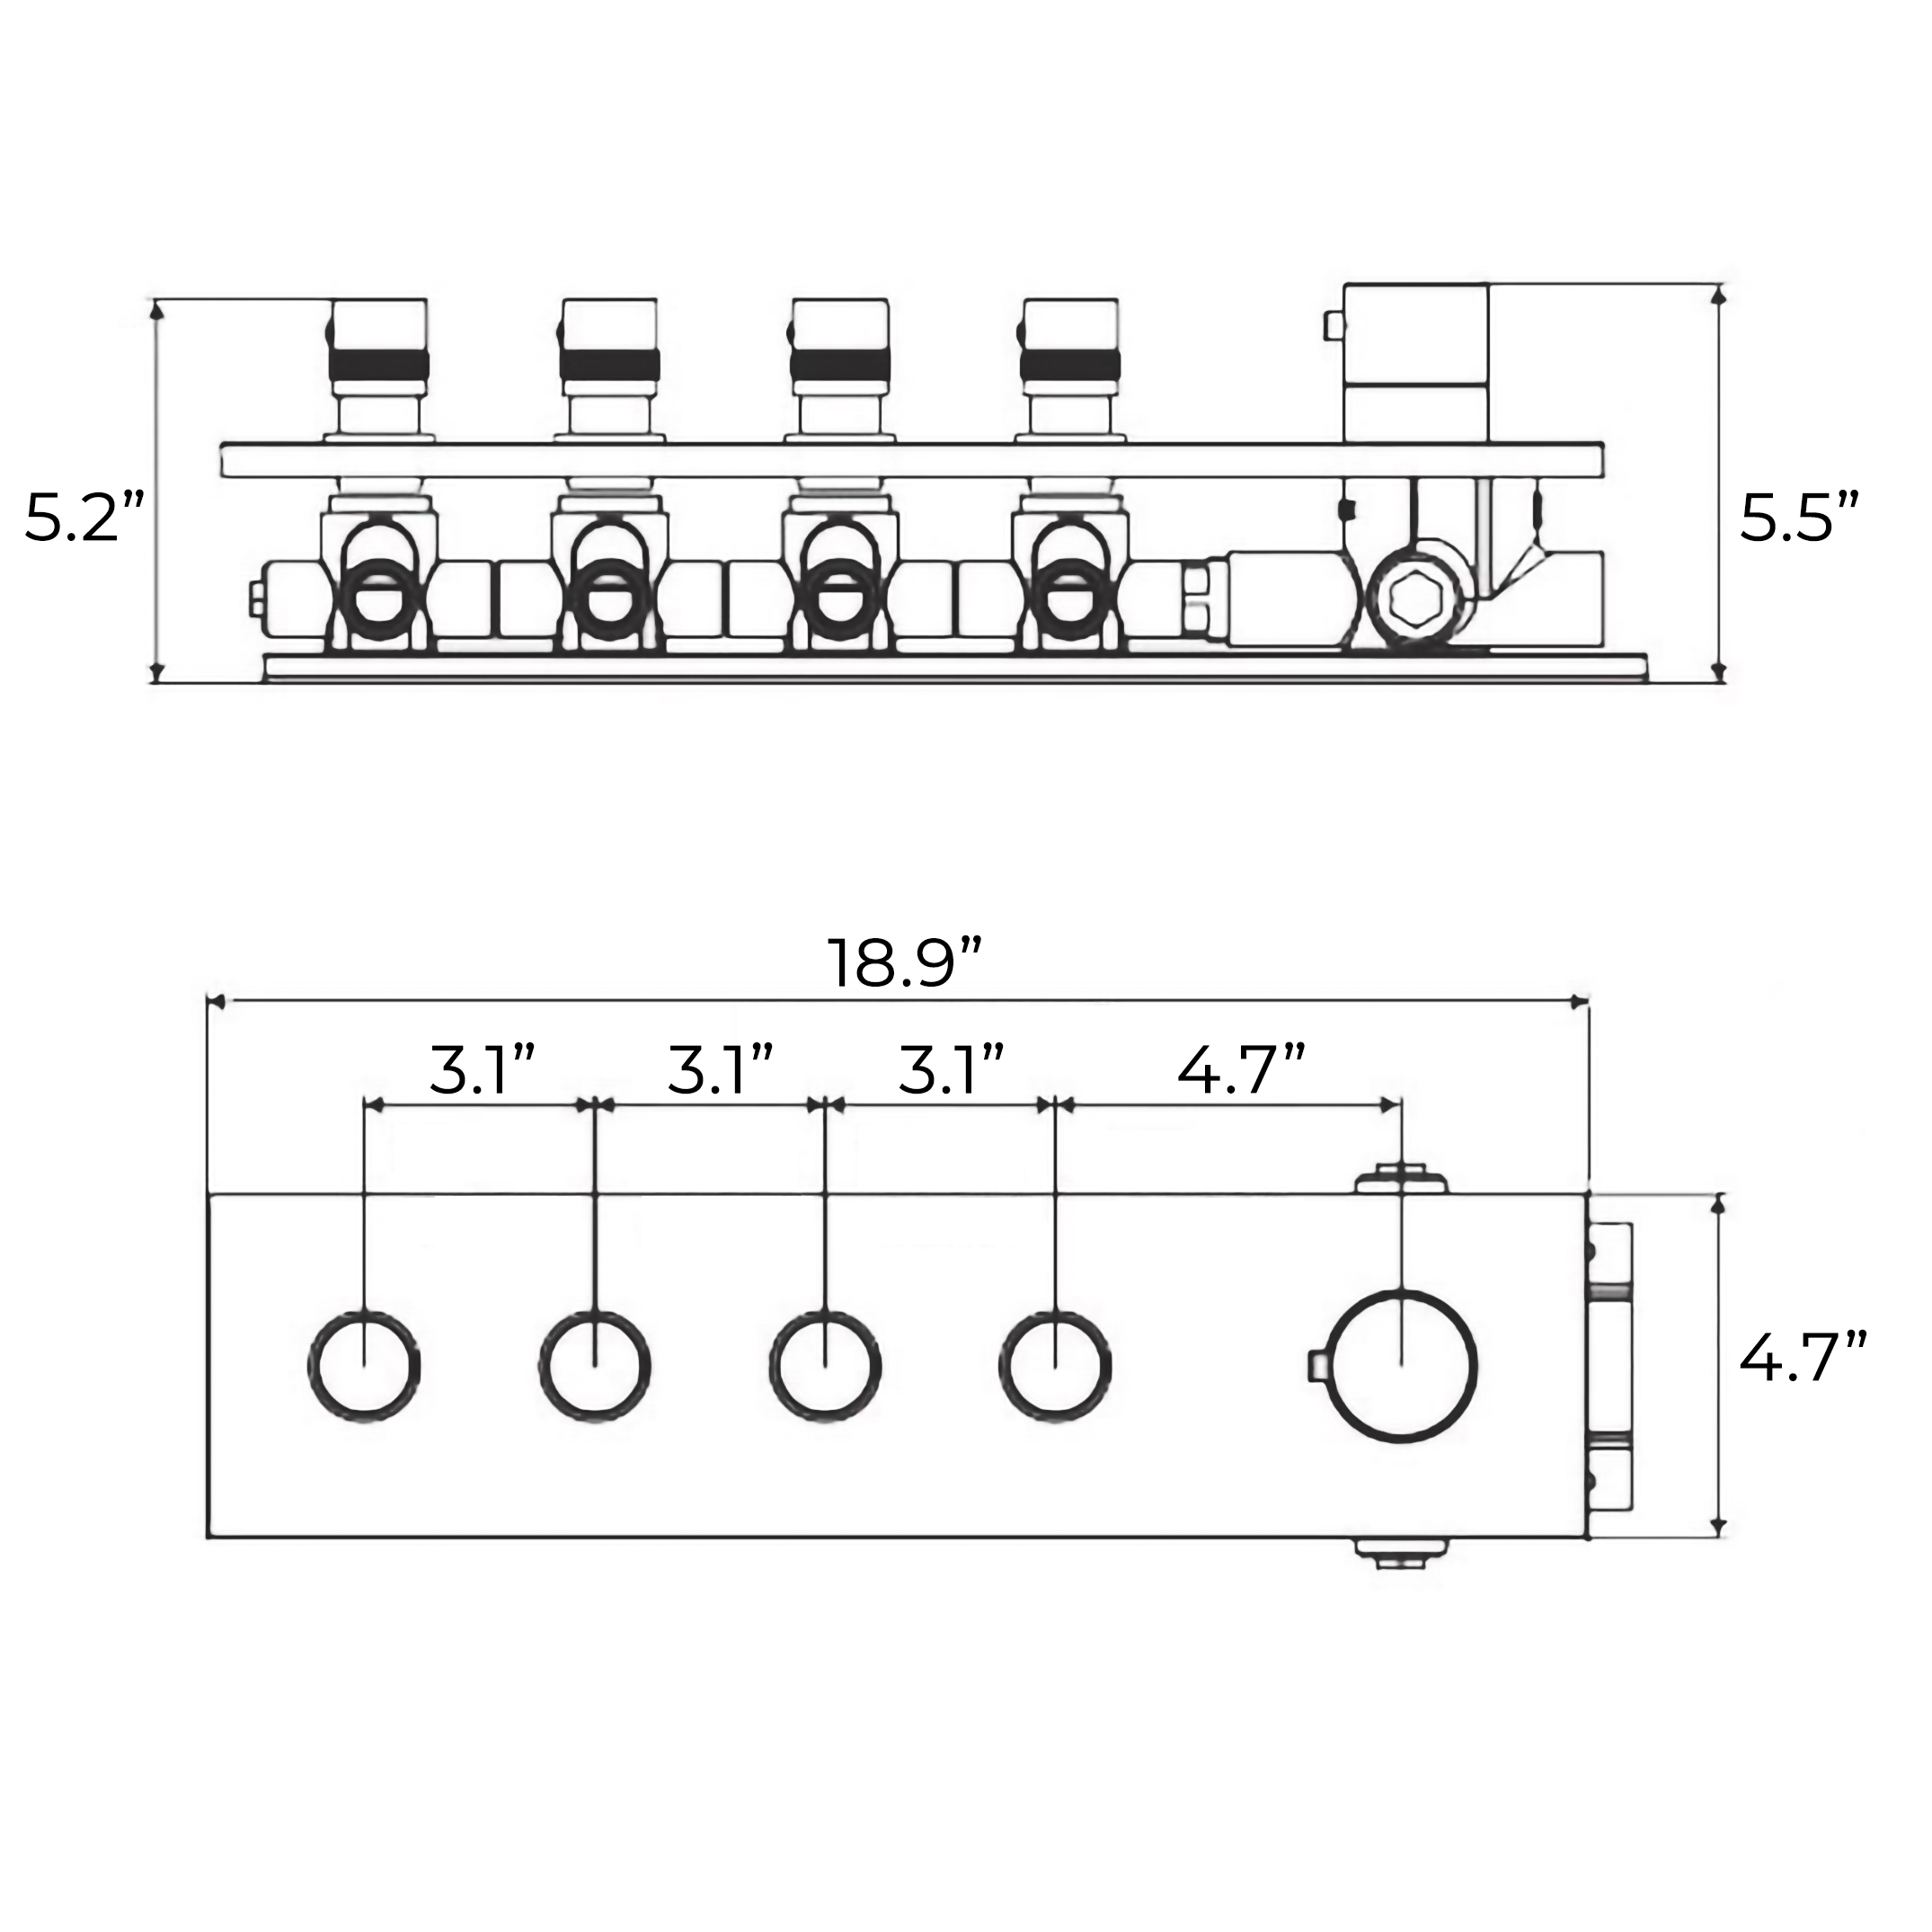
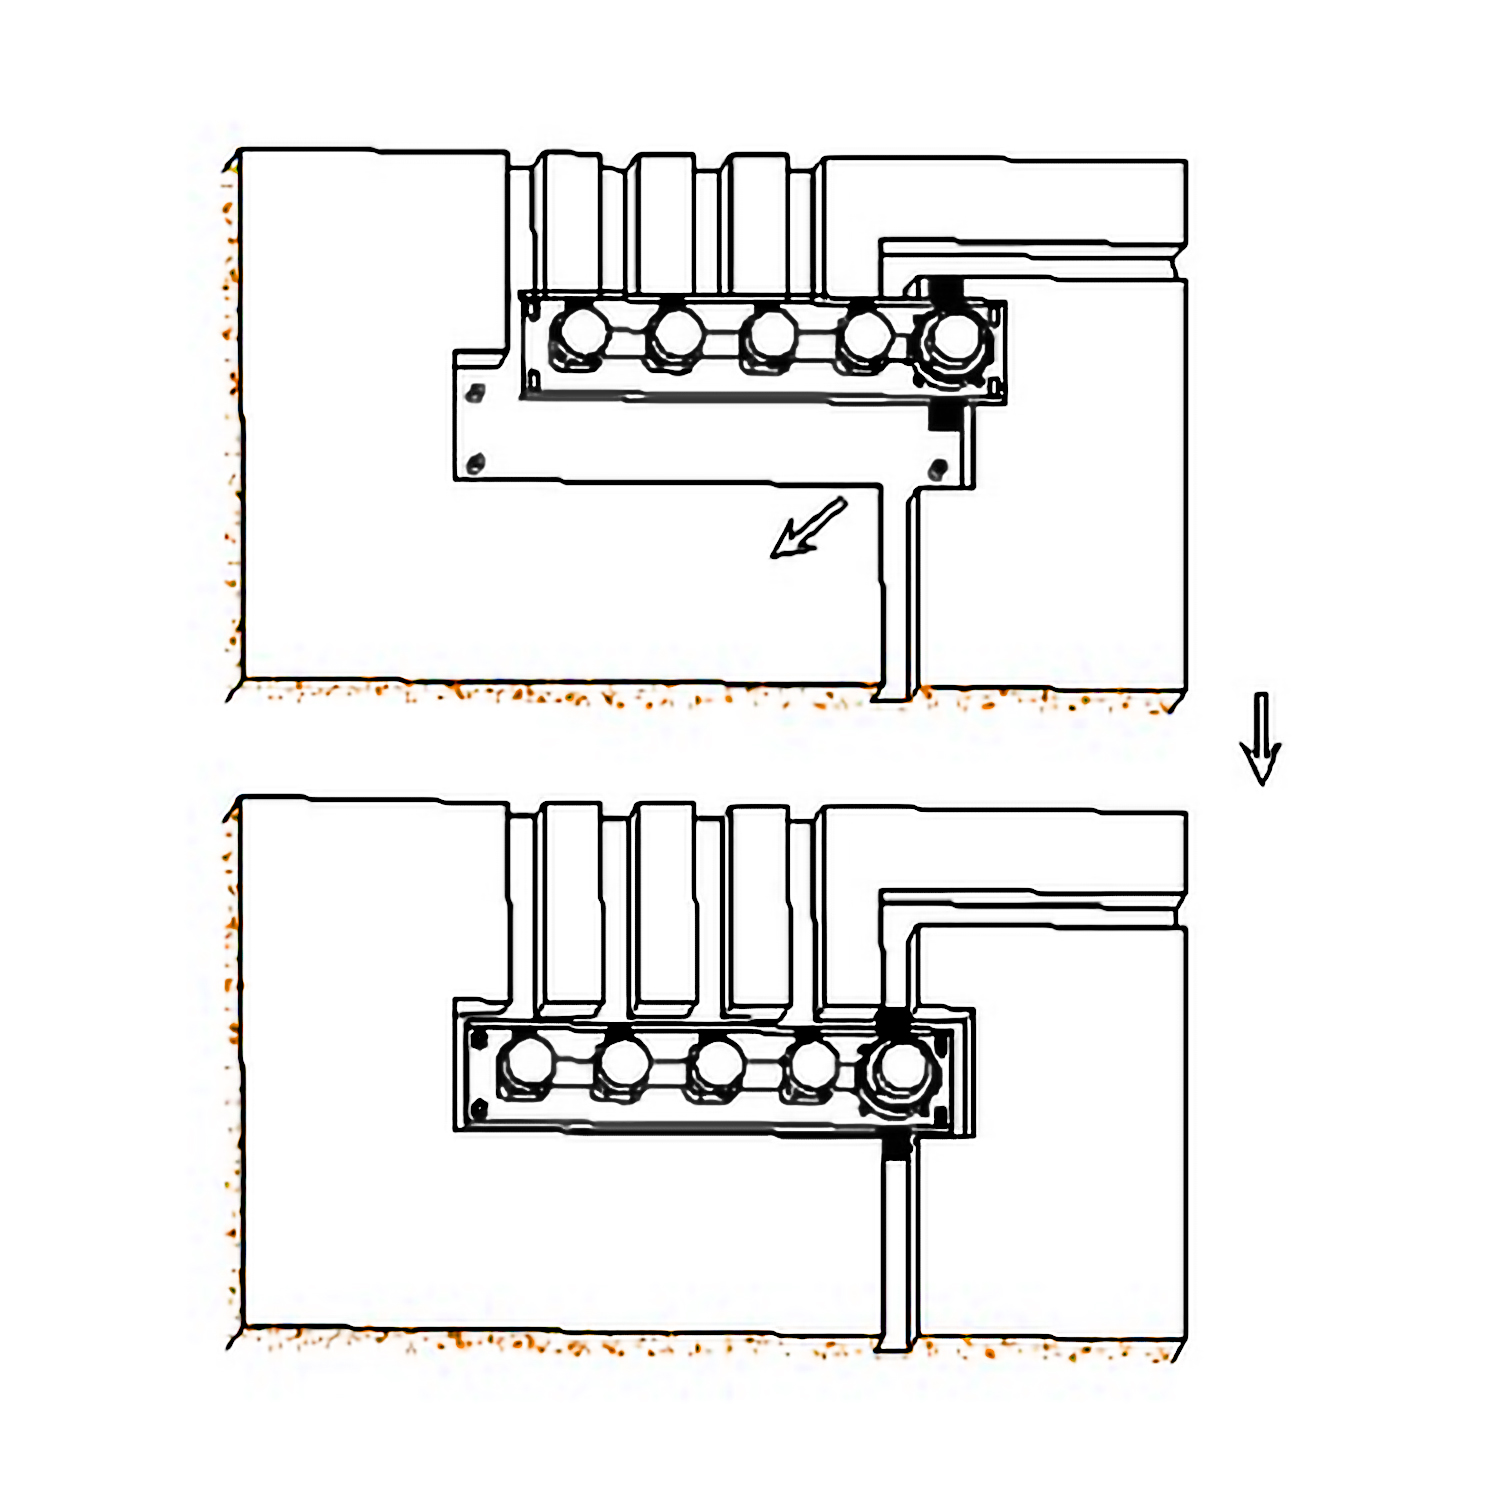
Dig the embed space for the pipe on the wall according to the specification of the valve.
Dig 4 holes according to the position of the screws.
| | | Use a hammer to thwack the screws into 4 holes.
Fix the valve body with 4 screws.
| |
| Mixer Control Valve Installation Instruction | | | | |
| Step 5: | | | Step 6: | |
 | | | 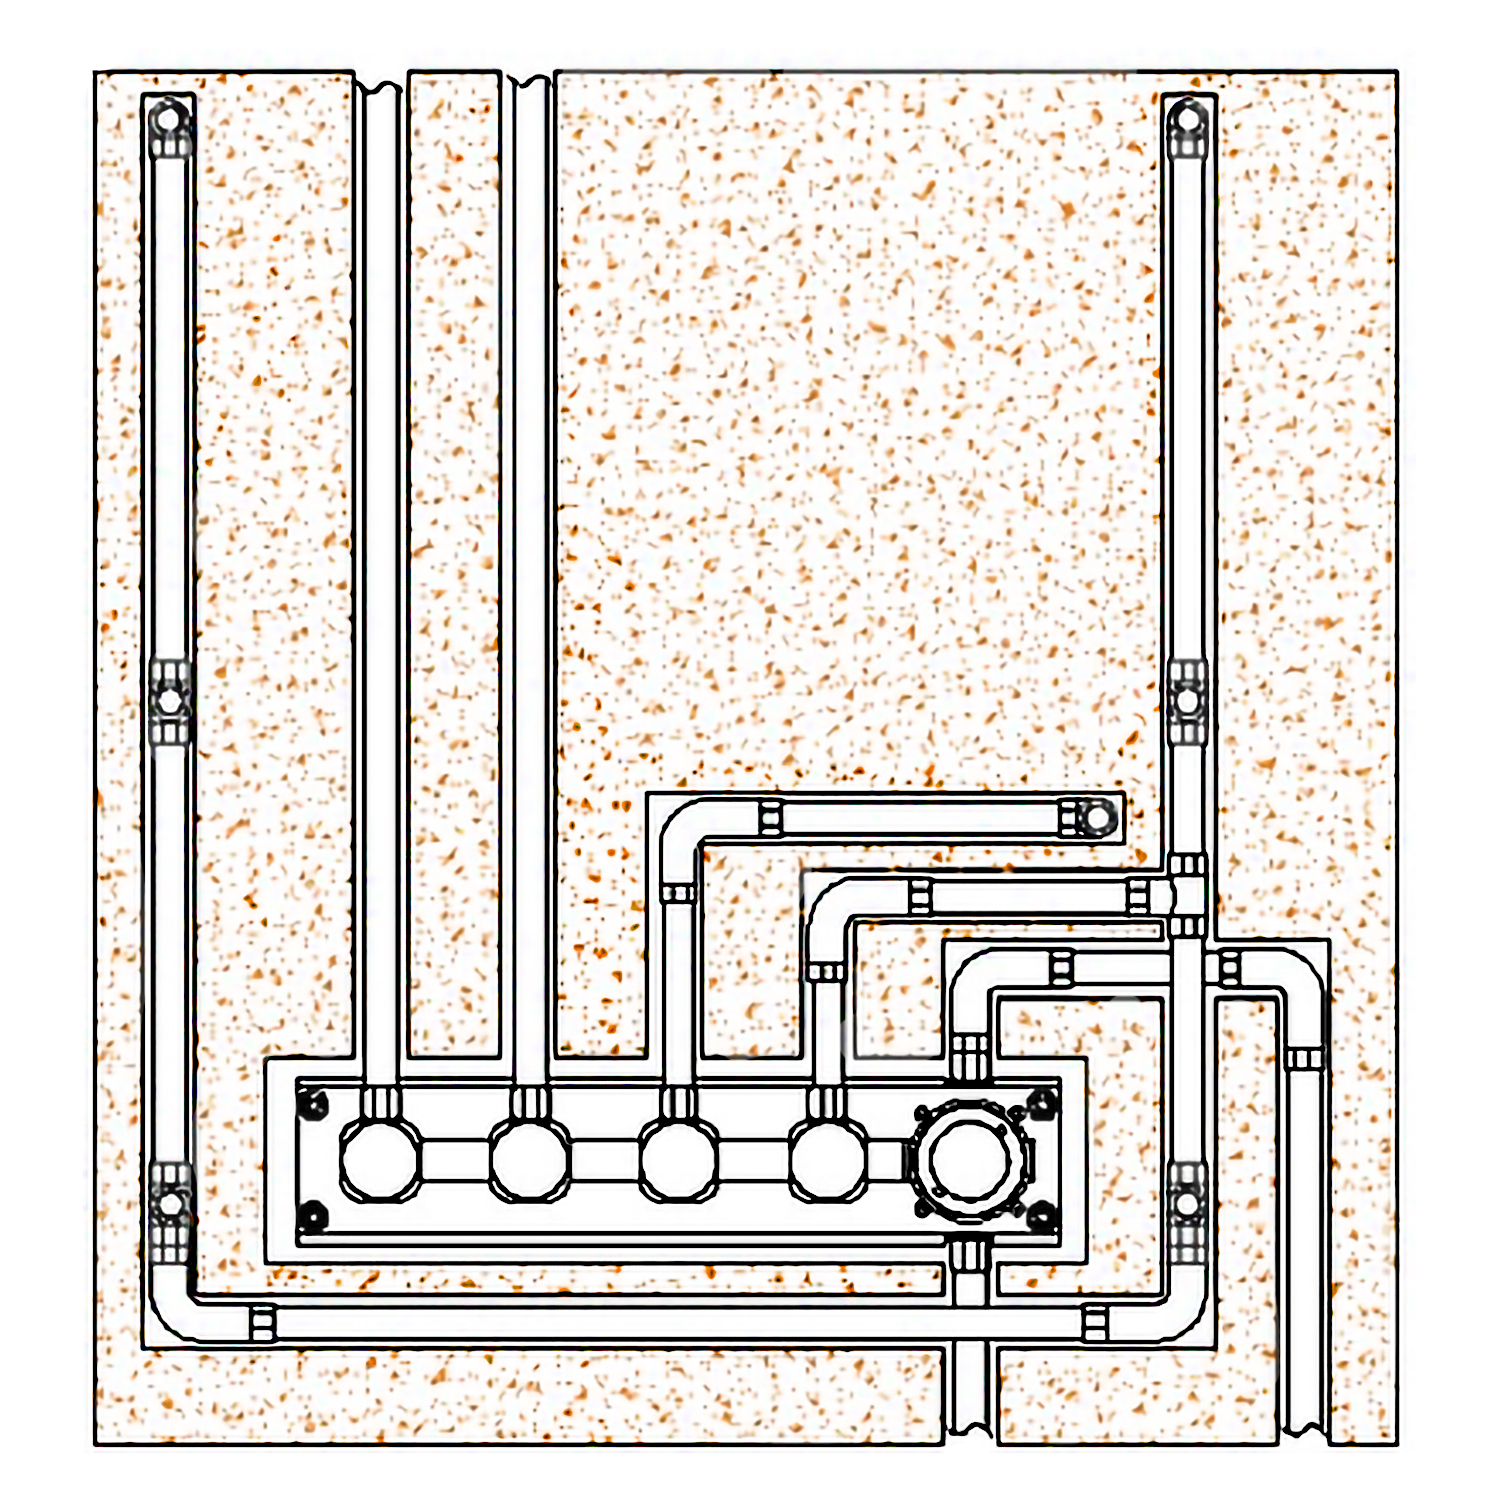 | |
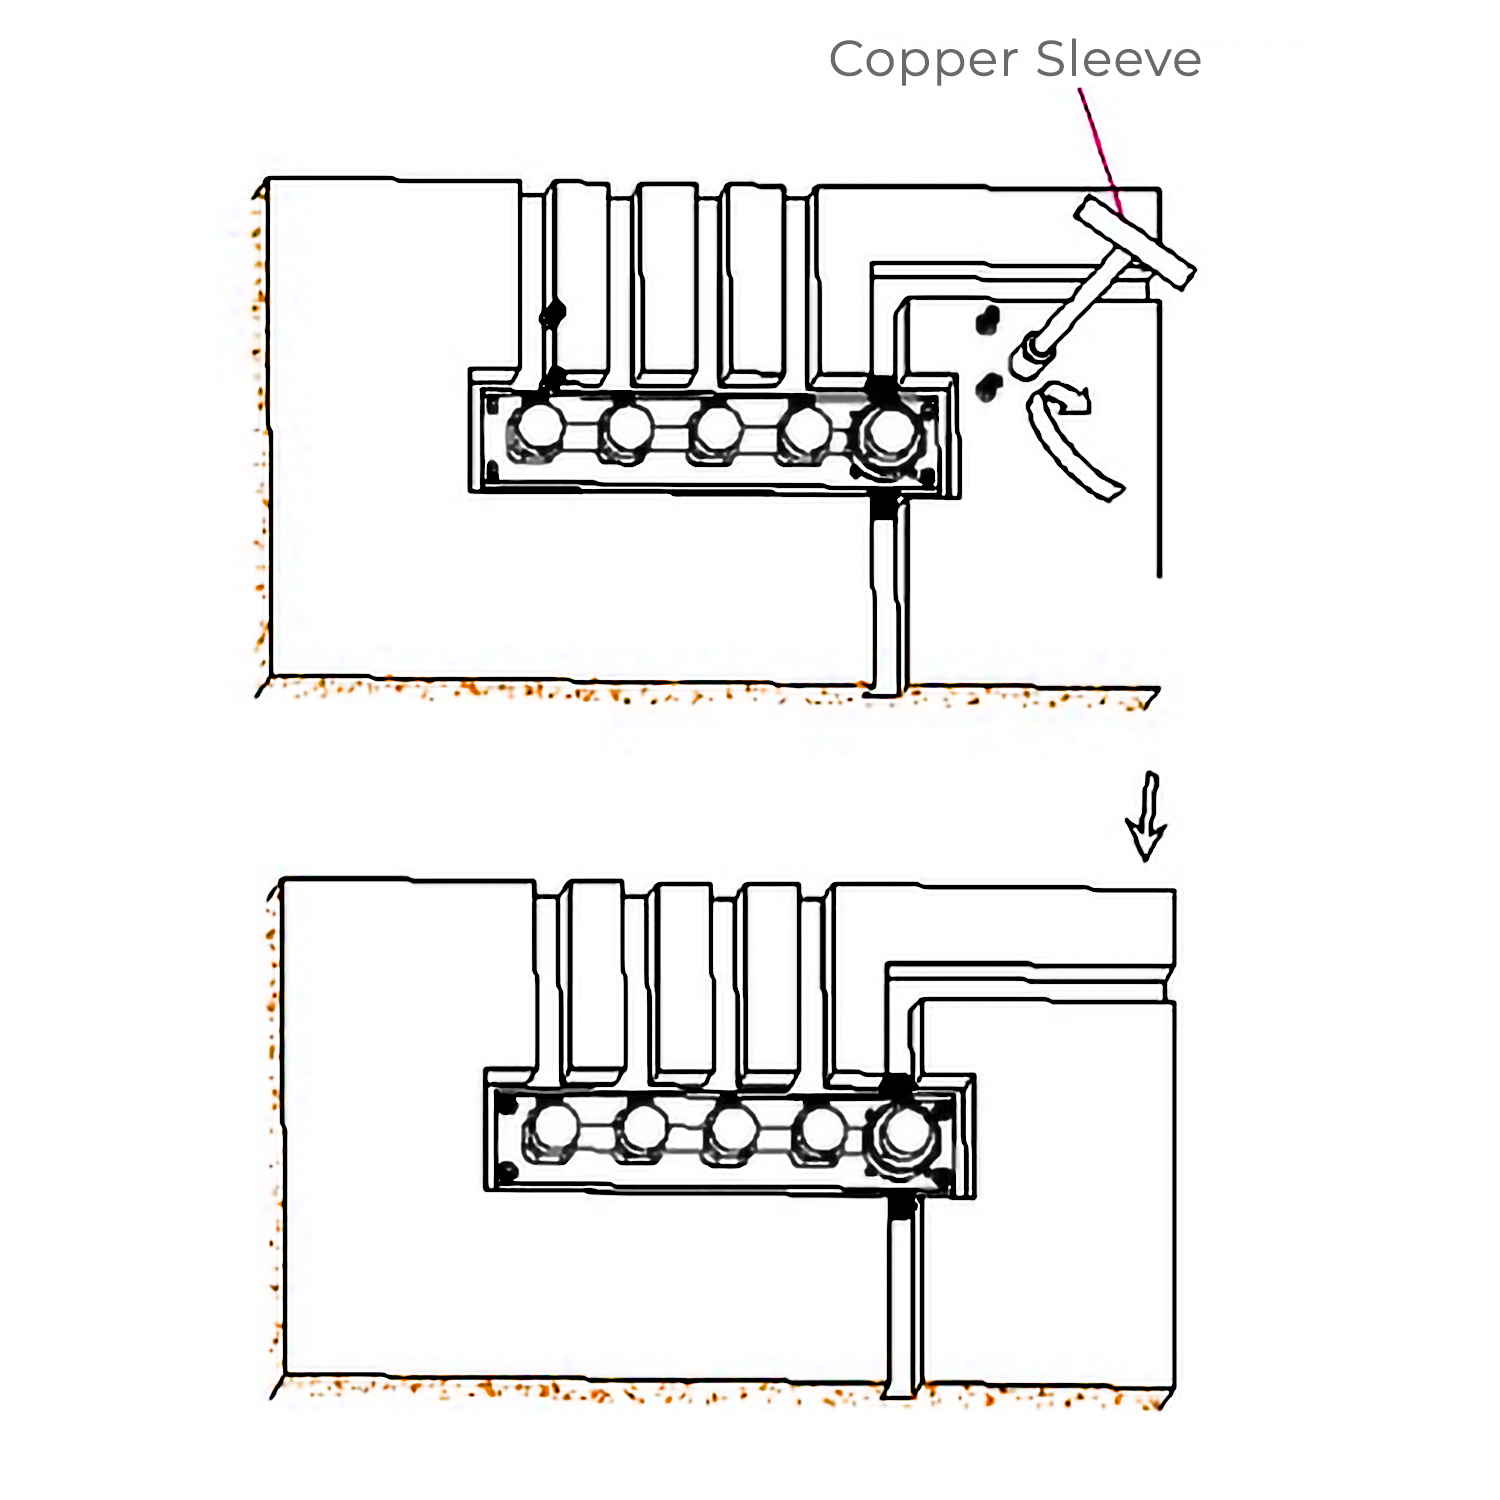
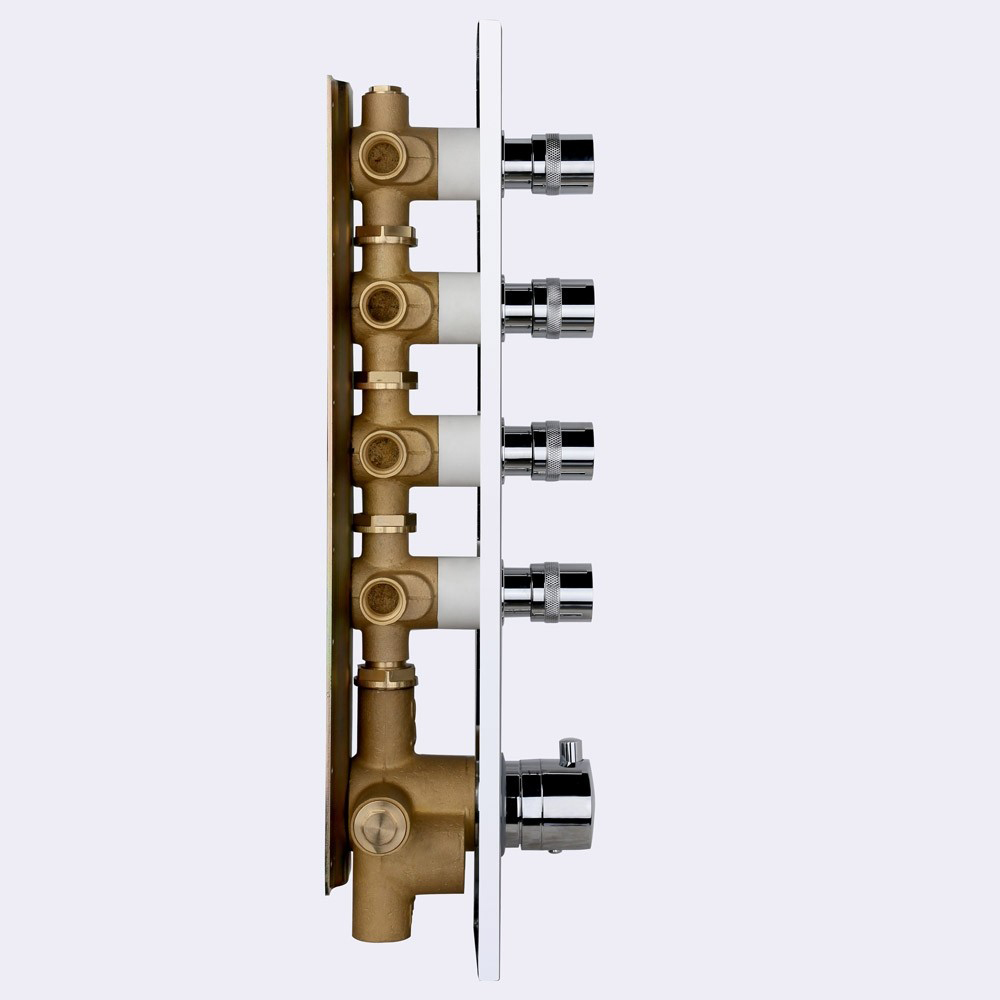
| Find out the expansion screw heads with washer and spring washer. Use copper sleeve wrench to lock the screw heads with the embed valve body. | | | After connecting all the pipes and before sealing the wall with concrete, confirm no leaking problem occurs when you turn on the water. | |
| Mixer Control Valve Installation Instruction | | | | |
| Step 7: | | | Step 8: | |
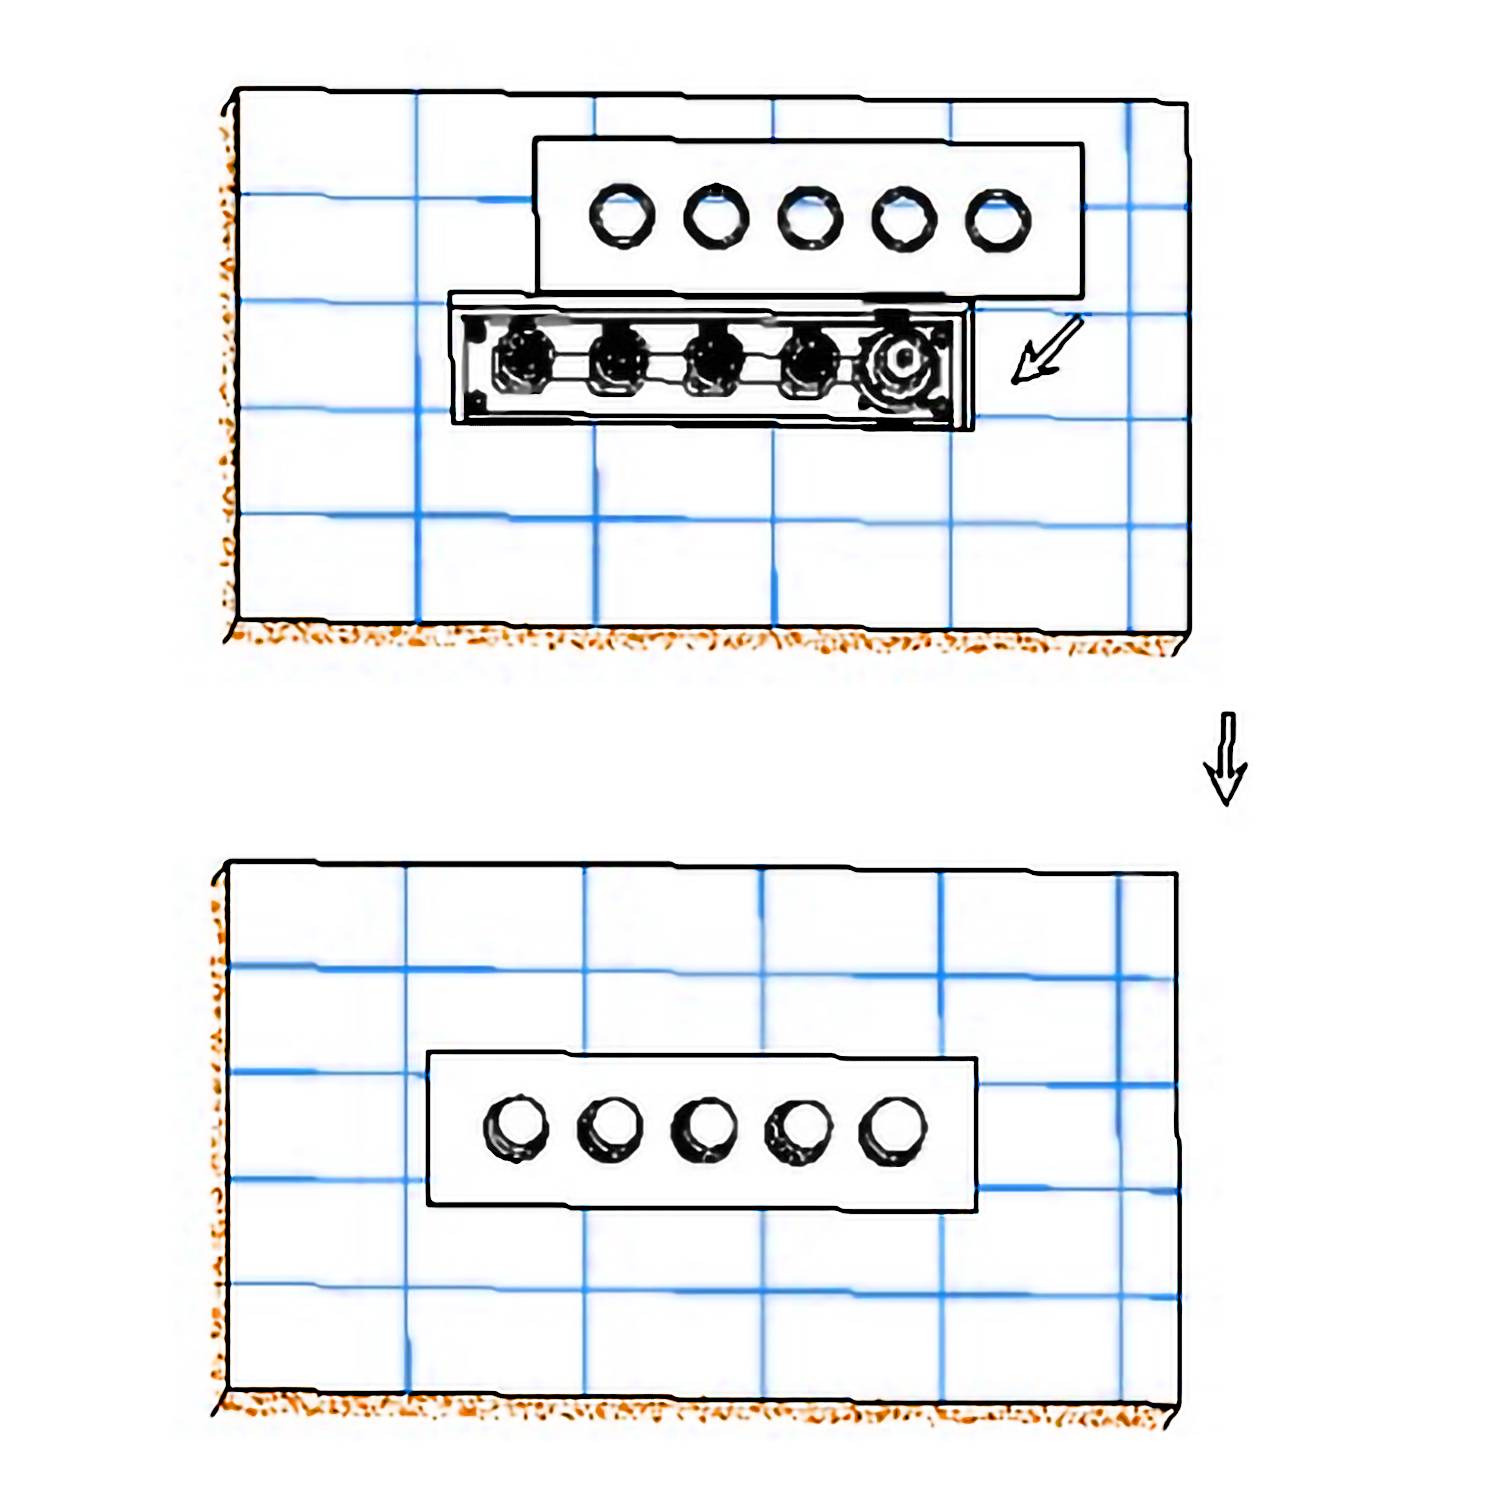 | | |  | |
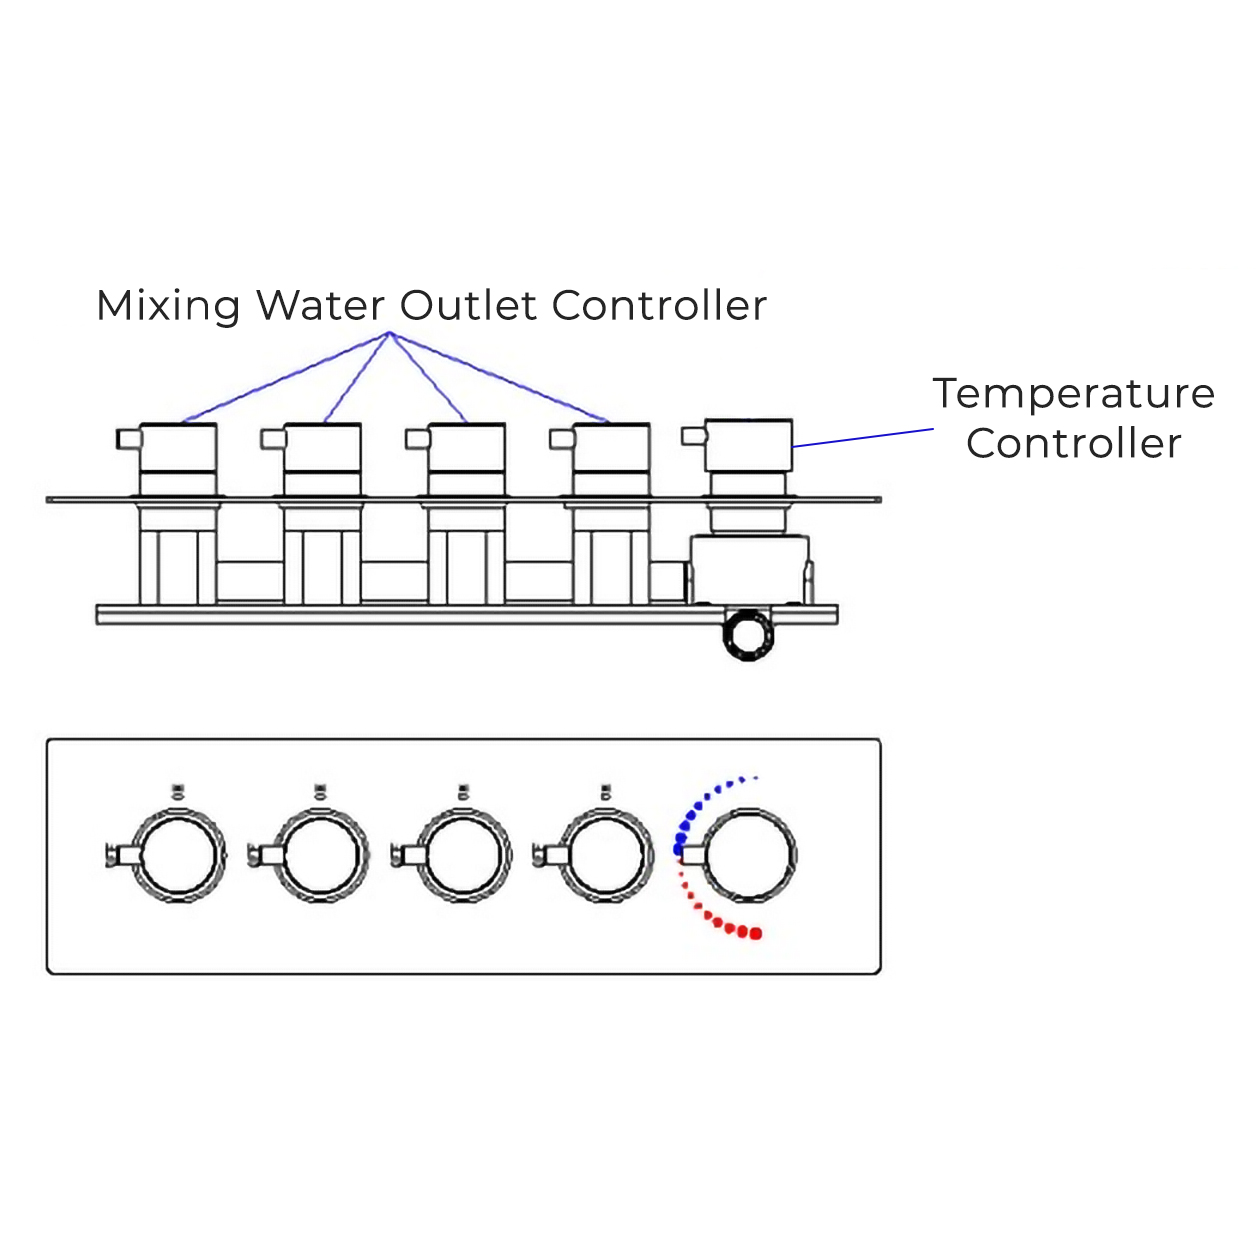
| Fix the decorative panel on the embed valve body. | | | Screw the handwheel arms with the handwheels. | |
| Mixer Control Valve Installation Instruction | | | | |
| Step 9: | | | Step 10: | |
 | | |  | |
| | | | |
| Mixer Control Valve Installation Instruction | | | | |
| Step 11: | | | Step 12: | |
 | | |  | |
| Mixer Control Valve Installation Instruction | | | | |
| Step 13: | | | | |
| | | |