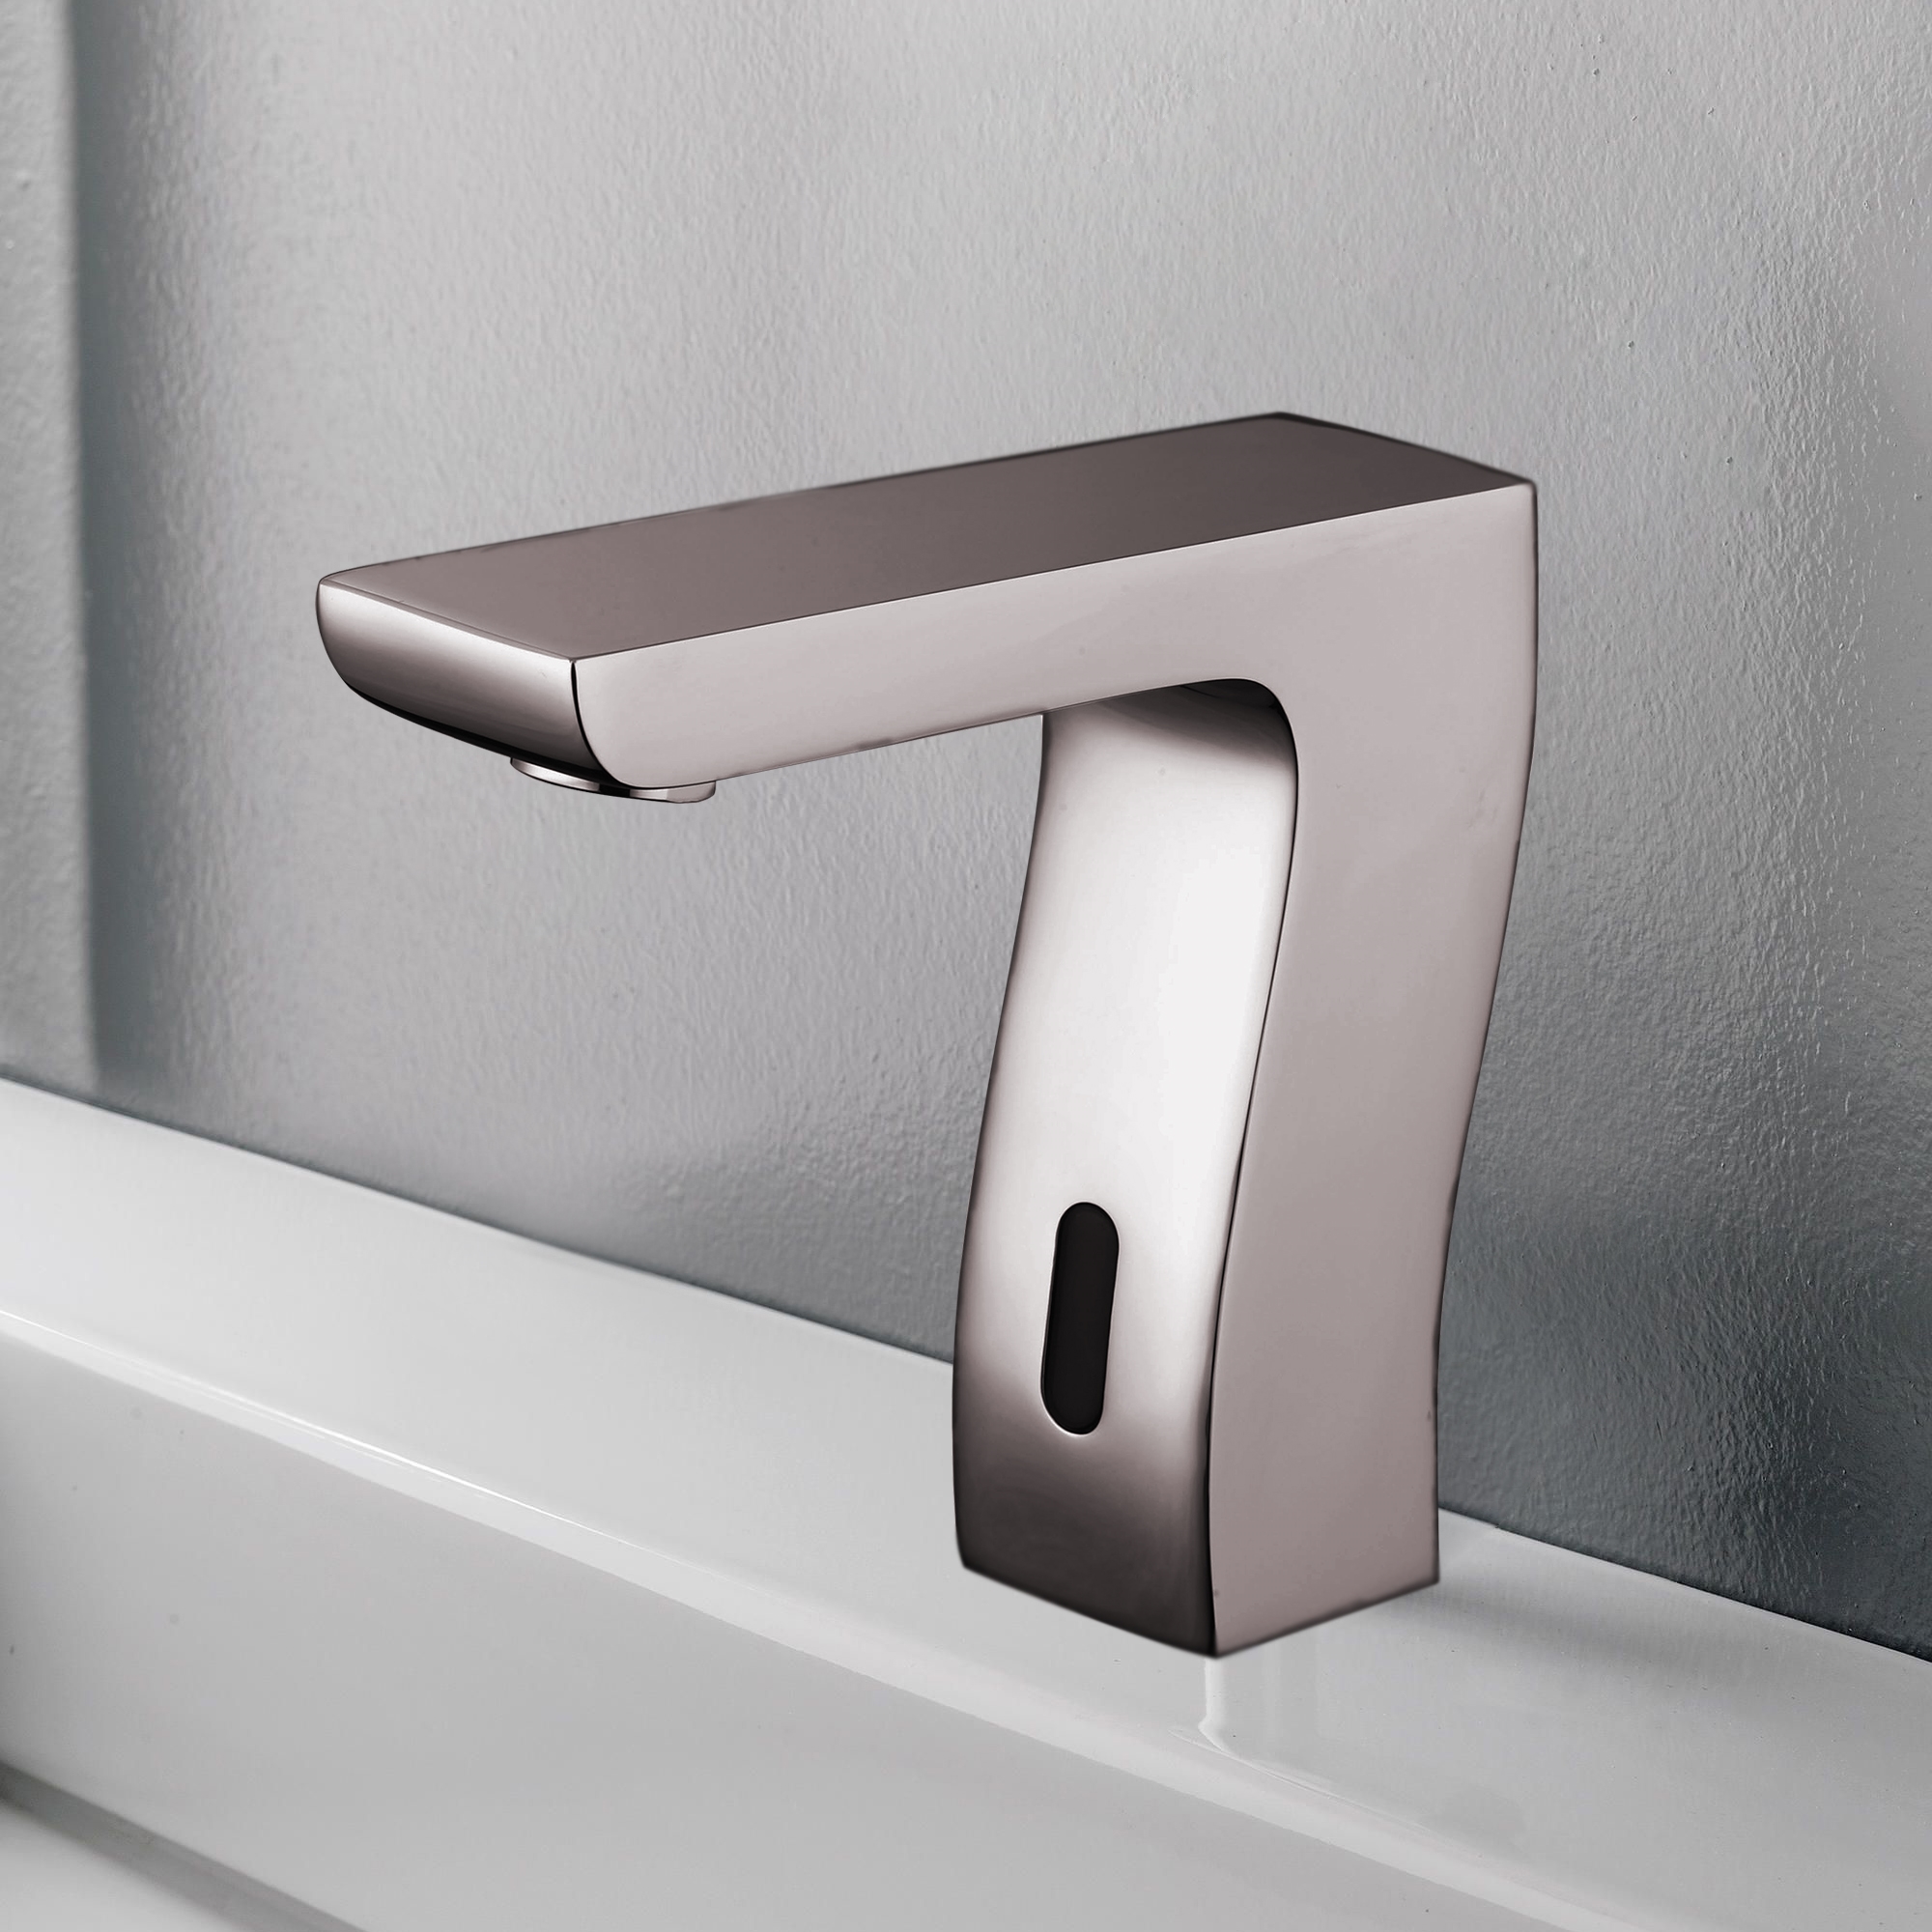
How to Install Bravat Trio Commercial Automatic Motion Sensor Faucets | BST-201BN
|
Minimize waste of water, by using the automatic faucet. Immediately reduces water waste by eliminating unnecessary and unattended water flow. Ideal for commercial use applications in public restrooms, restaurants, office building, public facilities, hospitals. Fits all standard US plumbing. Reduces the transfer of germs by preventing cross-contamination and re-contamination of germs and bacteria by not touching the faucets or handles.Cut down on water usage by minimizing waste of water while soaping, lathering, scrubbing and drying hands by eliminating unnecessary and unattended water flow.
|
|

|
|
Features:
|
|
Visit Product Page 
|
- Durable solid-brass construction; expertly crafted
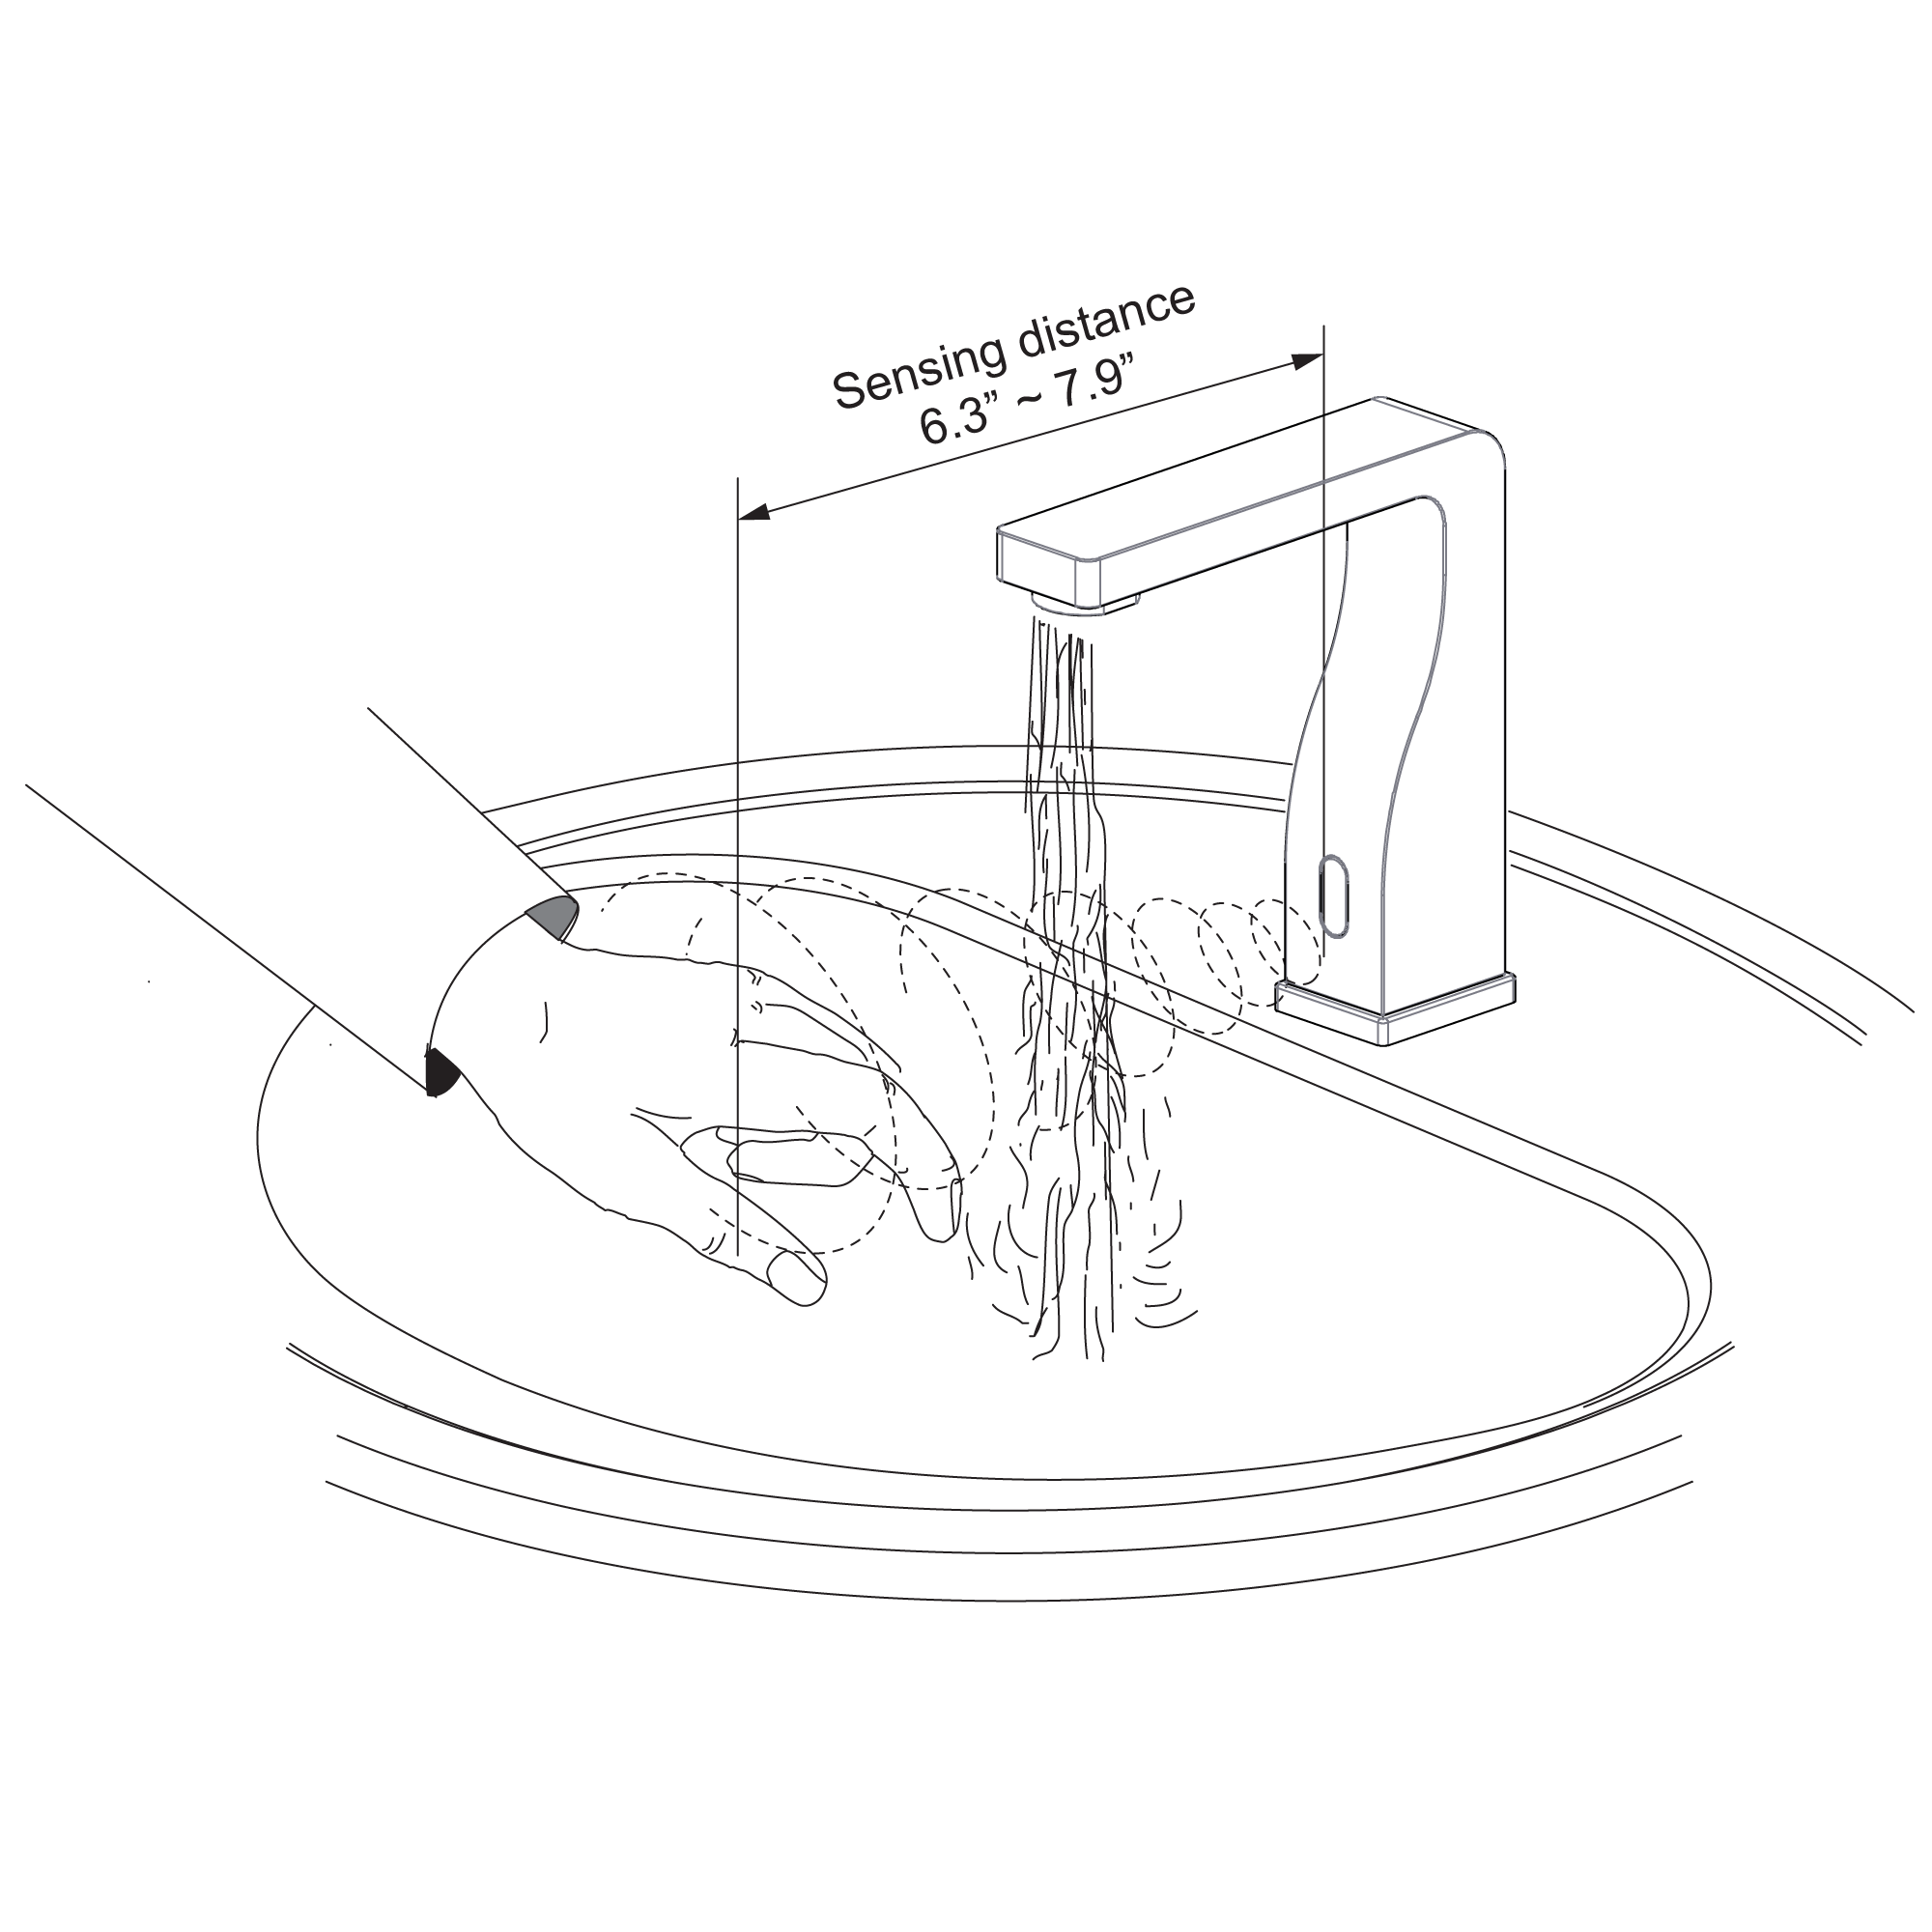
- Motion detection Touchless sensor faucet operation
- Drip Free Ceramic Disc Cartridge for Smooth and Long Lasting Operation
- Sensitive Sensor with Infrared AI Smart-Chip
- The factory is set to 30-second Auto Shutoff (can be adjusted).
- Water Pressure : 0.5 - 7.0 KGS/cm, 10 - 125 psi
- Solid Brass Construction, Chrome Finish
- Easy to Install - Instructions Included
- Water resistant solenoid enclosure
- Advanced energy saving design for long lasting battery life
- Comes complete with Hoses & Accessories
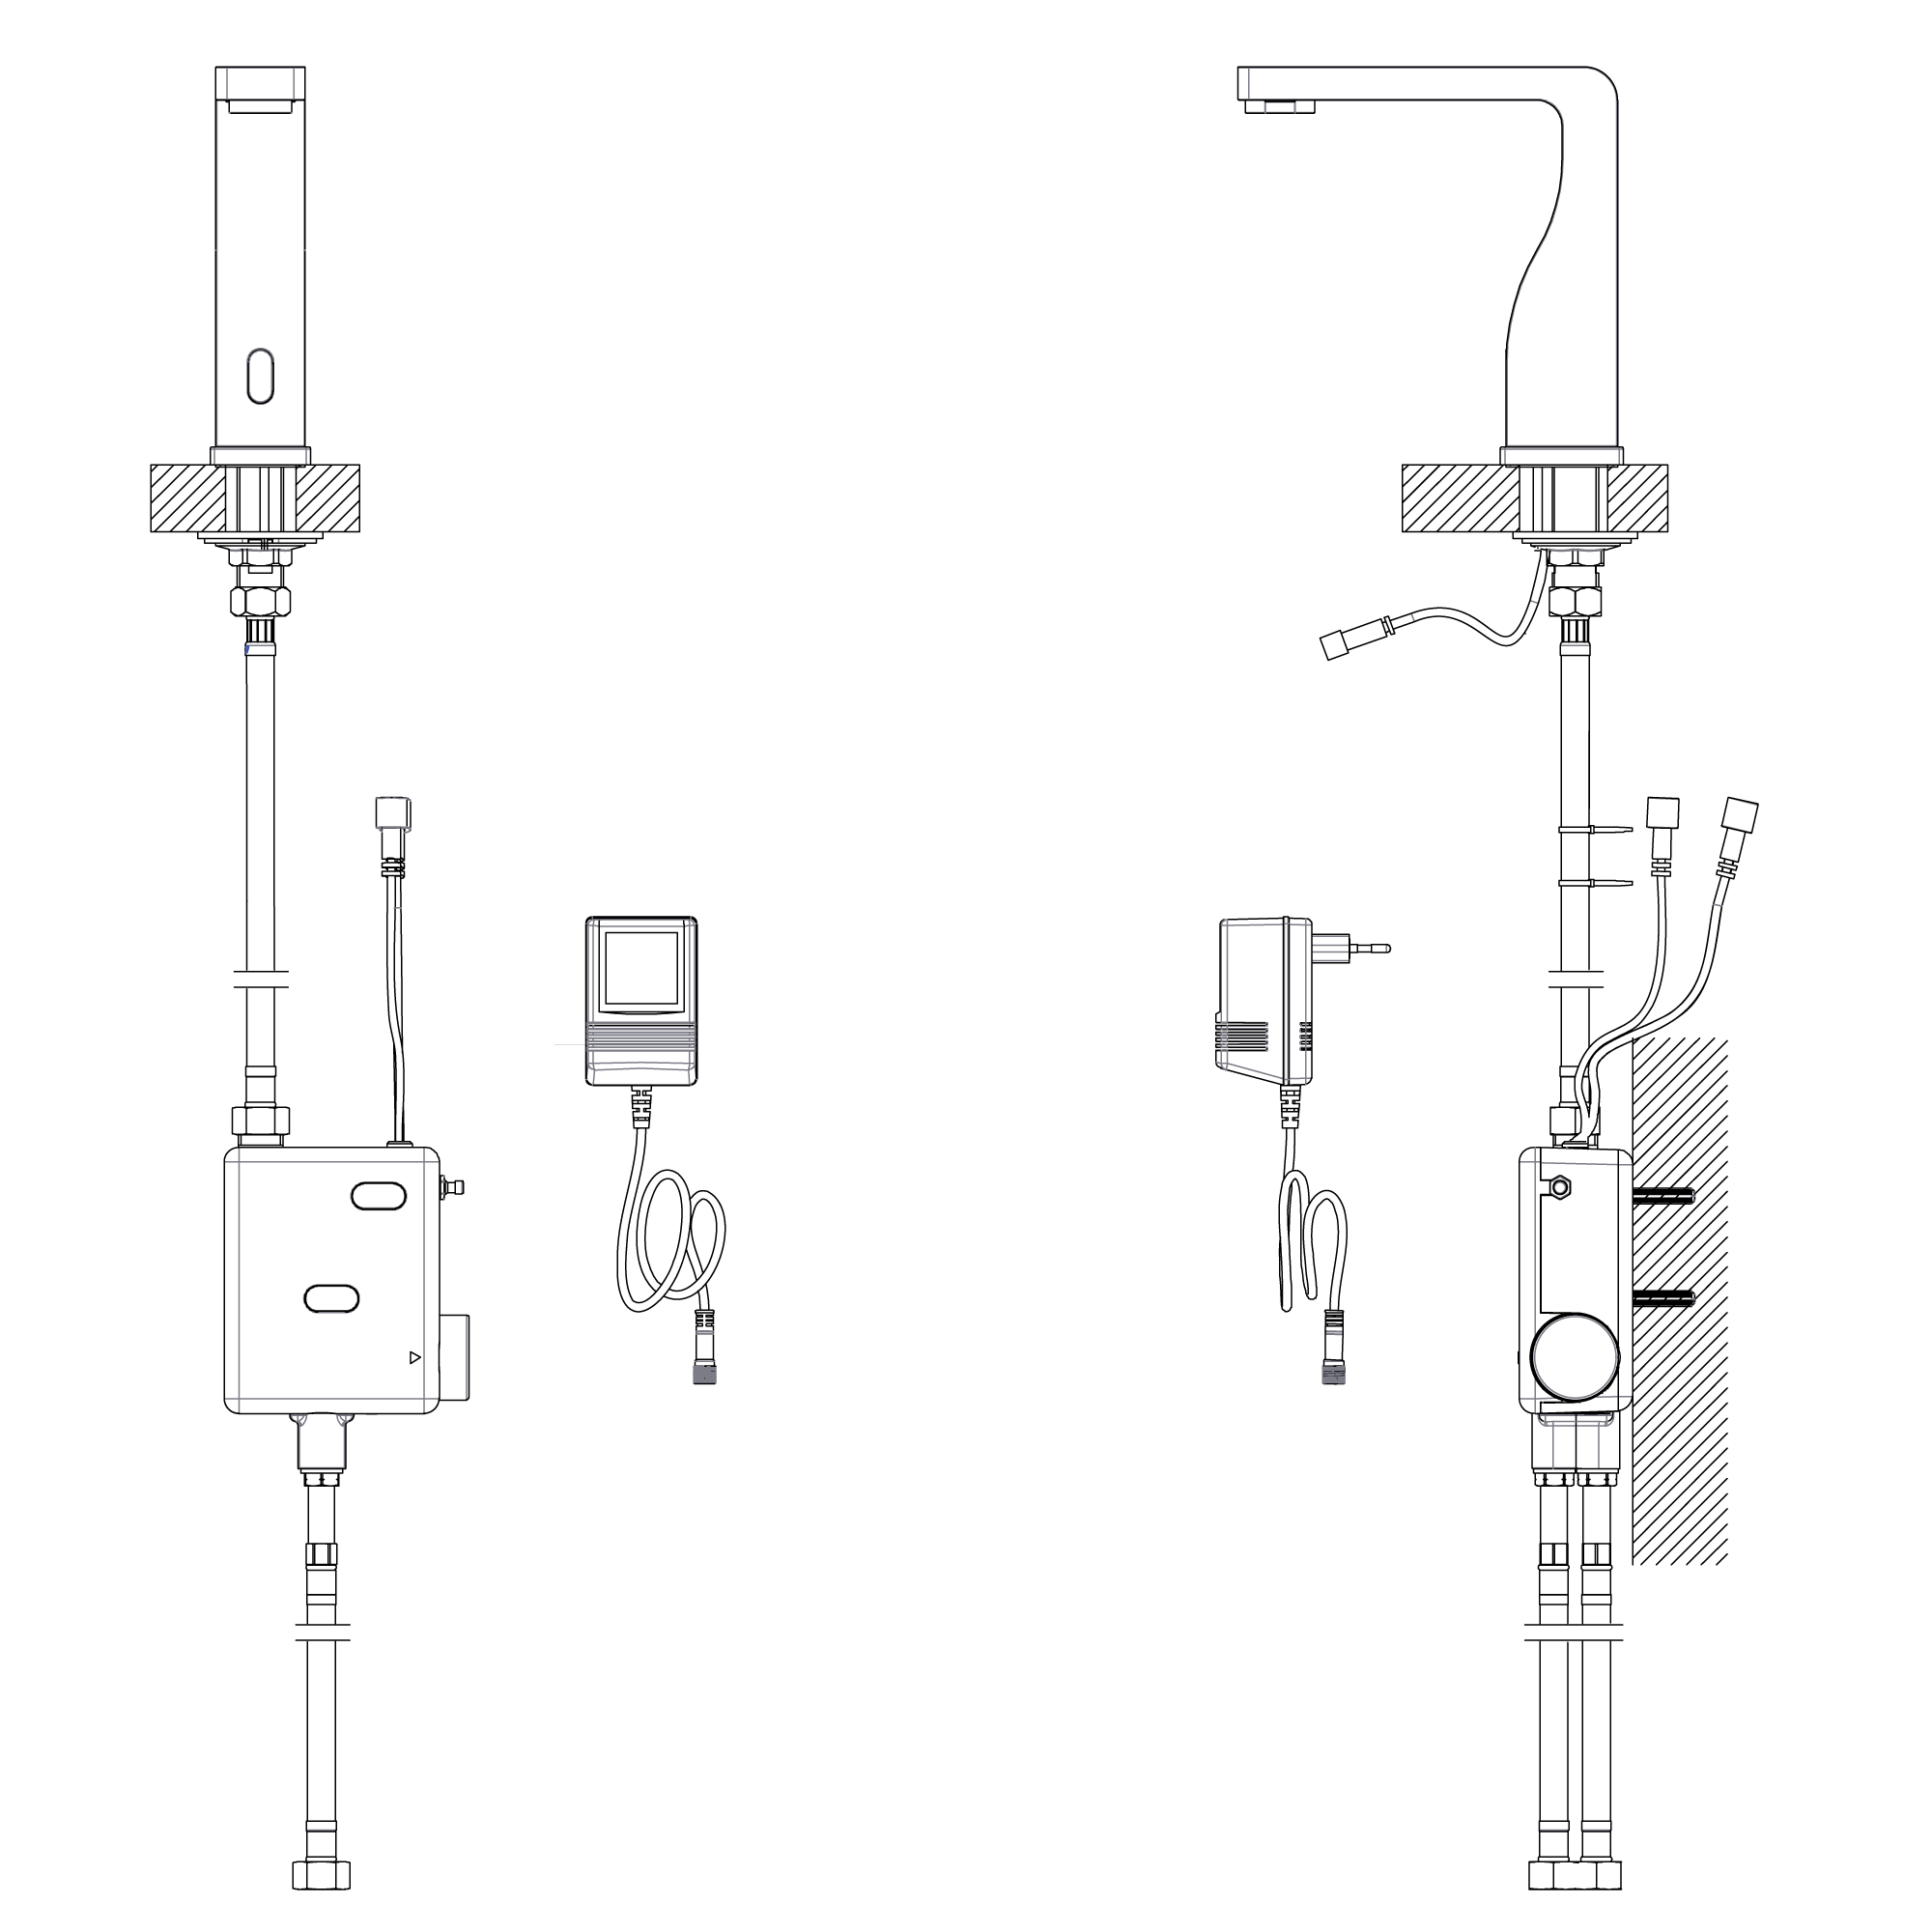
- Power Supply : AC110V And DC6V (batteries not included)
- AC/DC power option.
- ADA Compliant
- Stainless Steel Hoses Included
- Easily can be installed in new or retrofit applications.
- Suitable Places : family bathroom, hotels, office buildings, airports, medical institutions and public restrooms
- The flow rate is 0.75 GPM
- Usage: Commercial / Residential
- Ideal for commercial use applications in public restrooms, restaurants, office building, public facilities, hospitals. Fits all standard US plumbing.
|
sensor faucet
|

|
Important Note:
Before you begin, please read the installation instructions below. Observe all local building and safety codes.
Unpack and inspect the product for any shipping damages. If you find damages, do not install.
Please note all products must be installed by a professional and certified plumber otherwise warranty may be voided.
|
|
Sensor Faucet Installations Instructions
|
|
|
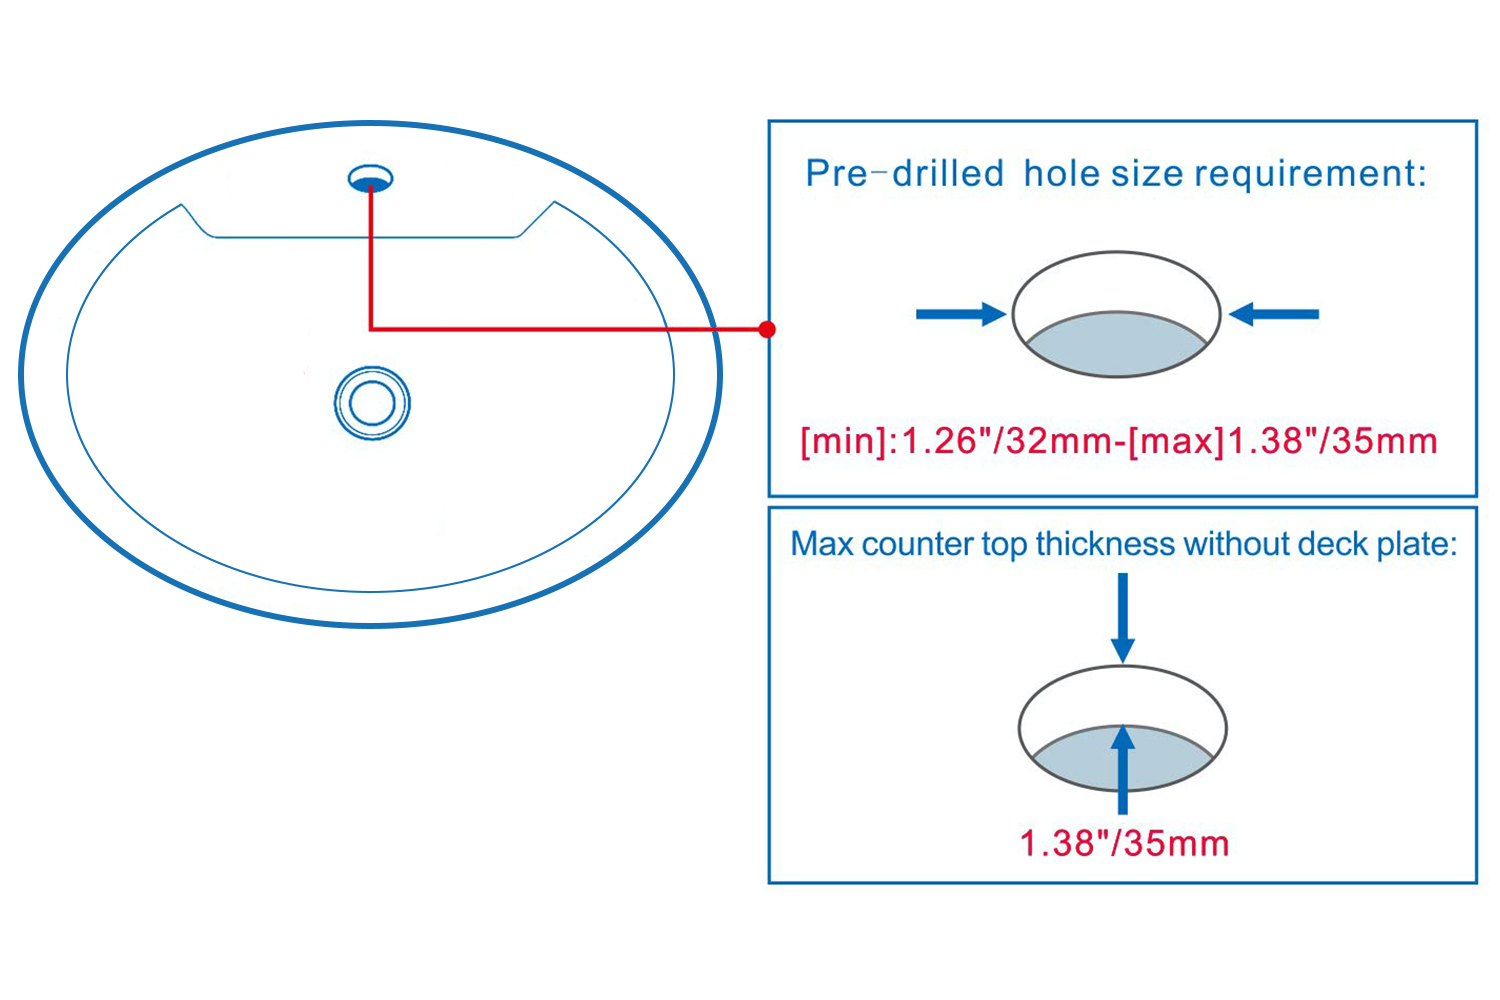
Hole Size Chart
|
|
|

|
|
|
|
|
|
Size
|
|
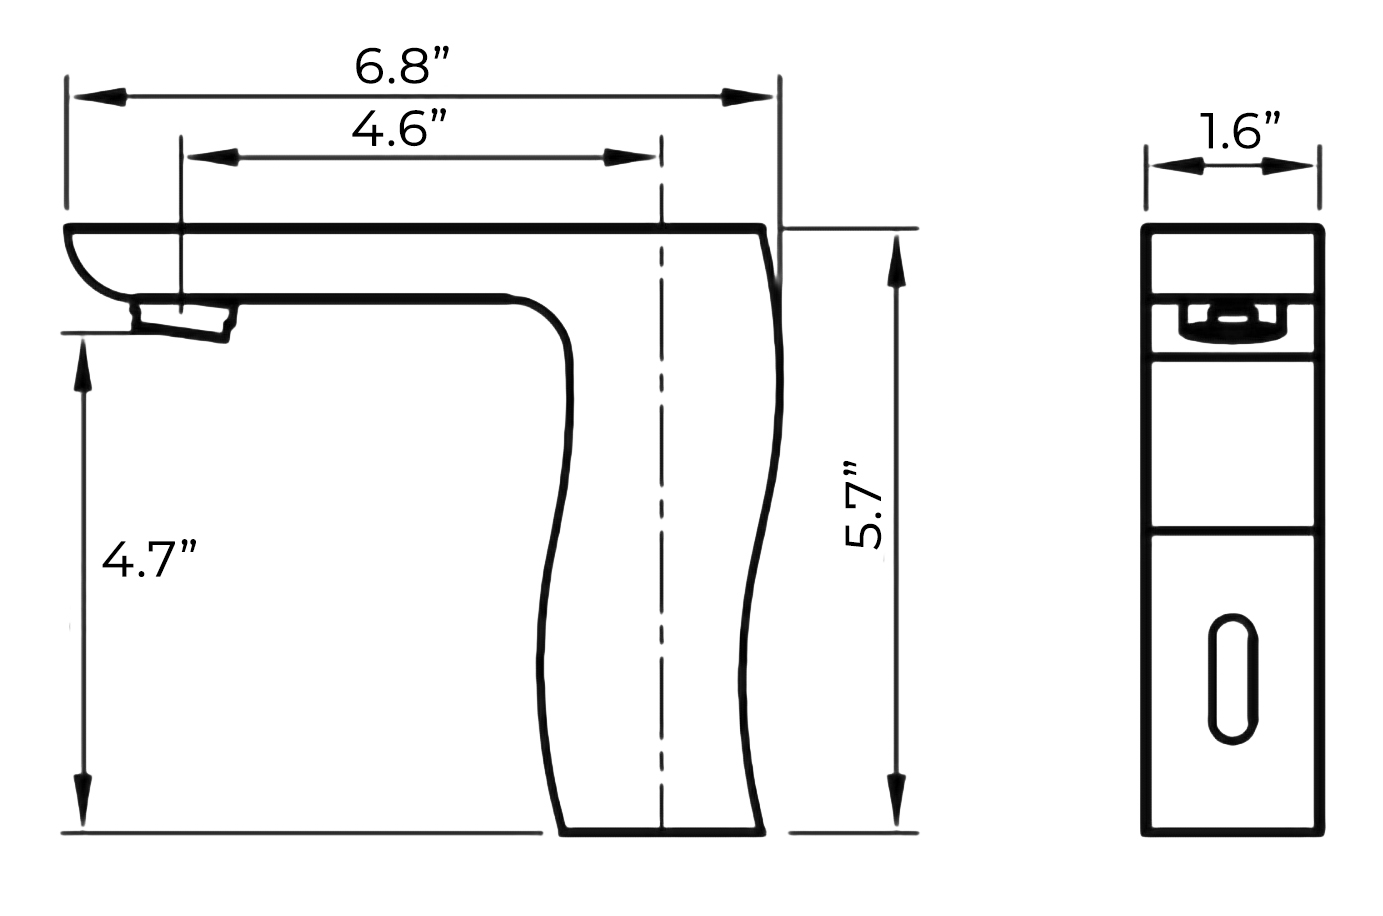
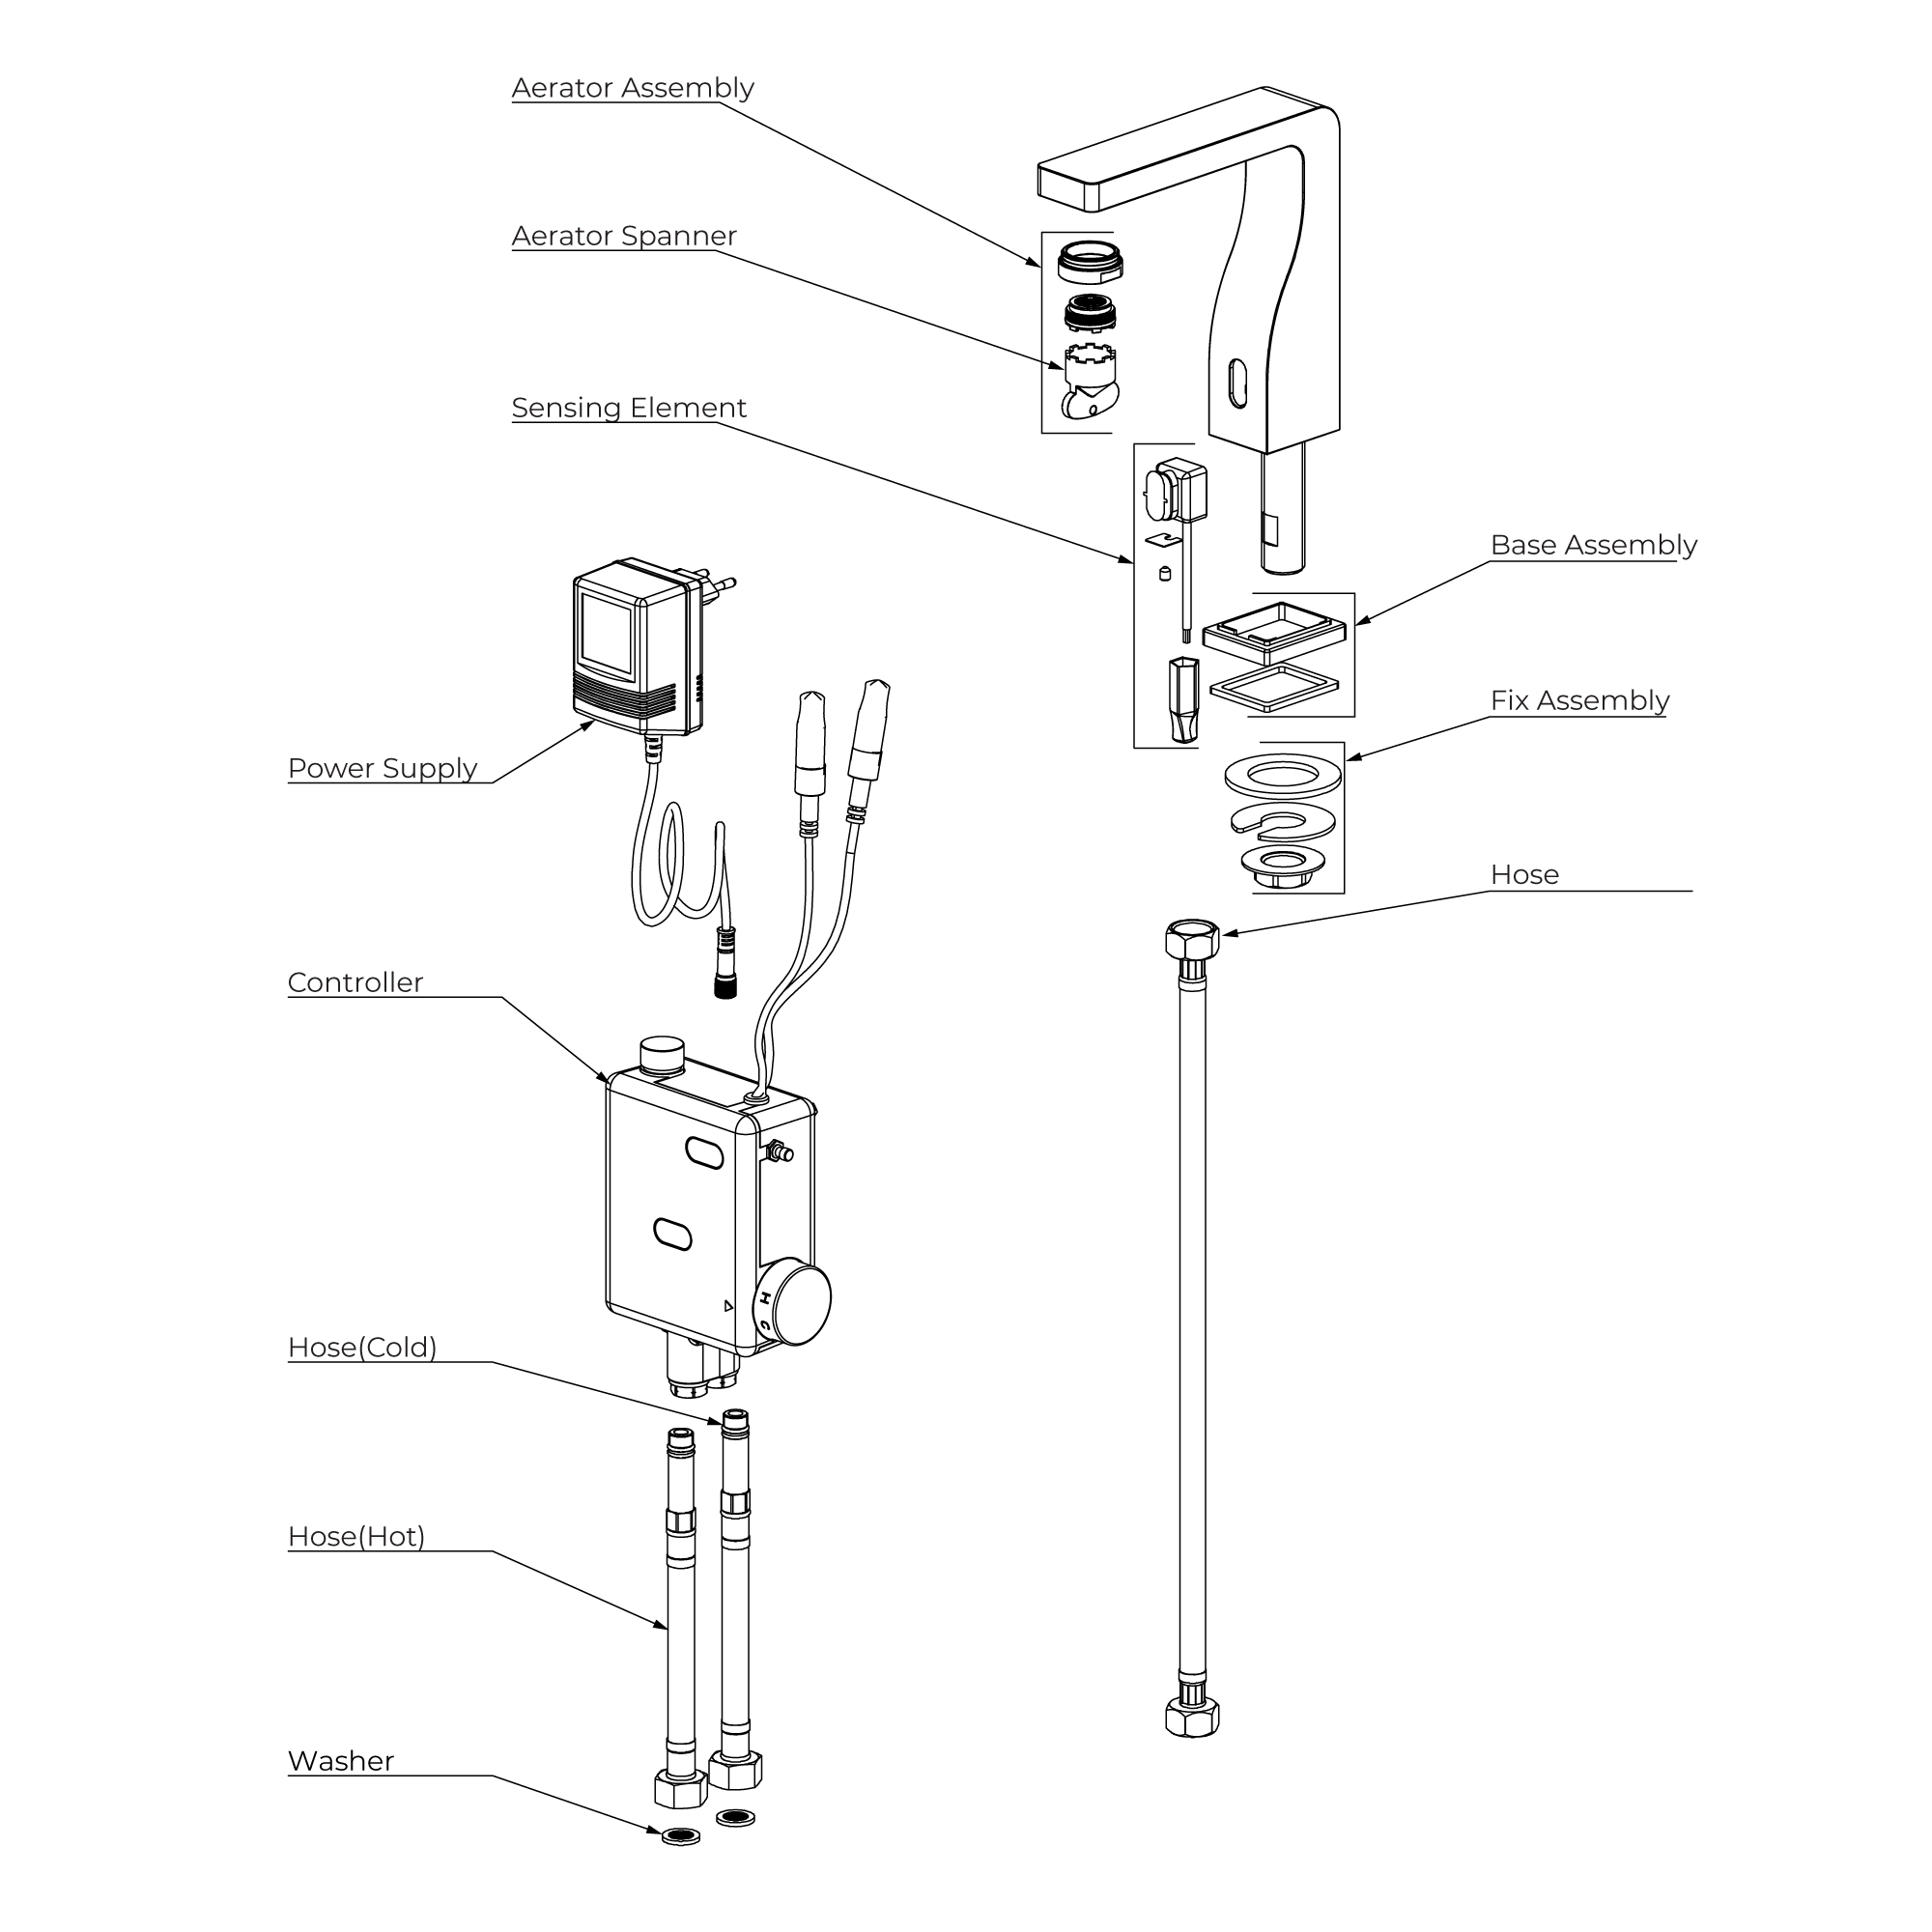
Parts
|
|
sensor
|
|
|
|
|
|
|
Step 1:
|
|
Step 2:
|
|
sensor
|
|
|
|
|
|
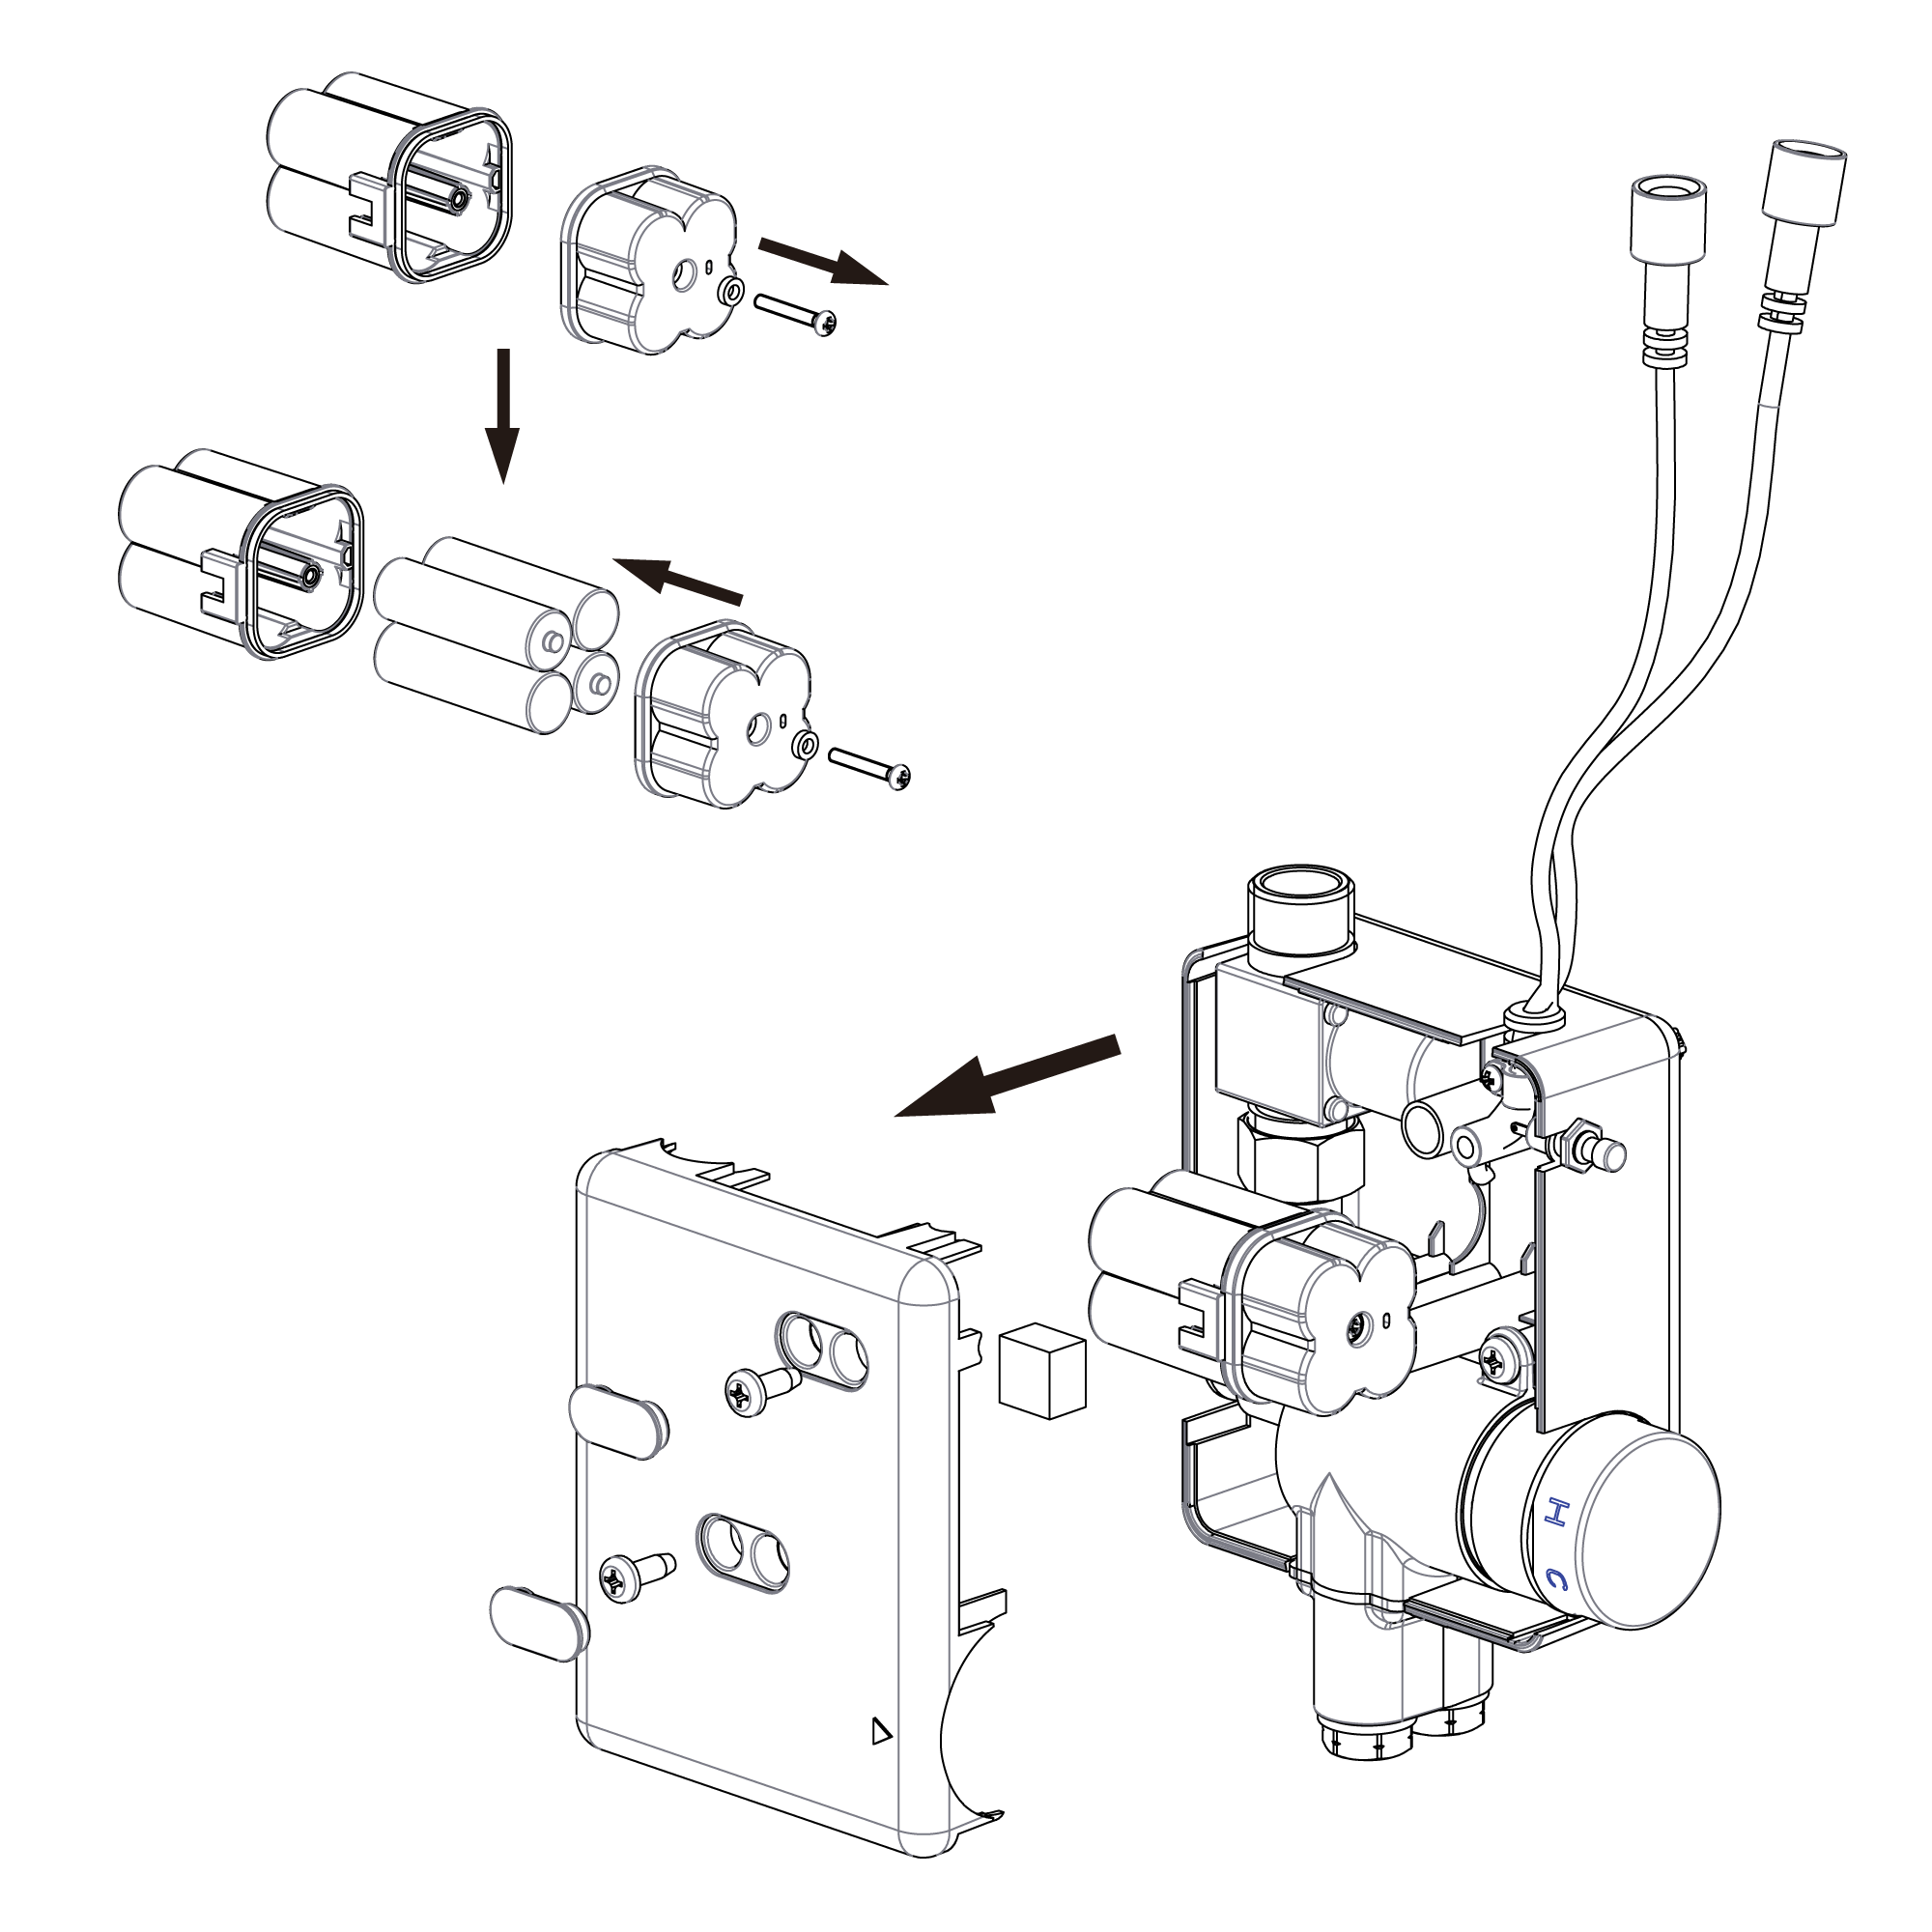
Step 3:
|
|
Step 4:
|
|
|

|
|
|
|
|
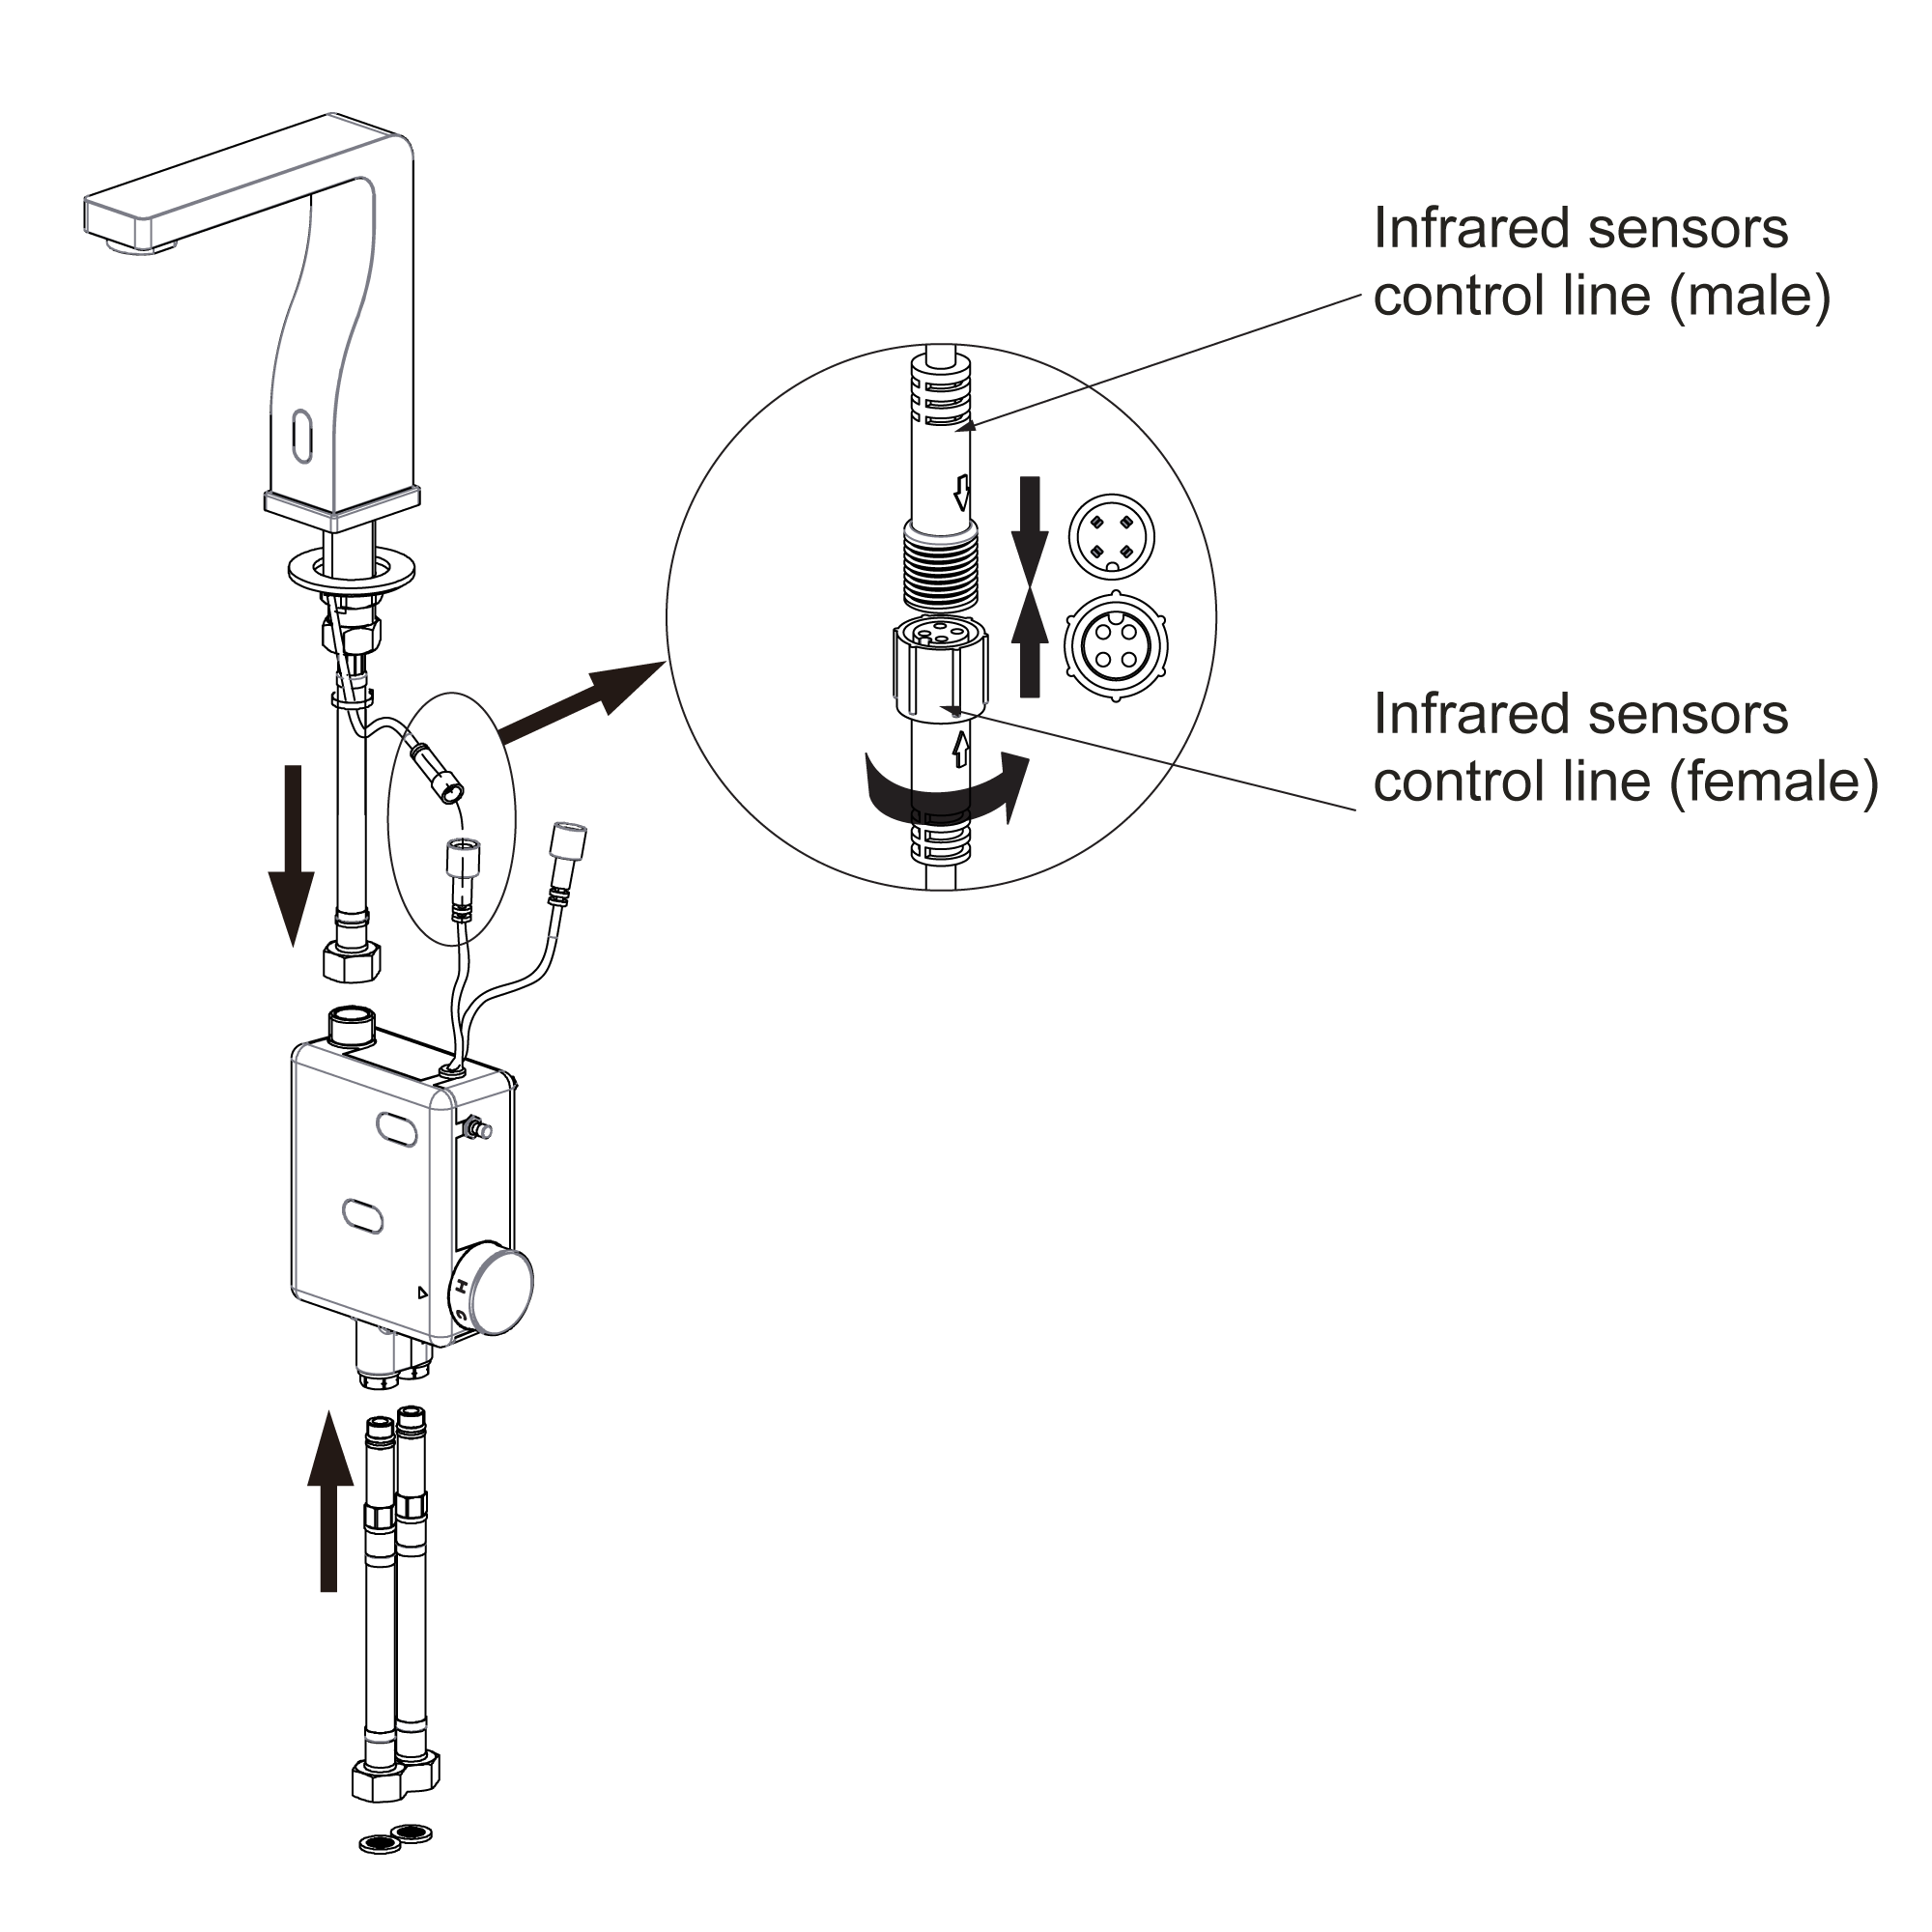
Step 5:
|
|
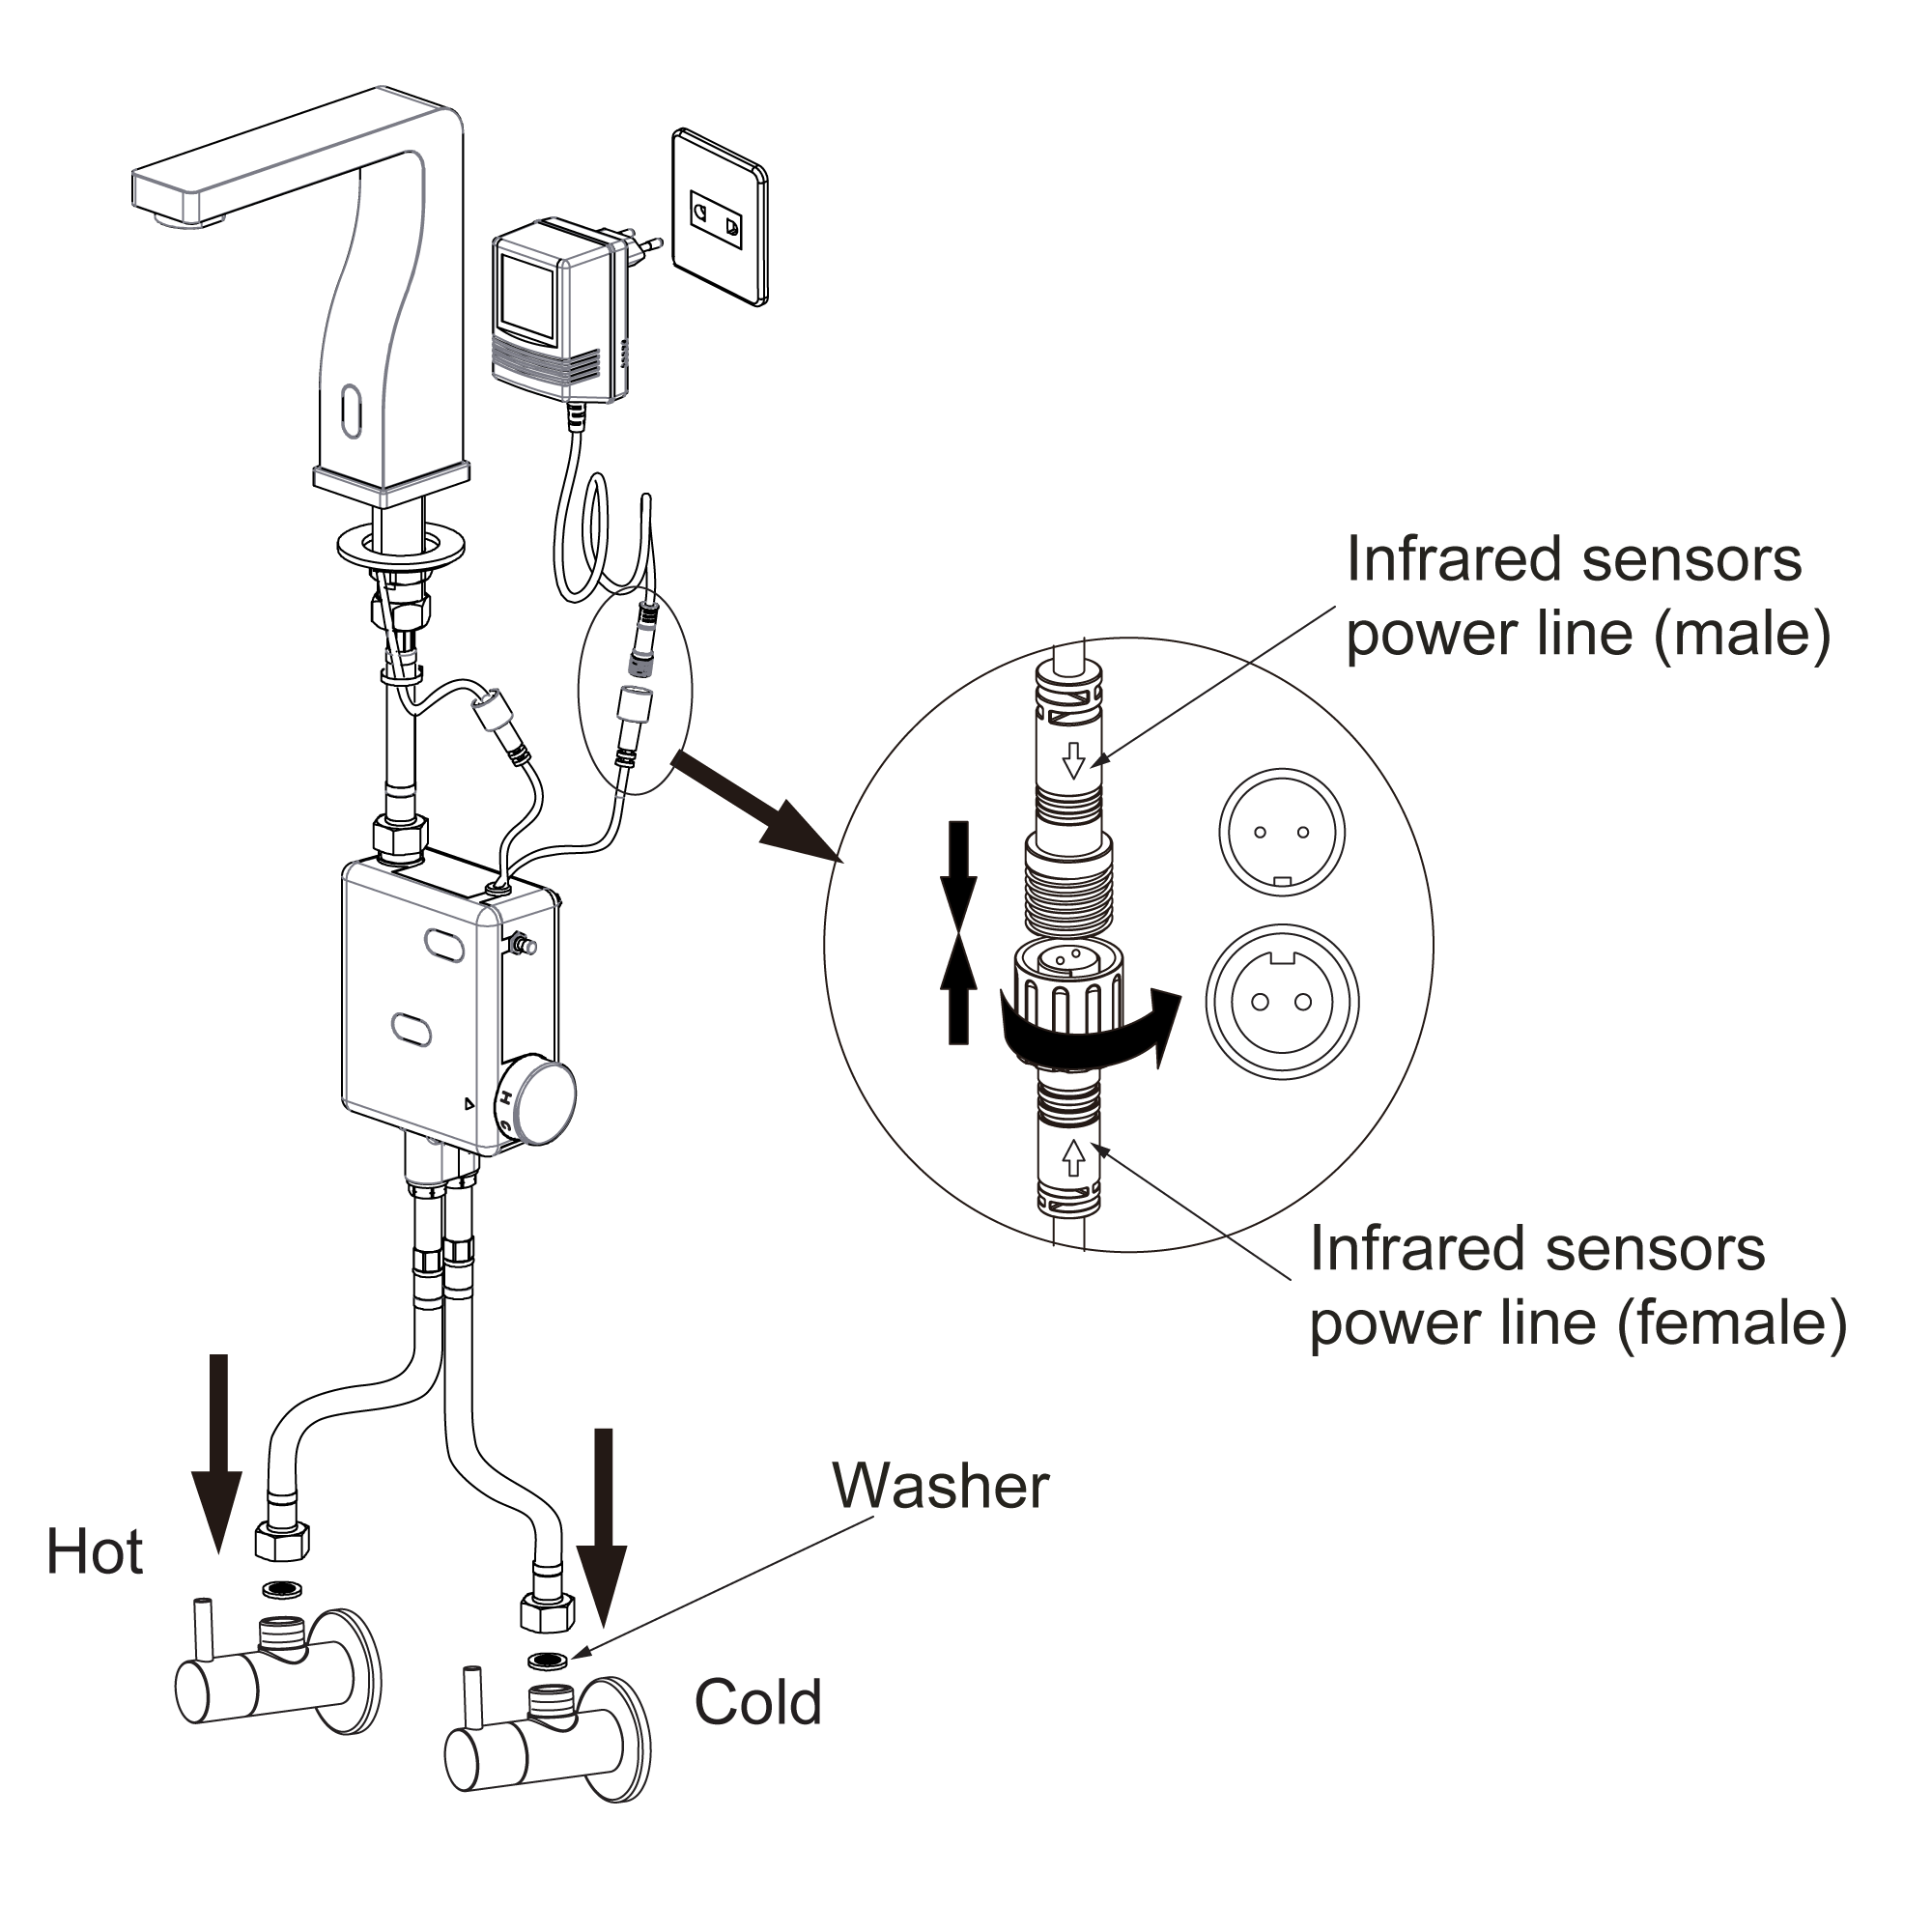
Step 6:
|
|
|
|
|
|
|
|
Step 7:
|
|
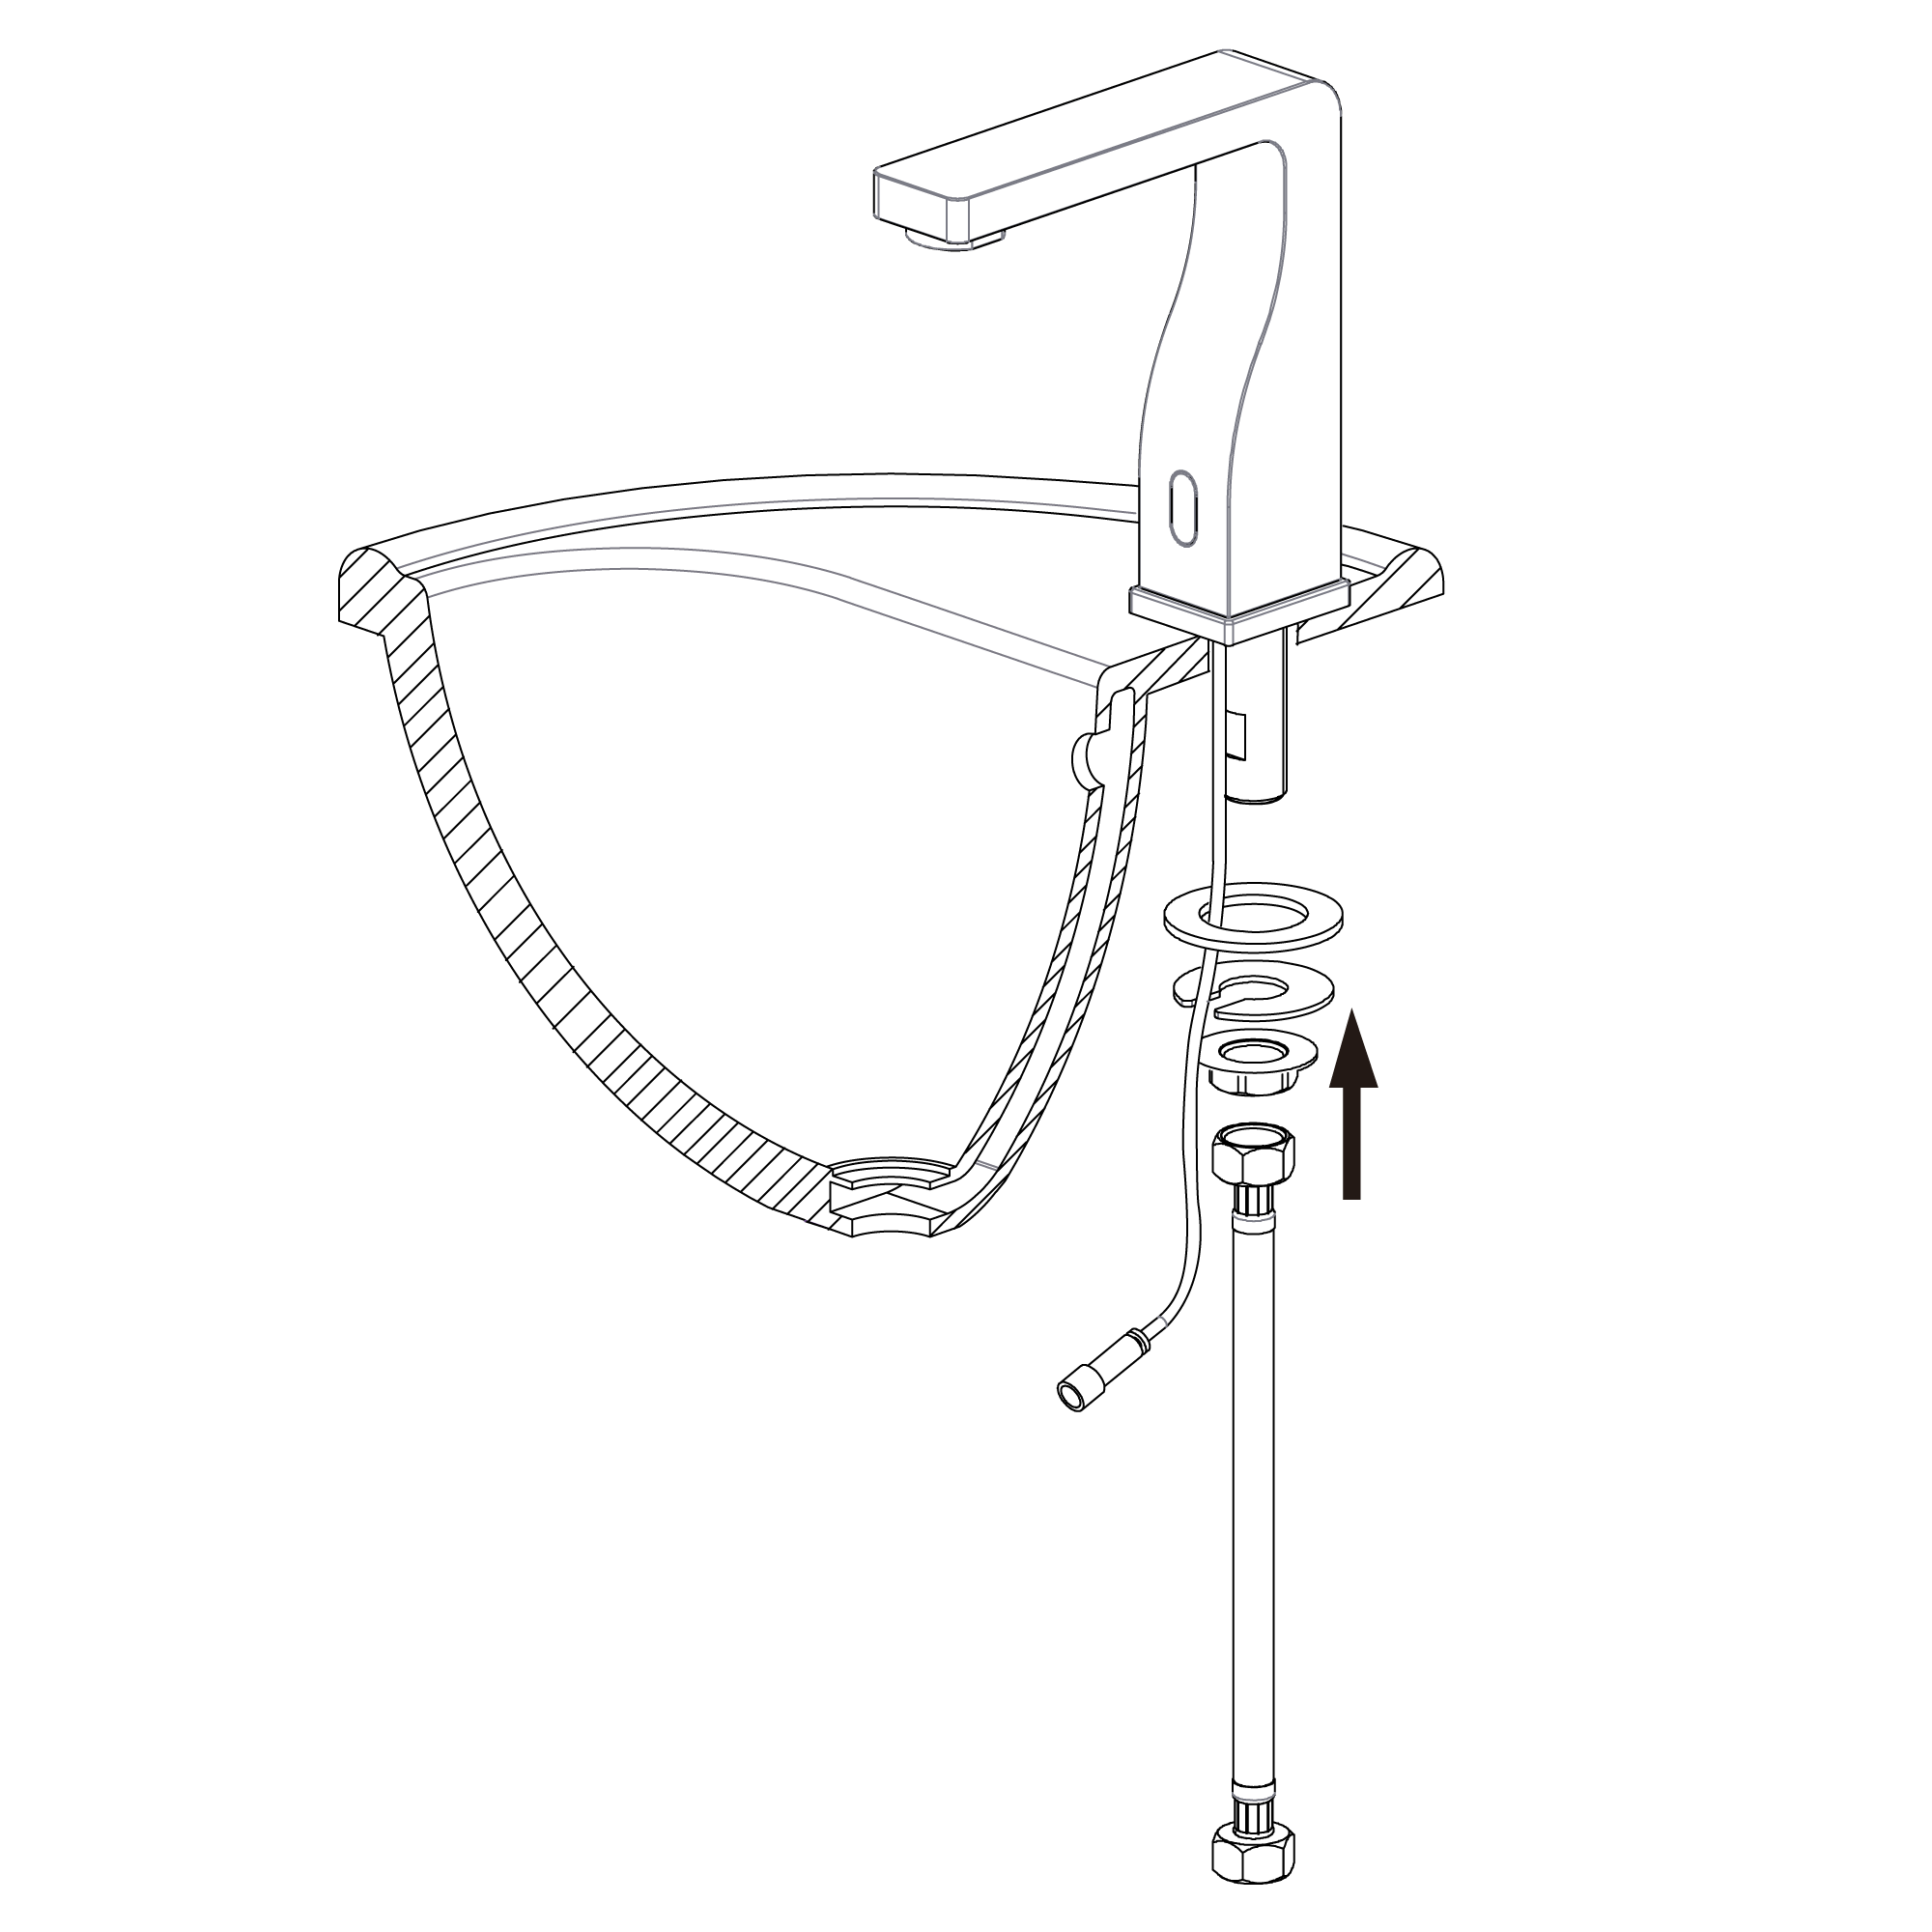
Step 8: (Correct way for Hose)
|
|
|
|
|
|
|
|
Step 9:
|
|
|
|
|
|
|
|
|
|
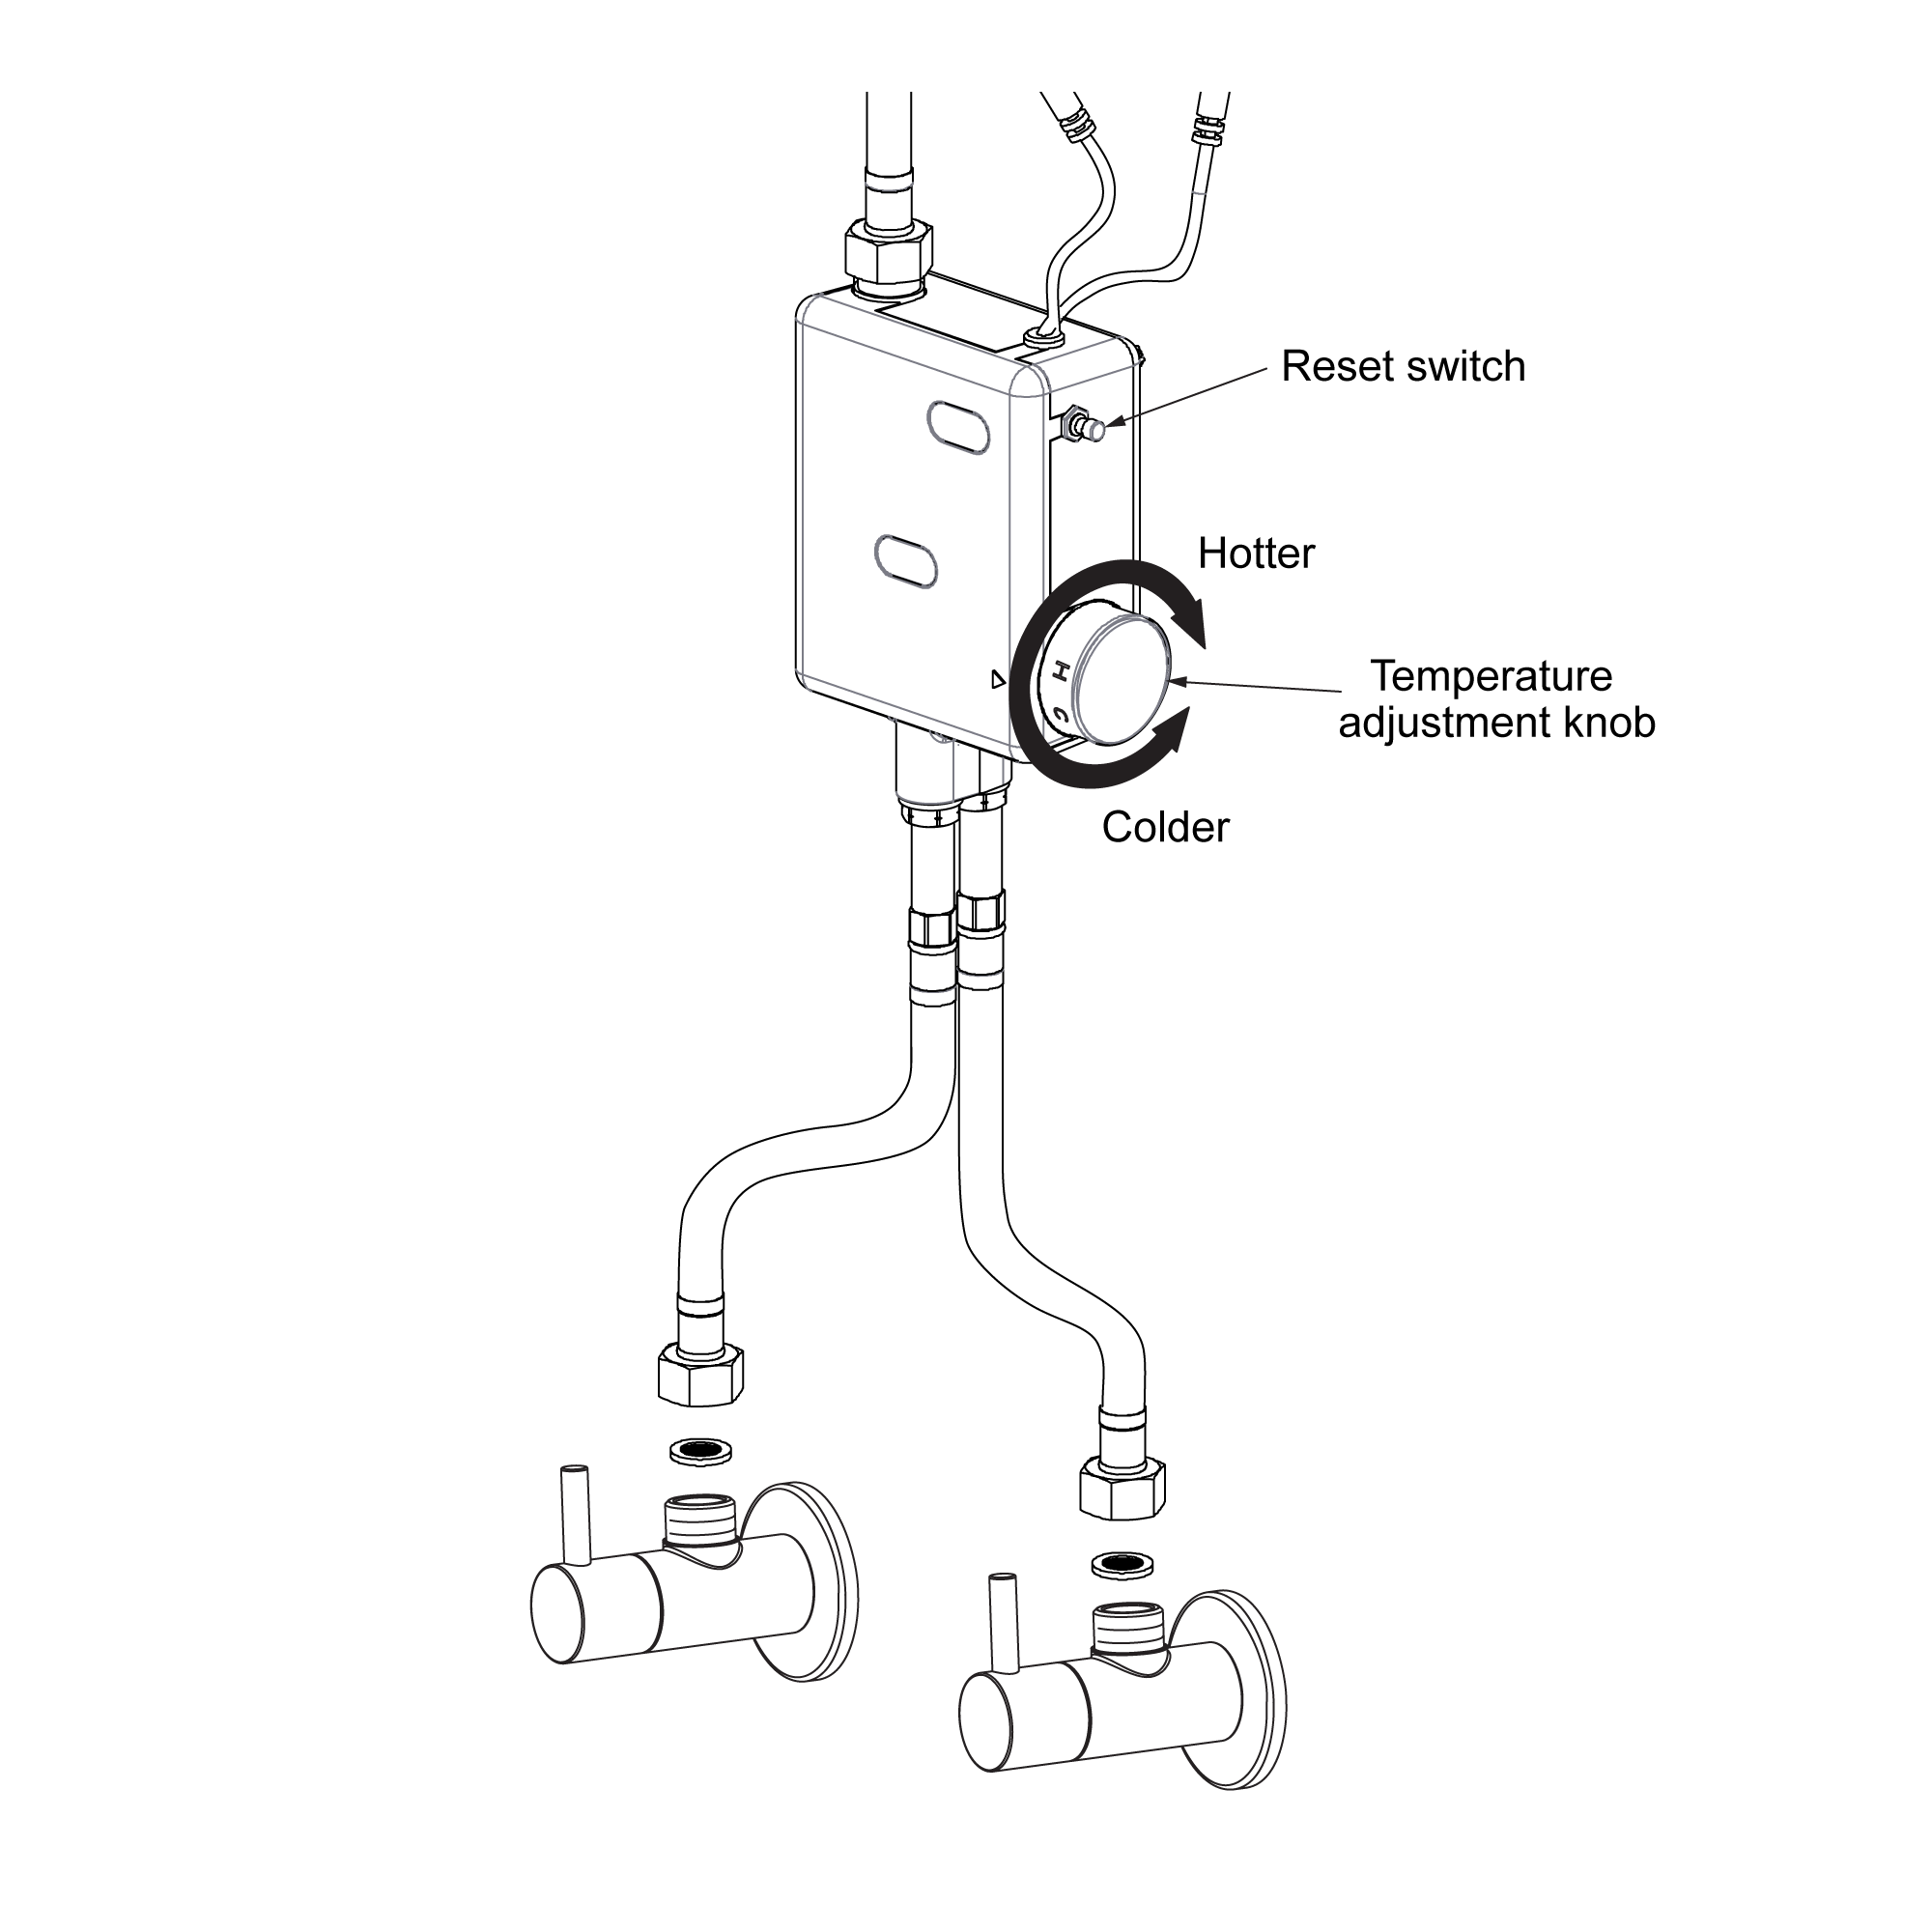
1. Before installation, please make sure the power is turned off.
2. When connecting the control line and power line according to the arrow, please note the male and female to prevent the circuit board from burning out, because of the incorrect connection.
3. Be sure the washer installed to prevent impurities into the water valve to avoid leakage.
4. Overtime protection: Continuous induction water for more than 60 seconds, it will stop automatically.
5. When abnormal (No Induction but water out etc.), hold down the reset switch on the sensor box 3 seconds then release (When press the reset switch the sensor does not action), the control circuit repower, return to normal.
|
|
|
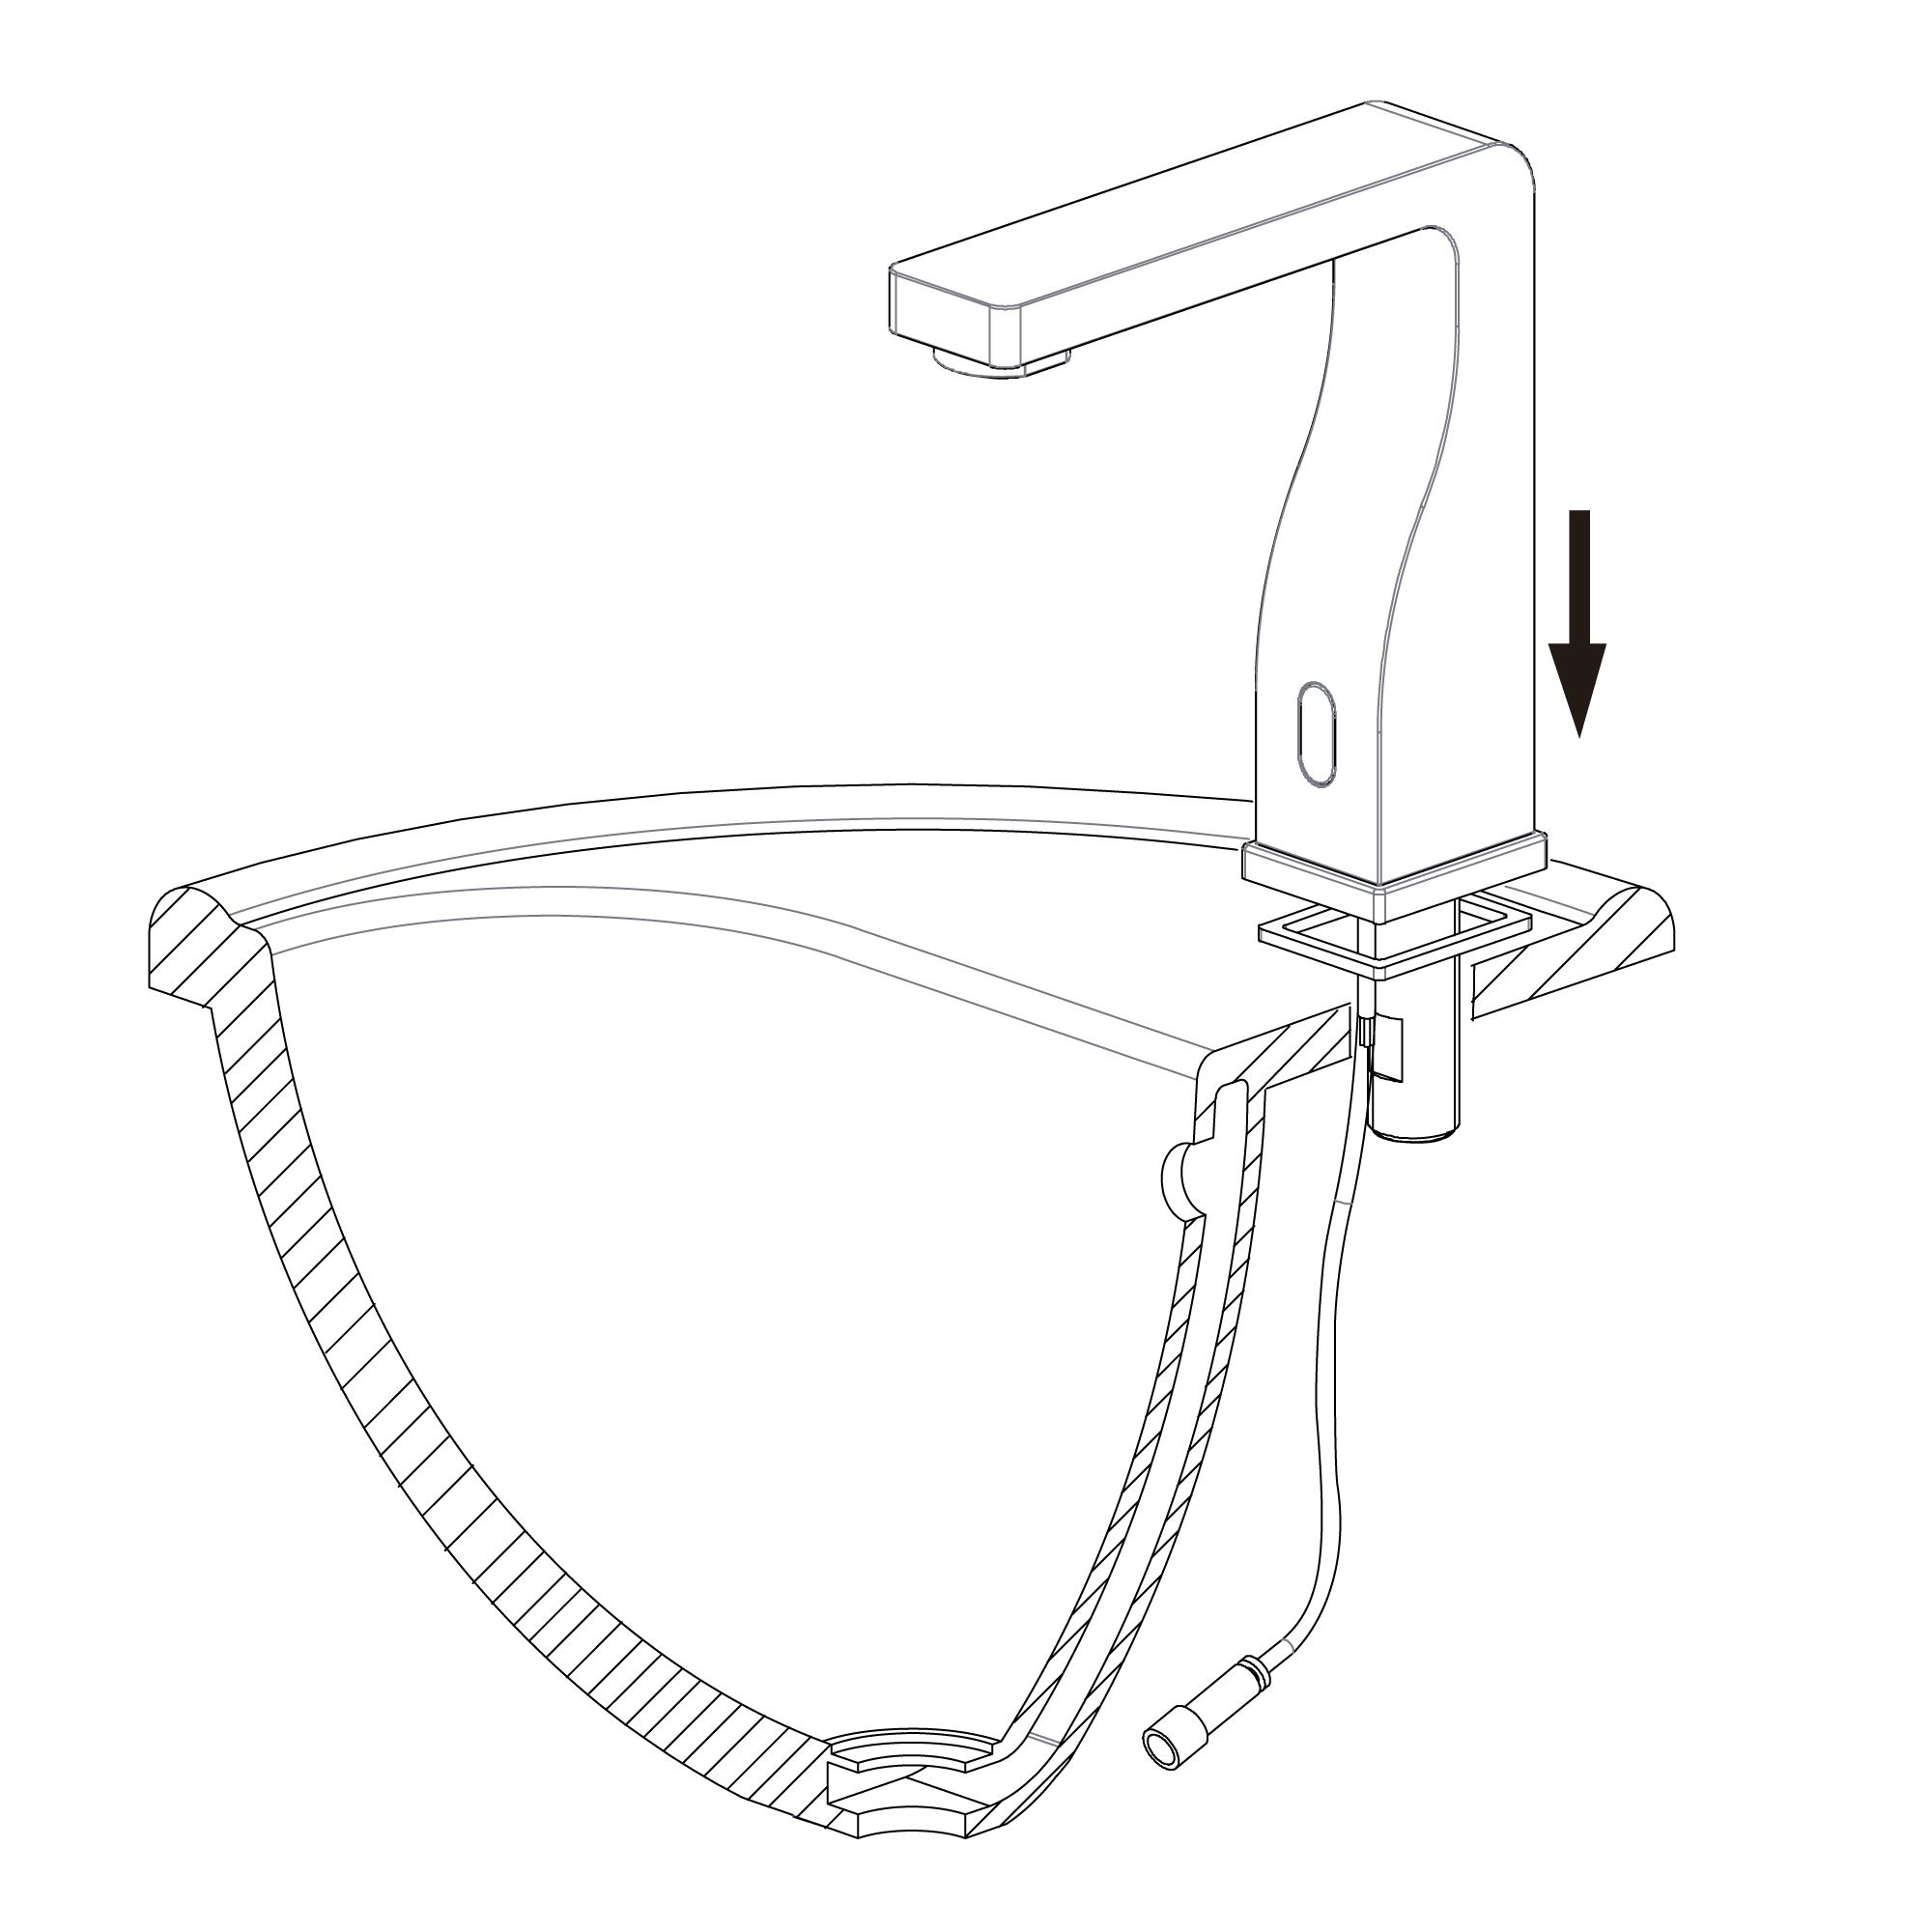
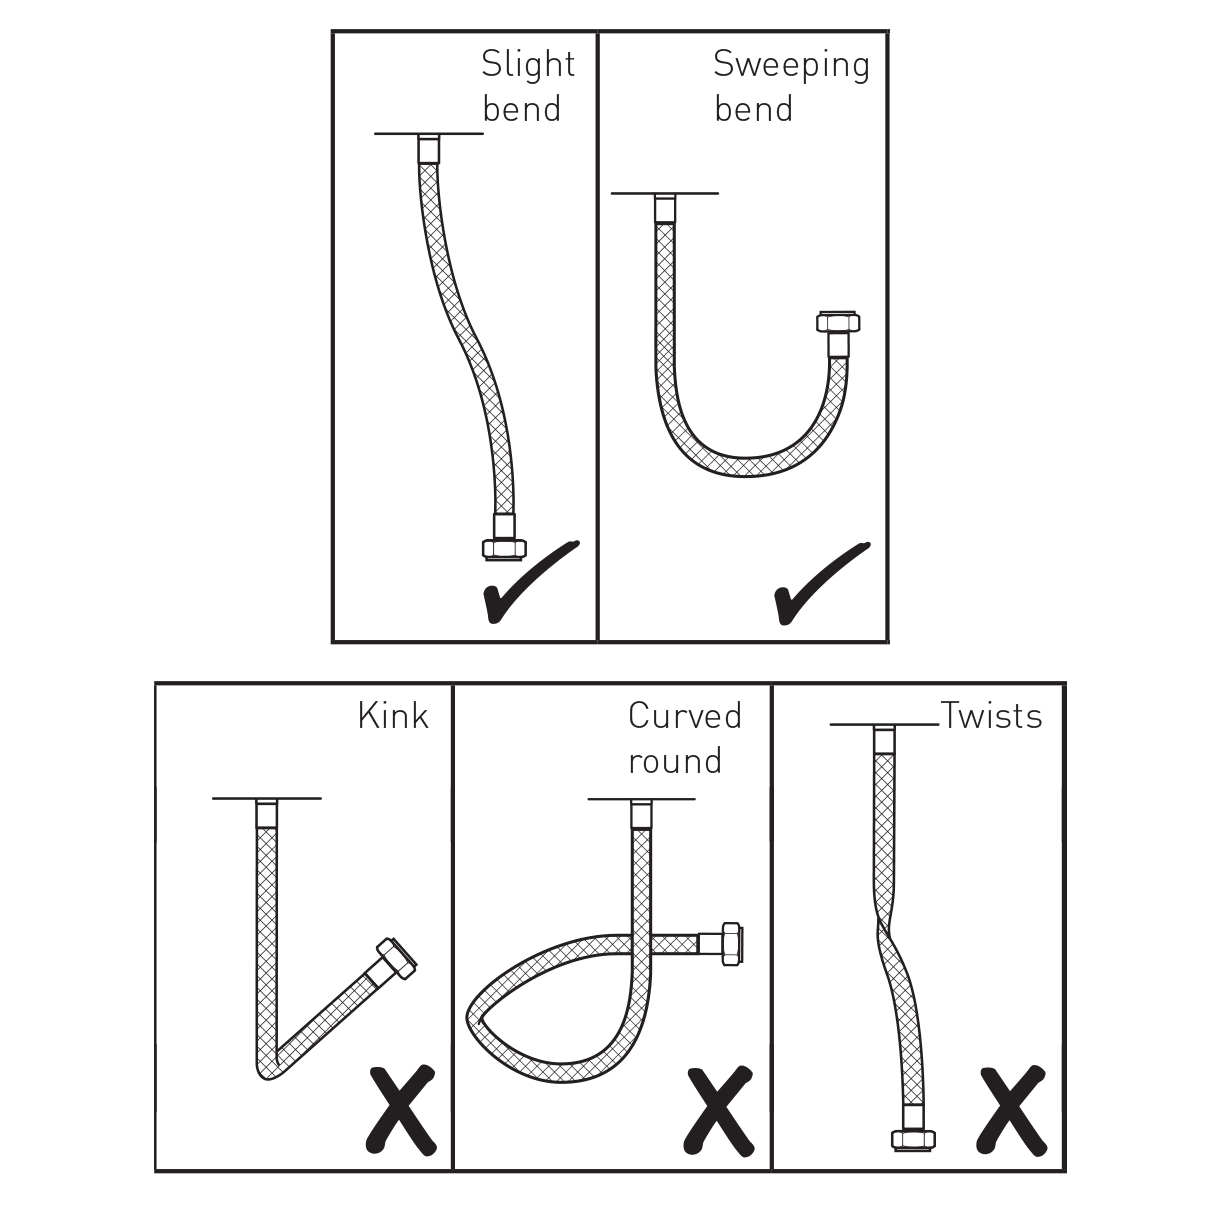
Flexible Connecting Hose
Care must be taken when connecting the flexible connection hose from the power supply box to the spout to ensure it does not bend sharply and kink or twist.
See above for recommended ways to fit the flexible connecting hose.
Important: Failure to follow these guidelines may result in poor performance and damage to the flexible connection hose.
|
|
|
|
|
|
|
|
|
|
|
|
|
|
|
|