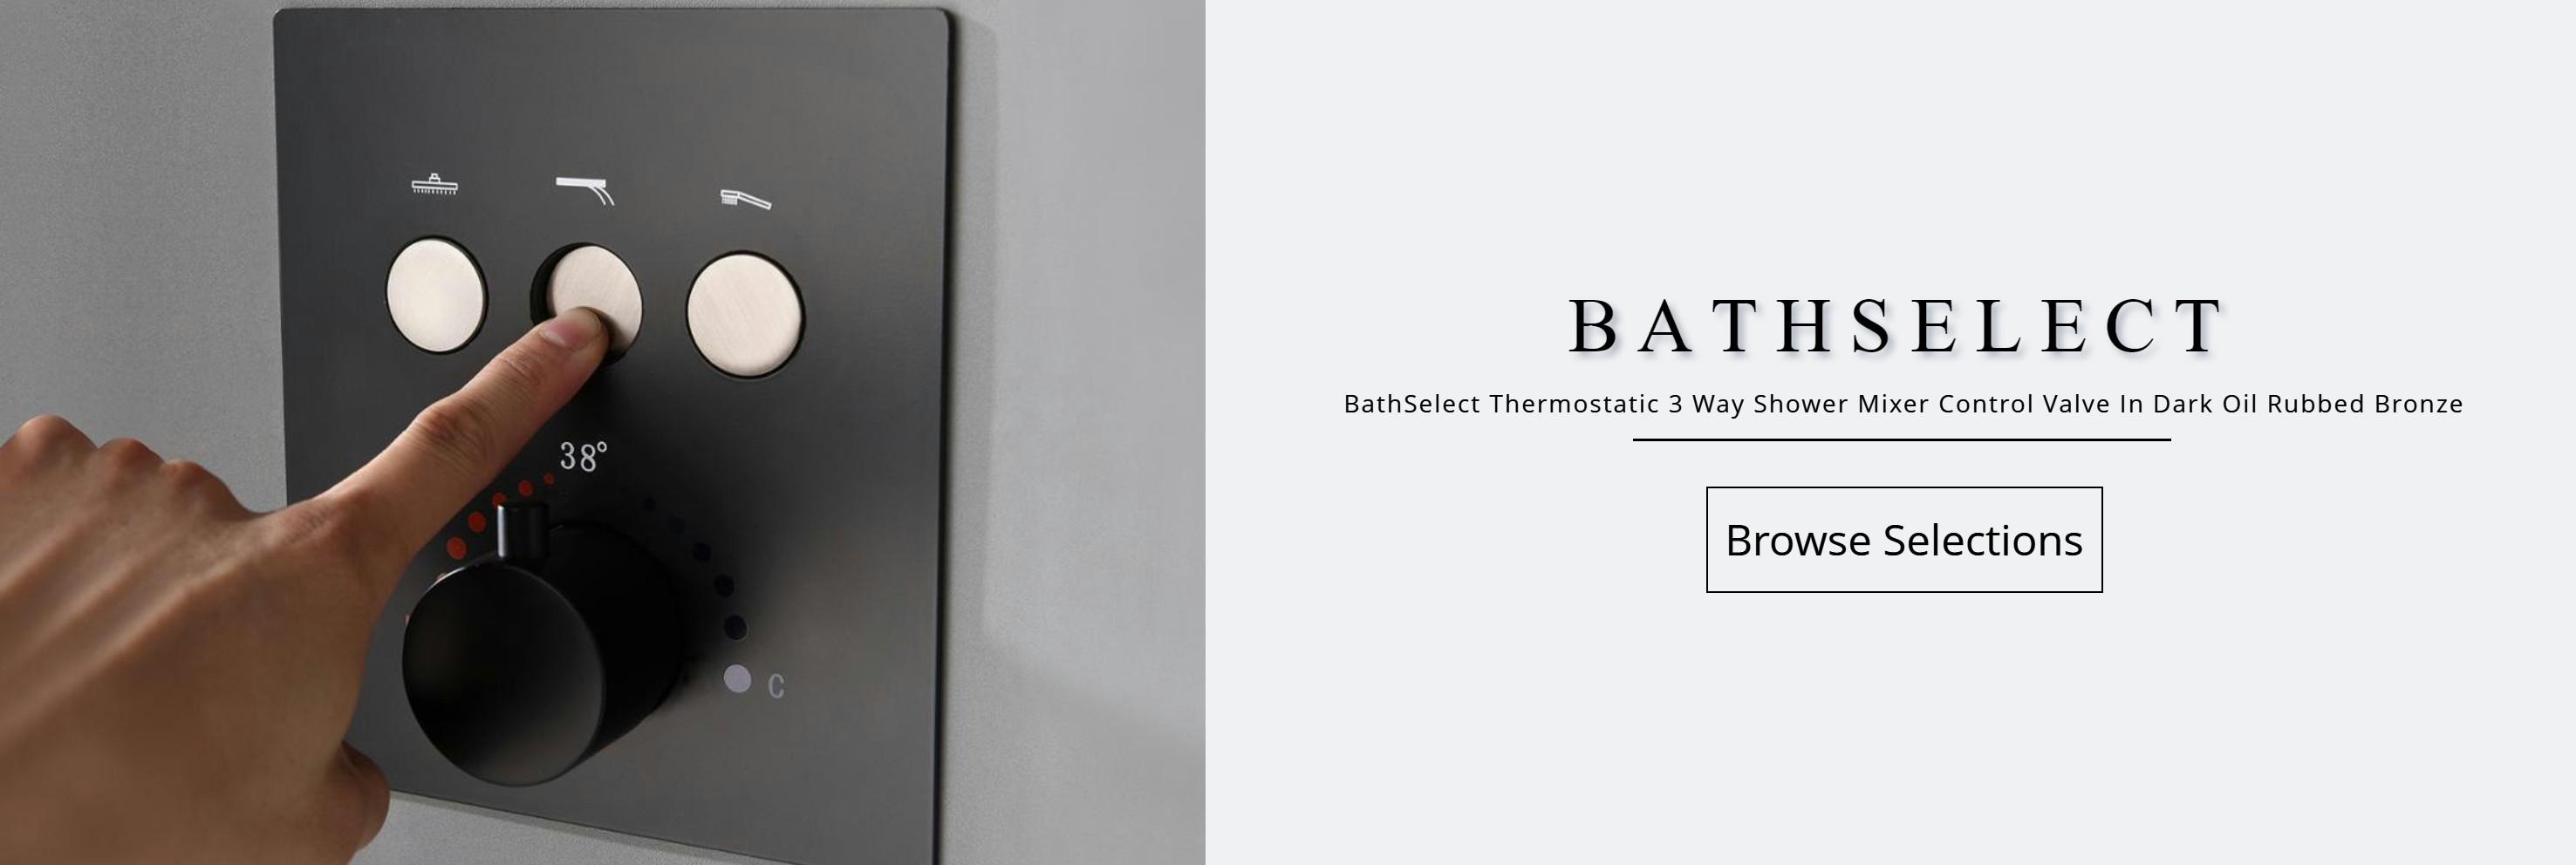
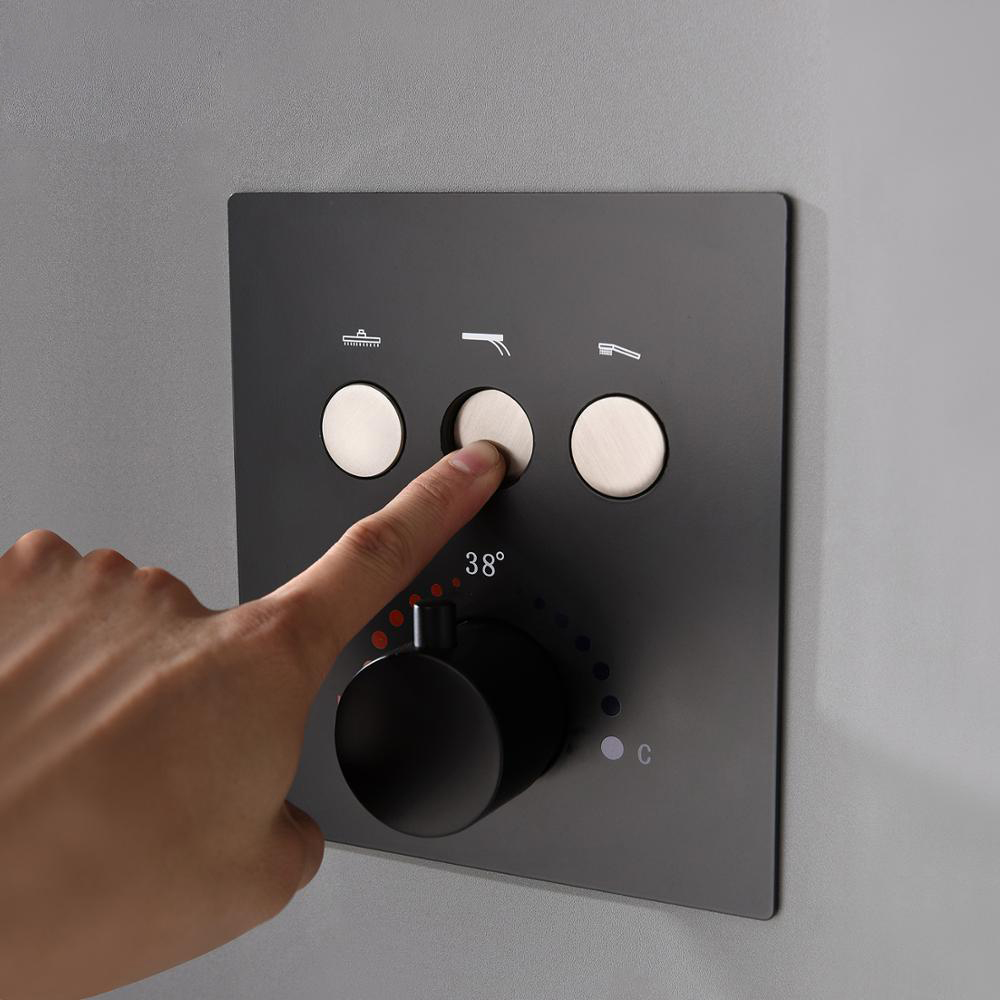
BathSelect Thermostatic 3 Way Shower Mixer Control Valve In Dark Oil Rubbed Bronze
Concealed shower mixer are a great solution for those looking to create a minimalist theme to their bathrooms. There will be no unsightly pipework as this would be released, they're elegant and most of all pleasing on the eye once installed. Enhanced with oil rubbed bronze finish, offers a sleek look. Simple and modern design, easily match with your bathroom style. Luxury bathroom shower mixing valve offers three functions that can be used simultaneously. The thermostatic shower mixer has new technological coating layers electroplating to anti-rust.Designed for hassle-free installation.This is one of the most trendiest finishes across decor styles in the bathroom. It comes super seal technology inside, capable of delivering superior performance with a solid construction for long durability that will upgrade your bathroom with a modern and cool look for a long period of time.
BathSelect Thermostatic 3 Way Shower Mixer Control Valve In Dark Oil Rubbed Bronze Features
- Type: Mixer Valve Control
- Brand: BathSelect
- Model Number: BST10049
- Cold / Hot Water Control Type : Auto-Thermostatic Control
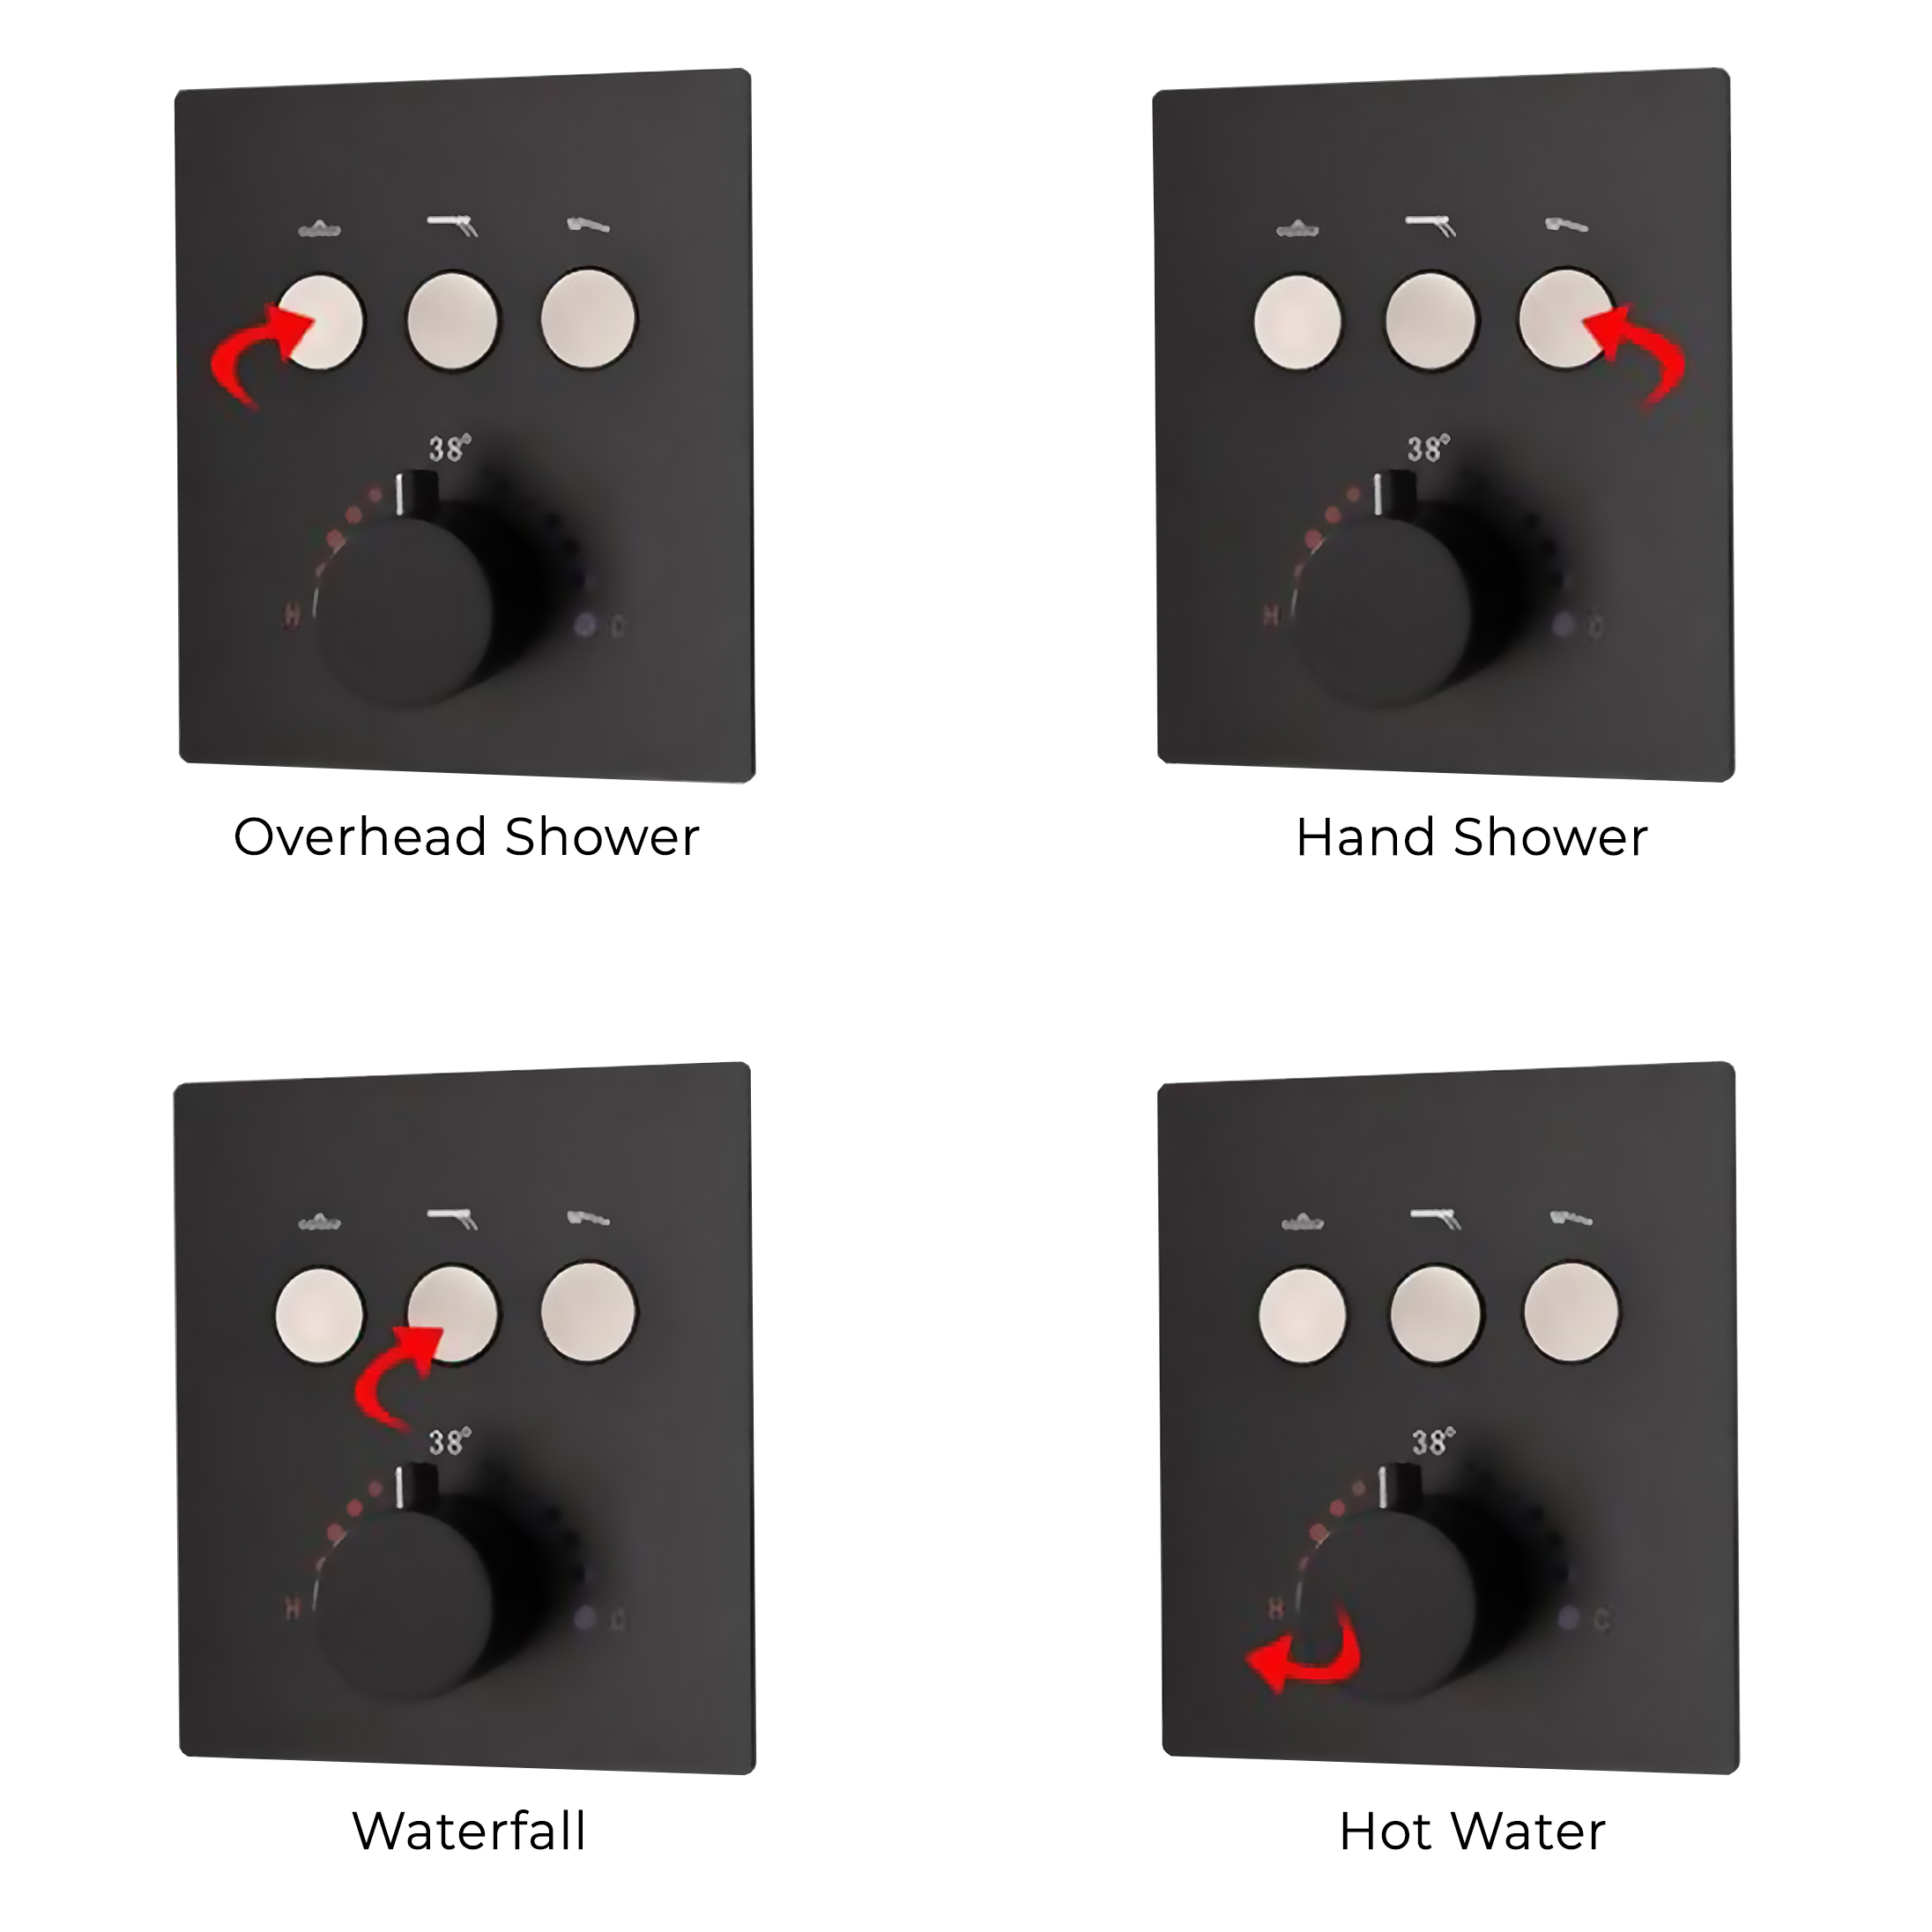
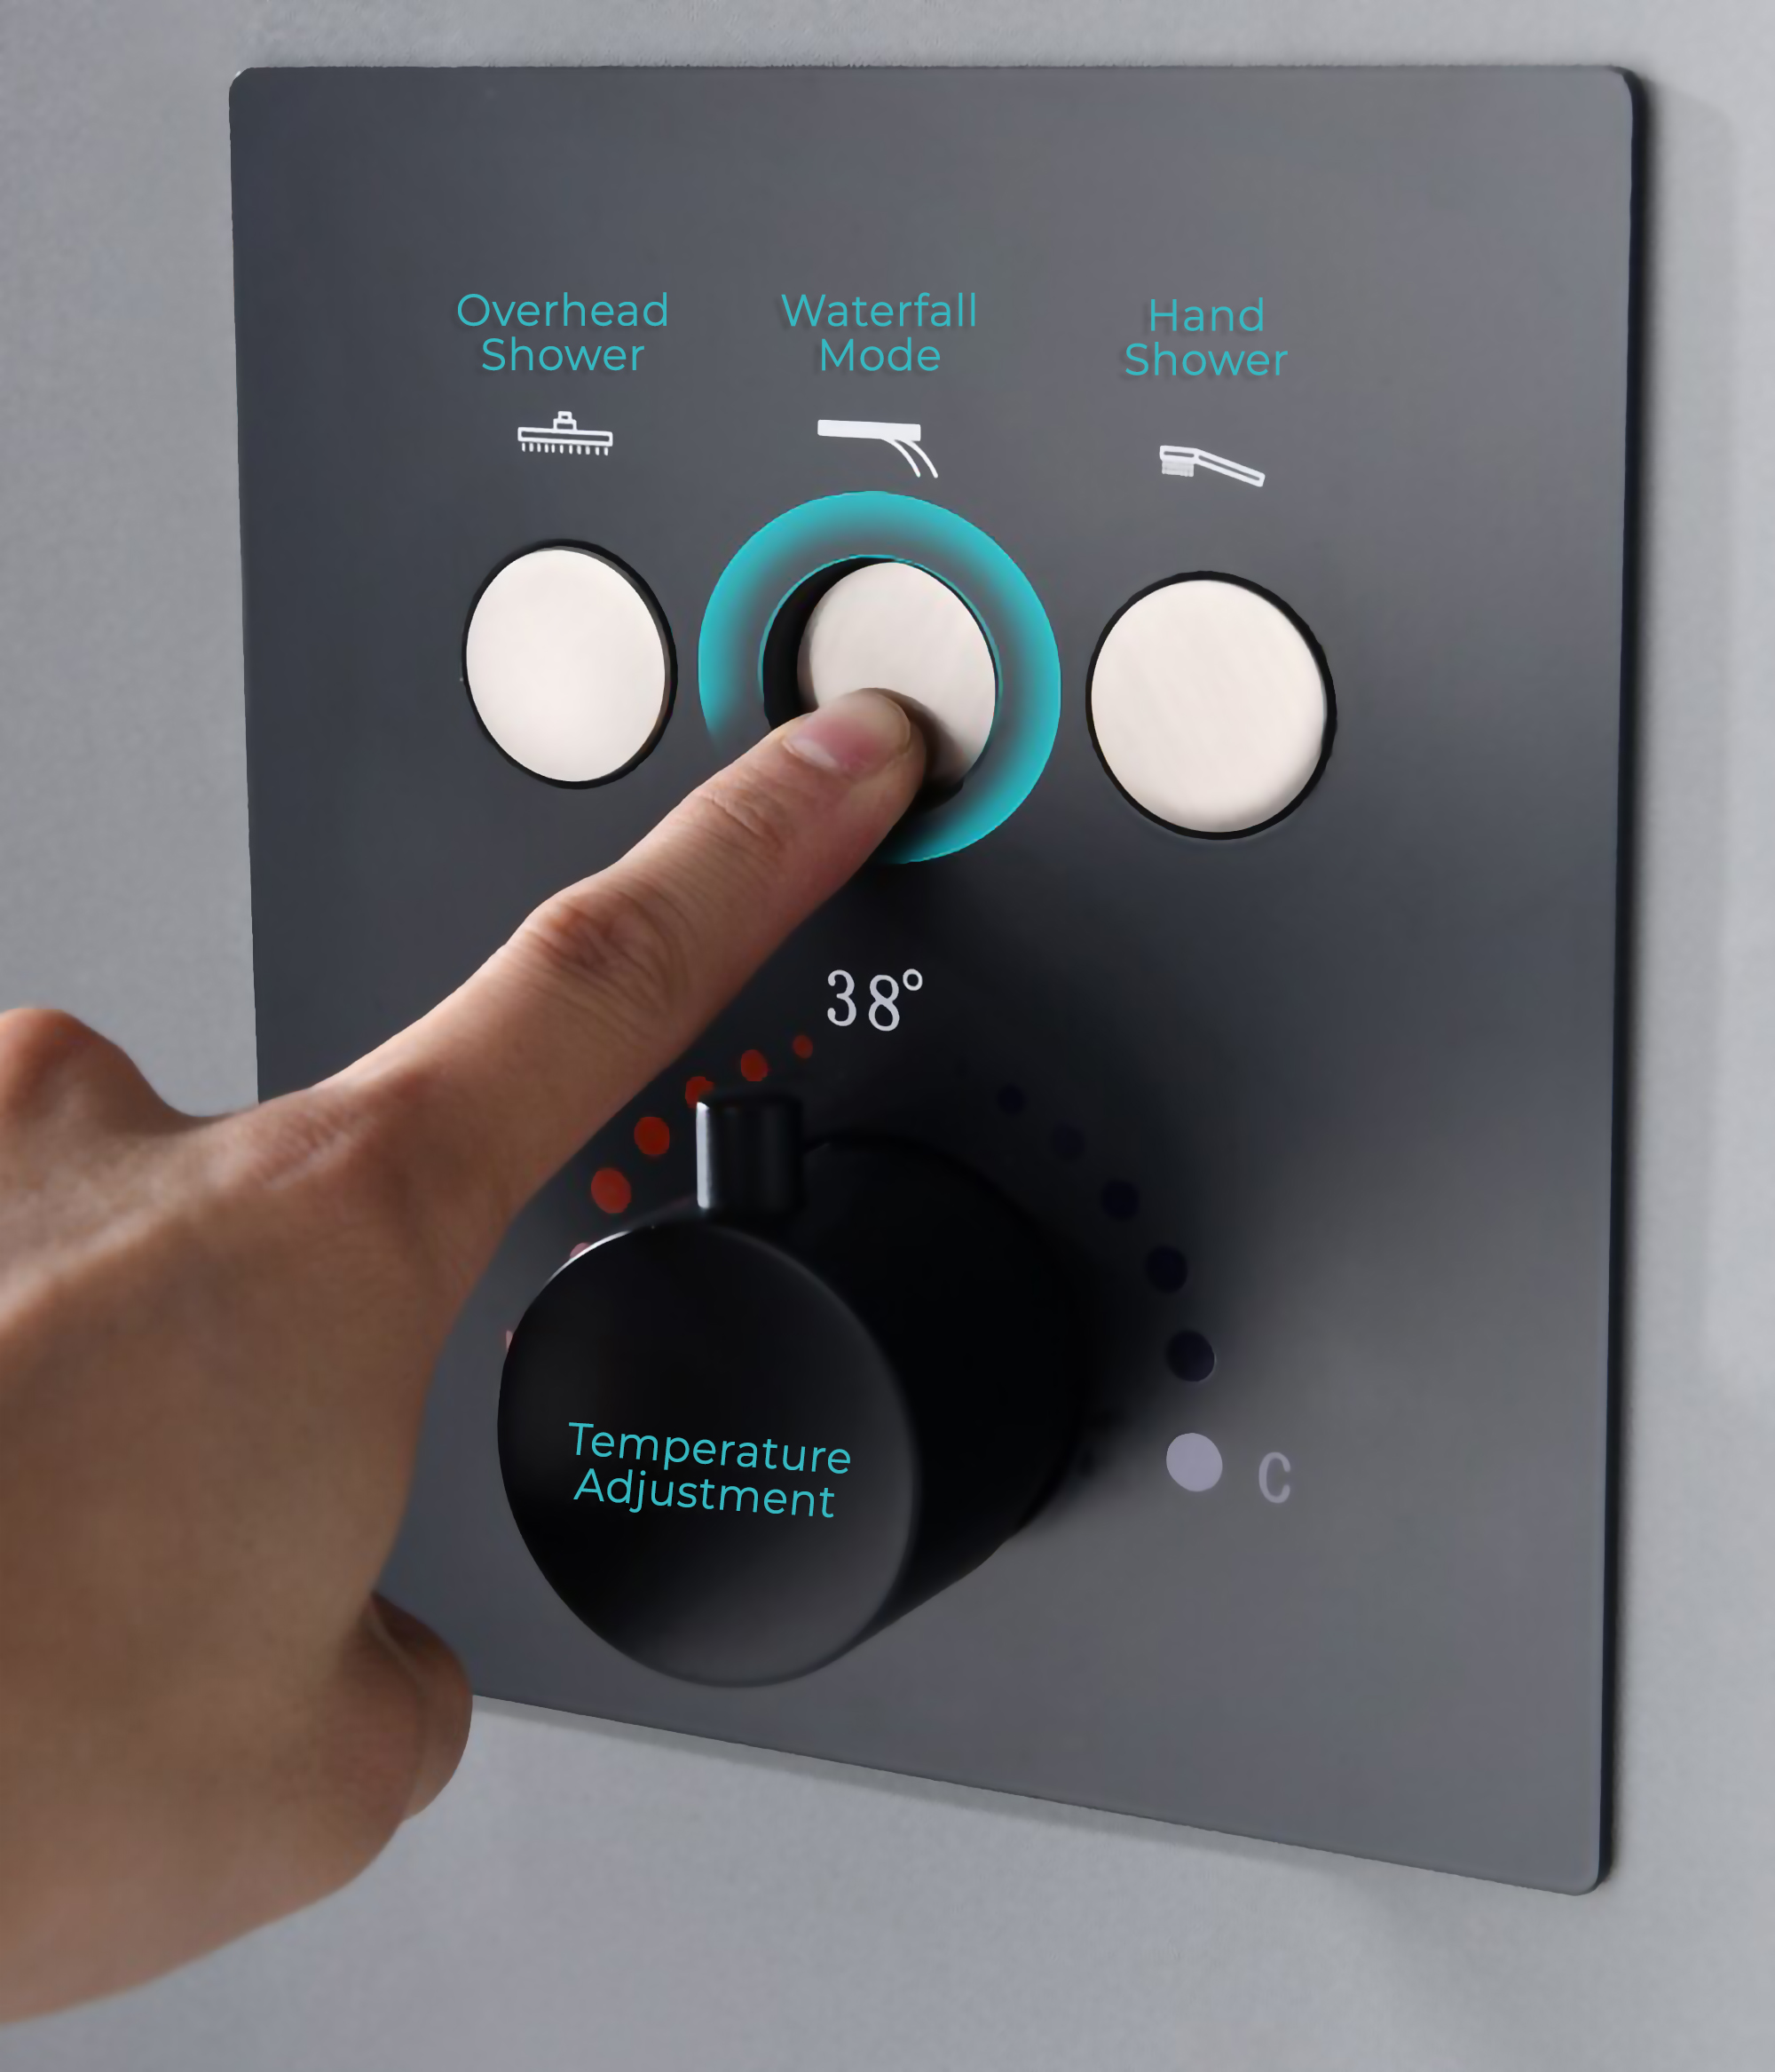
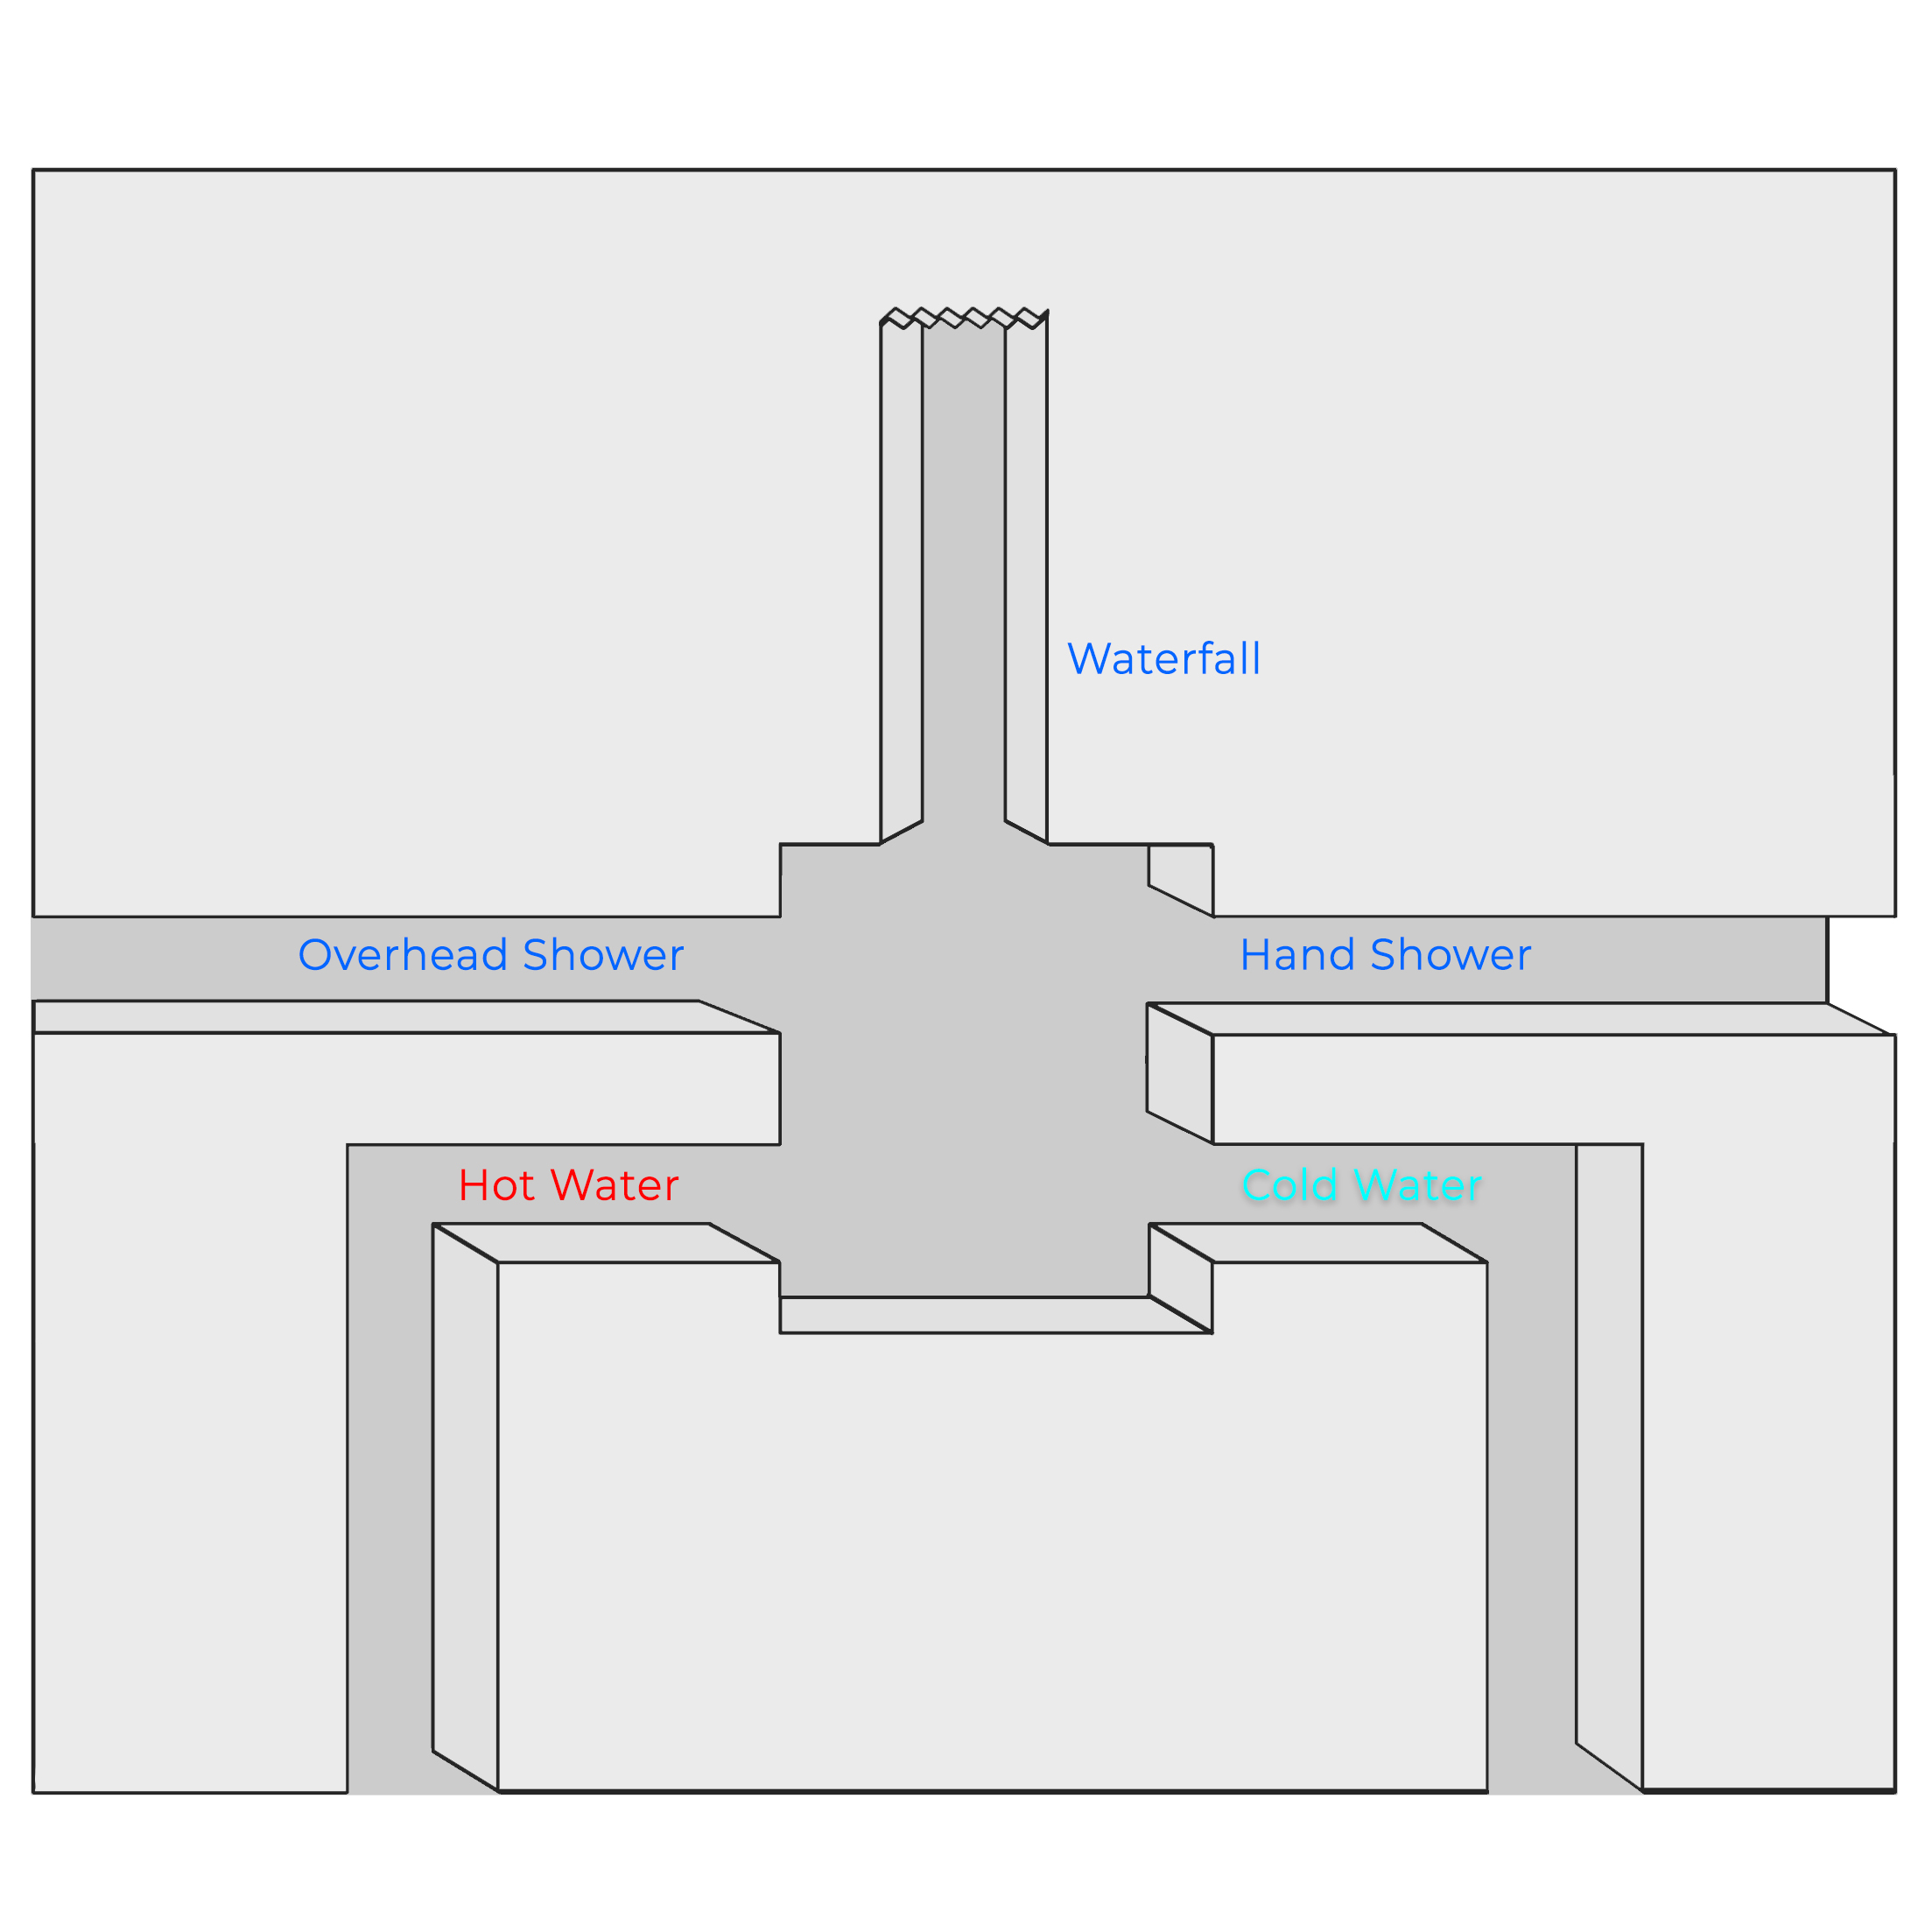
- Mixing Valve Functions: 3 function options
- Core material valve : Ceramic
- Style : Contemporary
- Type : Fixed Support Type
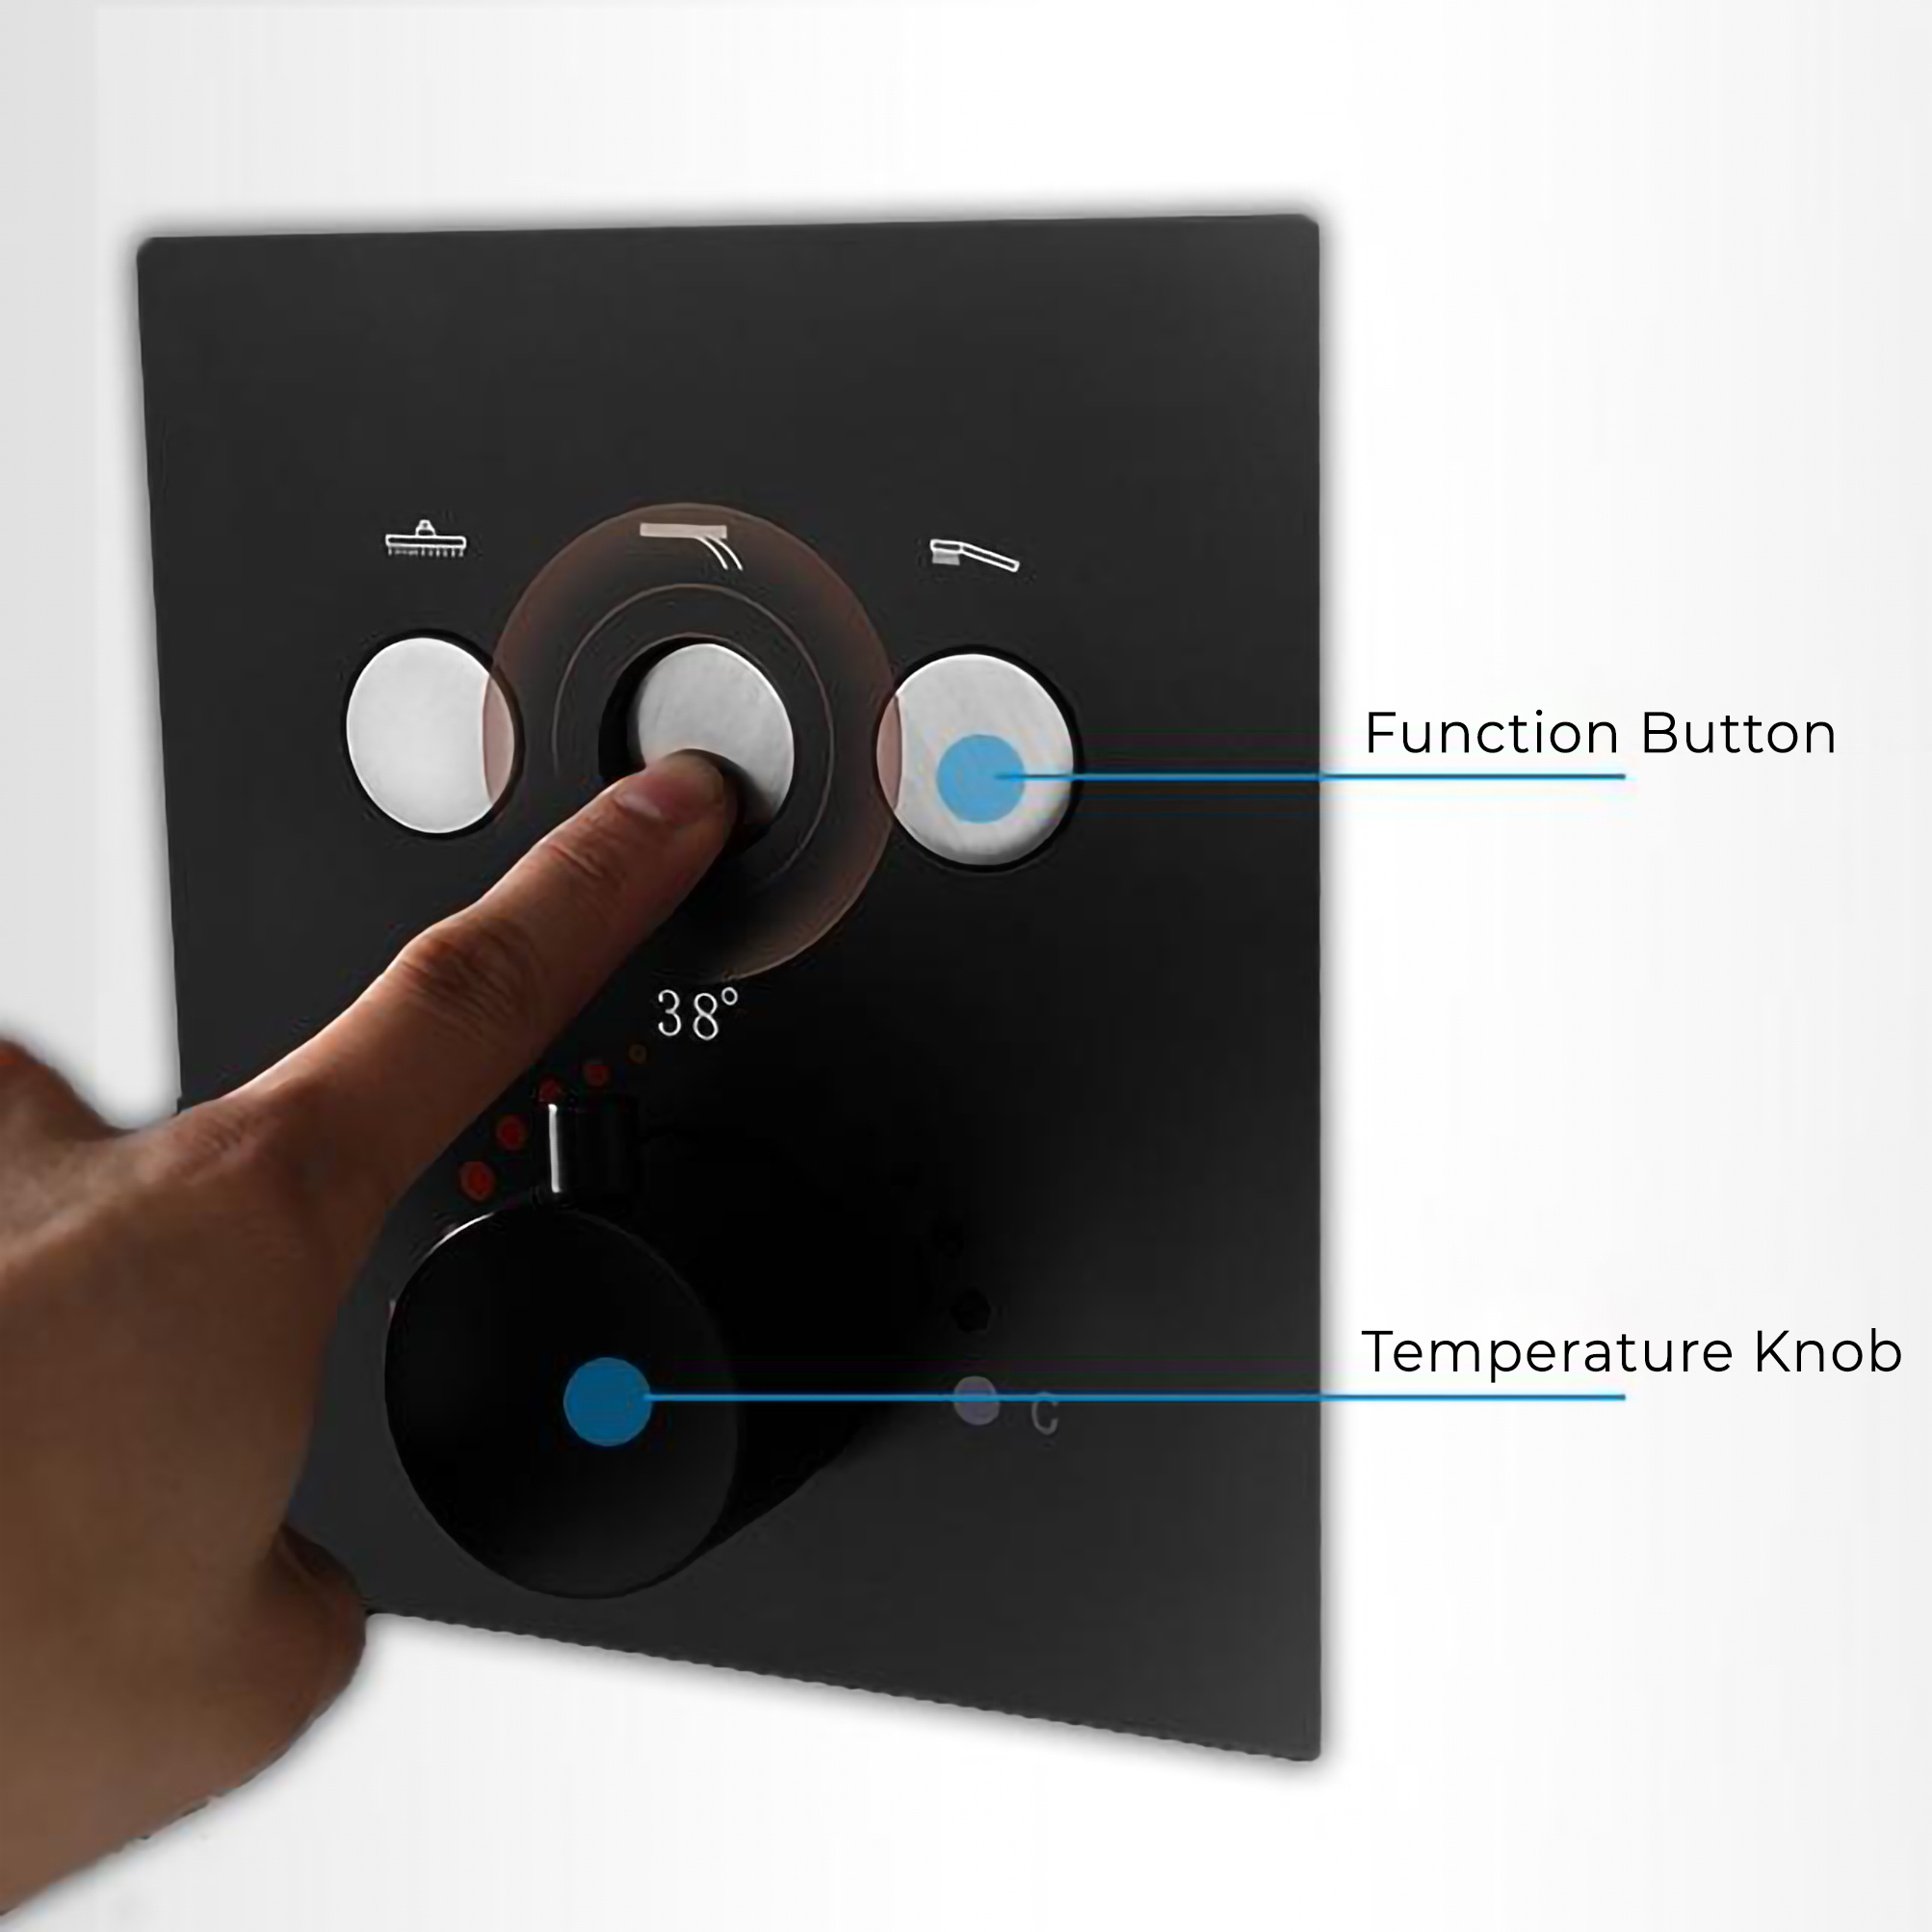
- Number of handles : Single Handle with 3 function push button
- Style: Contemporary
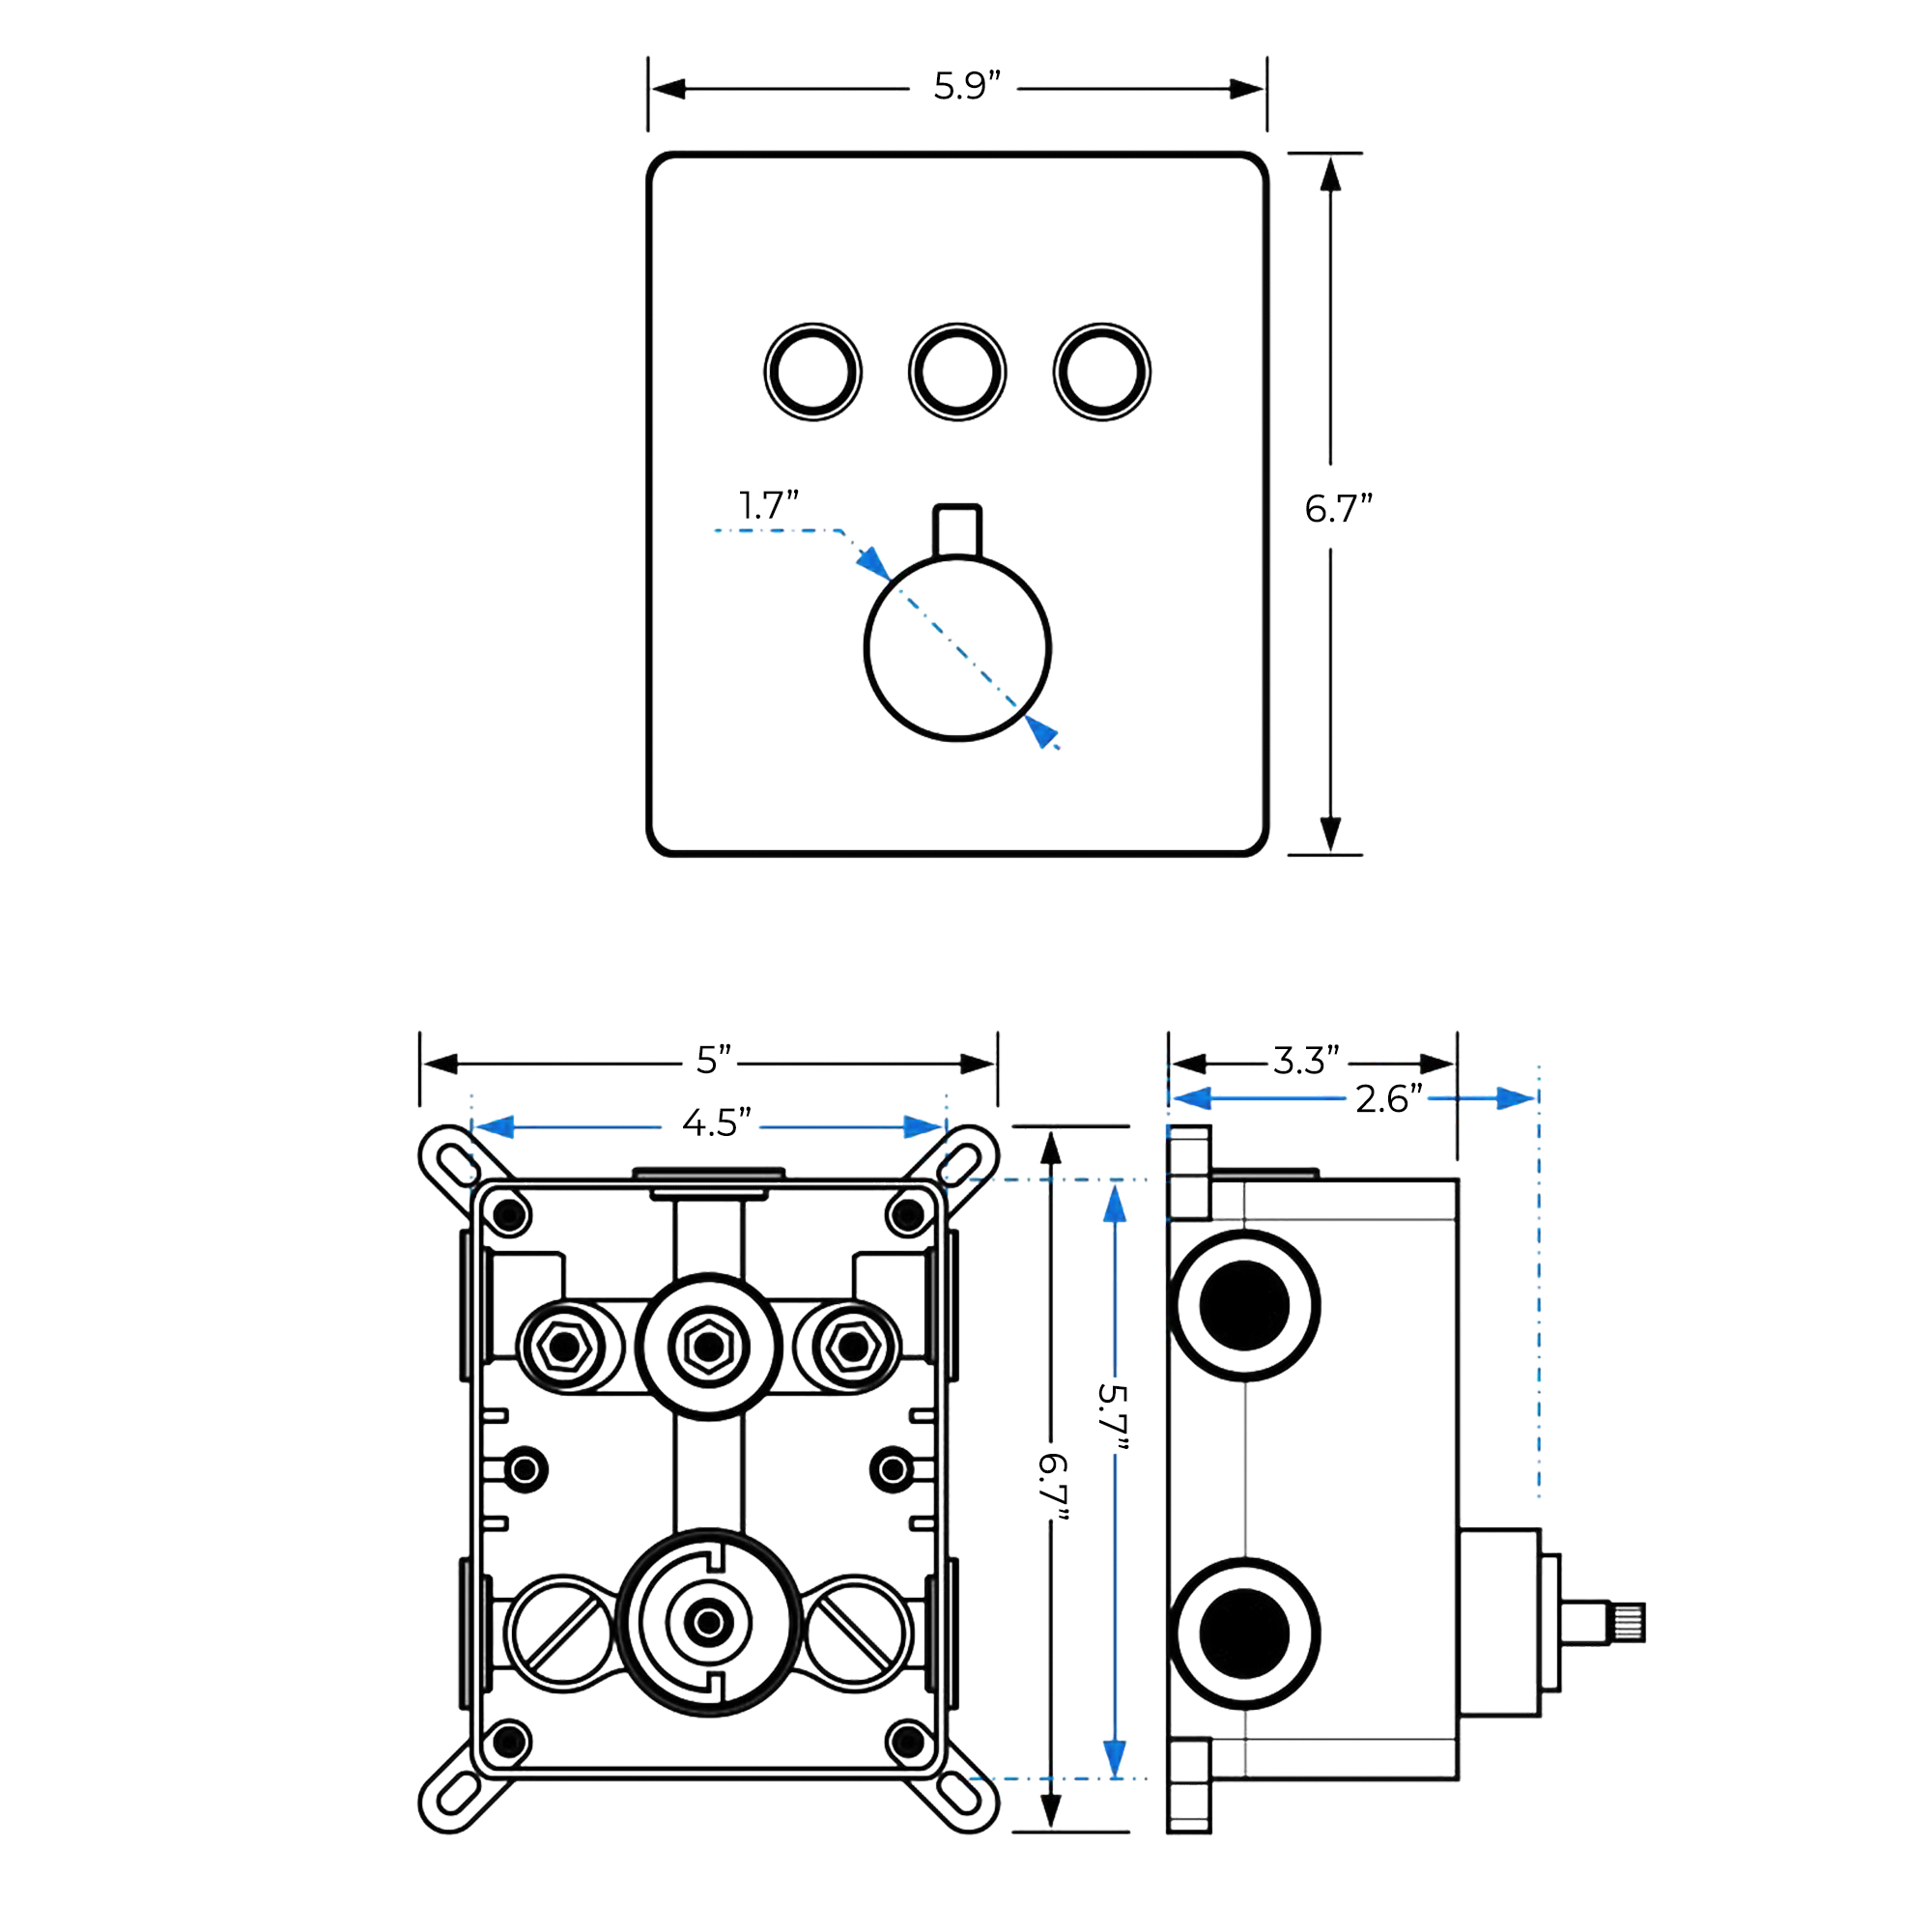
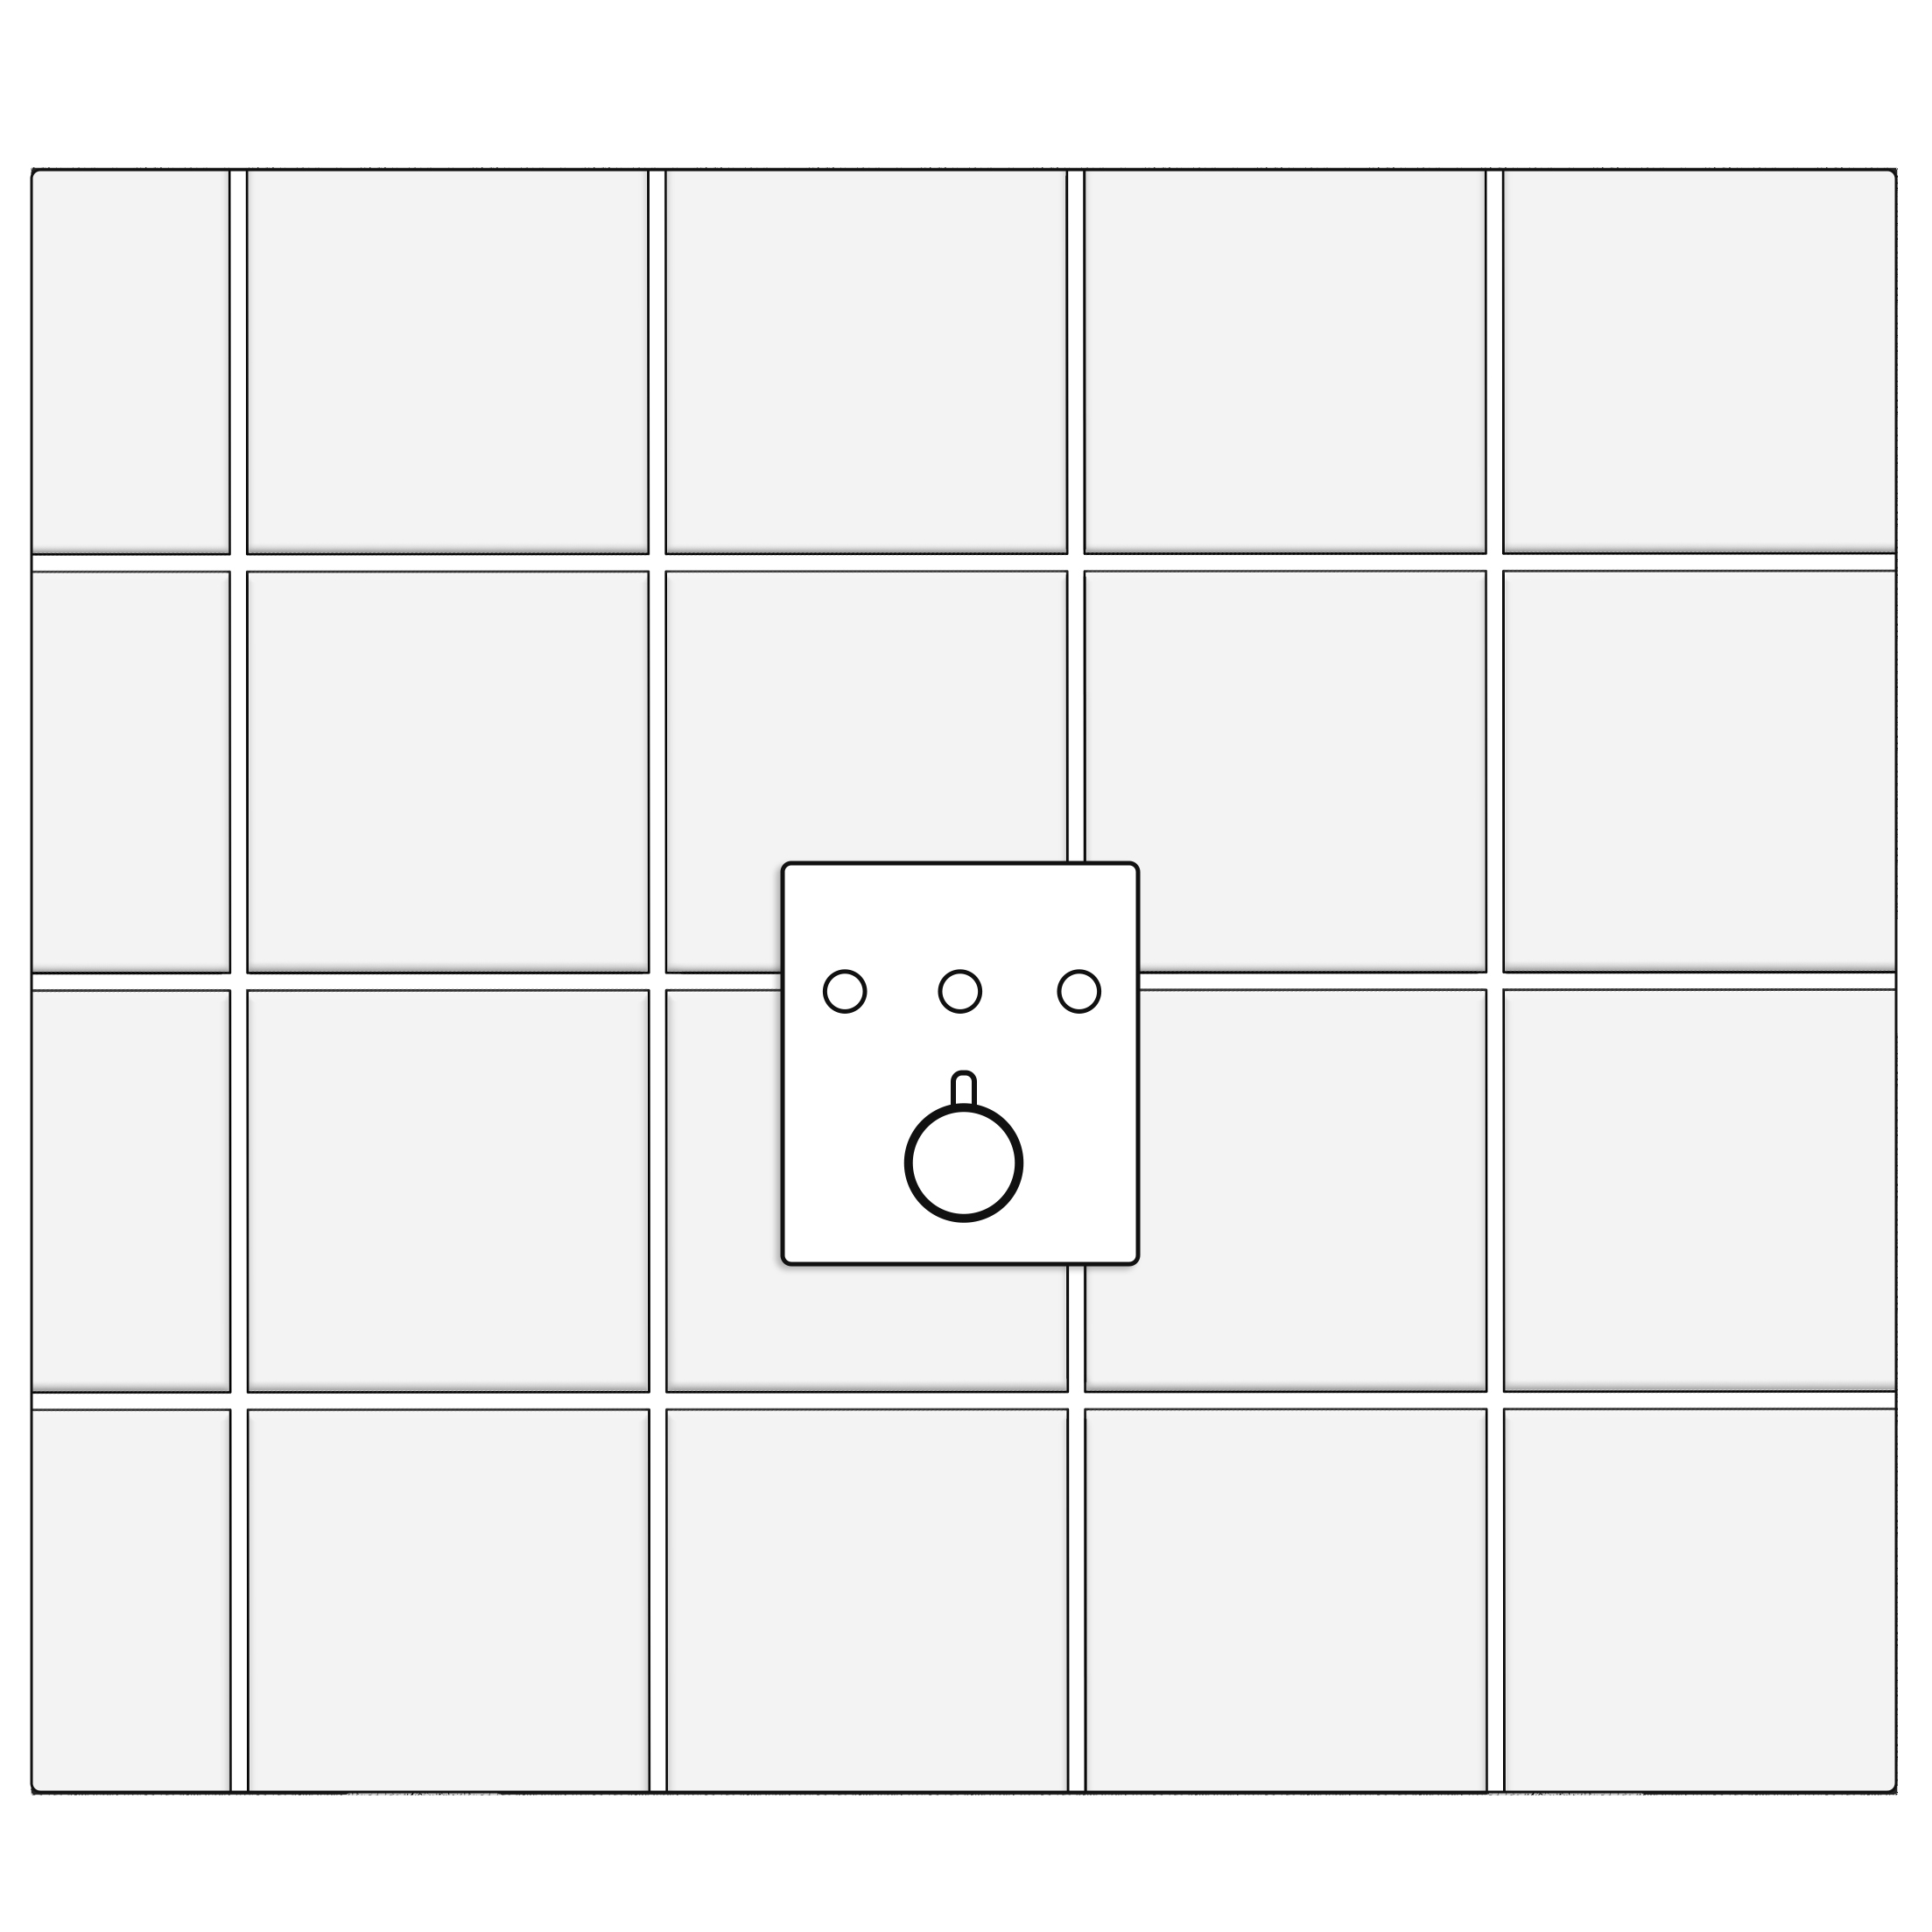
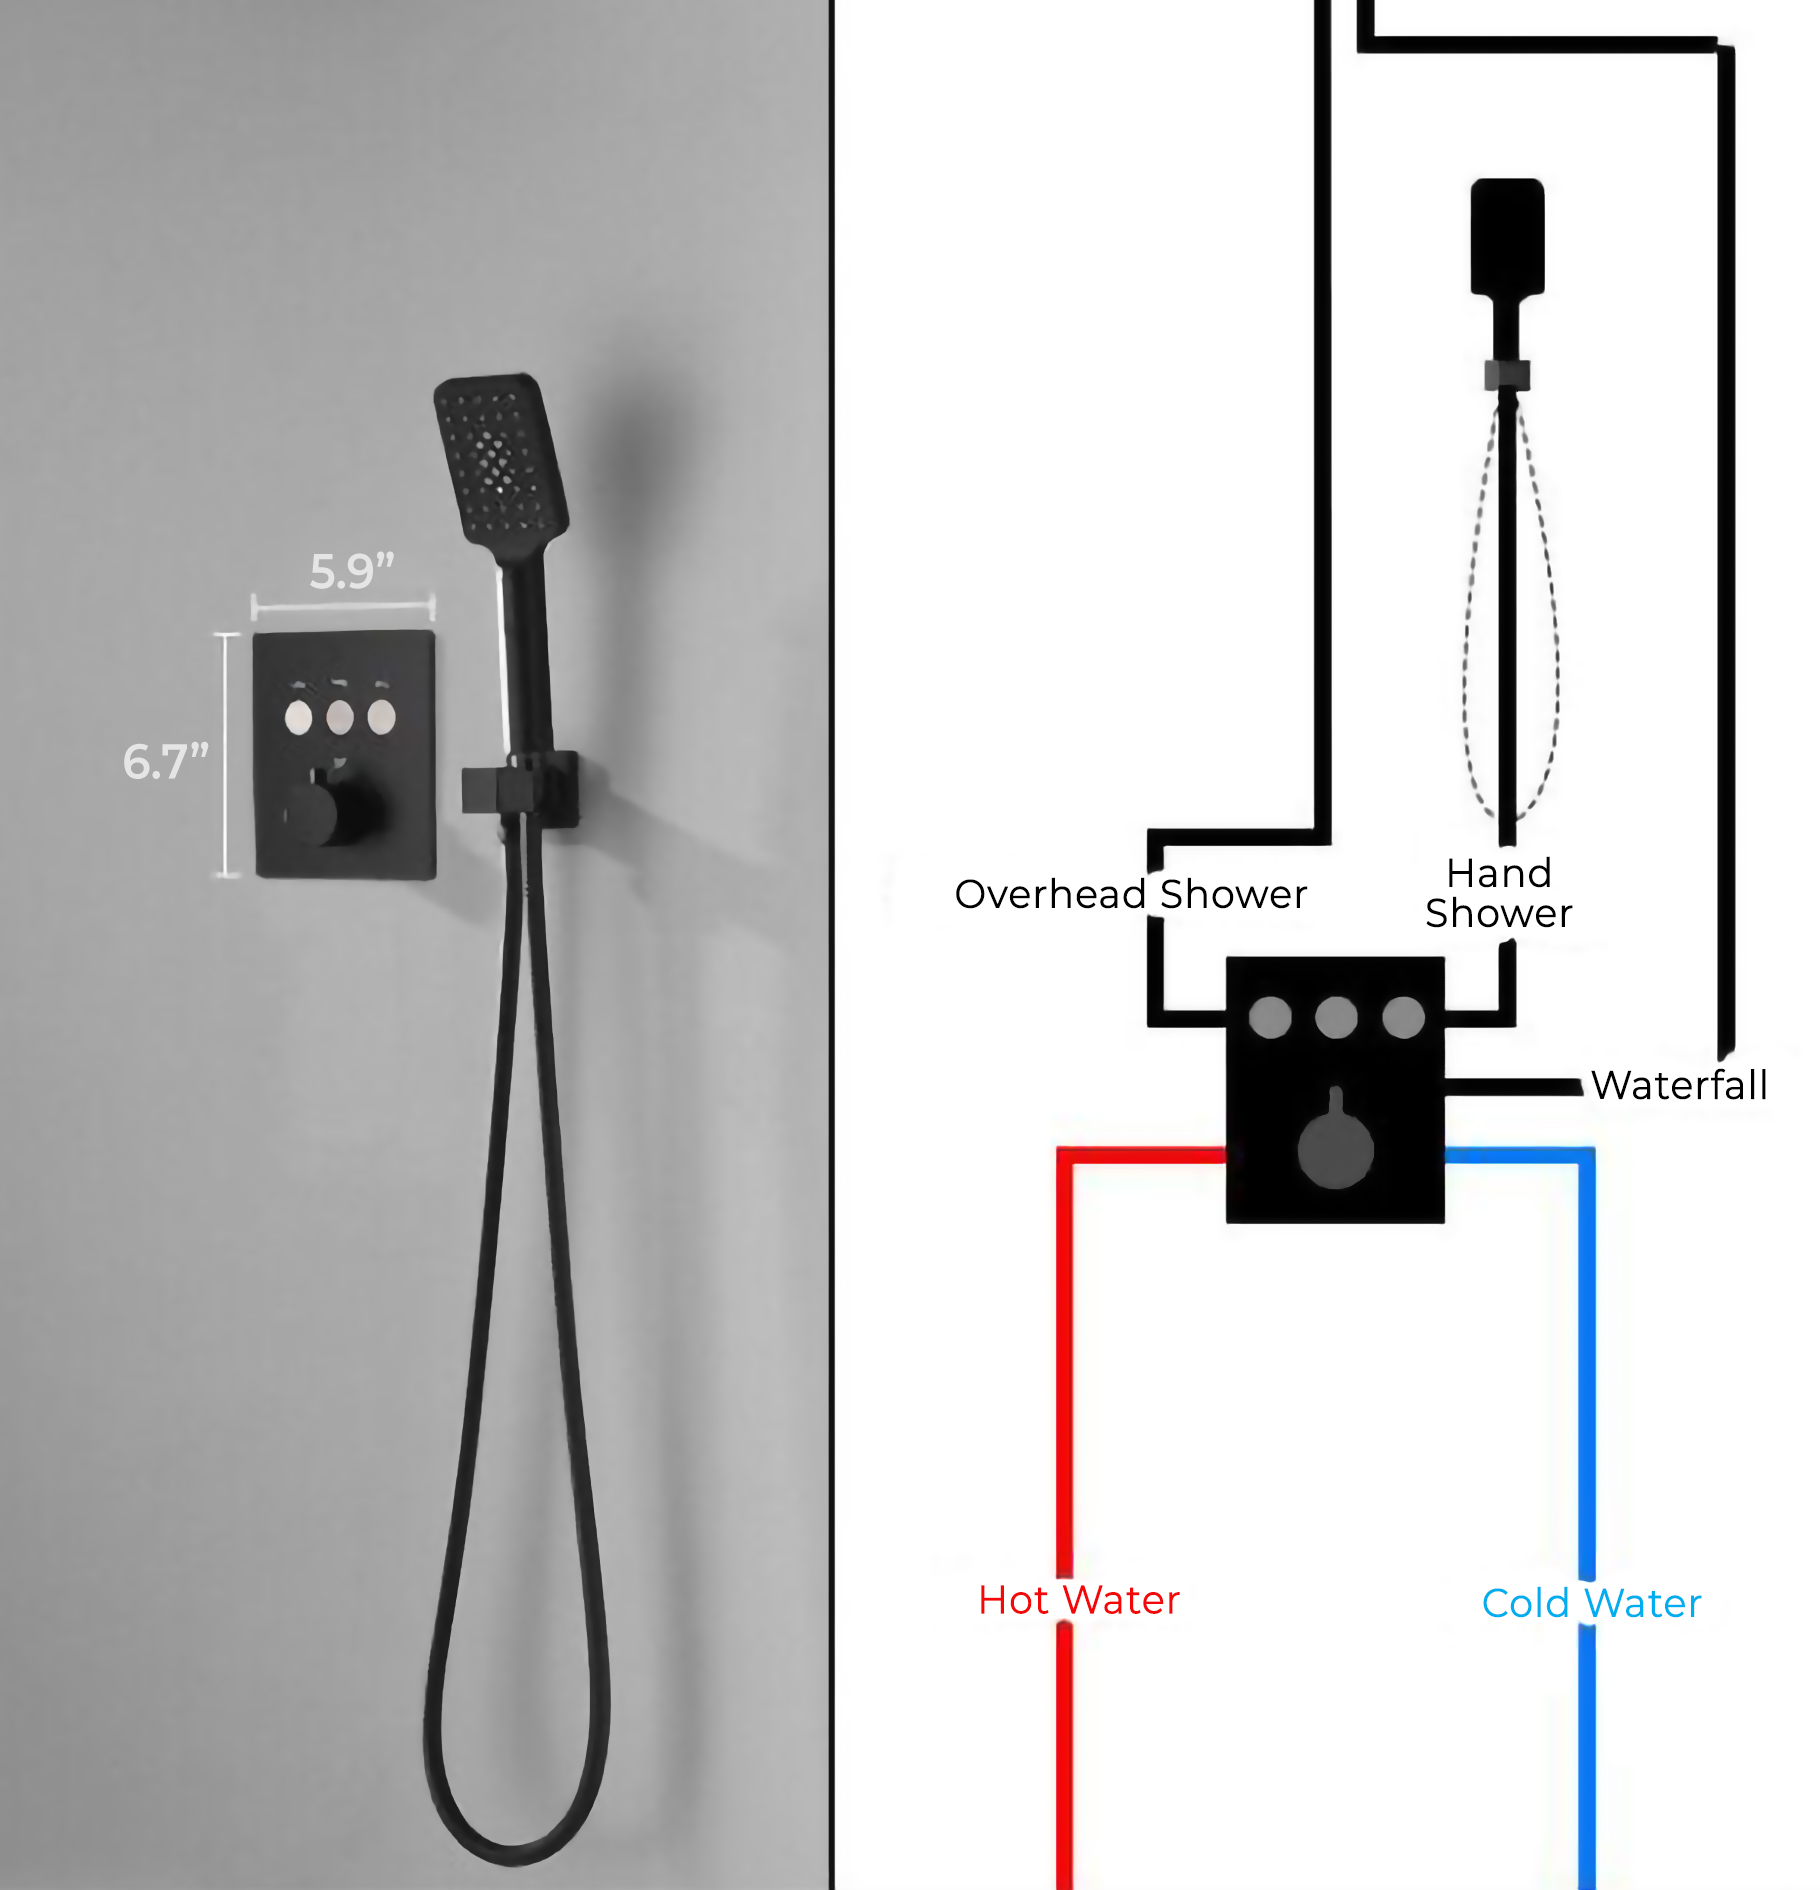
- Size: 7" - 11.8" (200-300 mm)
- Installation: In-Wall Shower Mixer
- Surface Finish: Dark Oil Rubbed Bronze
|
|
BathSelect® Manufacturer Warranty Information
- Before you begin, please read the installation instructions below. Observe all local building and safety codes.
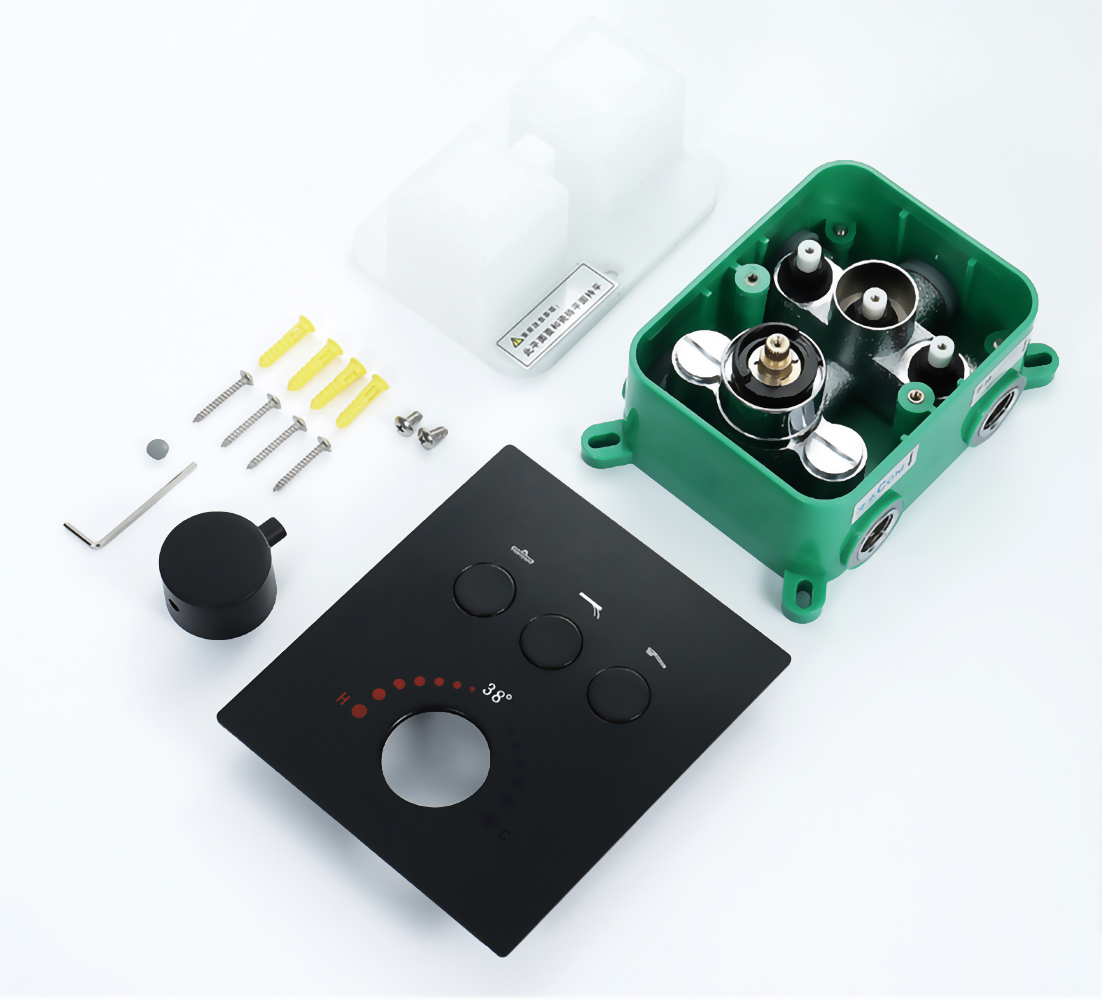
- Unpack and inspect the product for any shipping damages. If you find damages, do not install.
- Please note all showers must be installed by a professional and certified plumber otherwise warranty may be voided.
|
shower
|
|
|
Thermostatic Mixer Installation Instructions
Step 1

|
shower
|
Step 2
|
shower
|
Step 3
|
|
Step 4

|
|
Step 5

|
|
Step 6
|
|
Step 7
|
|
Step 8
|
|
Step 9
|
|
Step 10

|
|
Step 11
|
|
Step 12
|
|
Step 13
|
|
Step 14

|
|
Step 15
|
|
Step 16
|
shower
|
Step 17

|
faucet
|
Step 18
|
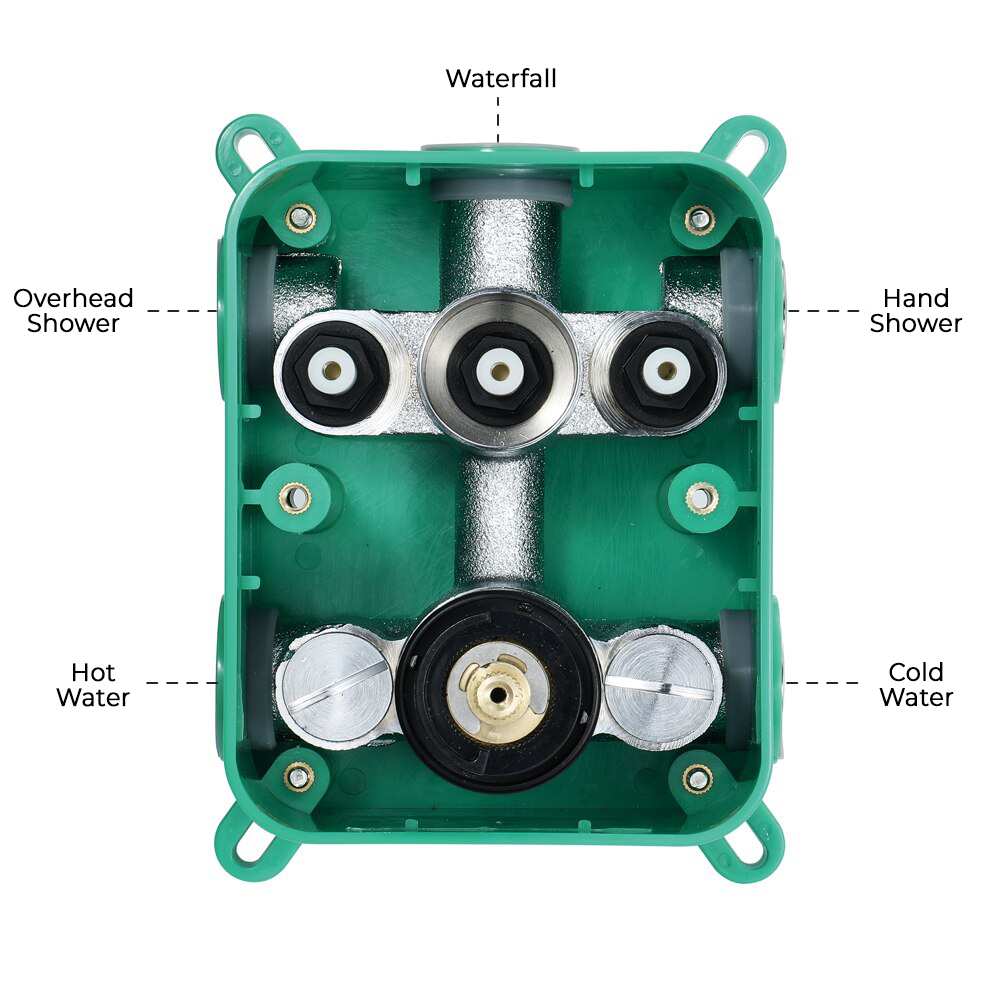
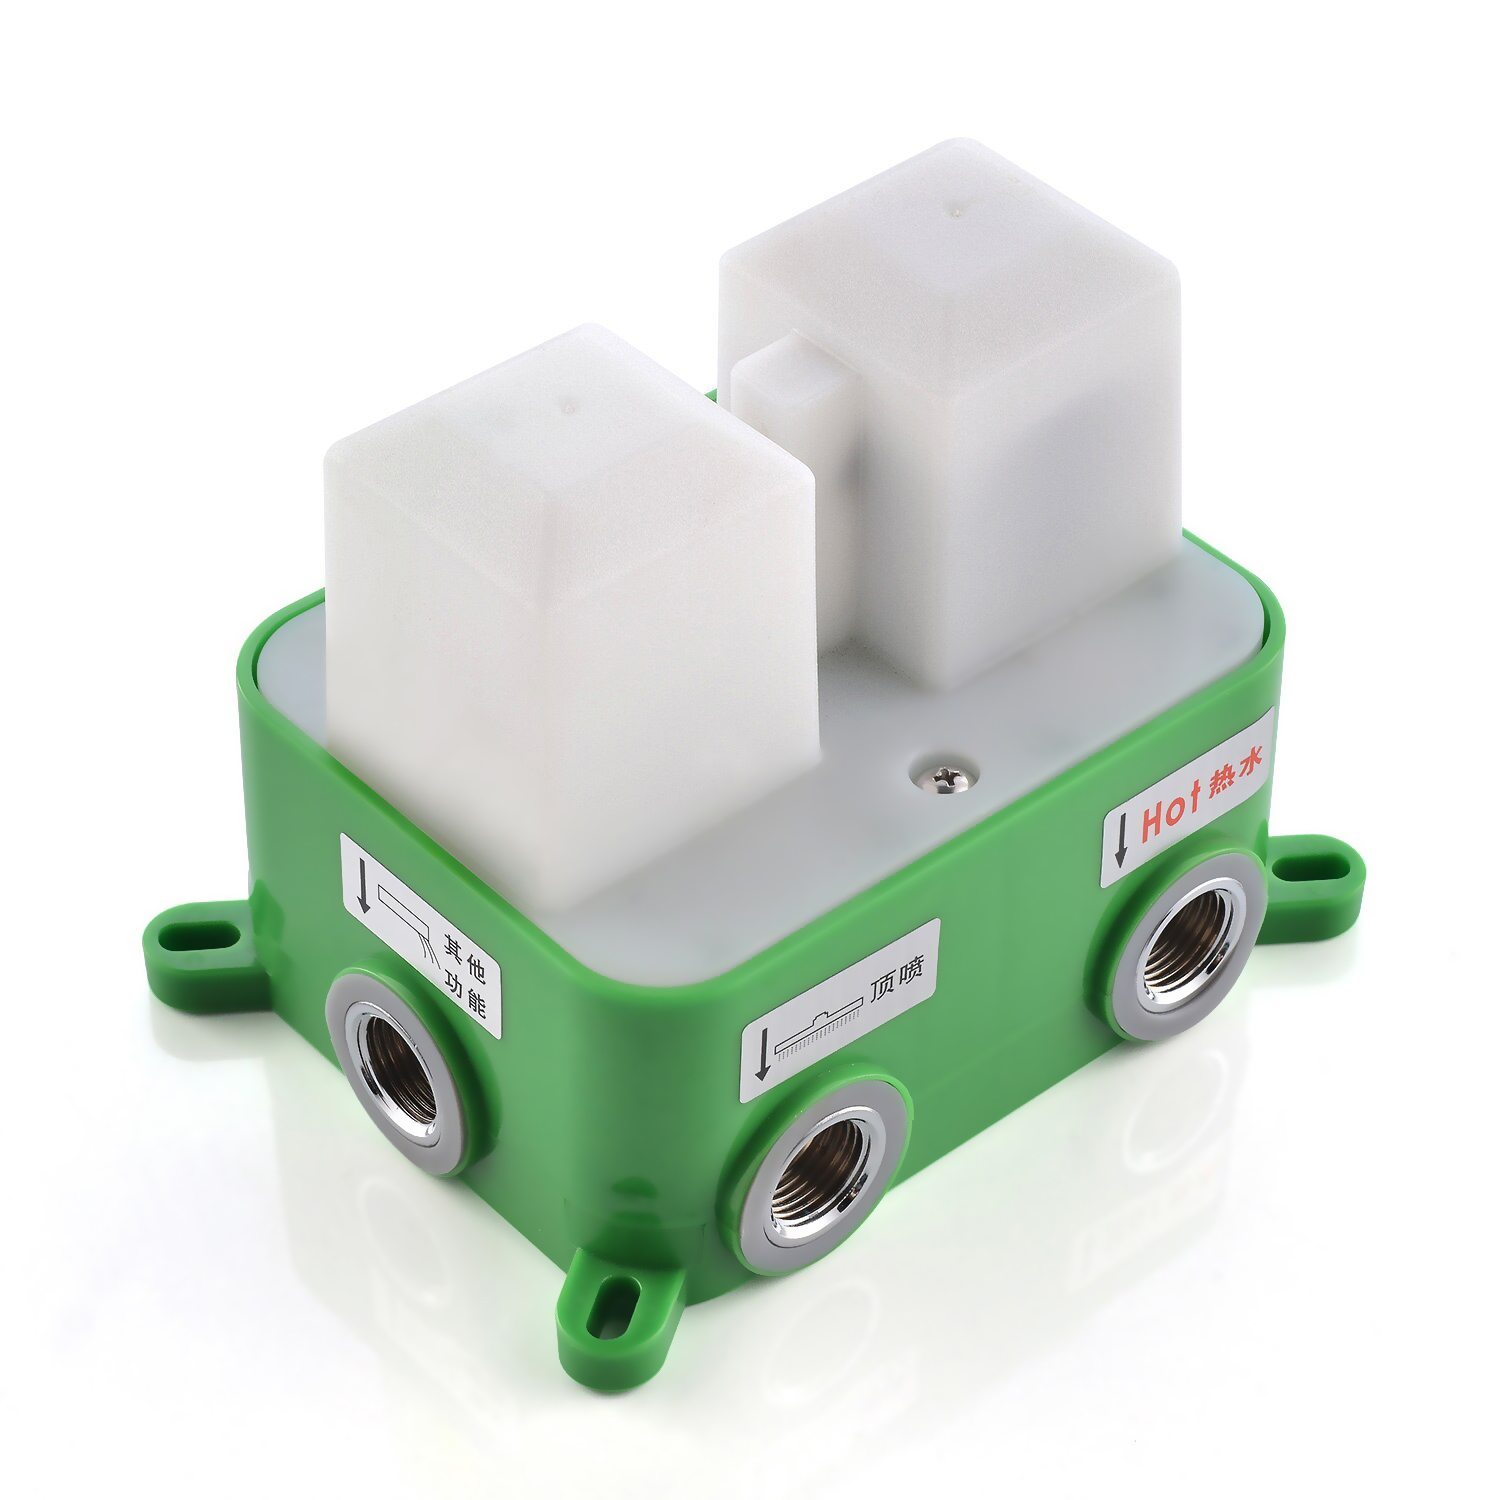
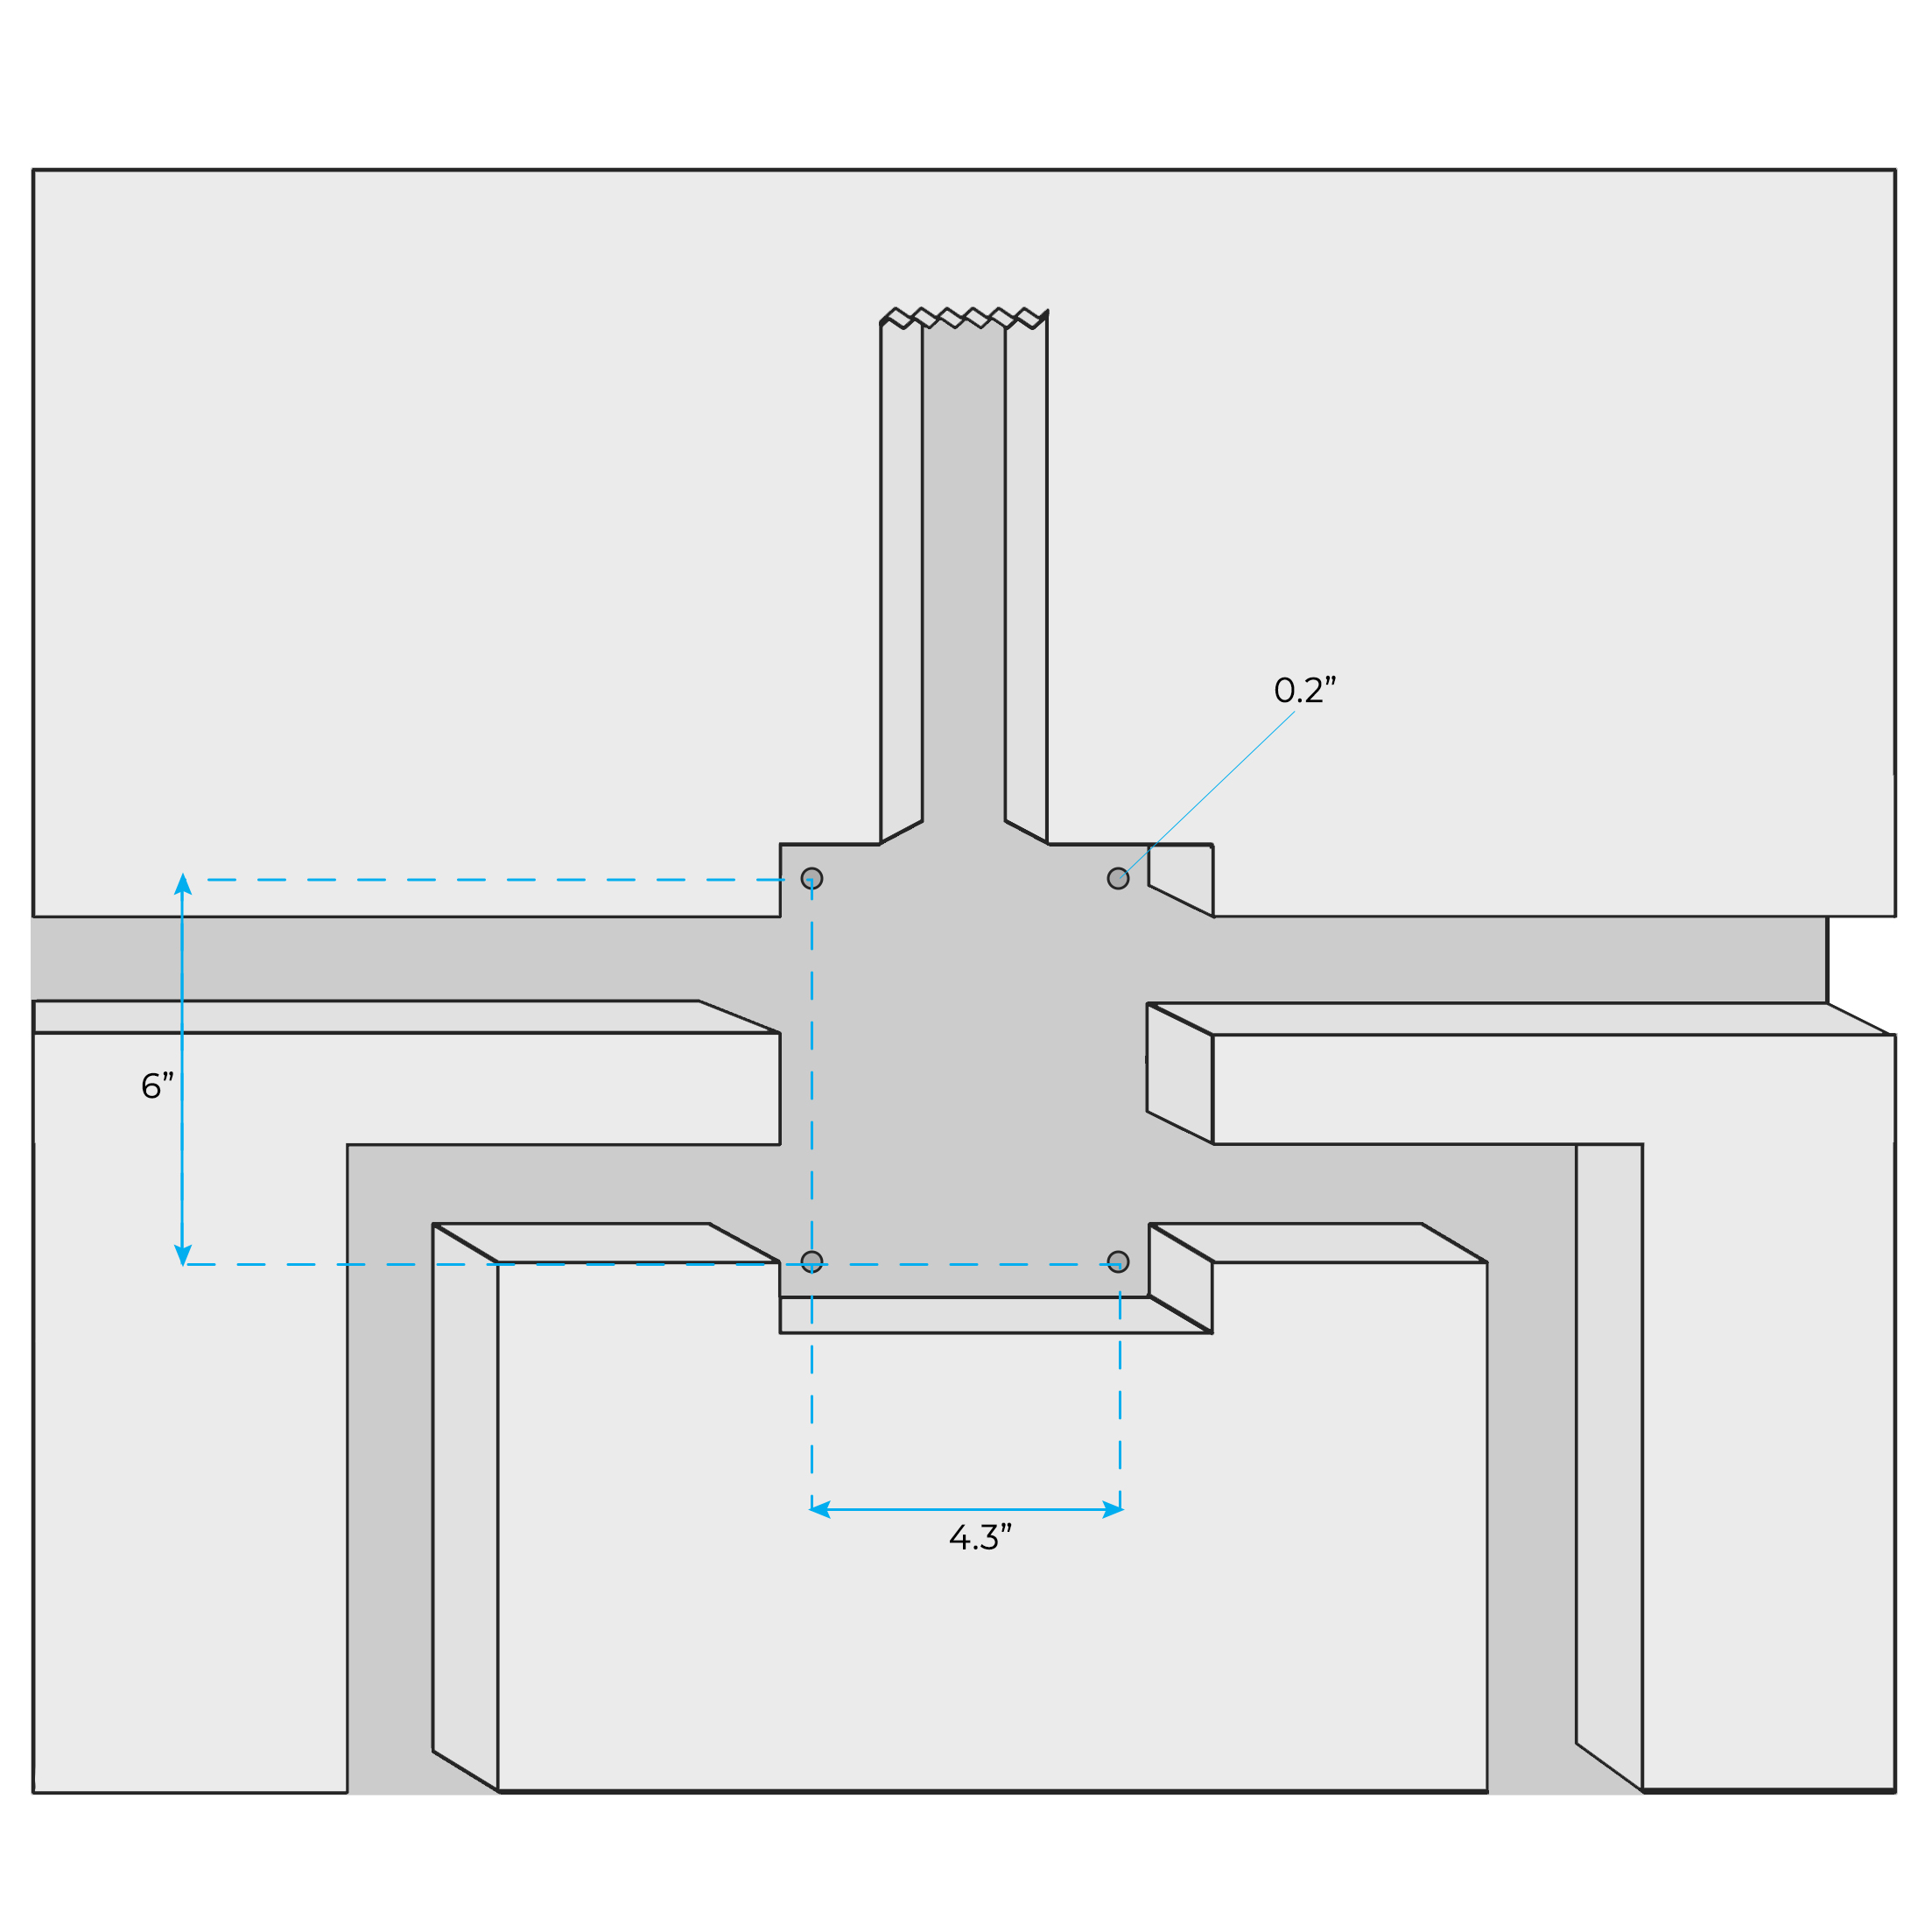
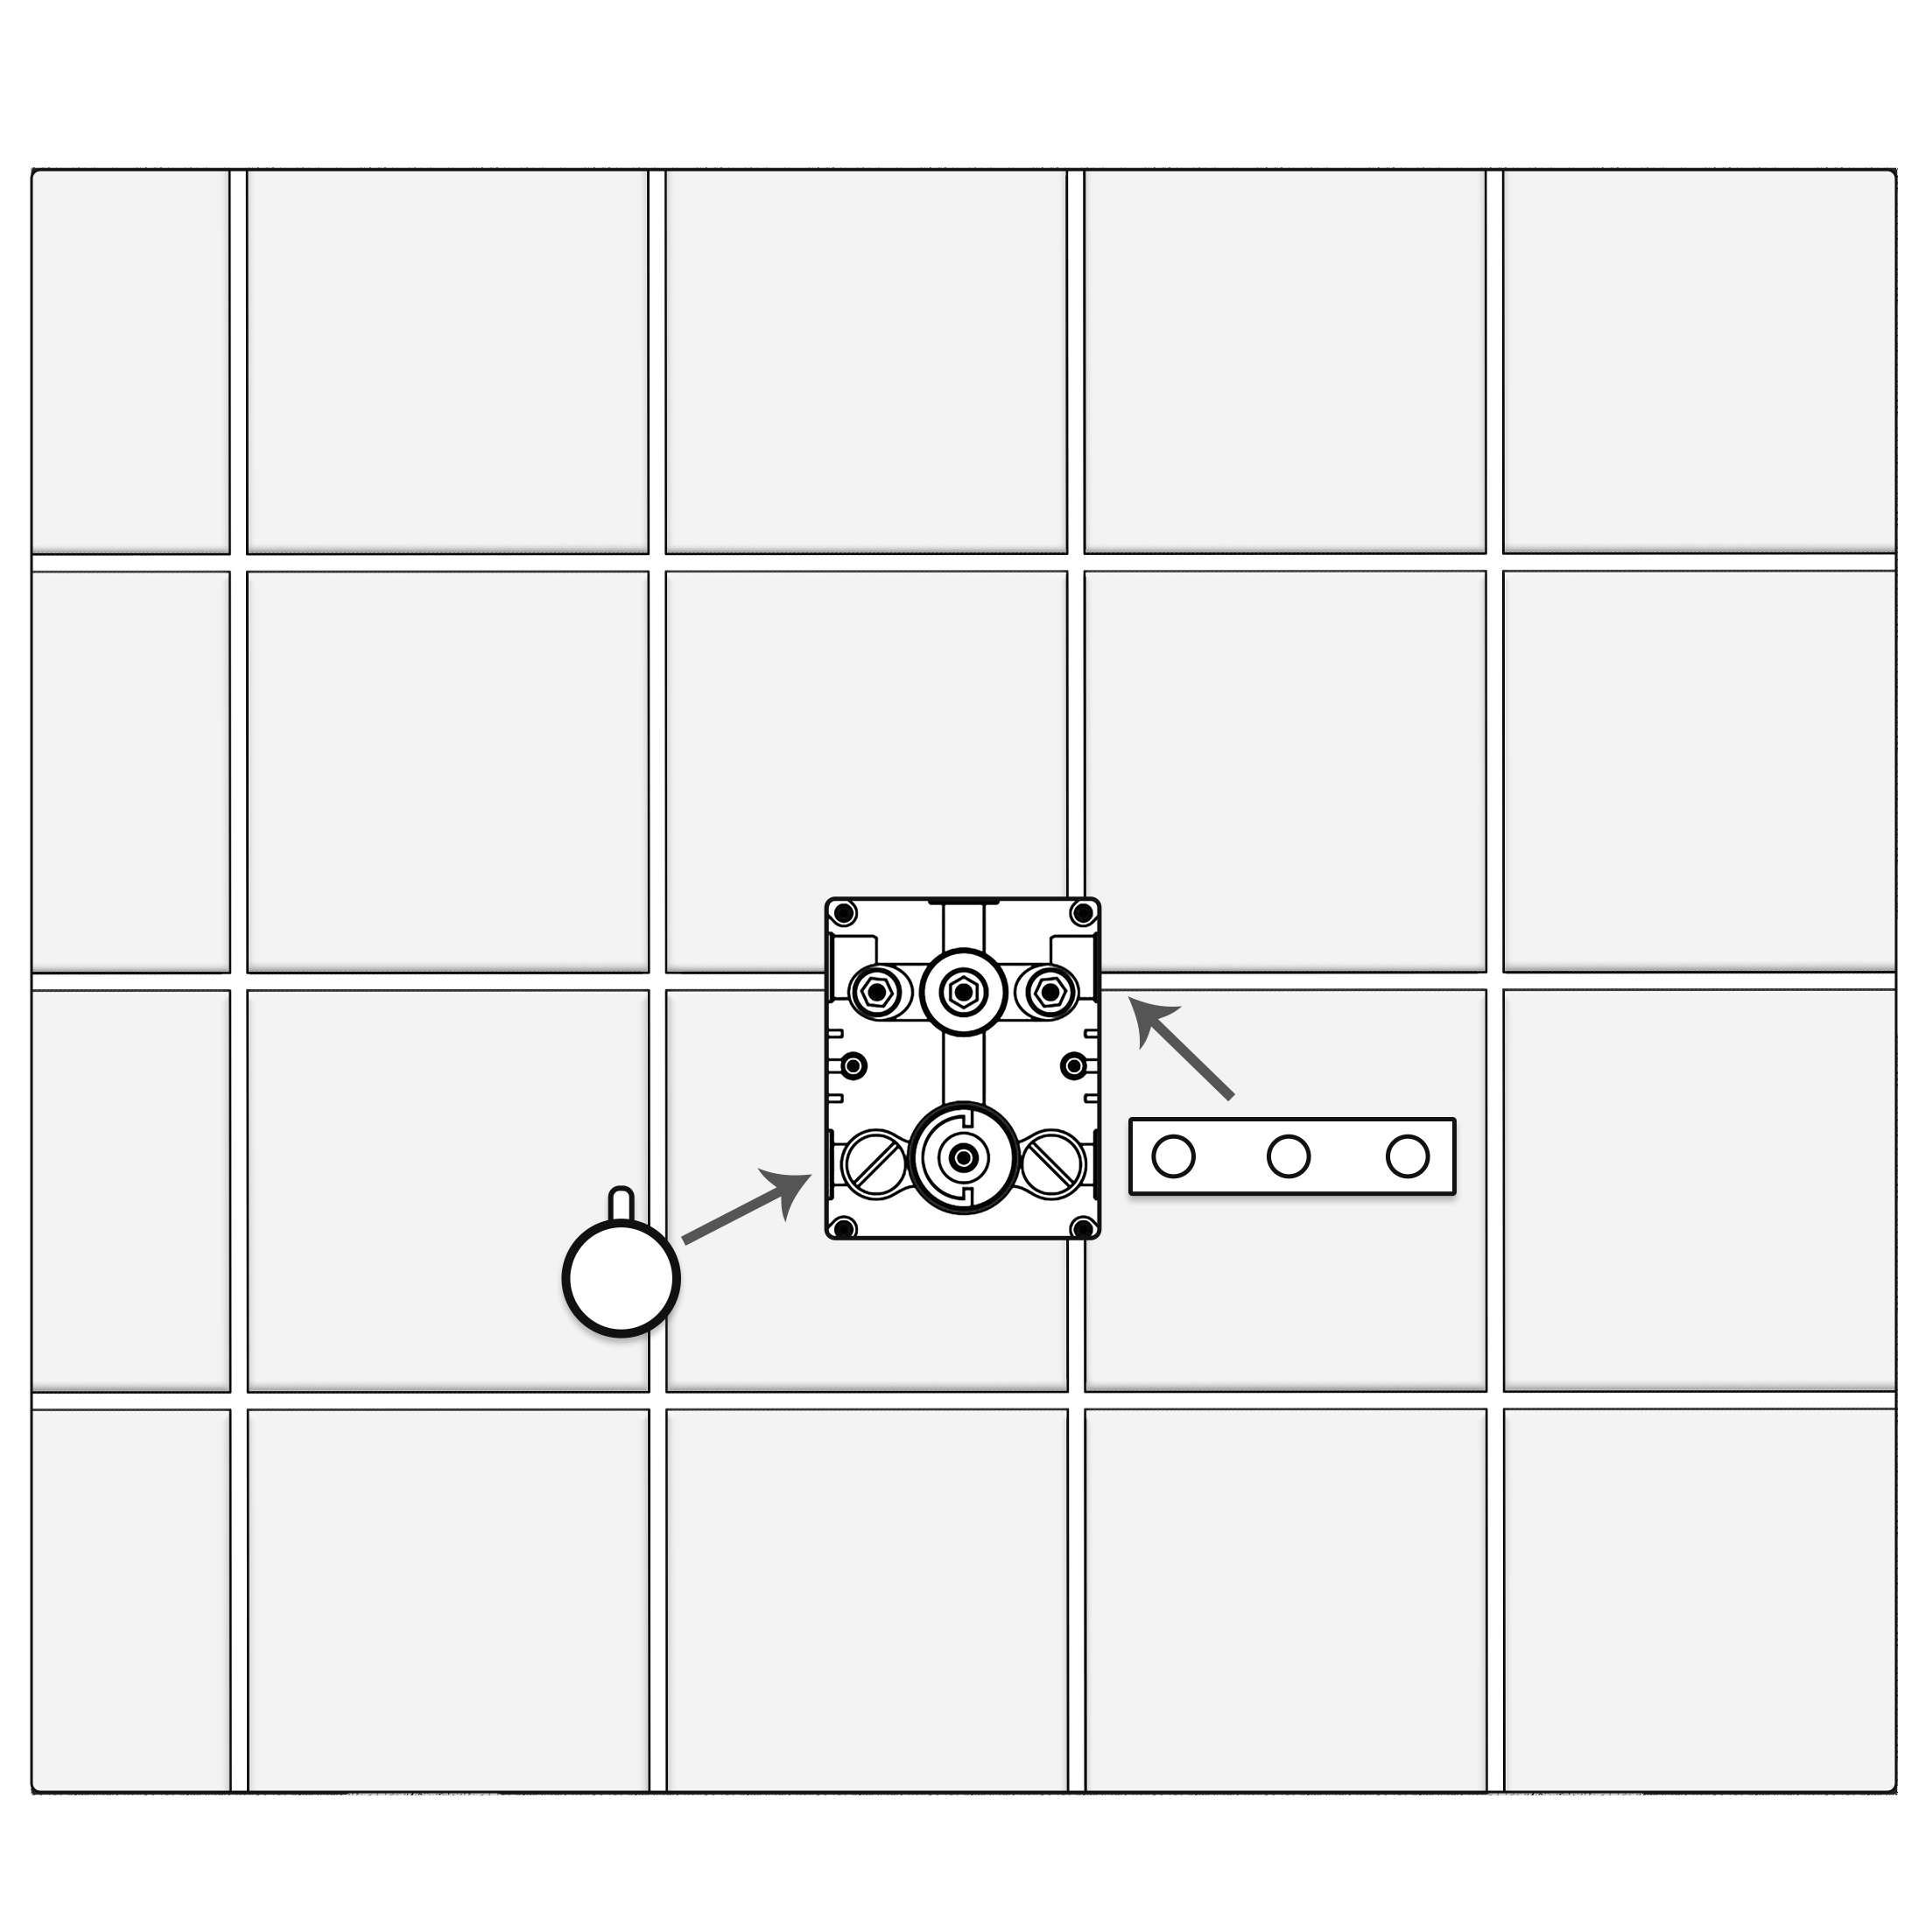
Step 8: According to the basic picture of the product, refer to the above picture, open the wall to dig the main body embedded port, the hot and cold water inlet, and the mixed water outlet.
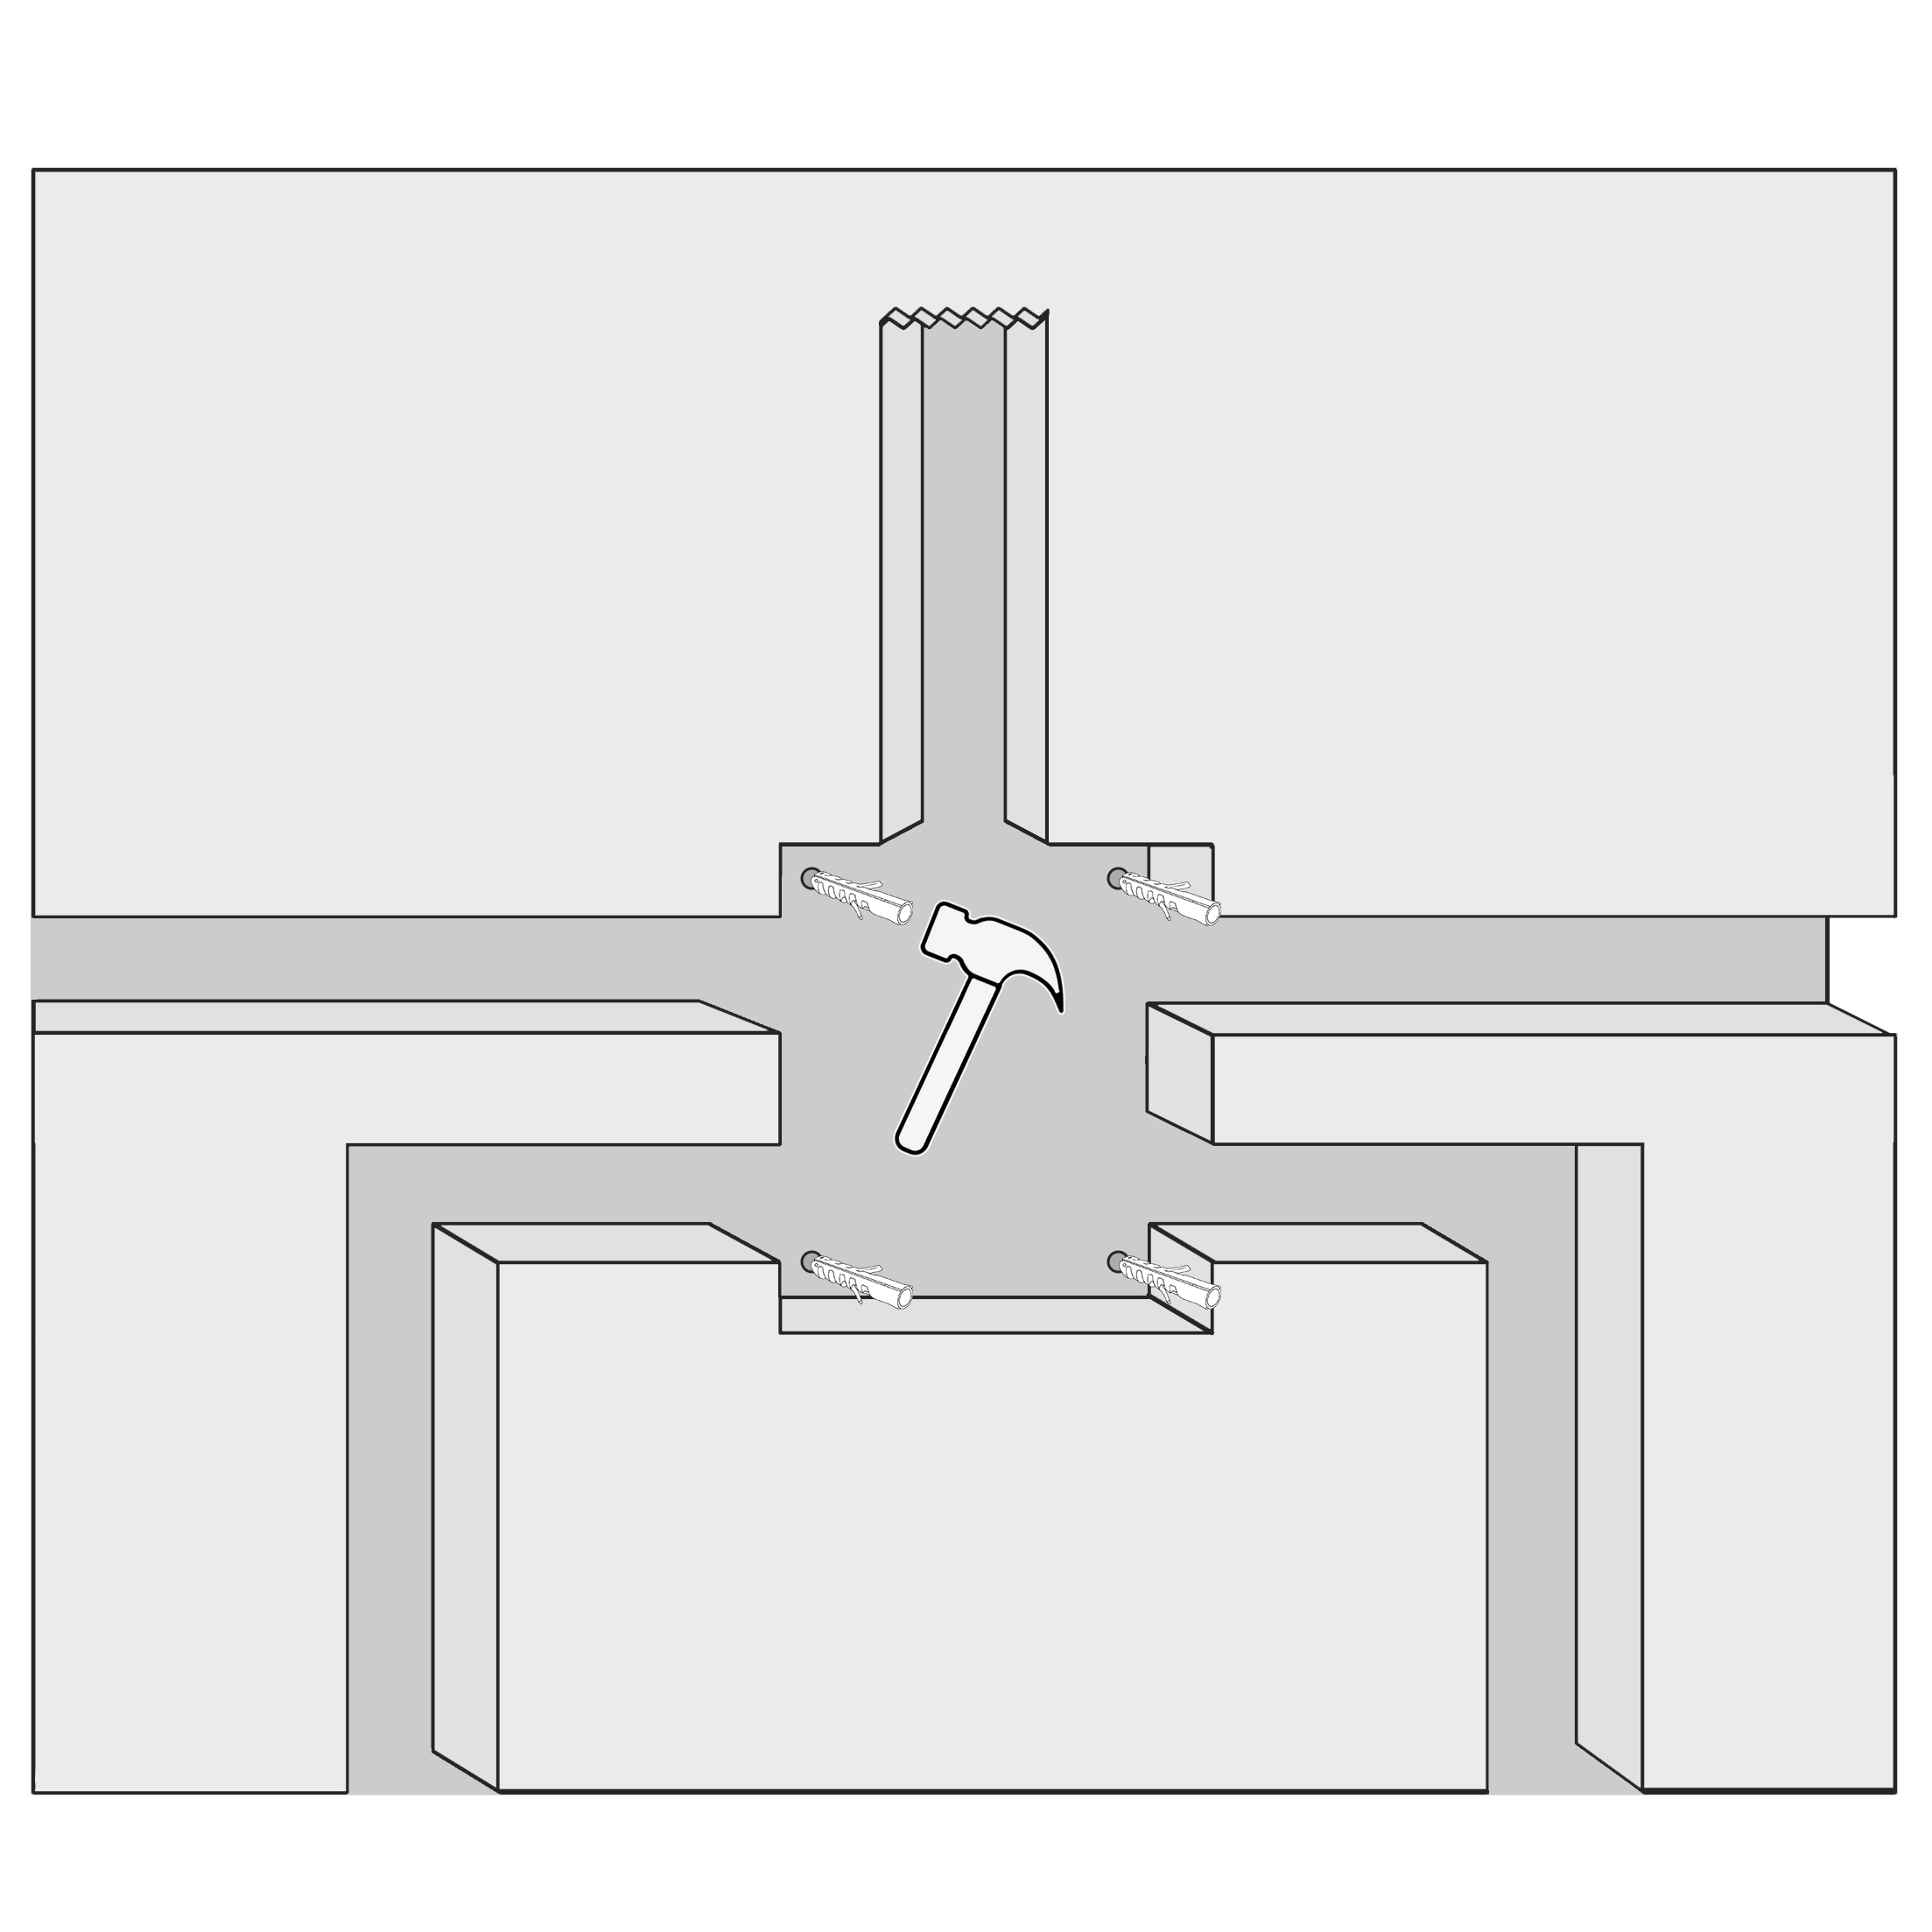
Step 9: Drill5 6mm(0.2") holes with impact drill according to product size.
Step 10: Use a hammer to break four expanded capsules into the drilled holes.
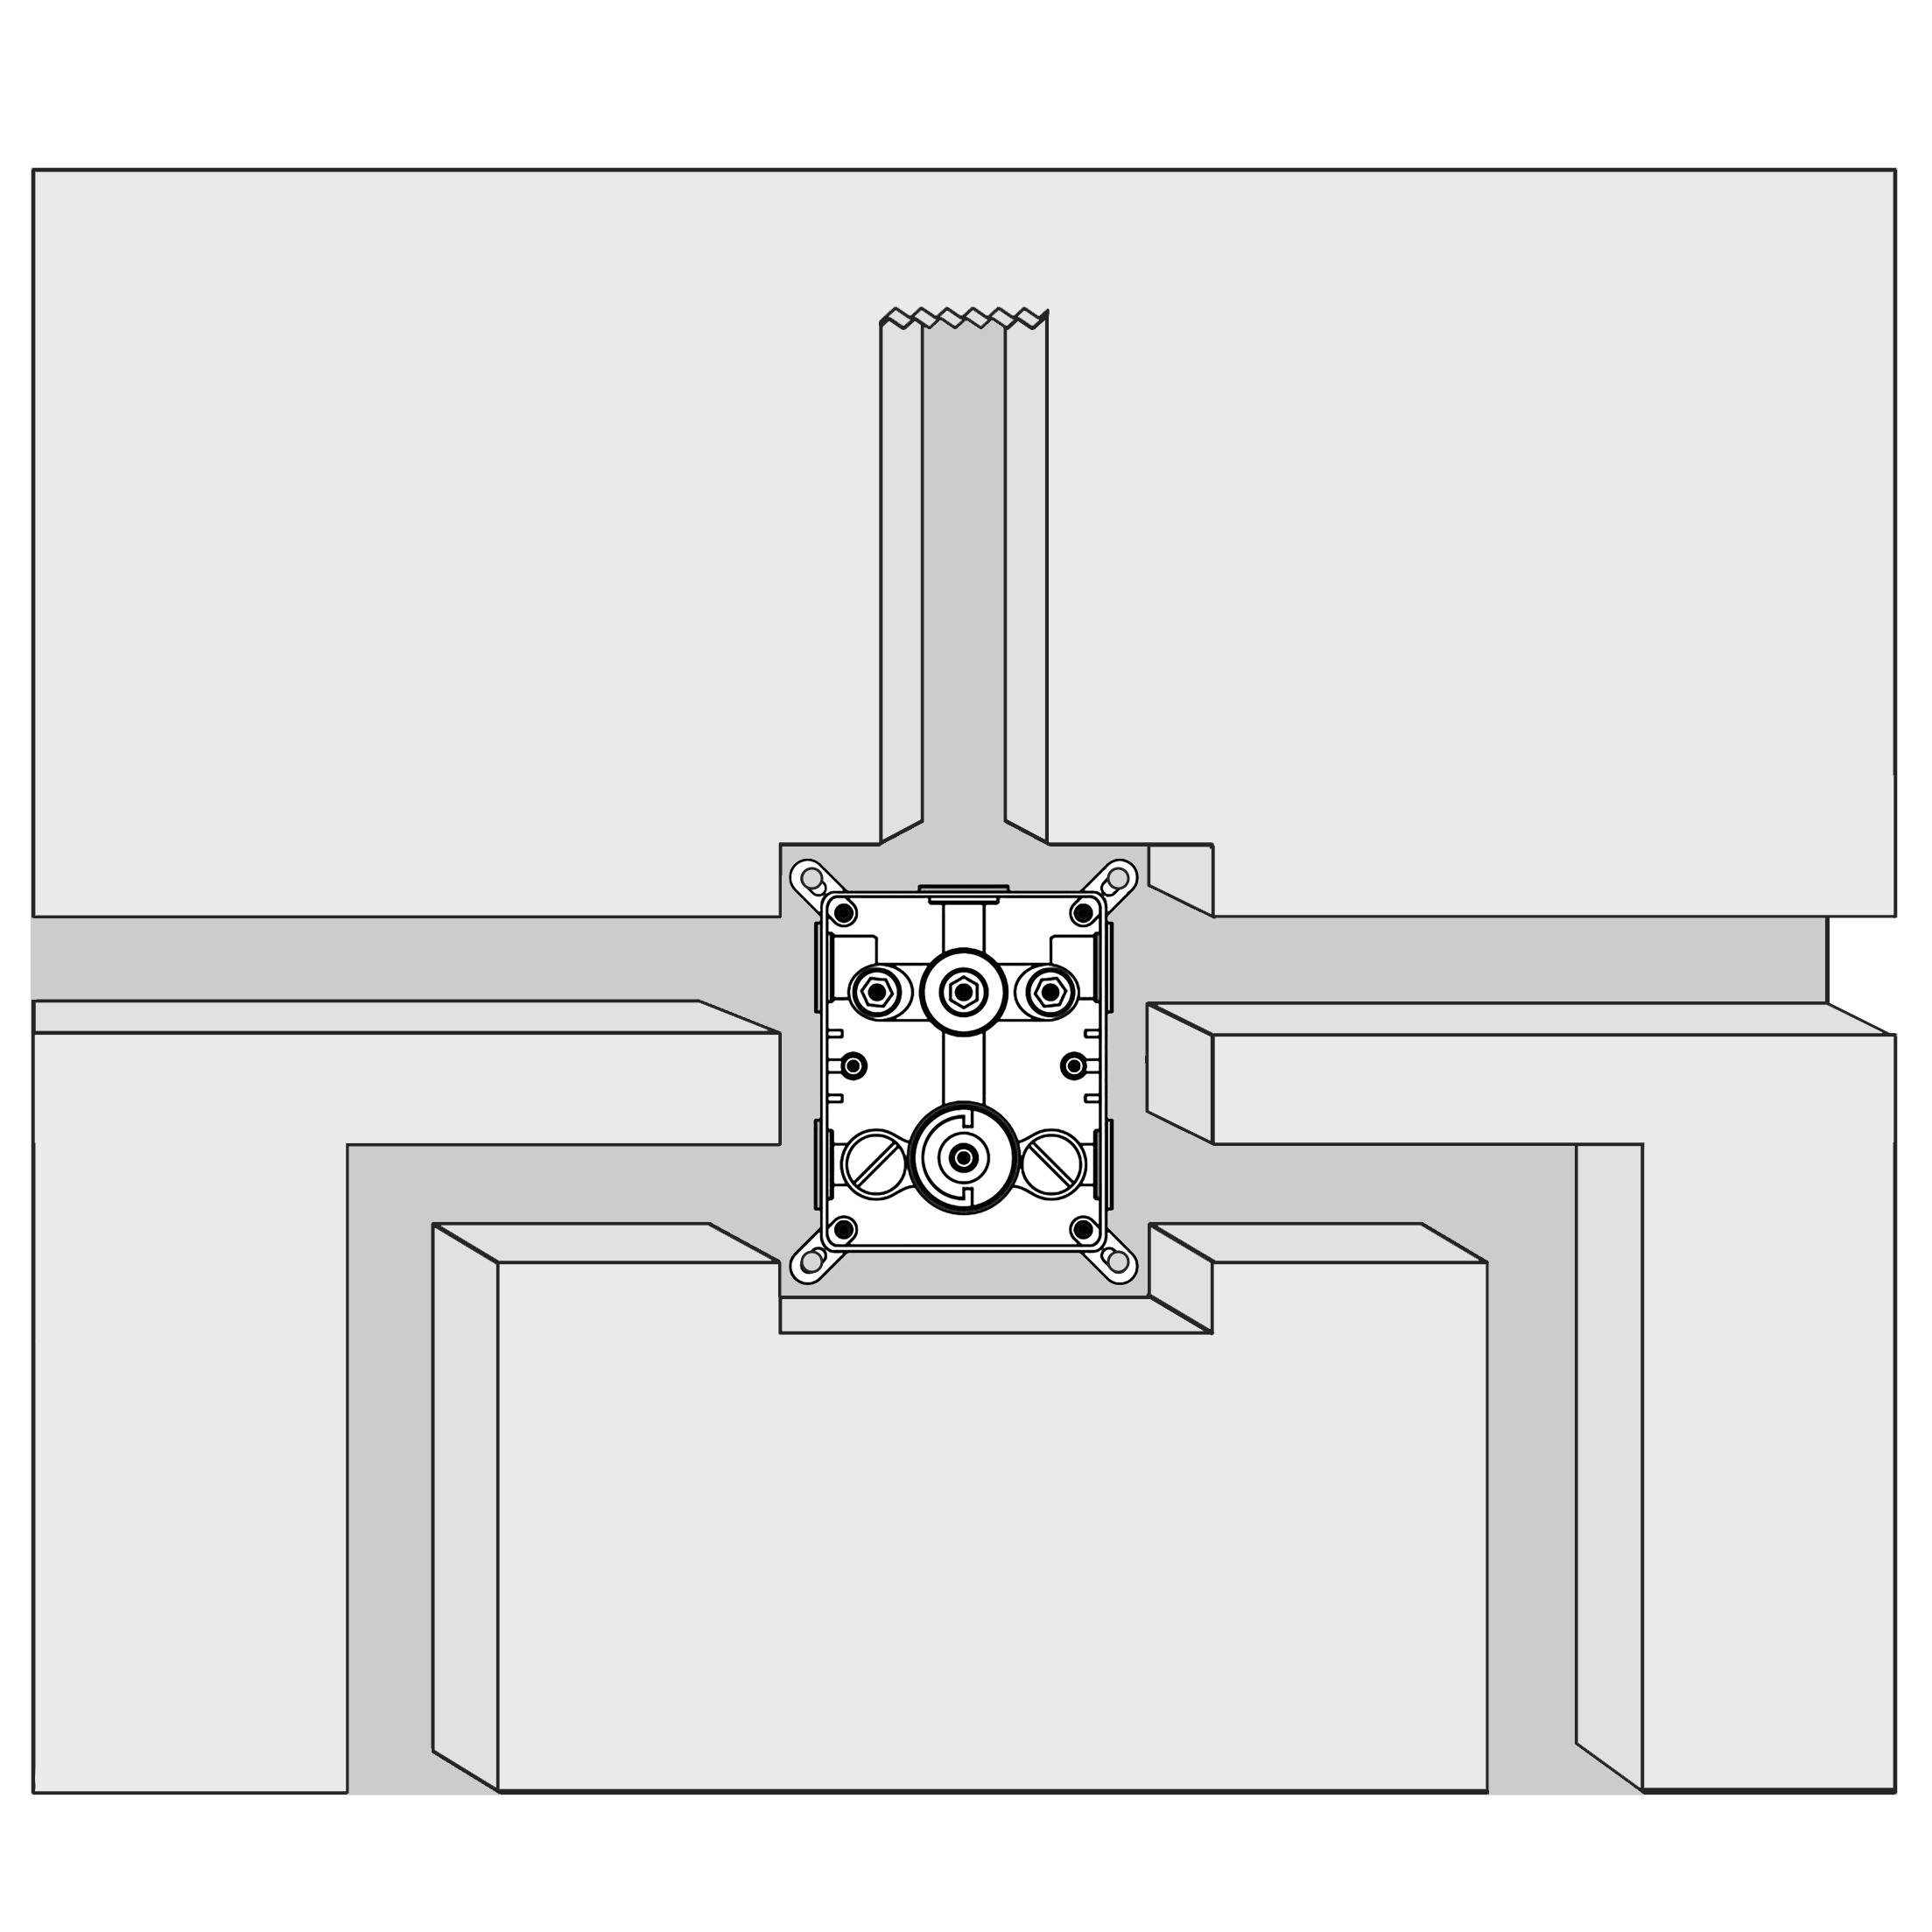
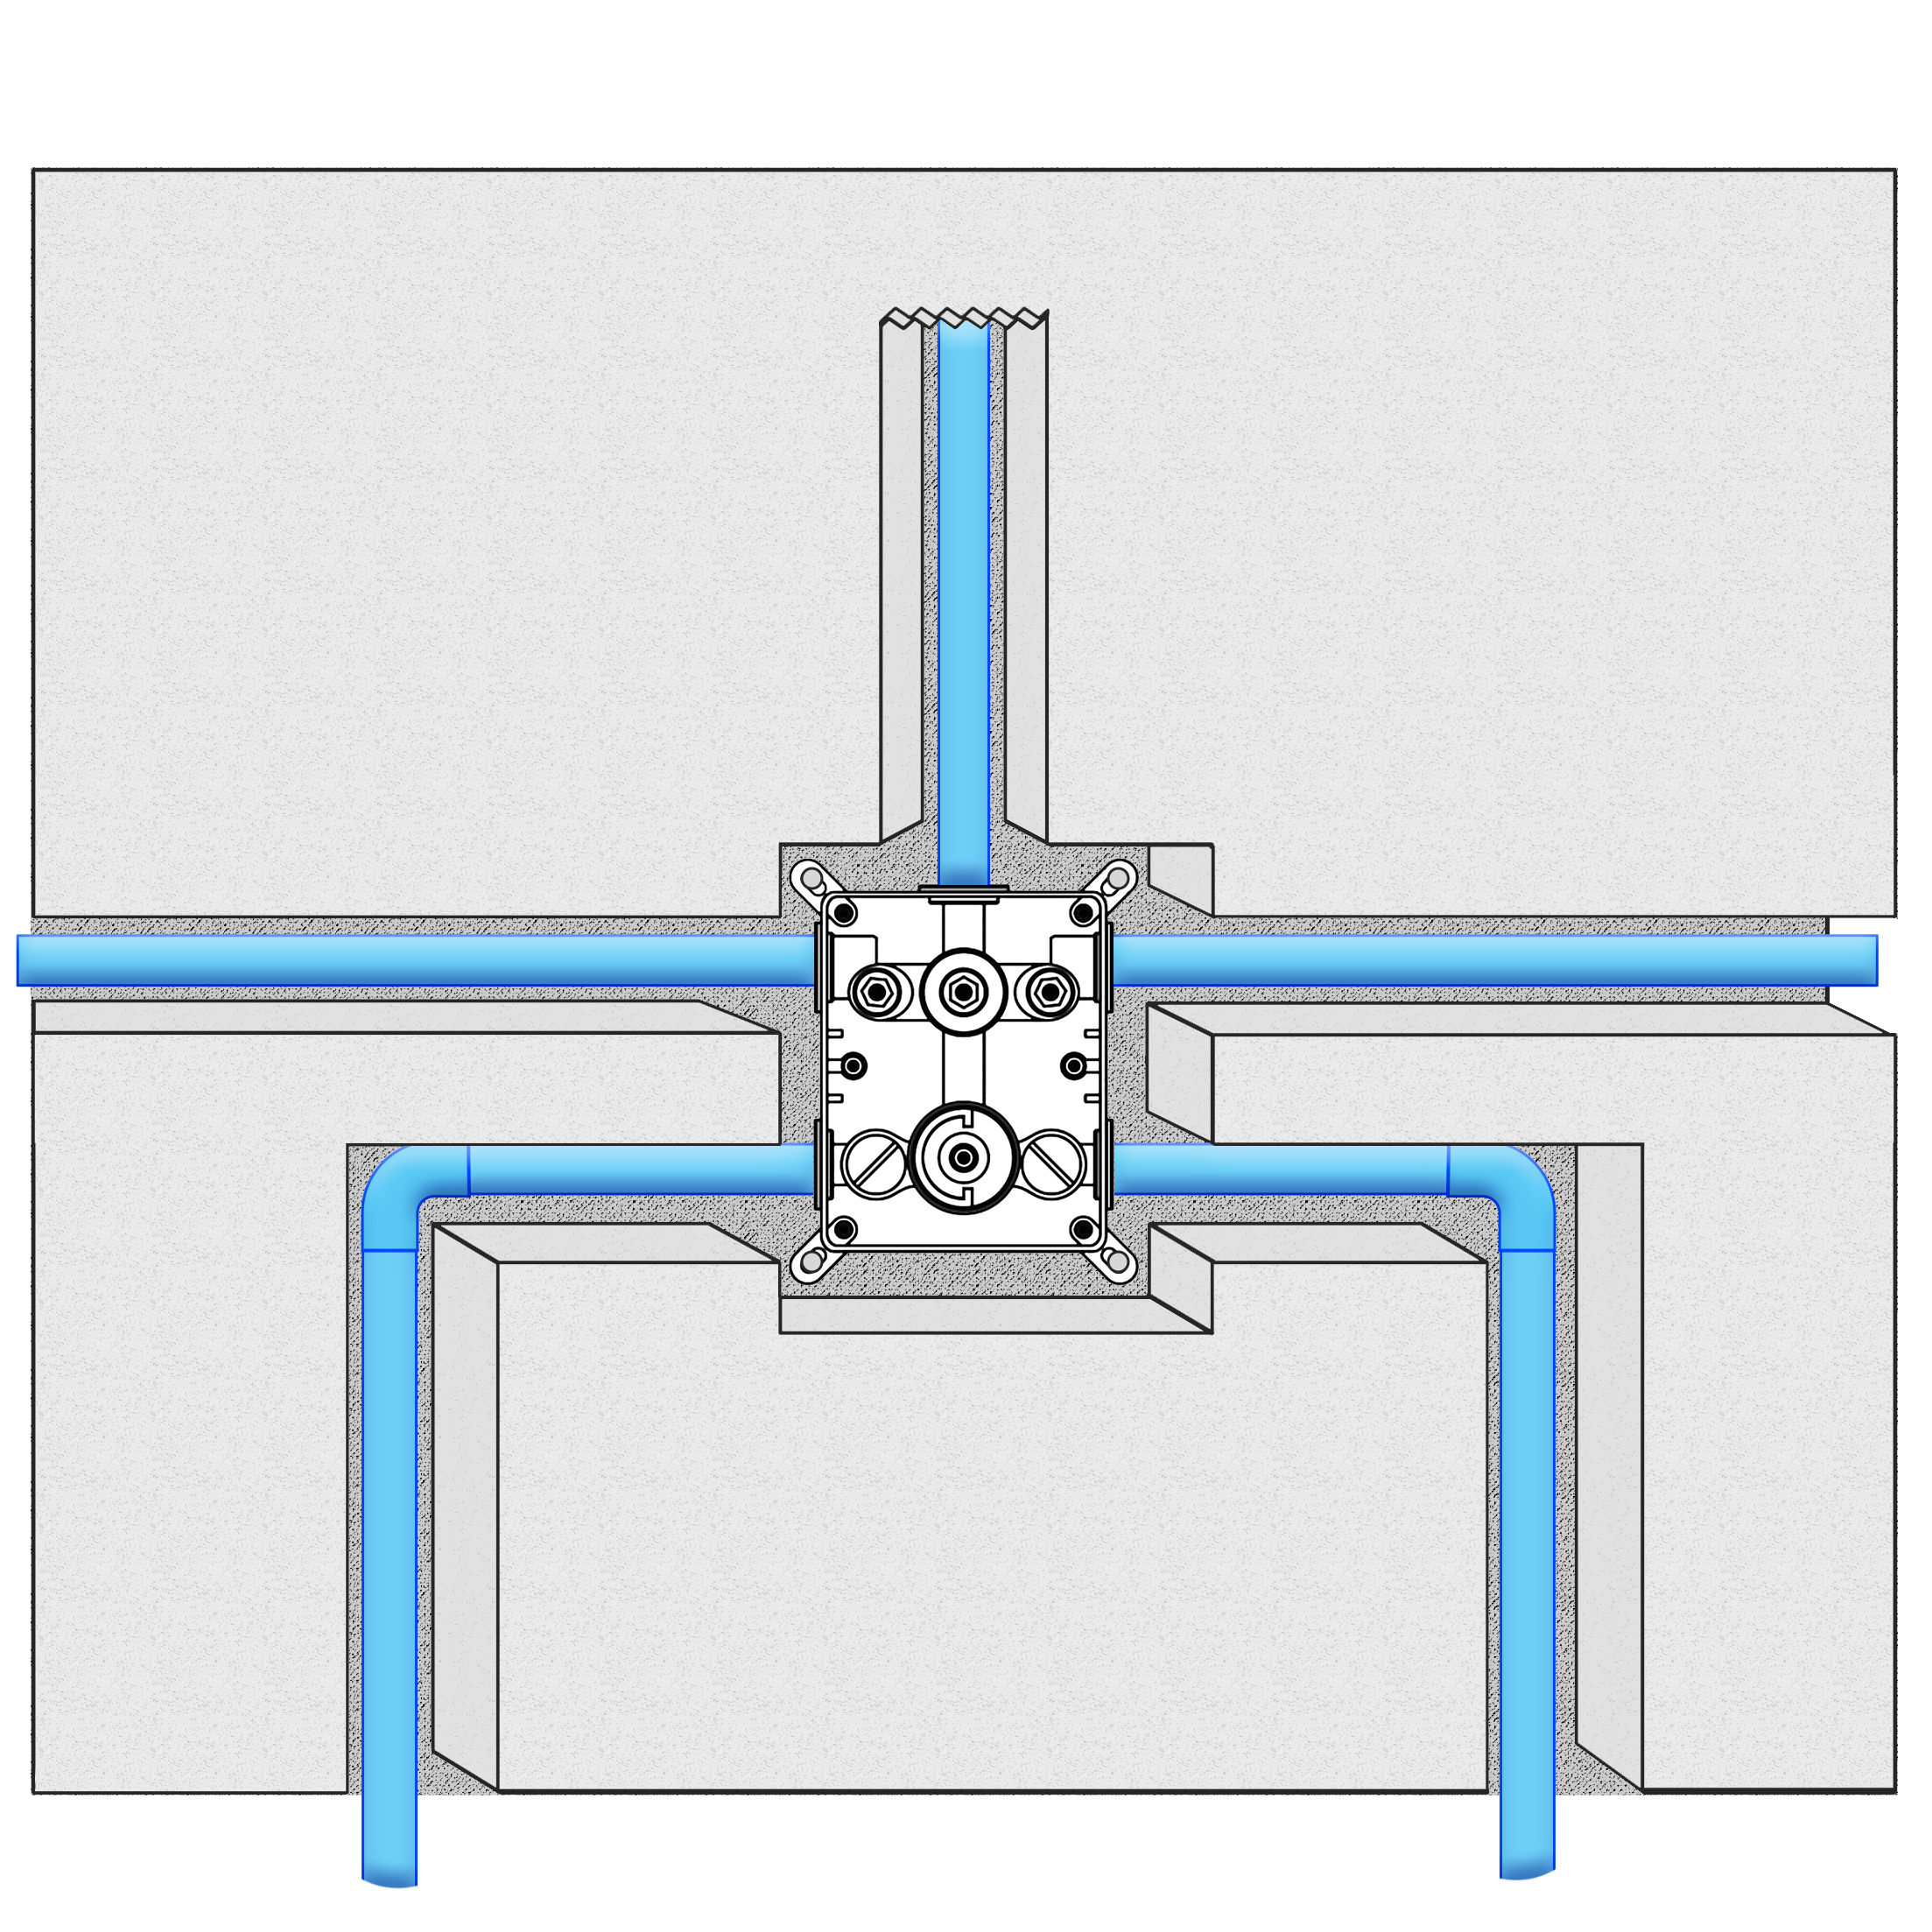
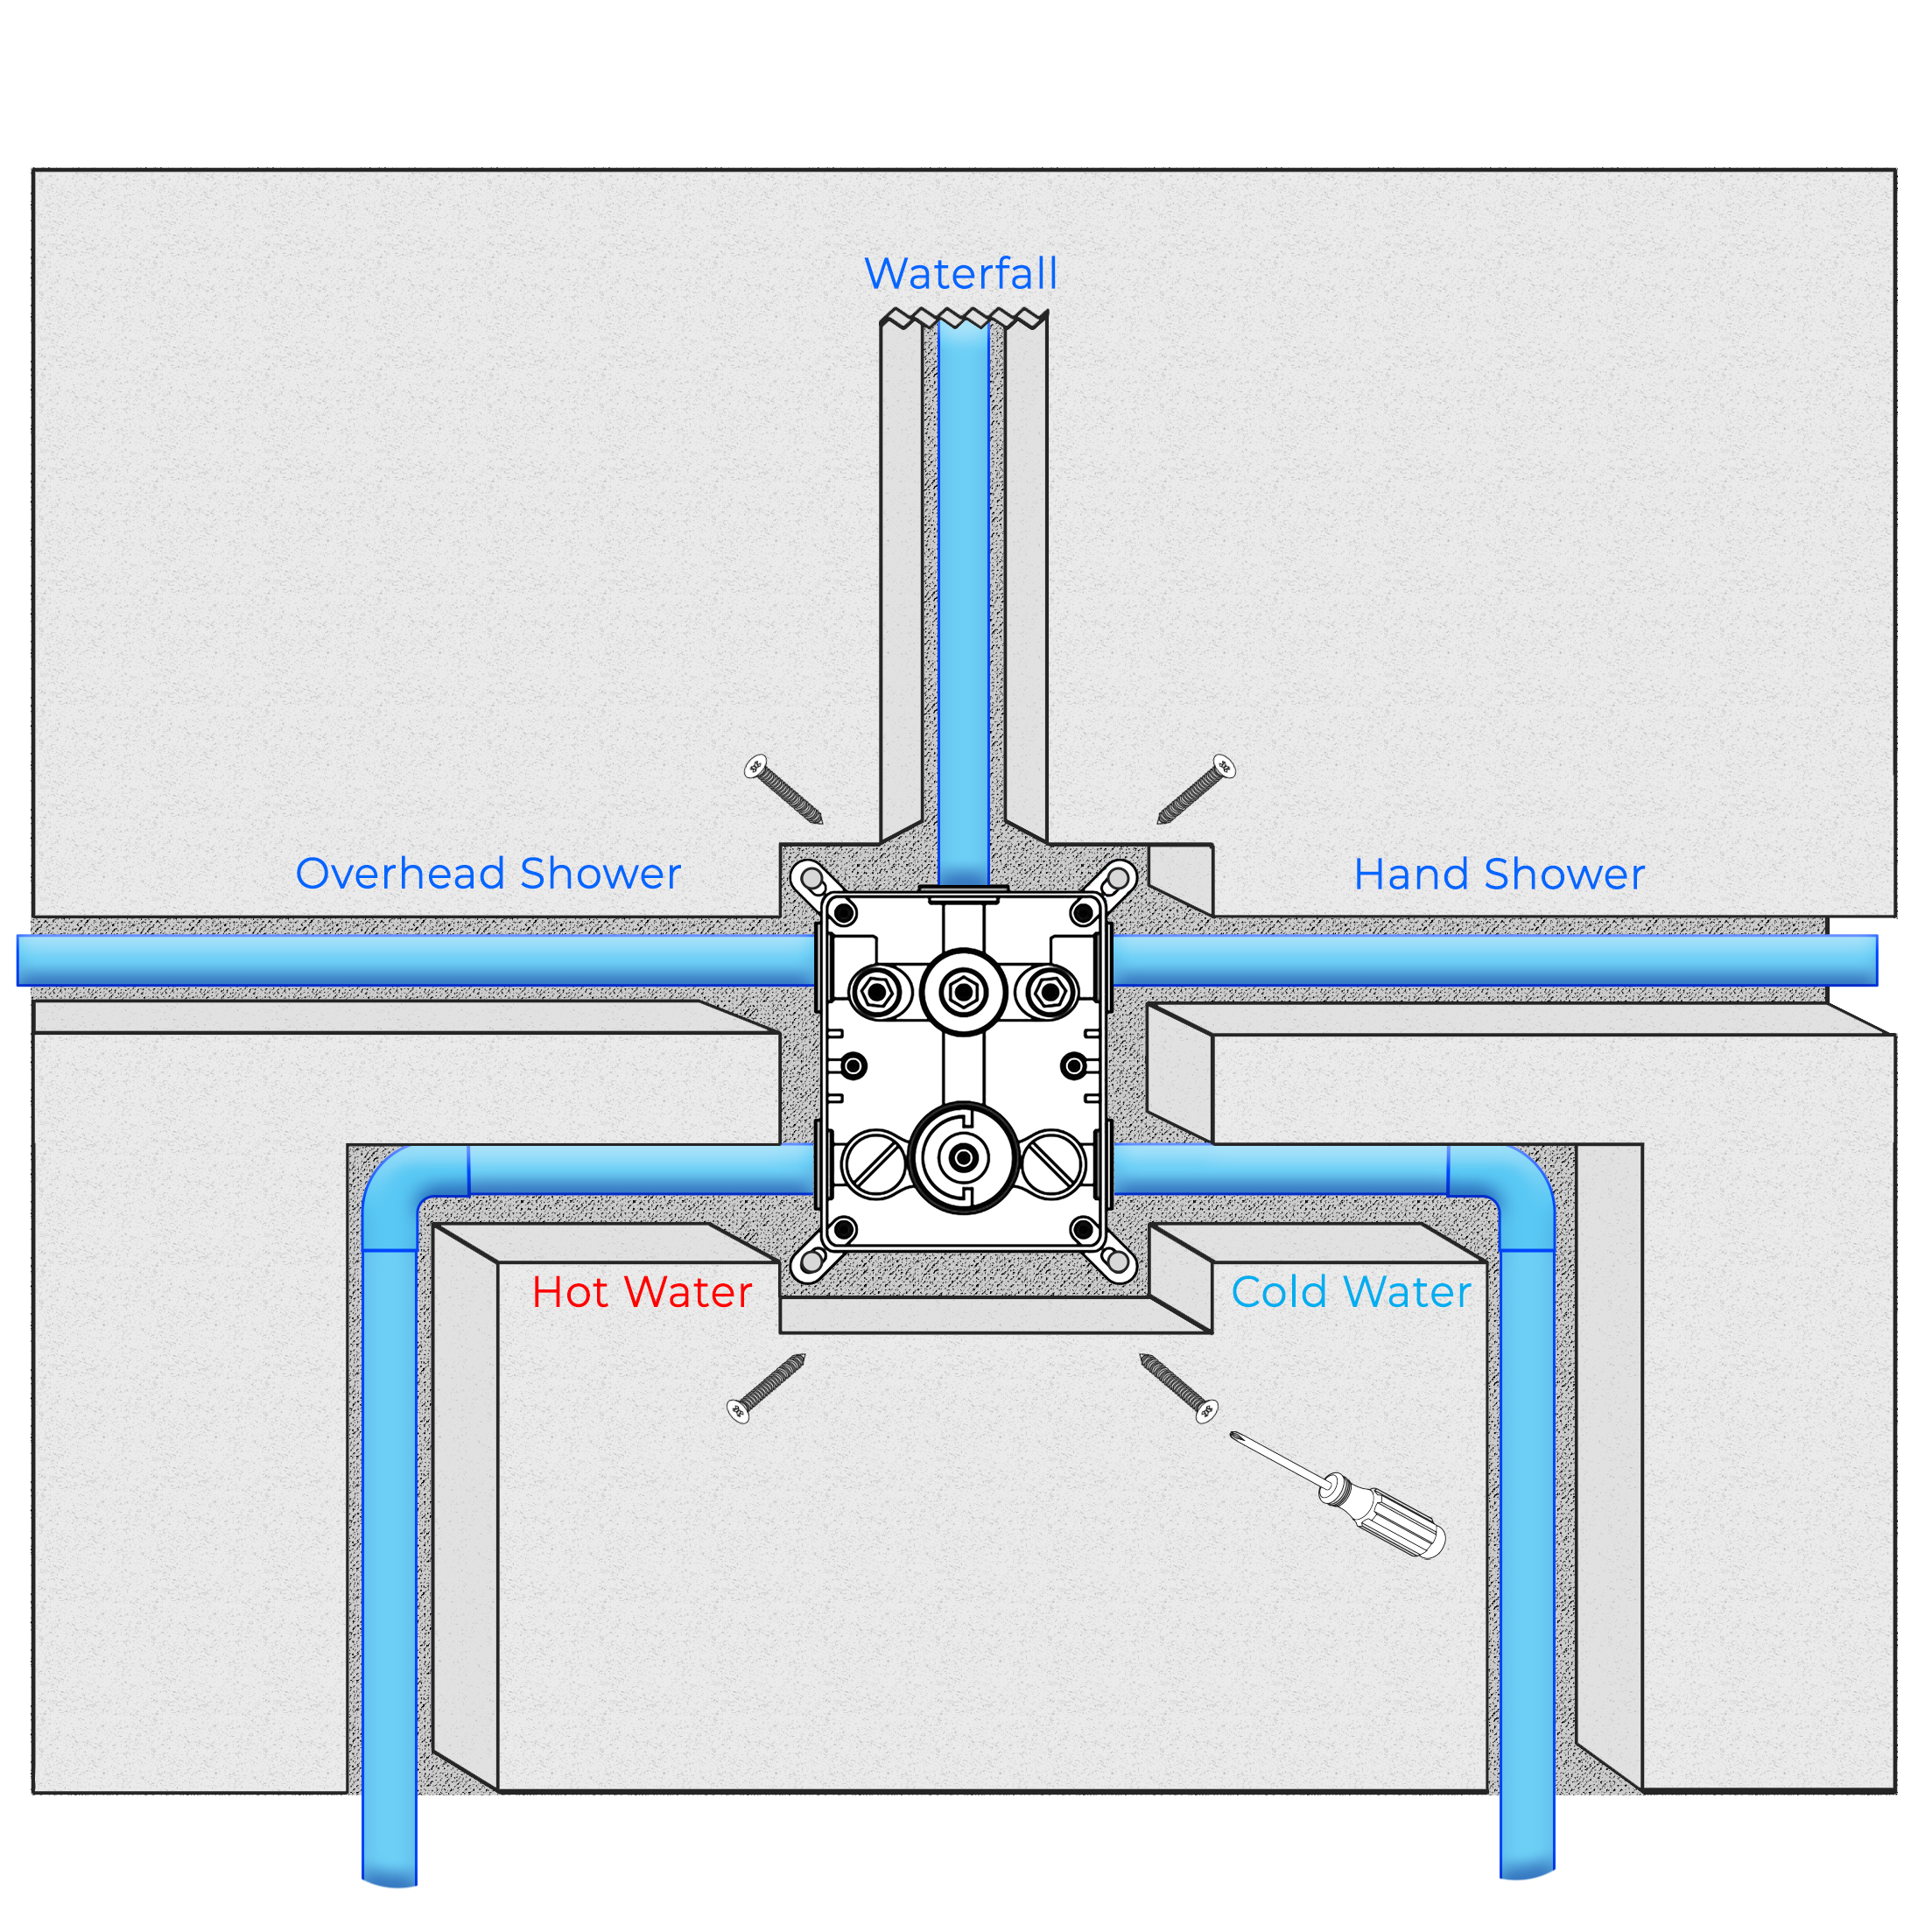
Step 11: Connect each takeover, then connect the water source to confirm that there is no leakage.
Step 12: Adjust the embedded body to the horizontal line, and fix the embedded body on the wall with a cross screwdriver to lock the 4 self- tapping screws. Seal the pipeline with cement filler.
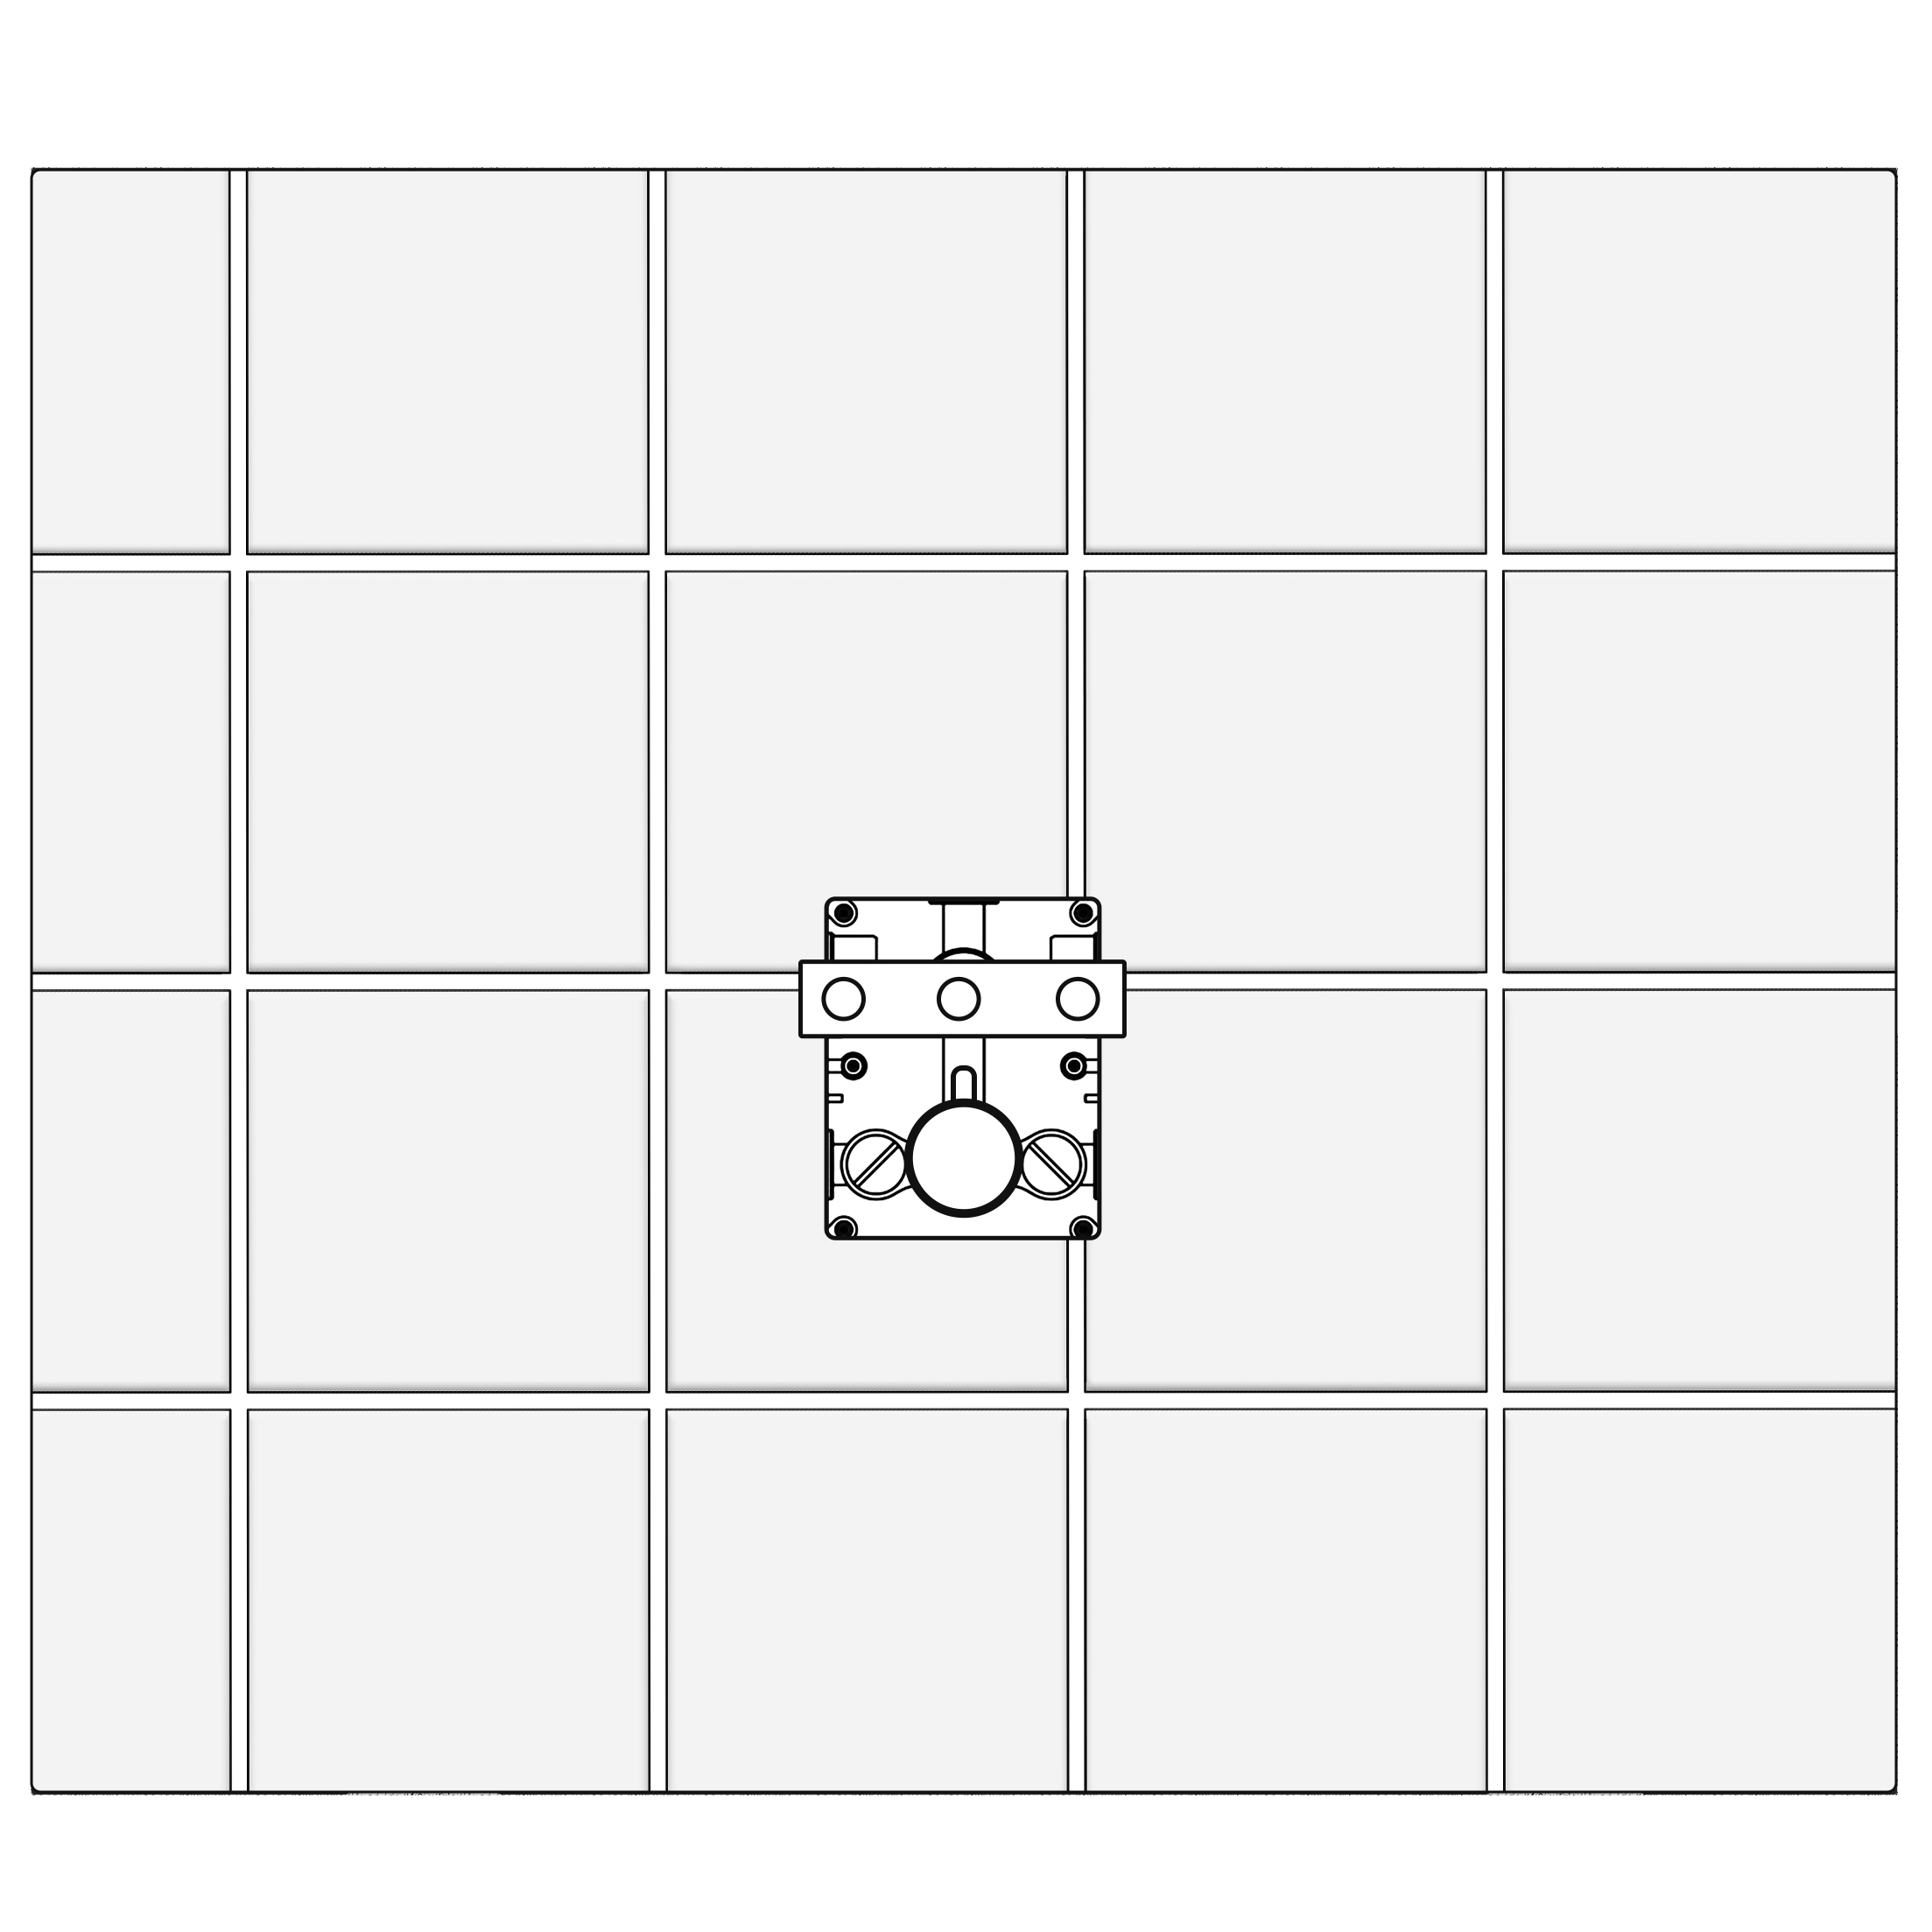
Step 13: Loosen the two M5 screws on the sheath counter-clockwise with a cross screwdriver and remove the sheath.
First, remove the color button of the constant temperature handwheel, loosen the main handwheel in the counterclockwise direction with the 2.5mm hex plate, and remove it. When taking out the constant temperature handwheel, do not turn the constant temperature handwheel to ensure that the constant temperature handwheel button is aligned with the 38-degree dial line on the panel.
Step 14, Step 15 & Step 16: Tighten the three long poles on the key-value core, flatten the wall on the set, and cut off the extra parts with a cutting machine or blade to extend the positioning plate plane of the long rod. Then go to the positioning board and press the icon.
Positioning board
Long pole
The excess part of the long bar.
Tight on the wall.
Step 17: Balance the panel on the main body. Put the accessories of the constant temperature handwheel in the opposite direction of the unloading on the main body,(pay attention to the constant temperature handwheel installation to ensure that the valve core does not turn, the button direction is aligned with the direction of the outlet pipe.)
|
|
|