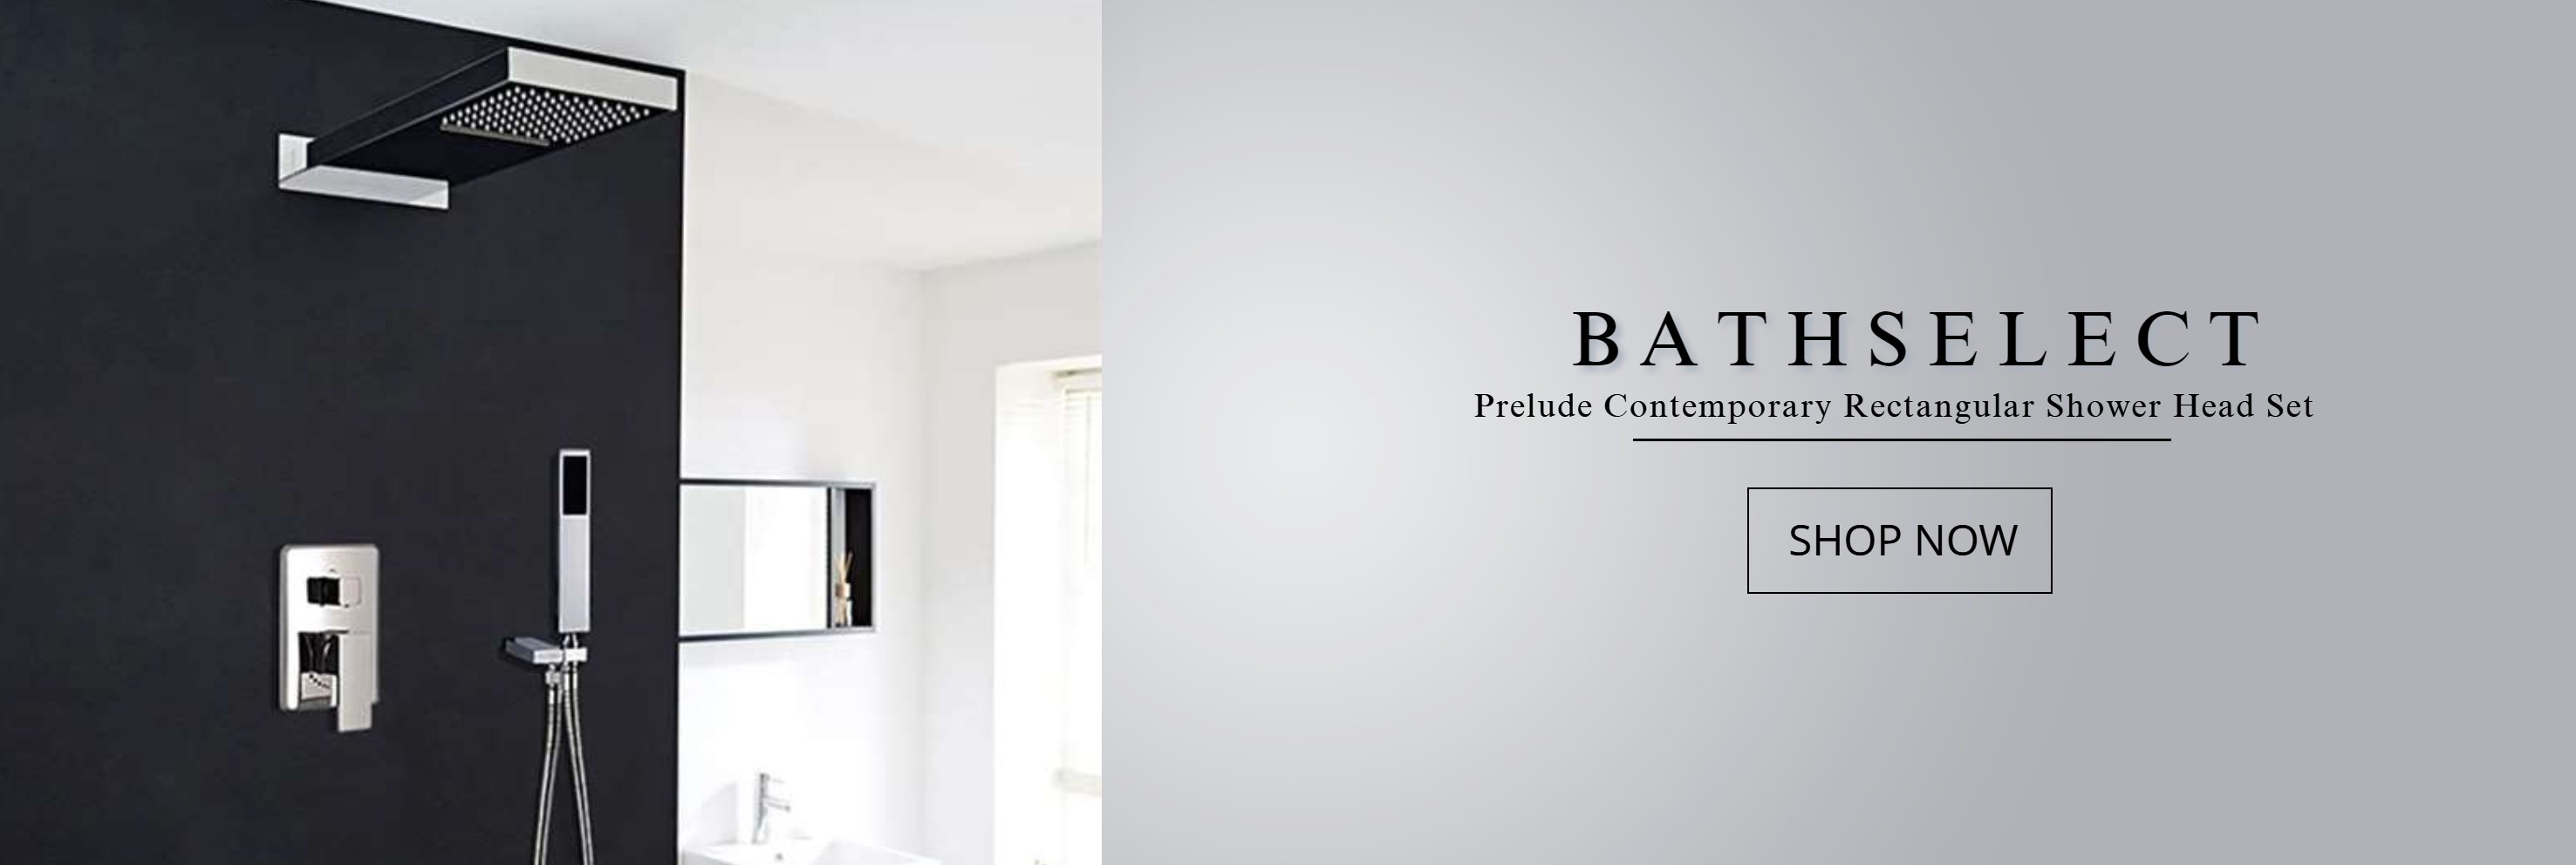
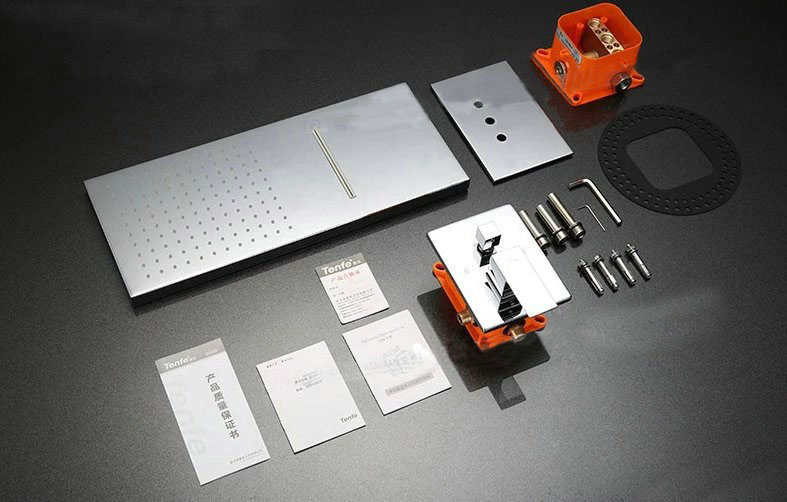
Prelude Contemporary Rectangular Shower Head Set
Prelude Shower Set Specifics
|
Type
|
Complete Shower Set
|
|
Warranty
|
1-Year
|
|
Cold/Hot Water Control Type
|
Dual Holder Dual Control
|
|
Style
|
Contemporary
|
|
Number of Handles
|
Dual Handles
|
|
Surface Treatment
|
Polished
|
|
Type
|
Fixed Support Type
|
|
Valve Core Material
|
Ceramic
|
|
Surface Finish
|
Chrome
|
|
Bath & Shower Faucet Type
|
Shower Sets
|
|
Installation Type
|
Wall Mount
|
More Description
|
Faucet Type
|
Shower Faucet
|
|
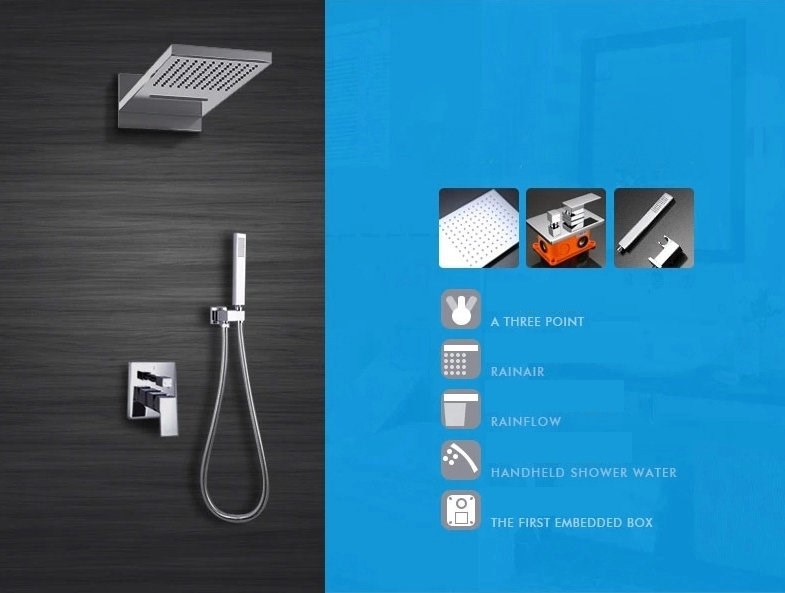
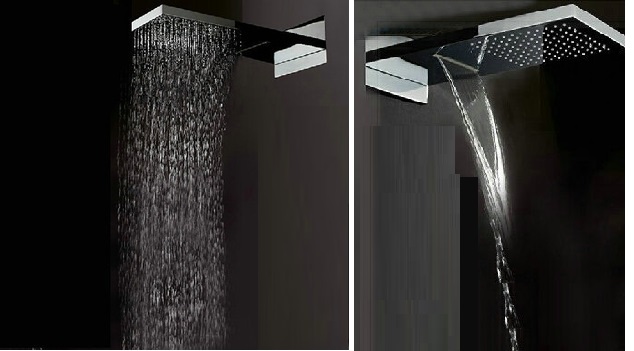
Features
|
Rain Shower,Hand shower included
|
|
Flow Rate
|
3.5 GPM (13.2 L/min)
|
|
Cold and Hot Switch
|
Yes
|
|
Valve Type
|
Brass Valve
|
|
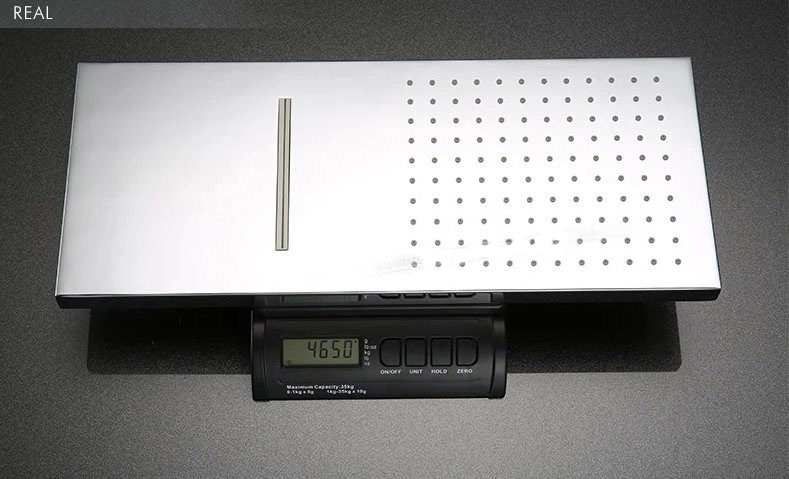
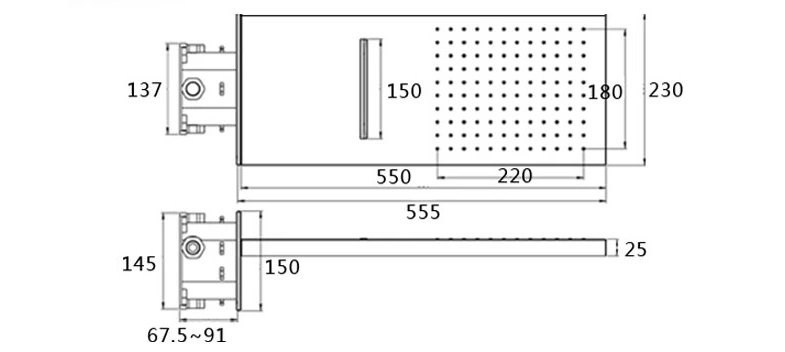
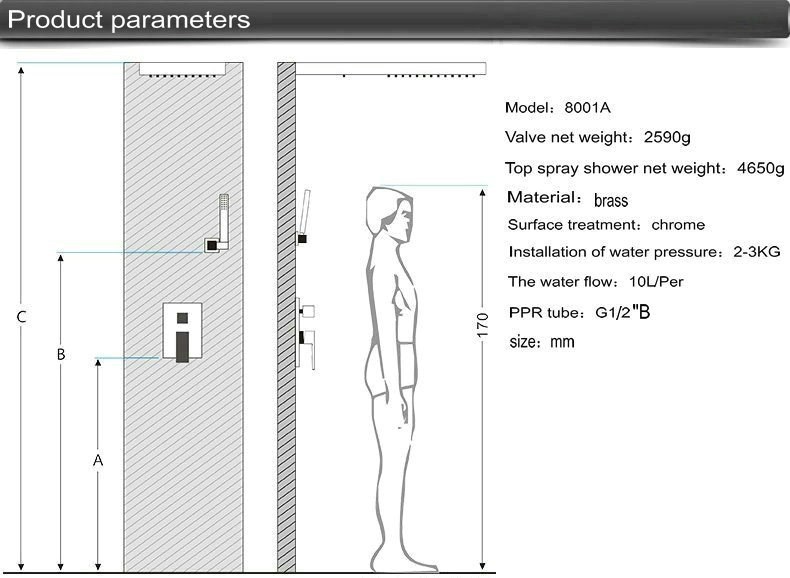
Showerhead Dimensions
|
230x550mm(9.2"x22")
|
Material
|
|
Rain Shower Material
|
Stainless Steel
|
|
Faucet Handle Material
|
Zinc Alloy
|
|
Handshower Material
|
Brass
|
|
Faucet Body Material
|
Brass
|
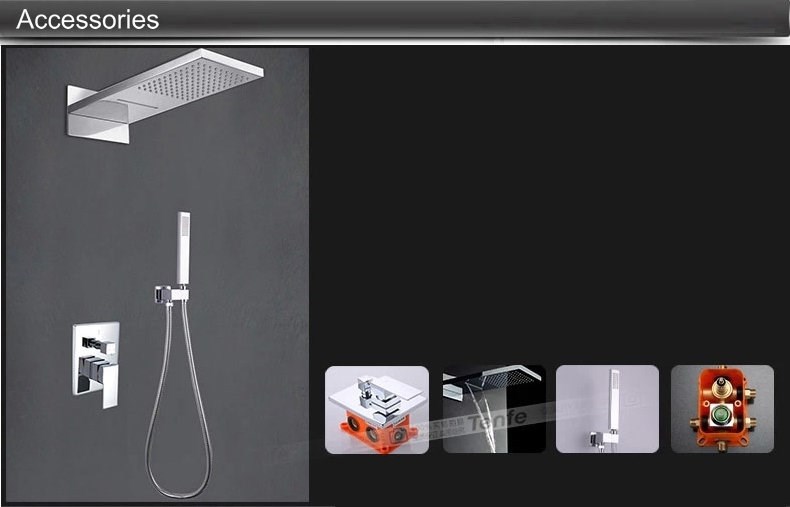
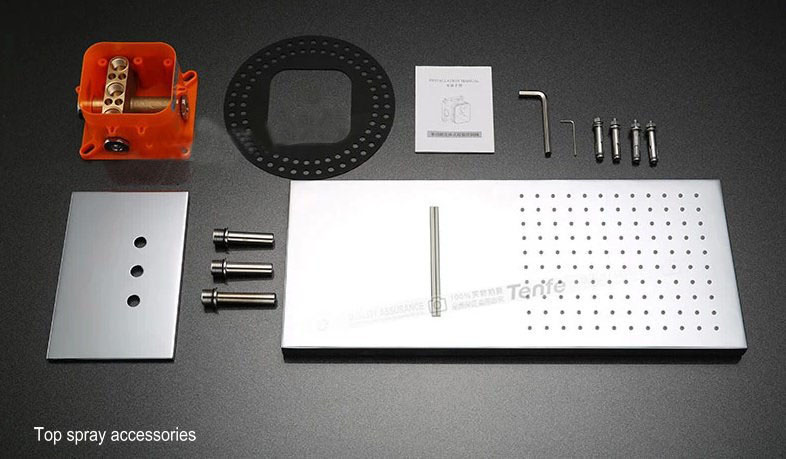
Accessories Information
|
|
Rain Shower Included
|
Yes
|
|
Shower Arm Included
|
No
|
|
Water outlet spout Included
|
Yes
|
|
Bodysprays Included
|
Yes
|
|
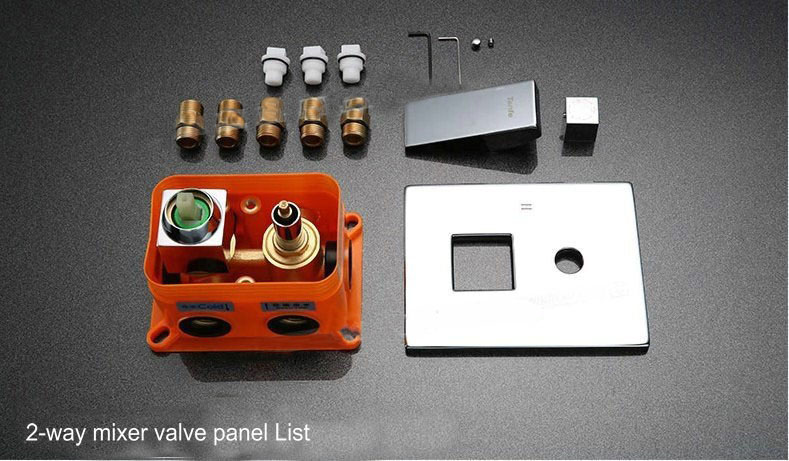
Valve Included
|
Yes
|
|
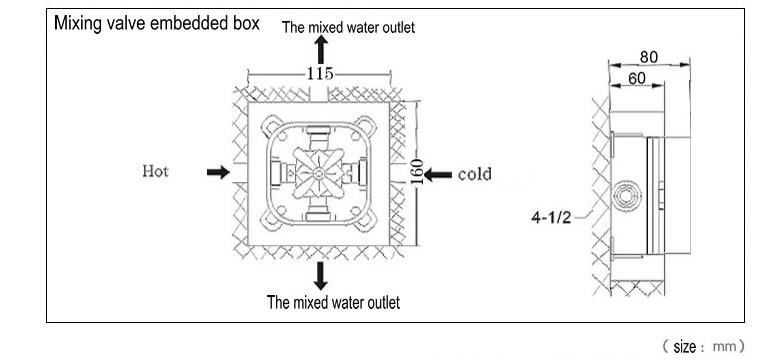
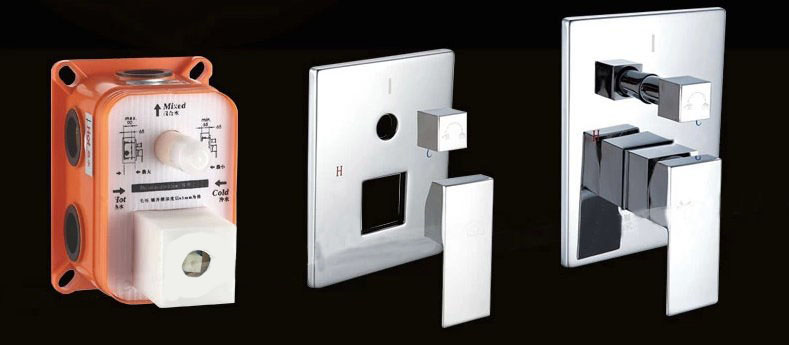
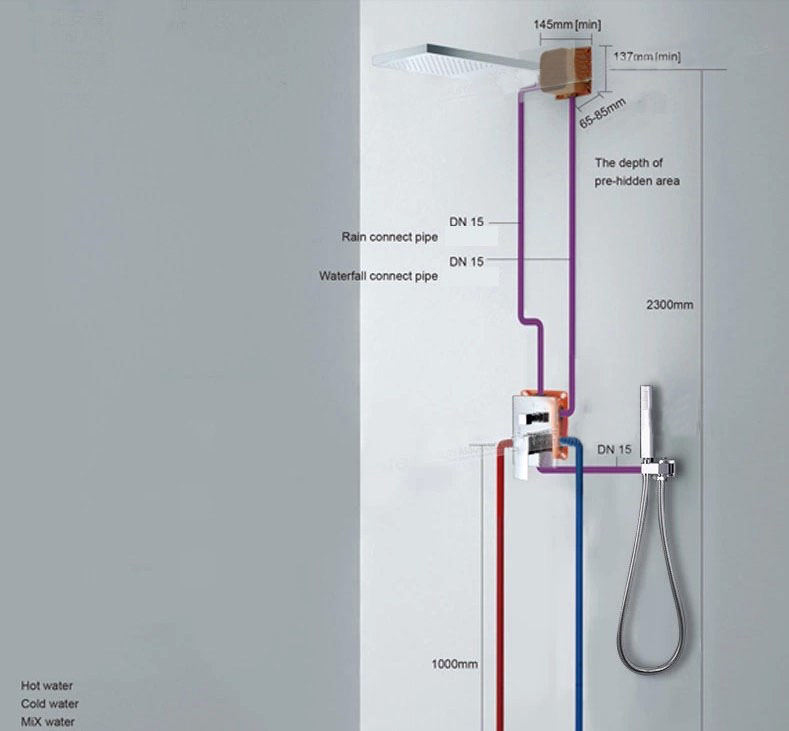
Mixer valve Features
- Chrome plated solid brass Construction
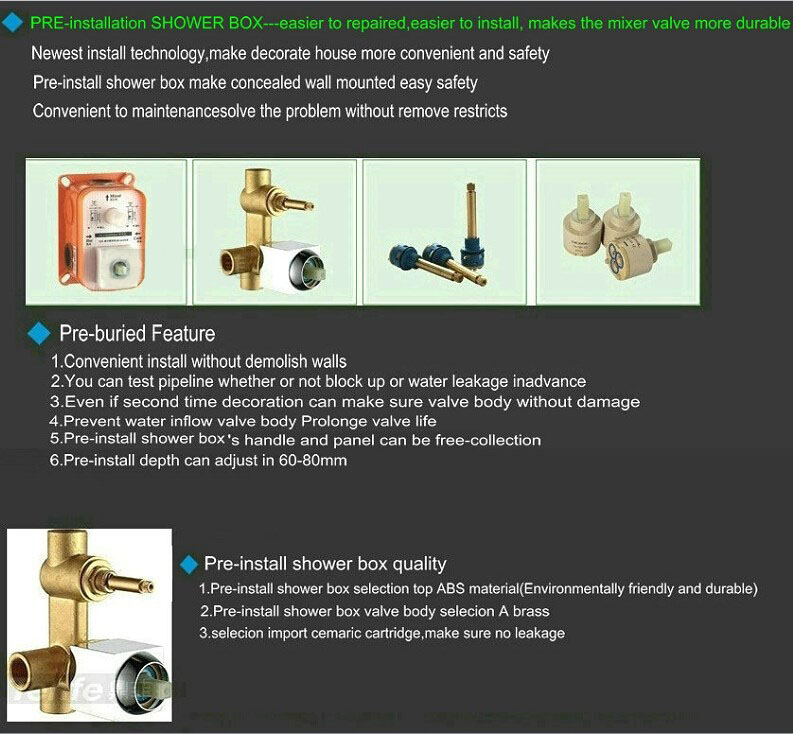
- PRE-installation SHOWER BOX---Leading Technology , safer to install, much easier to get repaired, protect your home
- Laser printed dials
- Latest ceramic disc technology
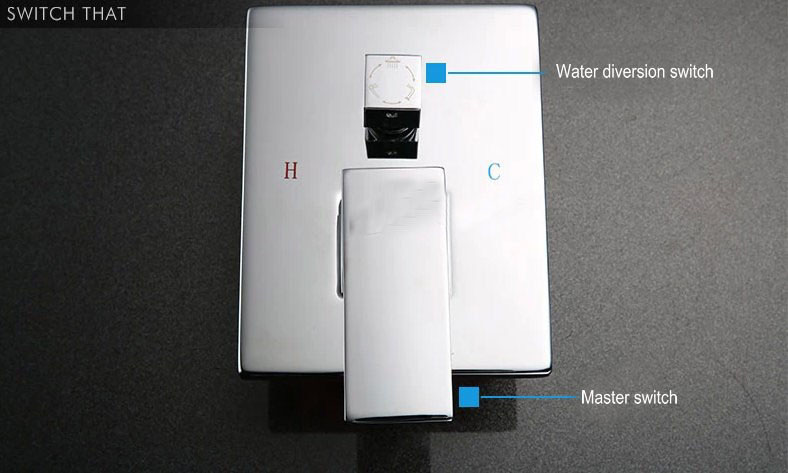
- Handle up/down for on/off
- with handle turn up angel increasing water flow increasing
- with handle turn up angel decreasing water flow decreasing
- Handle Left/Right for Hot/Cold
- with handle turn left angel increasing water temperature increasing
- with handle turn right angel increasing water temperature decreasing with 1 diverter to control water outlet
- Turn left/right change water outlet from one into the other one outlet,shower head/hand shower
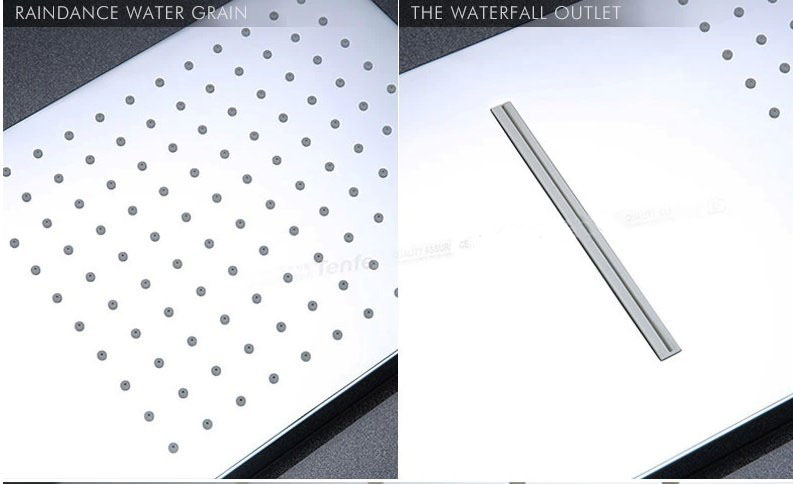
Shower Head Features
- Contemporary design
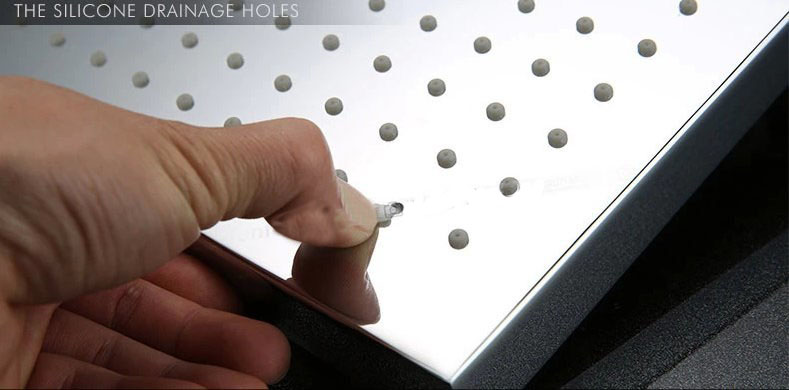
- Easy to clean rubber jets
- Chrome plated brass shower head
Hand Held Shower Head Features
- Solid Brass hand shower
- Wall connector and bracket - chrome plated
- 1.5 meter flexible shower hose - rust resistant 304 stainless steel
|
BathSelect® Manufacturer Warranty Information
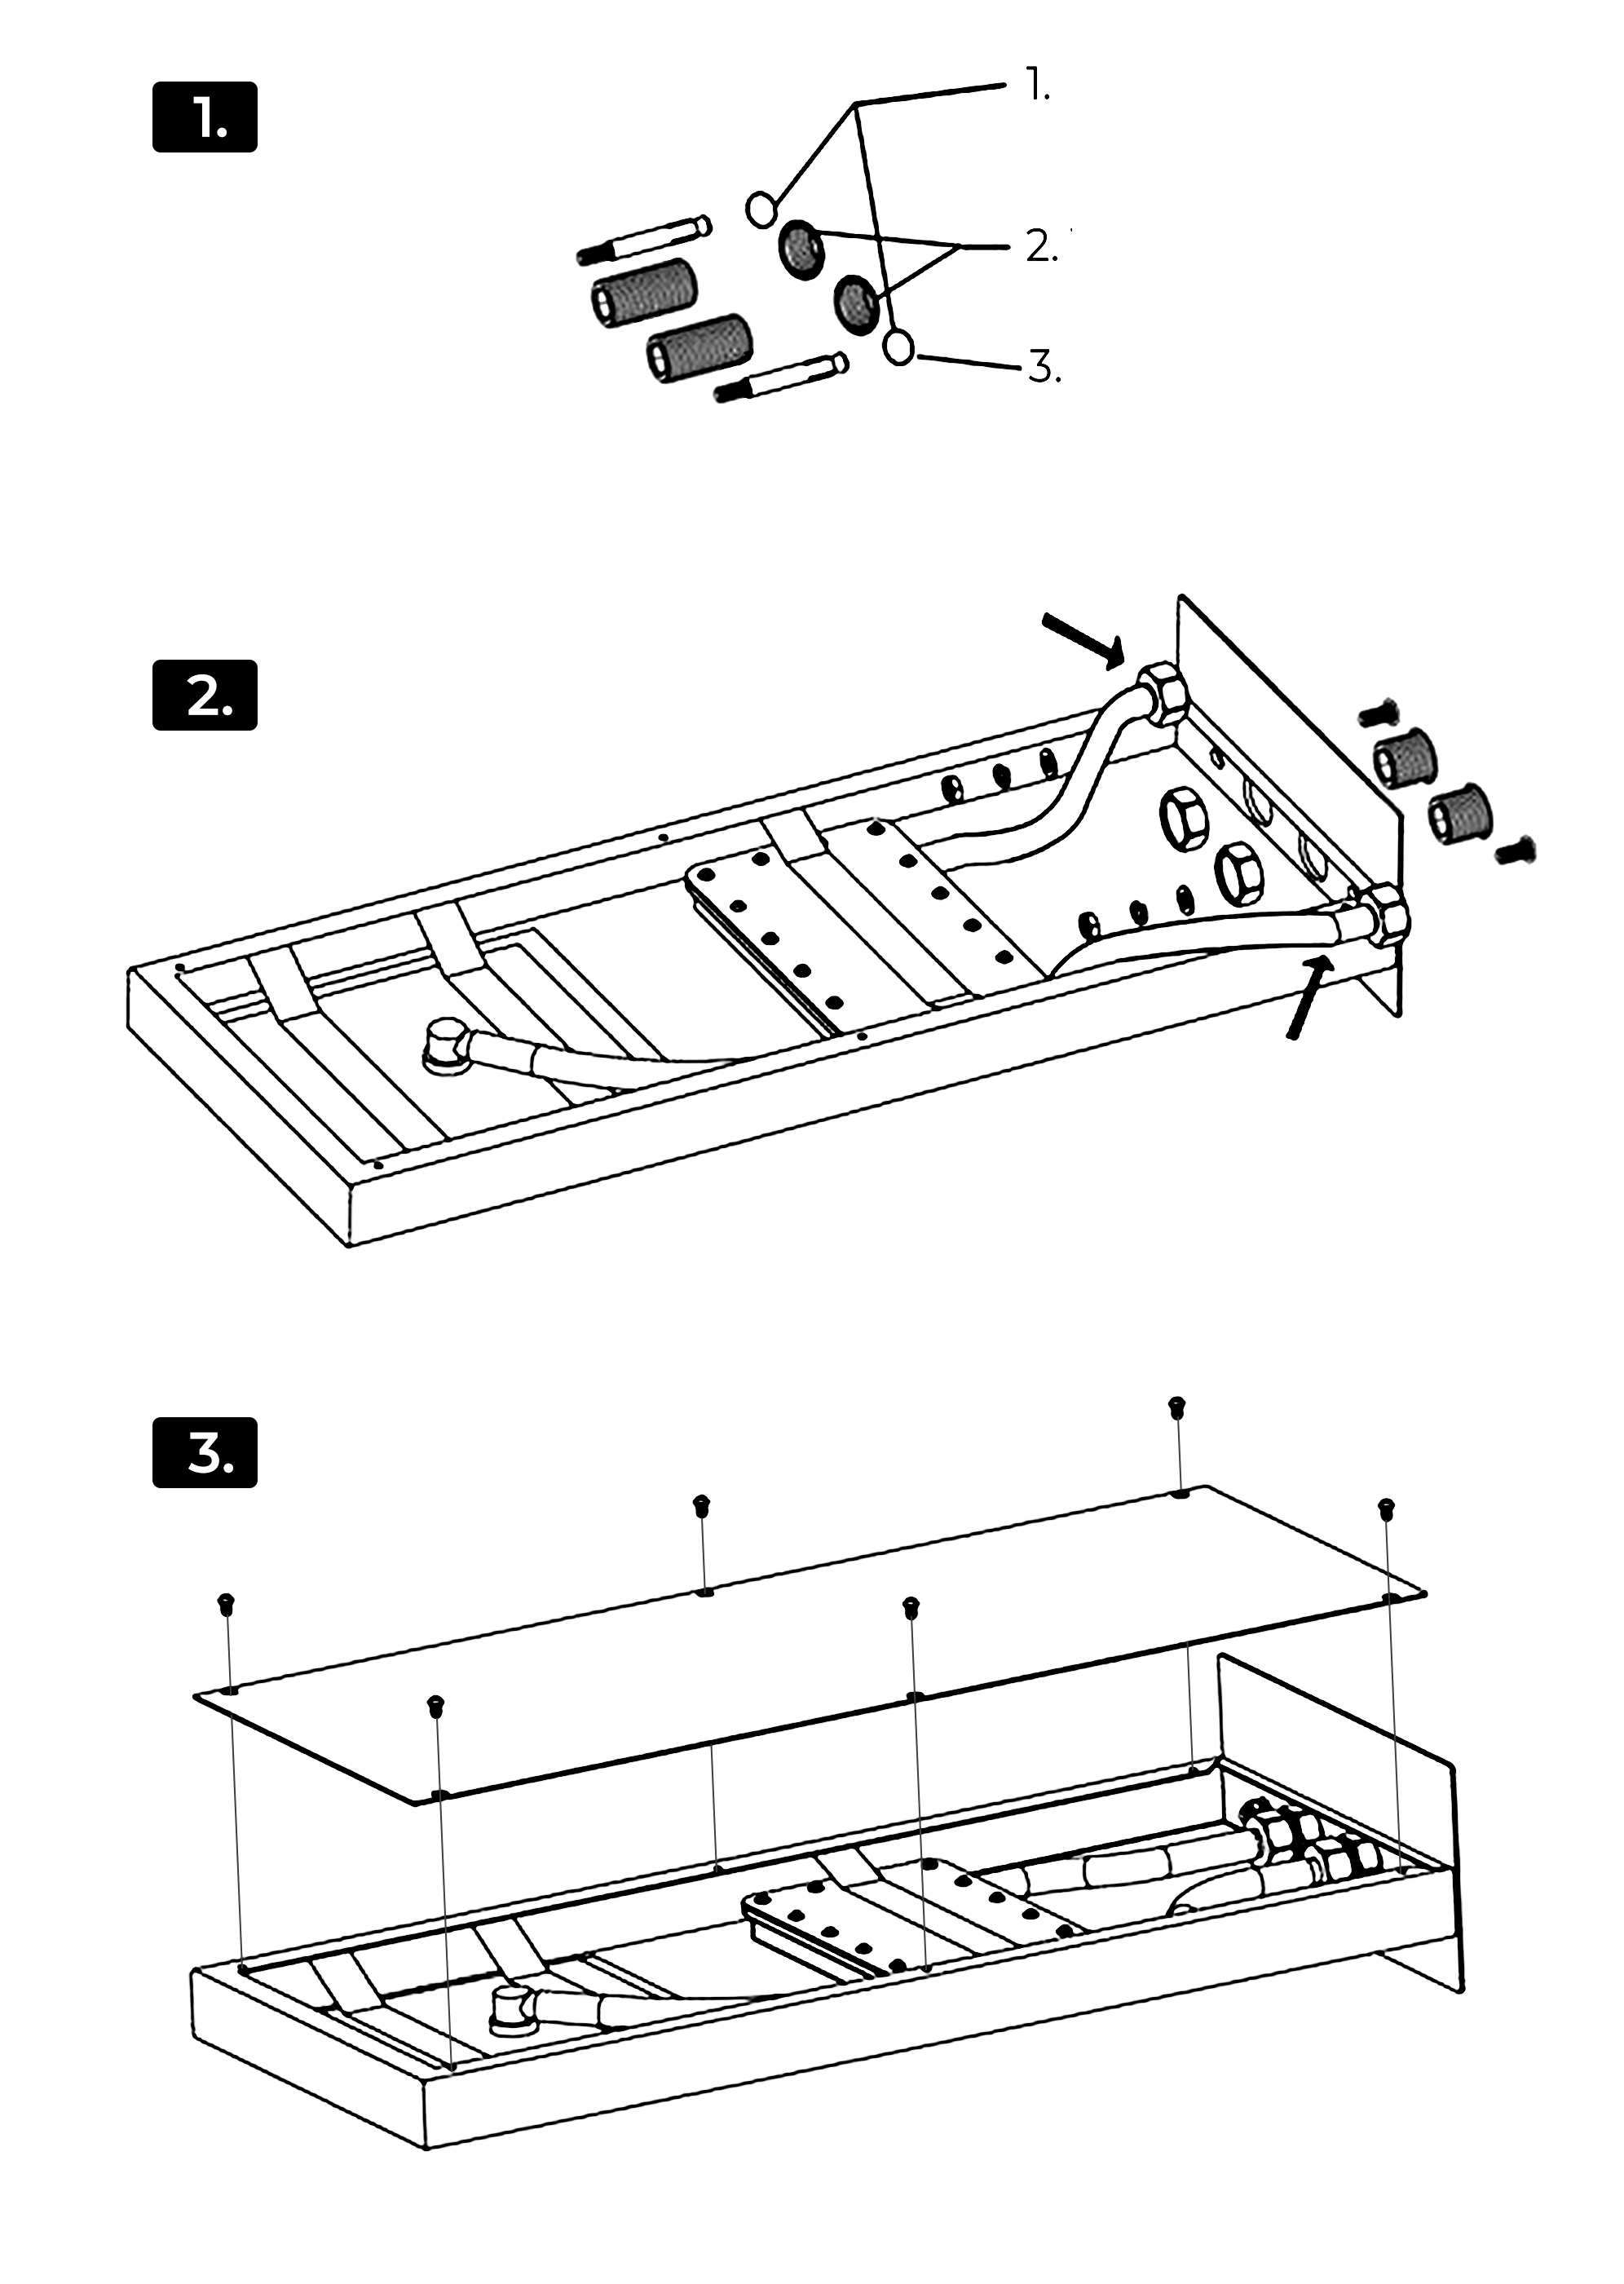
1. Open the top cover and drill according to the marked position.
- Mark by the position of the four holes.
- Take care to avoid wires and pipes to prevent damage.
- Be sure to confirm that the four holes are on the same horizontal line.
2. Two inlet fittings are connected to the pipe joint of the wall; then the nut, expansion screw, and inlet pipe are connected.
3. Reinstall the top cover.
|