Home > Installation Instruction Genoa Square Thermostatic Bath Shower Set

Genoa Square Thermostatic Bath Shower Set with Rainfall Shower Head & Hand Shower

Genoa is a modern shower set, designed to easily fit in contemporary bathrooms due to its classical chrome finish and simple design elements. It is easy to install, with a wall mount square rain shower head, 6 massage jets that can be placed as they best suit you and a practical hand shower with slider bar. You can choose the size of the shower head according to your preferences, between 8” and 16”. If you want to farther stimulate your senses while enjoying a relaxing shower, you can also add the water activated LED lights. Only the best materials have been used and the valve core material is ceramic for a long-lasting lifetime. It comes complete with accessories and installation instructions.

Genoa Bathroom Shower Set with Rainfall Shower Head & Hand Shower Specifications

  • Type : Square Shower Set
  • Features : Rainfall Shower Head, Body Massage Jets & Hand Shower with Slider Bar
  • Hot / Hold Water : Yes
  • Cold/Hot Water Control Type : Single Holder Dual Control
  • Installation Type : Wall Mount
  • Surface Finish : Chrome
  • Surface Treatment : Polished
  • Valve Core Material : Ceramic
  • Shower Head Size : See Options
Genoa Square Thermostatic Bath Shower Set with Rainfall Shower Head & Hand Shower
BathSelect® Manufacturer Warranty Information

Installation Instruction For Genoa Square Thermostatic Bath Shower Set


  • Before you begin, please read the installation instructions below. Observe all local building and safety codes.
  • Unpack and inspect the product for any shipping damages. If you find damages, do not install.
  • Please note all showers must be installed by a professional and certified plumber otherwise warranty might be voided

Shower Head Installation


No tools required, ½ connector fits standard sized shower plumbing.


  1. Use your hands counter clockwise to unscrew the old showerhead and removed it.
  2. Take out the showerhead, make sure the shower filter is placed in the connector.
  3. Ensure the showerhead full horizontal alignment wall mounted shower arm thread.
  4. Use your hands clockwise to tighten showerhead.

  5. Hand-Held Shower Instructions


    5. Hole Locations For Wall Mount
    Remove Front Cover (5A) from Wall Mount (5B). Use Wall Mount Screw Holes (5C) to place the desired location. Using a punch or awl, tap the screw hole locations. Holes must be vertically aligned.

    7. Wall Mount Installation
    Place Wall Mount (7A) into wall and inset Mounting Screws (7B) through Wall Mount Holes (7C) and tighten until Wall Mount (7A) is flush with the wall. Do Not Over Tighten! Insert Front Cover (7D) into Wall Mount (7A).


    8. Drop Elbow & Hose Installation
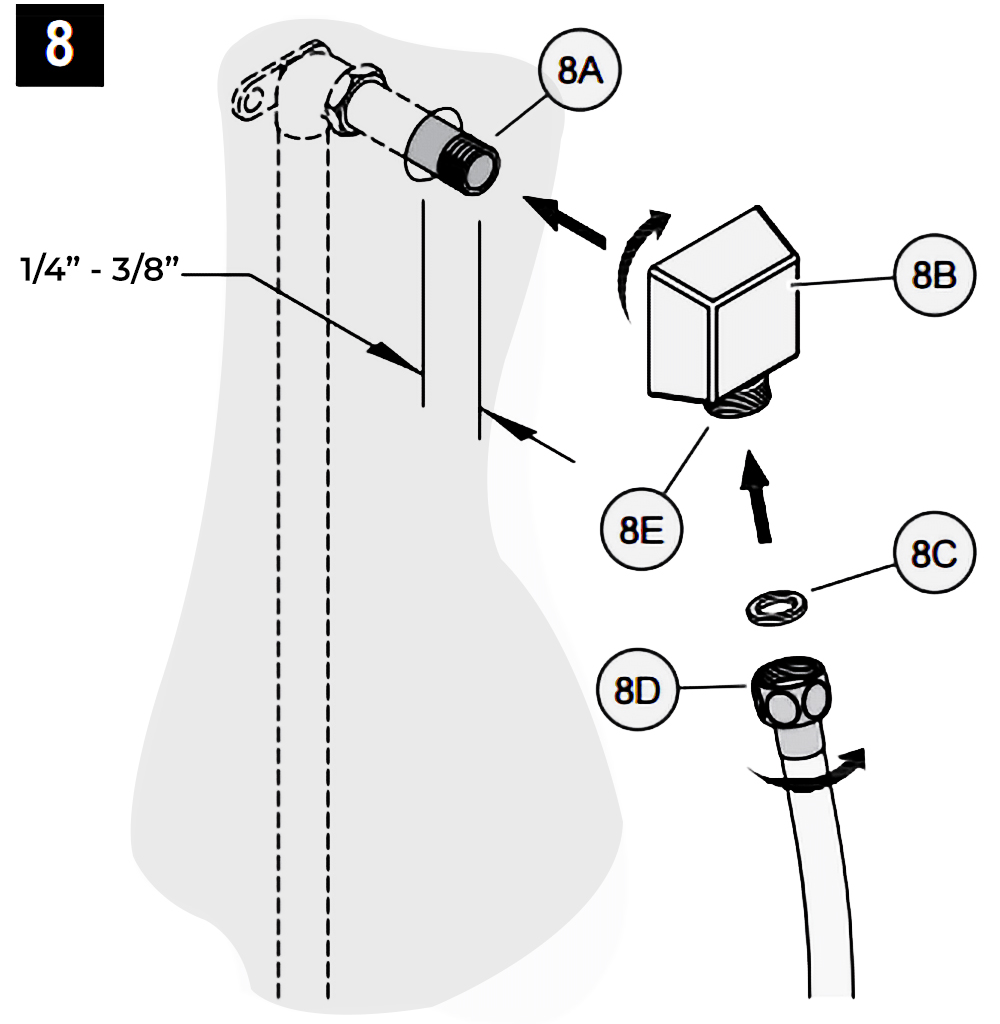
    Apply PTFE plumbers tape on both ends of Pipe Nipple (8A) (not included). Screw Pipe Nipple (8A) into the elbow inside the wall. The Pipe Nipple (8A) is to project 1/4” – 3/4” from the finished wall. Screw Drop Elbow (8B) onto Pipe Nipple (8A) and tighten until Drop Elbow (8B) is property positioned and flush to the finished wall.
    Place Rubber Seal (8C) inside Hex Hose Fitting (8D). Connect Hex Hose Fitting (8D) into Drop Elbow Outlet (8E) by turning Hex Hose Fitting (8D).


    9. Unit Start-Up
    Turn on hot and cold water supplies, and check all connections for leaks.

    10. Final Flushing
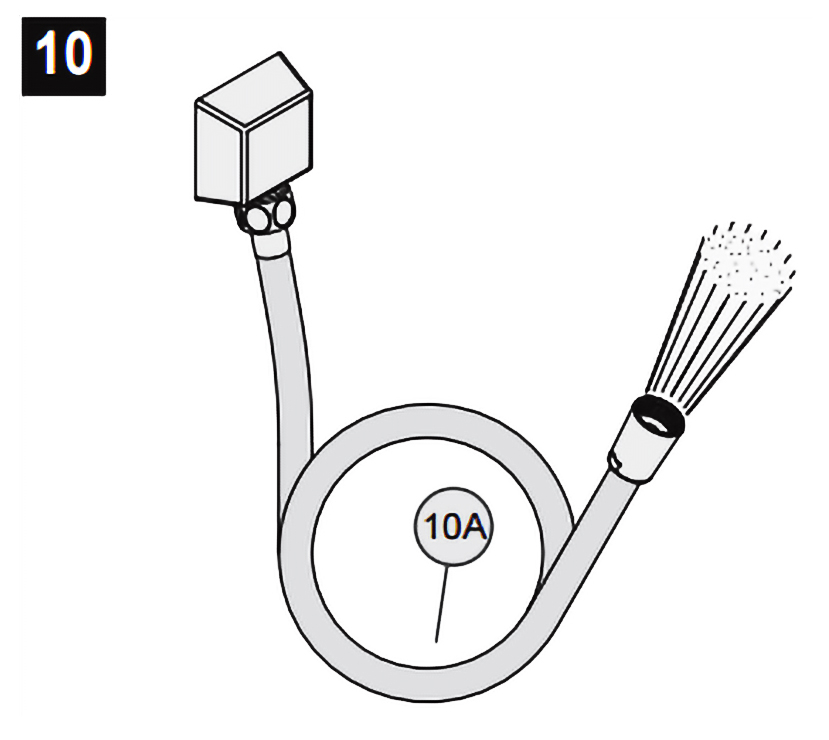
    For final flushing, turn the valve on and allow water to run through the Hose (10A) for several minutes. Allow water to run for several minutes until all foreign matter clears the line.


    11. Shower Arm Installation
    Place Rubber Seal (11A) inside Tapered Hose Fitting (11B). Conned Hand Shower (11C) to Hose (11D) by turning Tapered Hose Fitting (118) clockwise.

    Warning: Make sure Hand Shower (11C) is securely tightened to Hose (11D)


    Shower Body Jets Installation
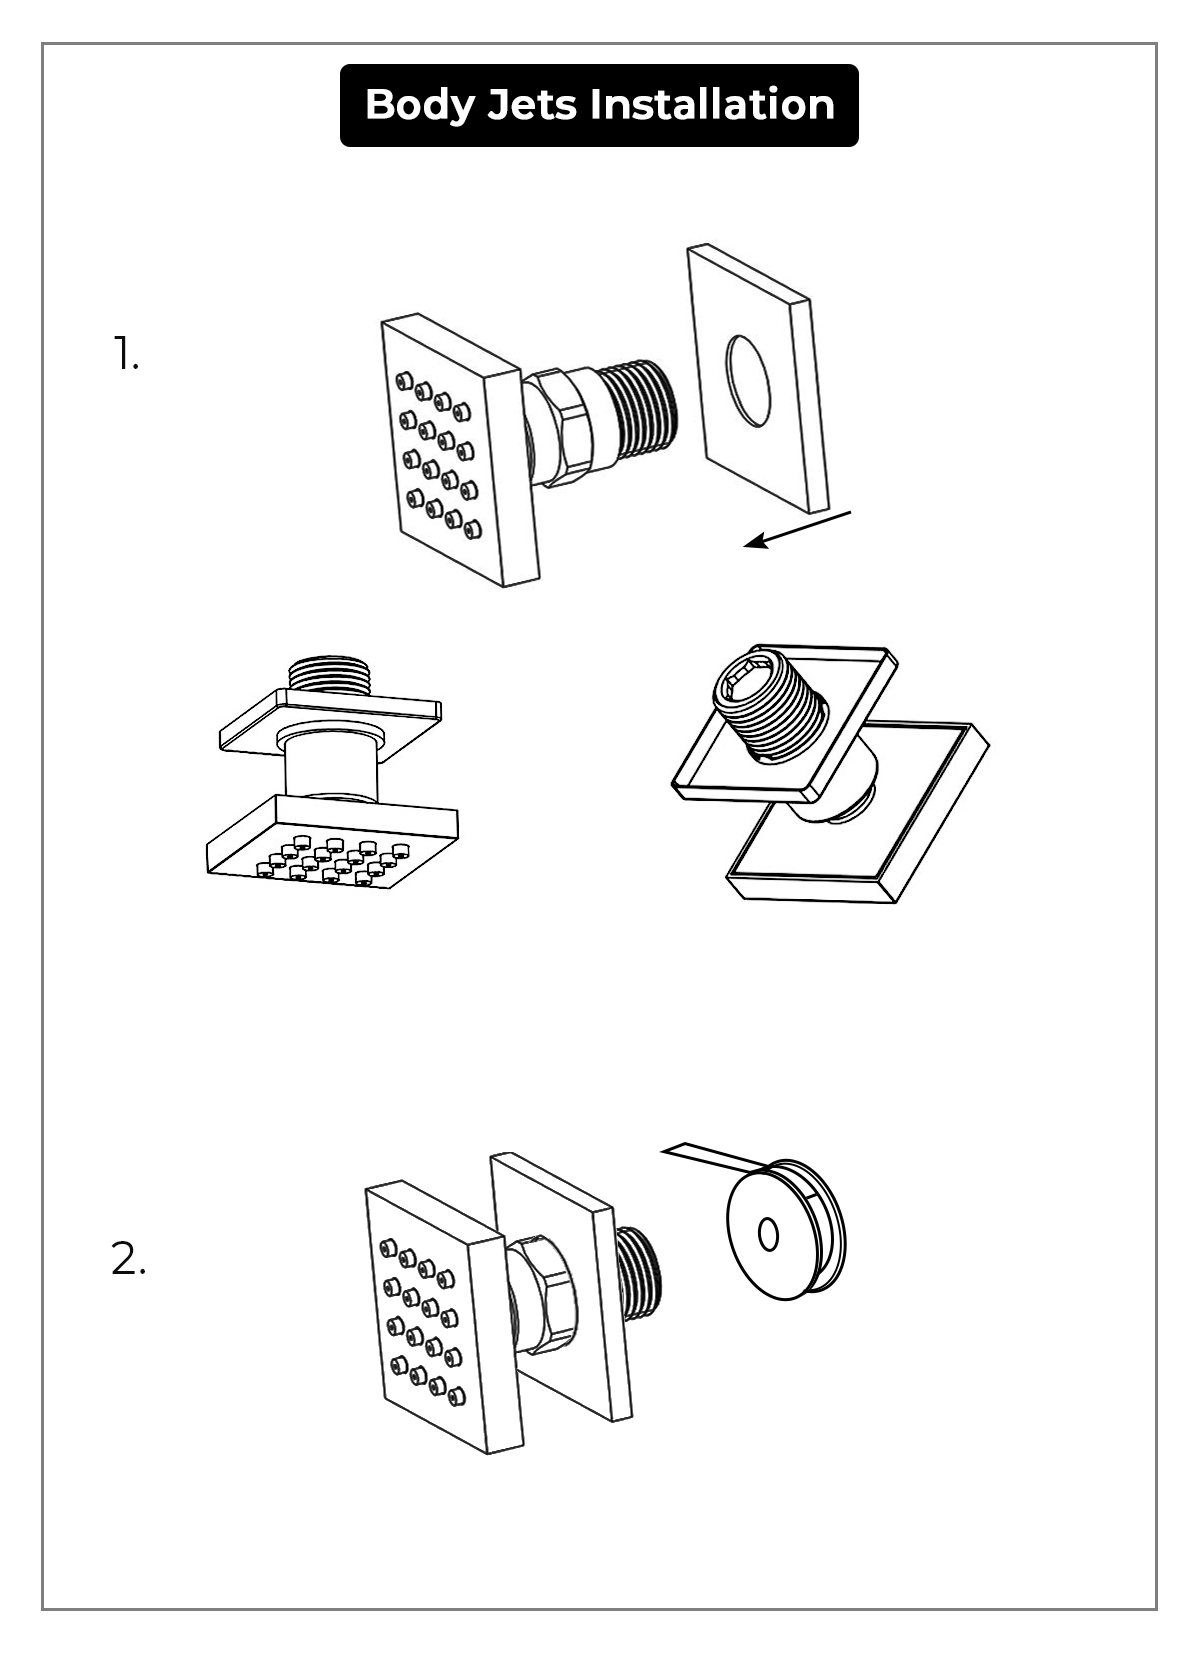

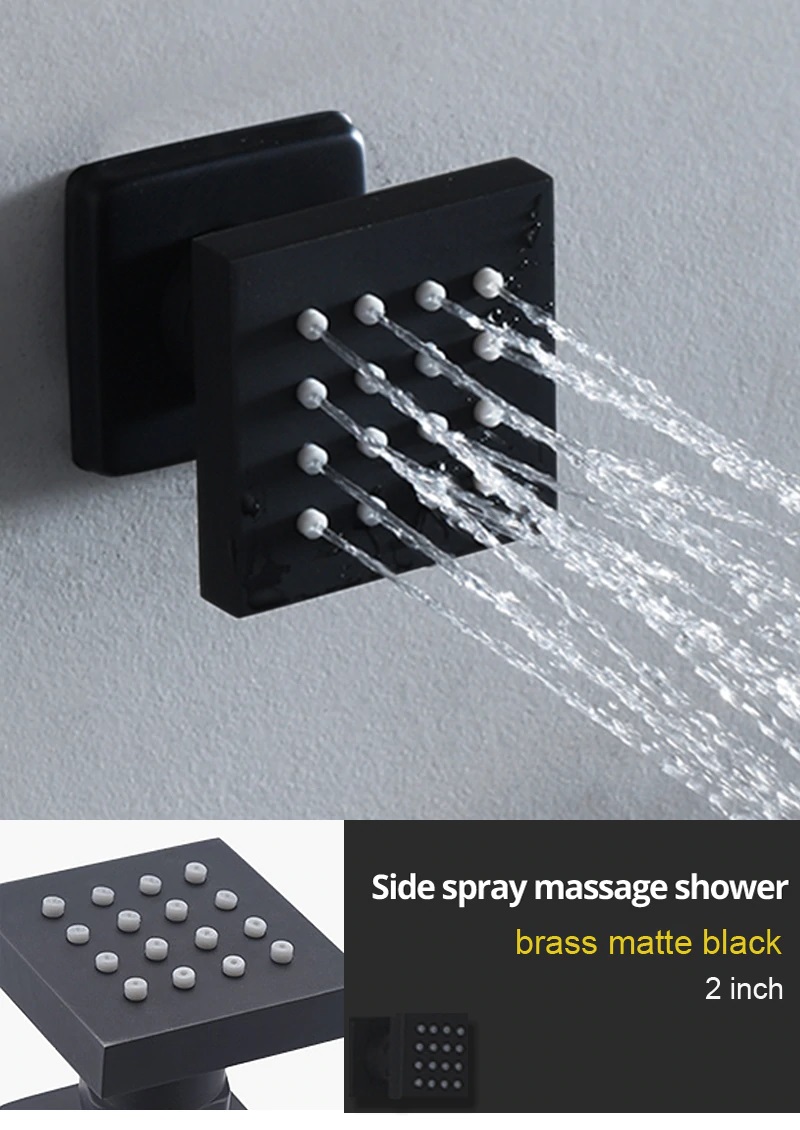
    1. Set the decorative cover on the body jet.

    2. Roll the raw material belt in the thread screws.
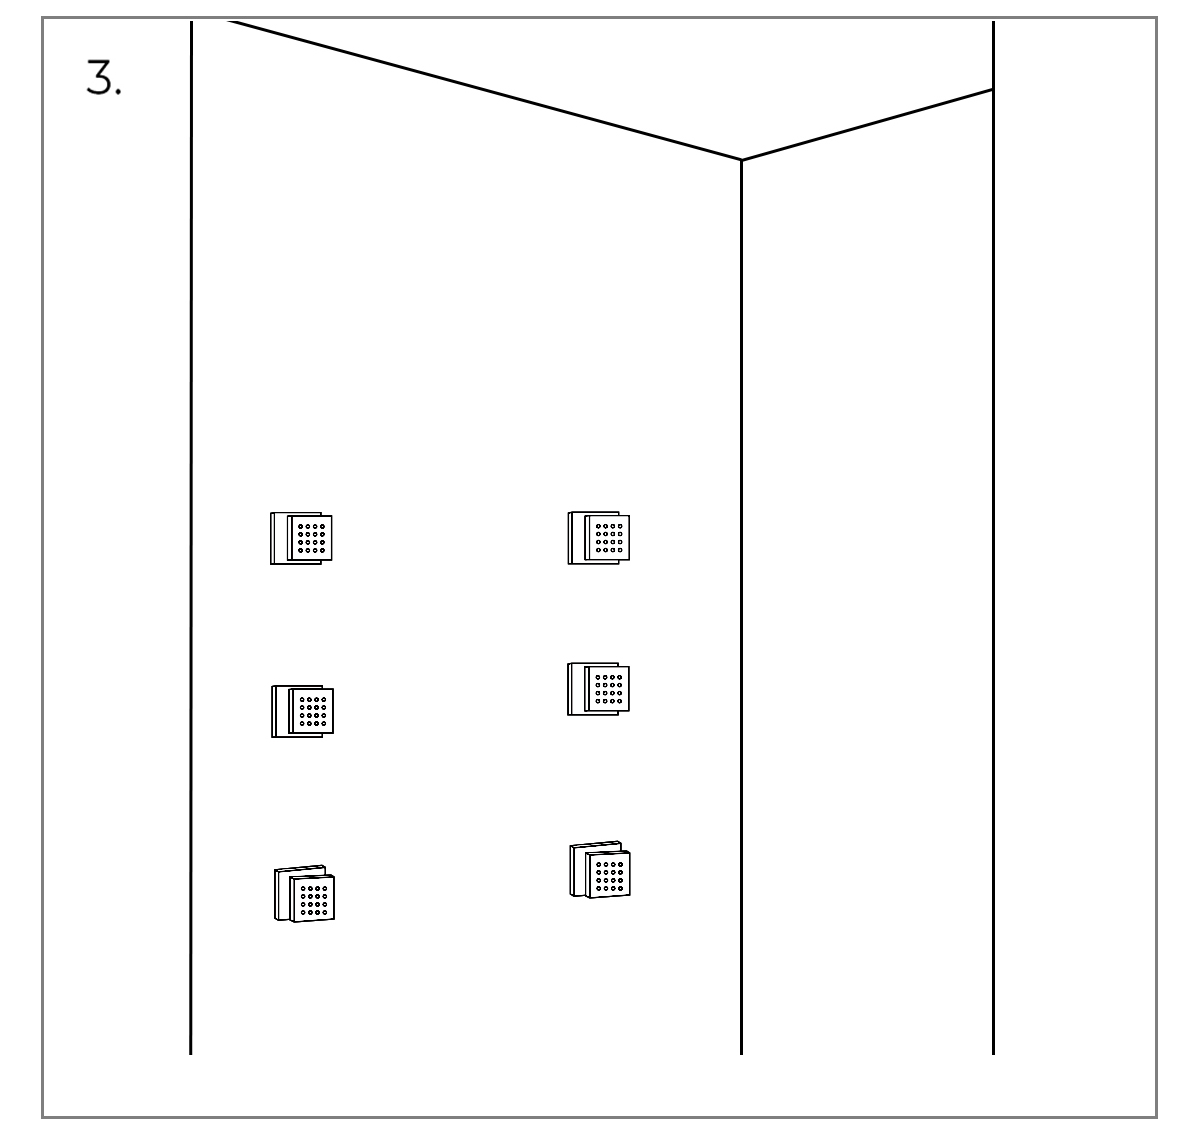
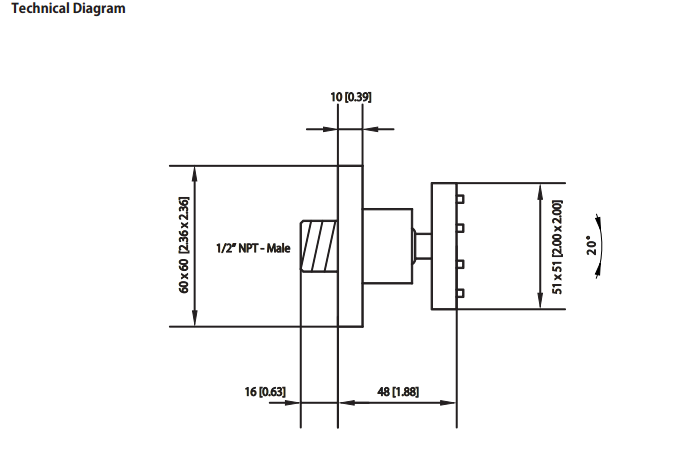
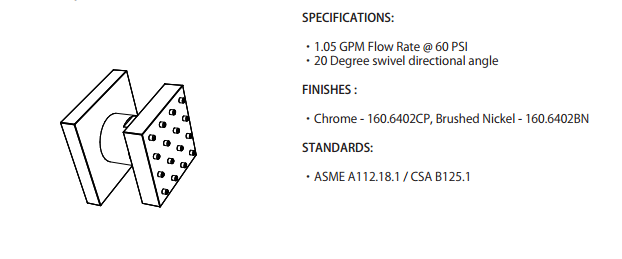
    3. Use a wrench to tighten 6 body jets on the water outlet holes in a clockwise direction.


    Shower Holder Installation
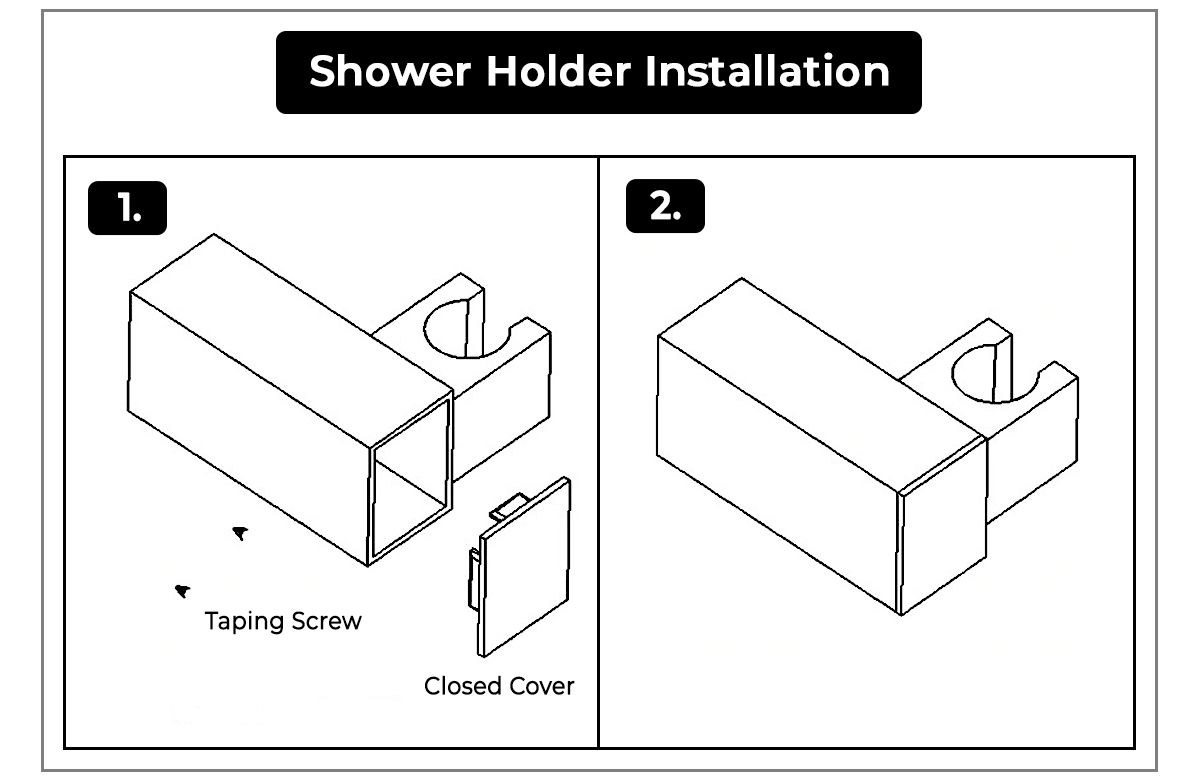
    1. Open the closed cover of the shower holder and take out the screws.

    2. Drill two holes size 6mm on the wall according to the hole position of the shower holder. Use a hammer to break 2 plastic wall plug into two holes. Tighten the screws with the plastic wall plug and locking with the shower holder. Then install the closed cover.
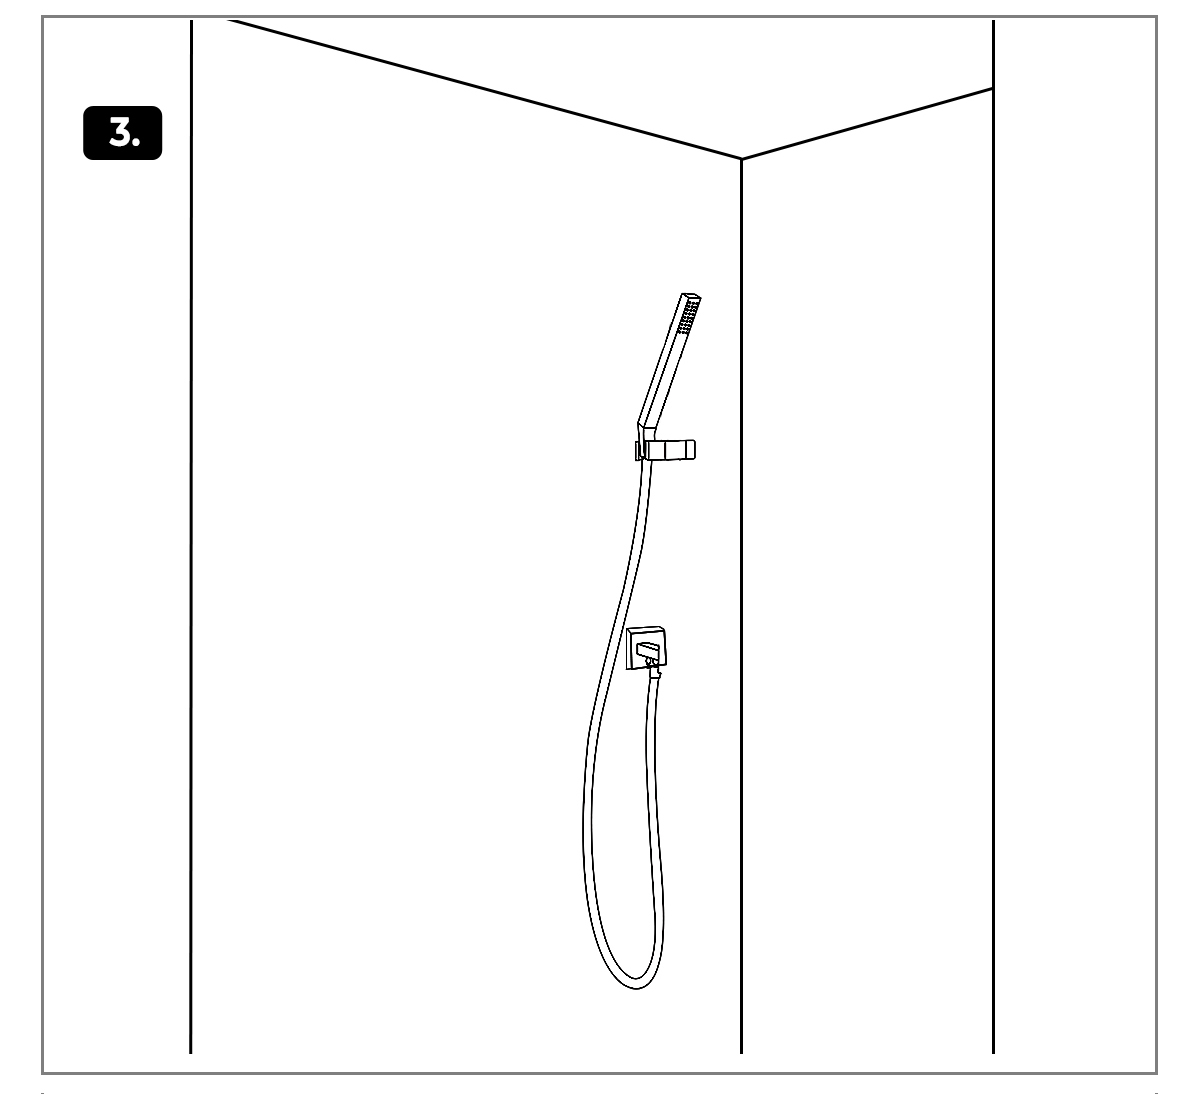
    3. Connect the shower hose with the water outlet connection part and hand shower. Plug the hand shower in the shower holder.
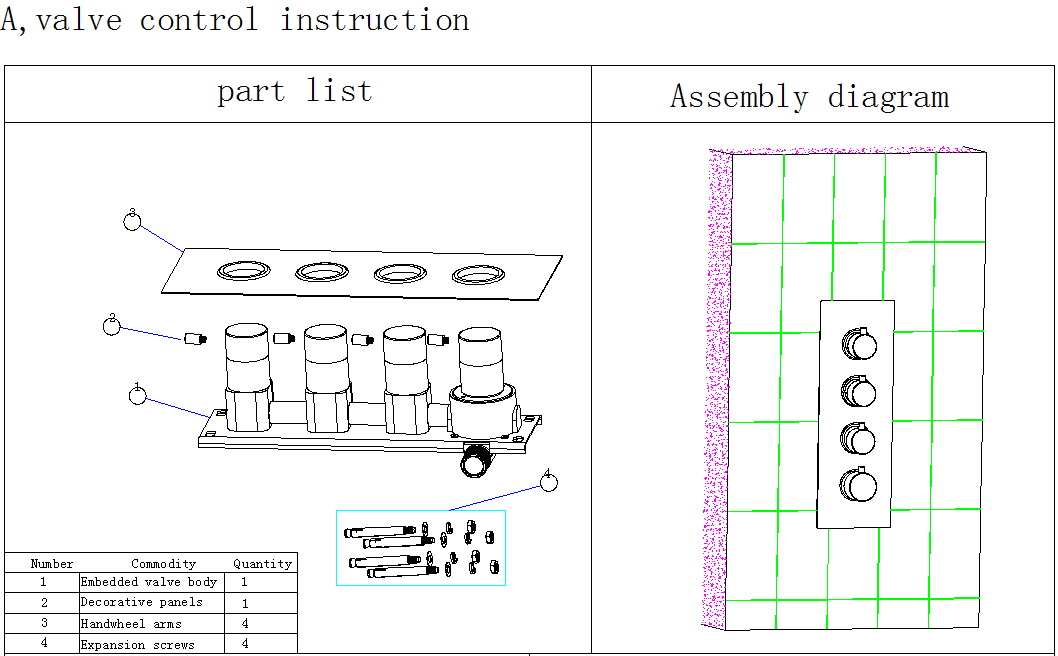

A.


Shower Valve Control Installation

a. Release 4 handwheel levers according to the above directions.
b. Take apart the embed valve, panel, and handwheel.
1. Dig the embed space for the pipe on the wall according to the specification of the valve.
2. Dig 4 holes according to the position of the screws.
3. Use a hammer to thwack the screws into 4 holes.
4. Fix the valve body with 4 screws.
5. Find out the expansion screw heads with washer and spring washer. Use copper sleeve wrench to lock the screw heads with the embed valve body.
6. After connecting all the pipes and before sealing the wall with concrete, confirm no leaking problem occur when you turn on the water.
7. Fix the decorative panel on the embed valve body.
8. Screw the handwheel arms with the handwheels.
BathSelect Ancient Round Antique Rainfall Wall ShoweBathSelect Ancient Round Antique Rainfall Wall Shower Head Installation Instructions Head Installation Instructions