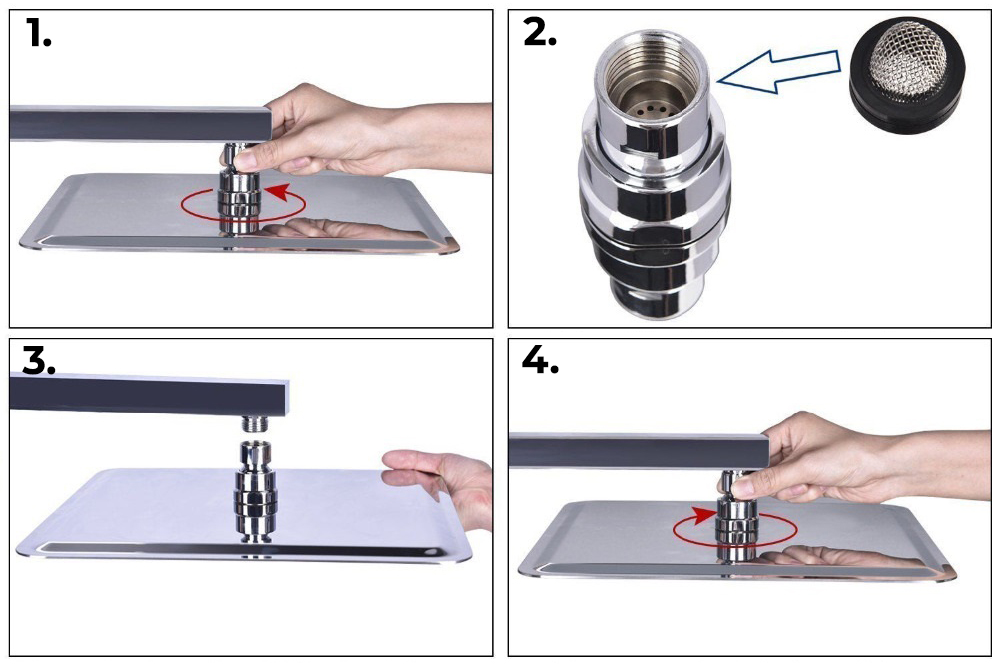
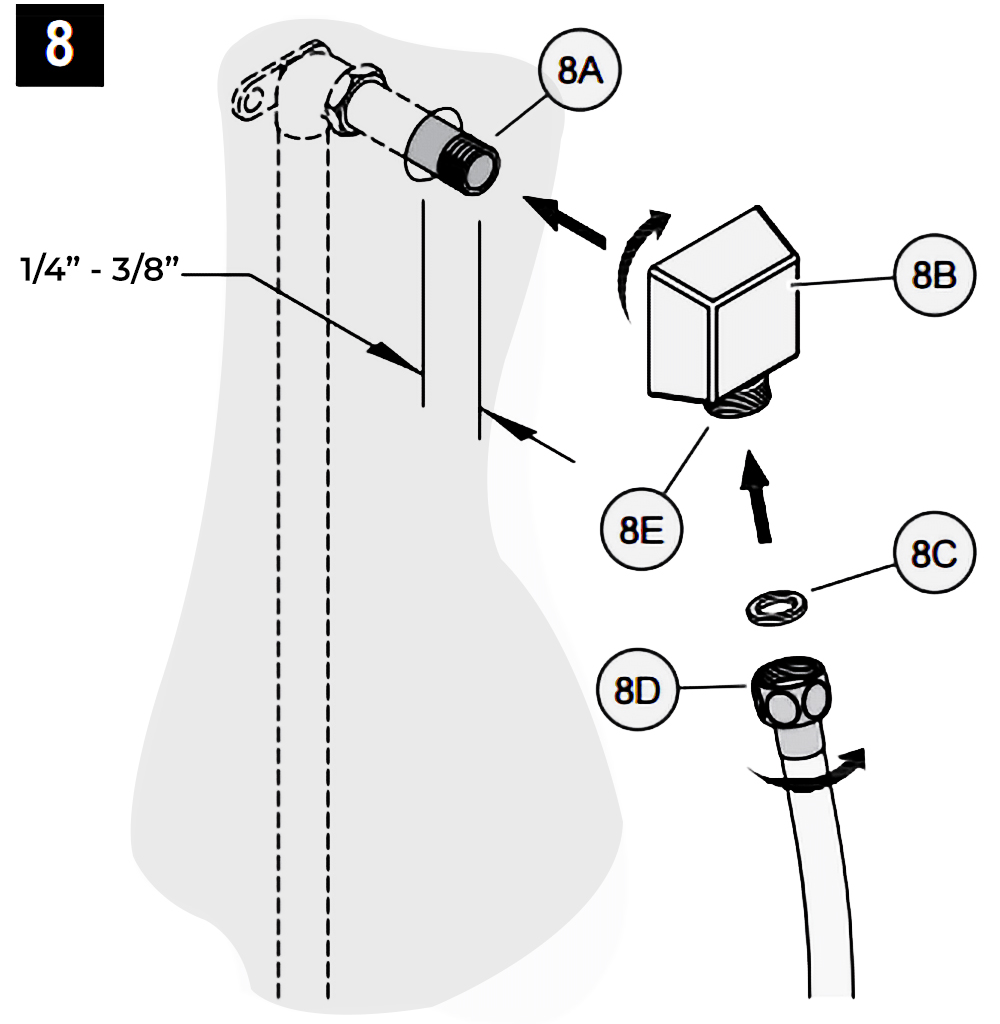
 8. Drop Elbow & Hose Installation
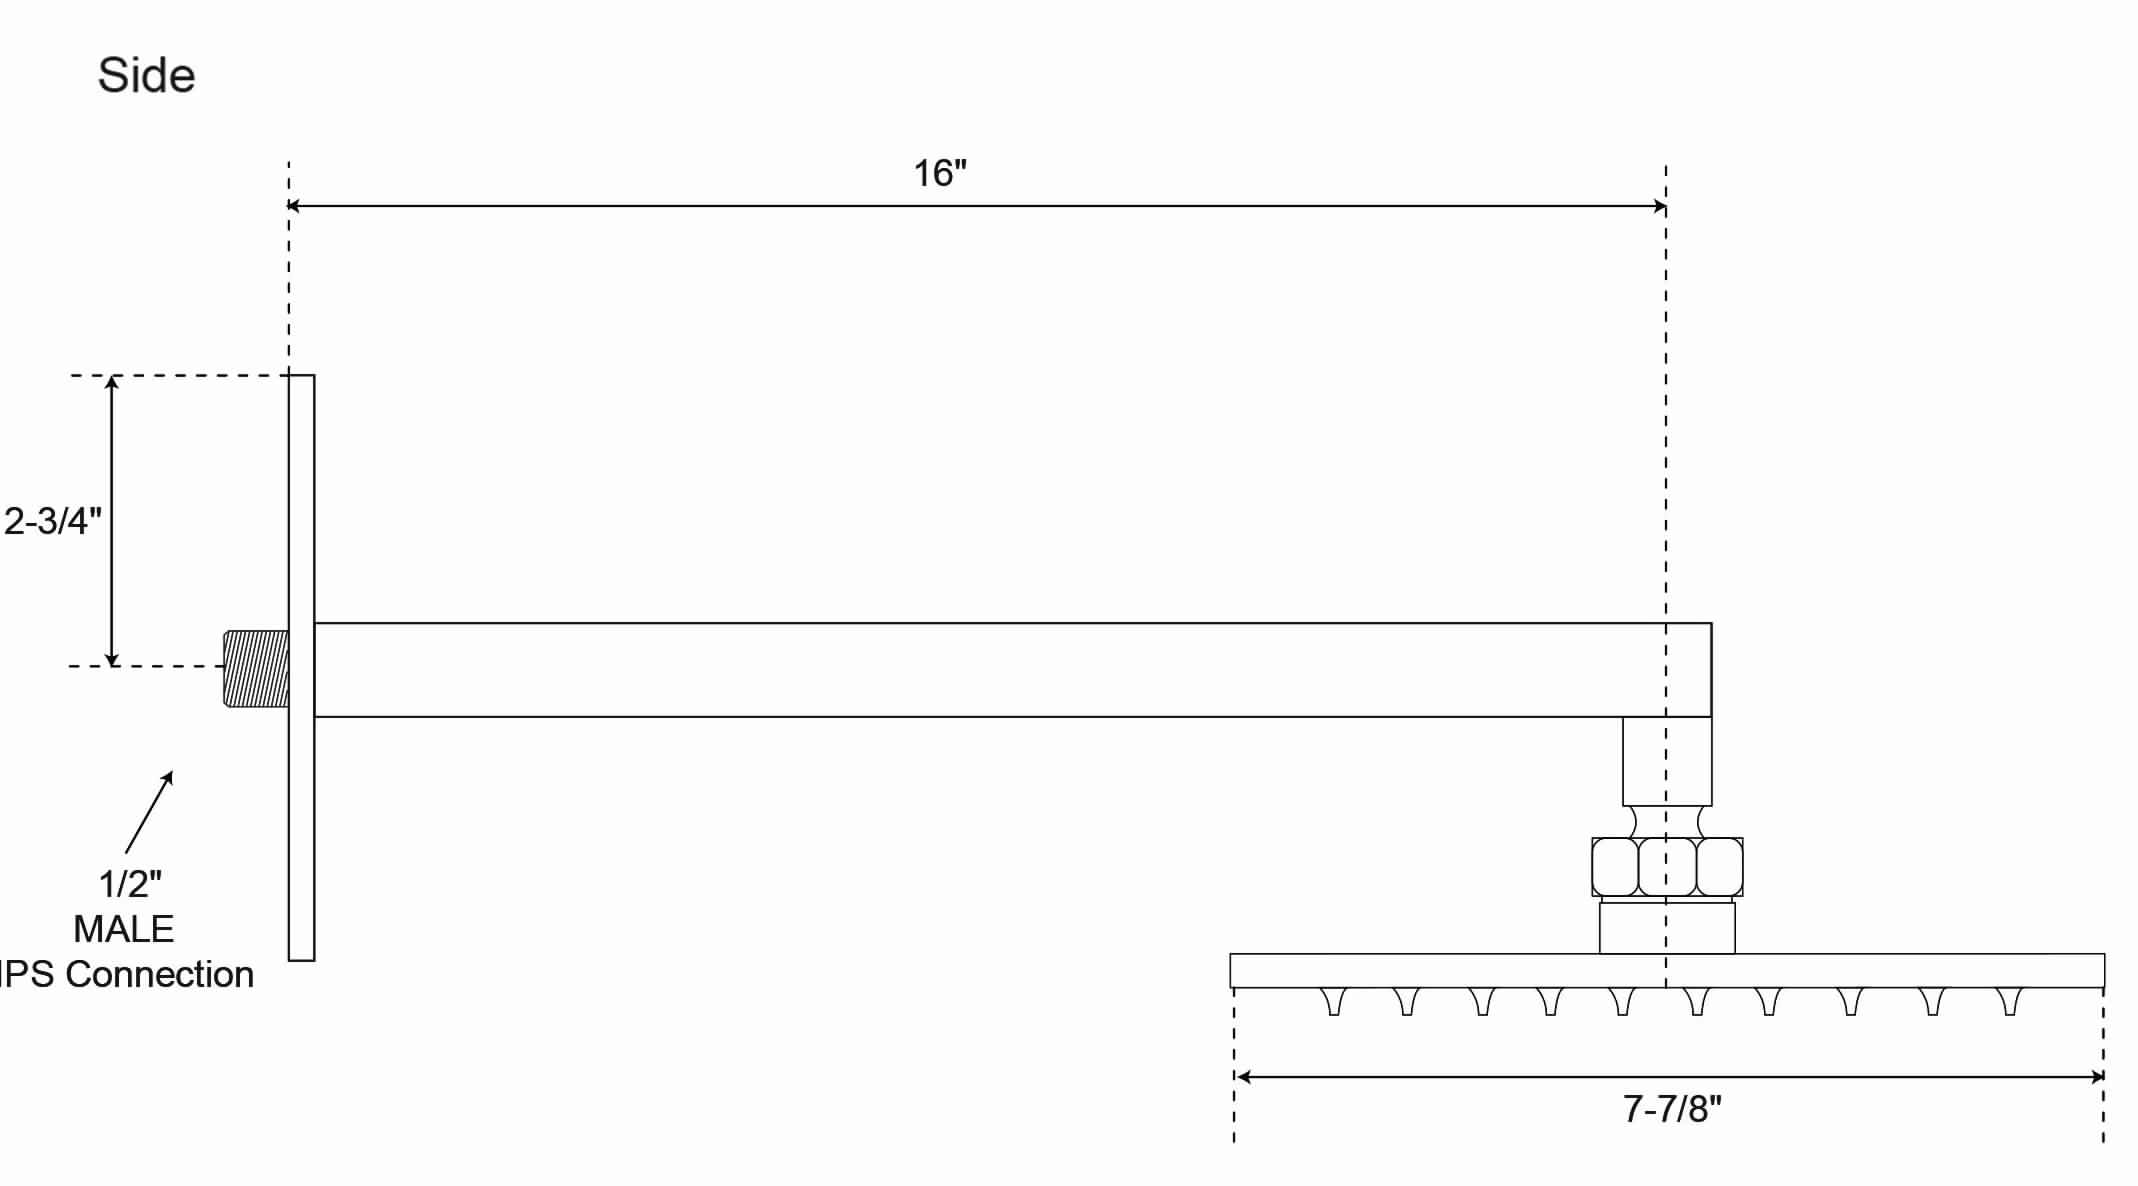
Apply PTFE plumbers tape on both ends of Pipe Nipple (8A) (not included). Screw Pipe Nipple (8A) into the elbow inside the wall. The Pipe Nipple (8A) is to project 1/4” – 3/4” from the finished wall. Screw Drop Elbow (8B) onto Pipe Nipple (8A) and tighten until Drop Elbow (8B) is property positioned and flush to the finished wall.
Place Rubber Seal (8C) inside Hex Hose Fitting (8D). Connect Hex Hose Fitting (8D) into Drop Elbow Outlet (8E) by turning Hex Hose Fitting (8D).
9. Unit Start Up
Turn on hot and cold water supplies, and check al connections for leaks.
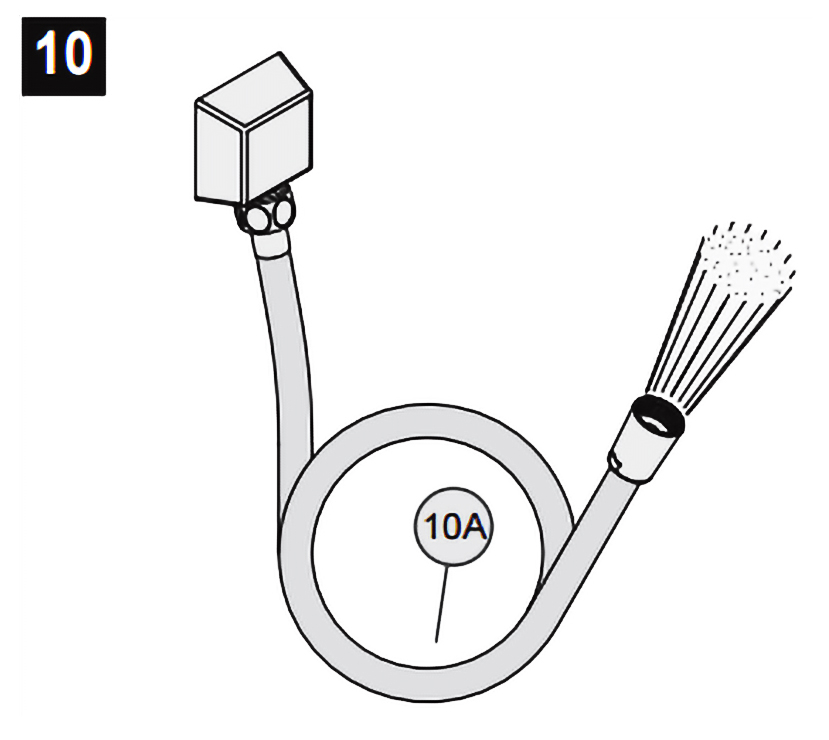 10. Final Flushing
For final flushing, turn valve on and allow water to run through the Hose (10A) for several minutes. Allow water to run for several minutes until all foreign matter clears the line.
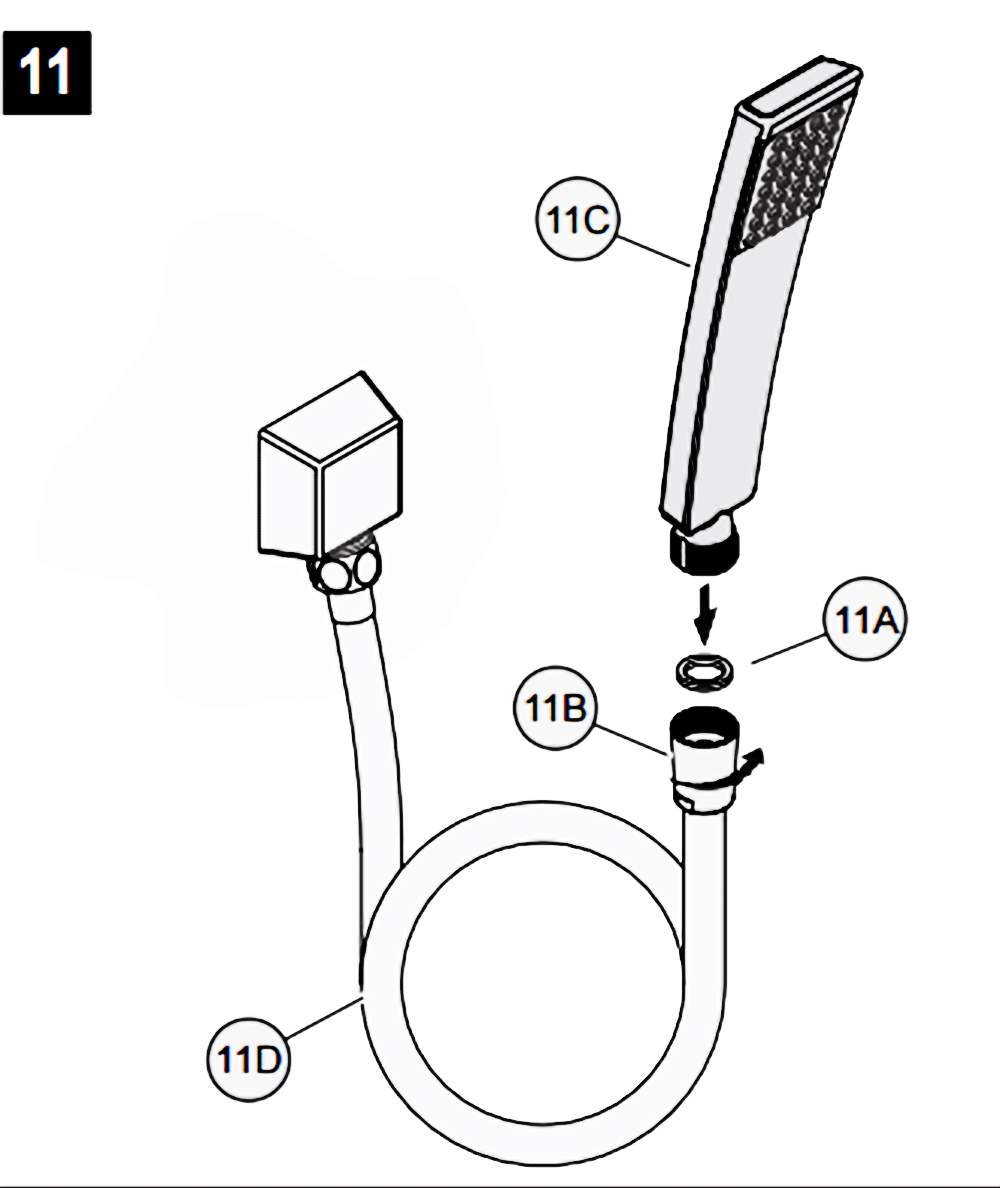
11. Shower Arm Installation
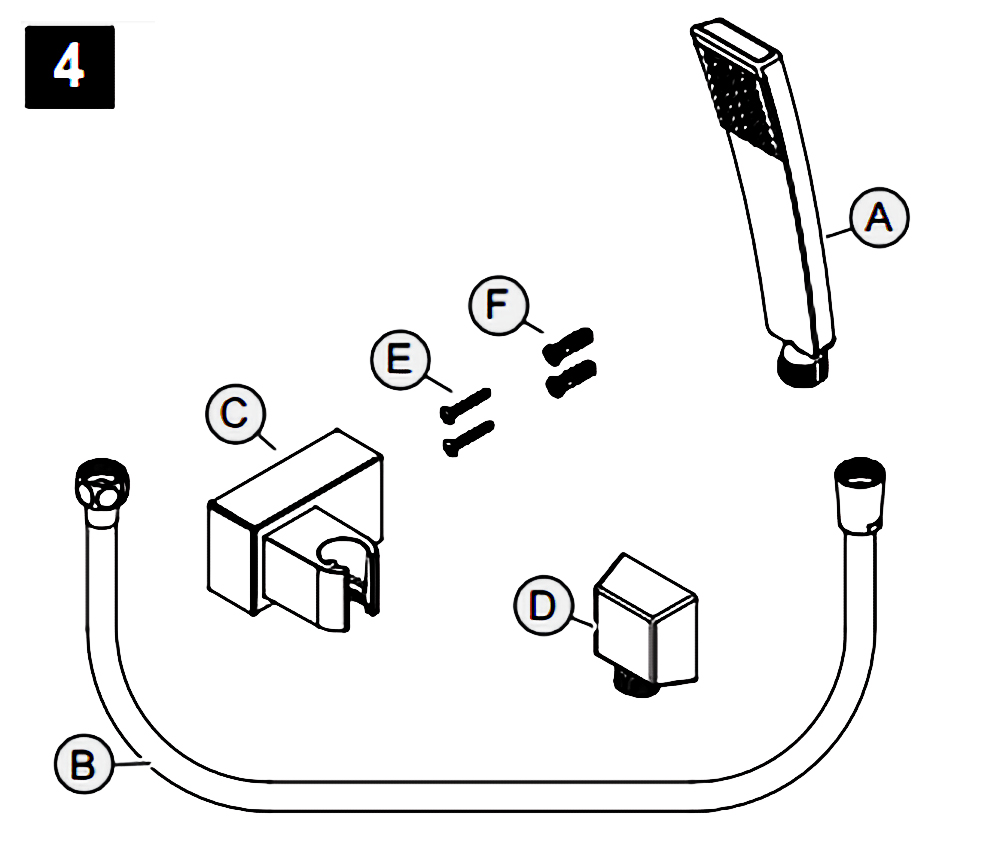
Place Rubber Seal (11A) inside Tapered Hose Fitting (11B). Conned Hand Shower (11C) to Hose (11D) by turning Tapered Hose Fitting (118) clockwise.
Warning: Make sure Hand Shower (11C) is securely tightened to Hose (11D).
Shower Mixer Installation
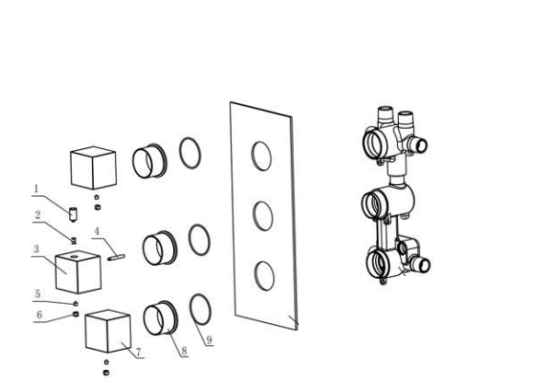
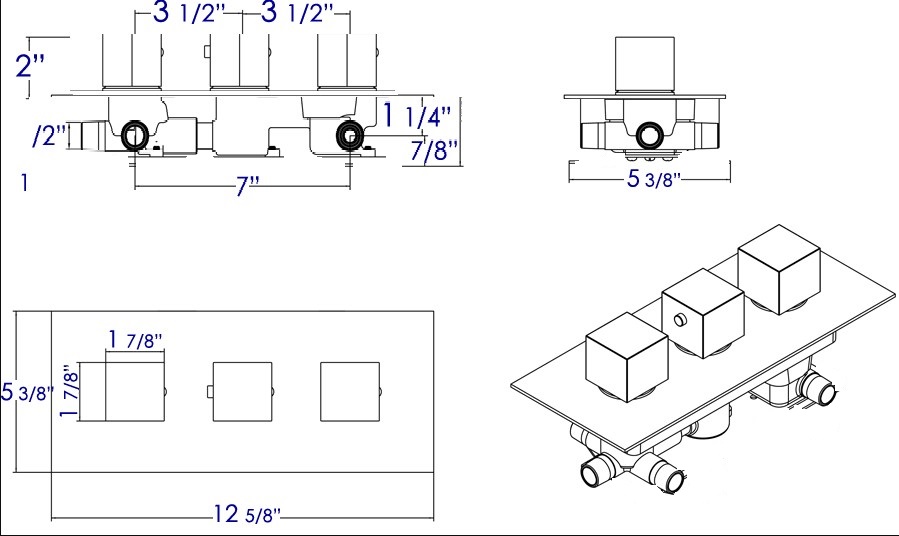
Shower Body Jets Installation
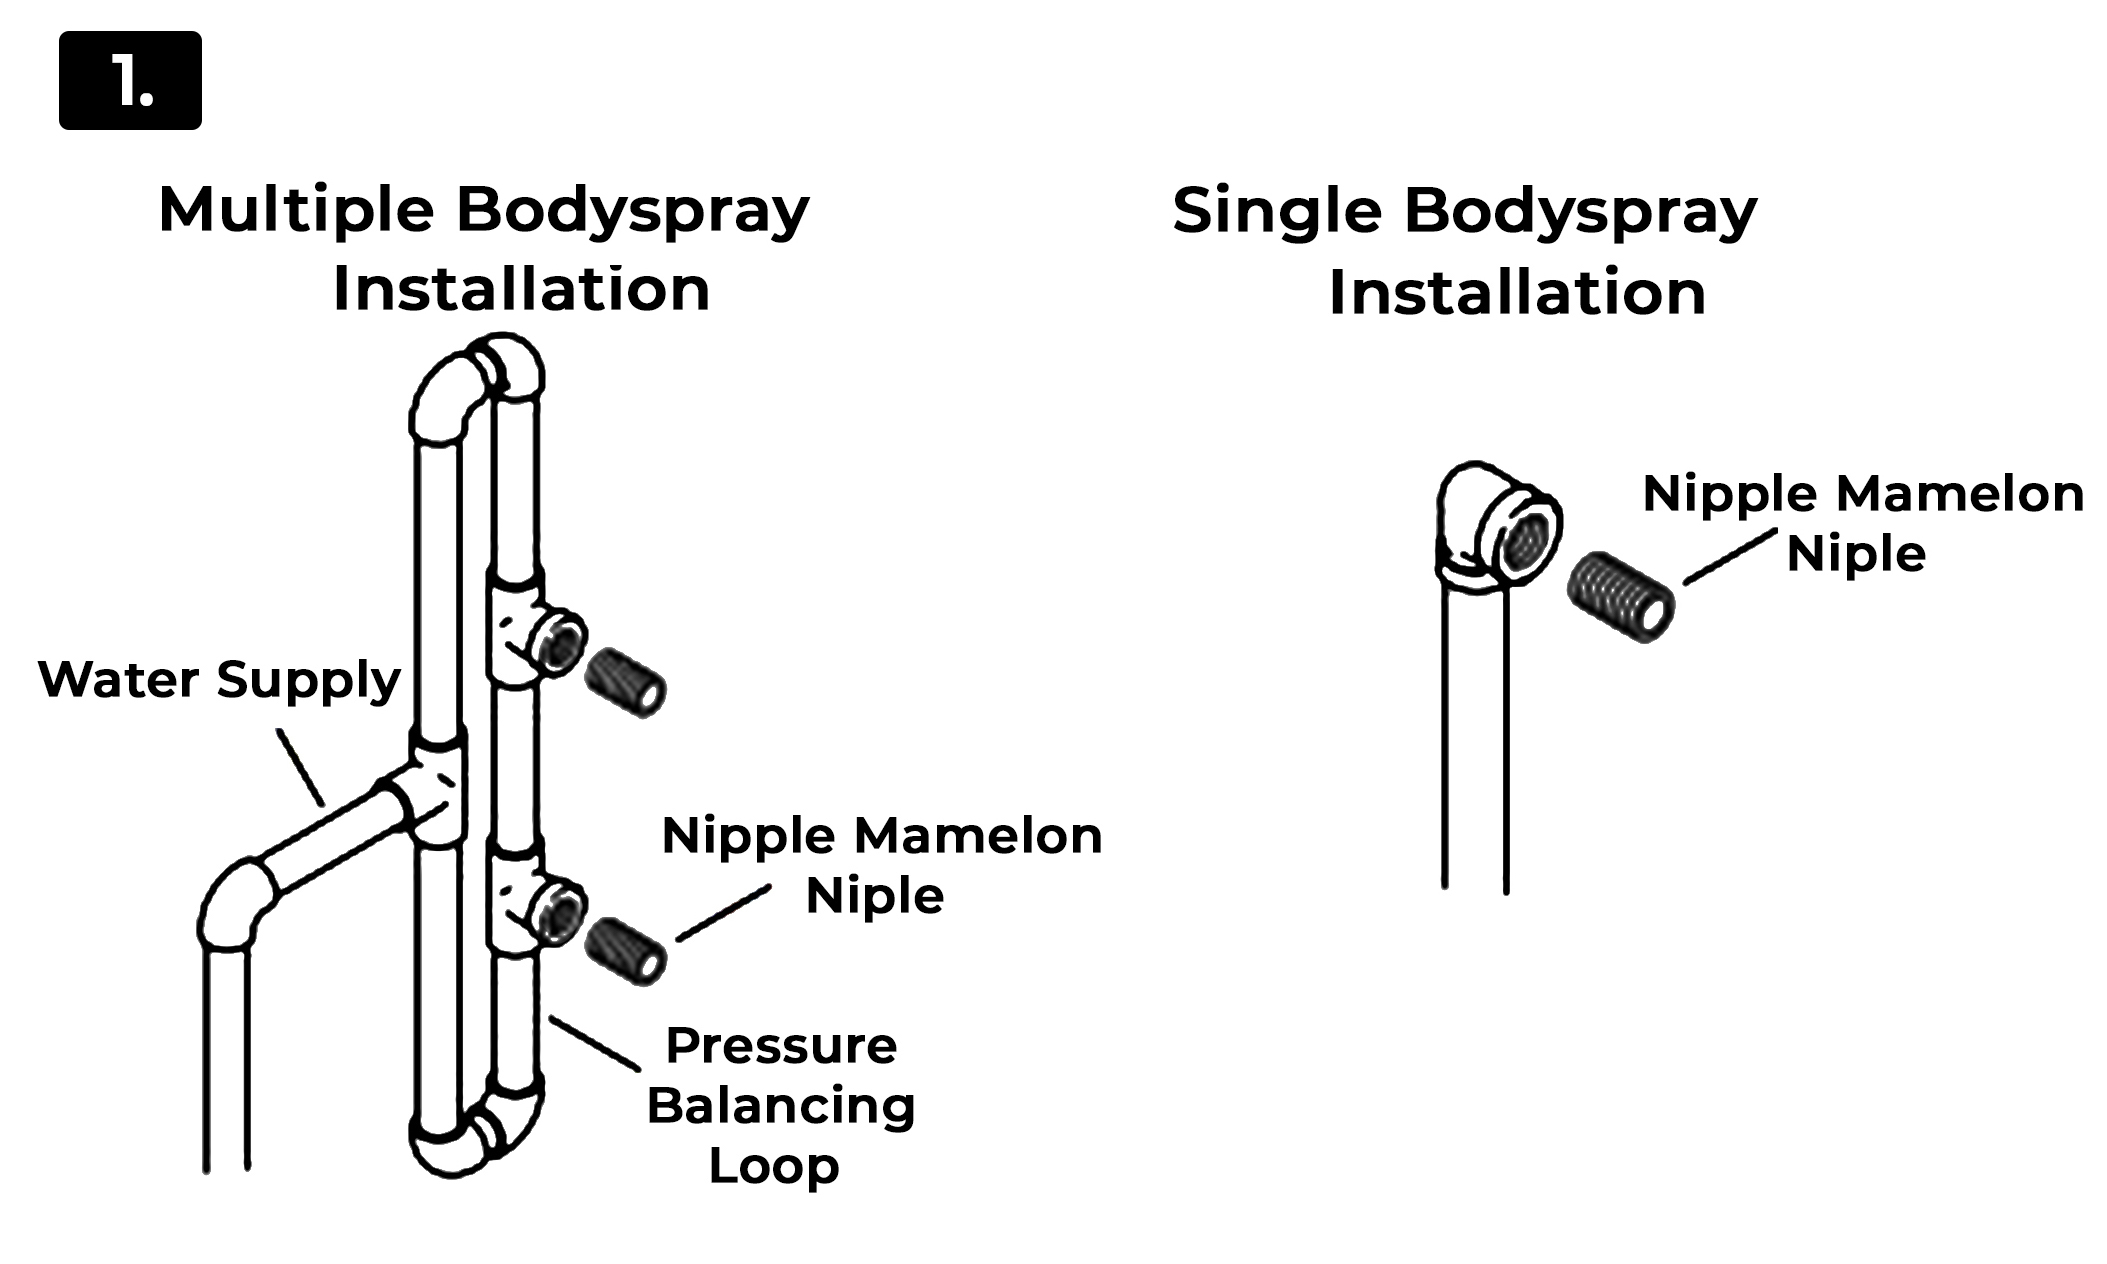
Multiple Bodyspray Installation
• Water Supply
• Nipple Mamelon Nipple
• Pressure Balancing Loop
1. Route the water supply lines.
2. If installing more than one bodyspray off the same supply line, construct a pressure balancing loop. Locate a tee along the loop at each bodyspray installation location.
3. Do not strap the pipes at this time.
Single Bodyspray Installation
• Nipple Mamelon Nipple
1. Route the water supply line.
2. Install an elbow to the end of the supply pipe at the bodyspray installation location.
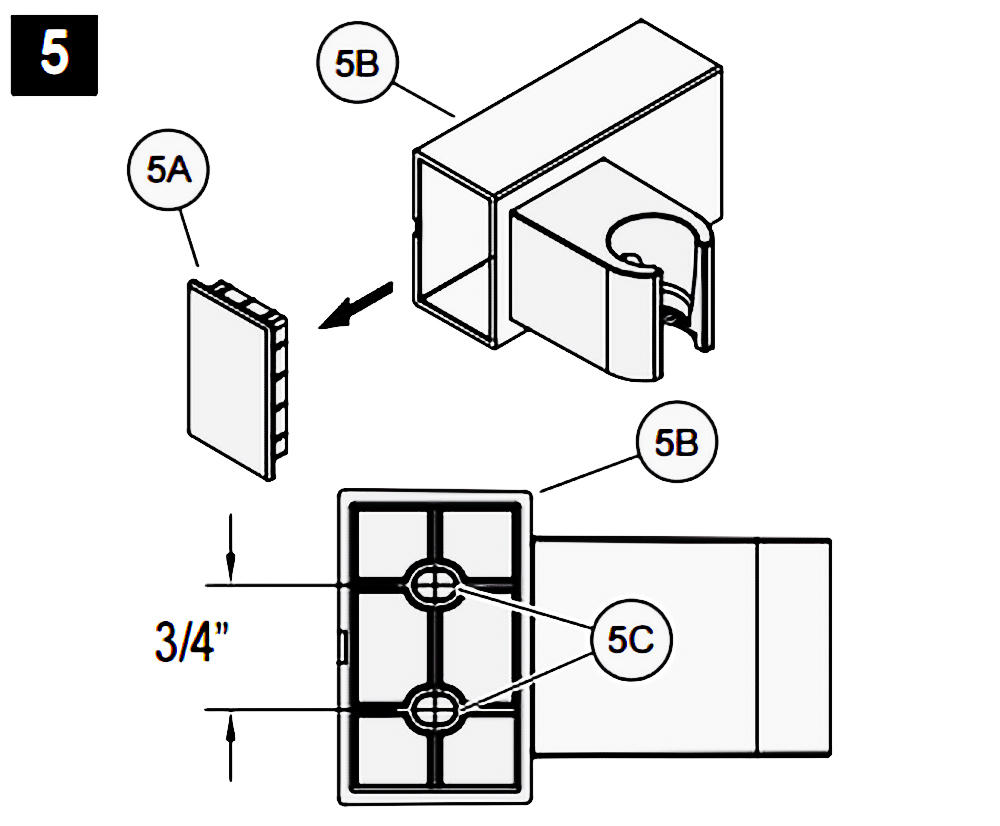
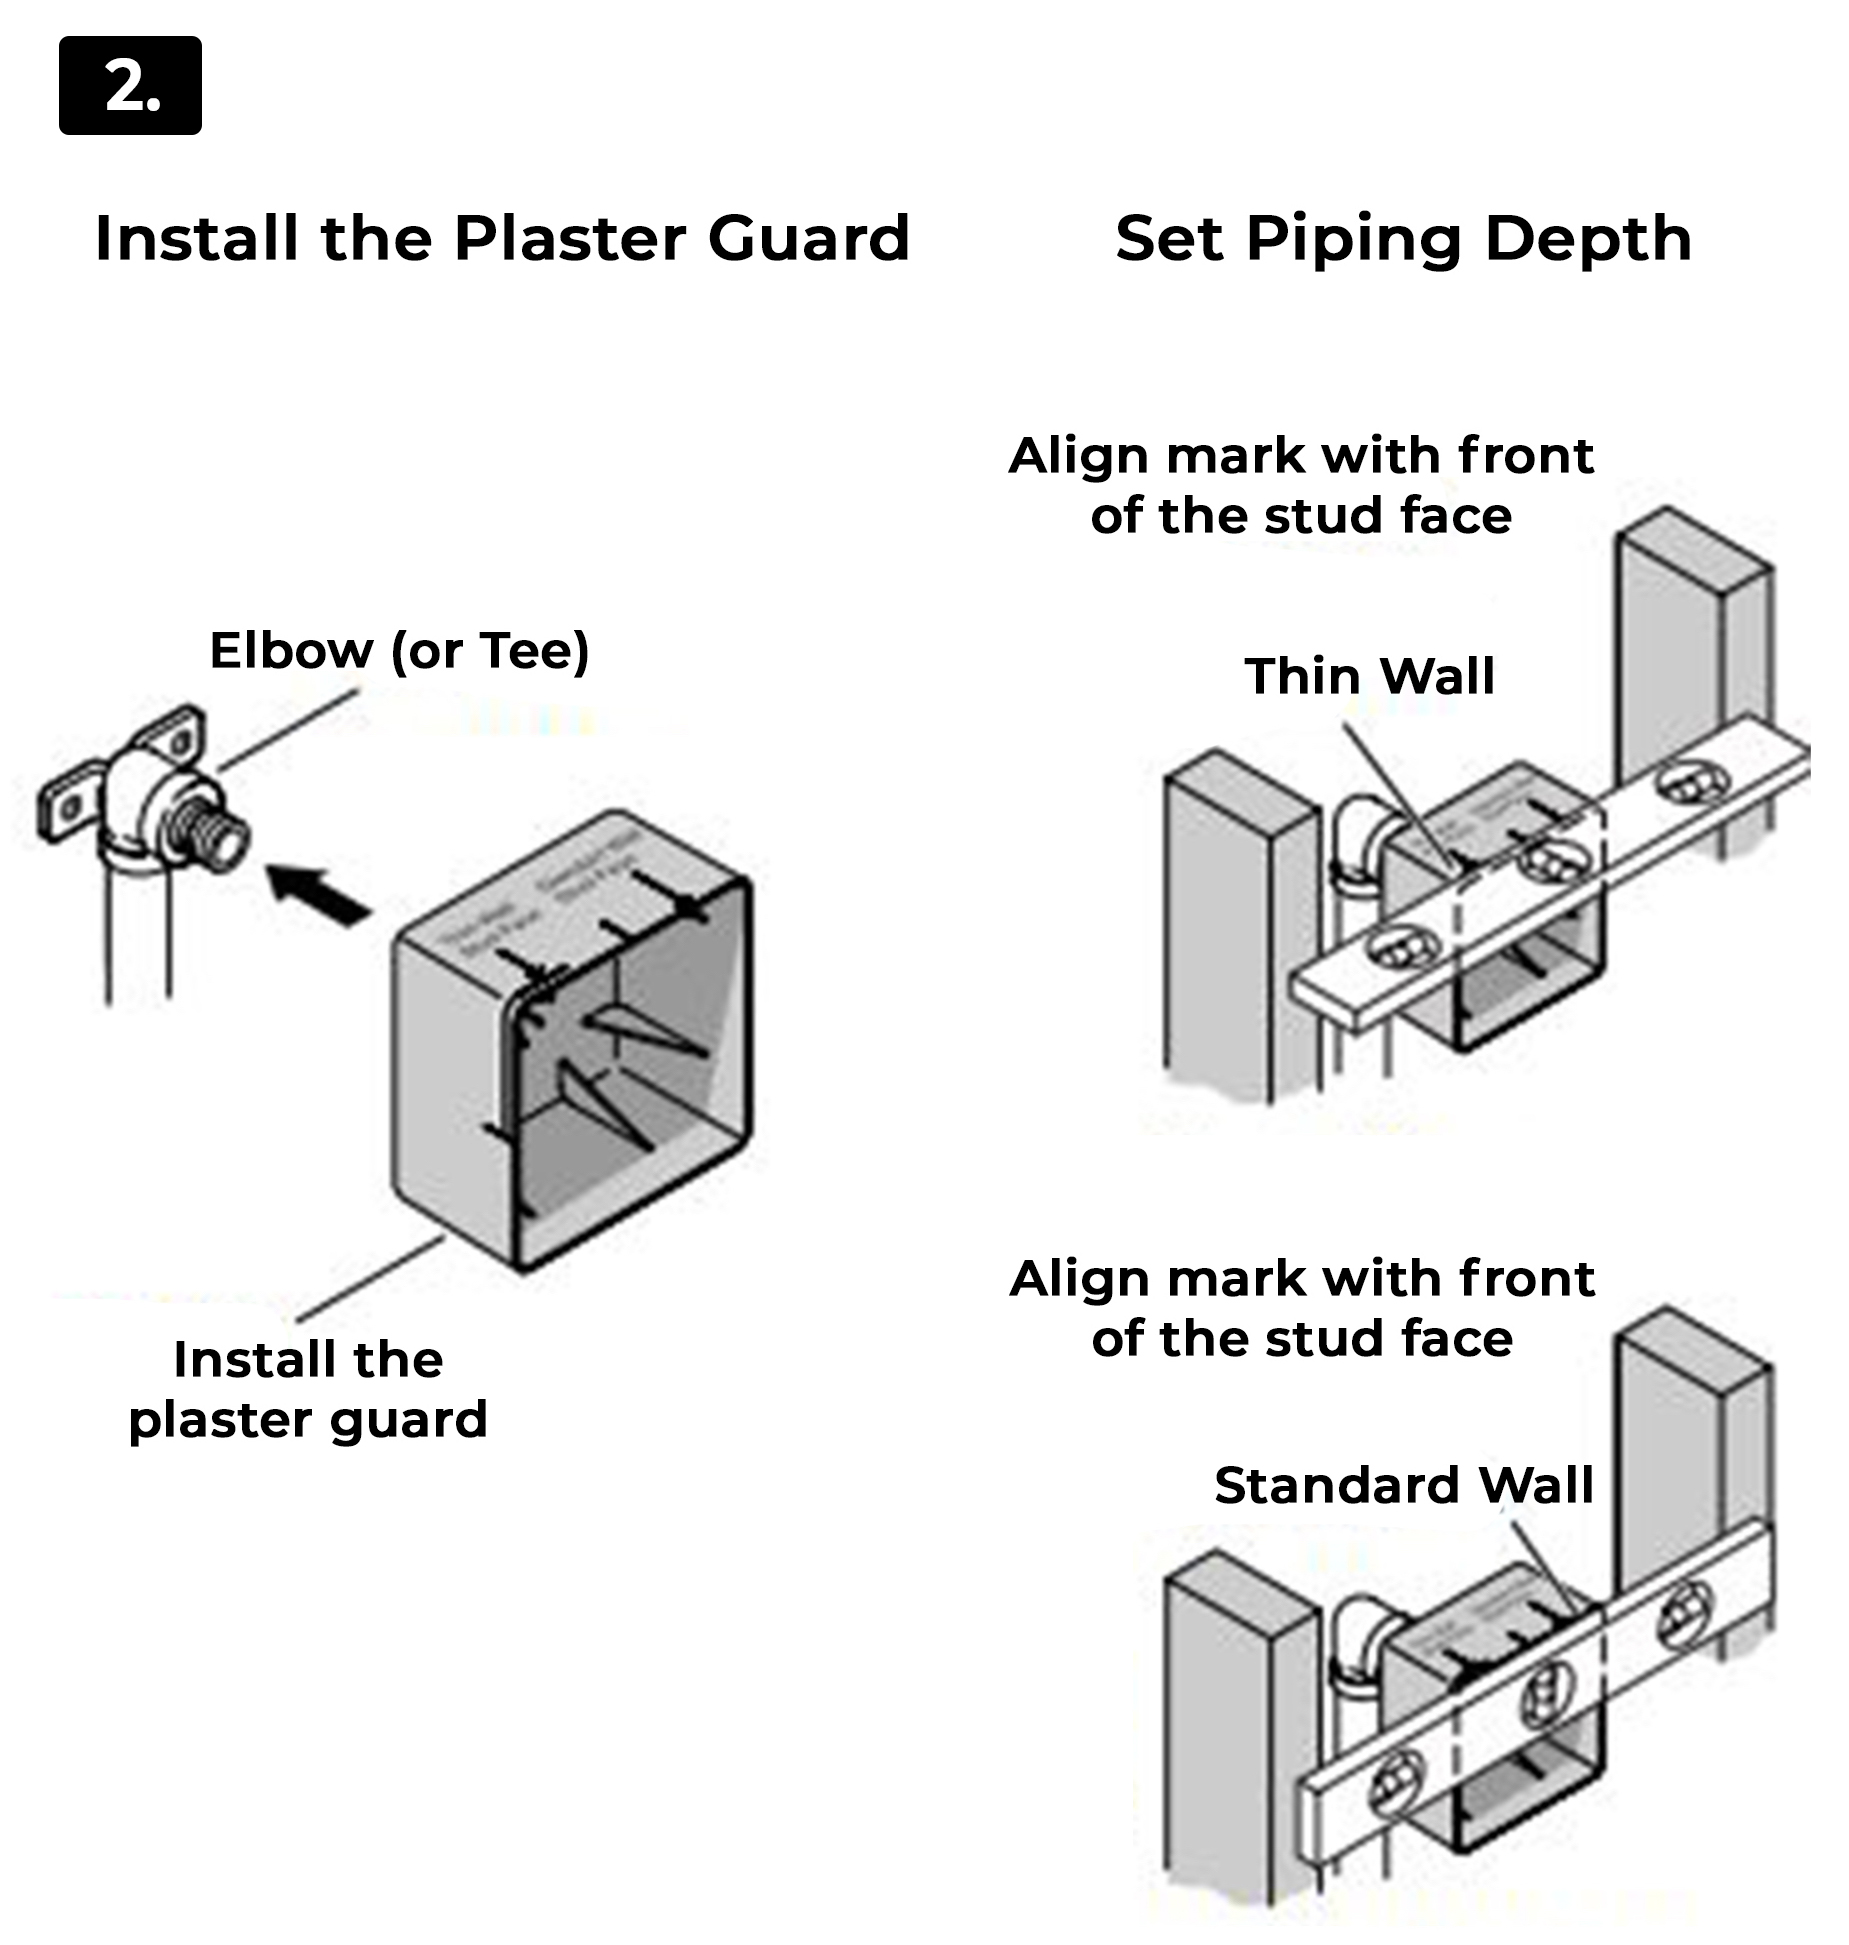 Install the Plaster Guard
• Elbow (or Tee)
•
Install the plaster guard
Set Piping Depth
Align mark with front of the stud face
•
Thin Wall
Align mark with front of the stud face
•
Standard Wall
Install the plaster guard. Push until the plaster guard is snug against the face of the elbow (or tee).
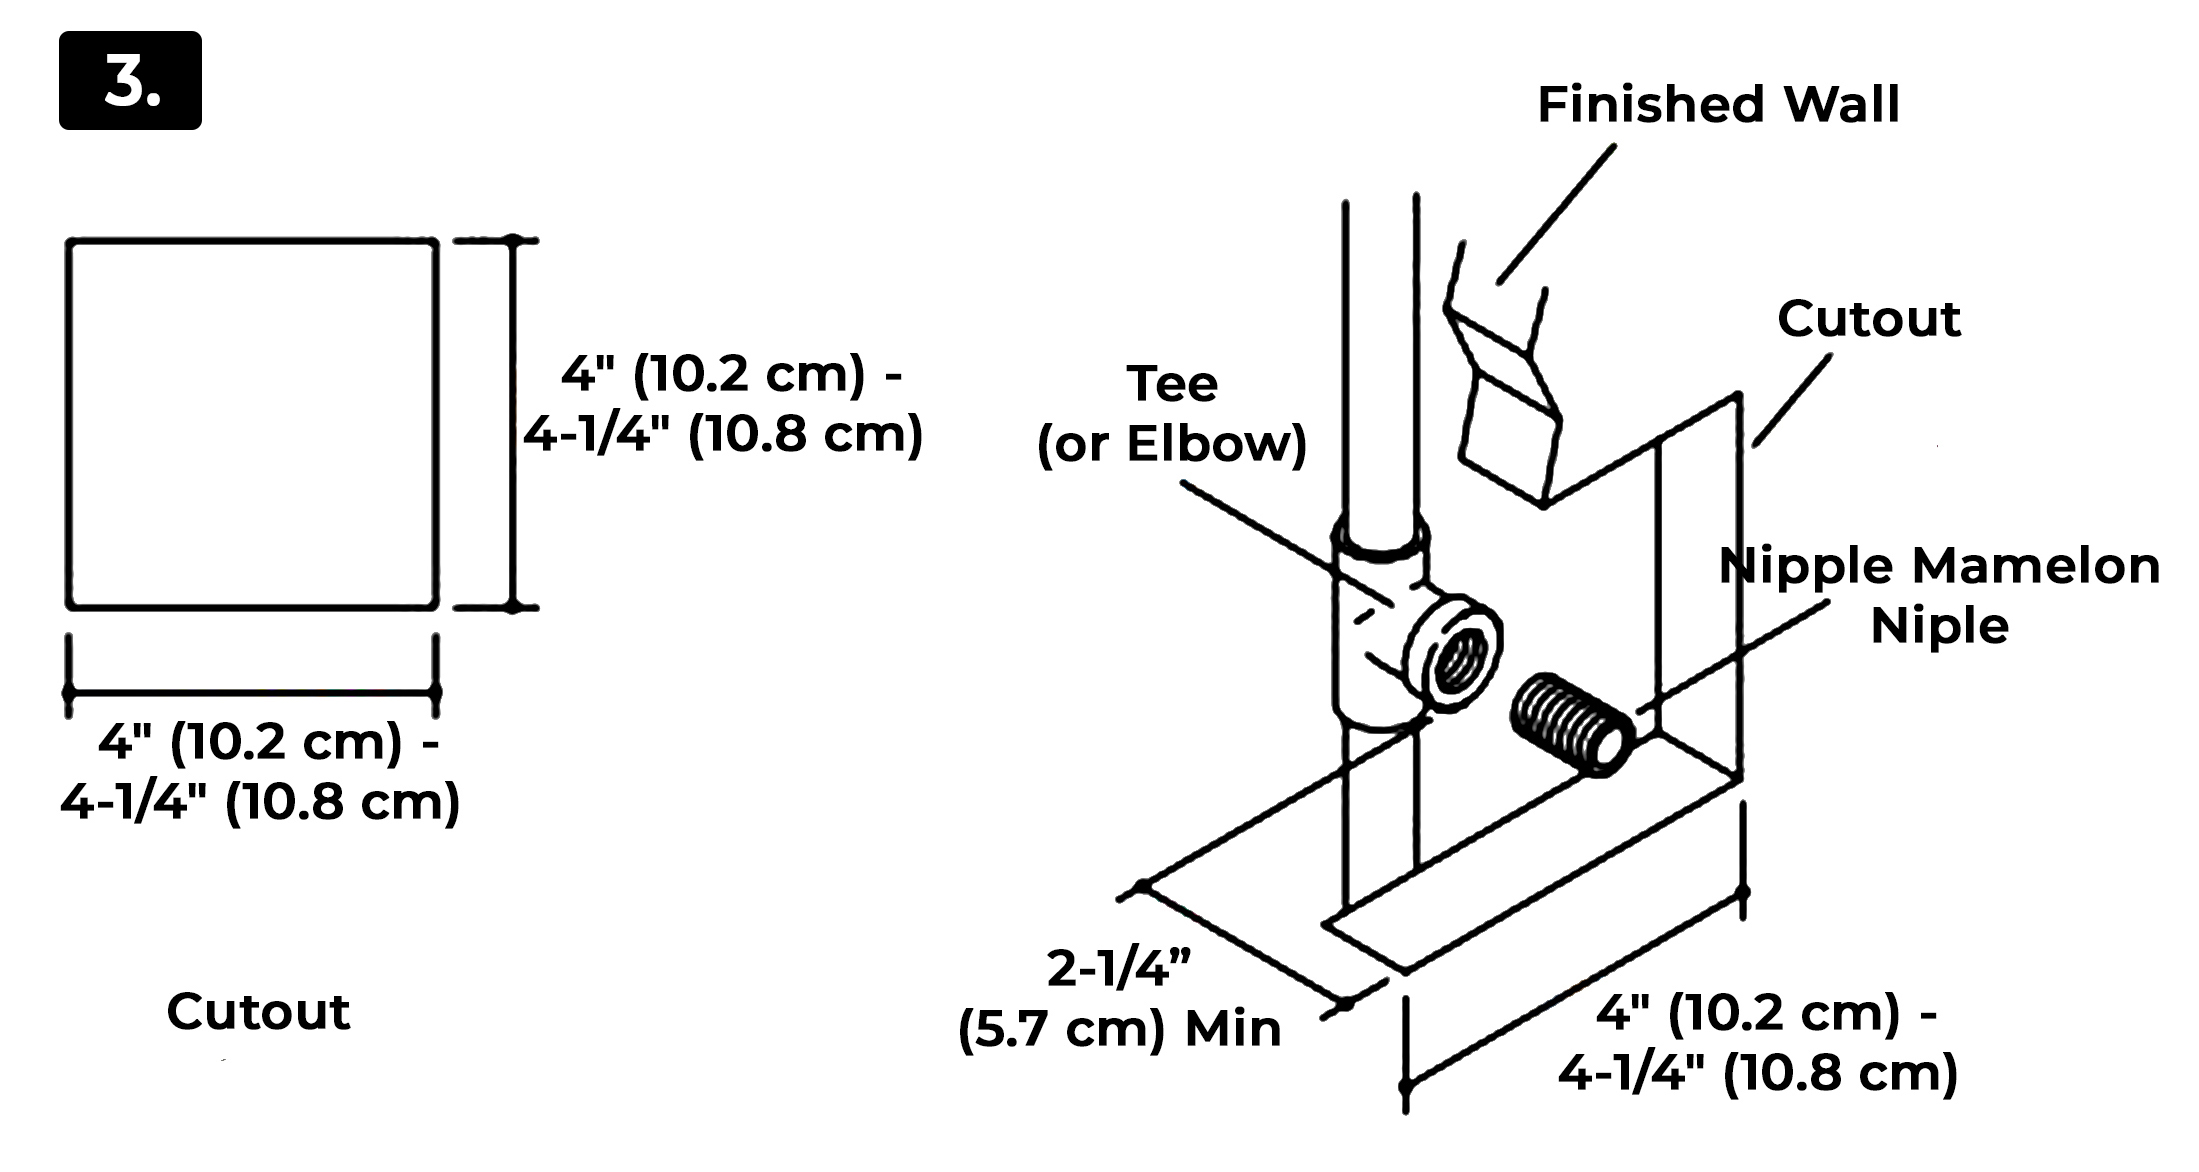 1. Install the water-resistant wall board.
2. Cut out a 4" (10.2 cm) to 4-1/4" (10.8 cm) square at each the installation location.
3. Install the finished wall material.
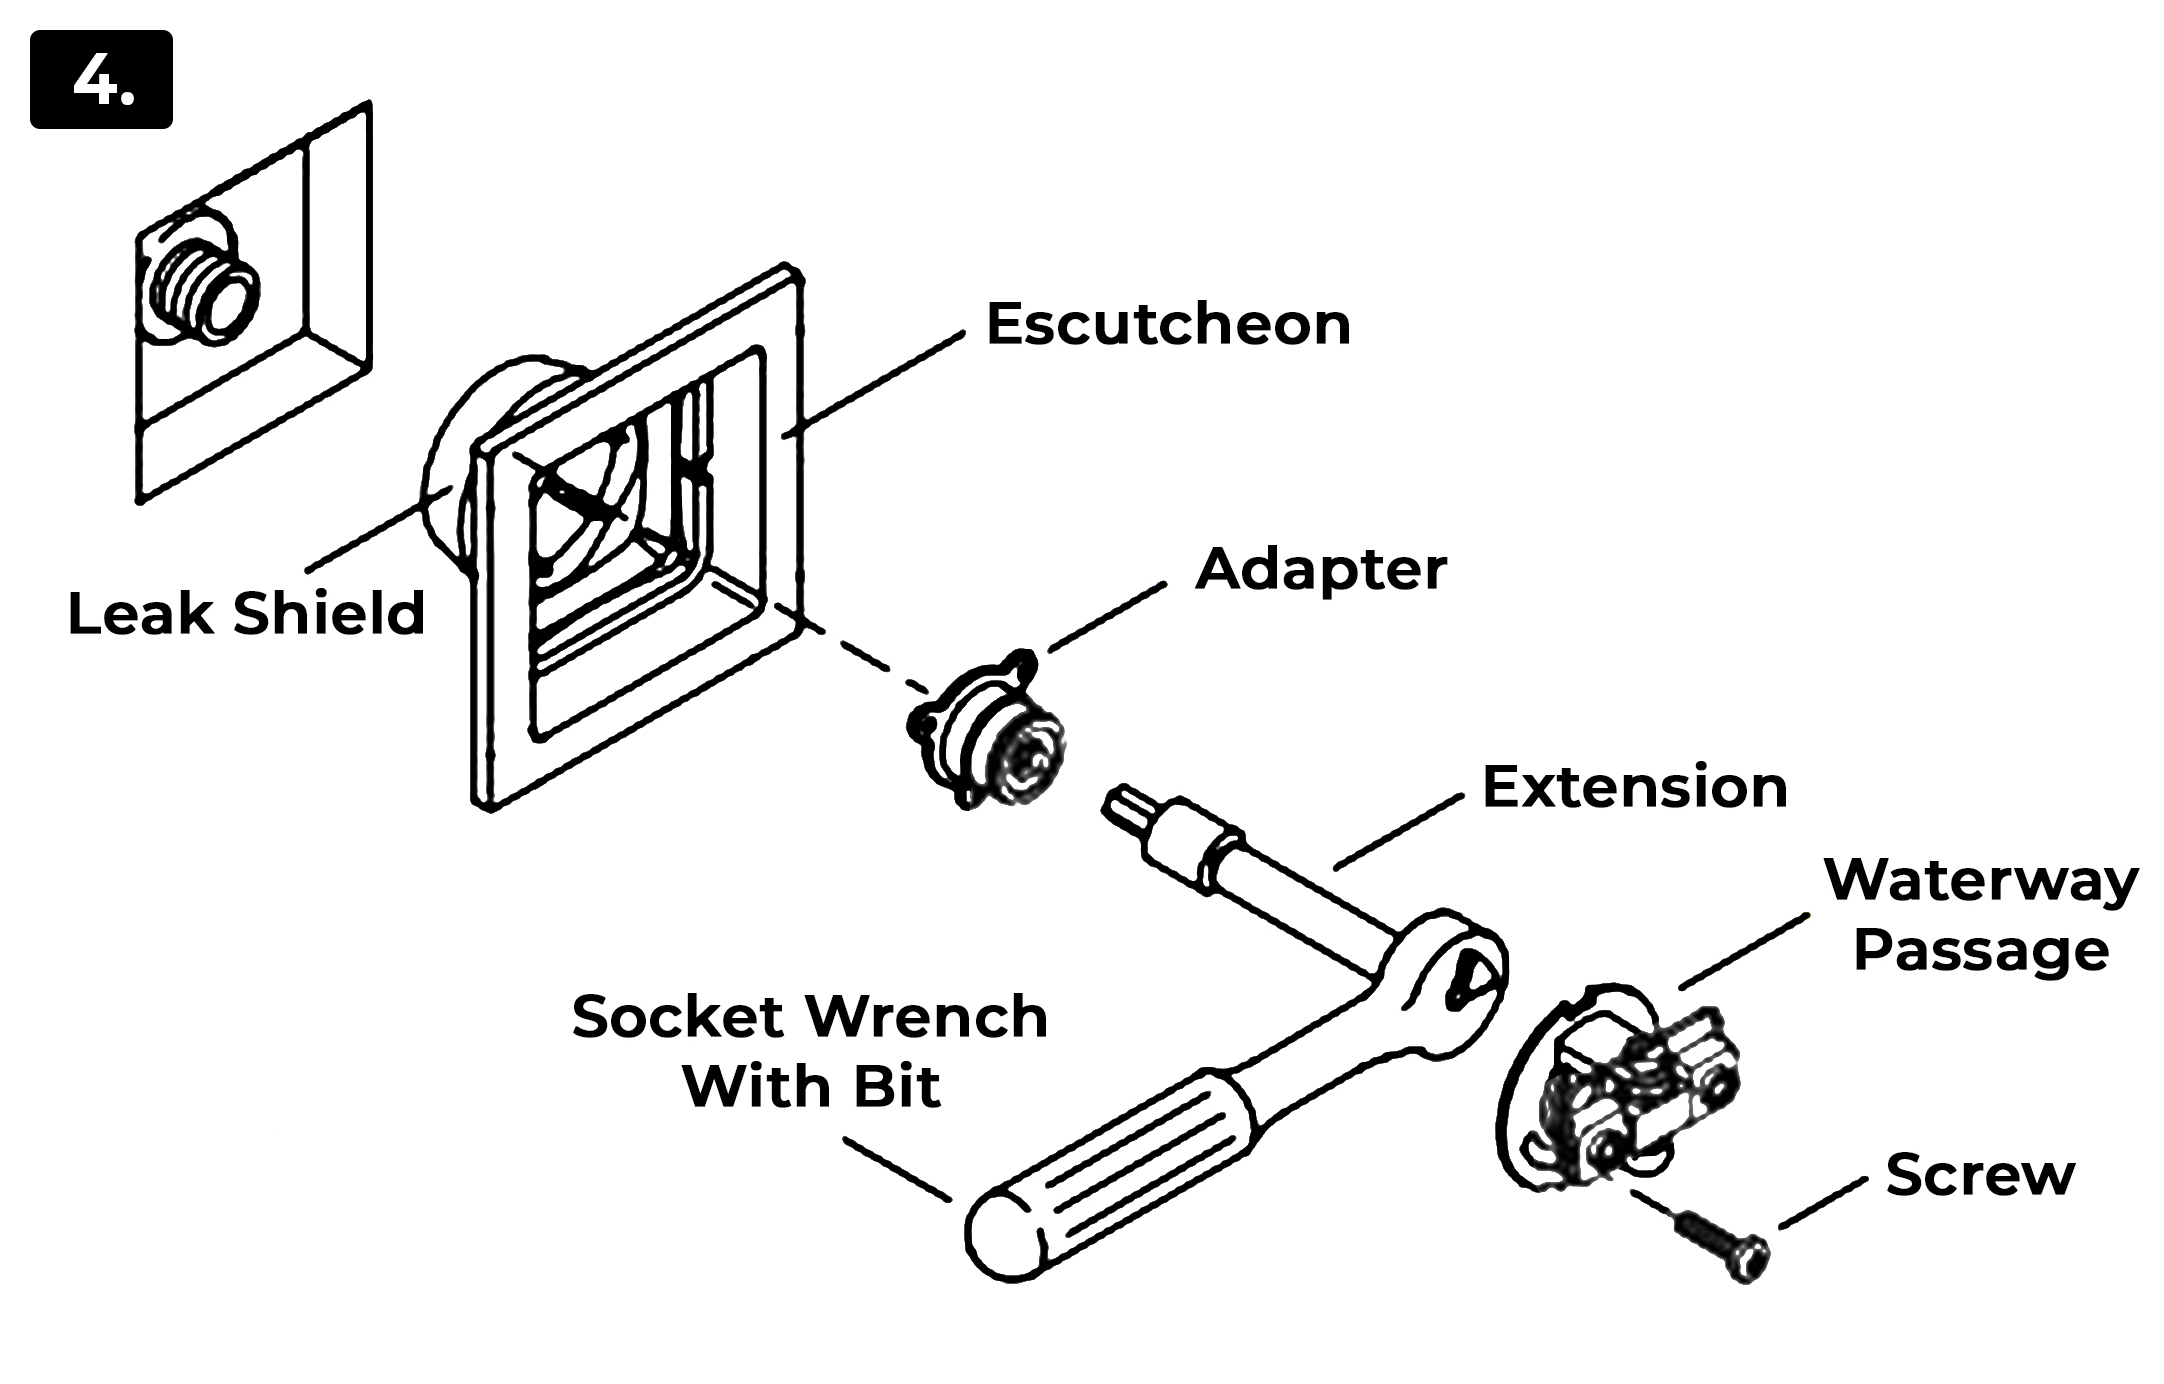 • Escutcheon
•
Leak Shield
•
Adapter
•
Extension
•
Socket Wrench With Bit
•
Screw
•
Waterway Passage
1. Insert the escutcheon into the rough opening. The double ribs of the leak shield should be facing up.
2. If the leak shield makes contact with the elbow: Enlarge the hole in the back of the leak shield to 1-1/4" (3.2 cm).
3. Thread the adapter onto the nipple using the provided 11 mm bit, 11 mm or 7/16" socket, extension and socket wrench. Use masking tape to hold the bit in place, as the bit could fall off and cause damage.
IMPORTANT! The escutcheon should sit loosely at this point. If it is tight against the wall, use a longer pipe nipple.
4. Align the groove in the waterway with the double ribs on the leak shield.
5. Press the waterway into place over the adapter. Secure the waterway to the adapter with the screw provided.
6. Verify that the escutcheon does not turn or shift.
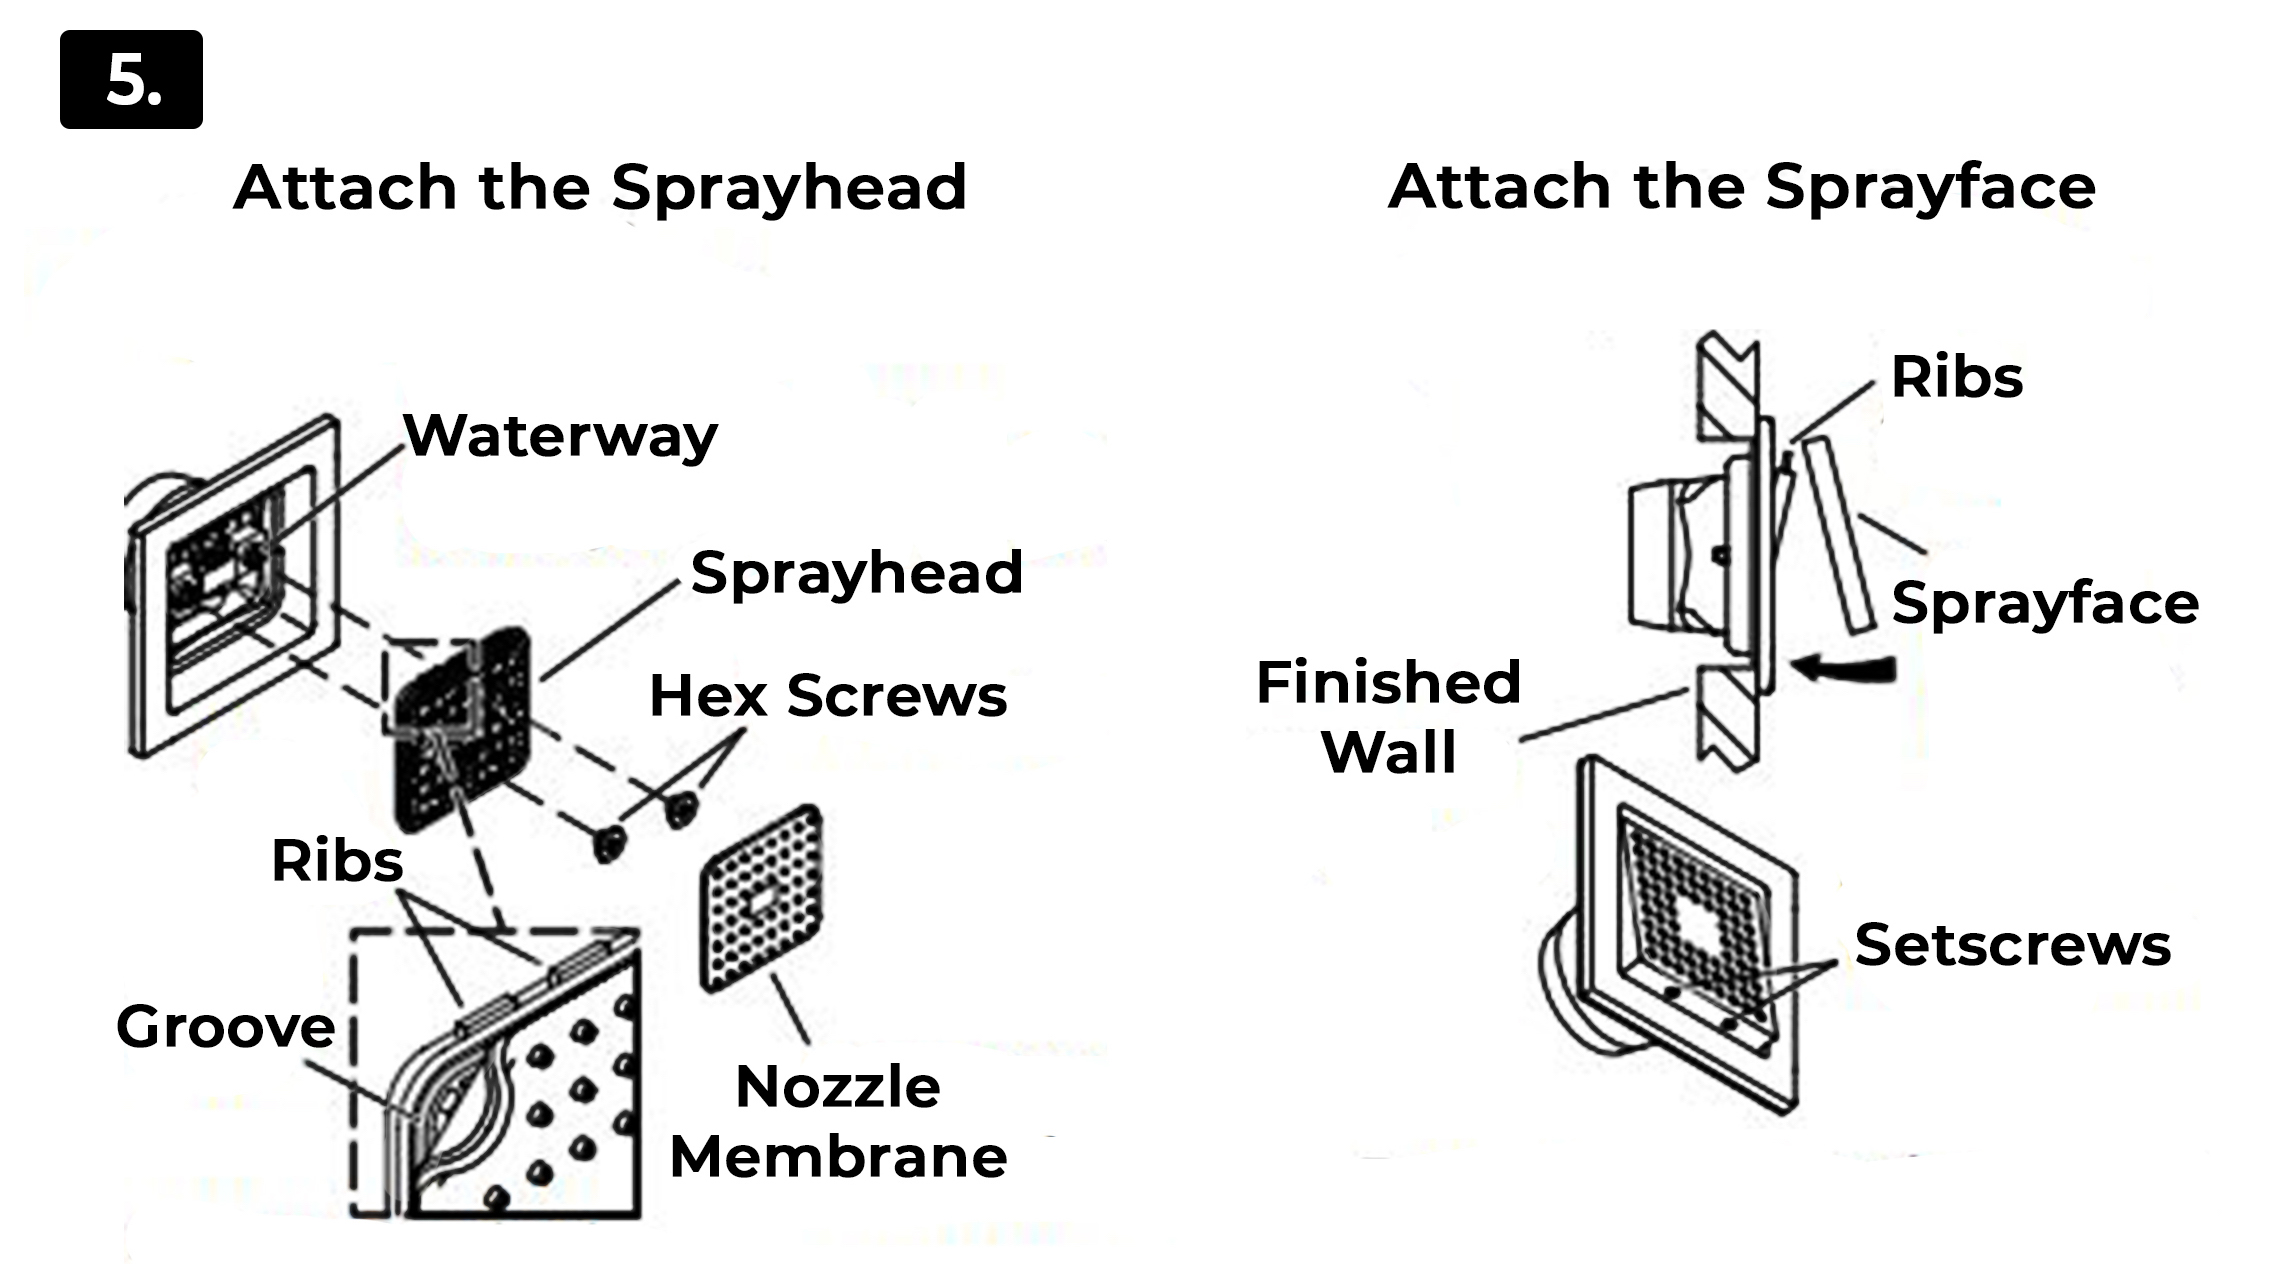
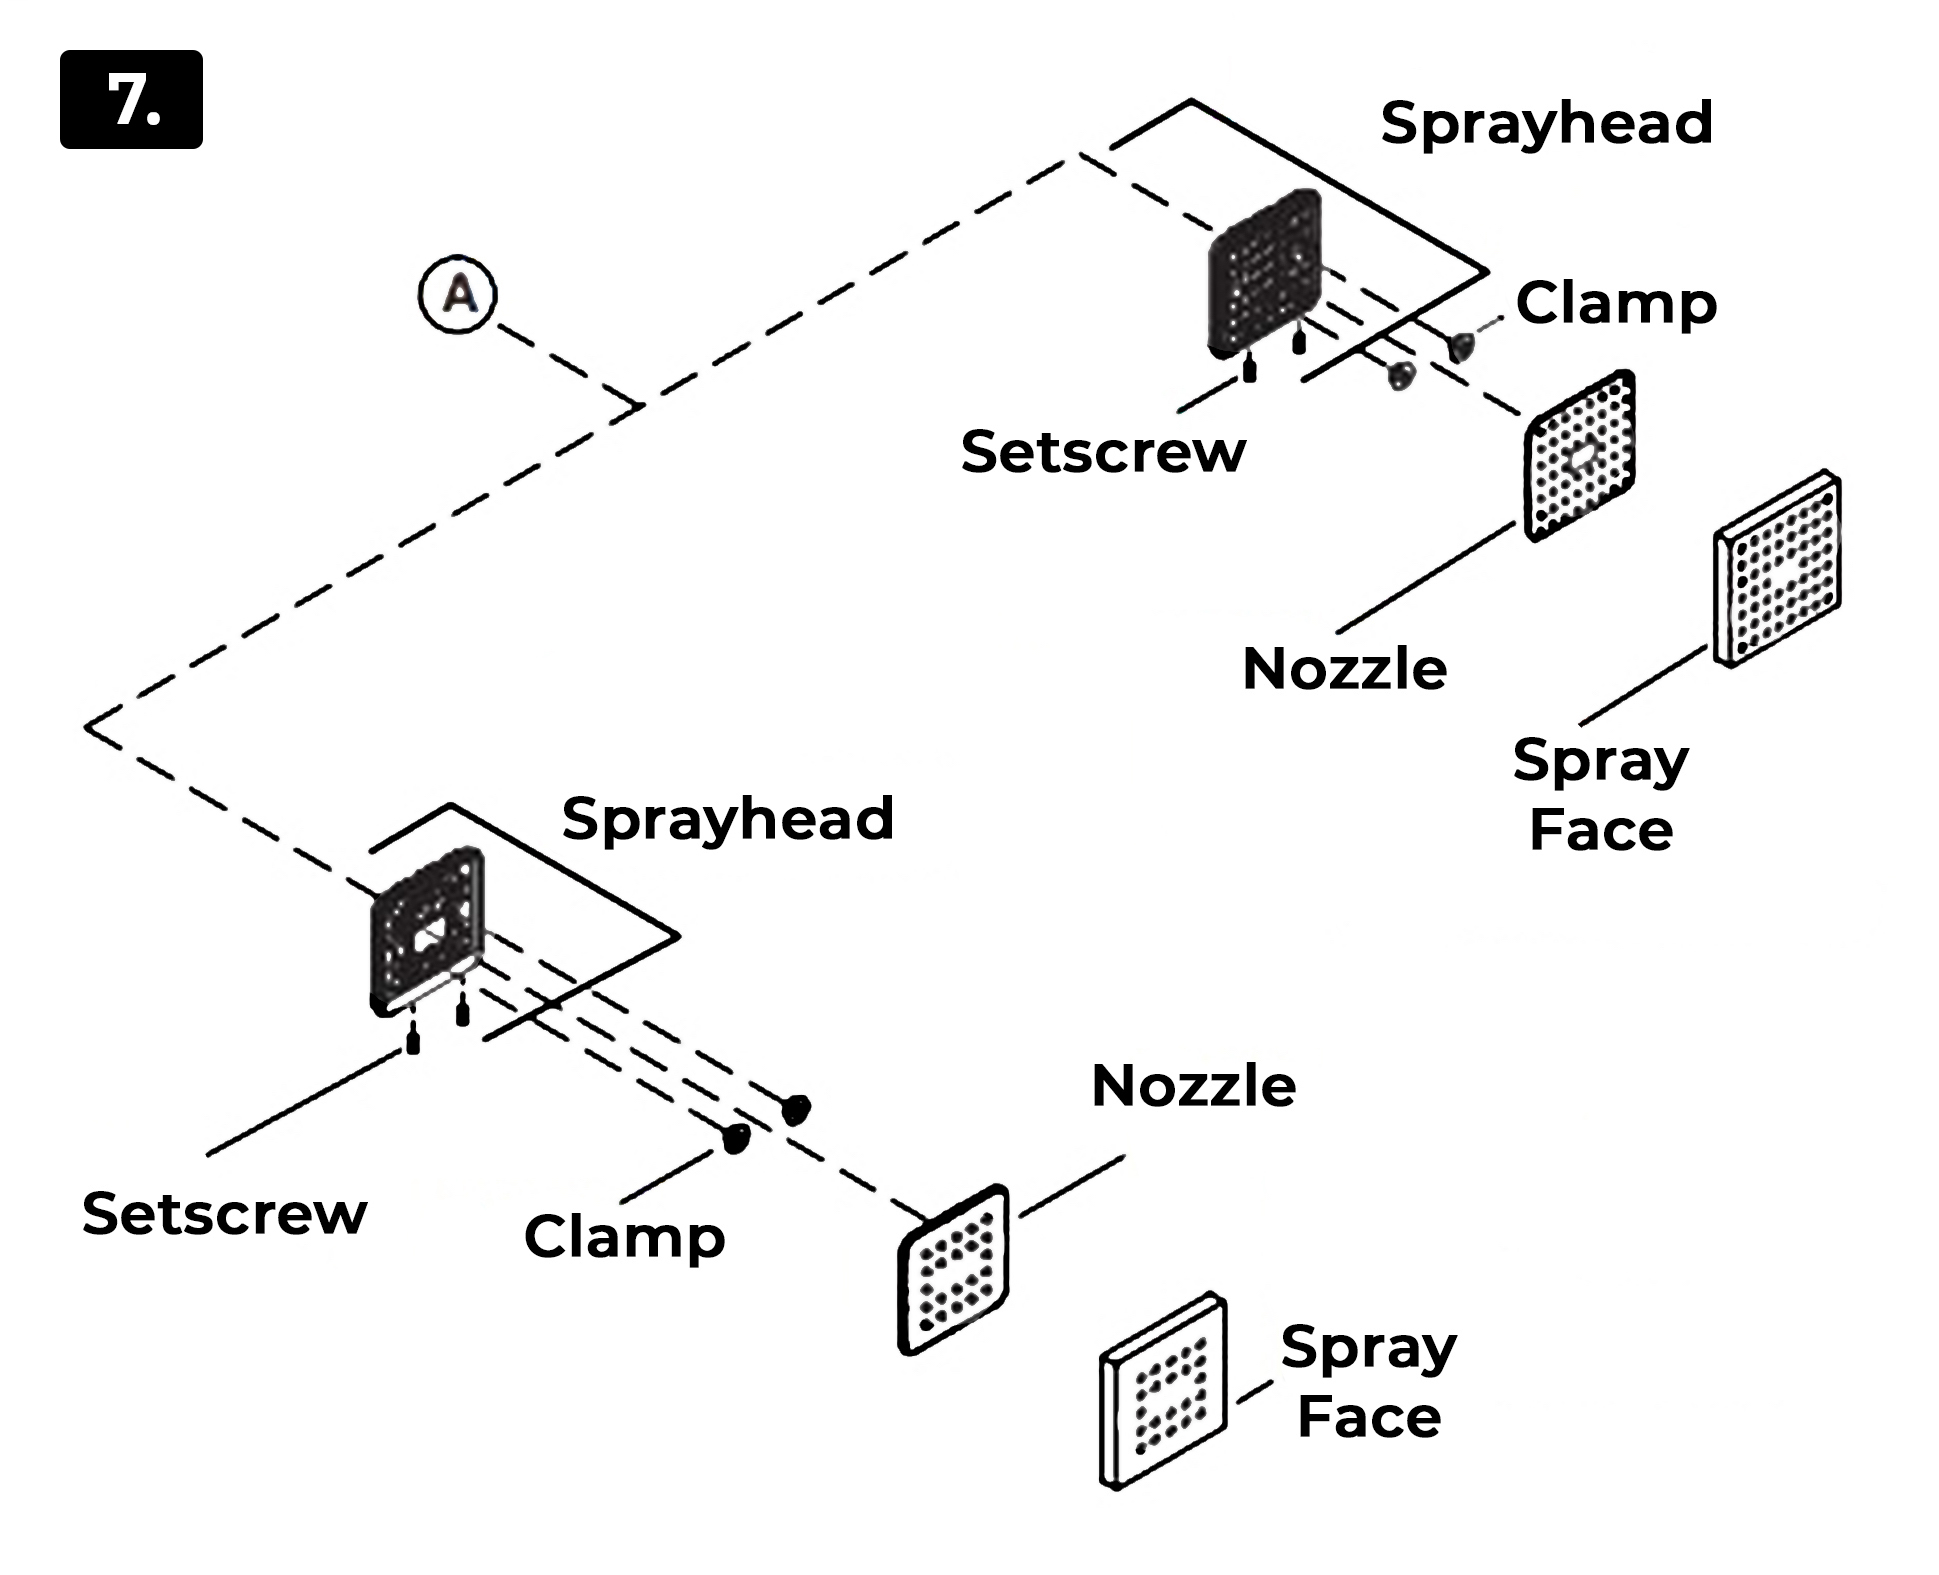
With the ribs of the sprayhead facing up, install the sprayhead to the waterway.
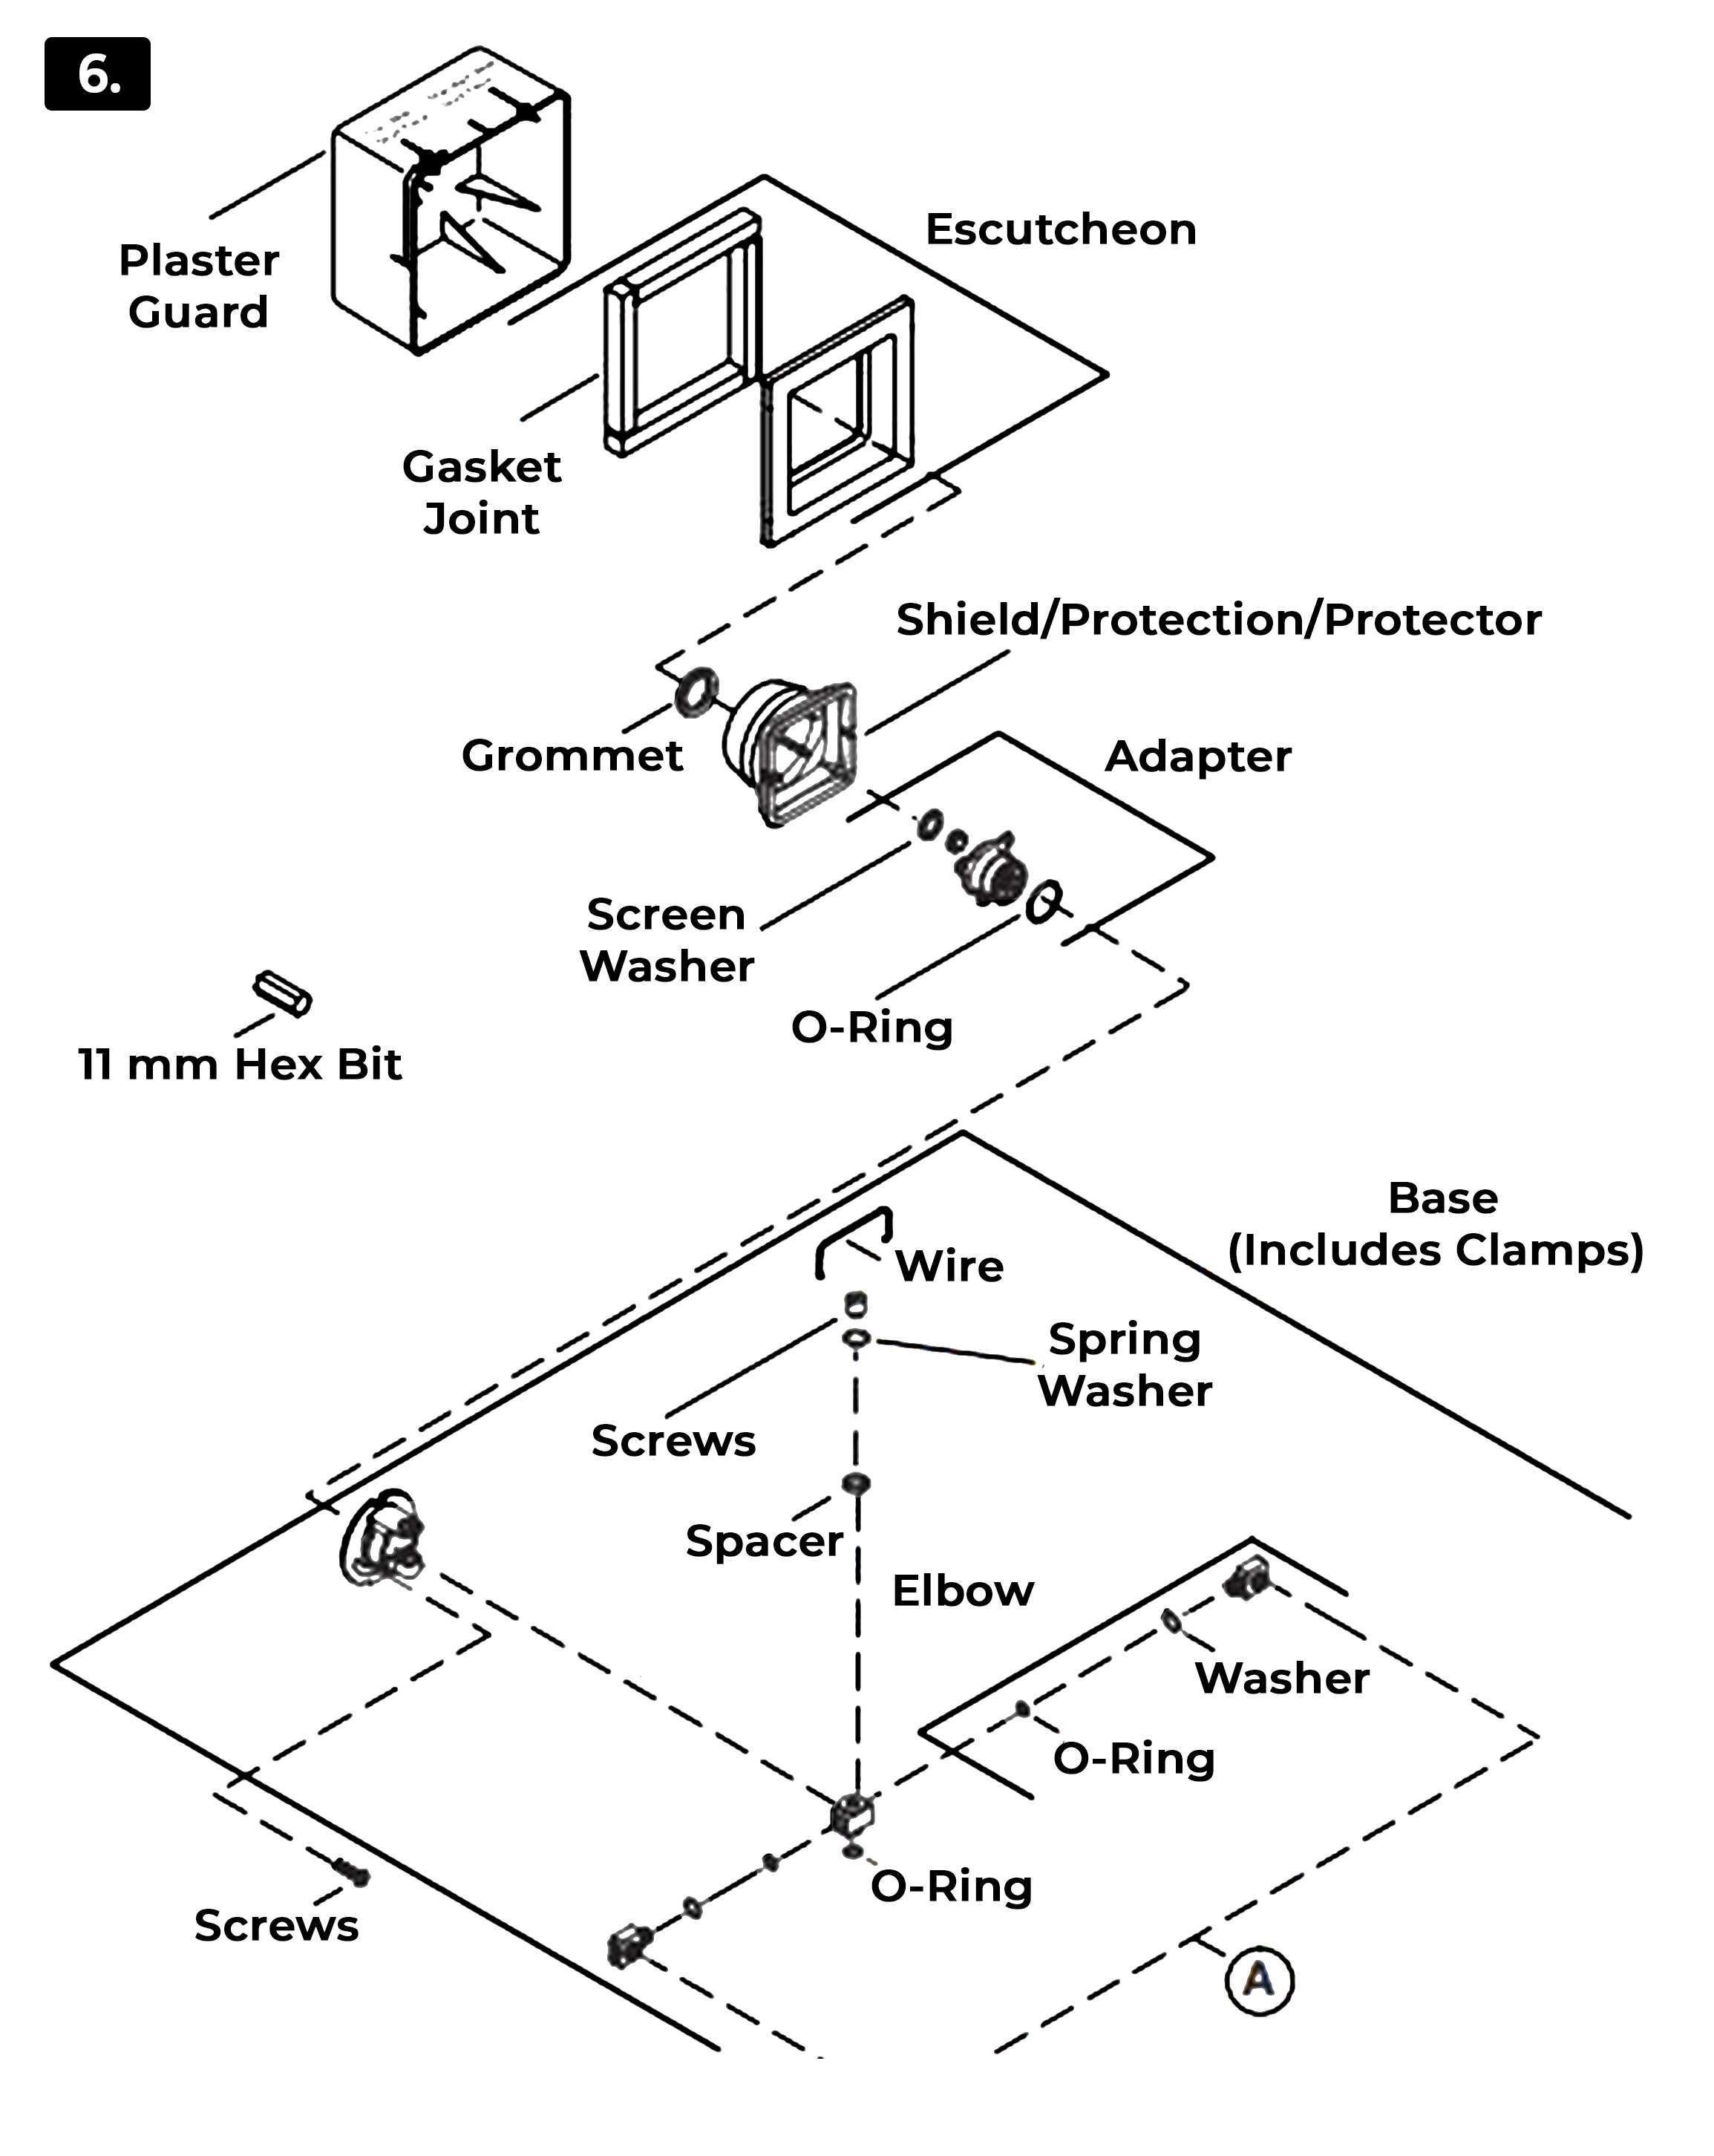
With the ribs of the sprayhead facing up, install the sprayhead to the waterway.