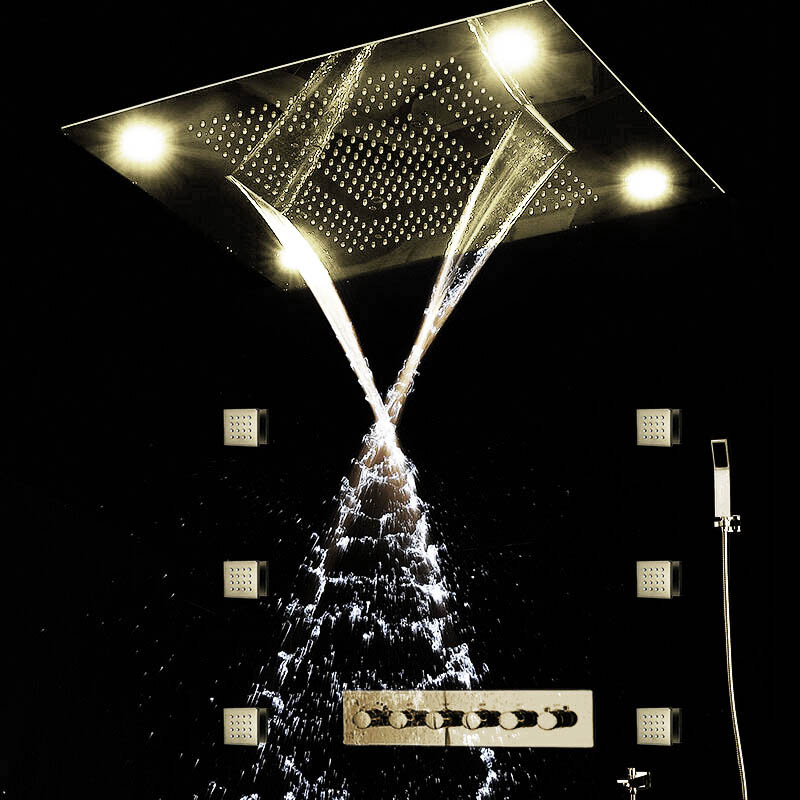
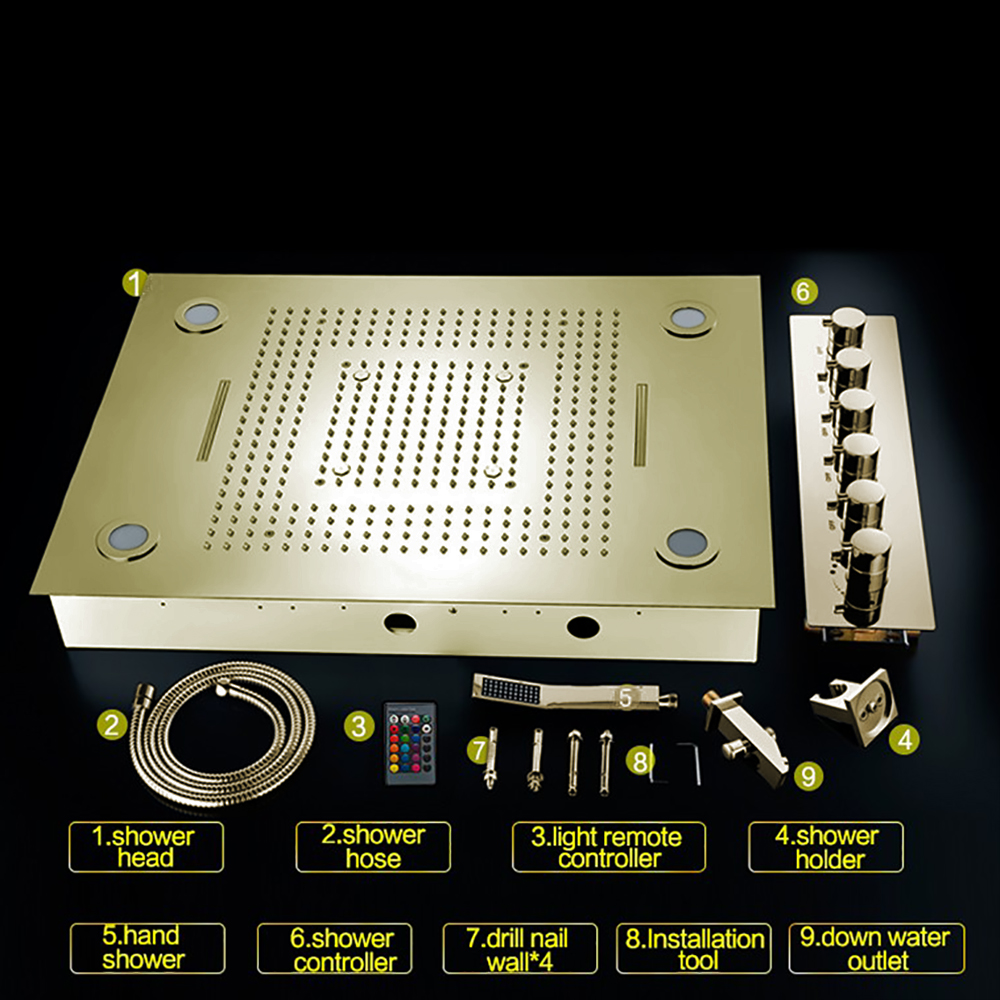
How to Install BathSelect Brushed Gold Romantic Environment LED Shower Head With Stress-Free Body Jet & Hand Held Shower | BS9640BG
Important Note:
Before you begin, please read the installation instructions below. Observe all local building and safety codes.
Unpack and inspect the products for any shipping damages. If you find damages, do not install.
Please note all products must be installed by a professional and certified plumber otherwise warranty might be voided.
|
|
Shower Head Installation Instructions
|
Step 1:
|
|
Step 2:
|
|
|
shower
|
|

|
|
LED Shower Head Installation Instructions
|
|
|
|
|
Step 3:
|
|
Step 4:
|
|
|
|

|
|
|
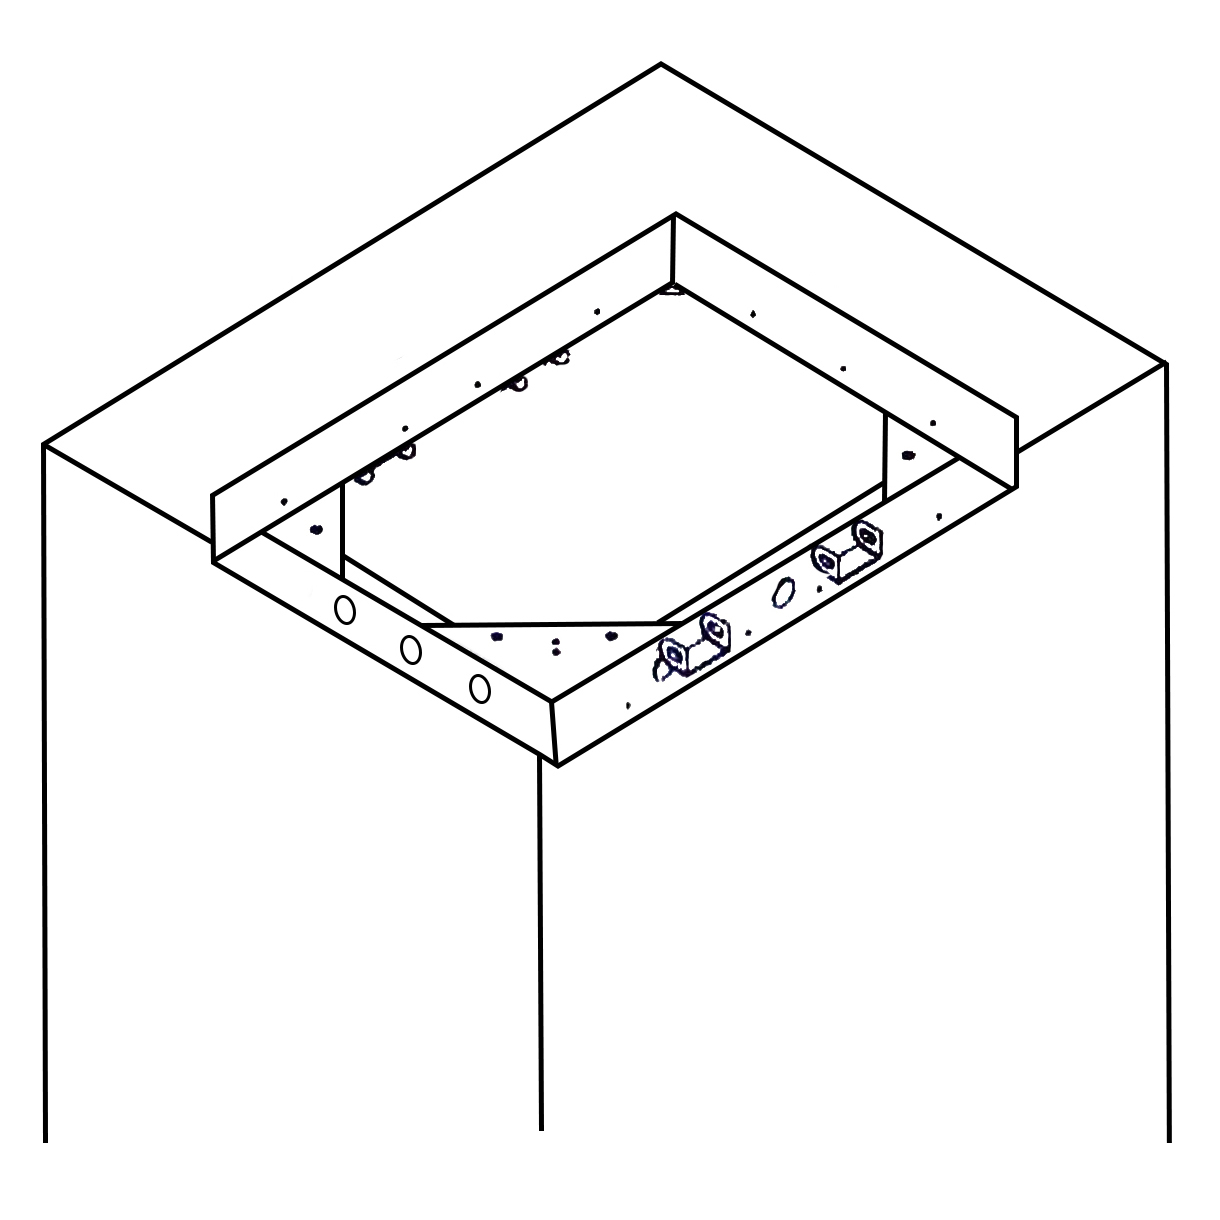
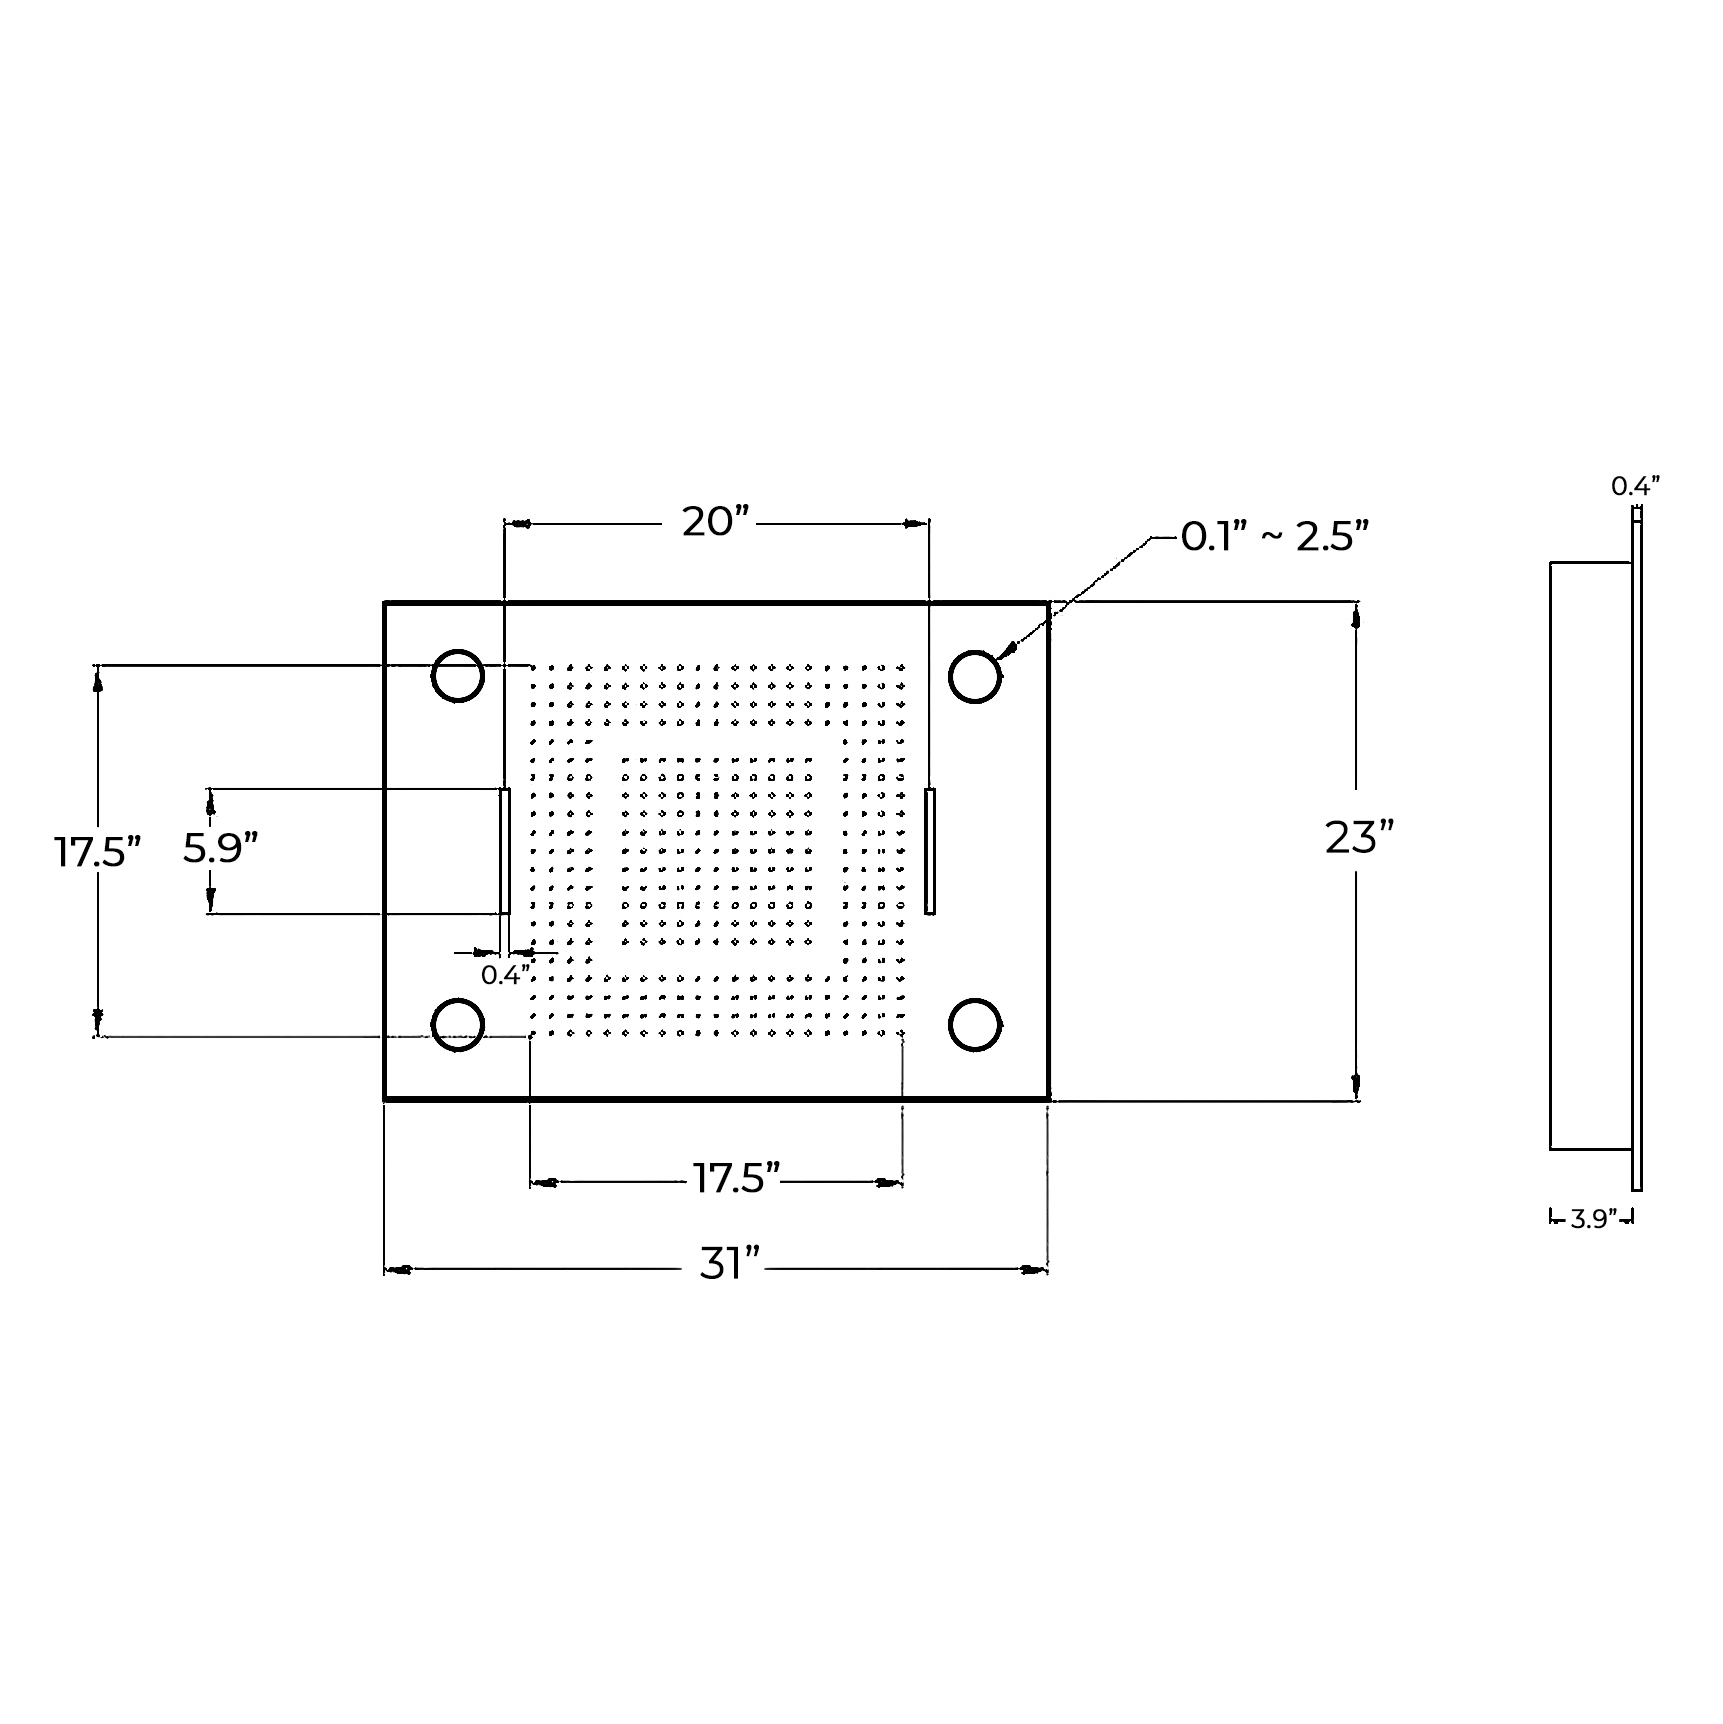
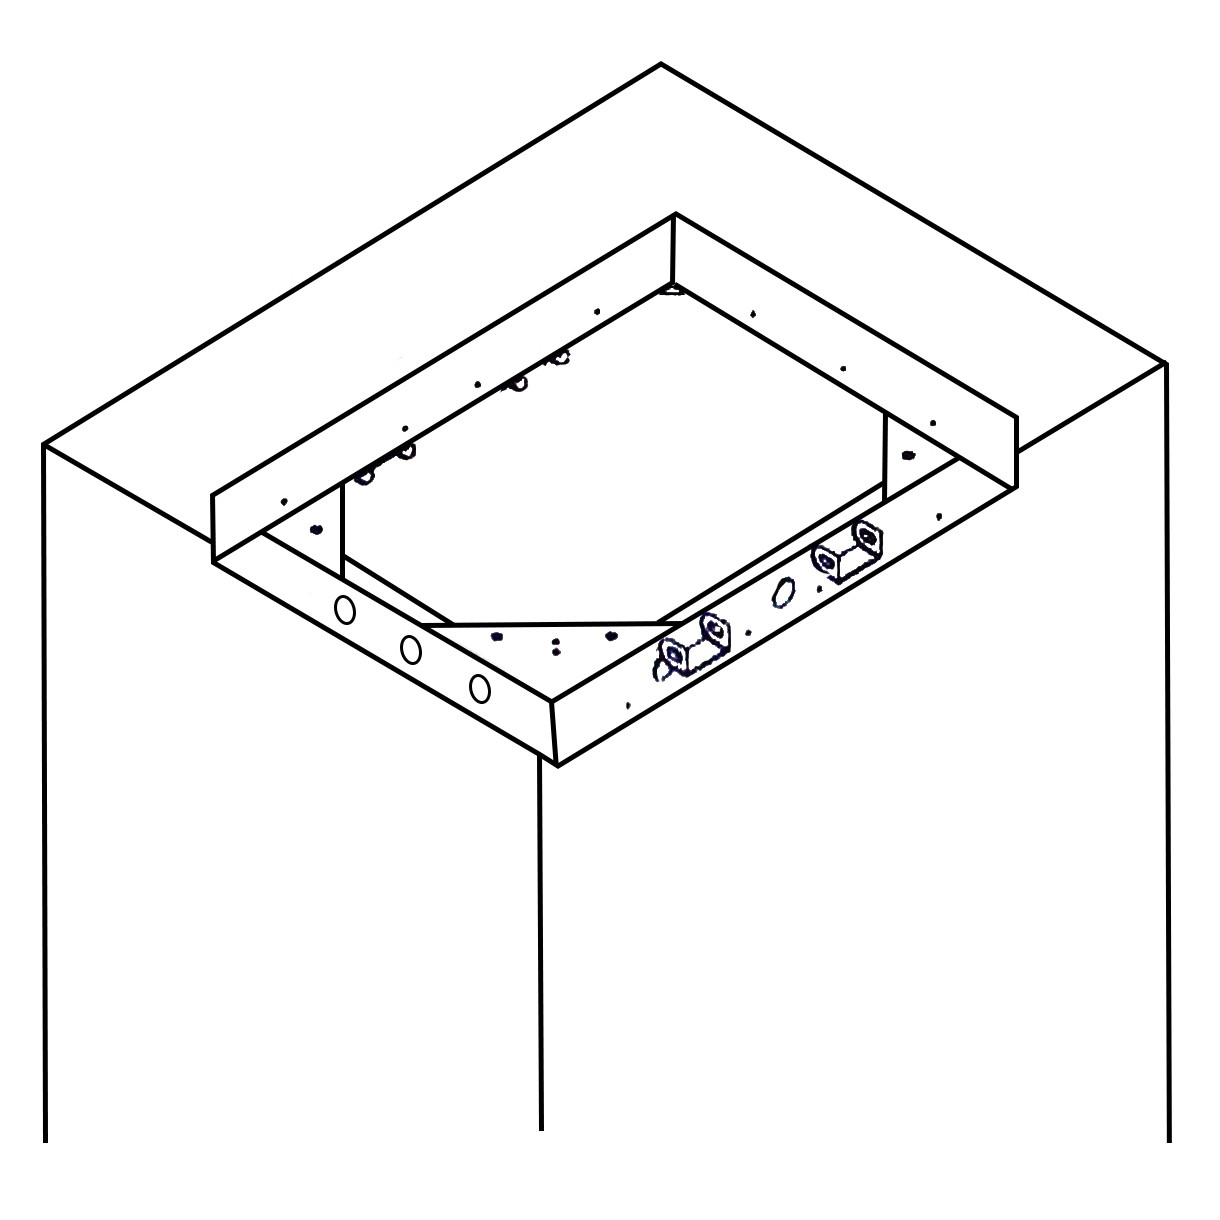
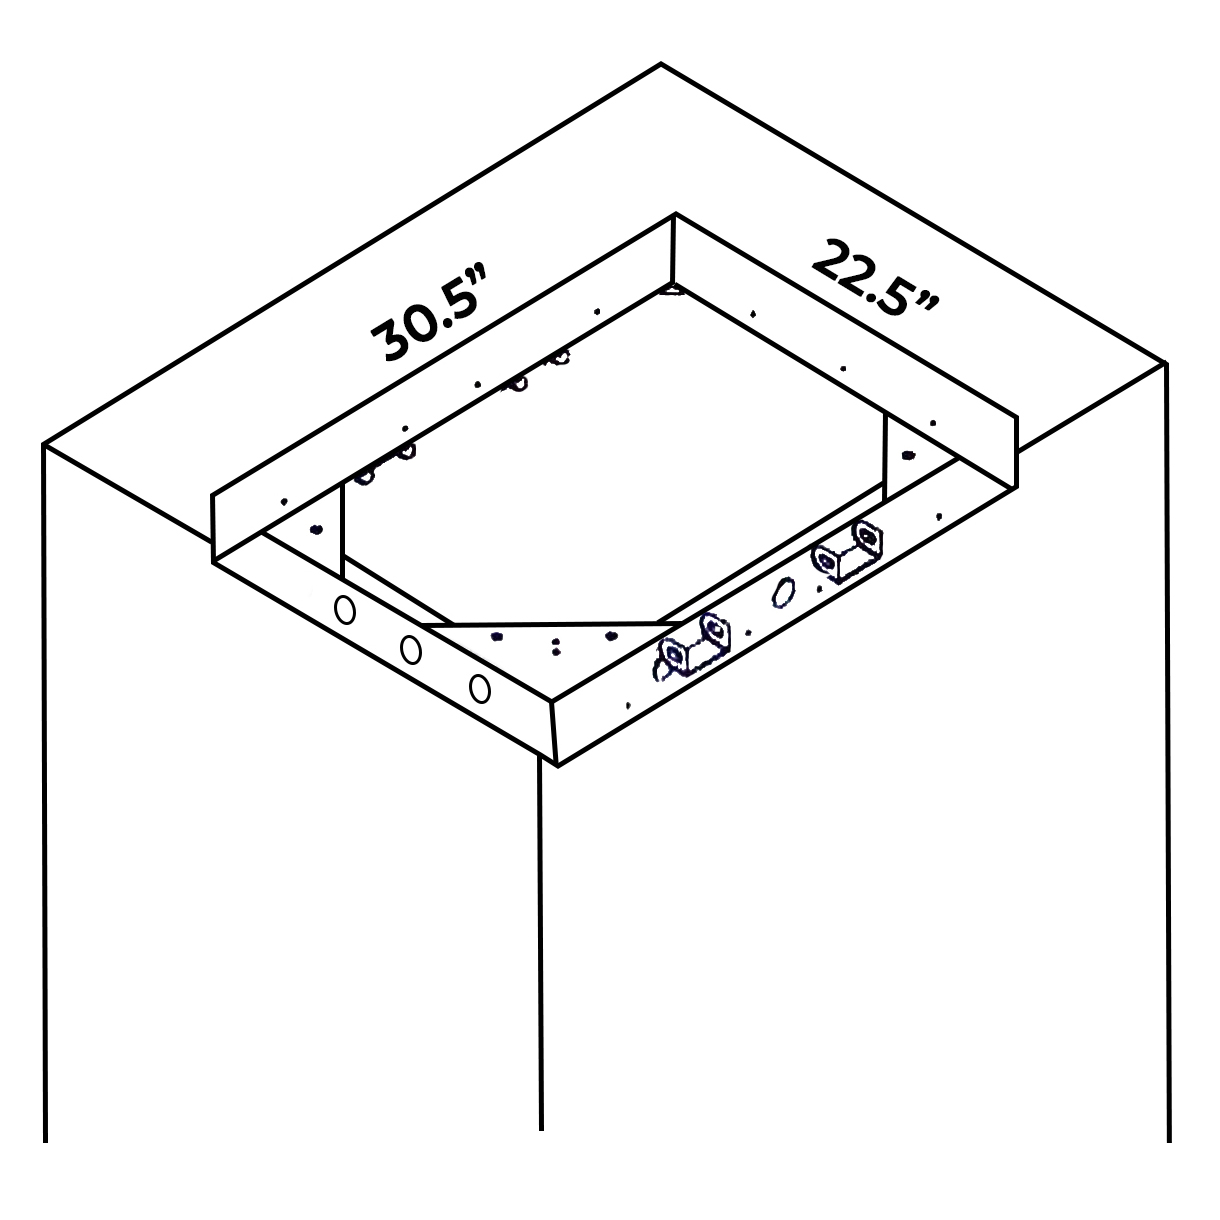
According to the dimensions and shape of the mounting bracket, determine the bracket location to be installed in the ceiling.
|
|
According to the 8 mounting holes on the mounting bracket, use an Electric drill to make the mounting holes.
|
|
|
Shower Head Installation Instructions
|
|
|
|
|
Step 5:
|
|
Step 6:
|
|
|
|
|
|
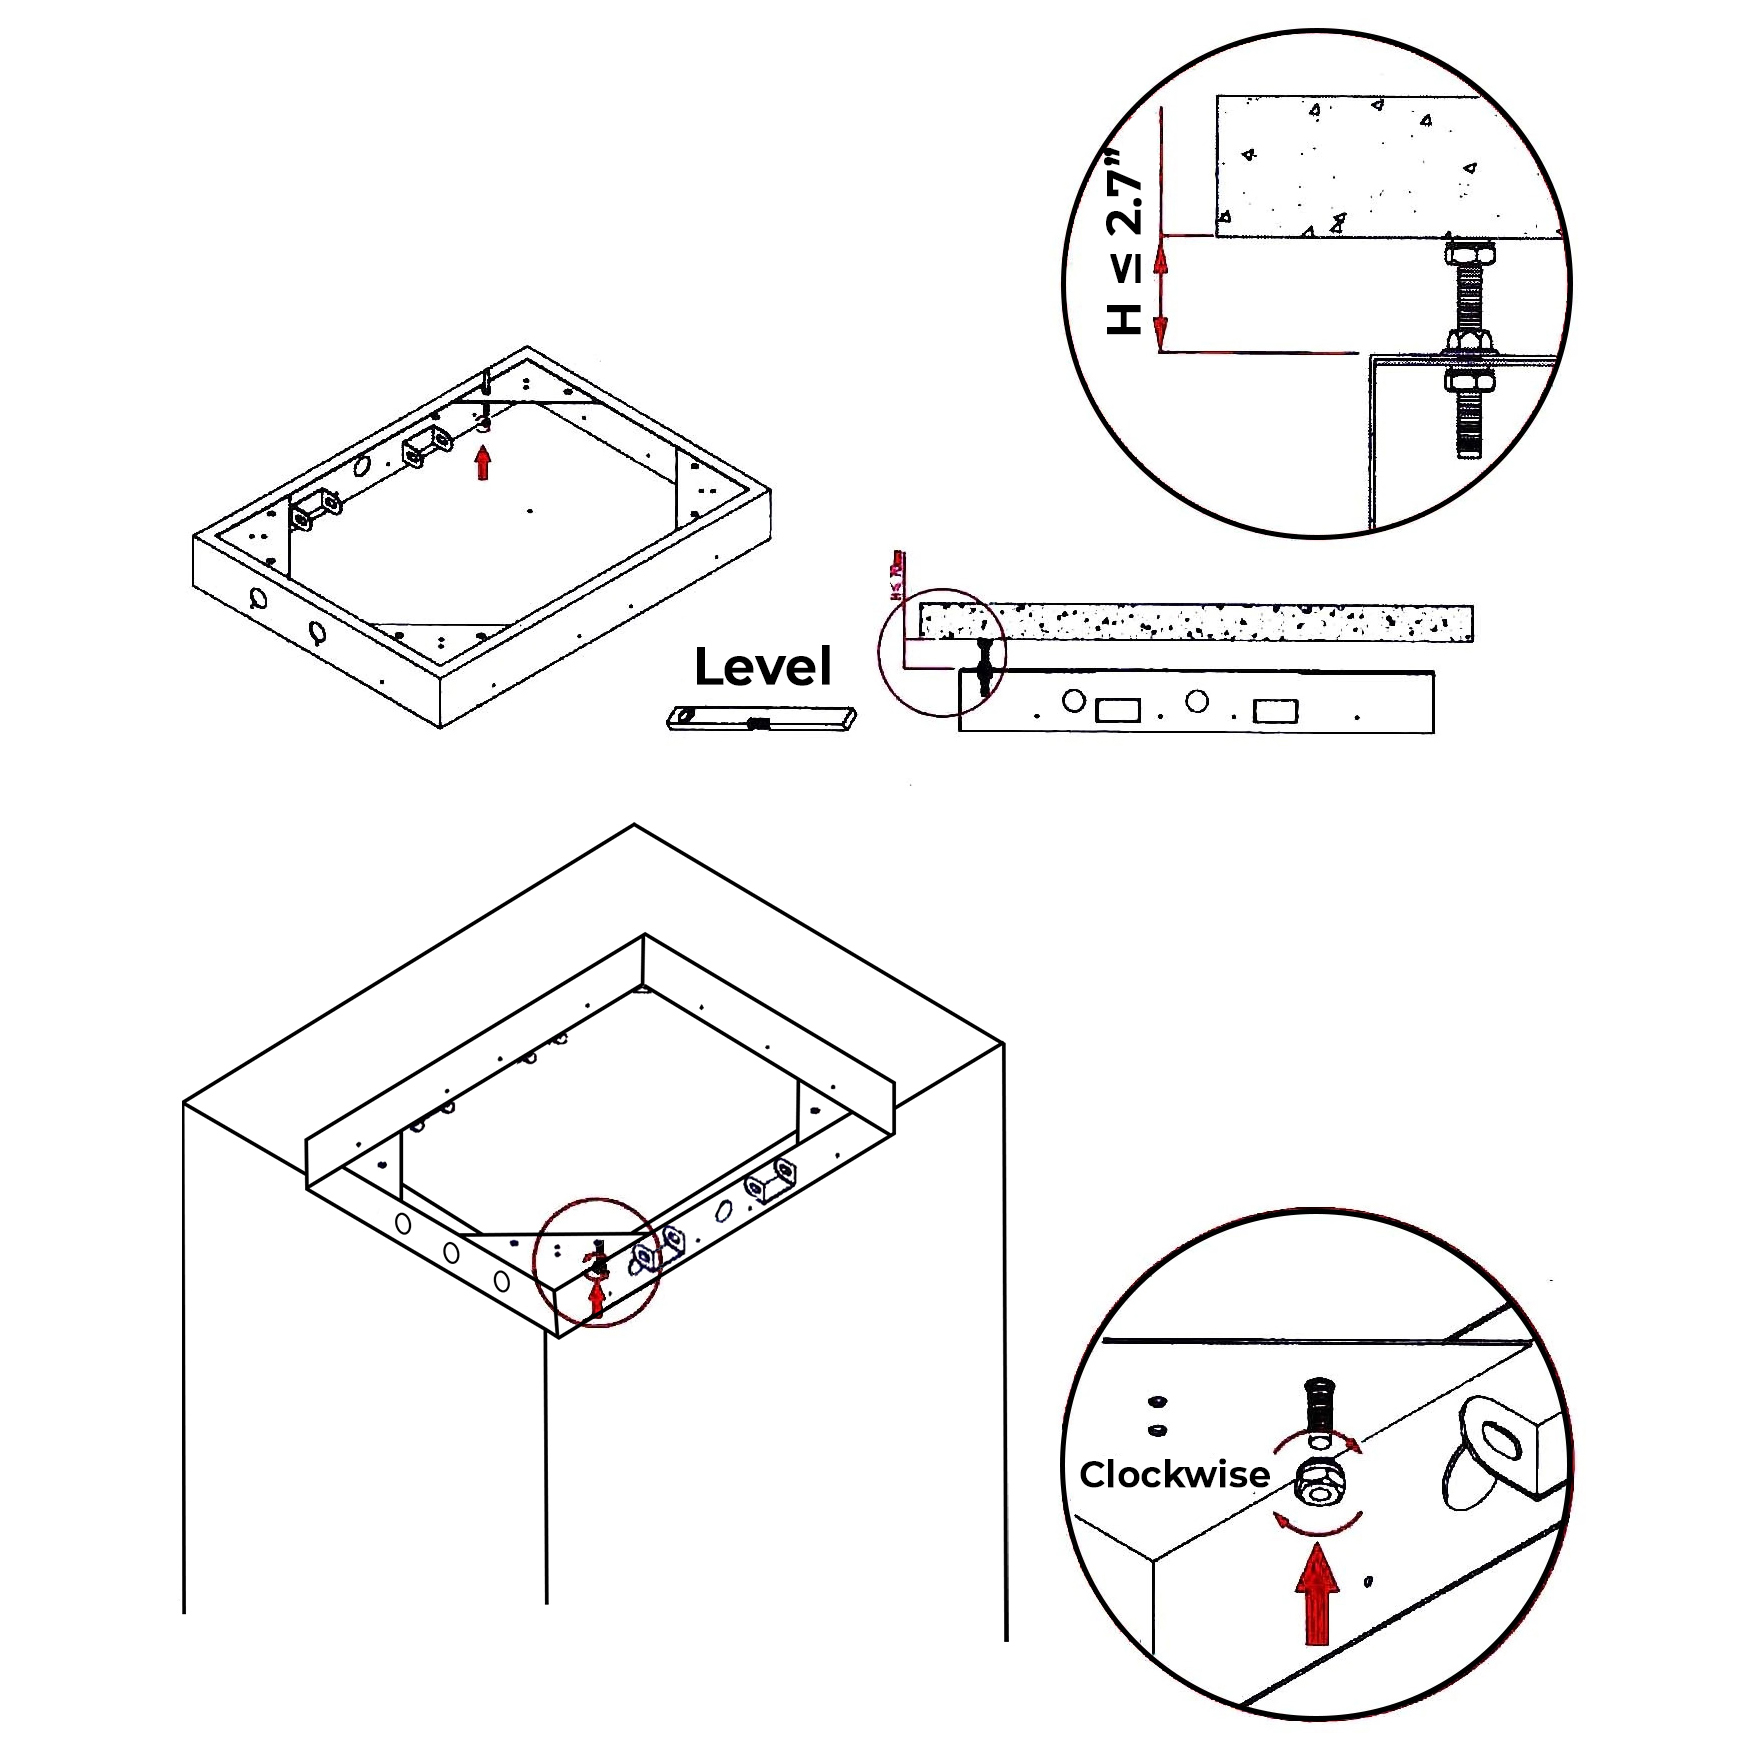
Using the two hexagonal nuts adjust the distance between the mounting bracket and the ceiling, and keep the mounting bracket on the level.
Use an explosion screw to fix the mounting bracket on the ceiling, pay attention to the explosion screw, it can adjust the height and use level tool to adjust the mounting bracket to reach level.
|
|
Connecting Circuits
|
|
|
Shower Head Installation Instructions
|
|
|
|
|
Step 7:
|
|
Step 8:
|
|
|
|

|
|
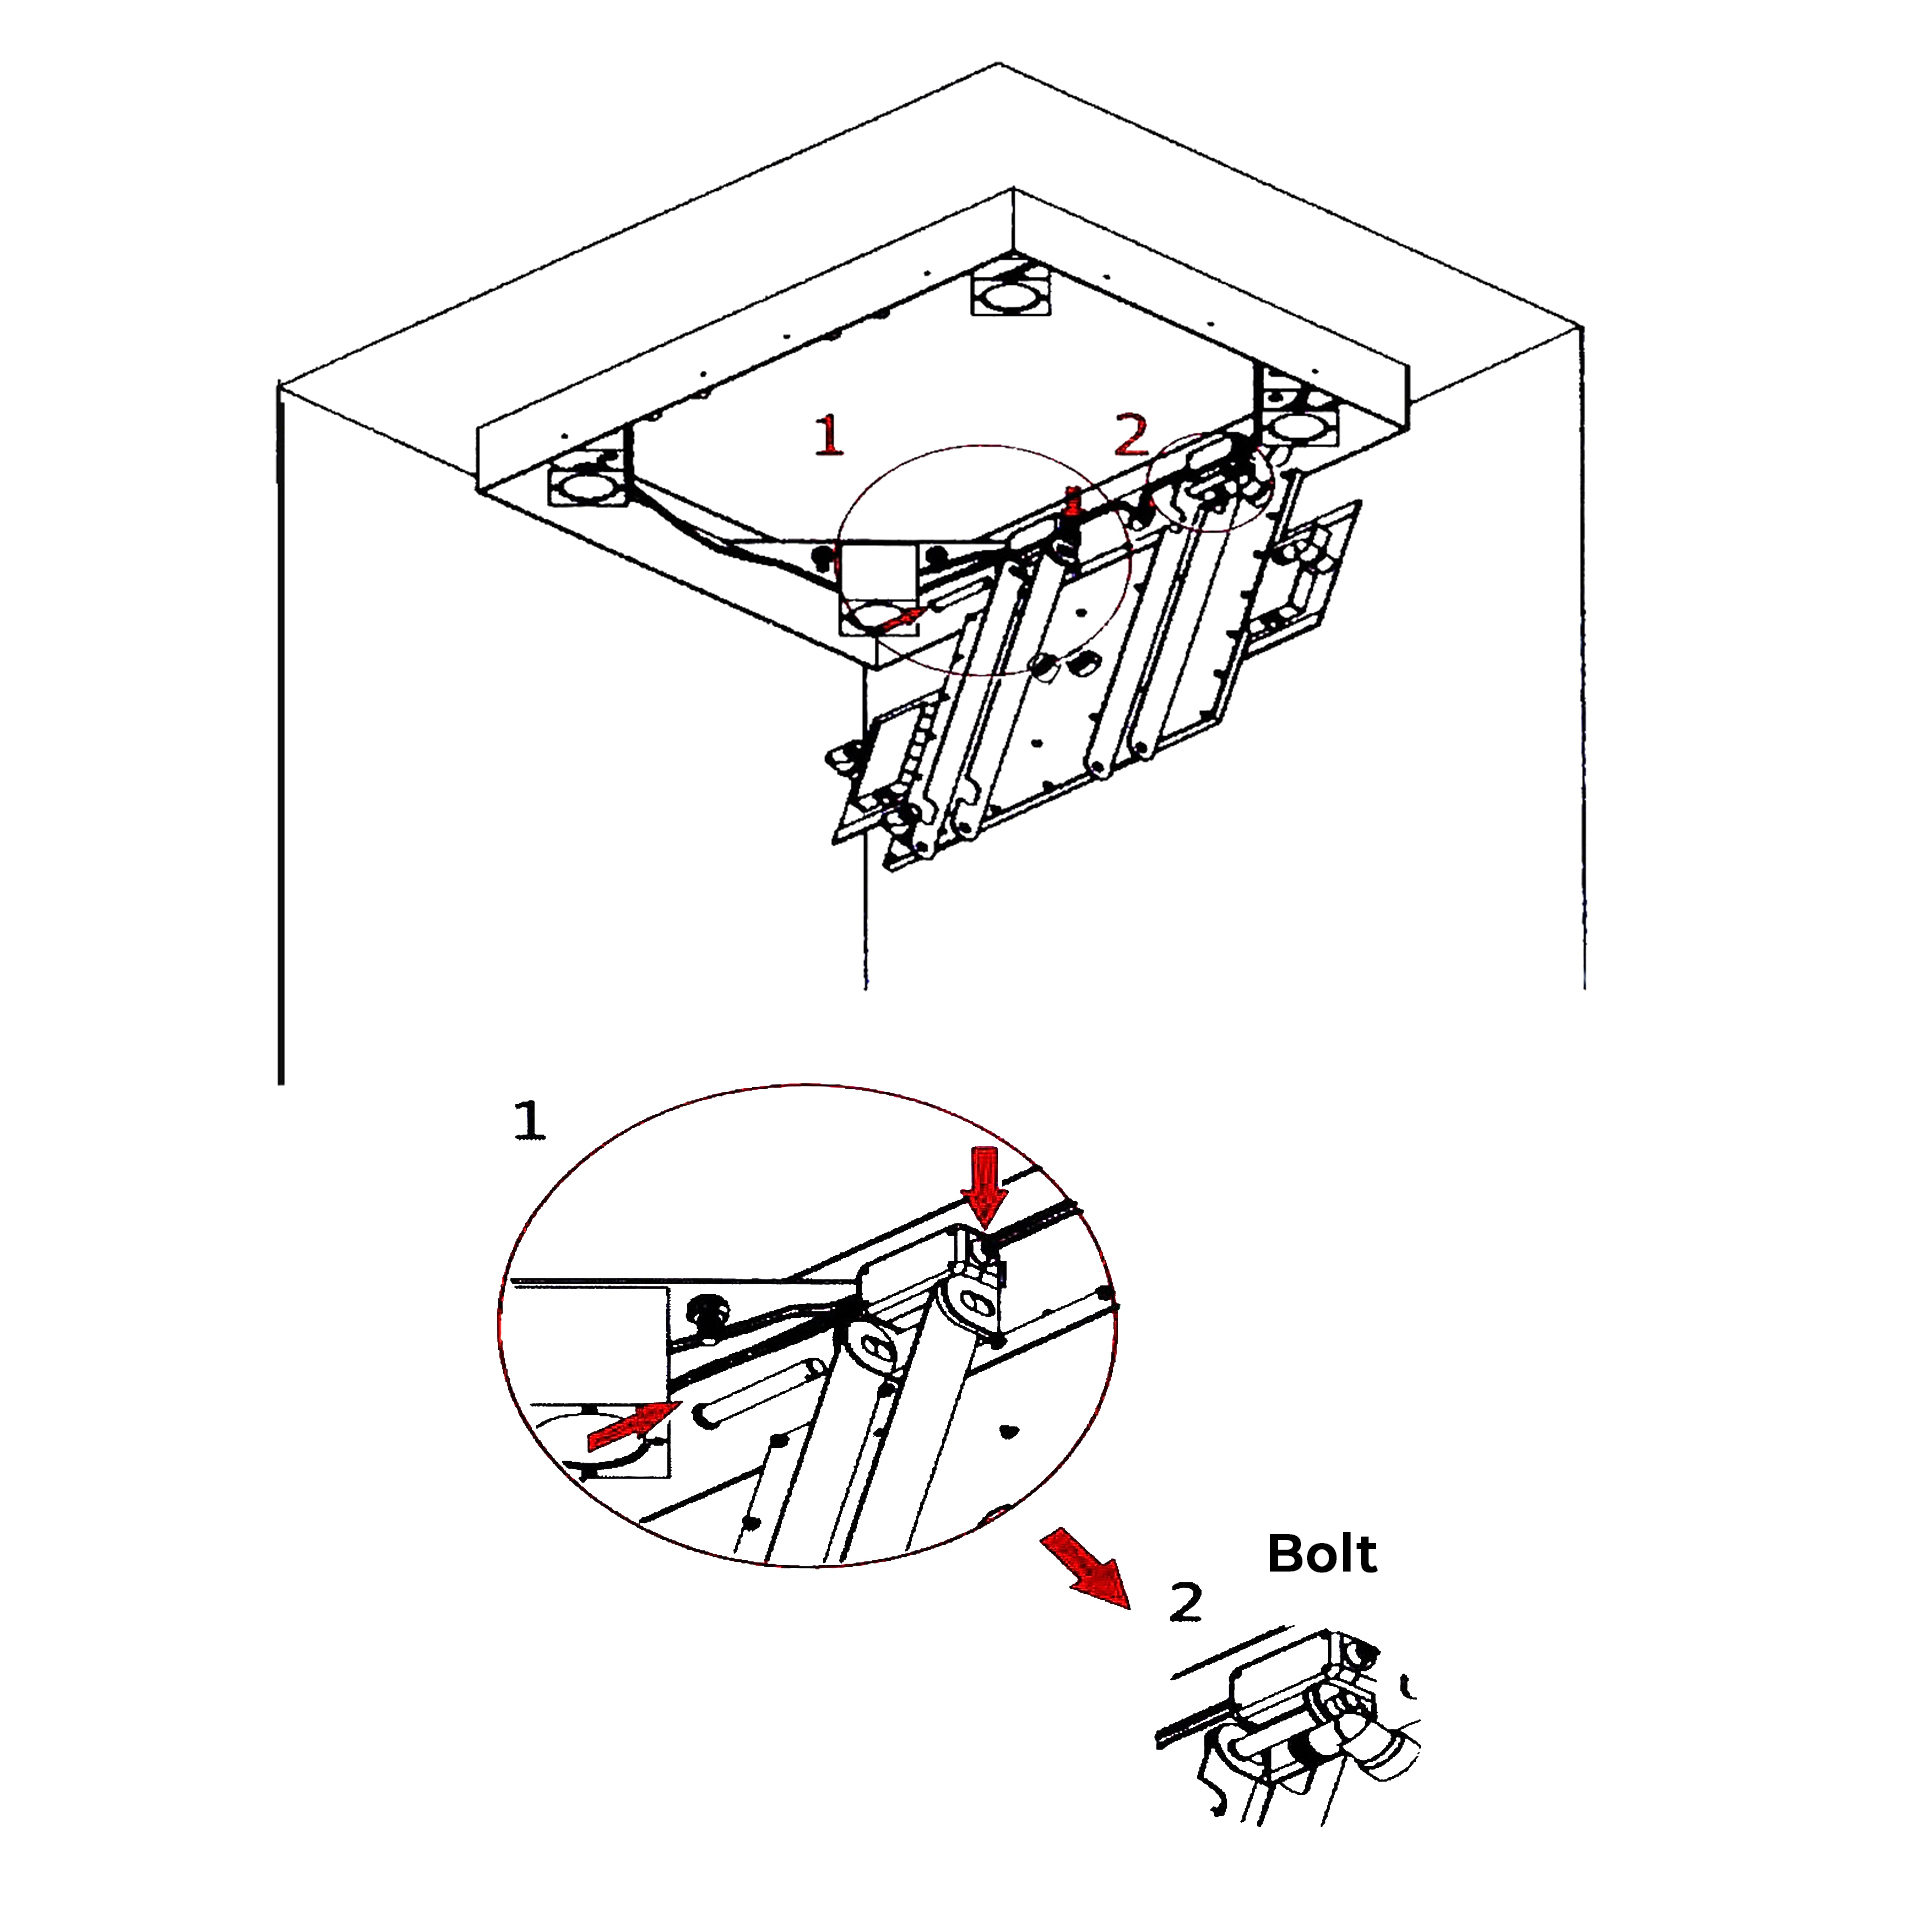
According to the chart shows: Raise the showerhead, Aim at the hole of the bolt, plug the bolt.
|
|
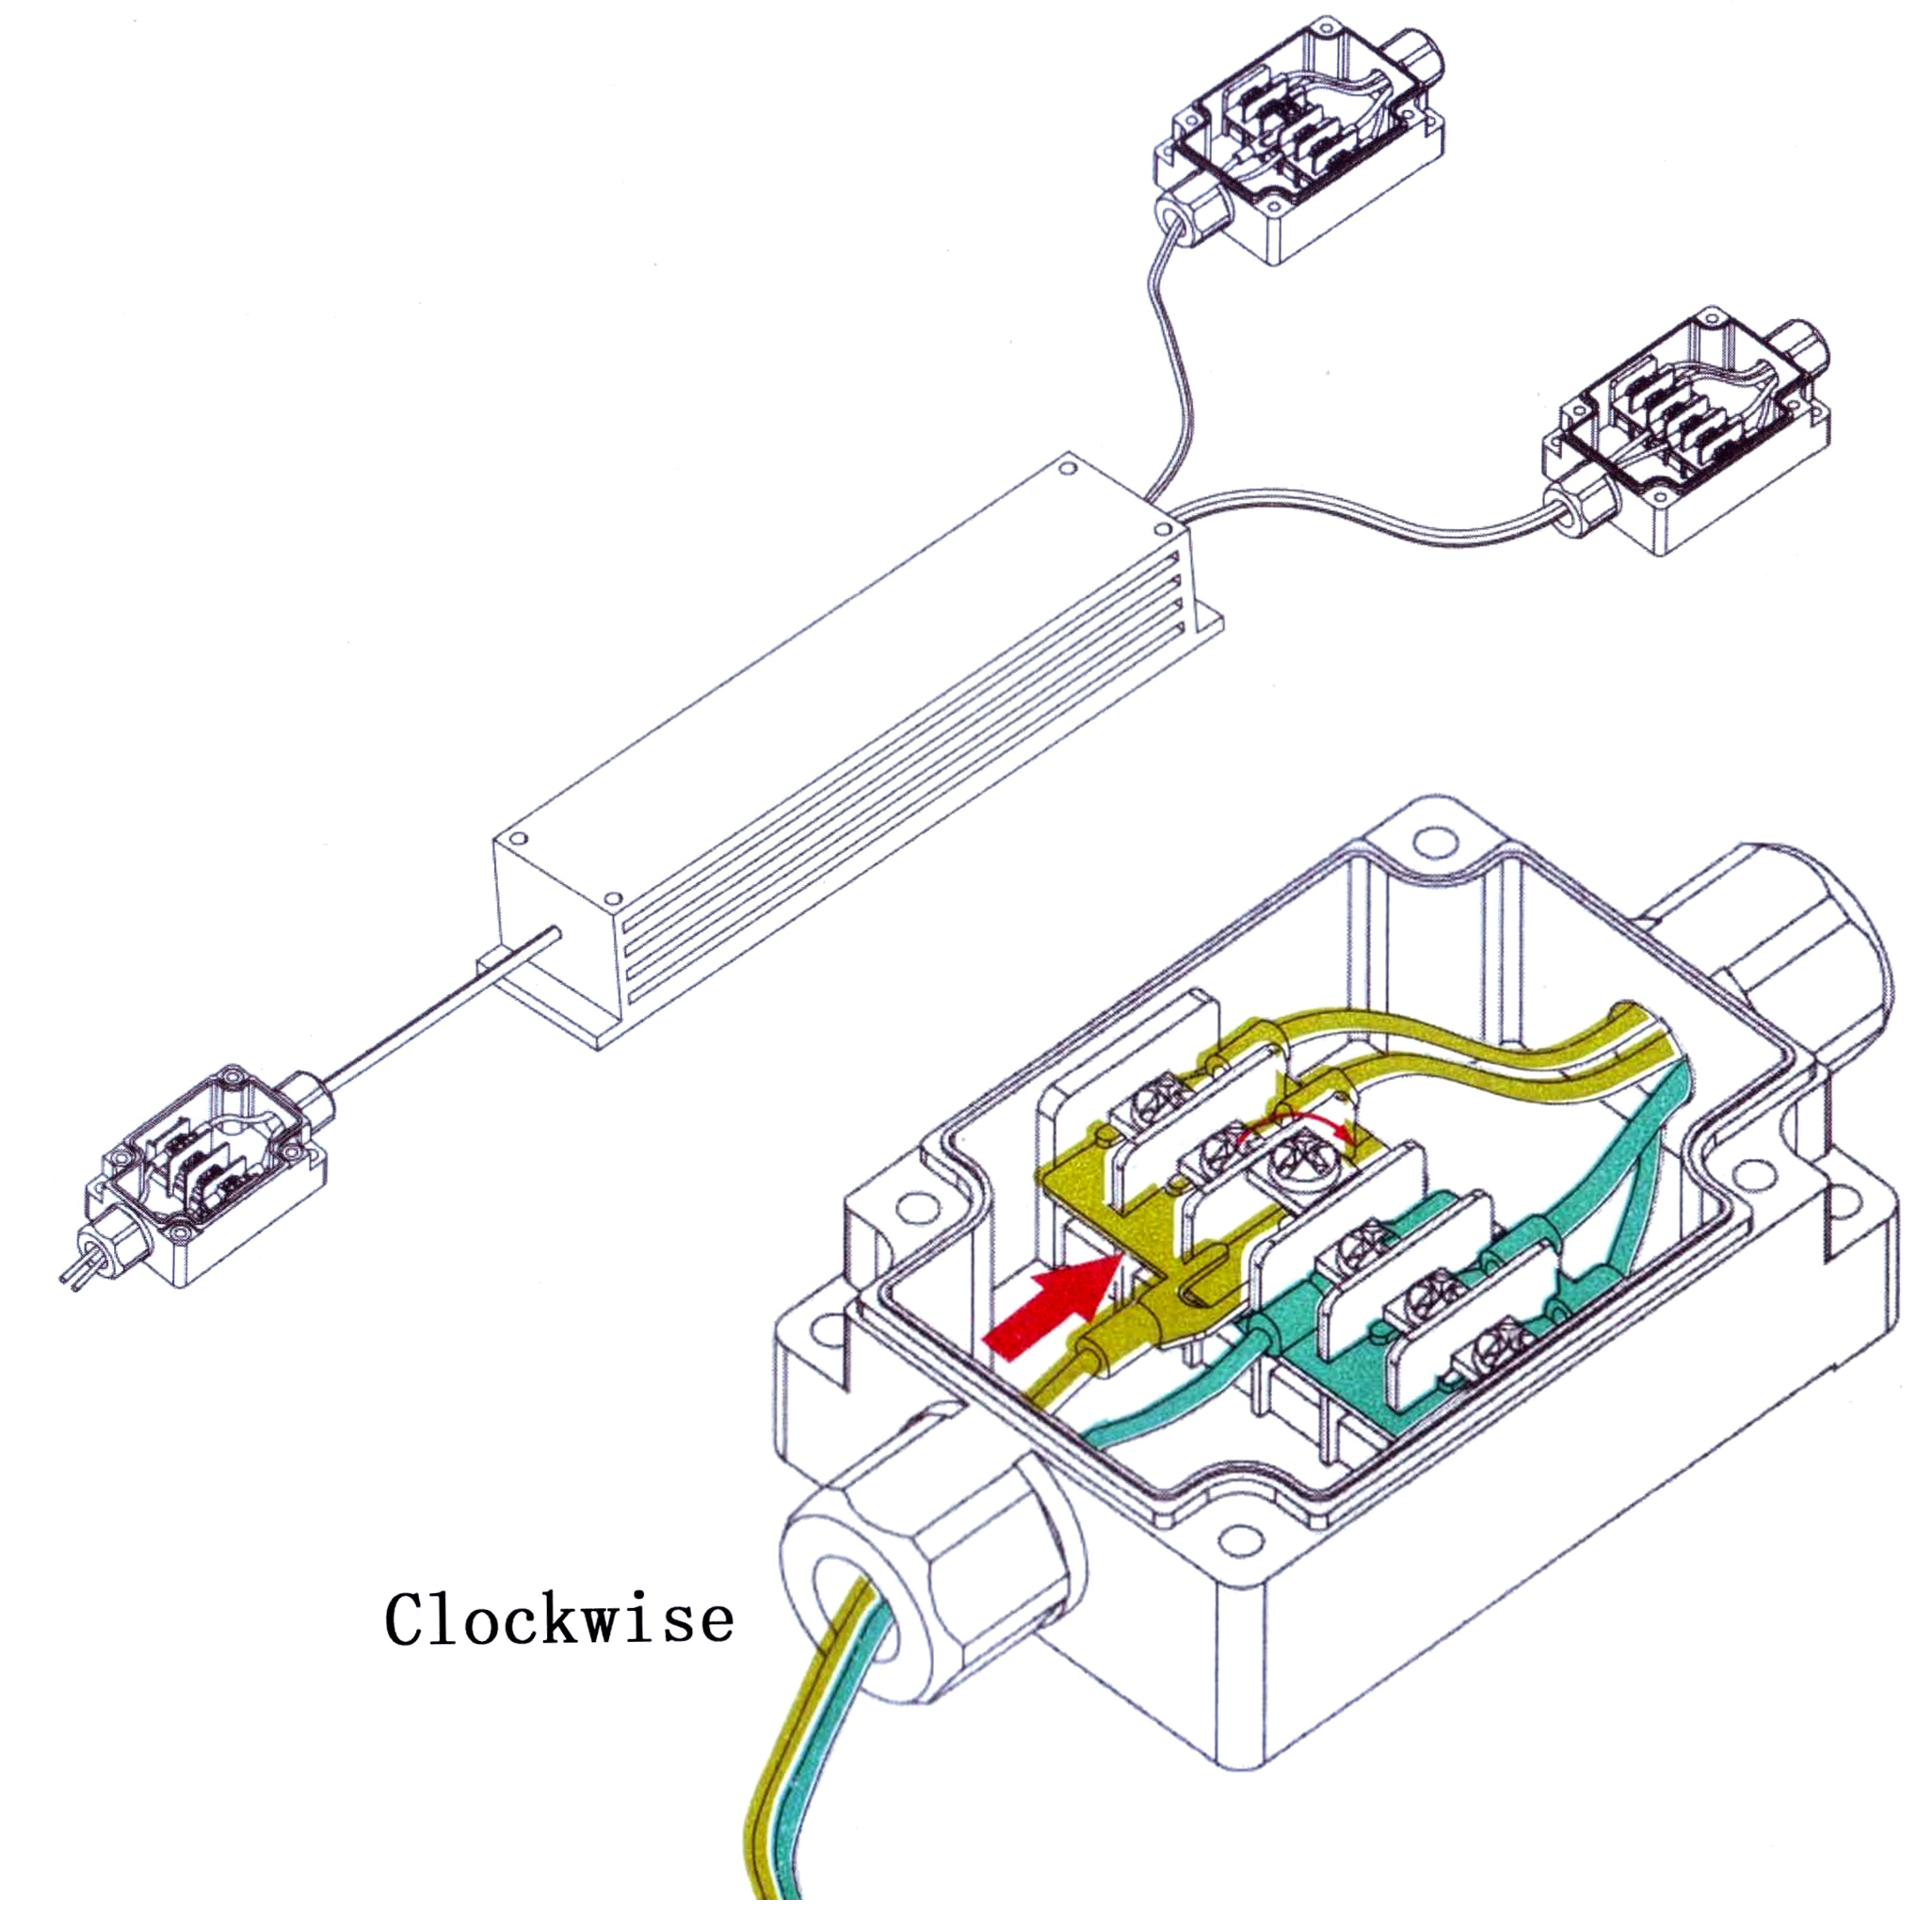
Use a Phillips screwdriver screw out the upper cover 4 screws, open the plastic waterproof boxes.
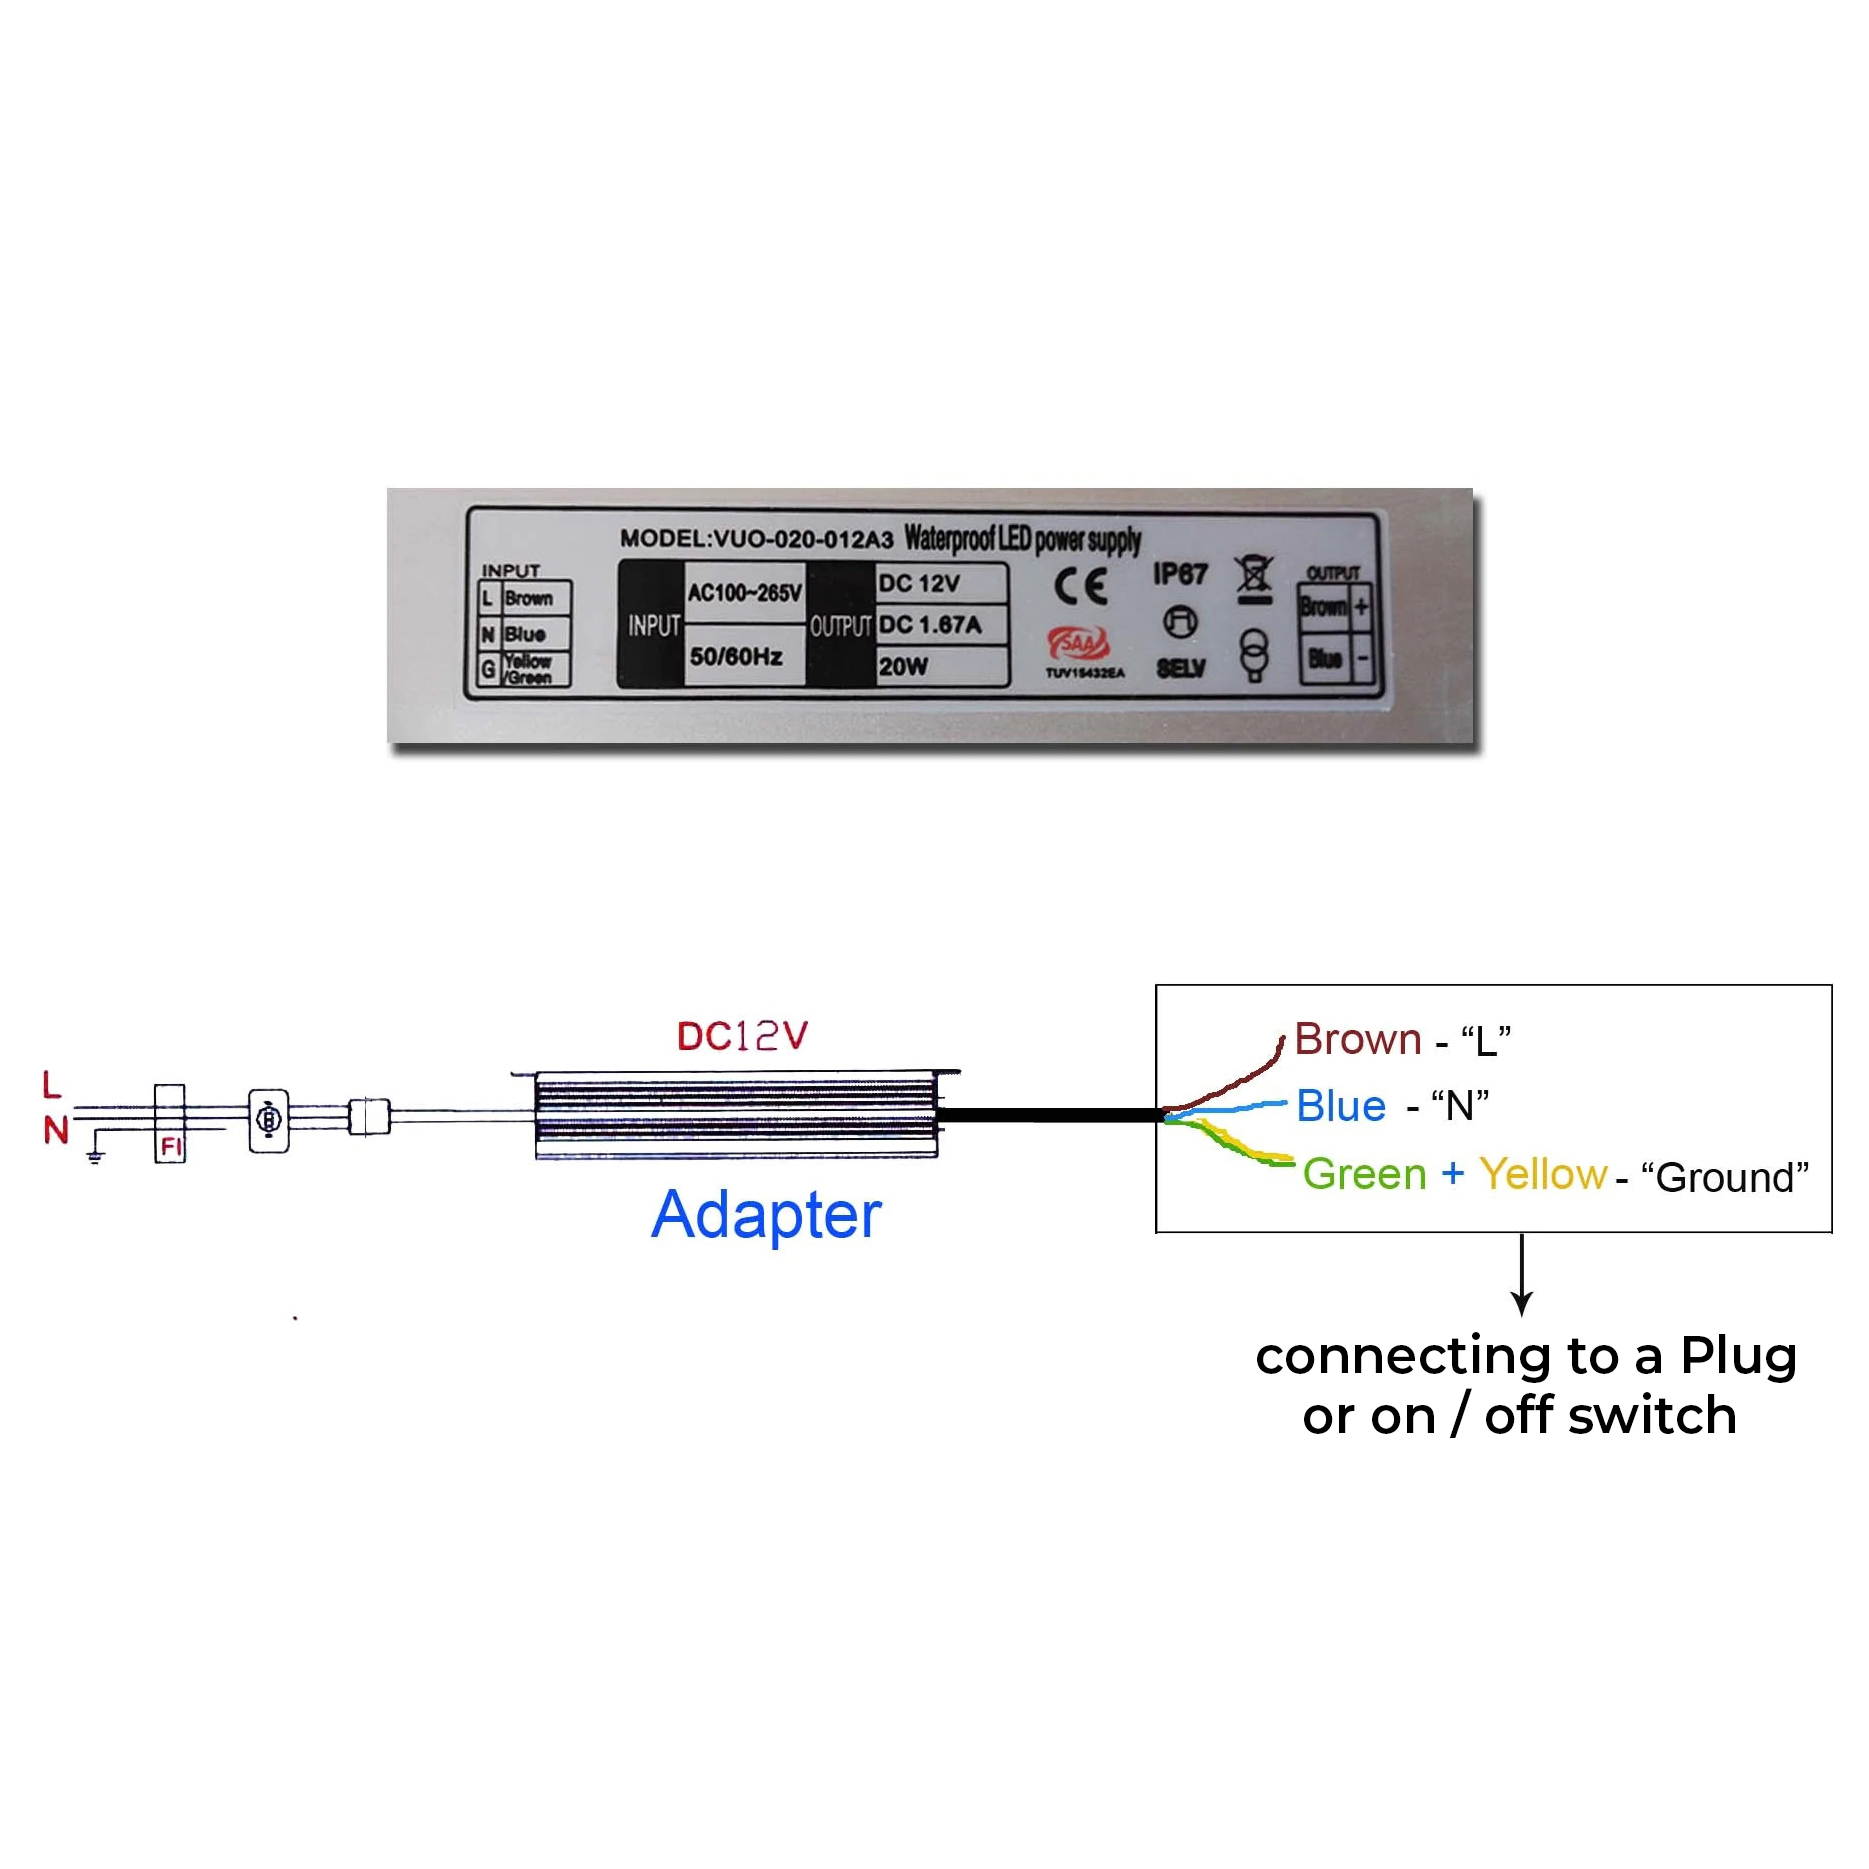
Note: The same color line docking, brown line for line, the blue line is zero line. Use a Phillips screwdriver screw out the screws in plastic waterproof box wiring position, then put the fork terminal line connected, then fix it with a Phillips screwdriver.
|
|
|
Shower Head Installation Instructions
|
|
|
|
|
Step 9:
|
|
Step 10:
|
|
|
|
|
|
|
BathSelect Brushed Gold LED Collection
Explore Romantic Gold LED Showers
Discover related brushed gold shower systems, LED rainfall heads, mounting options and components.
Main CollectionsProduct TypeInstallationFinishTechnologyComponents
|
|
|