Shower Head Installation
Attention
1. Open packages, check all the goods whether everything is ok.
2. Check the size of the connector and the thread size of the water pipes connector in the wall.
3. Clean the water pipes before installing them.
4. At least 2 water electricians to install the showerhead.
5. Pay attention to the water temperature, not over 70 degree.
6. Water pressure: 0.05 MPA - 0.5 MPA.
7. Adapter is 100-265 V to 12 V, insurance device rated currently less than 30 MA
Care & Maintenance
Keep the surface clean, regular cleaning.
Using water clean it, using a cotton cloth to wipe dry.
Shower-Head Installation
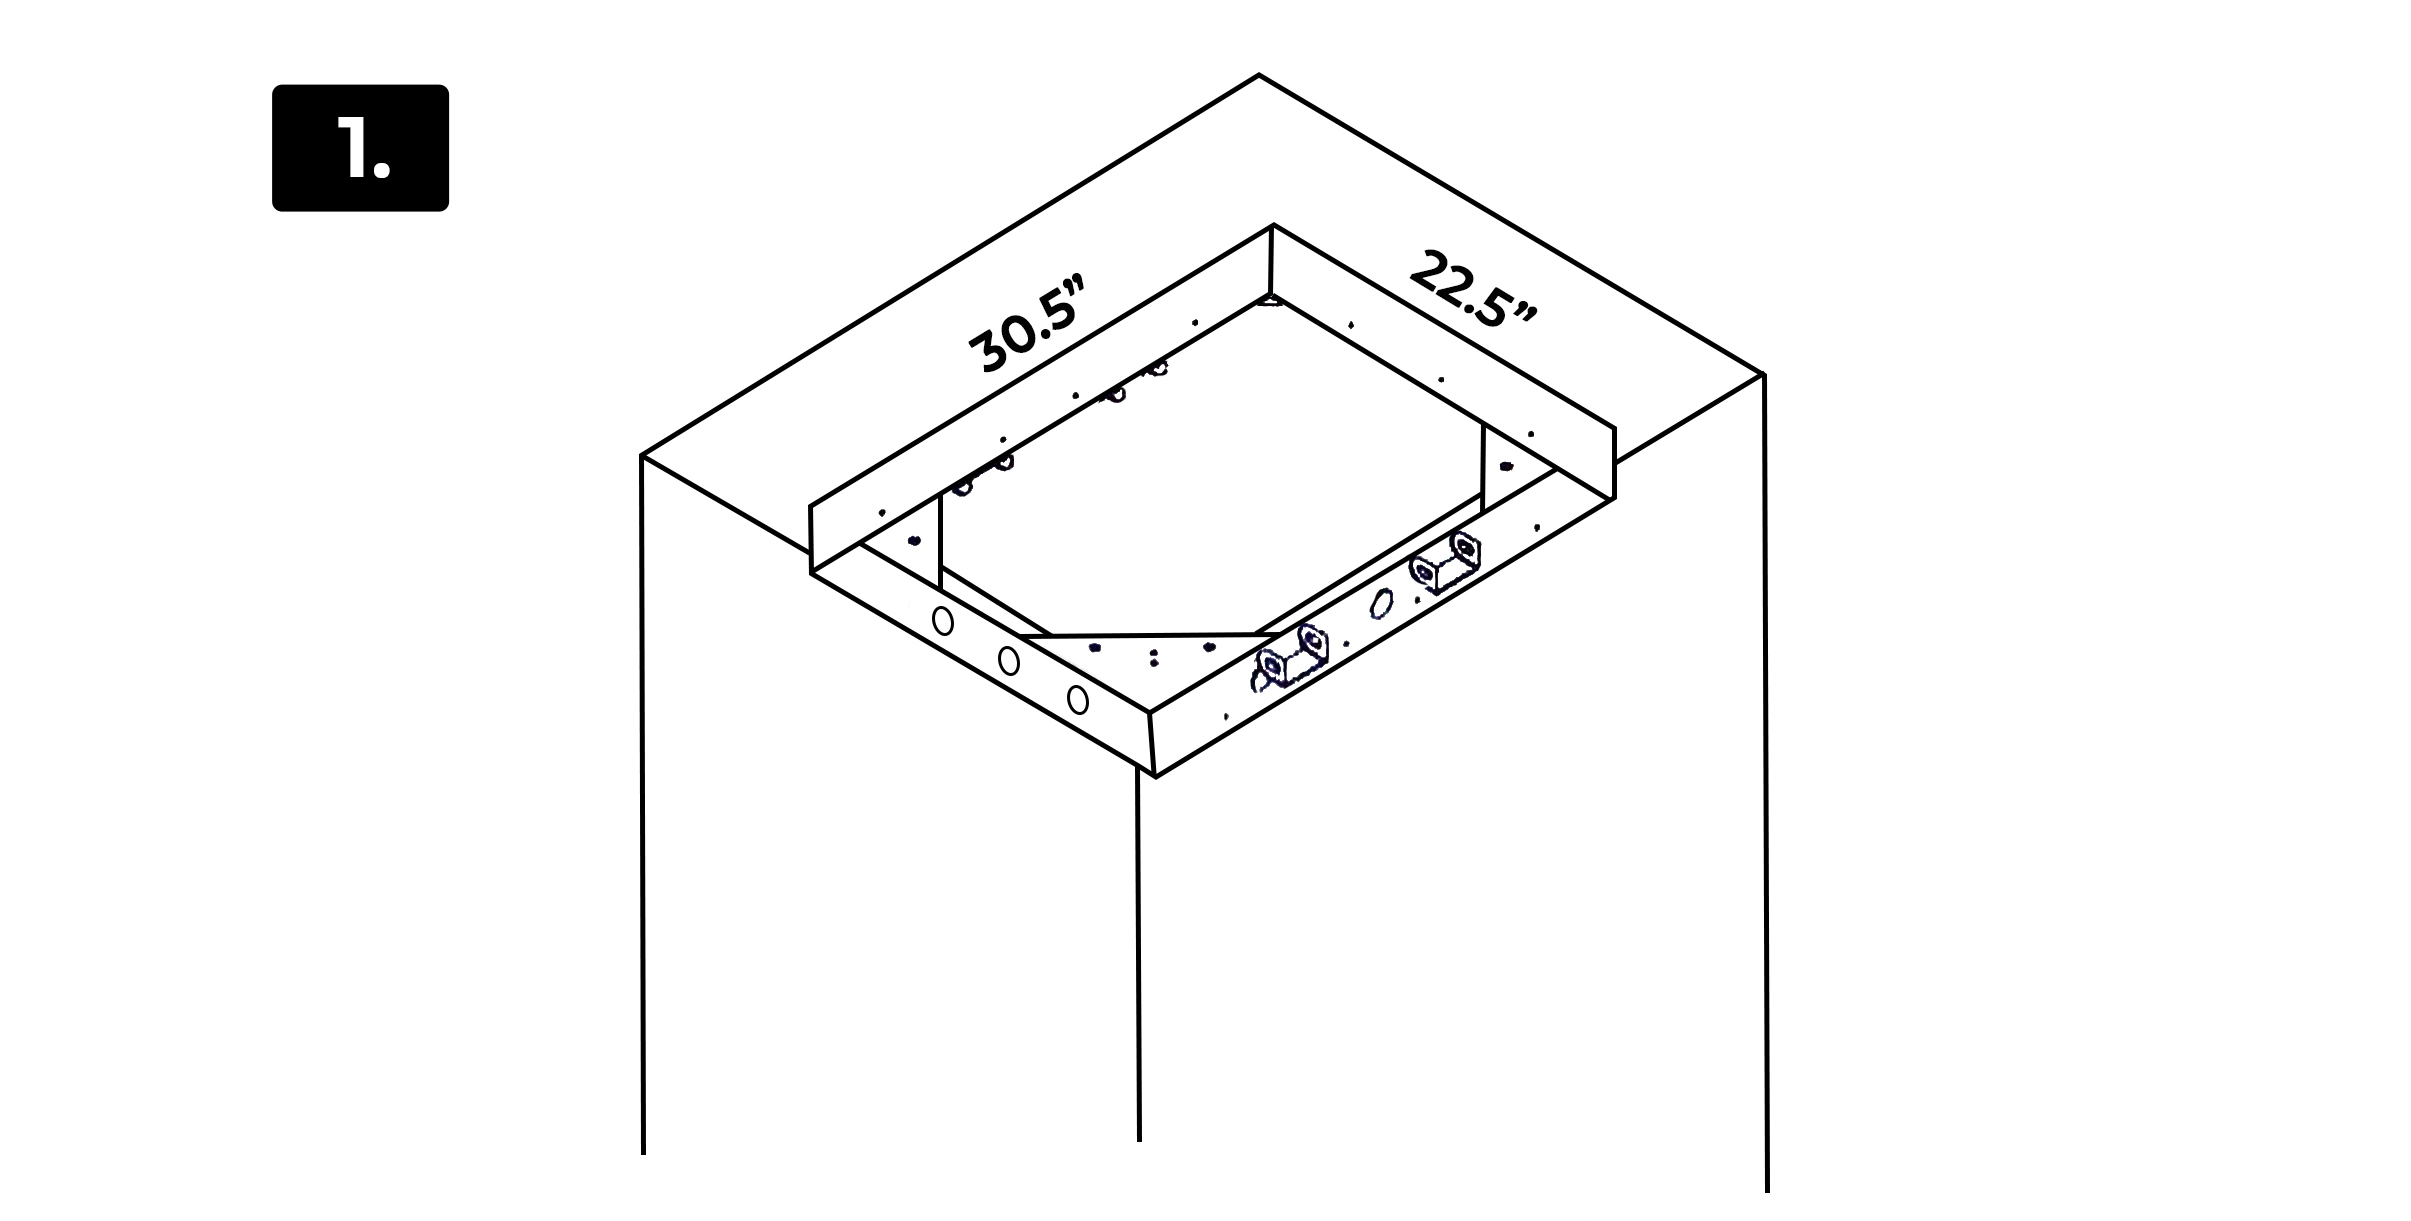
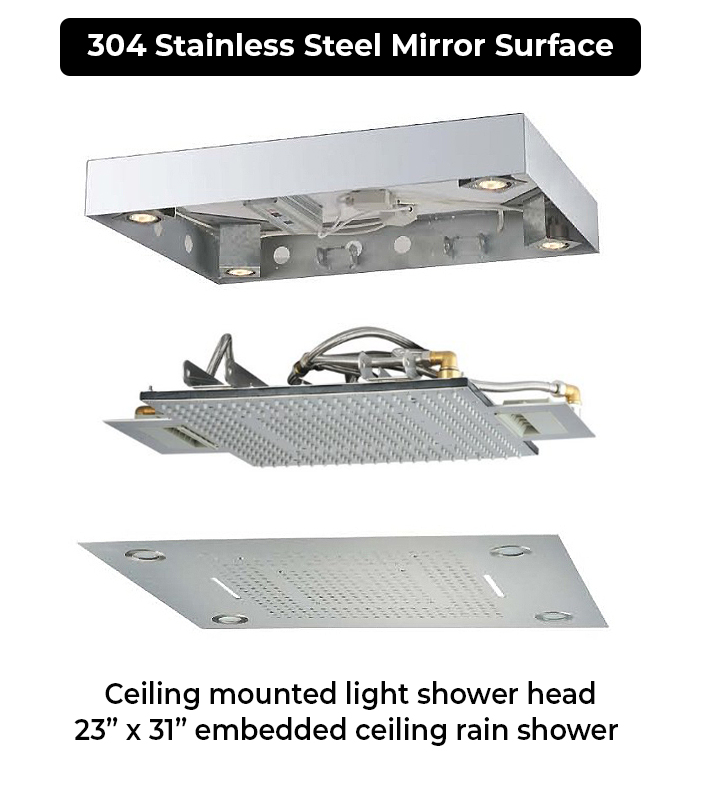
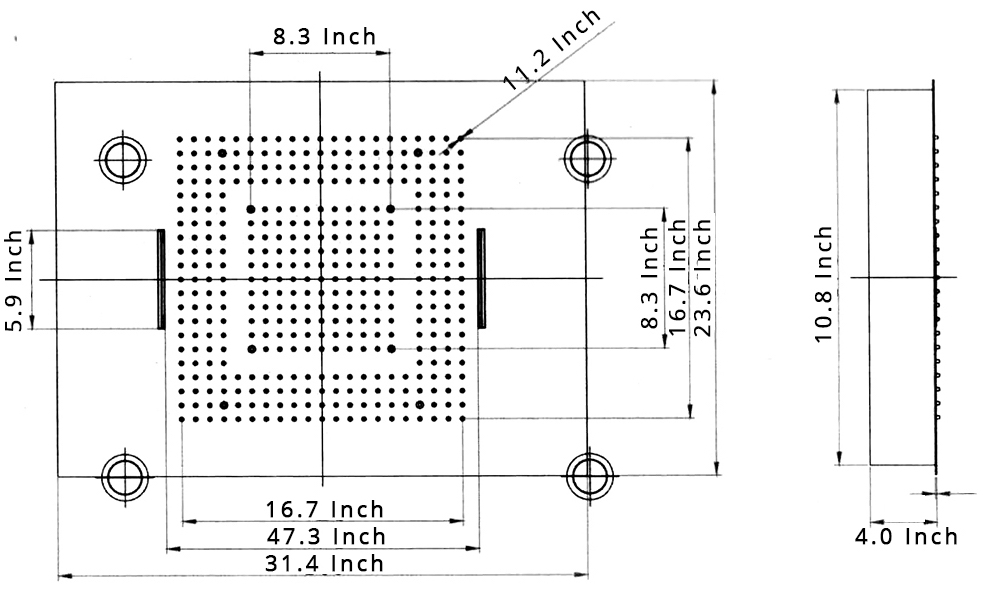
1. According to the dimensions and shape of the mounting bracket, determine the bracket location to be installed in the ceiling.
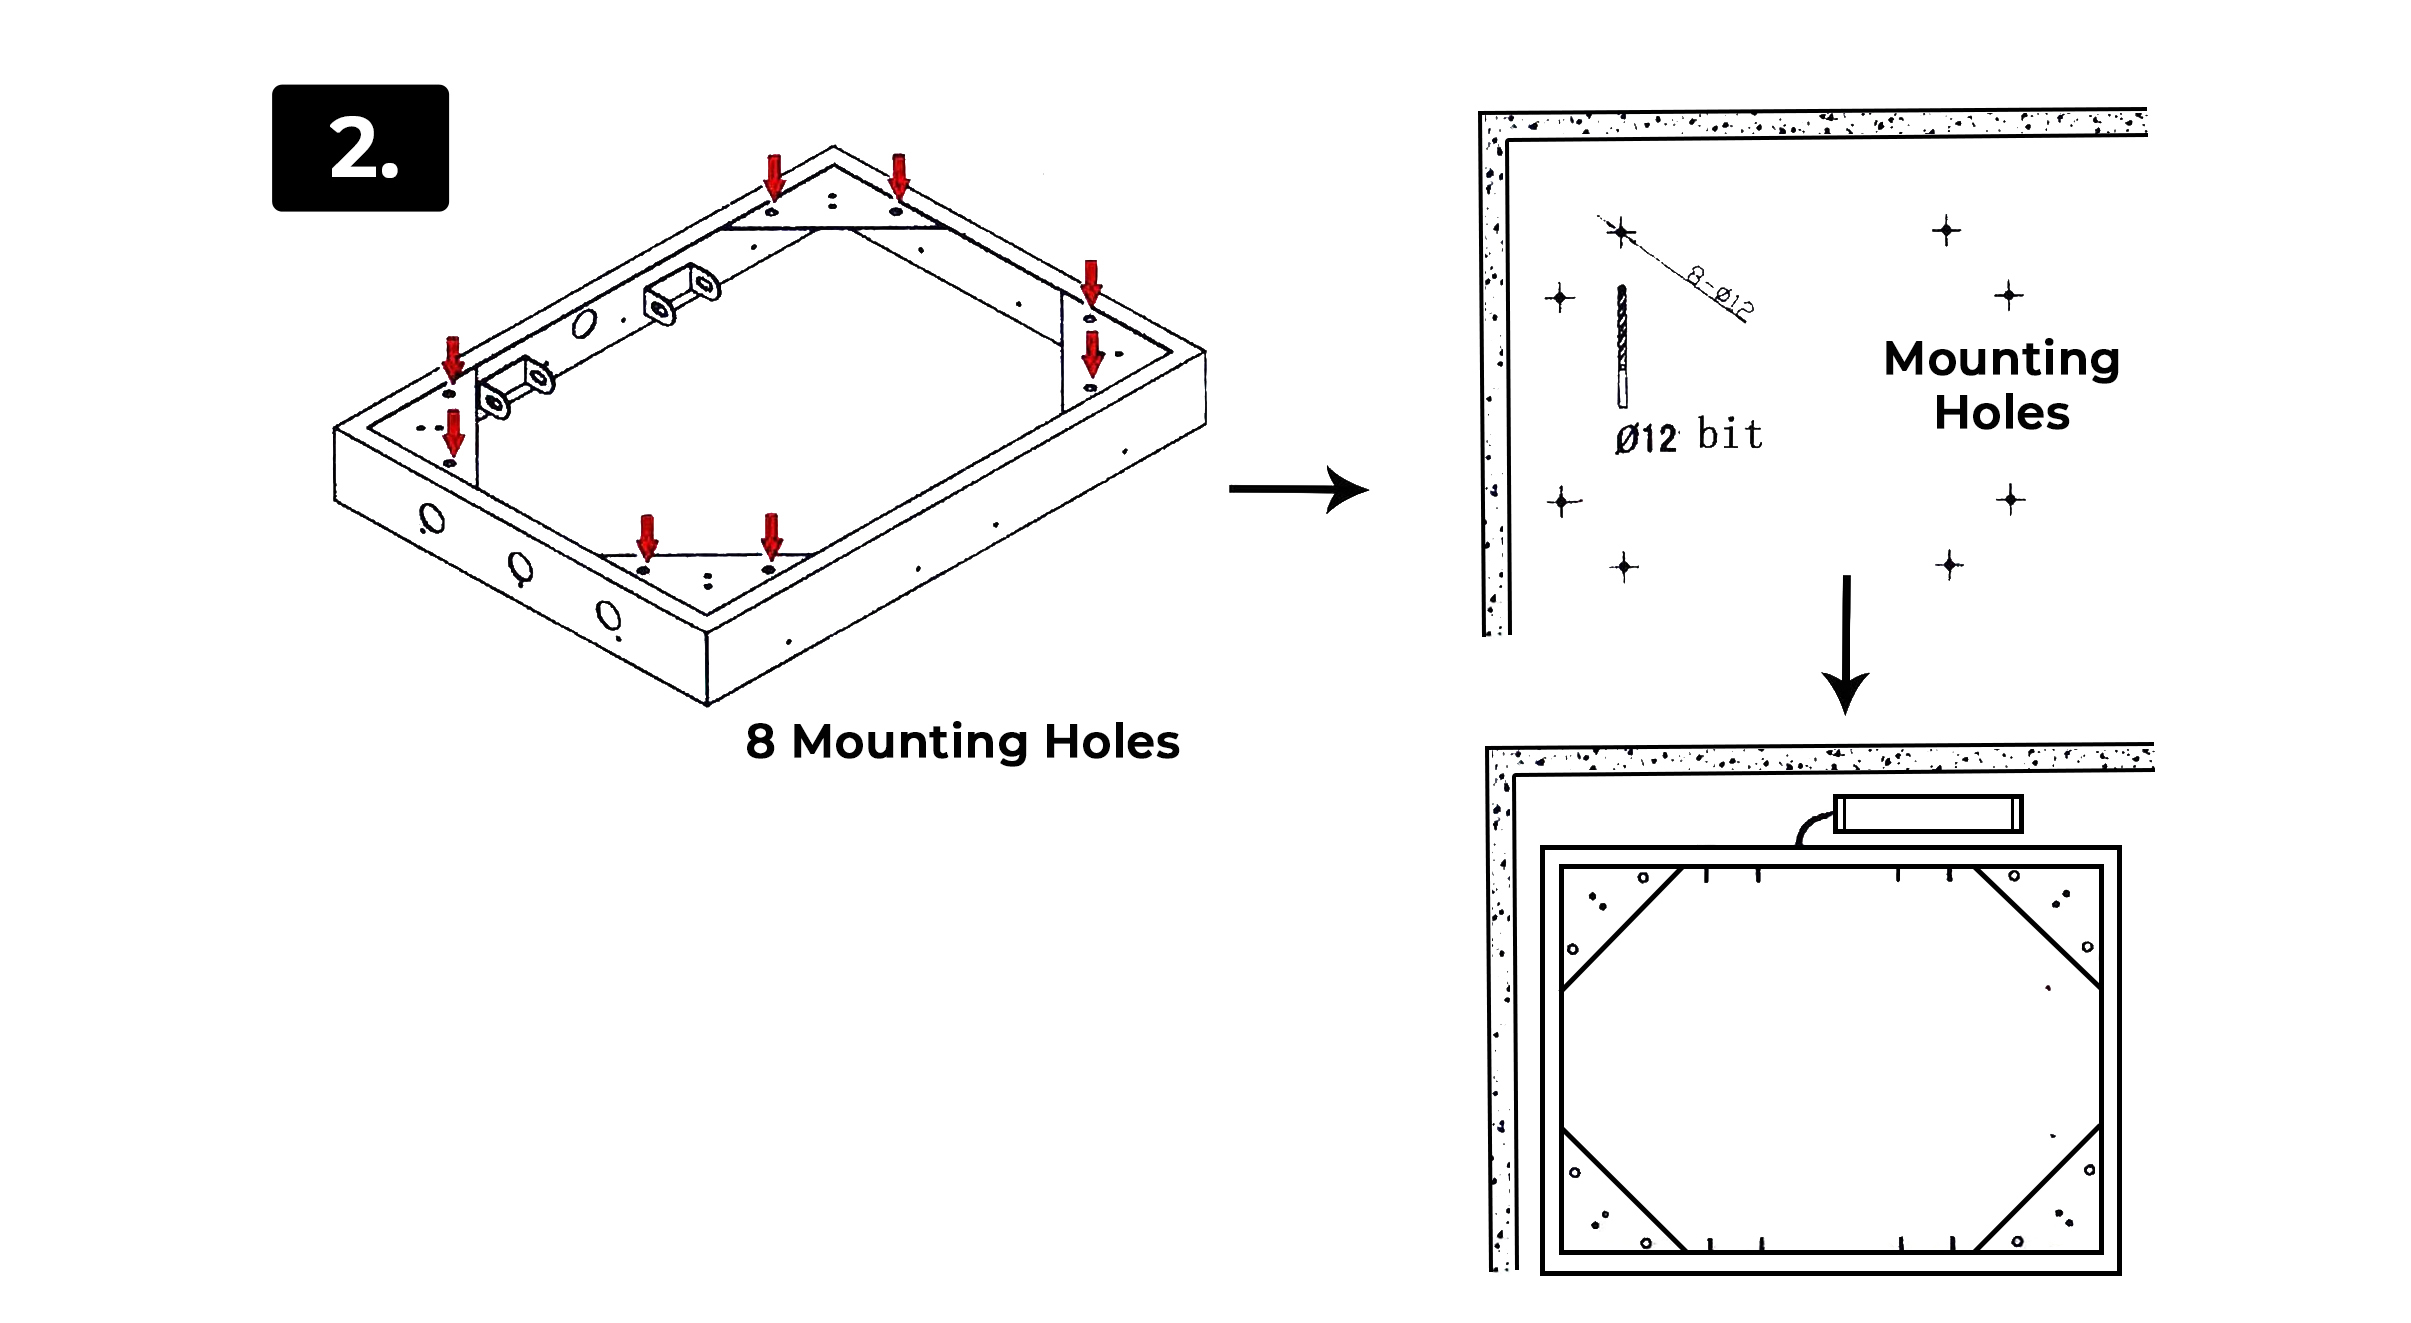
2. According to the 8 mounting holes on the mounting bracket, use Electric drill to make the mounting holes.
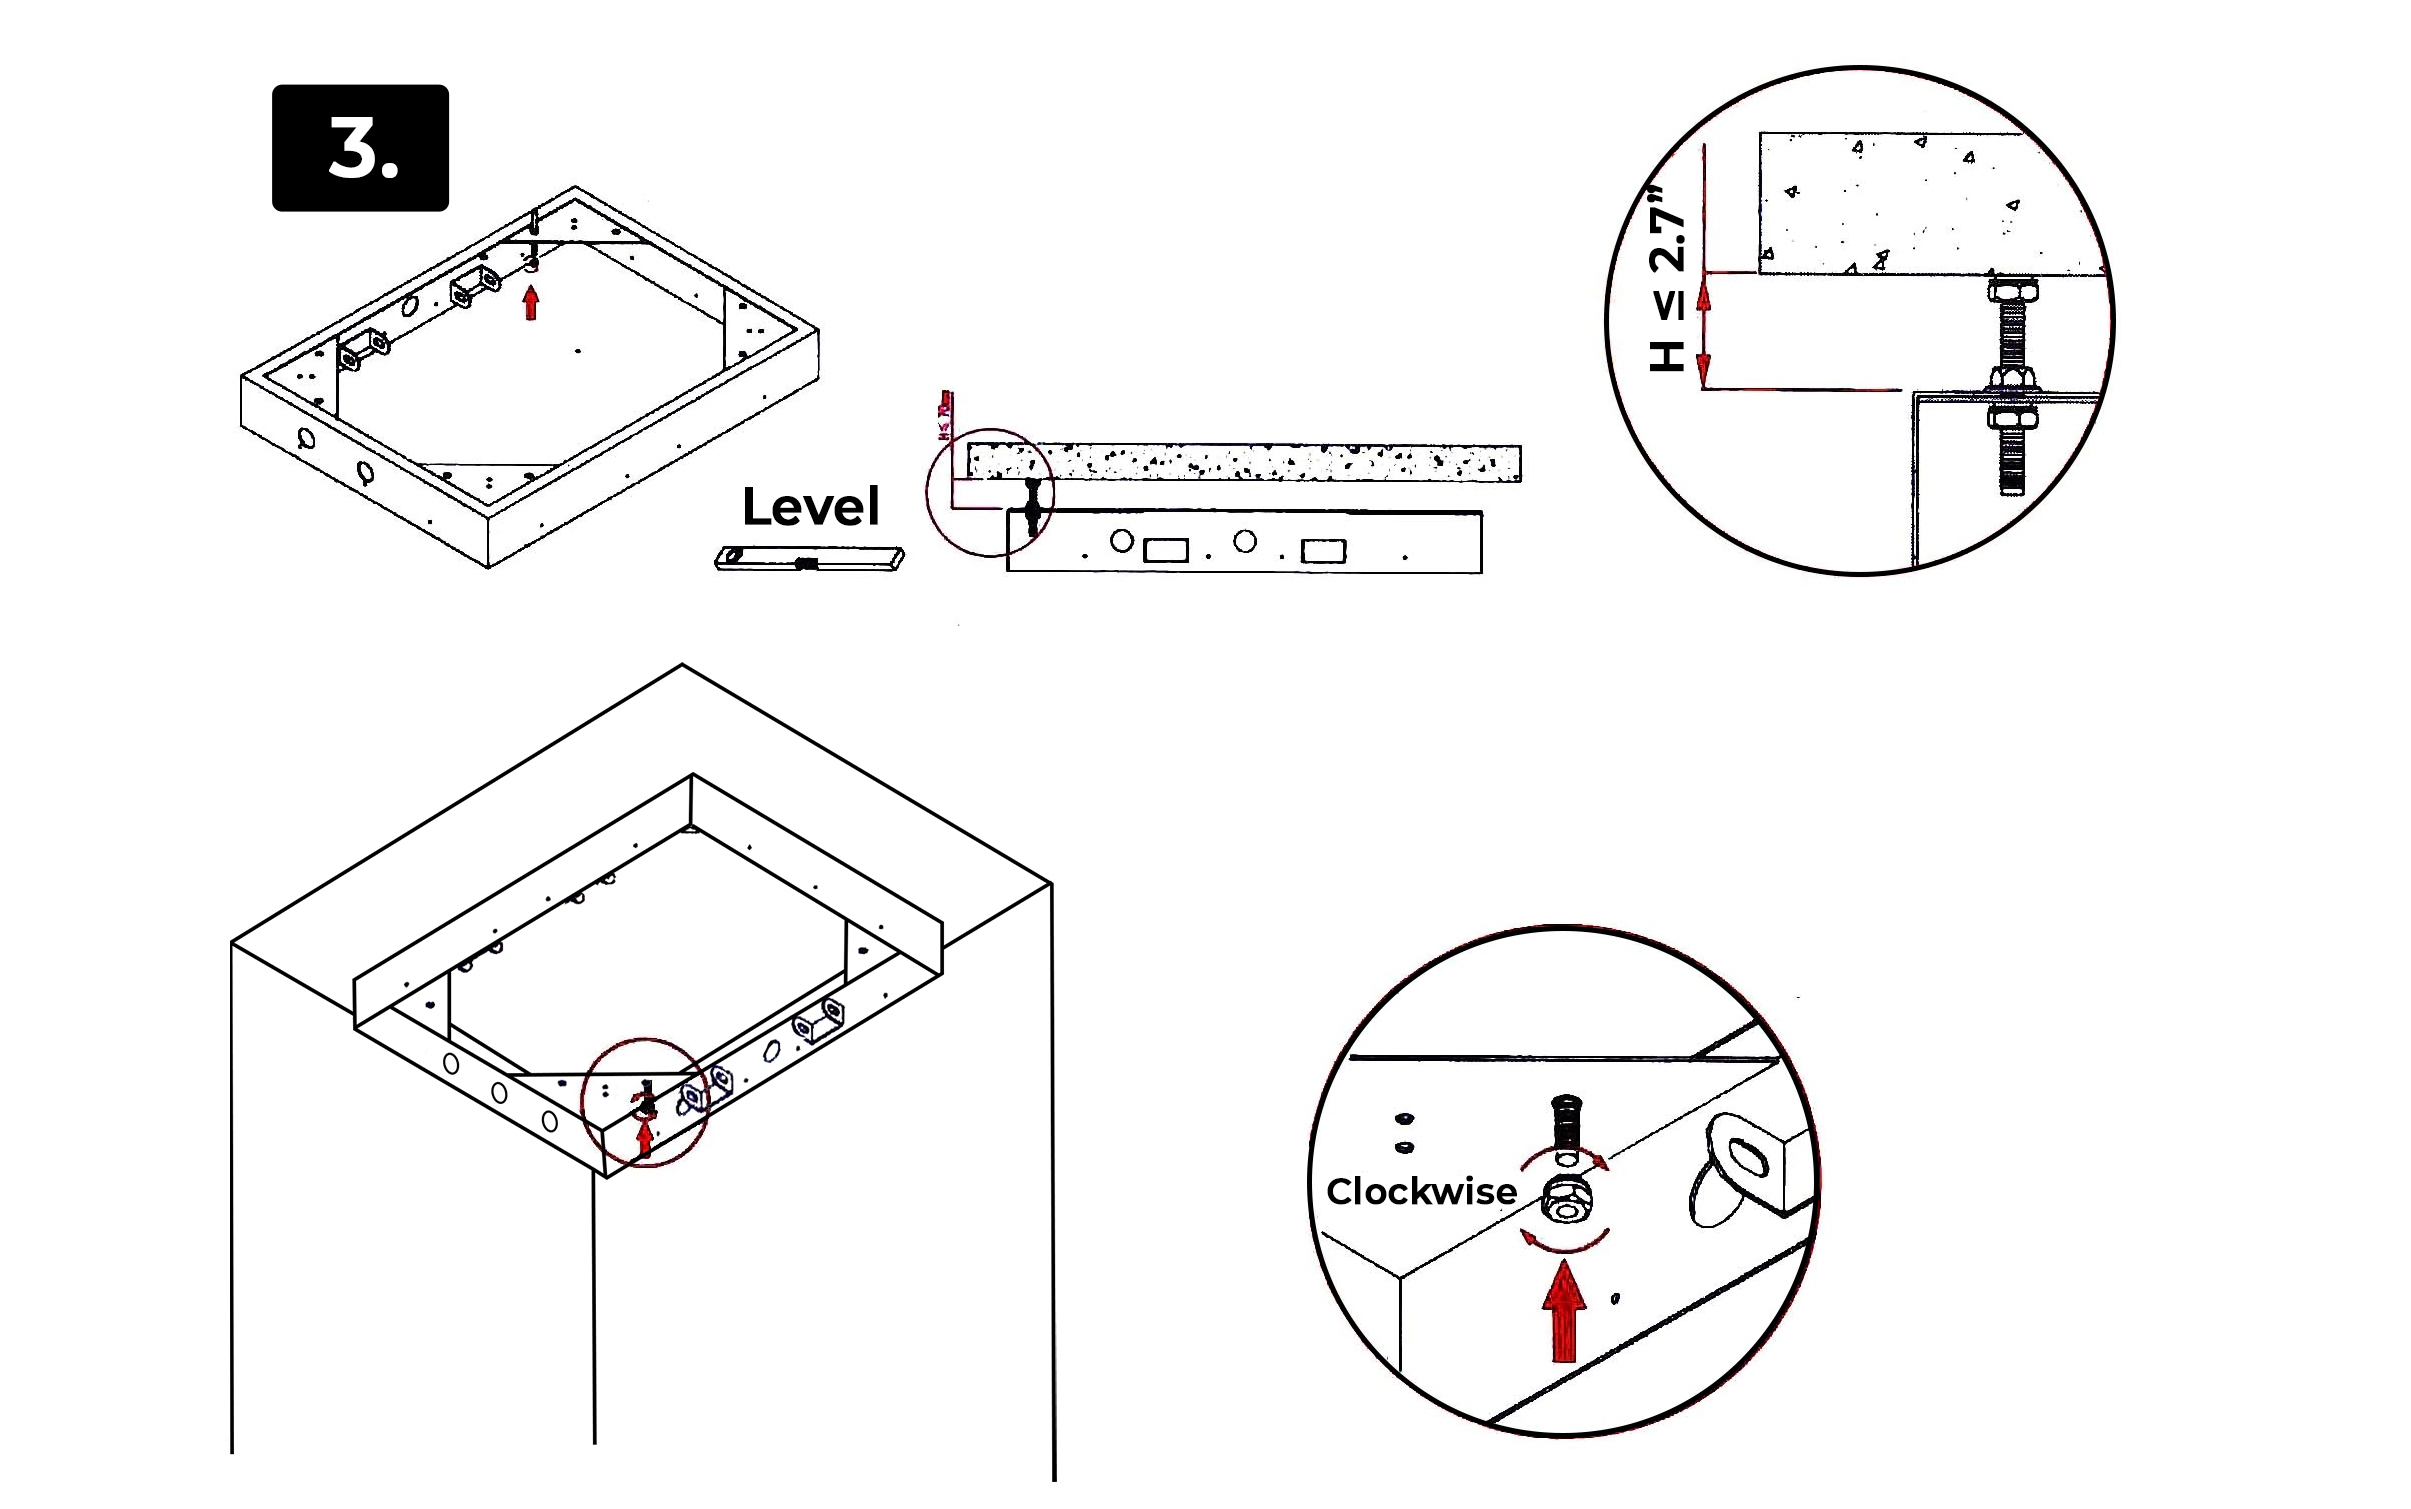
3. Using the two hexagonal nuts adjust the distance between the mounting bracket and the ceiling, and keep the mounting bracket on level.
Use explosion screw to fix mounting bracket on ceiling, pay attention to the explosion screw, it can adjust the height, and use level tool to adjust the mounting bracket to reach level.
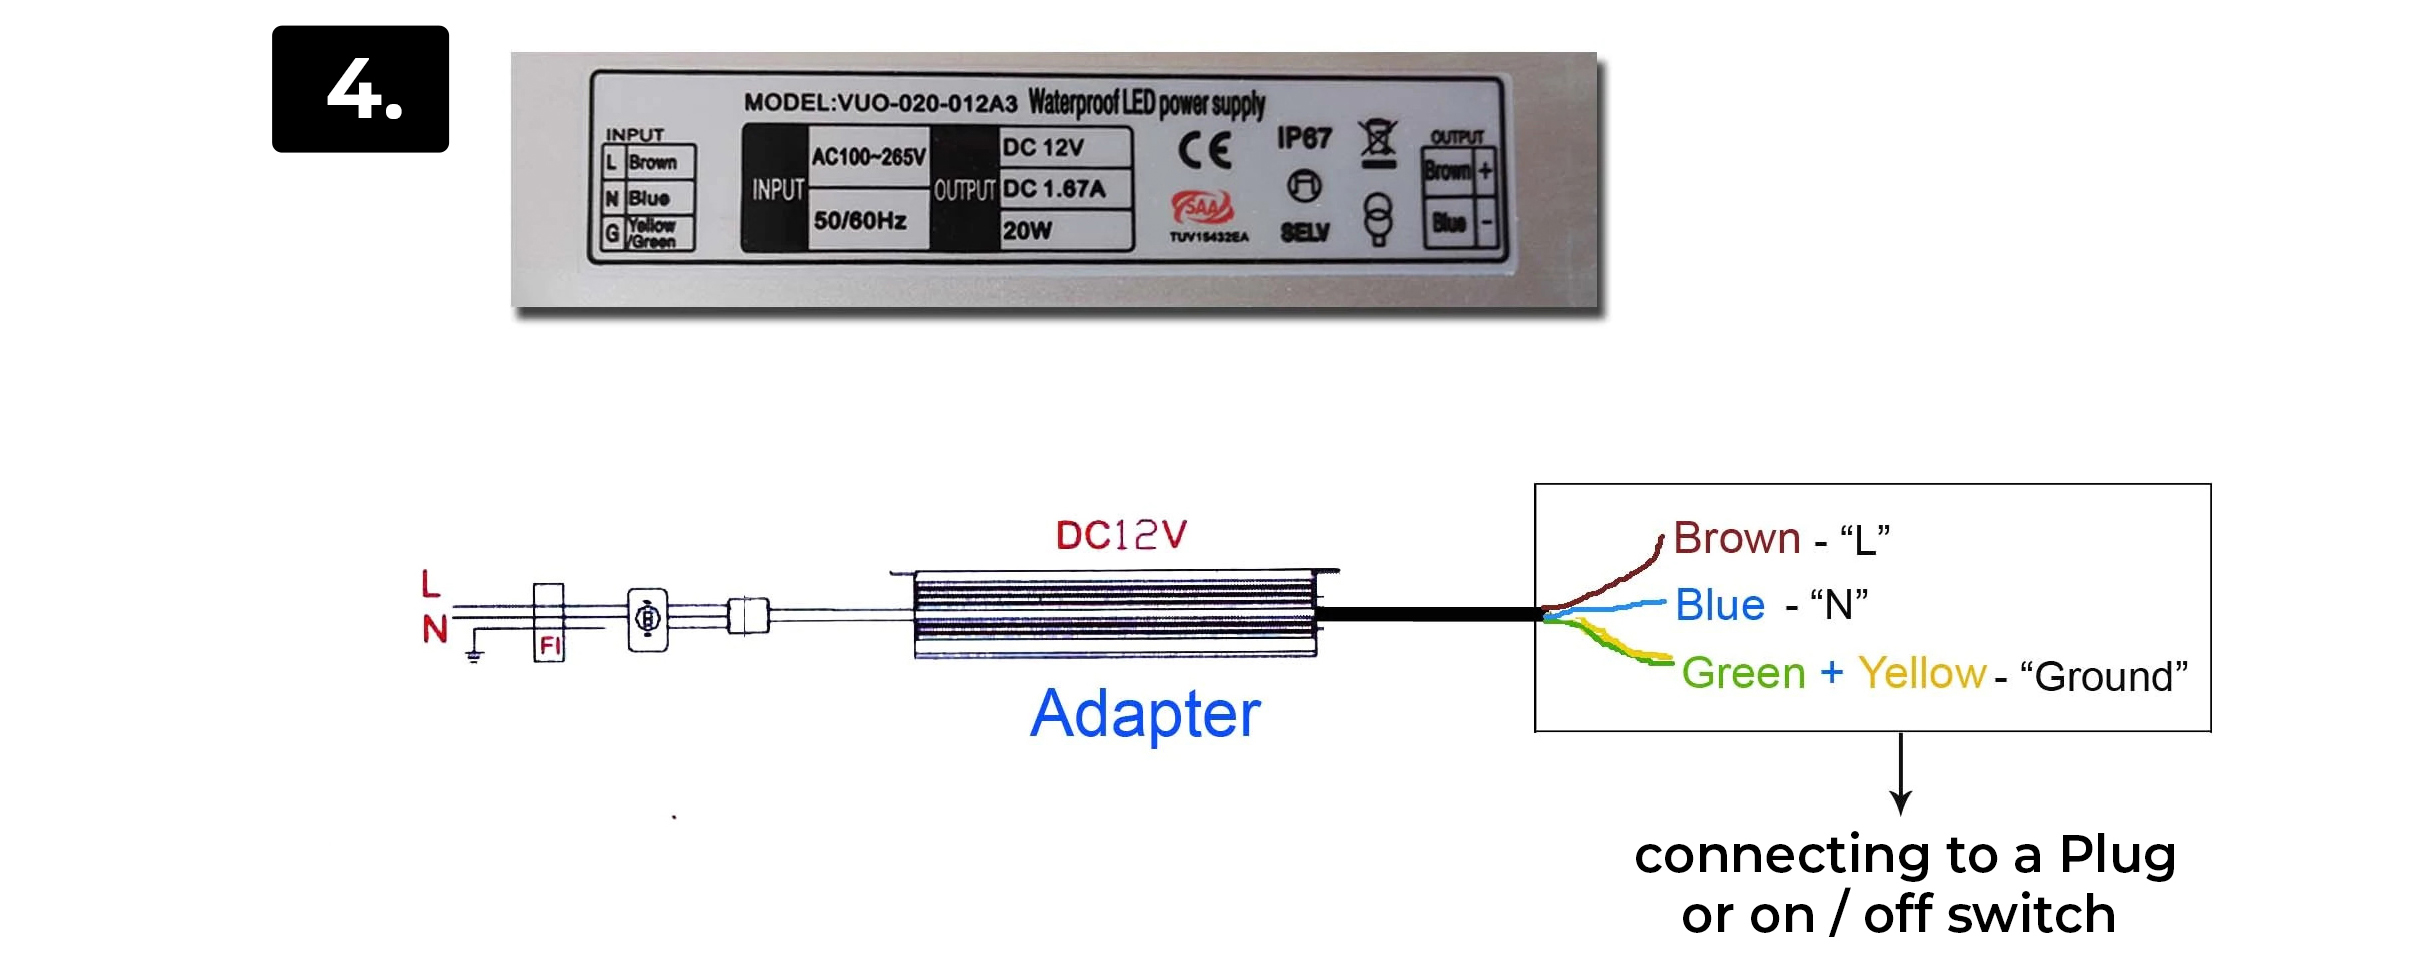
4. Connecting Circuits
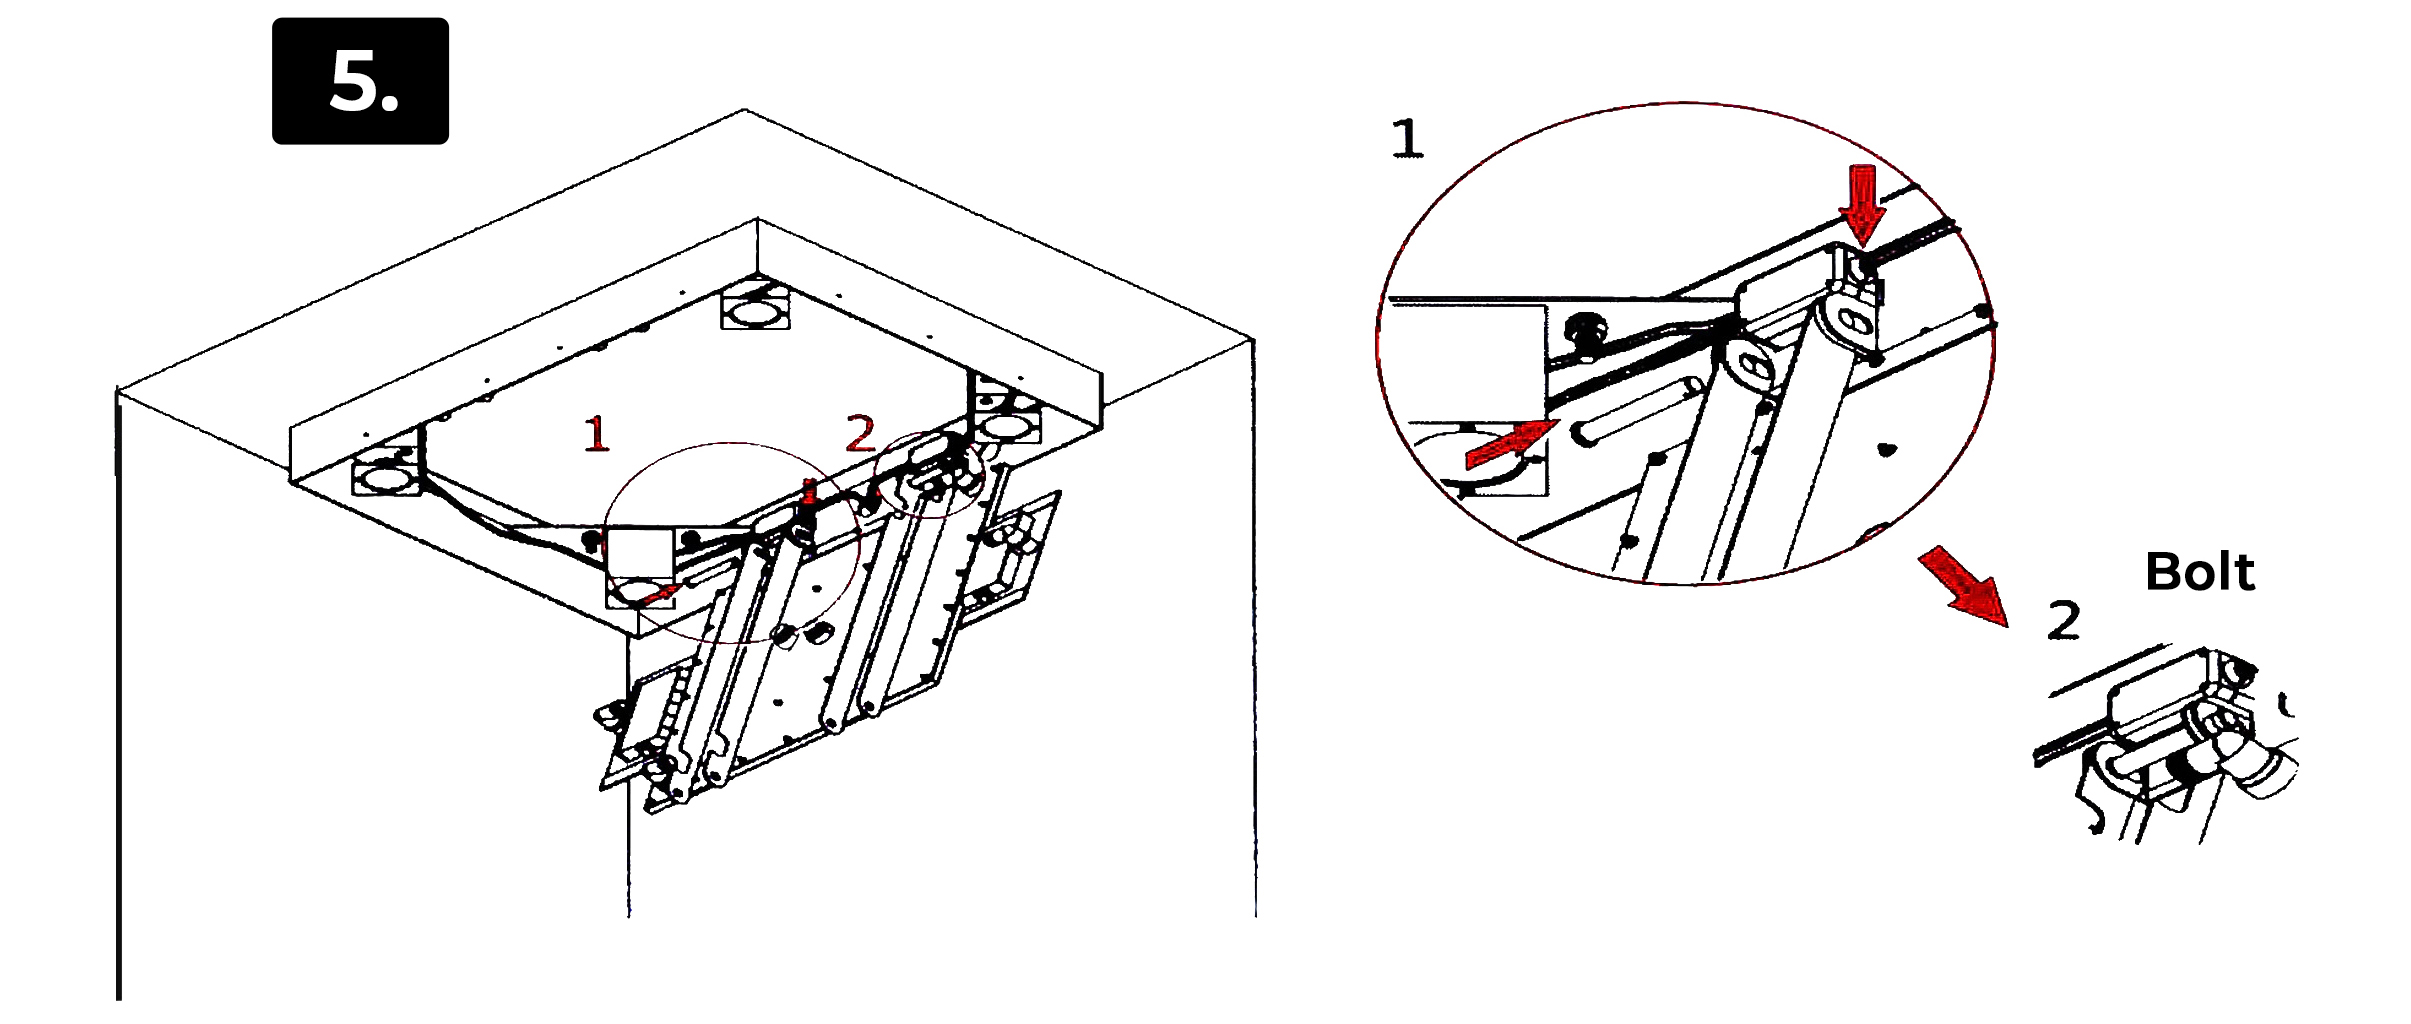
5. According to the chart shows: Raise the showerhead, Aim at the hole of the bolt, plug the bolt.
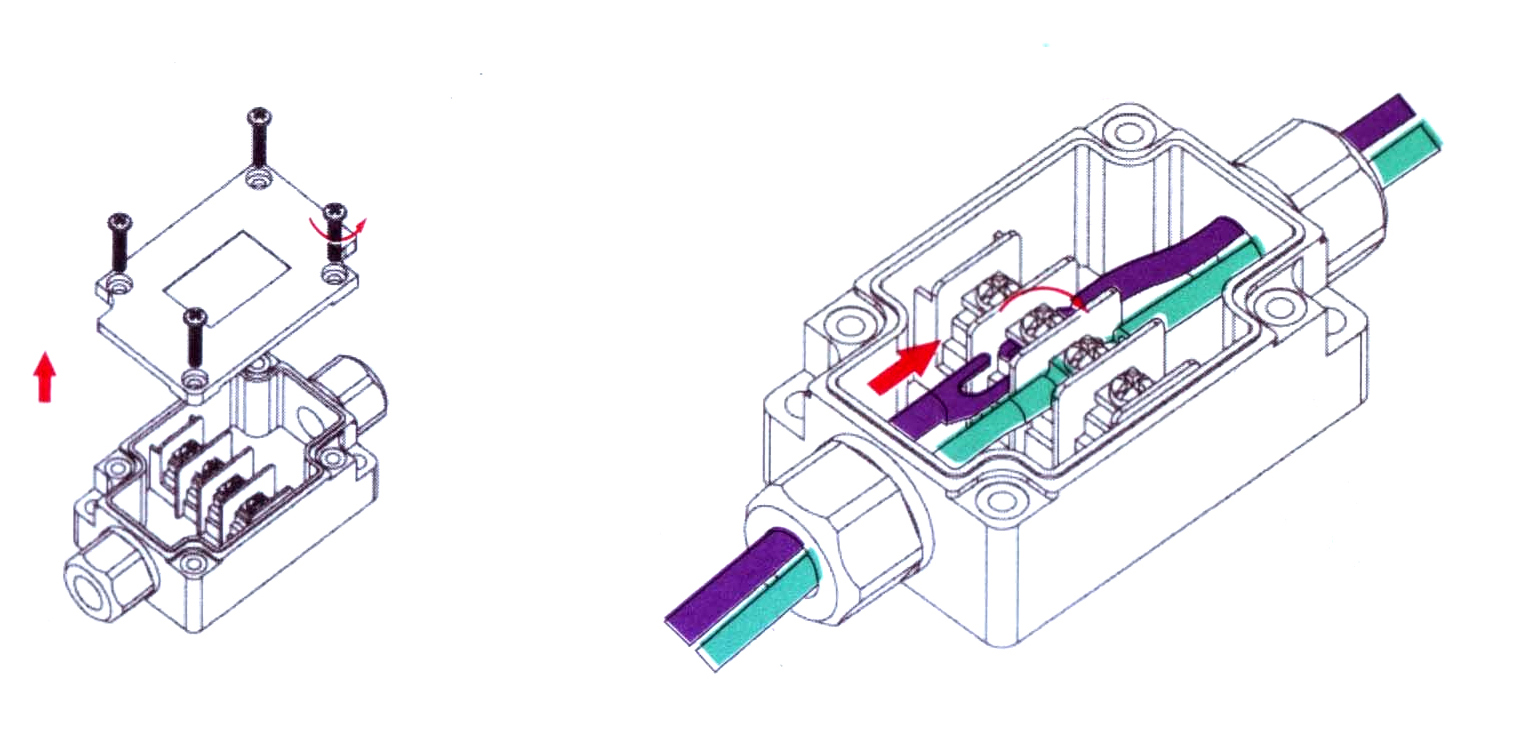
Use a phillips screwdriver screw out the upper cover 4 screws, open the plastic waterproof boxes.
Note: The same color line docking, brown line for line, blue line is zero line. Use a phillips screwdriver screw out the screws in plastic waterproof box wiring position, then put the fork terminal line connected, then fix it with a phillips screwdriver.
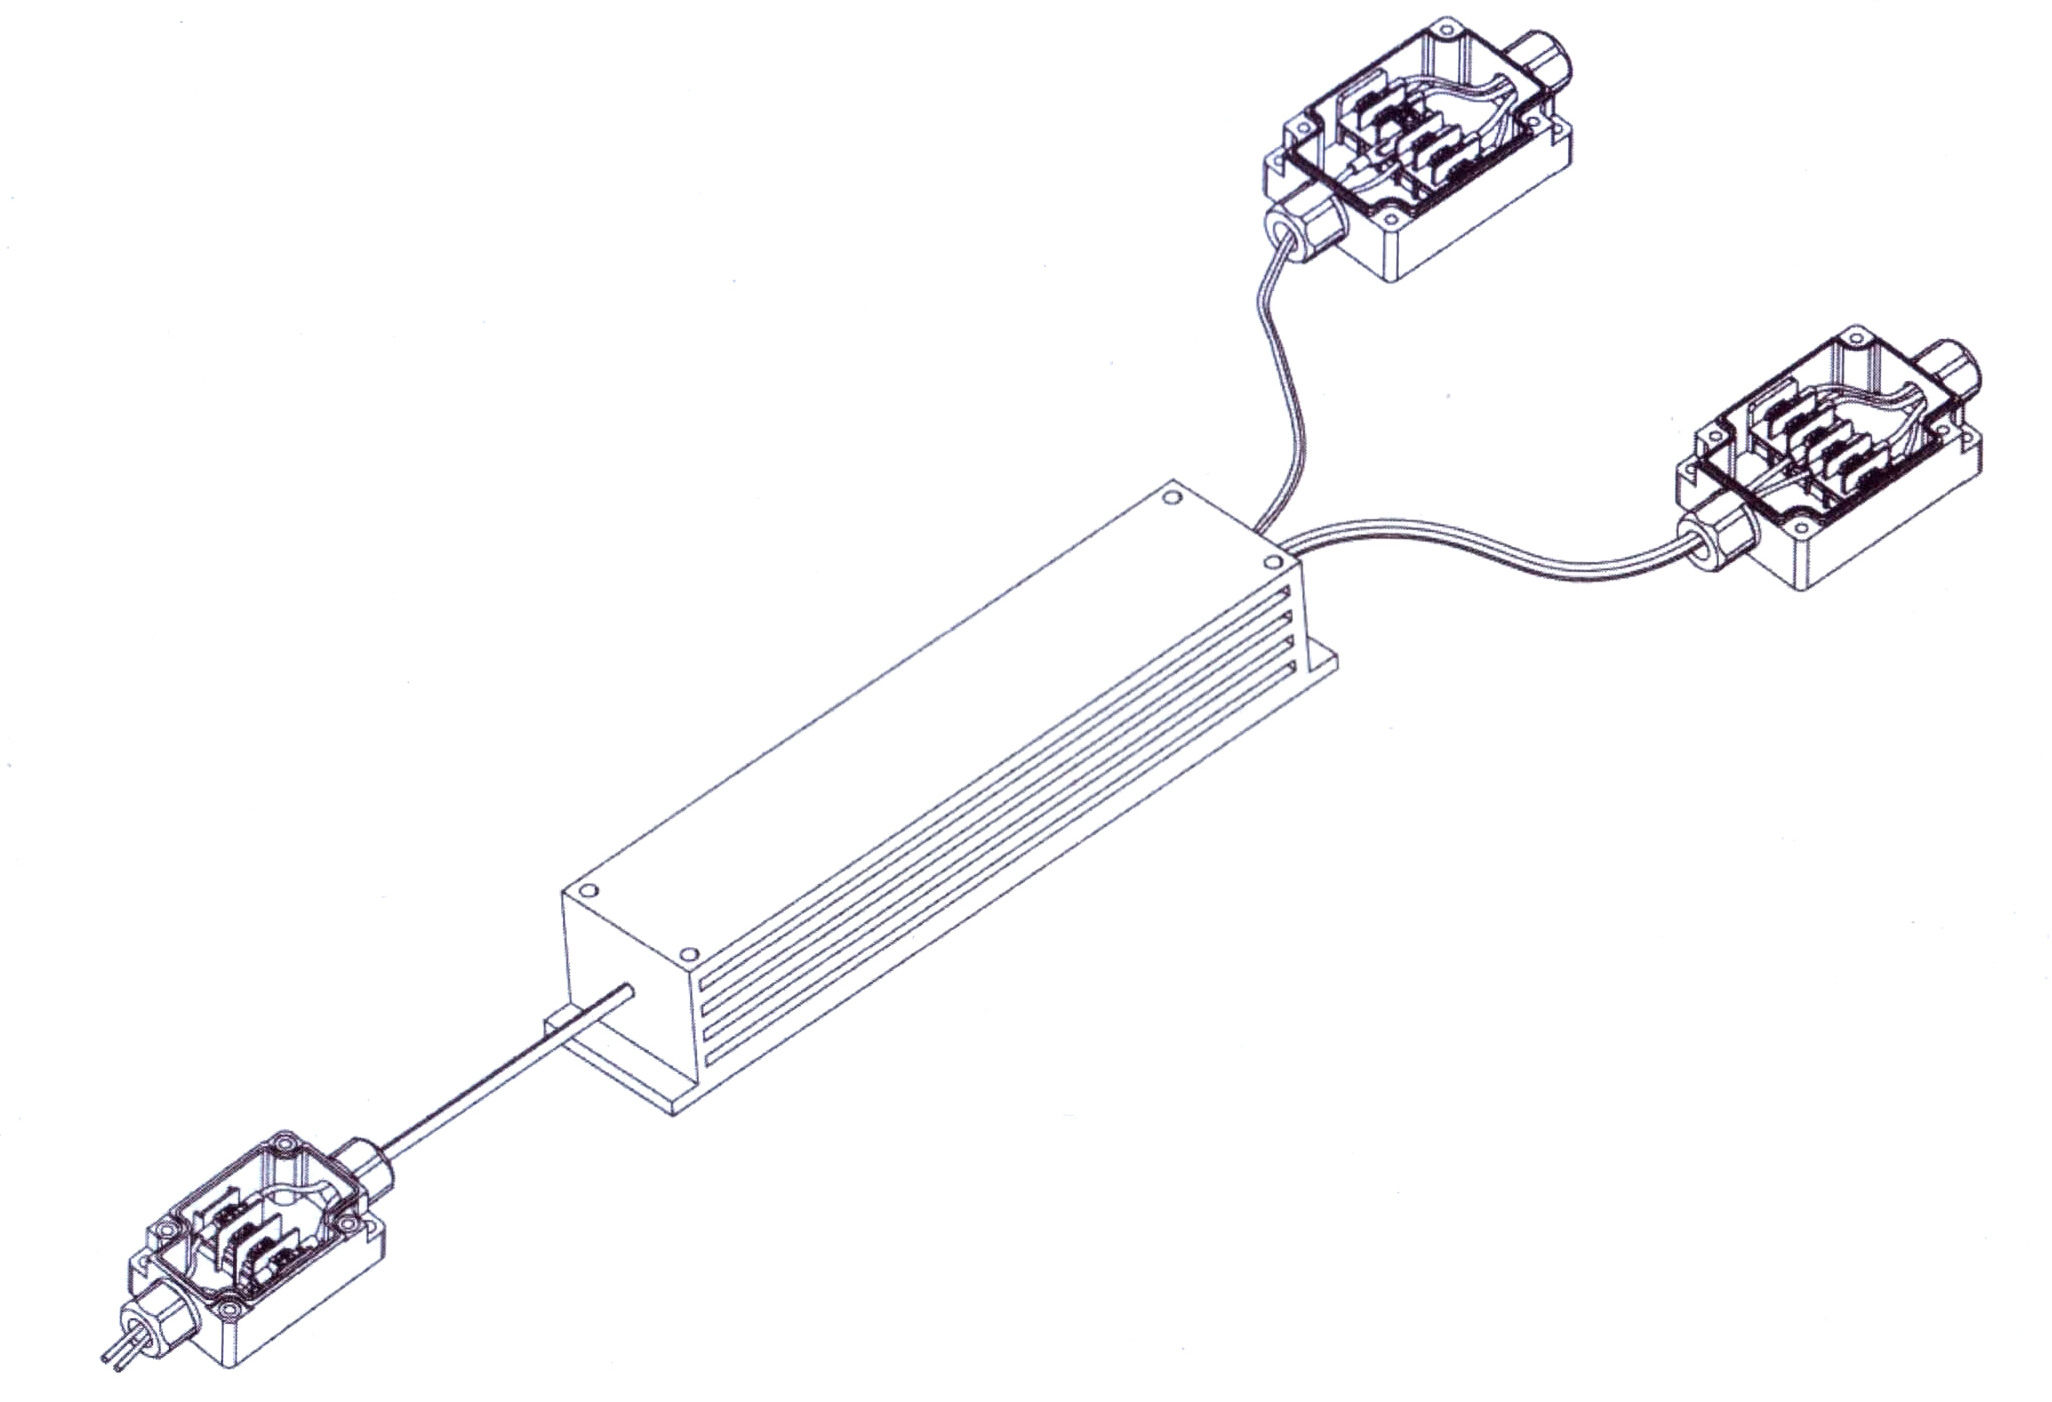
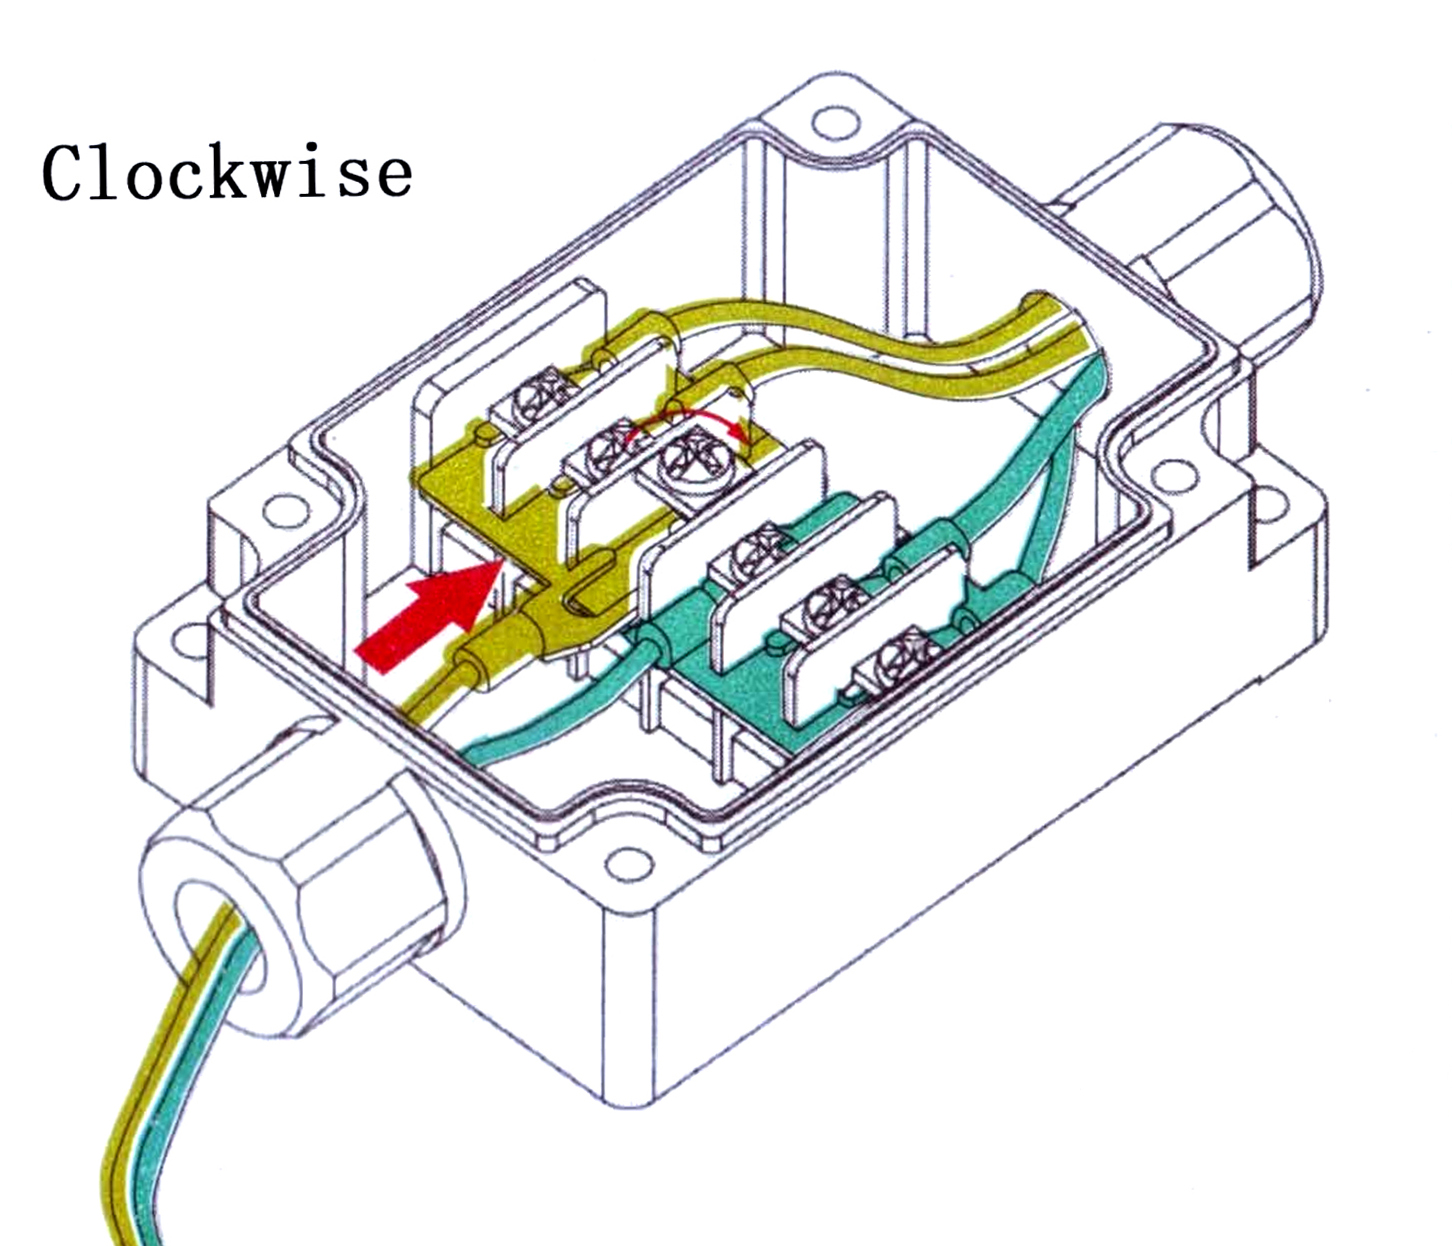
According to the circuit diagram as shown in step 5, then connect plastic waterproof case, please note that the same color of the wire when connecting circuit to docking.
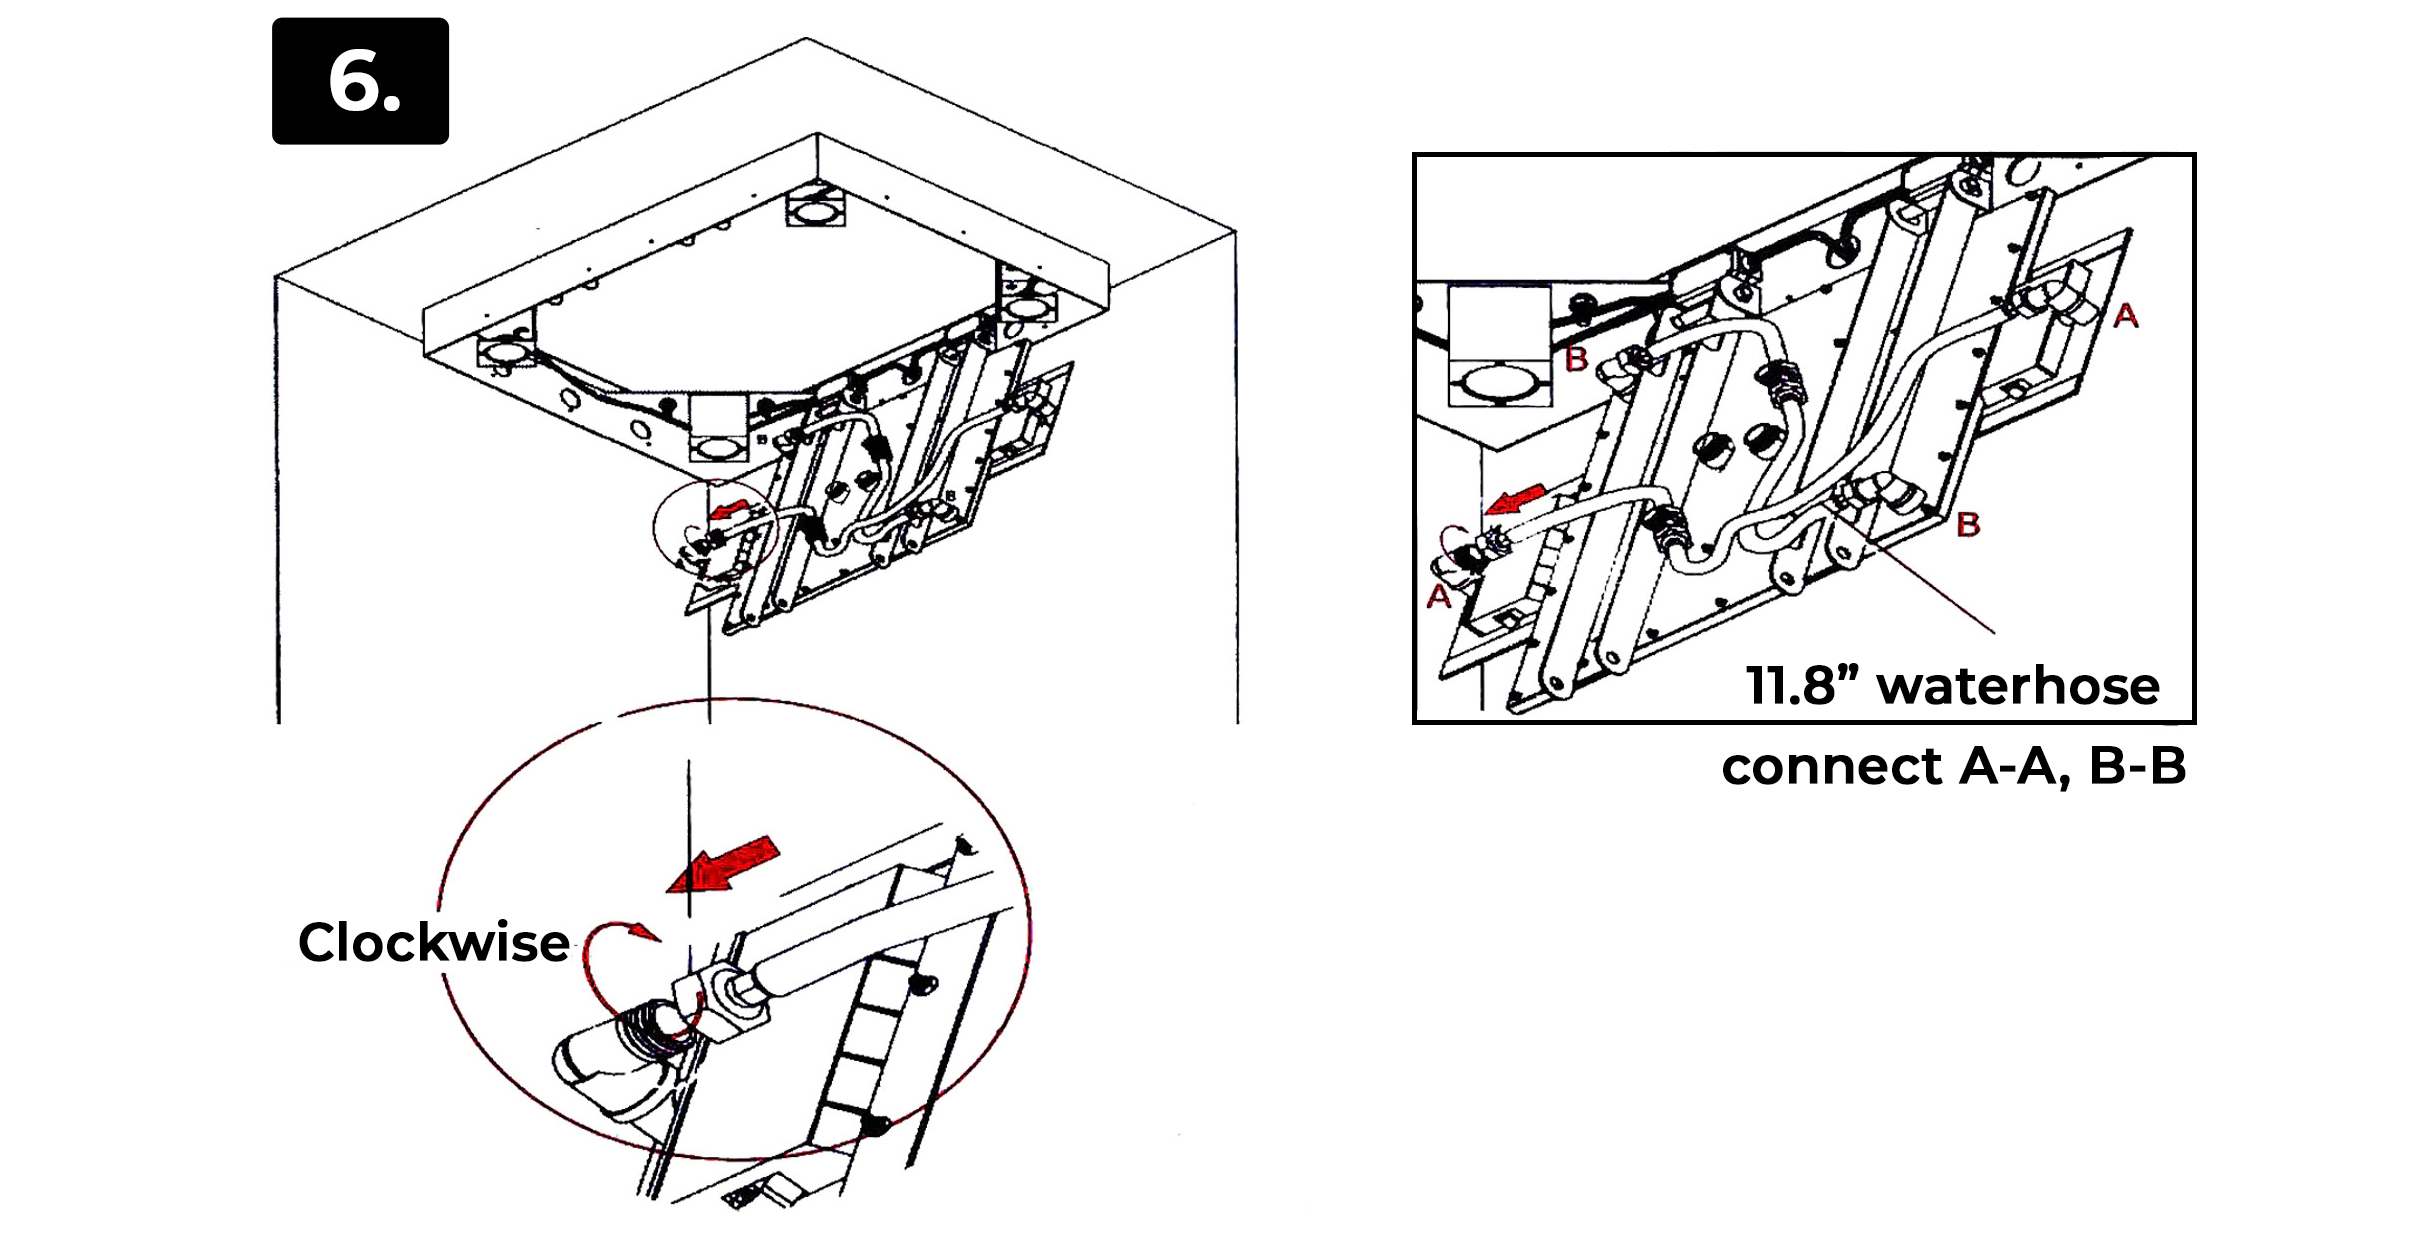
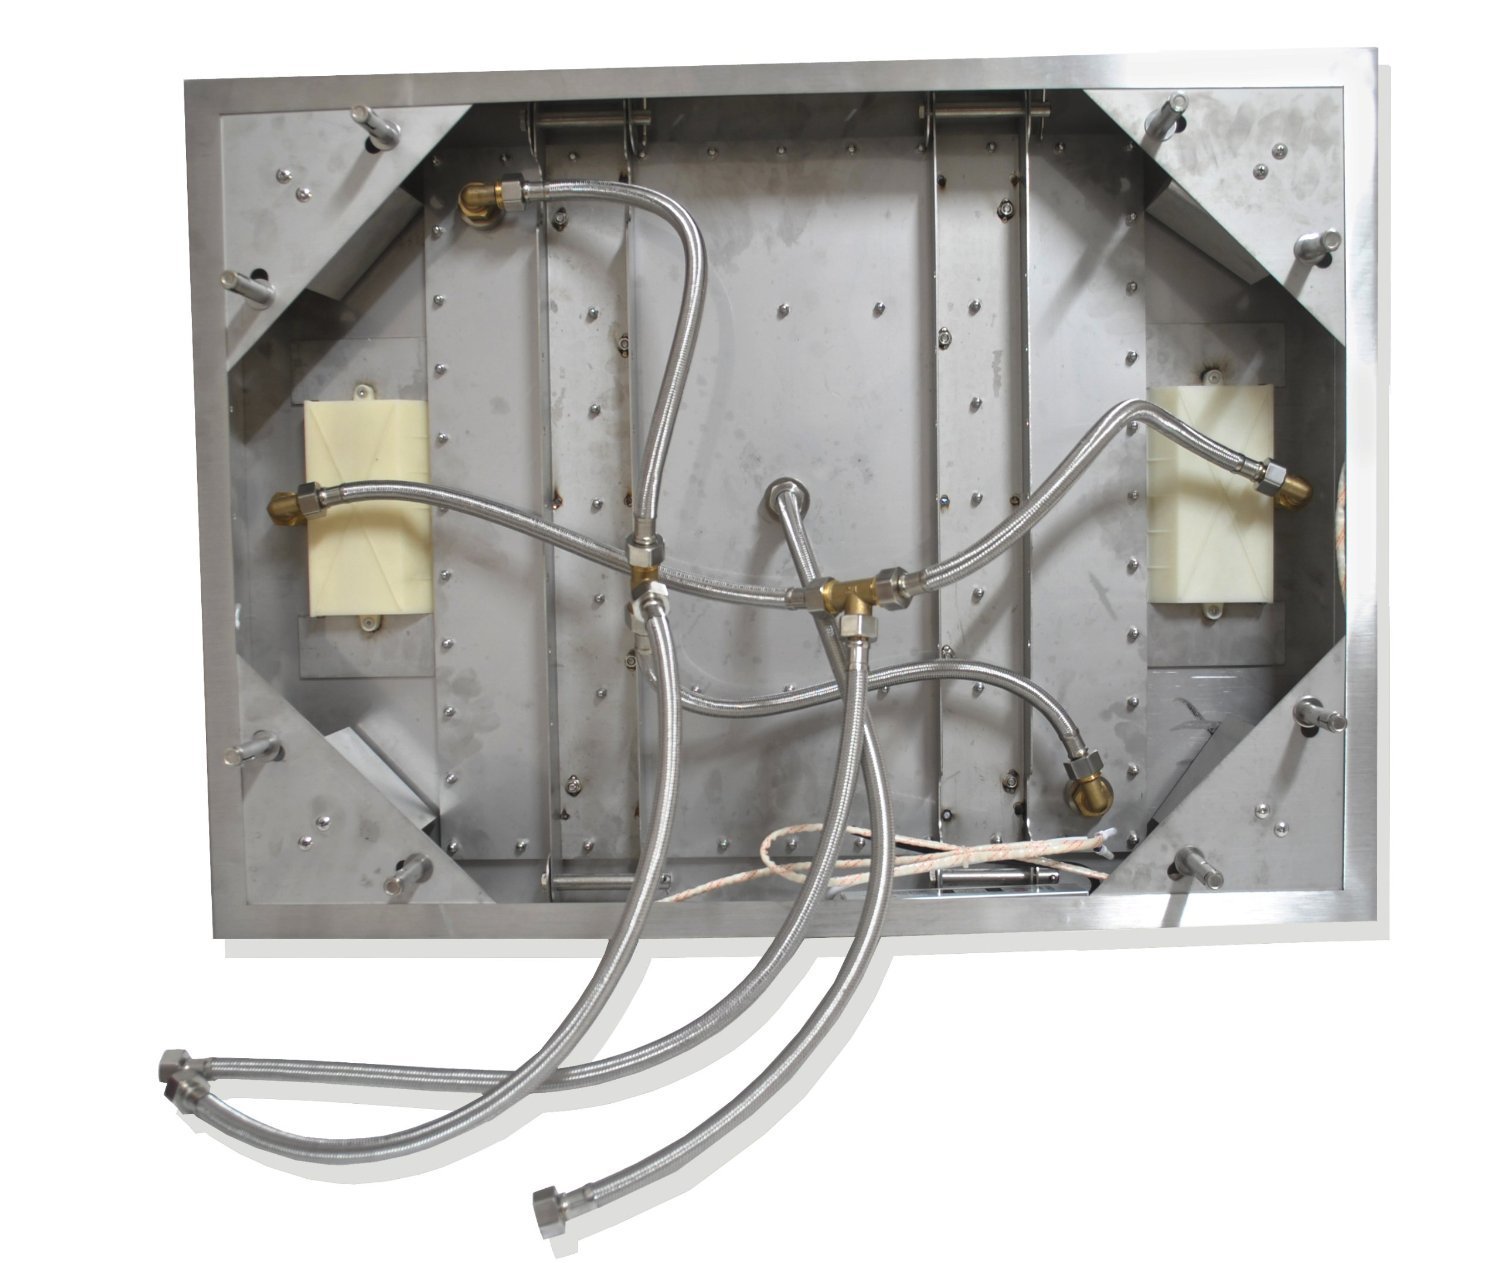
6. Connecting water hoses and Tee joints and then connect the water hoses to the water inlet pipe connector.
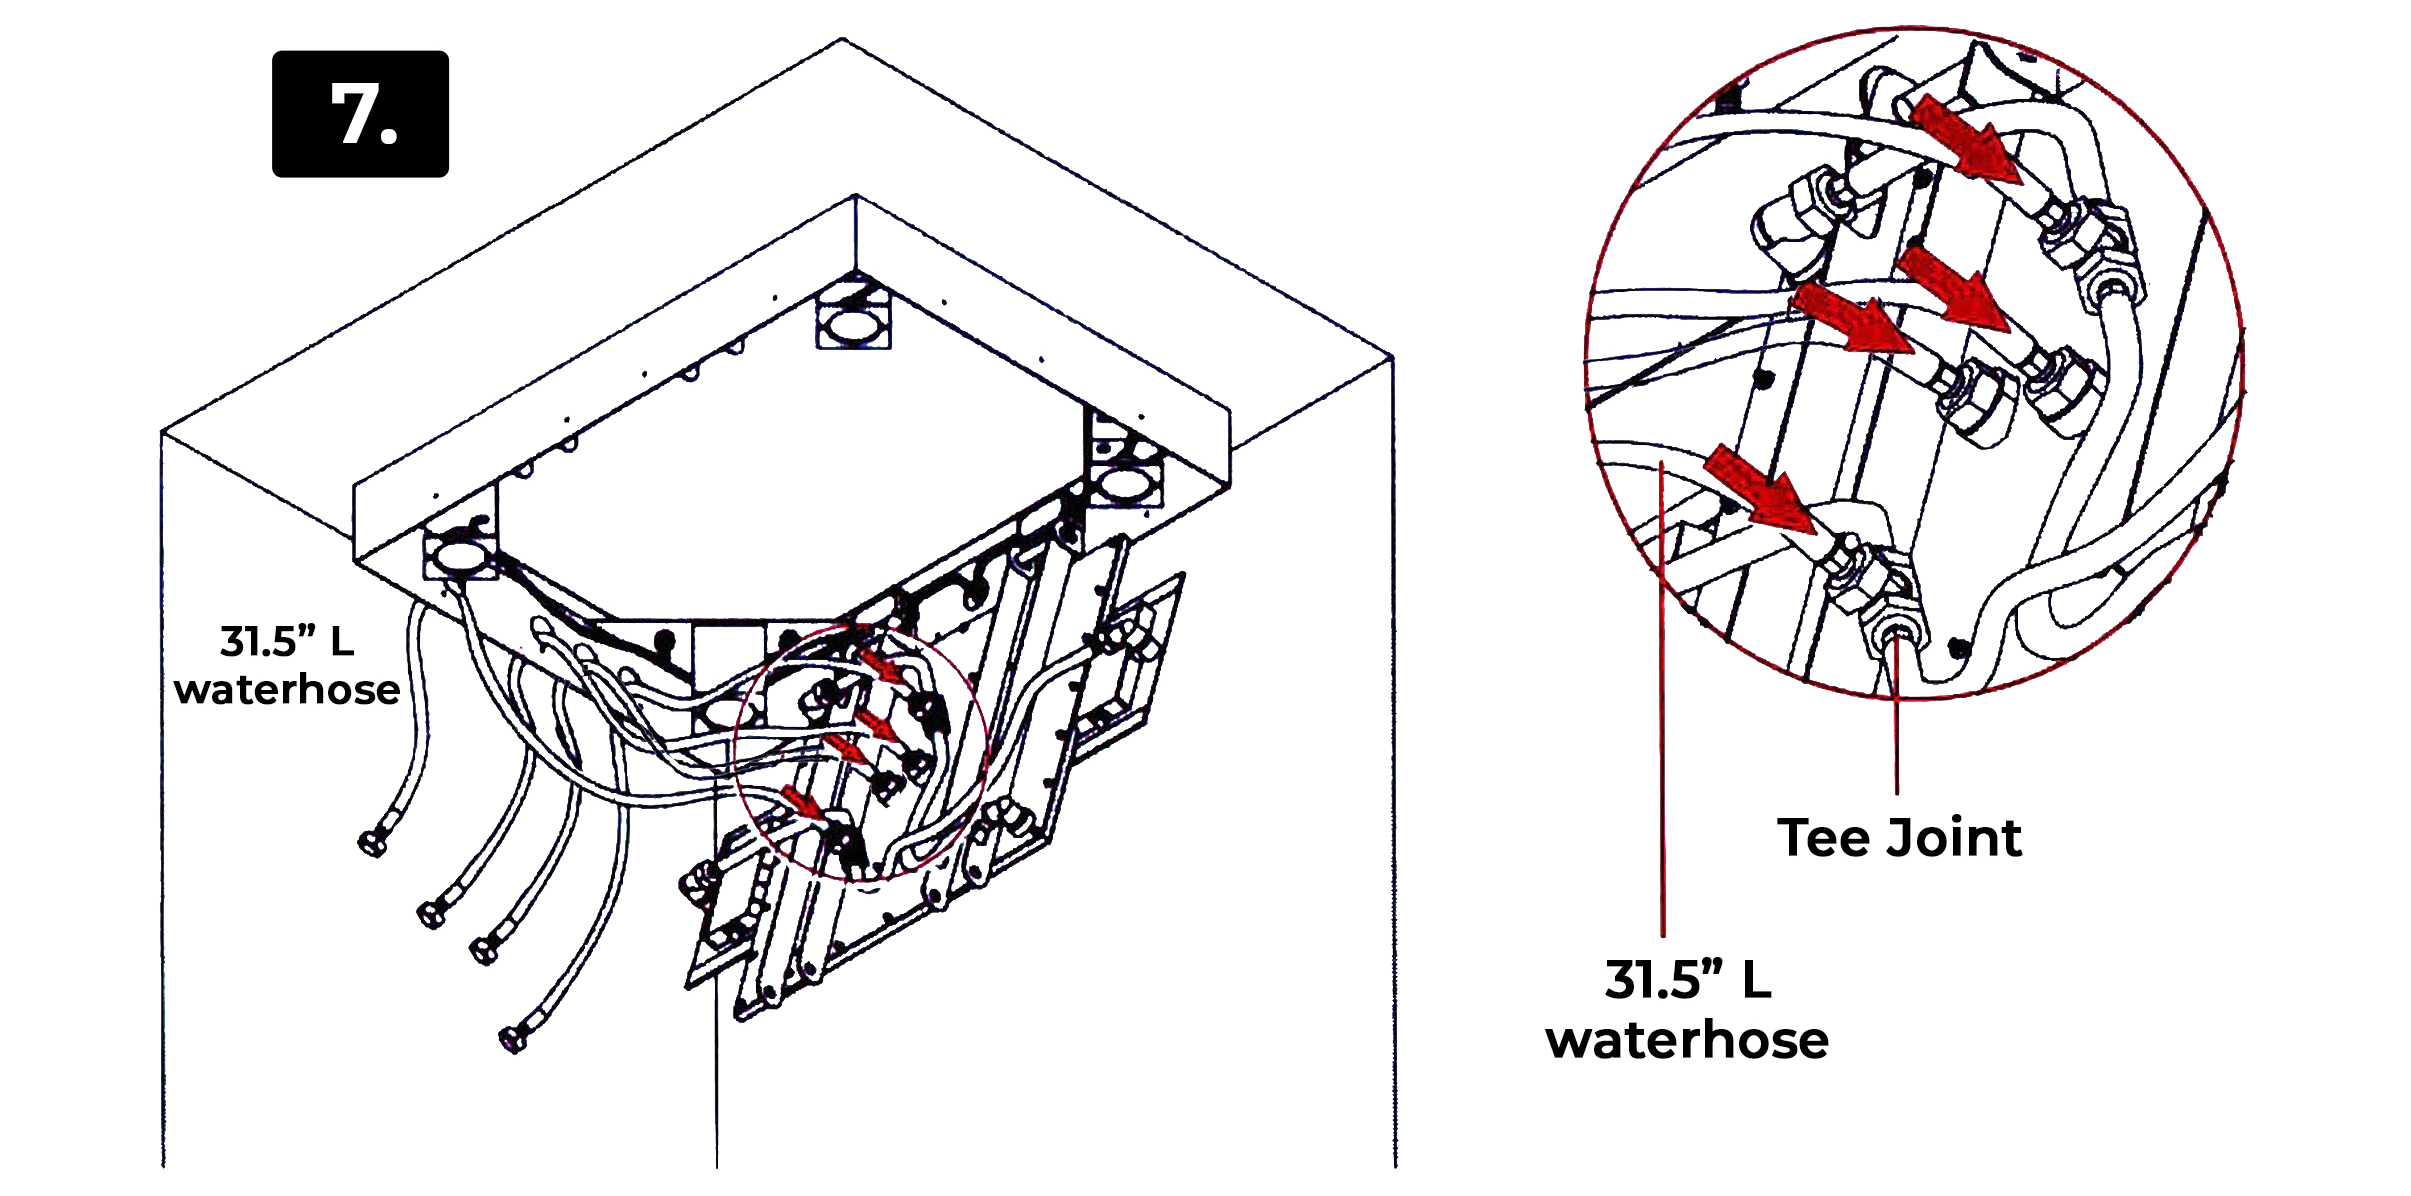
7. Connecting 4 pcs water hose to 2 Tee joints and G1/2 joints in the middle and then put another side of the shower hoses through the showerhead side holes.
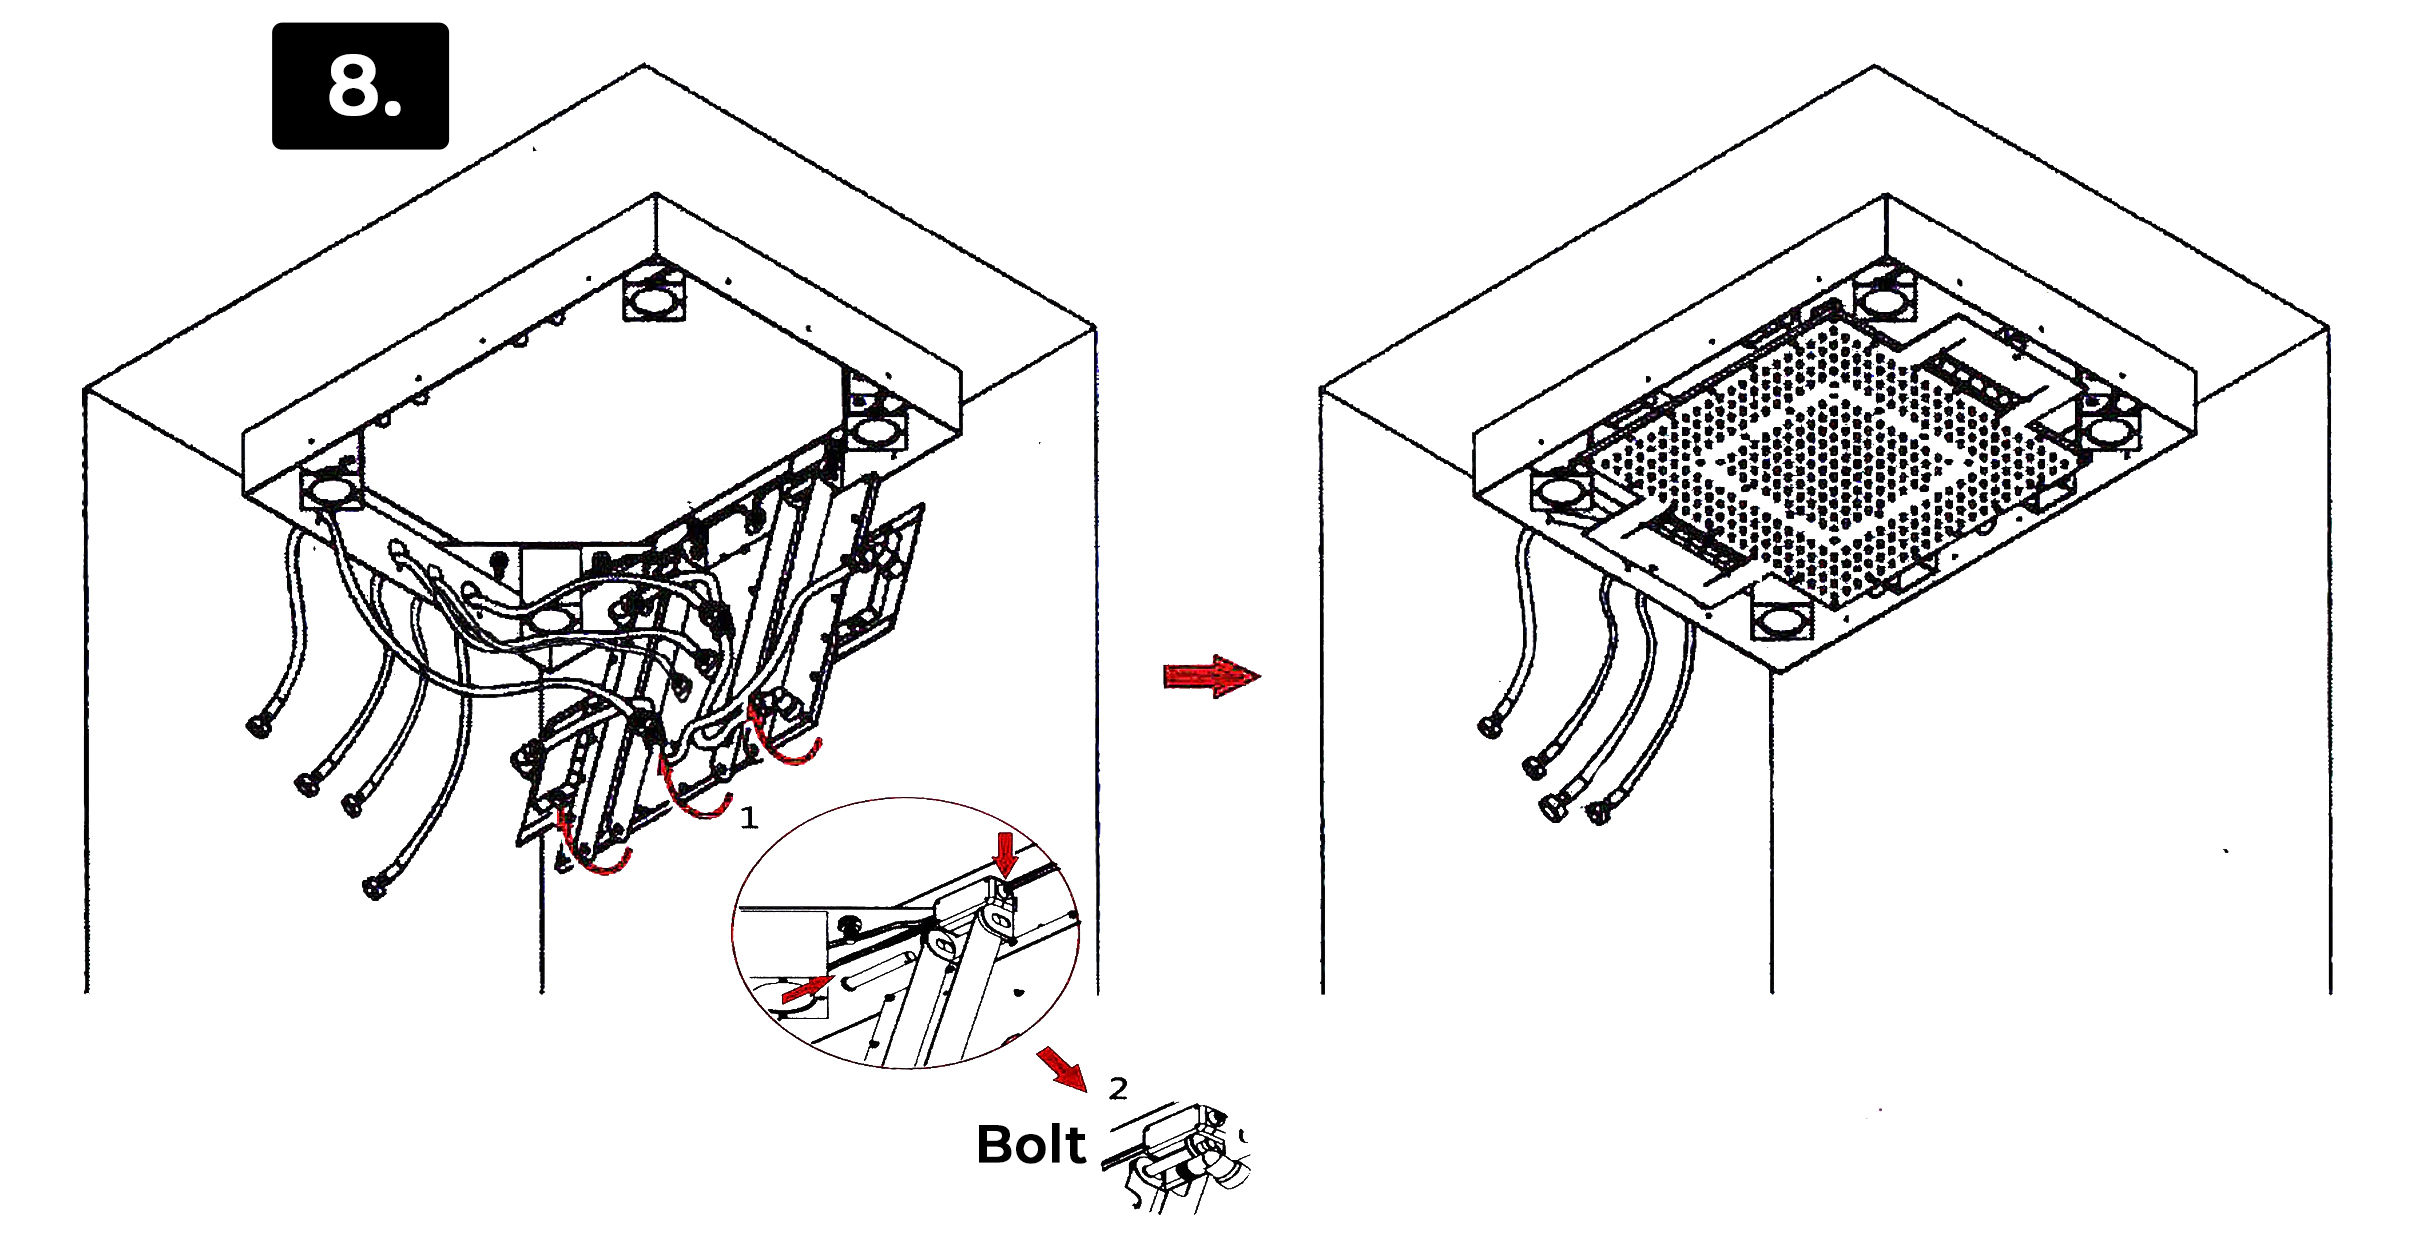
8. Installing the shower body by plugging the bolts. (As the above picture).
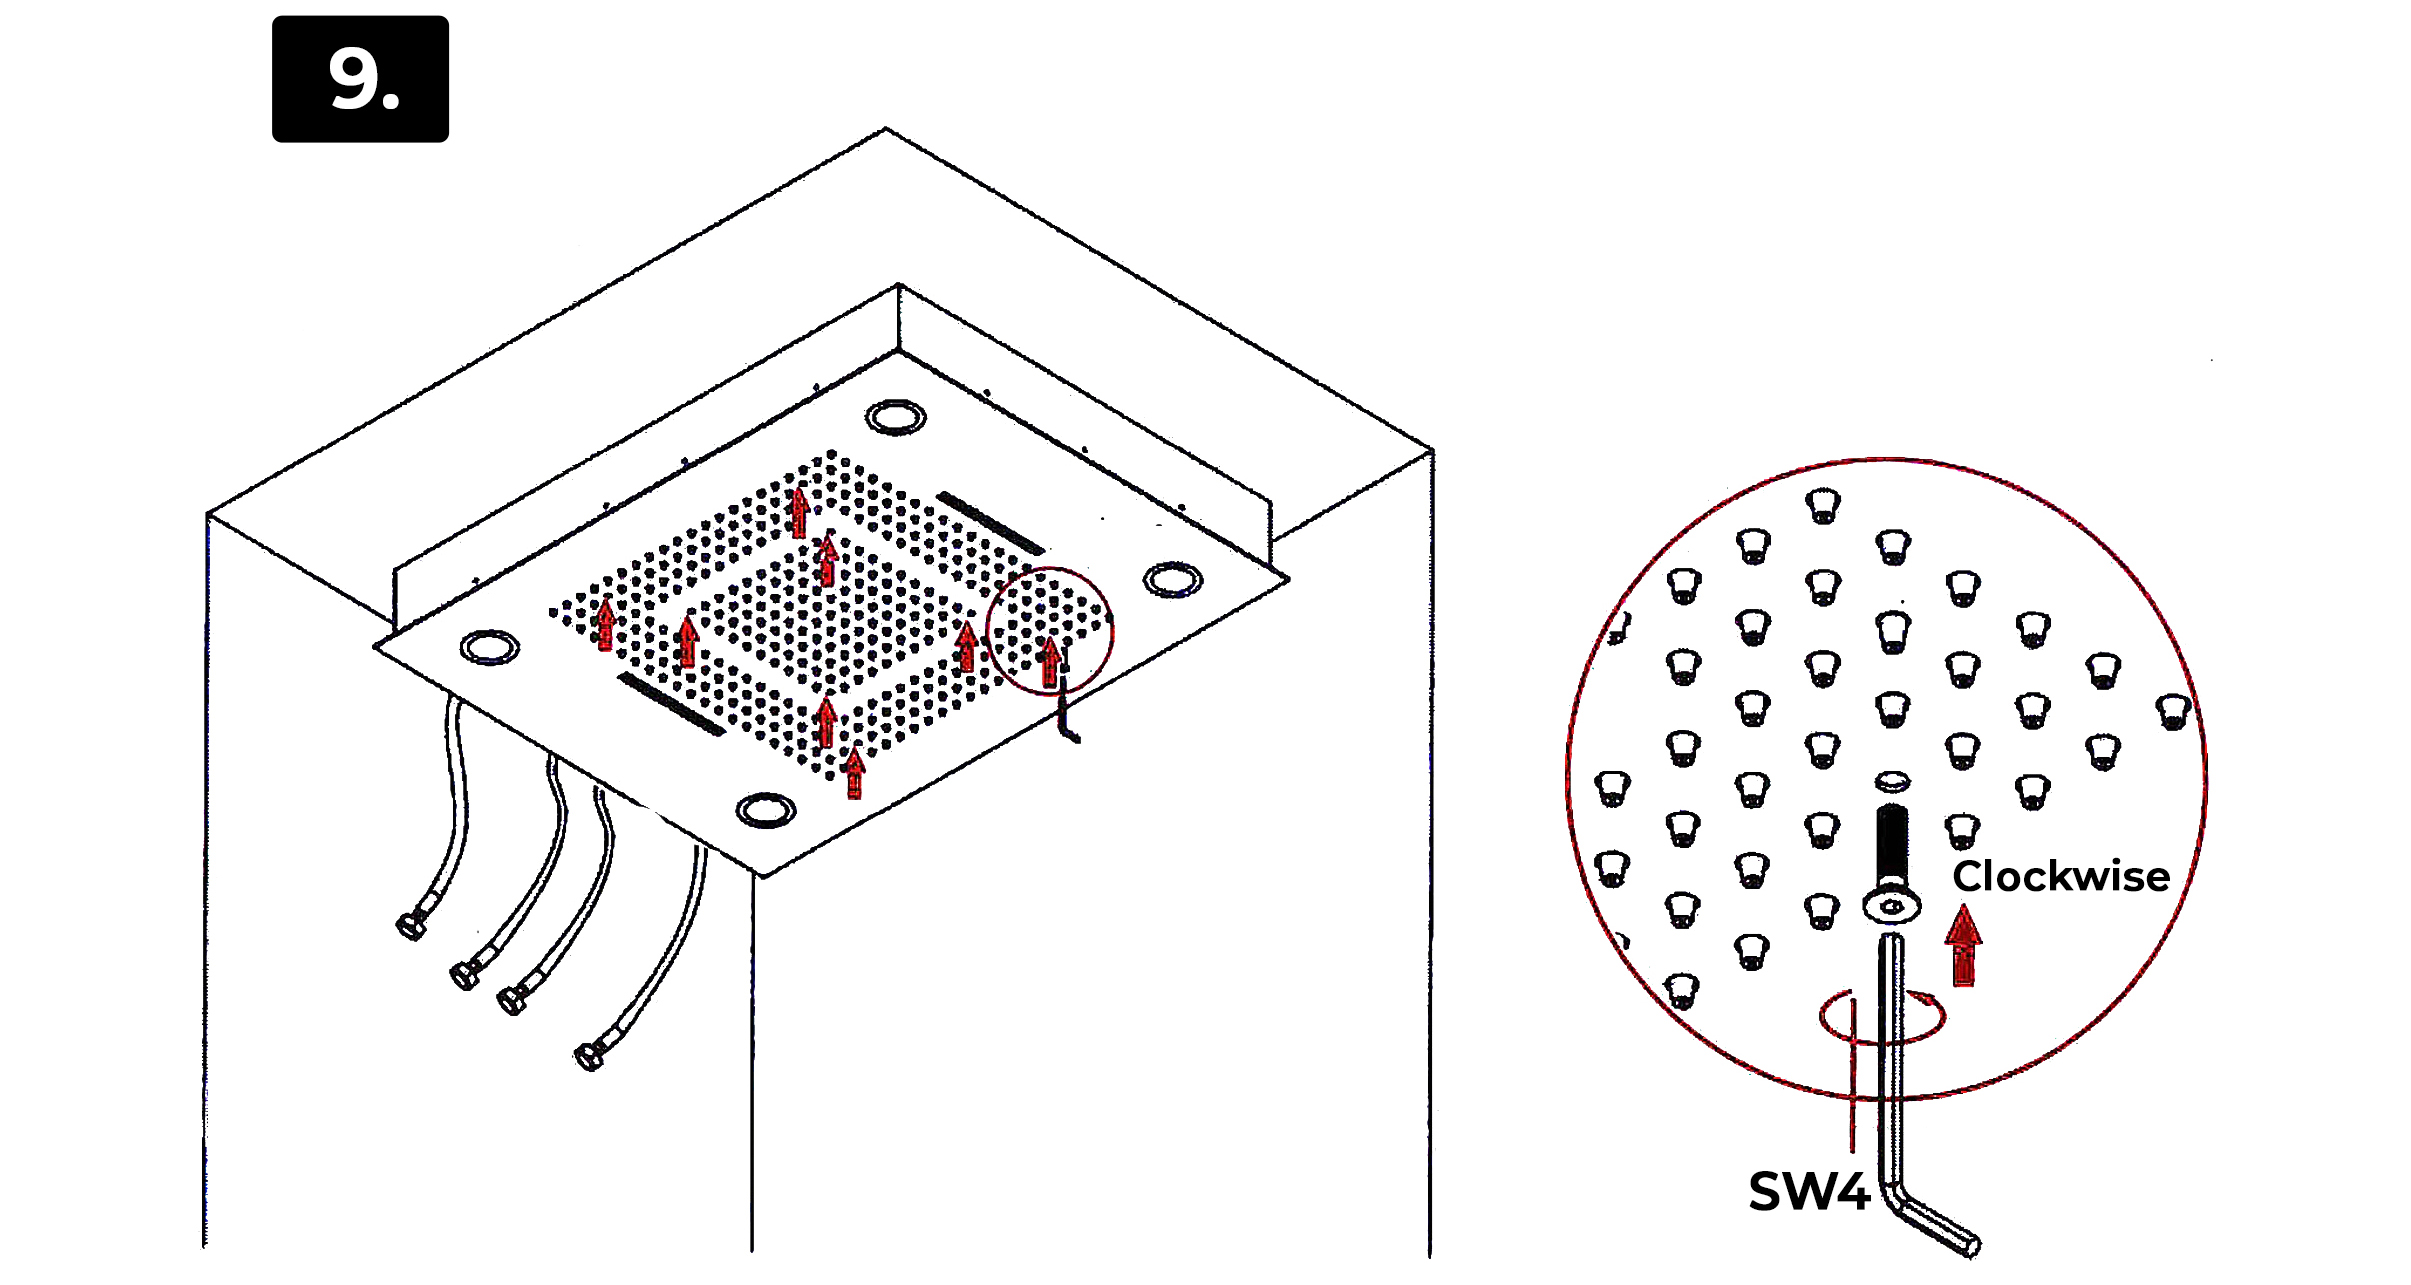
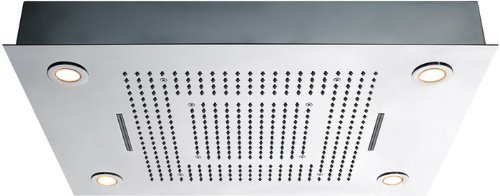
9. Install the decorative panel and twist the corresponding 8 fixing screws with a SW4 hex wrench.
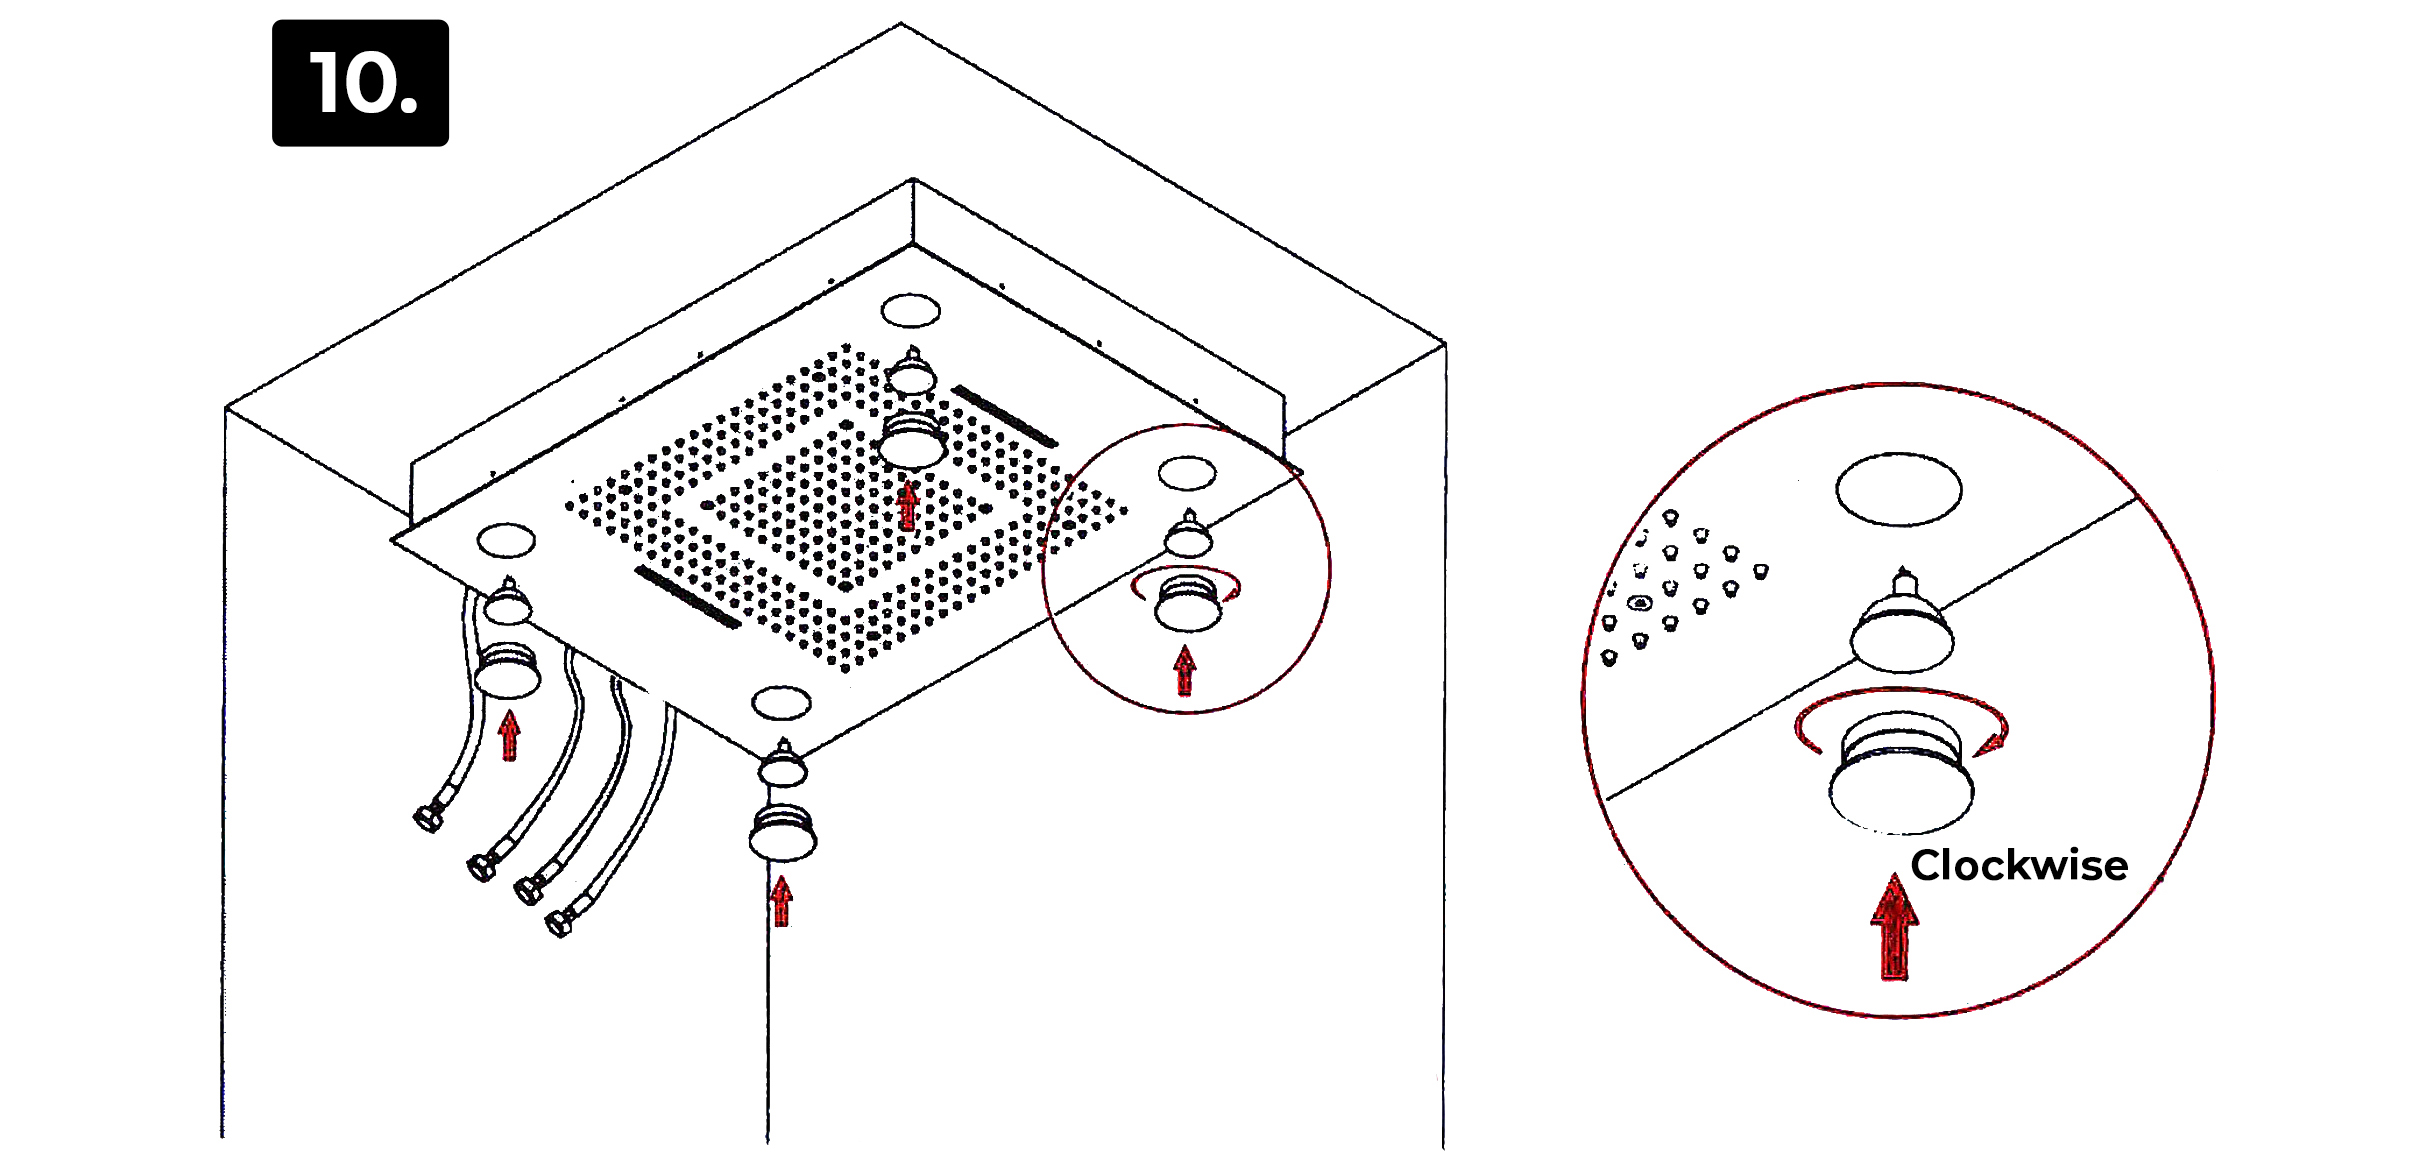
10. Install 4 LED lights and lamp cups clockwise.
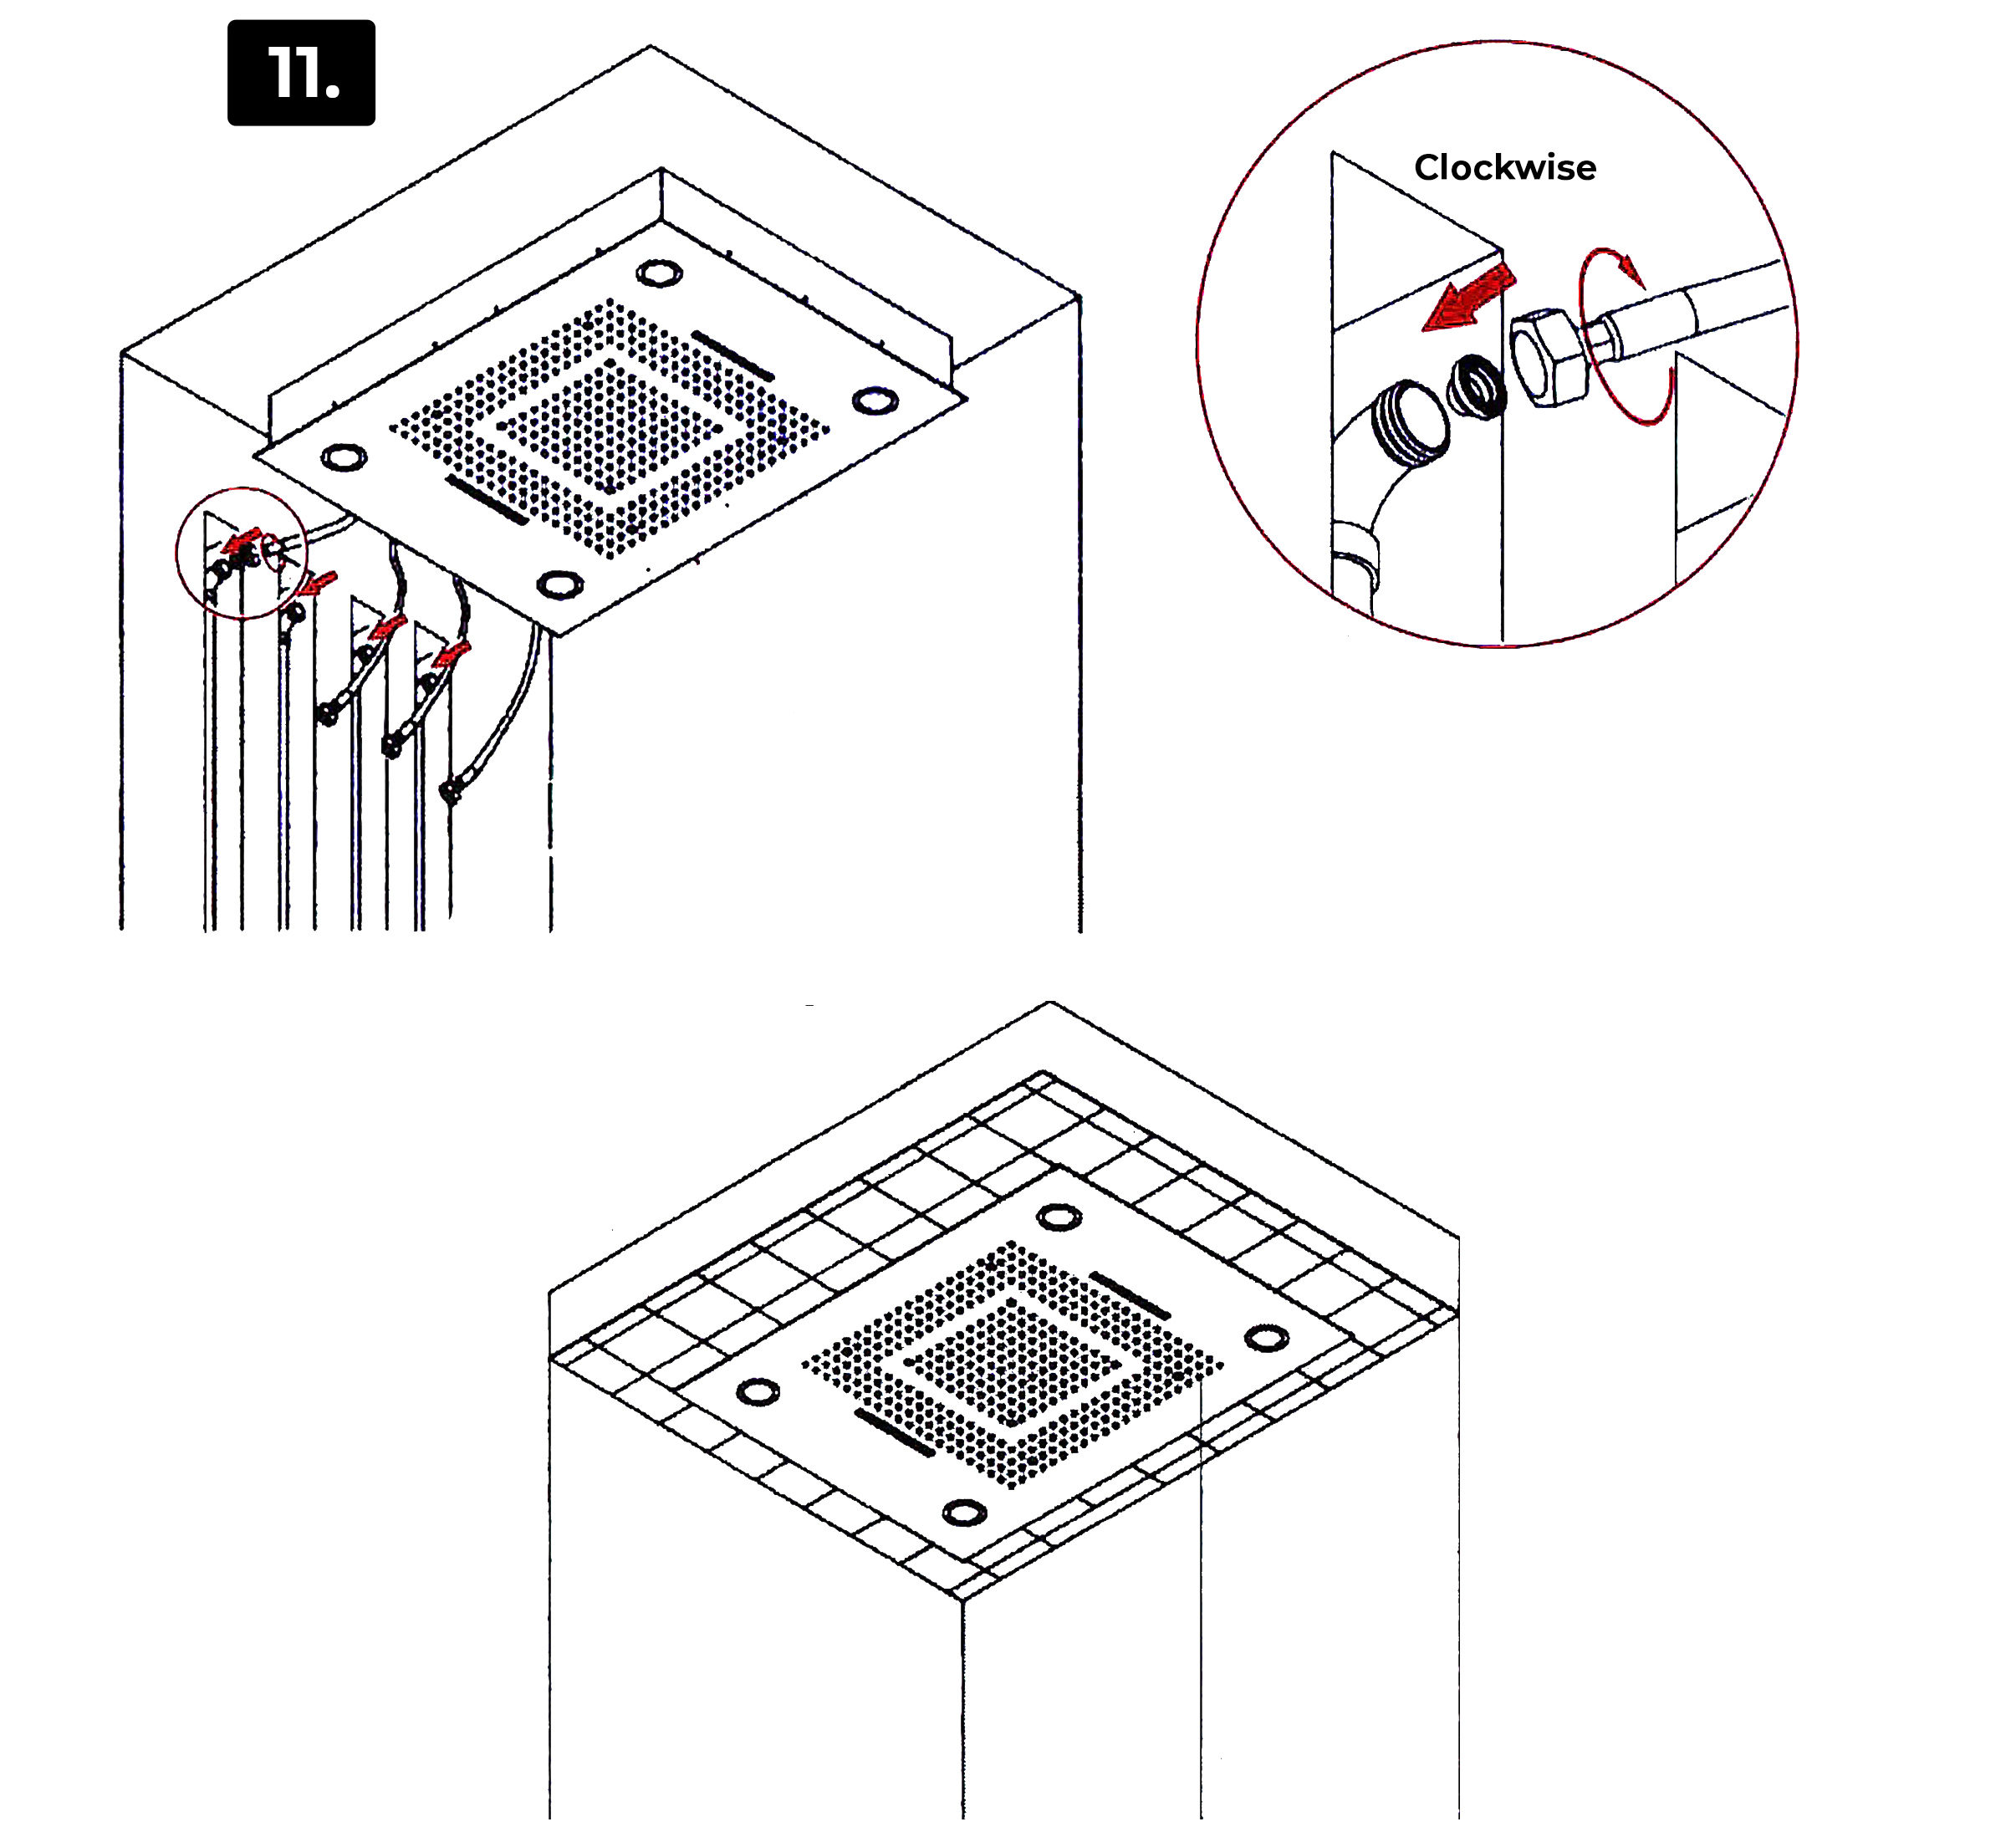
11. NOTE: 1. Before connecting water hoses and water pipes, cleaning the water pipes first. It will prevent impurities from clogging the showerhead. 2. When connecting water pipes and hoses ,don't forget putting G1/2 filternet in the water hoses, filtering impurities.
Connect 4 water inlet hoses to the wall-embedded water inlet pipes and then seal the wall.
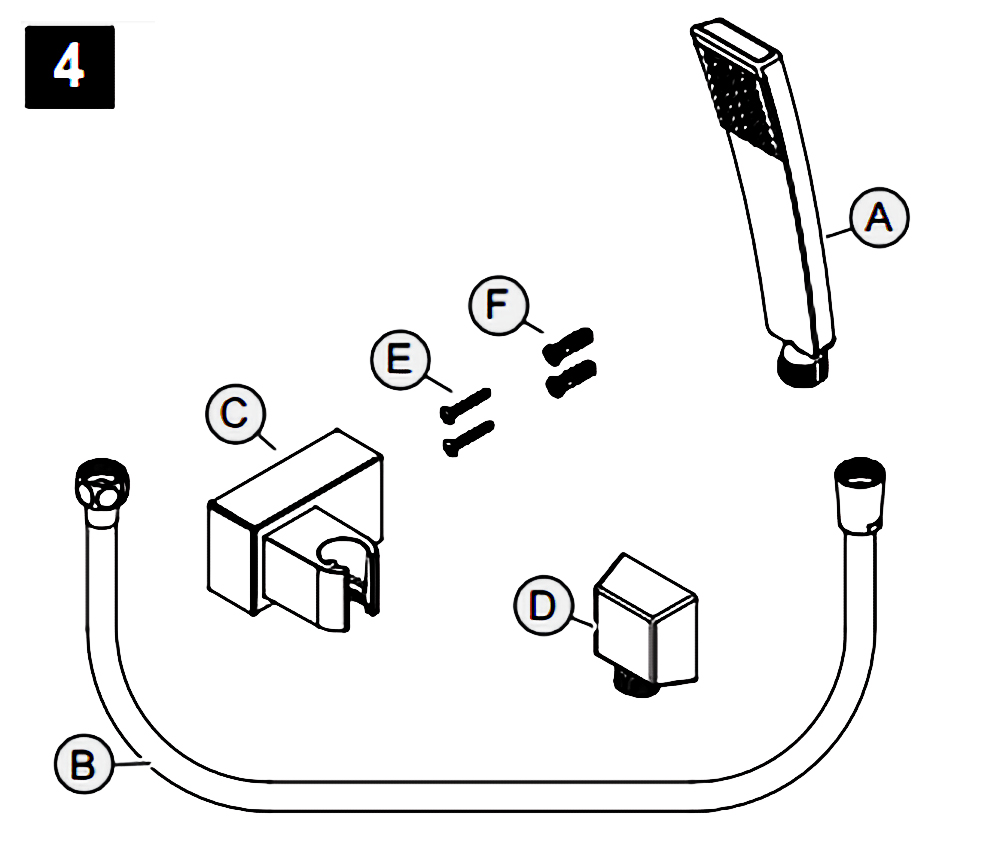
Hand-Held Shower Instructions