- Before you begin, please read the installation instructions below. Observe all local building and safety codes.
- Unpack and inspect the product for any shipping damages. If you find damages, do not install.
- Please note all showers must be installed by a professional and certified plumber otherwise warranty might be voided
|
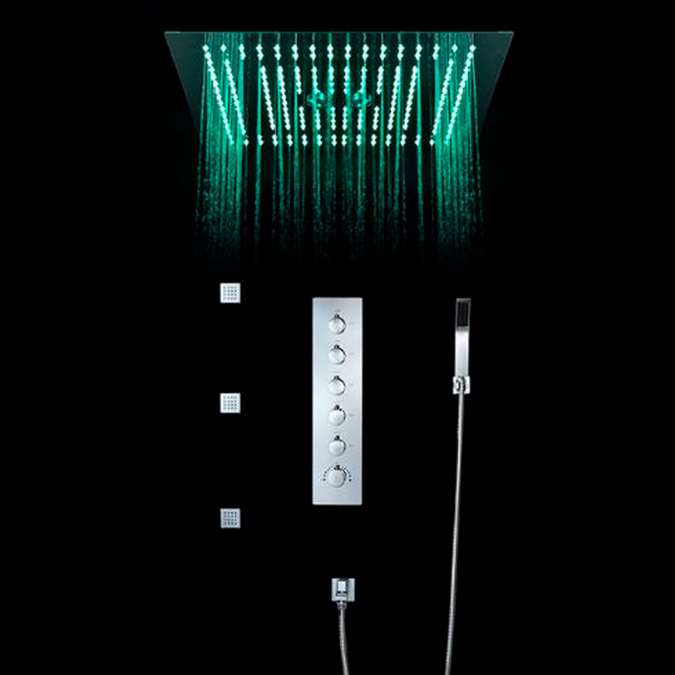
|
Shower Head Installation
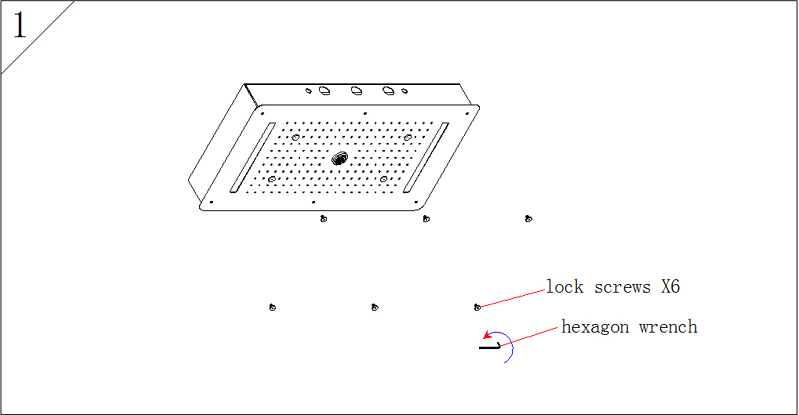
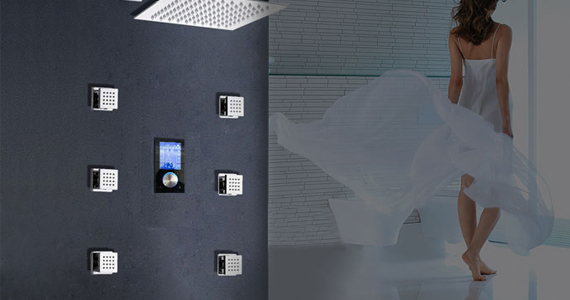
1. Use a hexagon wrench to lose the lock screws then separate the showerhead assembly and bracket.
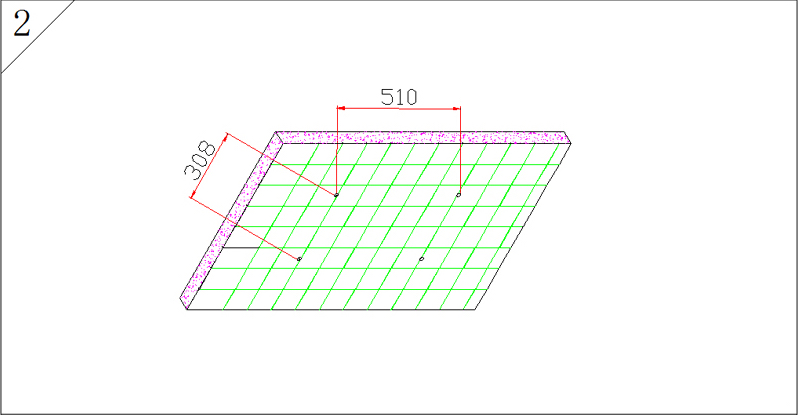
2. Dig 4 Ø10 holes on the ceiling according to the dimension of the screws.
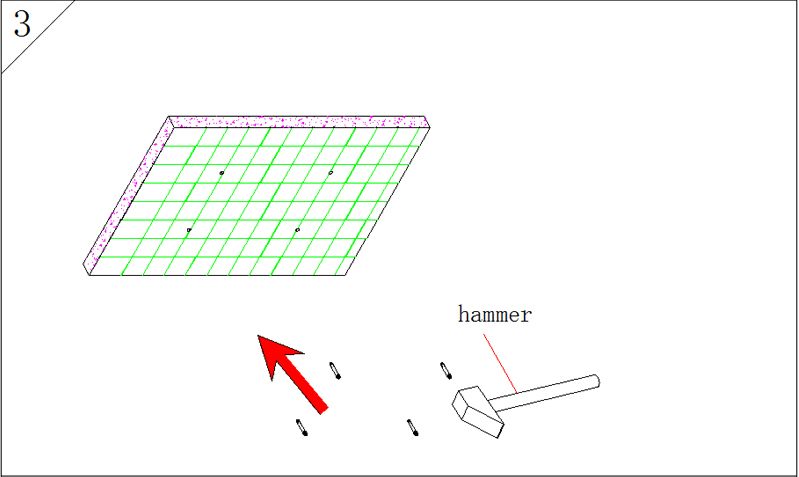
3. Use a hammer to thwack the 4 screws into 4 holes.
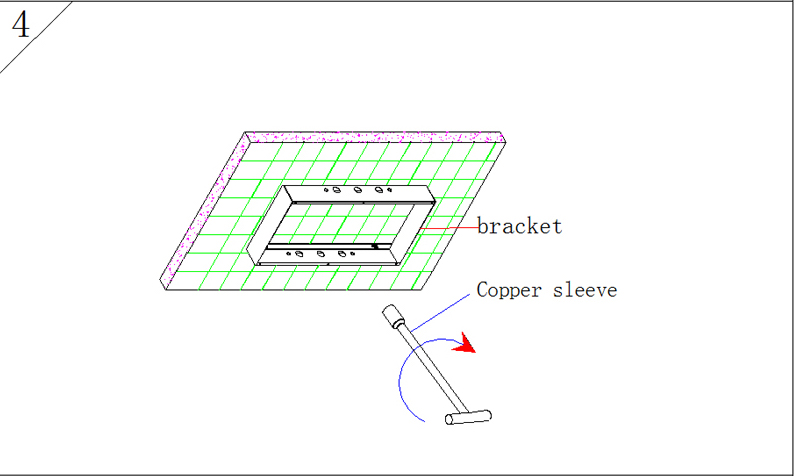
4. Install the bracket on the expansion screws then use copper sleeve wrench to lock 4 screws.
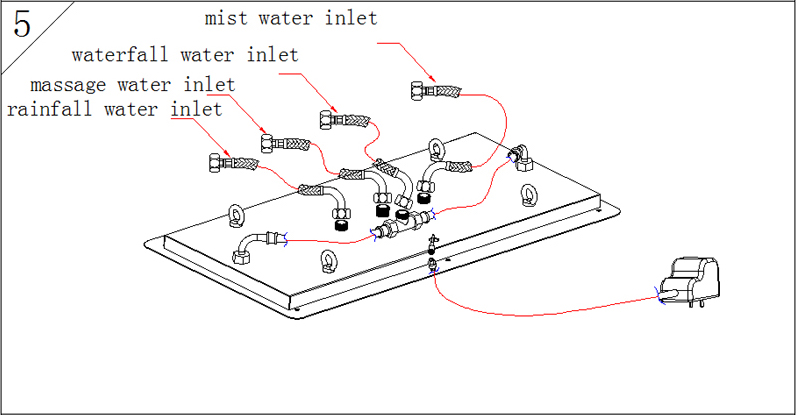
5. Make sure all the water inlet pipe connected well without leaking before insert the power plug into the socket.
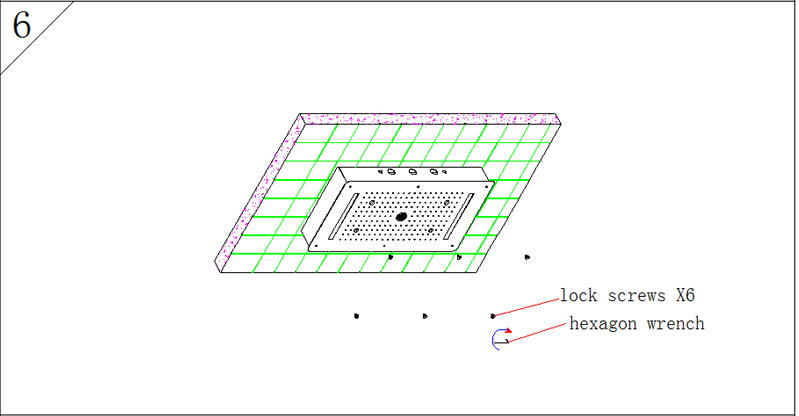
6. Fix the shower assembly on the bracket by turn the locking bolt.
Shower Mixer Installation
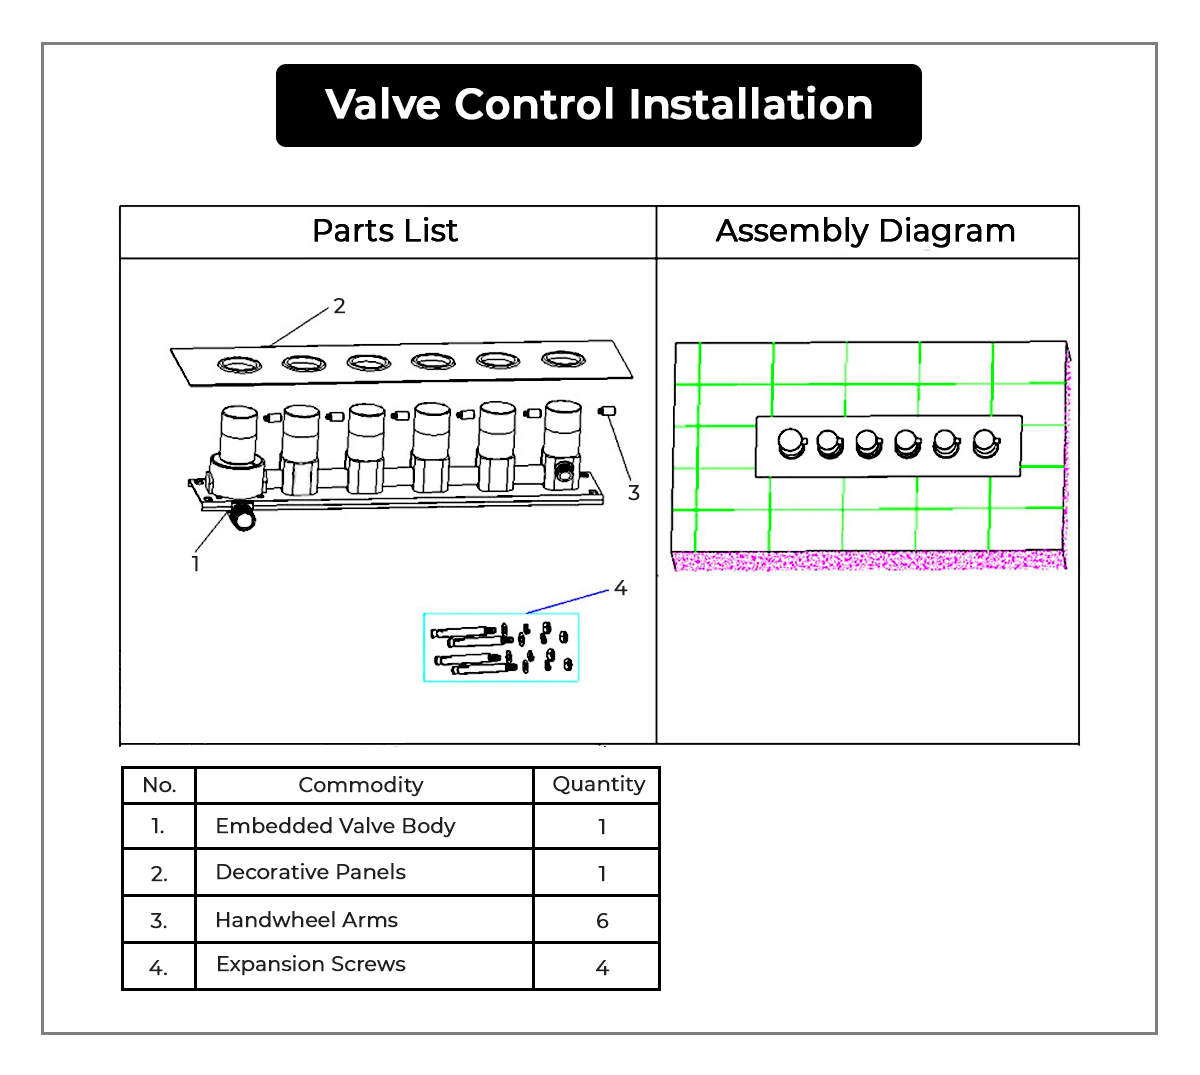
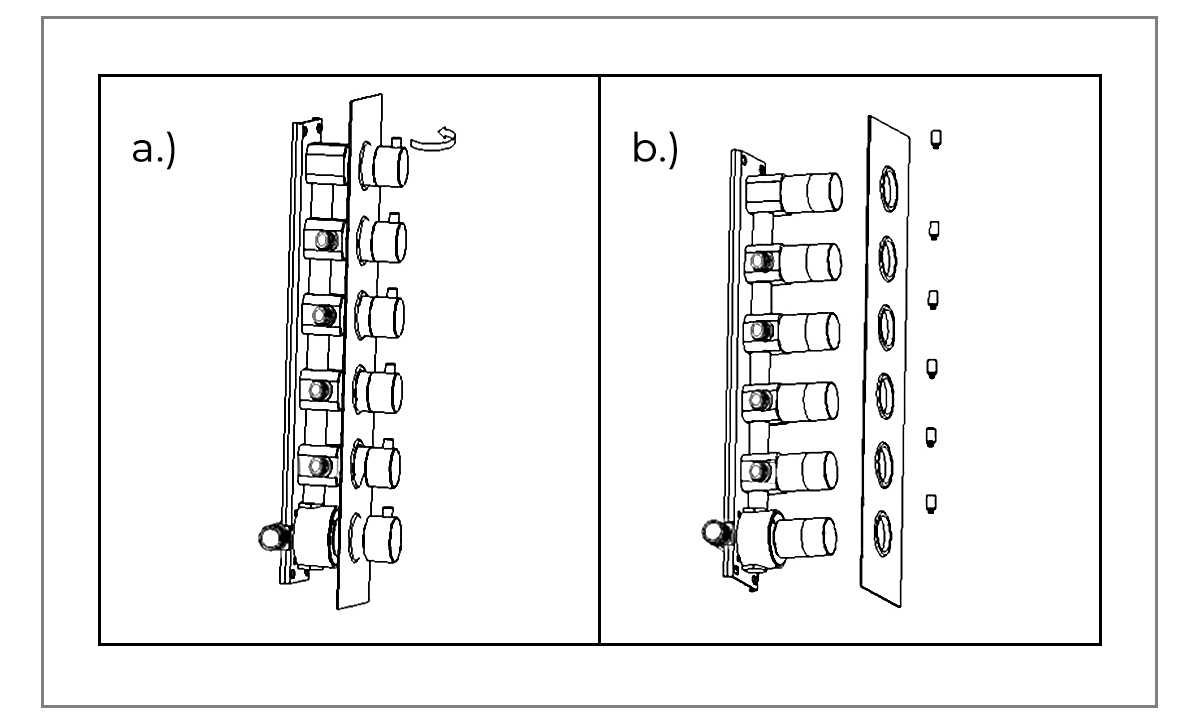
a. Release Six handwheel levers according to above directions.
b. Take apart the embed valve, panel, and handwheel.
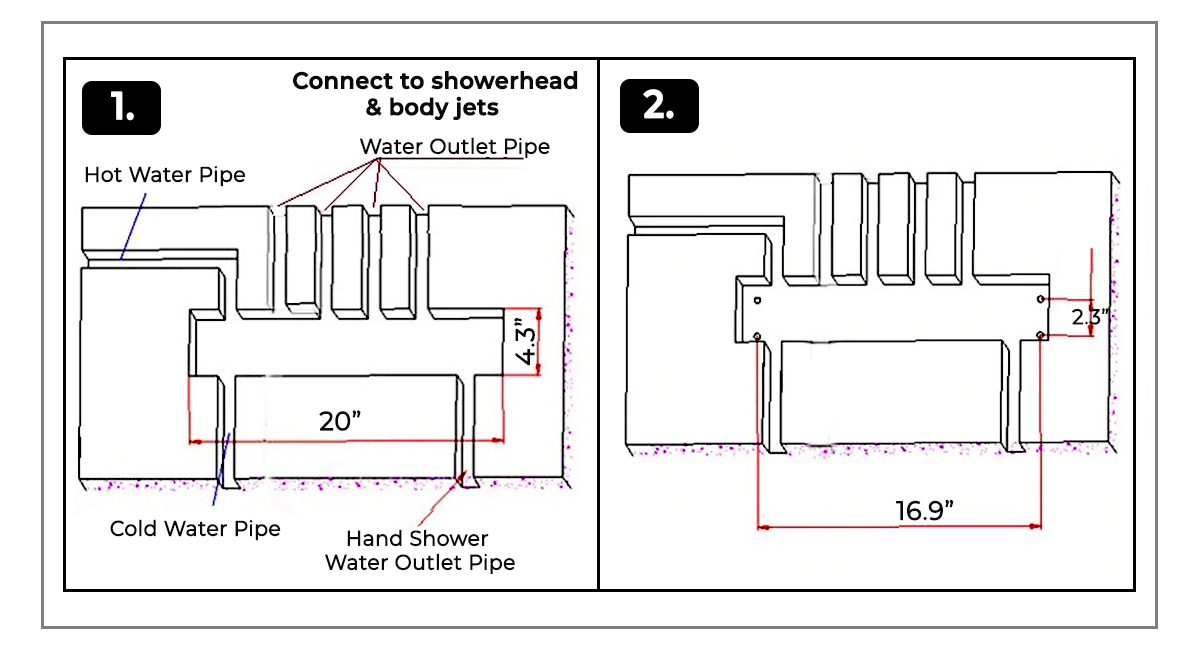
1. Dig the embed space for the pipe on the wall according the specification of the valve.
2. Dig 4 hole according to the position of the screws.
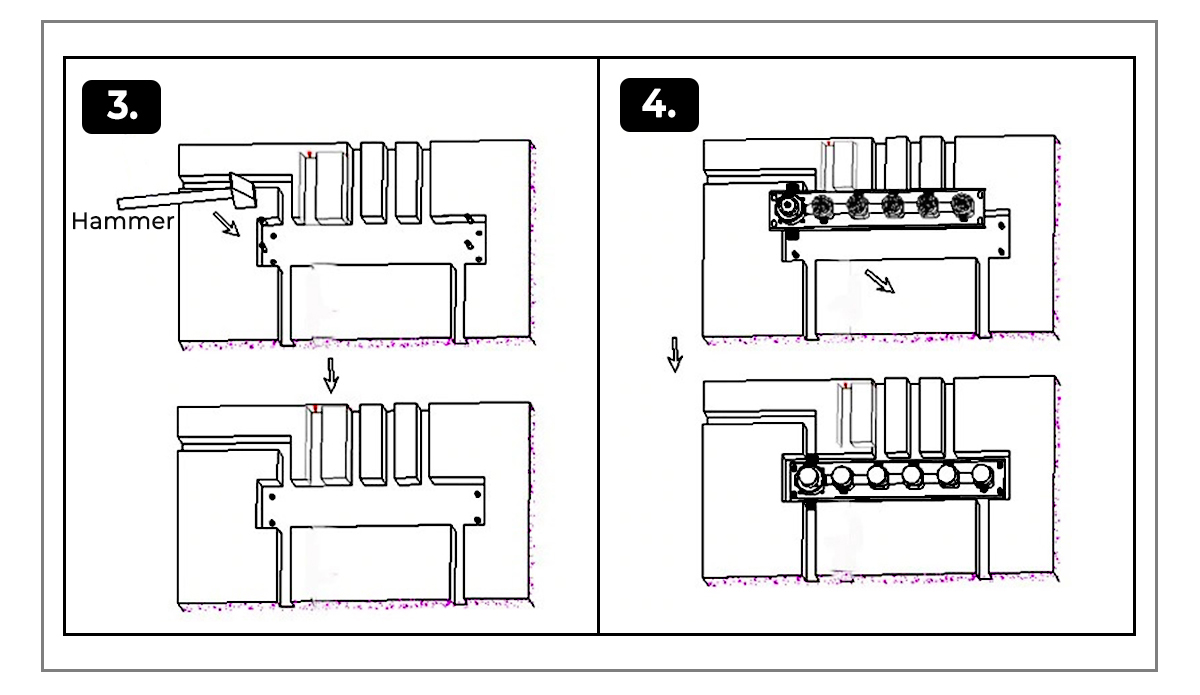
3. Use a hammer to thwack the screws into 4 holes.
4. Fix the valve body with 4 screws.
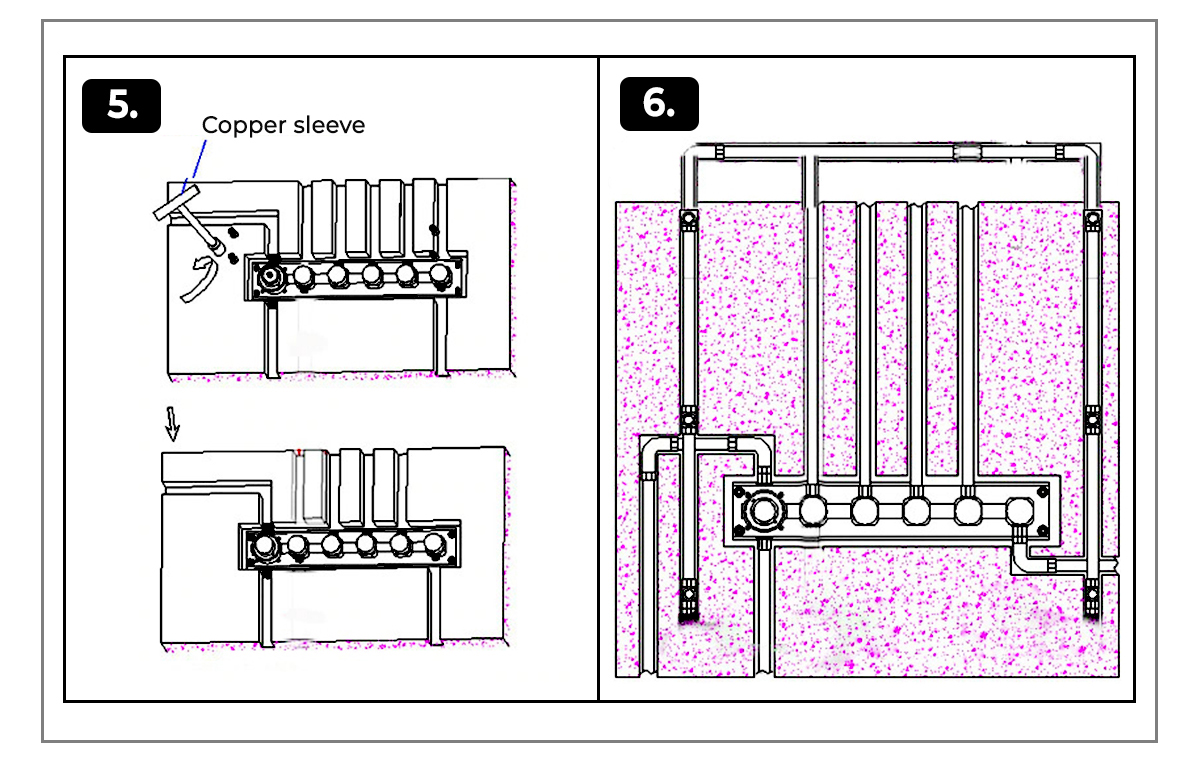
5. Find out the expansion screw heads with washer and spring washer. Use copper sleeve wrench to lock the screw heads with the embed valve body.
6. After connect all the pipes and before sealing the wall with concrete, confirm no leaking problem occur when turn on water.

7. Fix the decorative panel on the embed valve body.
8. Screw the handwheel arms with the handwheels.


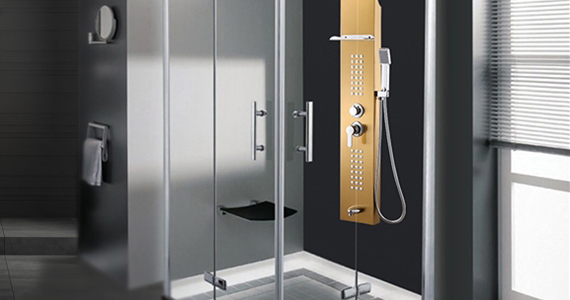
Hand-Held Shower Instructions
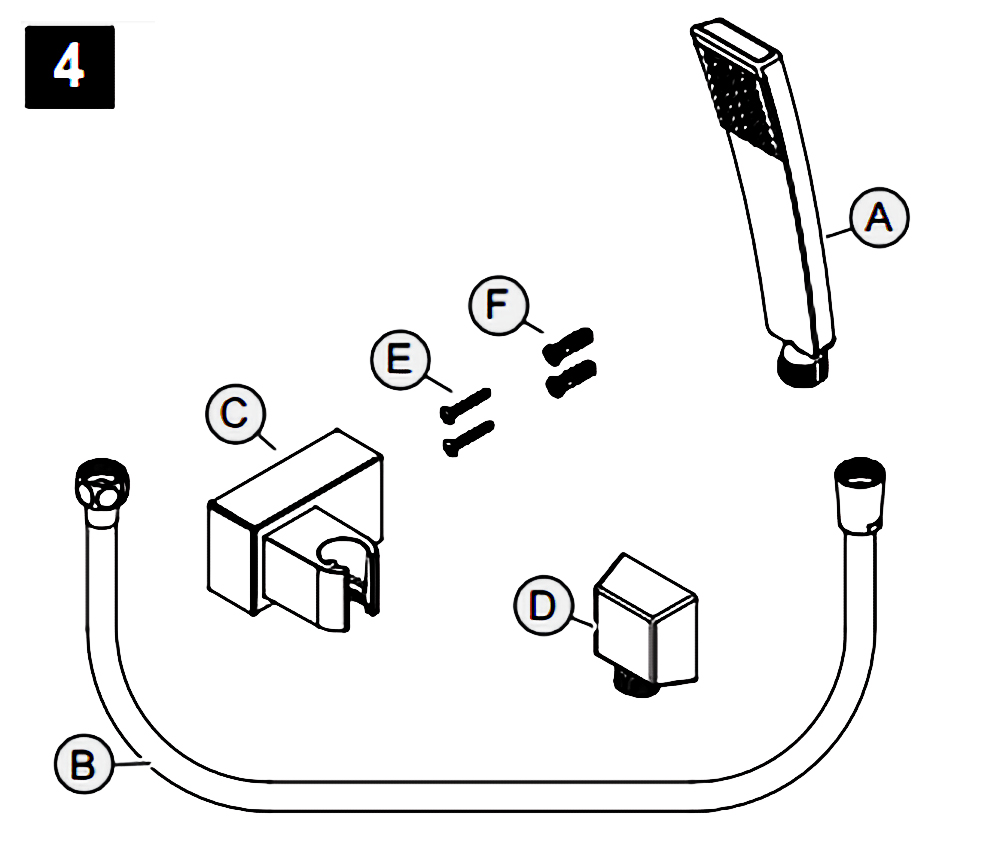
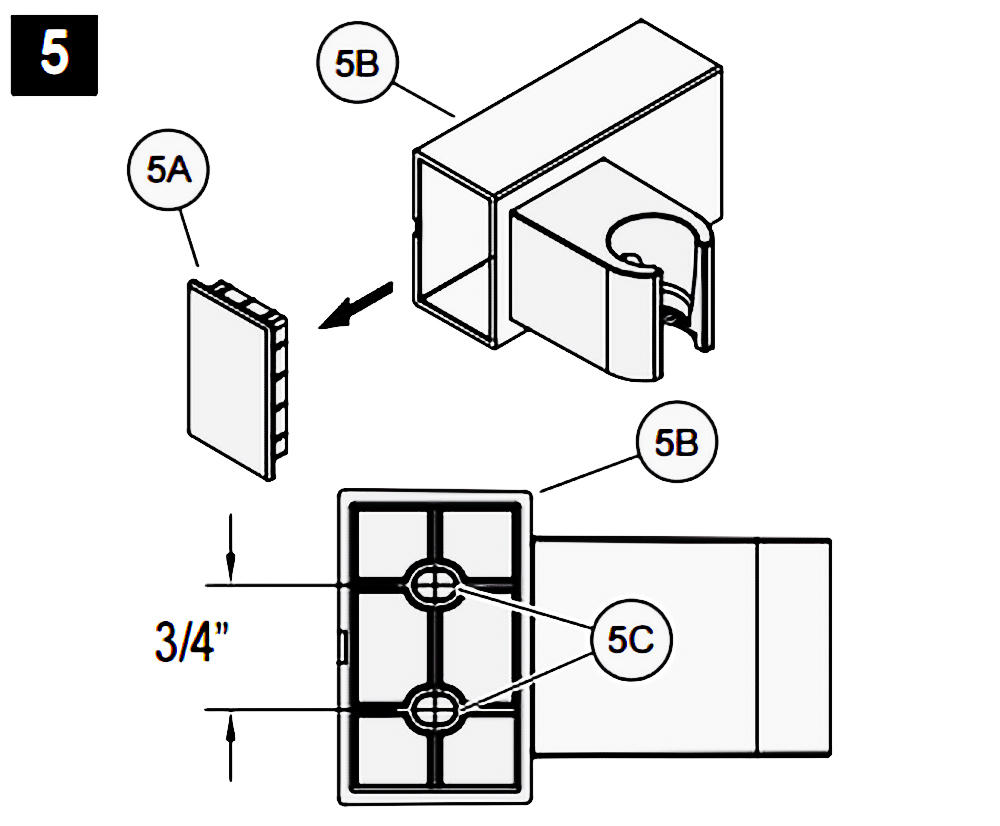
5. Hole Locations For Wall Mount
Remove Front Cover (5A) from Wall Mount (5B). Use Wall Mount Screw Holes (5C) to place the desired location. Using a punch or awl, tap the screw hole locations. Holes must be vertically aligned.
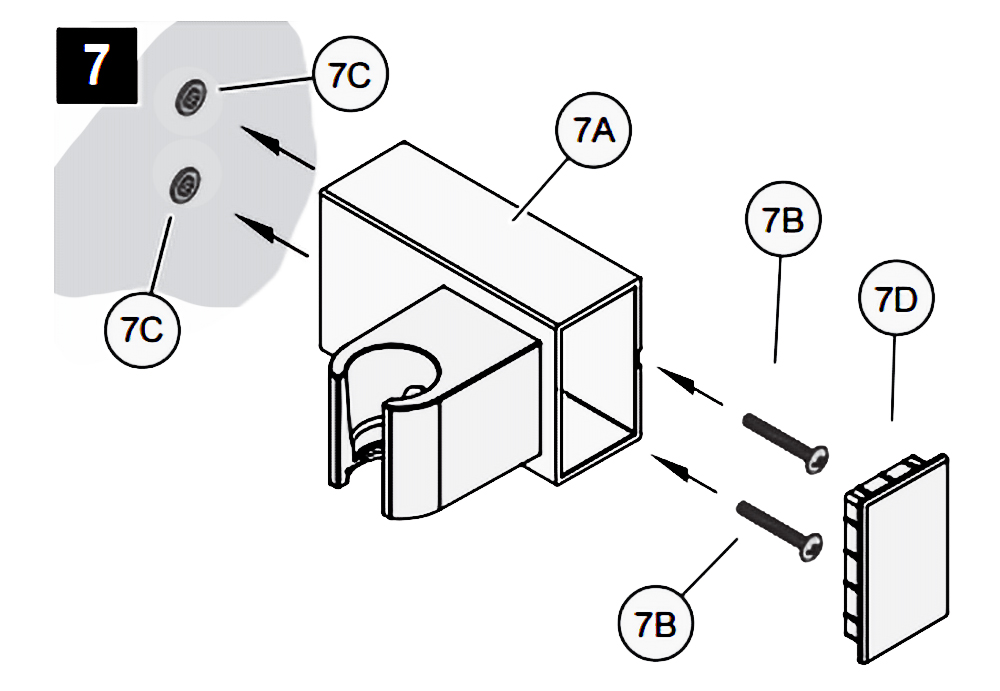
7. Wall Mount Installation
Place Wall Mount (7A) into wall and inset Mounting Screws (7B) through Wall Mount Holes (7C) and tighten until Wall Mount (7A) is flush with the wall. Do Not Over Tighten! Insert Front Cover (7D) into Wall Mount (7A).
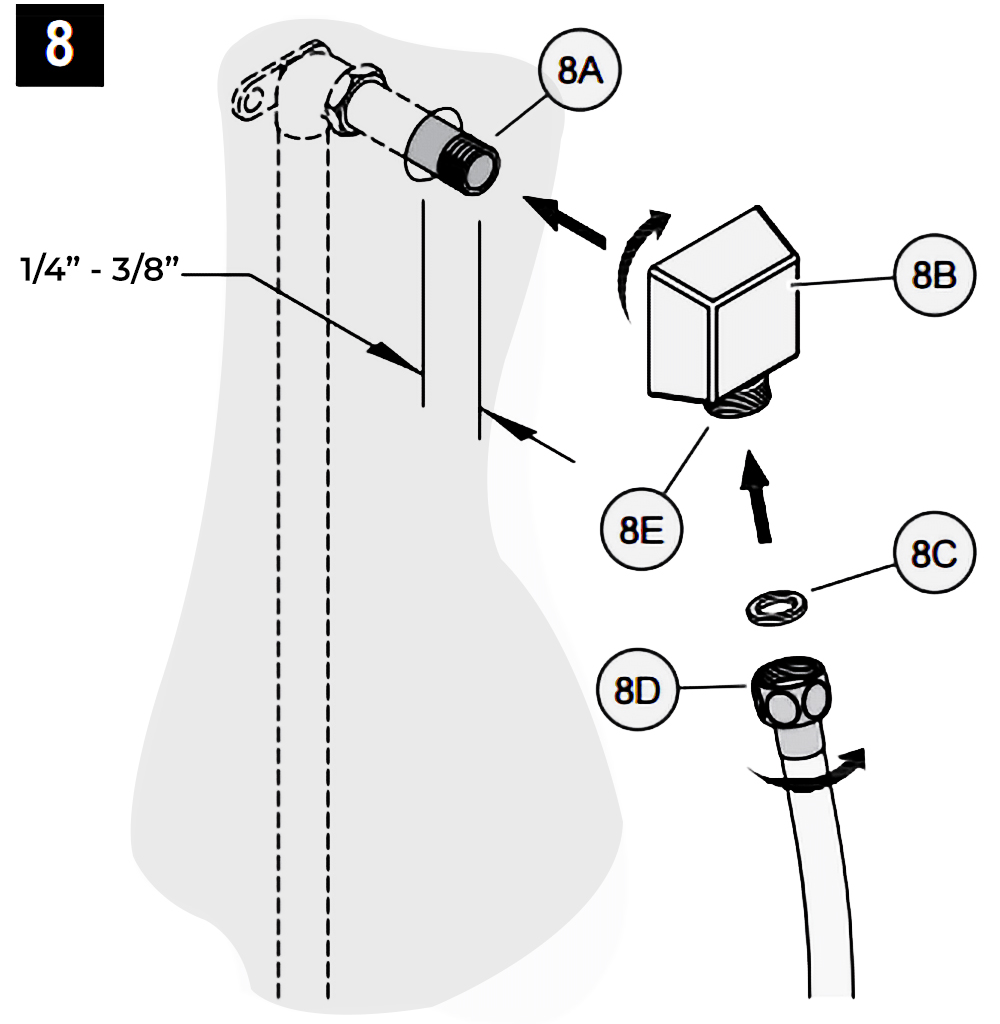 8. Drop Elbow & Hose Installation 8. Drop Elbow & Hose Installation
Apply PTFE plumbers tape on both ends of Pipe Nipple (8A) (not included). Screw Pipe Nipple (8A) into the elbow inside the wall. The Pipe Nipple (8A) is to project 1/4” – 3/4” from the finished wall. Screw Drop Elbow (8B) onto Pipe Nipple (8A) and tighten until Drop Elbow (8B) is property positioned and flush to the finished wall.
Place Rubber Seal (8C) inside Hex Hose Fitting (8D). Connect Hex Hose Fitting (8D) into Drop Elbow Outlet (8E) by turning Hex Hose Fitting (8D).
9. Unit Start Up
Turn on hot and cold water supplies, and check al connections for leaks.
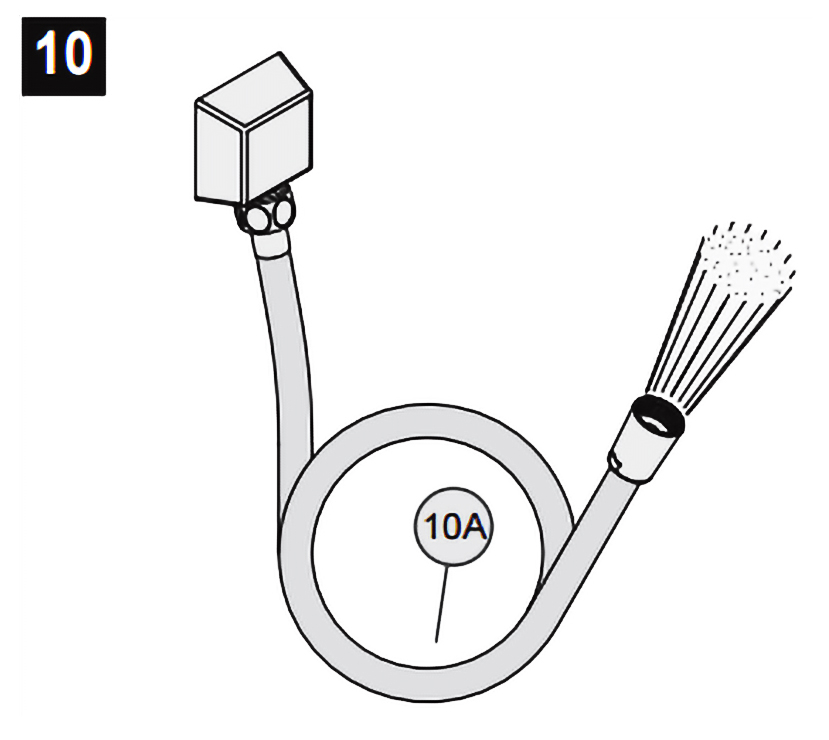 10. Final Flushing 10. Final Flushing
For final flushing, turn valve on and allow water to run through the Hose (10A) for several minutes. Allow water to run for several minutes until all foreign matter clears the line.
11. Shower Arm Installation
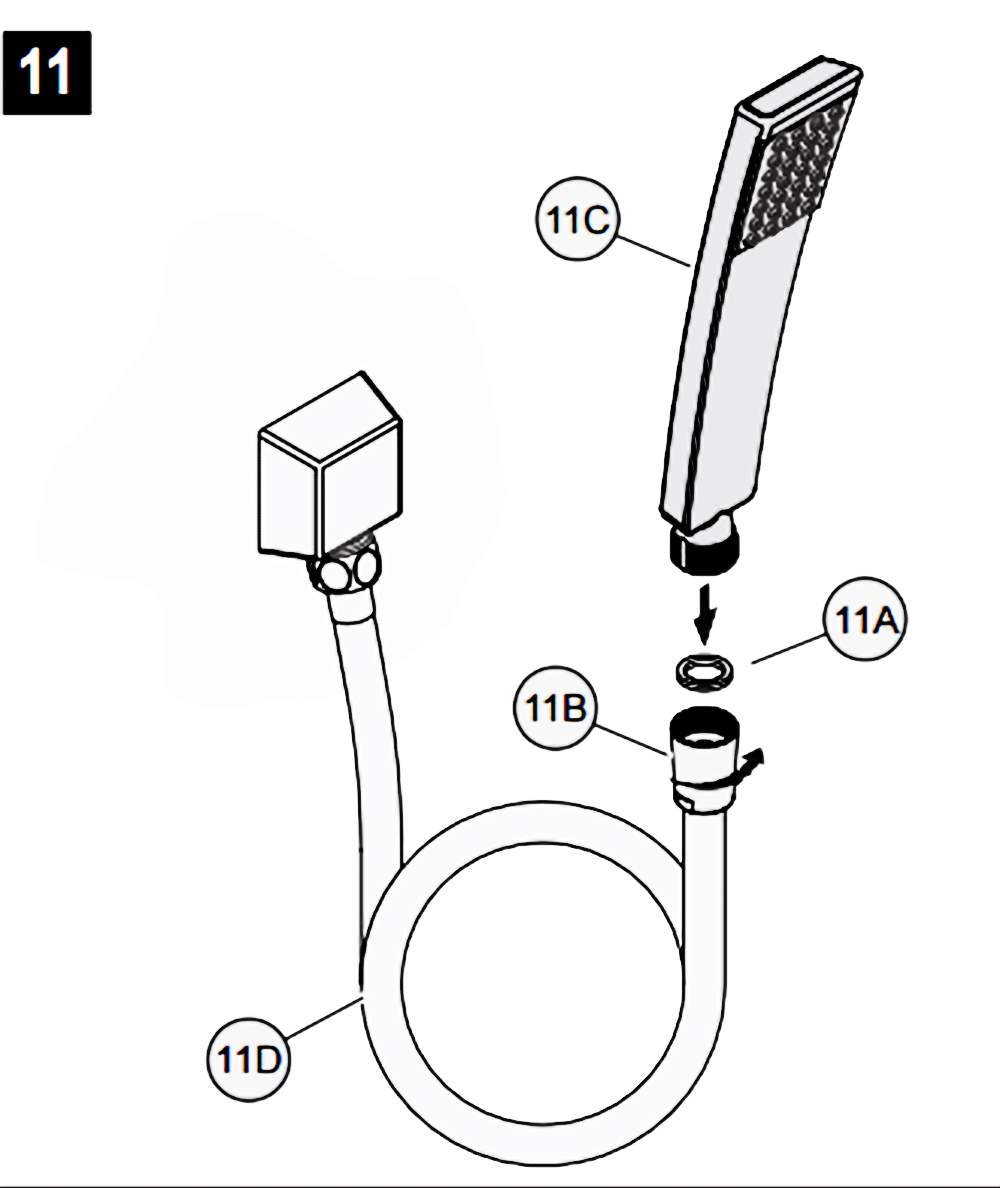
Place Rubber Seal (11A) inside Tapered Hose Fitting (11B). Conned Hand Shower (11C) to Hose (11D) by turning Tapered Hose Fitting (118) clockwise.
Warning: Make sure Hand Shower (11C) is securely tightened to Hose (11D).
|