|
ELECTRICAL INSTALLATION
1. Check that the electricity of the product is in accordance with market standards. Also check that the information of Voltage, Amps and Hertz is indicated for operation in the target market. It is essential to Connect to Ground before anything and then connect the Anti-leak Switch.
2. The cables connecting to the product must be permanently fixed, and the cables are 3-core cables.
3. The main cable should be tested with home electrical systems to determine if they are compatible.
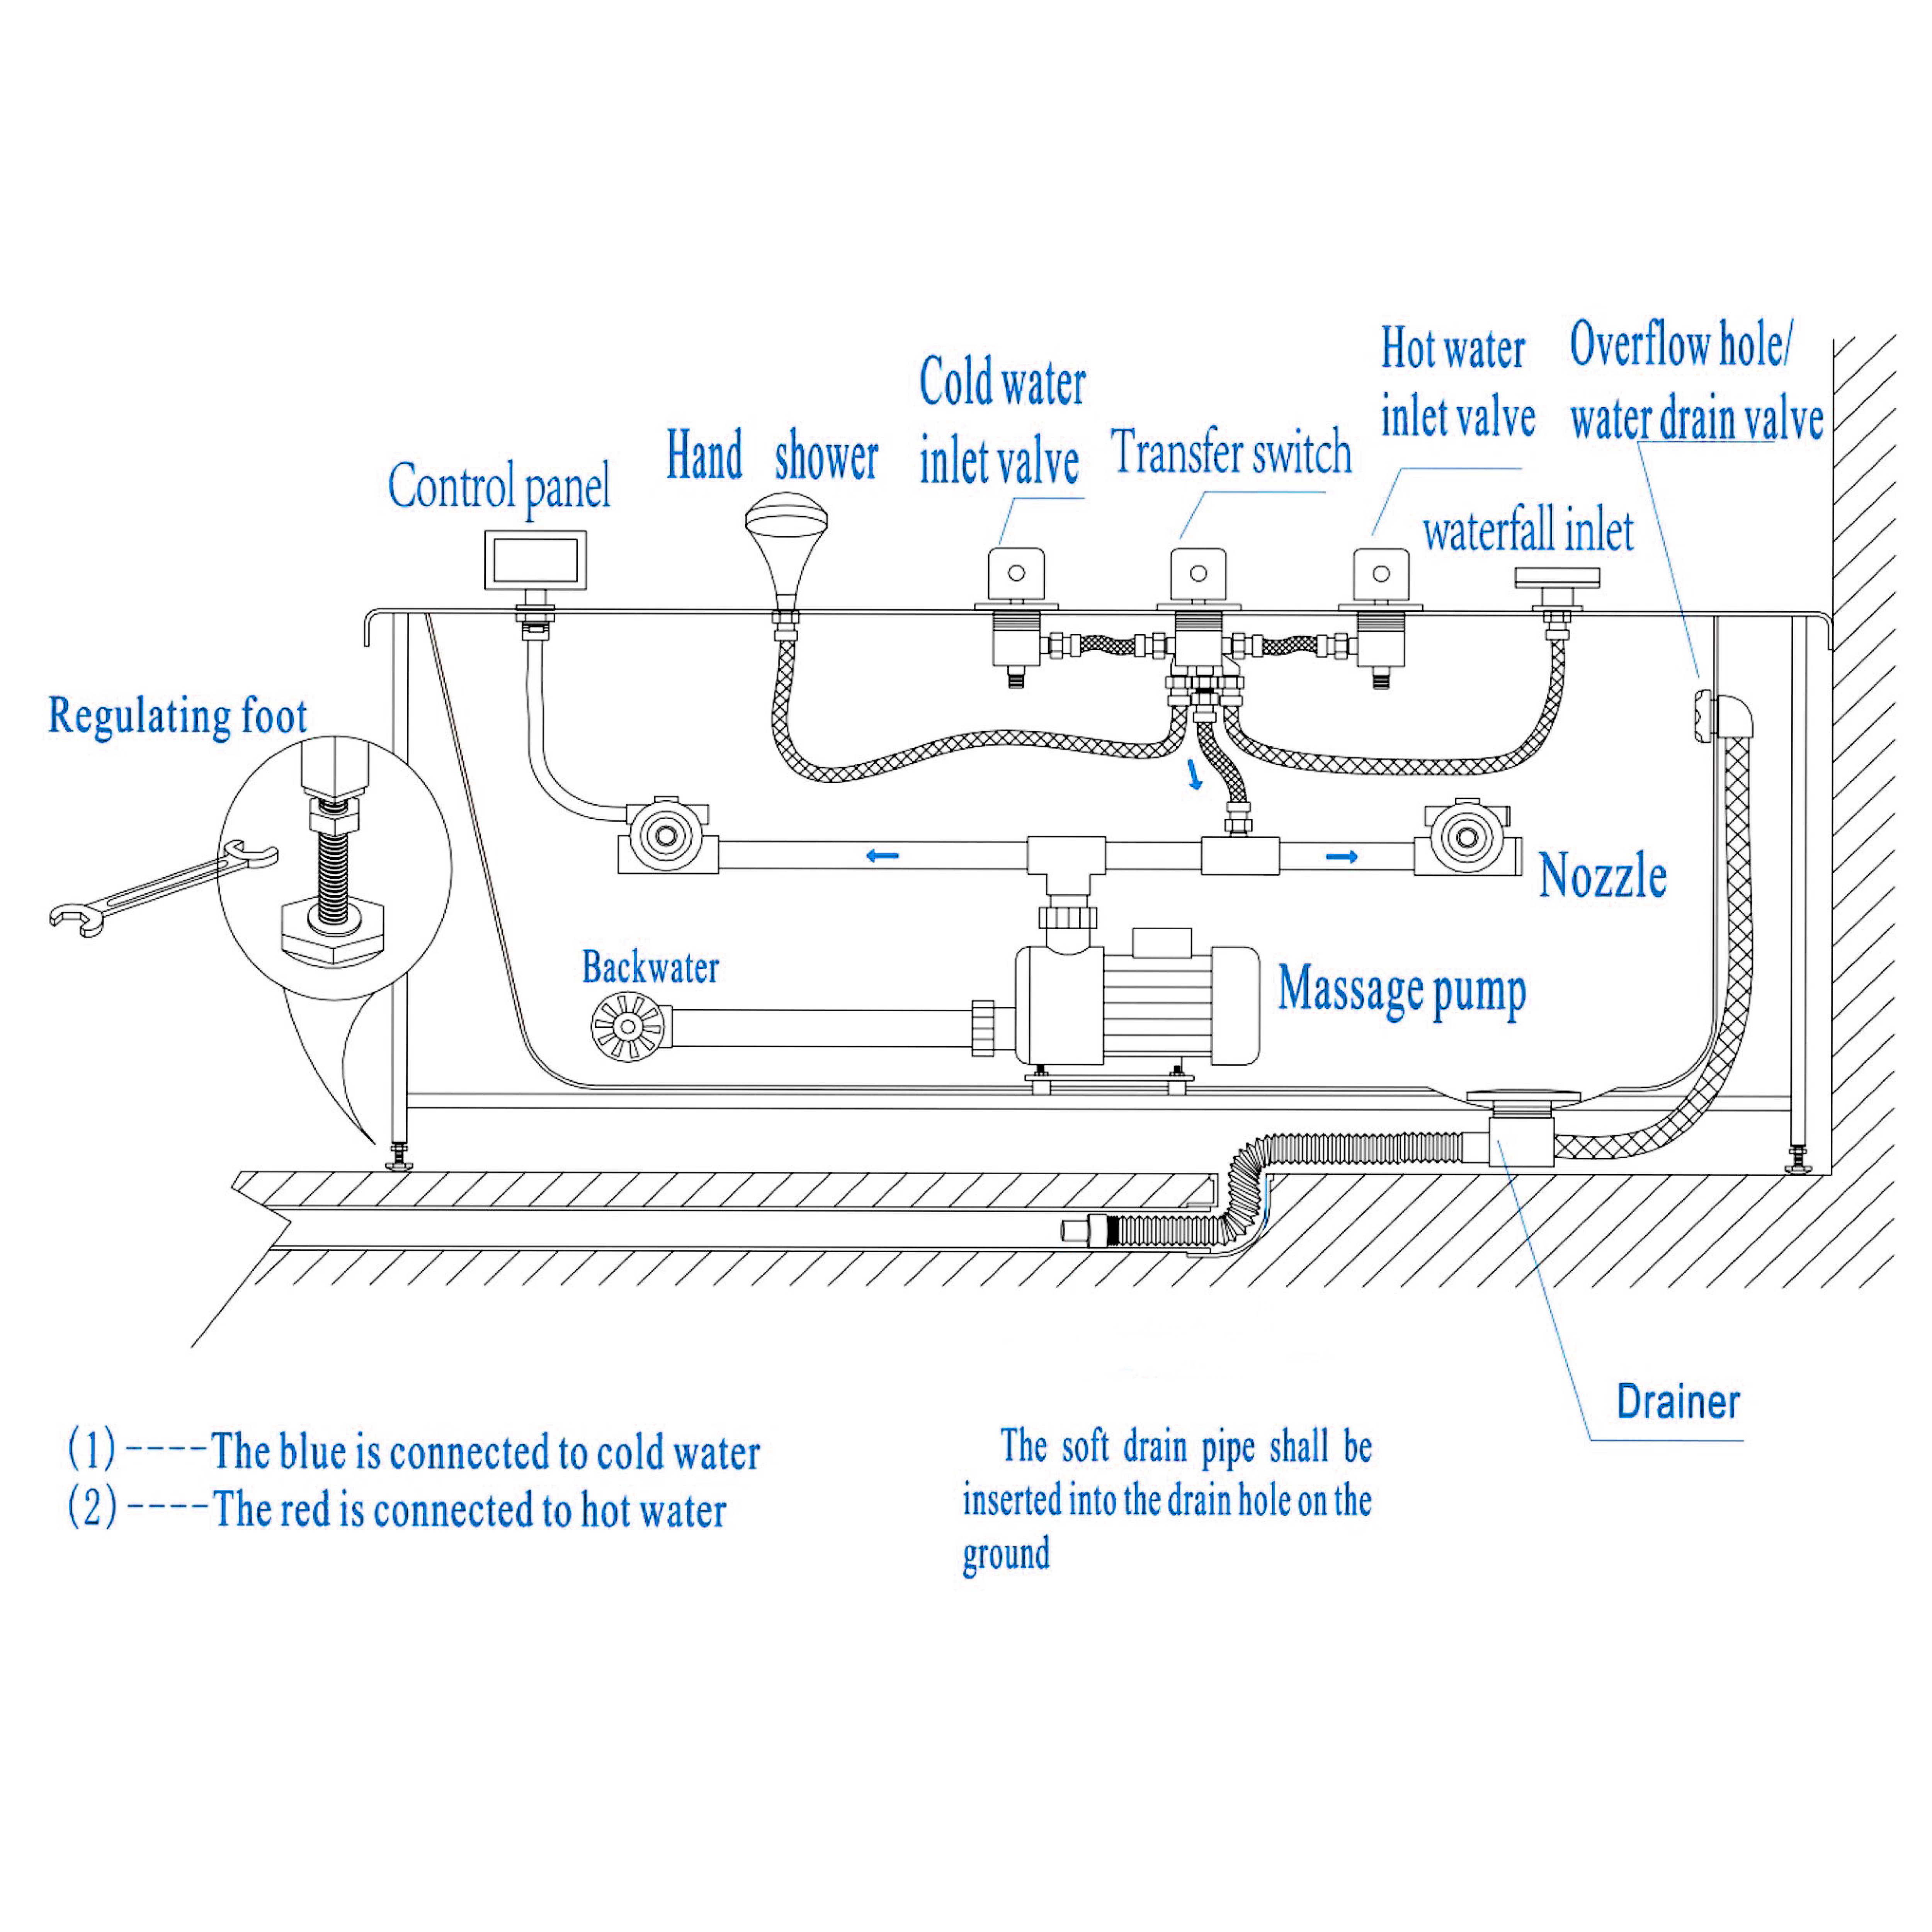
4. The cables of the Electric Control Box must be connected to the Control Panel, ceiling light, speakers, backlight and fan respectively.
WATER SUPPLY DEVICE
1. Hydraulic pressure of this device is 0.2-0.4Mpa
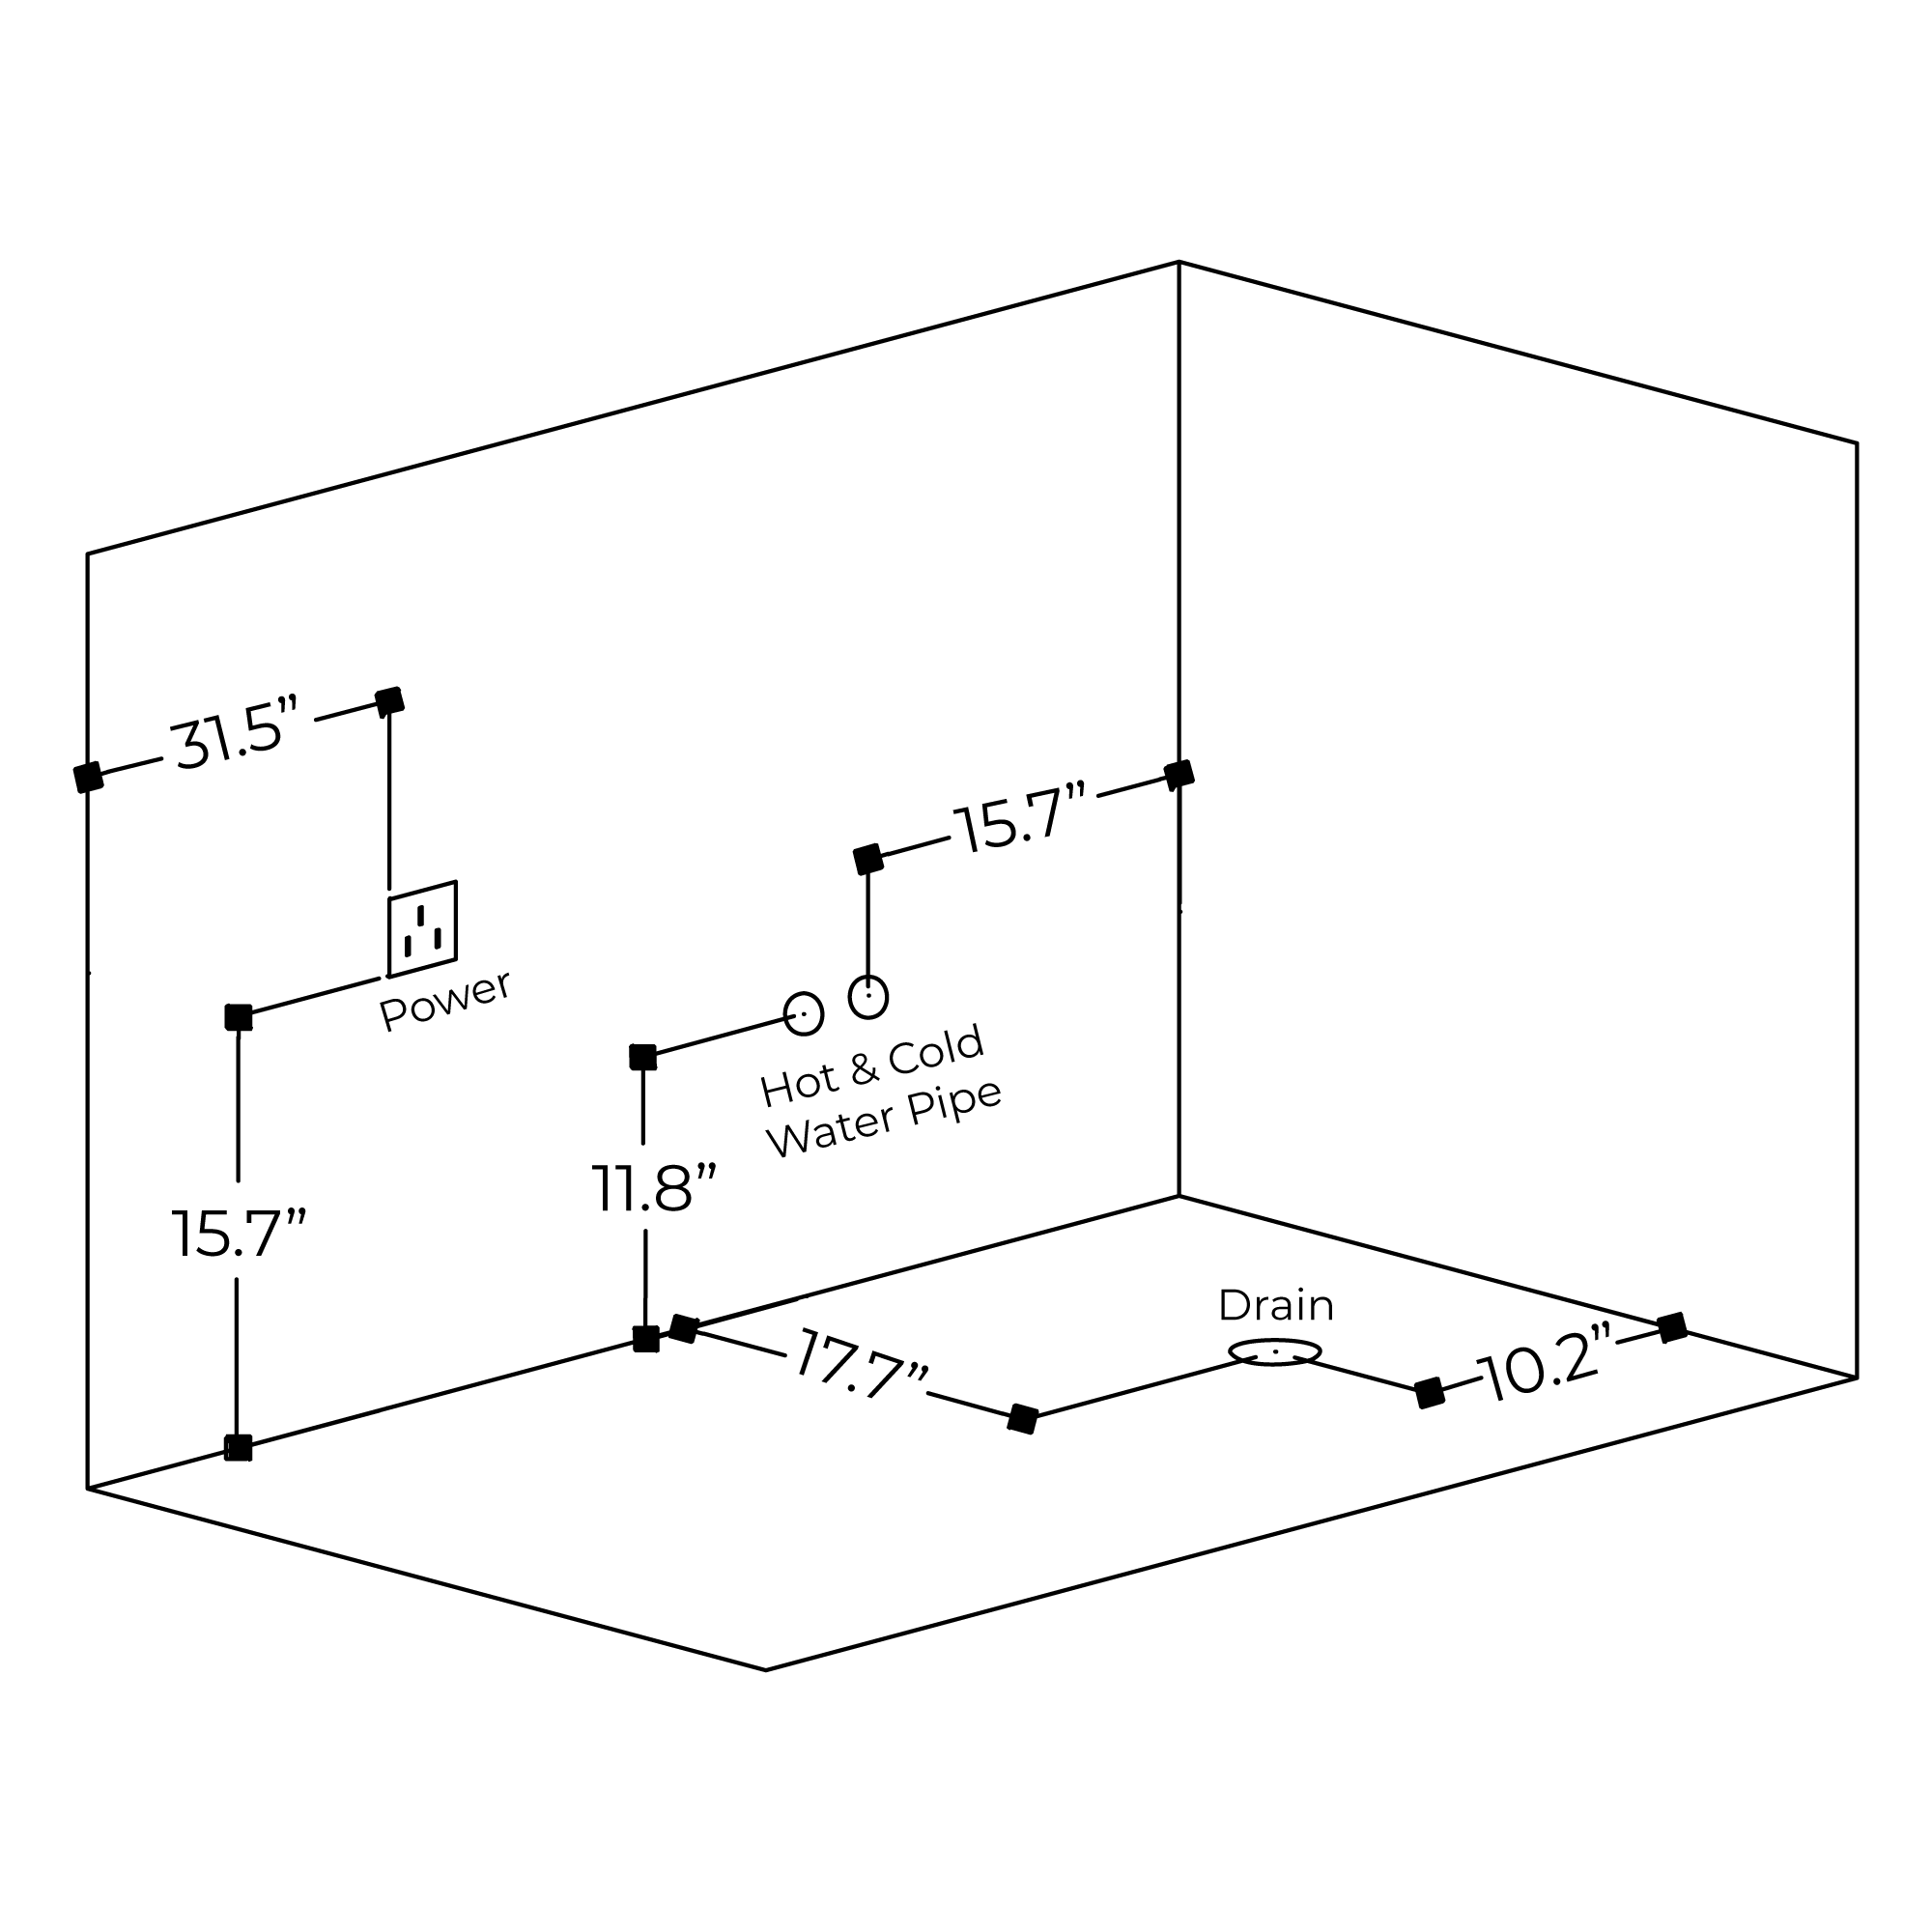
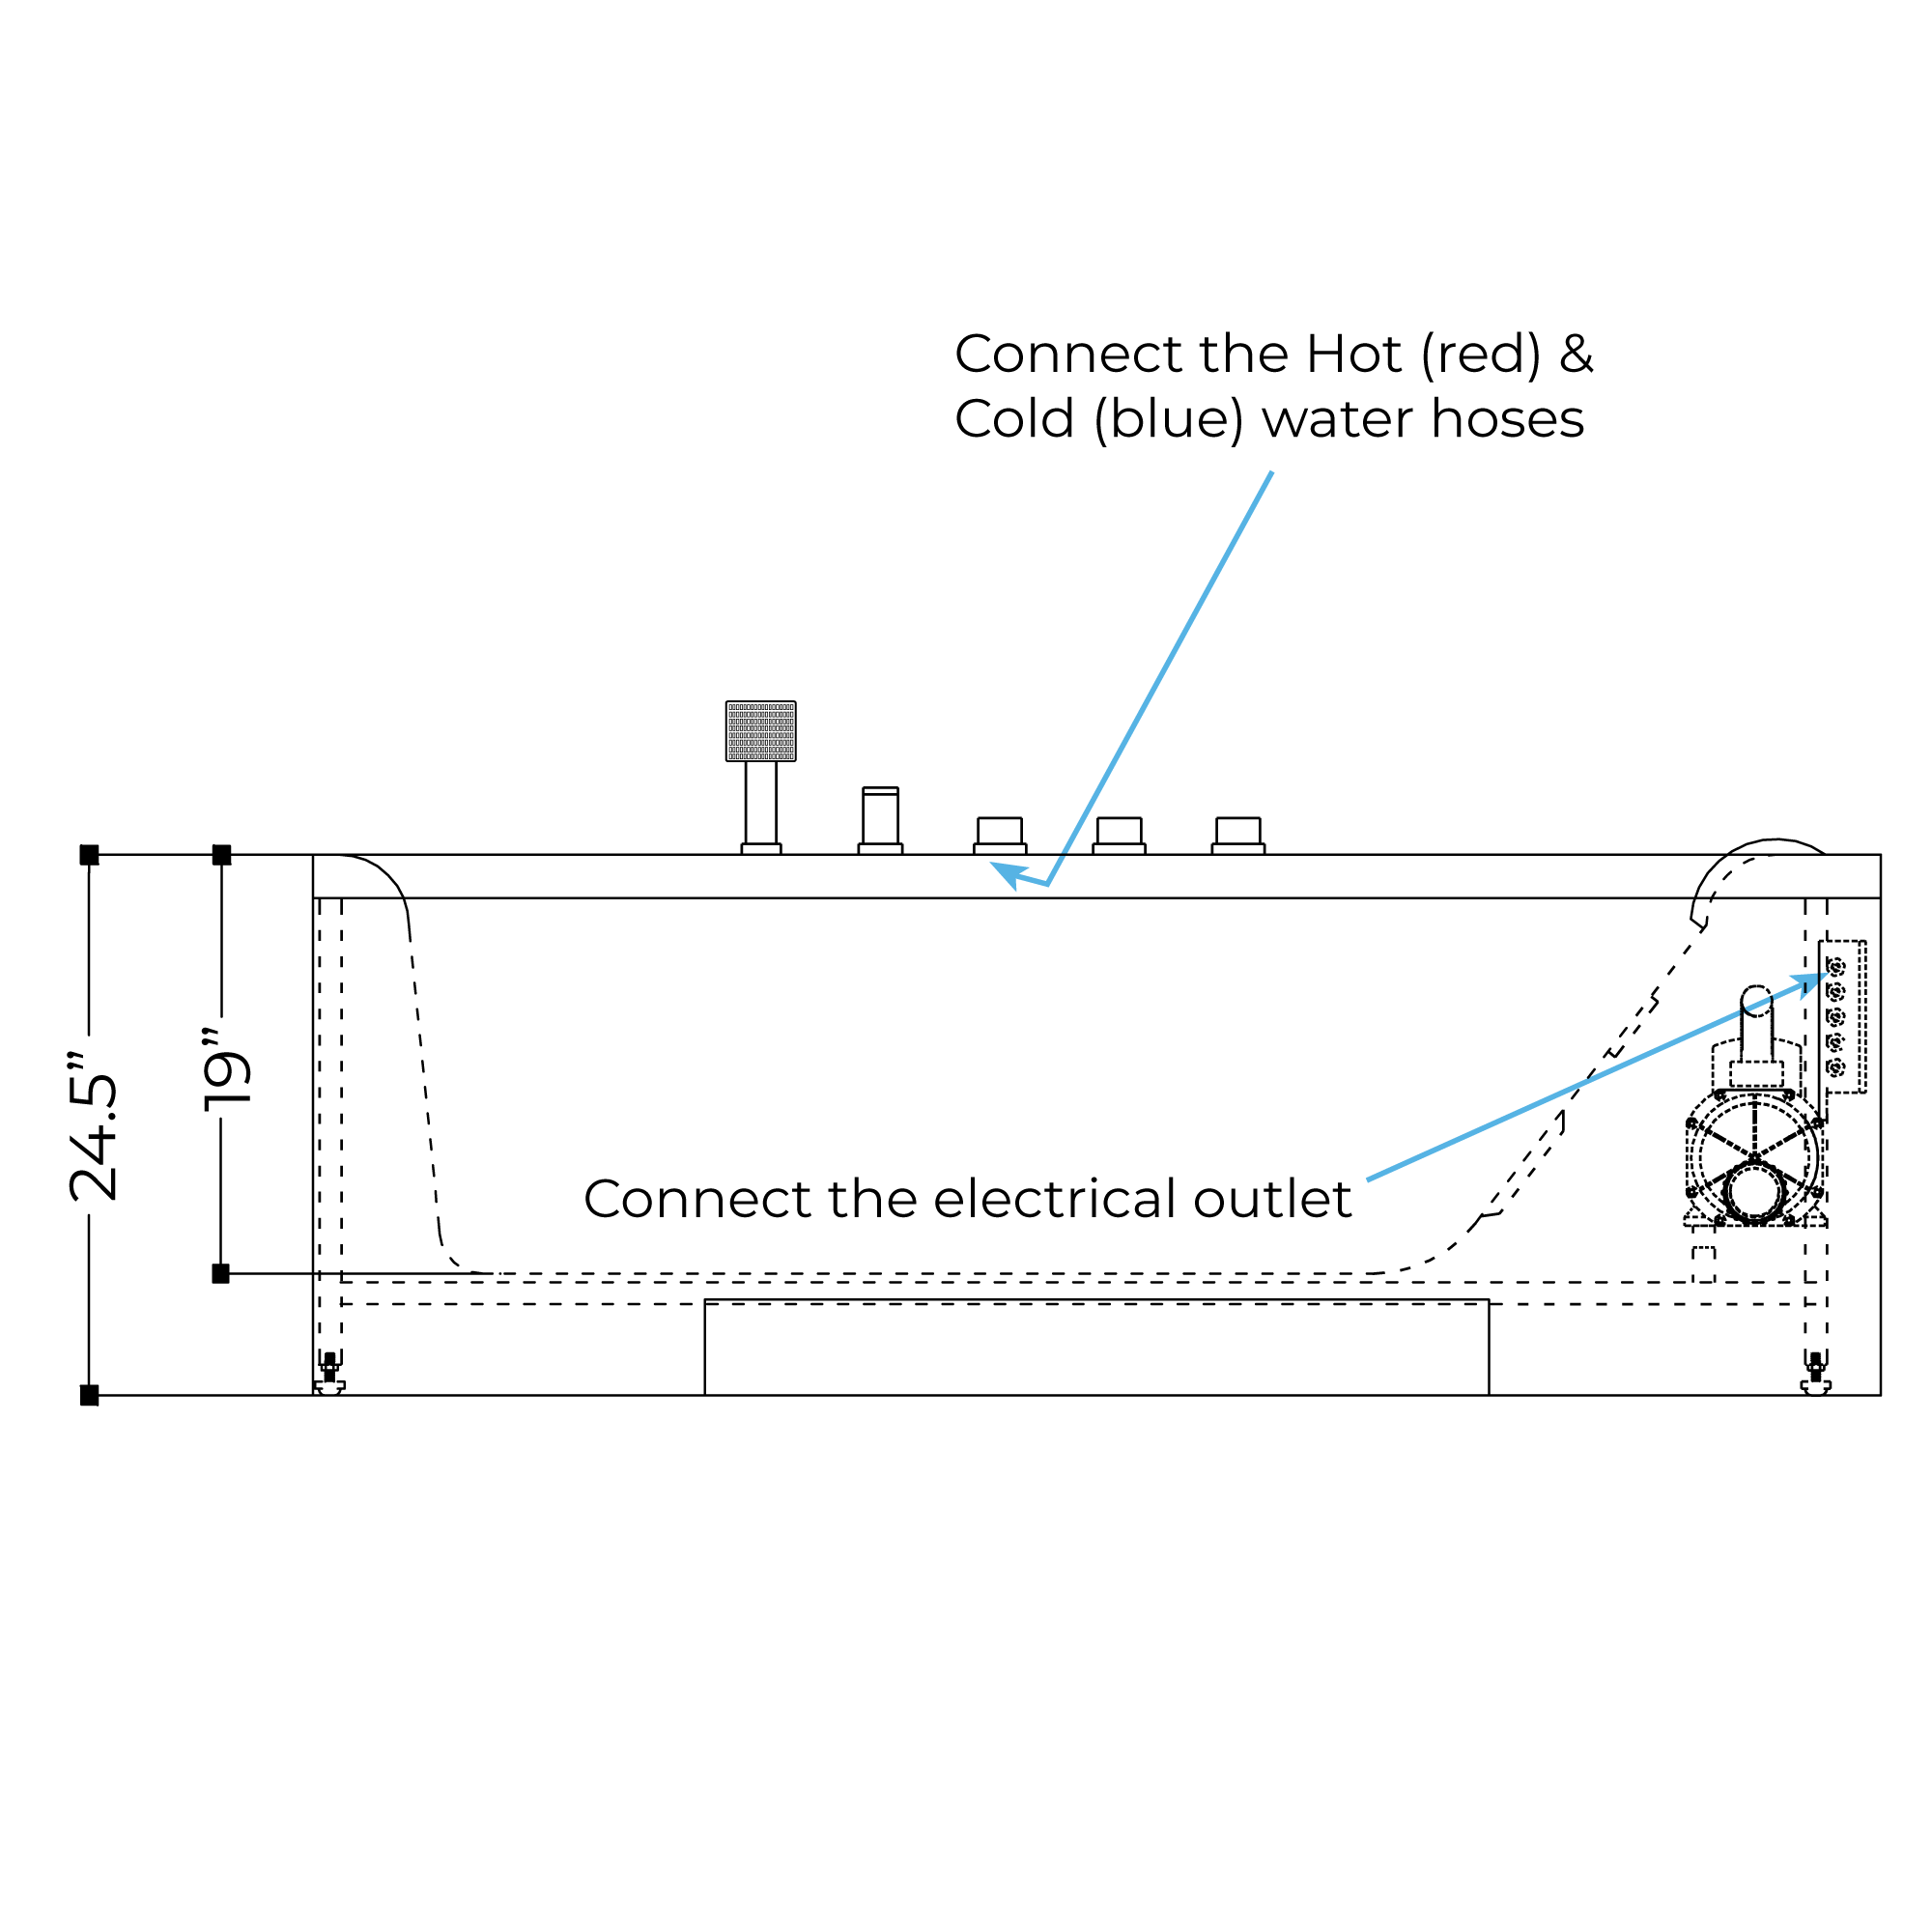
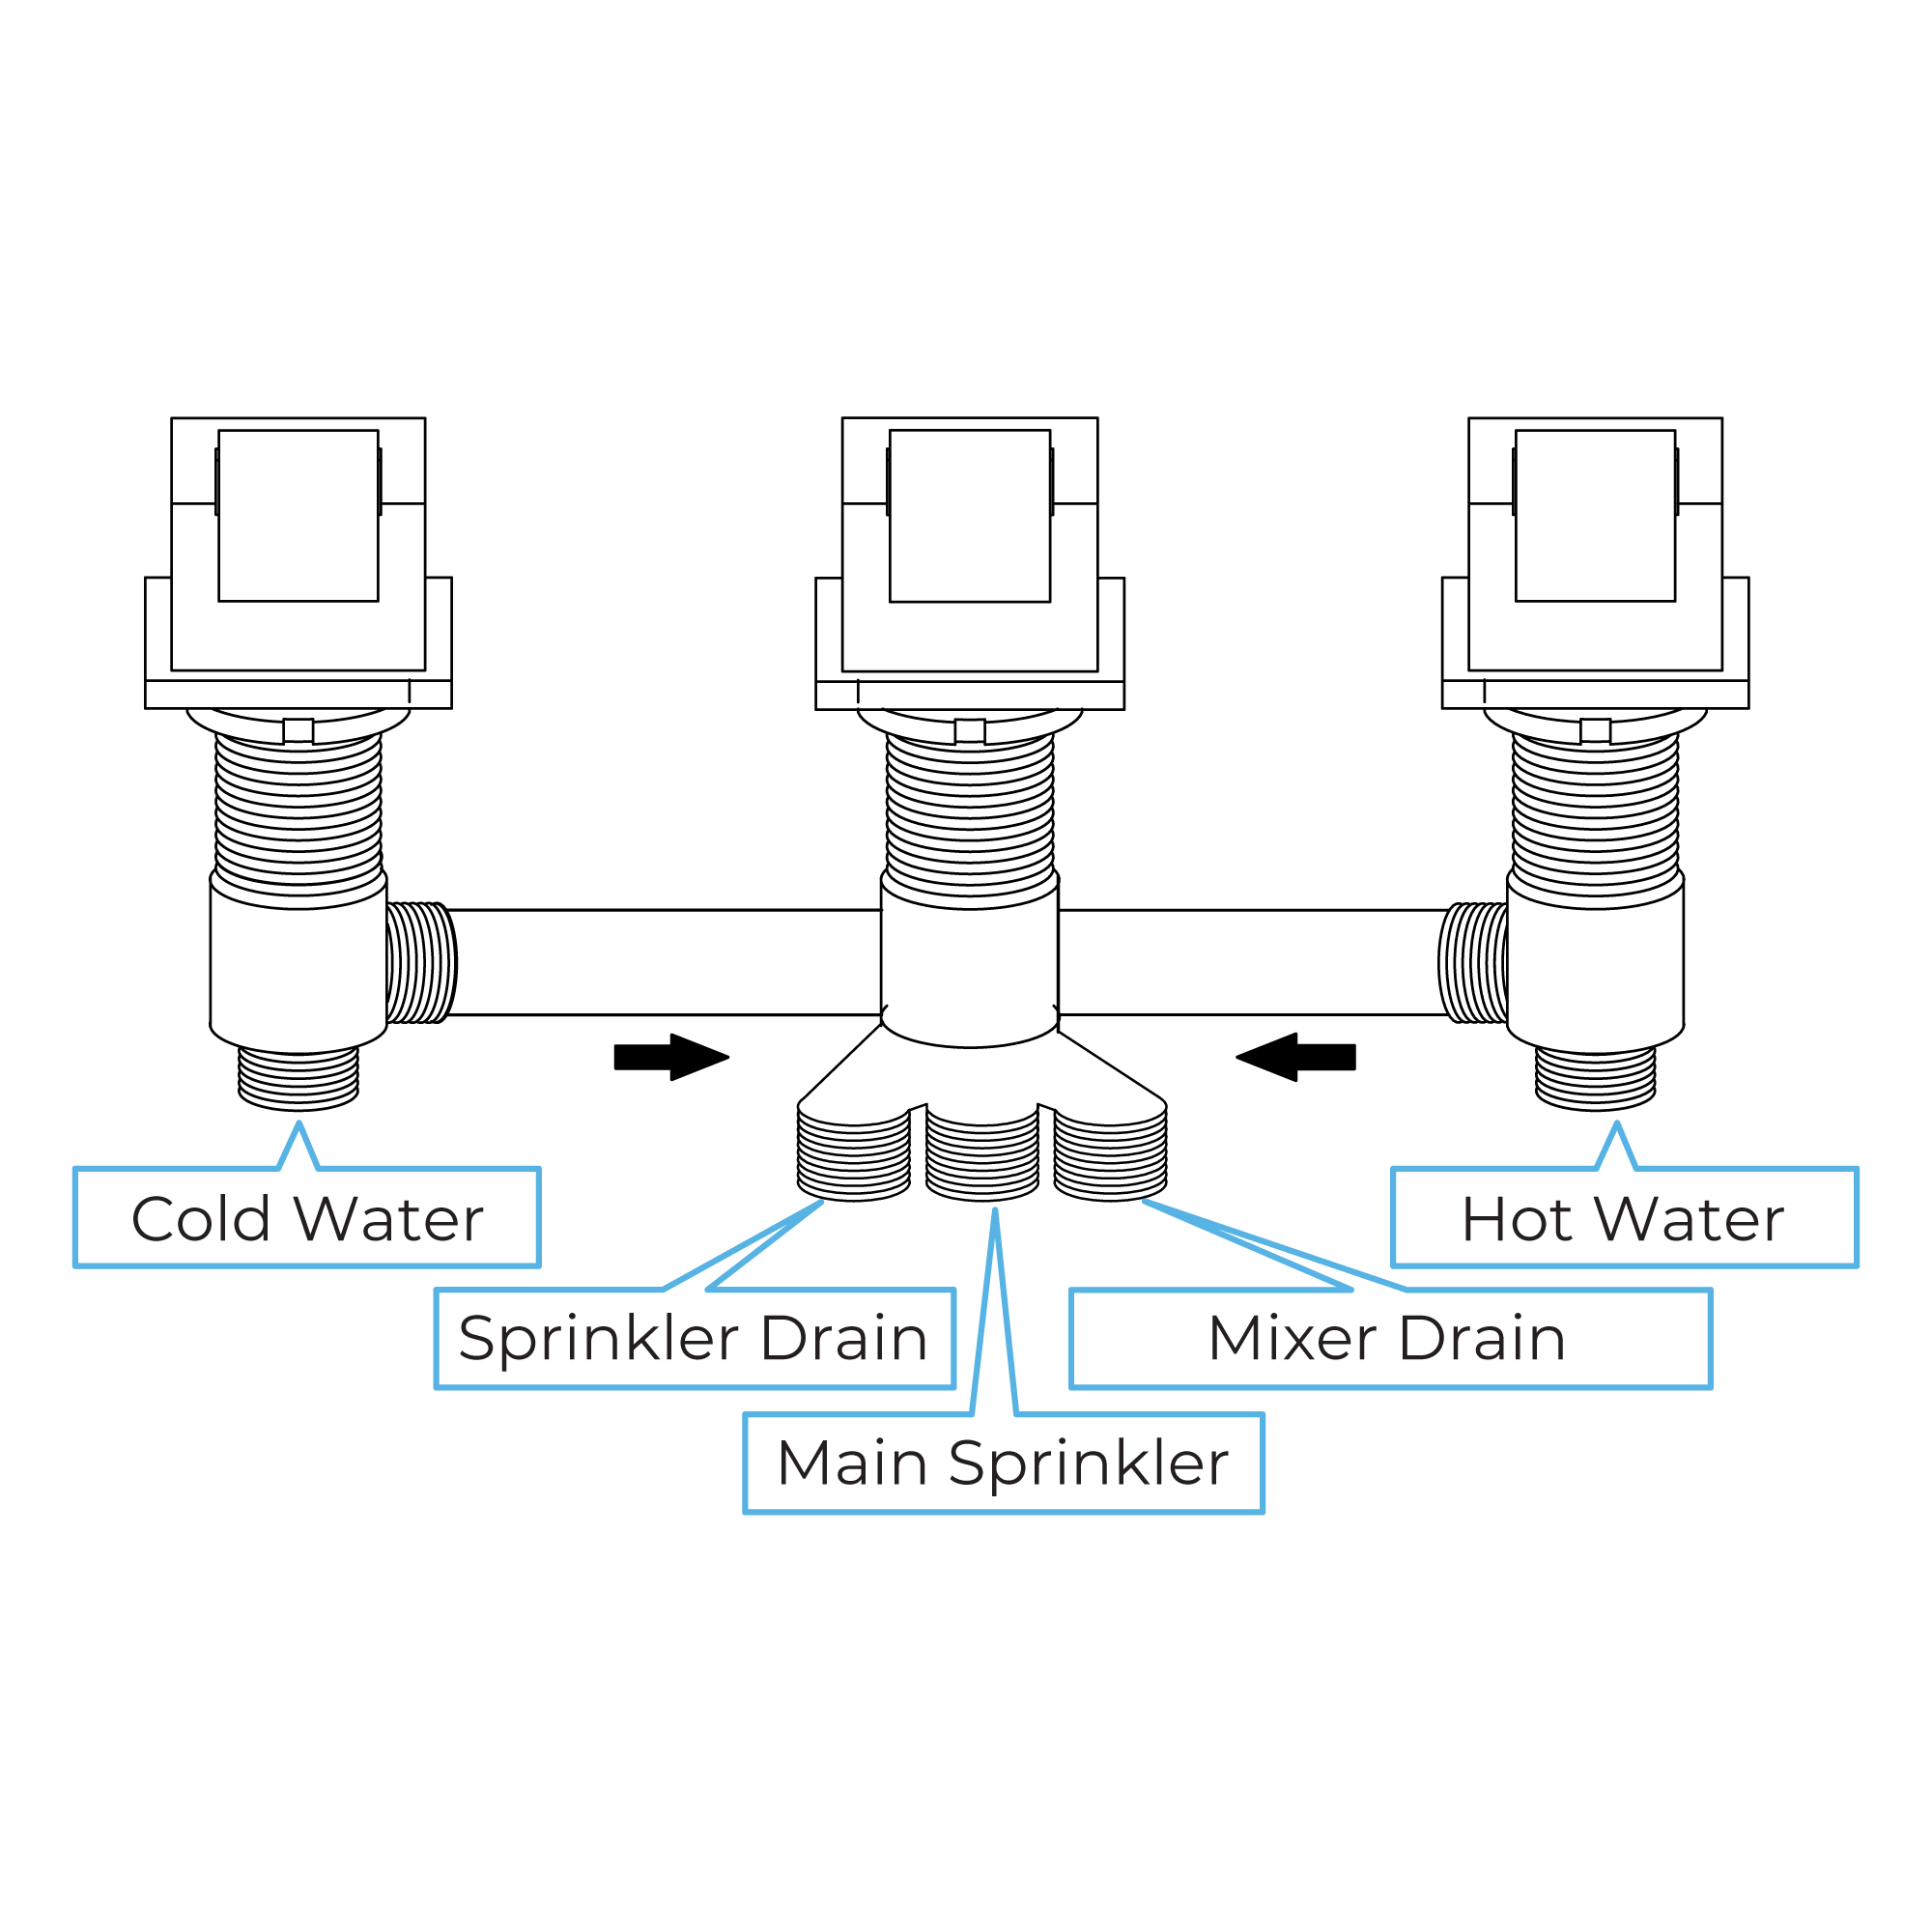
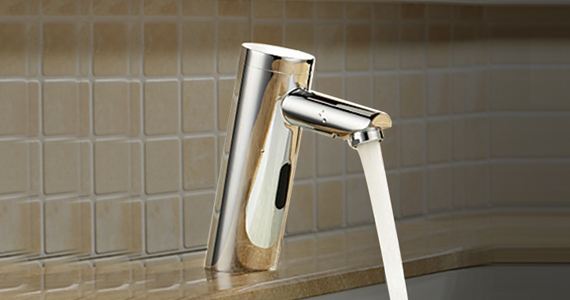
2. The location of the Hot and Cold water supplies establish the basis for locating the bathtub. Use the hoses to connect the hot and cold water outlets.
INSTALLATION INTRODUCTION
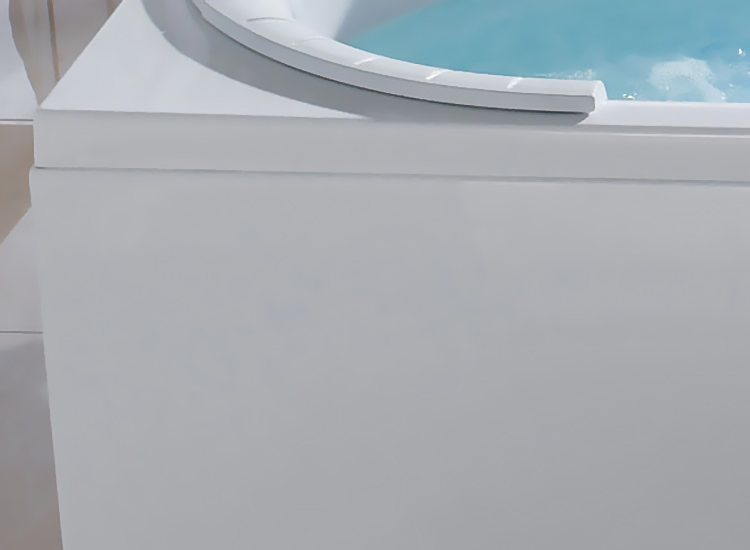
1. Before installing, consideration should be given to whether the chosen location and installation is capable of withstanding the pressure generated by the product.
2. Place the Bathtub in the chosen position, adjusting the level to make the drainage system level and functional.
3. Tighten the screws on the corner supports to ensure that the corners of the product are all touching the floor.
4. Install the Drain Tube
5. Install and securely accommodate cold and hot water inlet hoses, then install Mixer, install Drain Popup. Finally connect the electrical current verifying that the product is connected to ground.
METHOD OF USE
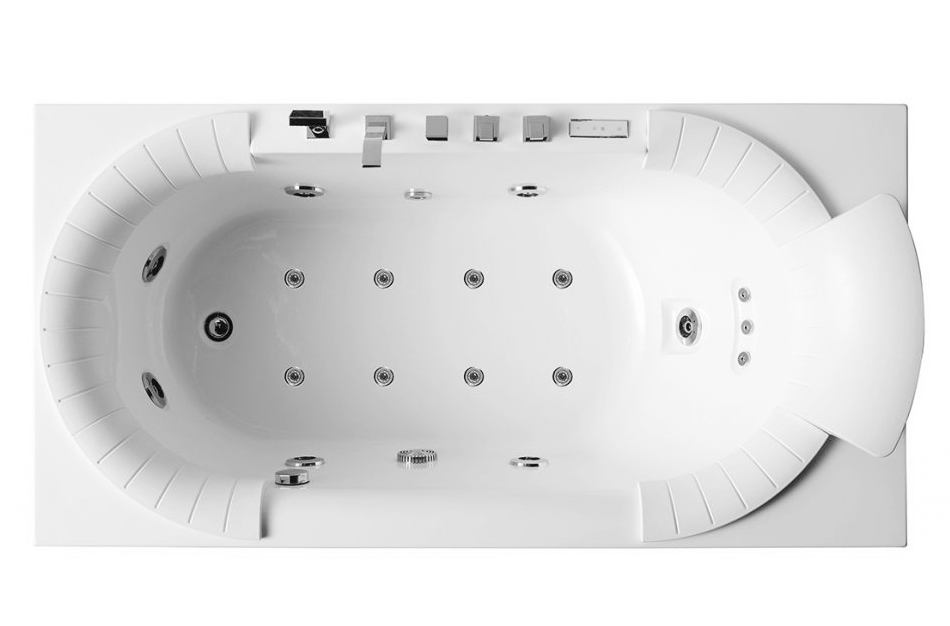
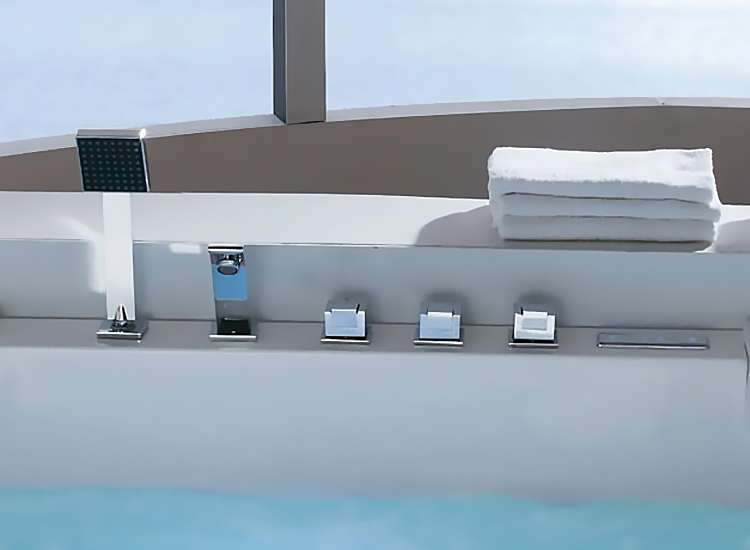
1. Turn on the mixer and adjust the water temperature. Fill the tub with water to a level approximately 20-30mm above the Jet Nozzle. Press the system actuation button.
2. Adjust mixer switches to achieve desired operating pressures.
3. At the end of the operation, the system should be turned off, then press the drain button, once the water is discharged, the bath should be cleaned to keep it in good condition.
MAINTENANCE AND CLEANING
1. Use soft cloths and general-purpose cleaners. The use of cleaners with Acetone or Ammonia is prohibited. To disinfect, it is prohibited to use disinfectants with formaldehyde.
2. For dirt spots on surfaces use a soft cloth with Toothpaste to clean carefully.
3. For minor surface scratches or cigarette burns, use 2000 grade sandpaper, which should be soaked in water for later polishing.
4. For chrome parts with stains, use a soft cloth to clean. Avoid using abrasive cleaning products.
5. Frequently check and clean the return net cover to prevent clogging.
6. Periodically check electrical connections, switch connectors, ties to prevent further damage
7. For long life, please do not use continuously for more than 3 hours
SPECIAL RECOMMENDATIONS
1. Please hire qualified people to install bathtubs according to the recommended installation process.
2. When using always open cold water first and then adjust with hot water. Never open the hot water tap first.
3. Bathtubs with system must be connected to ground with the 1.5mm2 Yellow / green cable. Connect and prove that this functional
4. Please do not turn on the system without water in the tub. Before starting the draining process please turn off the system.
5. There must be adult supervision when children use the bathtub.
6. The water temperature should never exceed the maximum recommended ranges of 32-37 degrees Celsius
7. After using the bath, please turn off the power.
8. If the following situations happen, please do not enter the bathtubs.
8.1. If the person to use the bathtub is less than 4 years old.
8.2. People with circulatory problems.
8.3. People with the flu.
8.4. People with heart problems.
8.5. You must wait 30 minutes after eating to use.
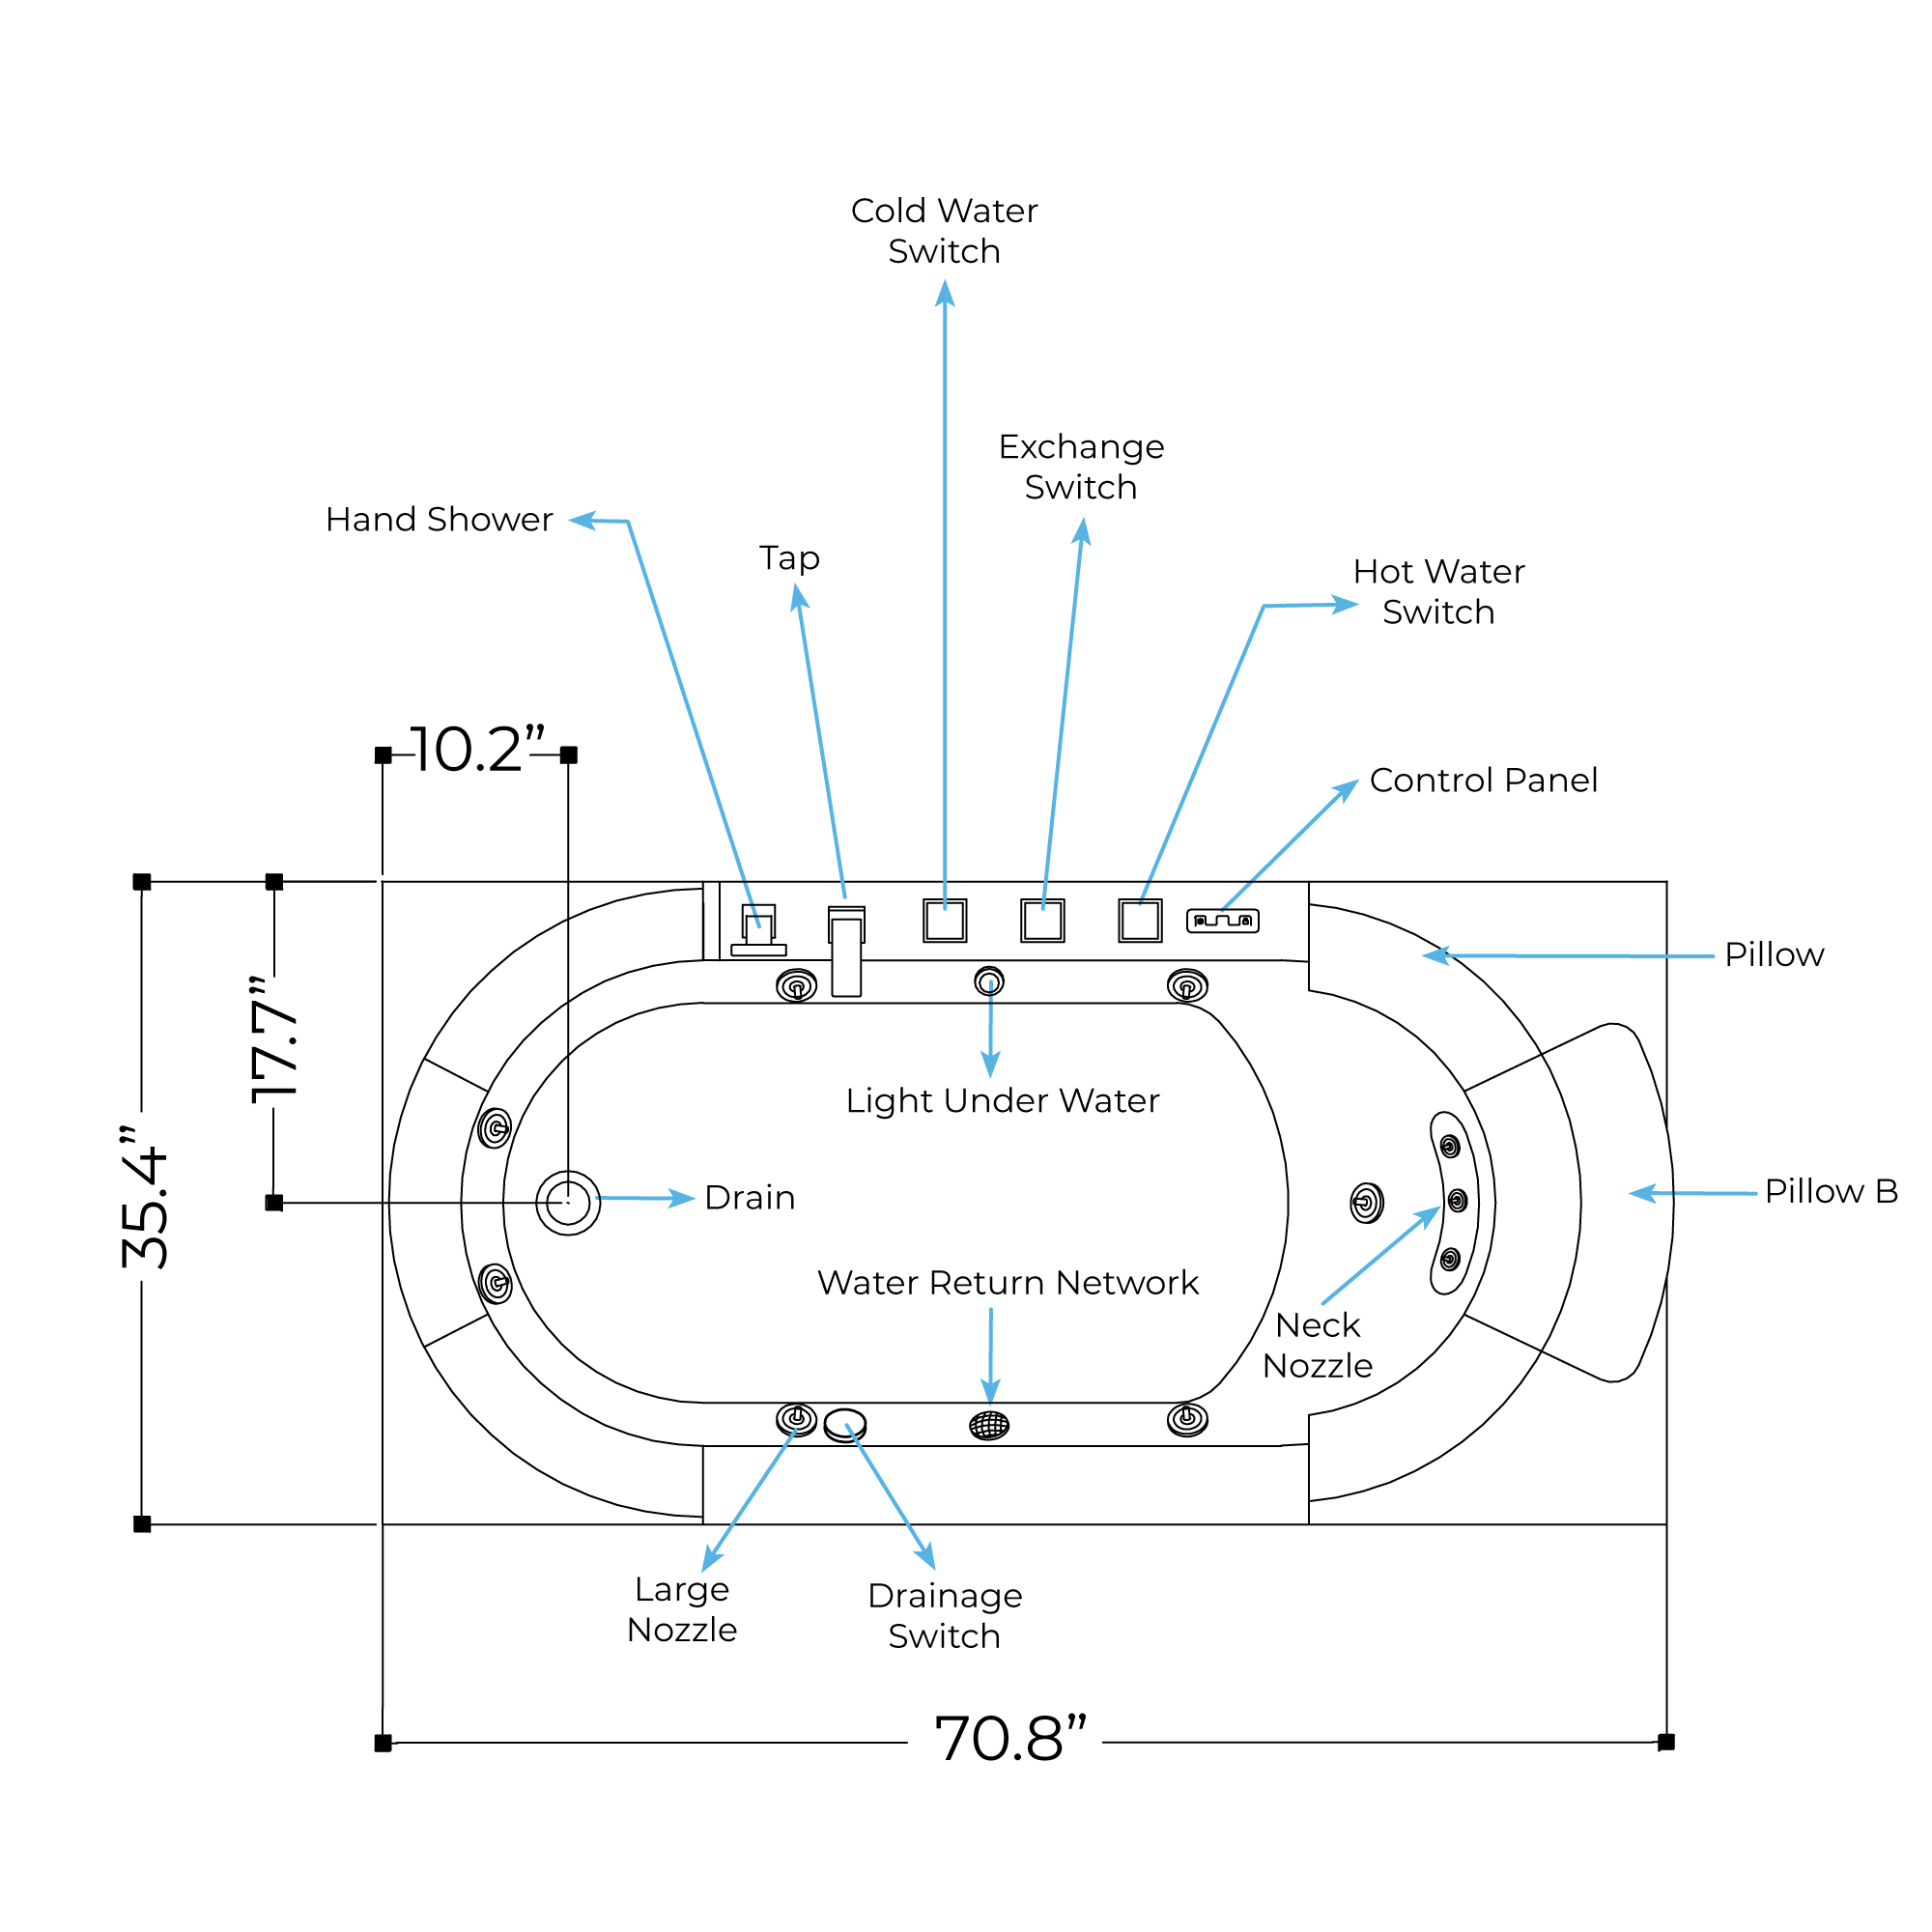
CONTROL PANEL OPERATION
1. When a function operates successfully there will be a sound like a beep.
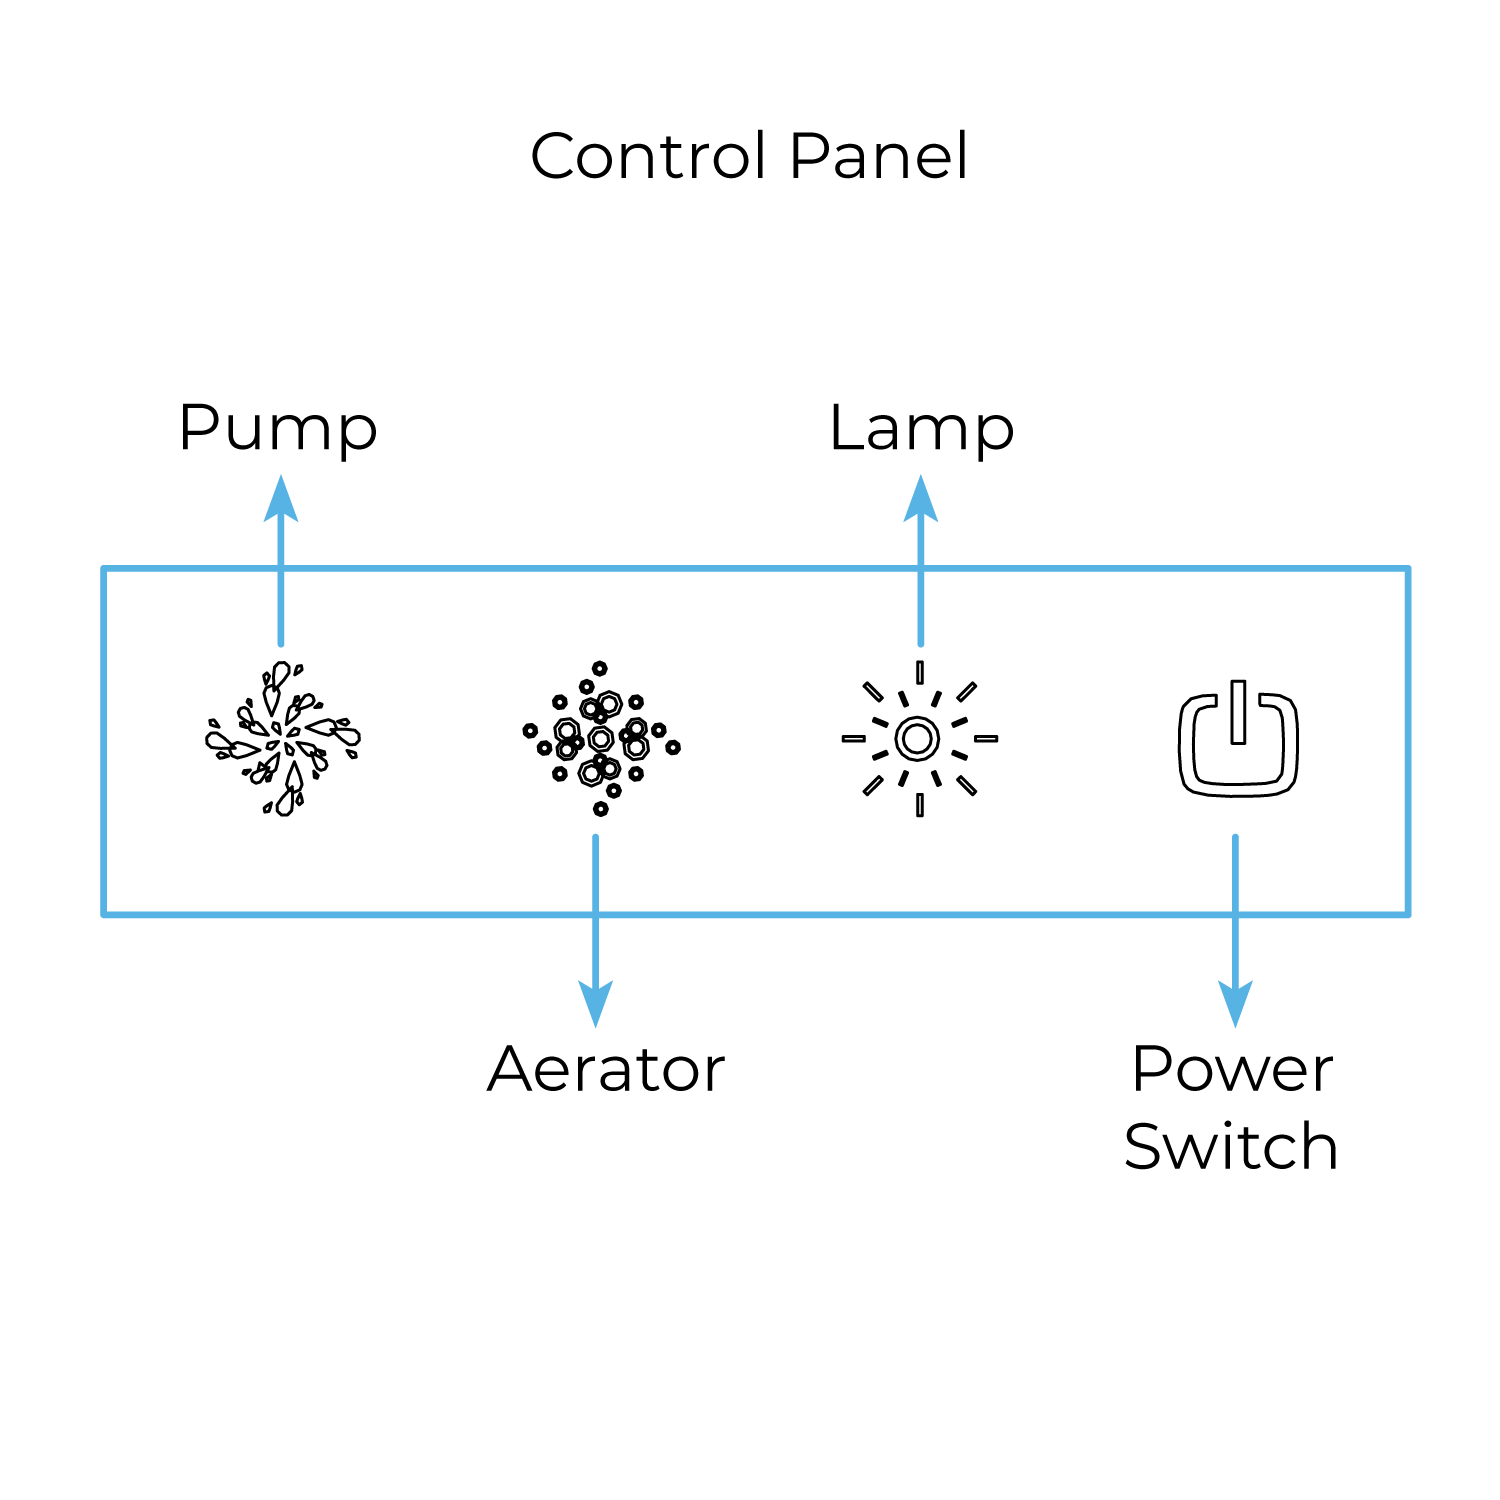
2. Power switch - Press power switch option to turn on the controller; press again to pay the system
3. Lamp -
Turn on the controller and the lamp will turn on automatically, then press to turn it off.
4. Pump -
4.1. The water level checking device of this controller prevents the water pump from overheating and burning.
4.2. Press pump option to start the water pump. When the water level falls below the standardized level
the pump will not start. Once the water level exceeds the standardized level, the pump will start without problems.
4.3. When the Water Pump function is turned on and the water drops below the standard level the pump stops working automatically. Once the water level exceeds the standardized level the pump will resume functions automatically.
5. Bubble Aerator - Press to activate the air bubbles; use the same button to turn off the function.
USE AND INSTALLATION PRECAUTIONS
The user should carefully read the following precautions to ensure the normal operation of the product, extend the useful life of the product and ensure personal safety.
1. Users must install the electrical parts strictly following the circuit diagrams and parameters provided by our company
2. The Ground Cable must be fixedly installed and connected to the socket securely.
3. The end user must use 3x3mm2 or thicker diameter main outlet cables.
4. The end user must make sure that the main power outlet has an anti-leak device installed according to national standards.
5. Please check carefully the wiring of the control box. Once you have confirmed that there are no errors, proceed to operate.
6. Unapproved modifications to the internal wiring of the product are strictly prohibited. It is not allowed to make modifications to the product wiring while it is turned on,
7. The wiring of the Power Box must be connected and plugged according to the tabs and labels of the connectors.
8. After using, please turn off the equipment to avoid unnecessary wear
9. The driver installation must be done by professionals who respect the supplier's instructions.
10. Please do not modify any of the electrical components of the Master Power Box as it can cause serious failures. The maintenance and adjustment of any electrical component must be carried out by professionals.
|
|

|