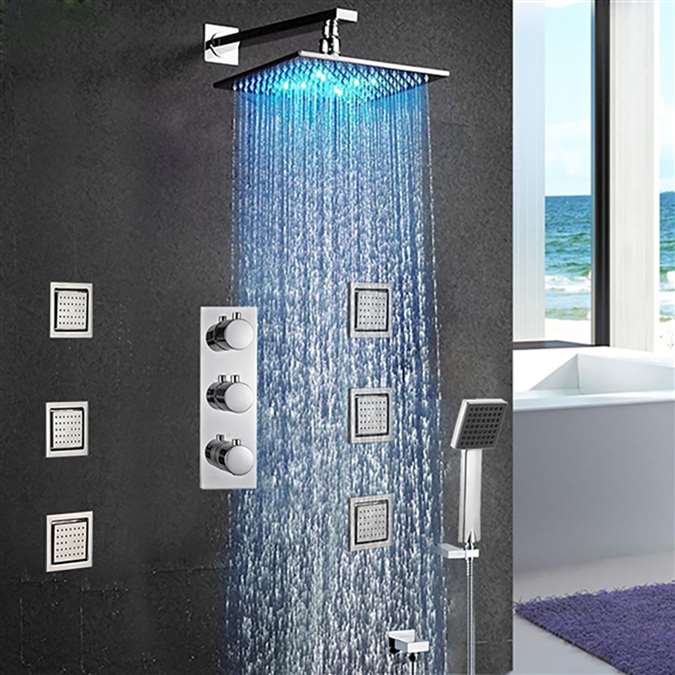
How to install a shower system with body jets and hand-held shower
- Before you begin, please read the installation instructions below. Observe all local building and safety codes.
- Unpack and inspect the product for any shipping damages. If you find damages, do not install.
- Please note all showers must be installed by a professional and certified plumber otherwise warranty might be voided
|
shower
|
shower
|

|
Shower Head Installation Instructions
- Use your hands counterclockwise to unscrew the old showerhead and removed it.
- Take out the showerhead, make sure the shower filter is placed in the connector.
- Ensure the showerhead full horizontal alignment wall mounted shower arm thread.
- Use your hands clockwise to tighten showerhead.
HOLE LOCATIONS FOR WALL MOUNT: Remove Front Cover (5A) from Wall Mount (5B). Use Wall Mount Screw Holes (5C) to place the desired location. Using a punch or awl, tap the screw hole locations.
Holes must be vertically aligned.
ANCHOR INSTALLATION: Drill two 1/4” dia. Holes (6A). If installing into a studs drill two 1/8” dia. holes and do not use Anchors (6B). Insert Anchors (6B) into Holes (6A) and tap flush with the wall.
WALL MOUNT INSTALLATION: Place Wall Mount (7A) into wall and inset Mounting Screws (7B) through Wall Mount Holes (7C) and tighten until Wall Mount (7A) is flush with the wall.
Do Not Over Tighten! Insert Front Cover (7D) into Wall Mount (7A)
DROP ELBOW & HOSE INSTALLATION: Apply PTFE plumbers tape on both ends of Pipe Nipple (8A) (not included). Screw Pipe Nipple (8A) into the elbow inside the wall.
The Pipe Nipple (8A) is to project 1/4” – 3/4” from the finished wall. Screw Drop Elbow (8B) onto Pipe Nipple (8A) and tighten until Drop Elbow (8B) is
a property positioned and flush to the finished wall.
Place Rubber Seal (8C) inside Hex Hose Fitting (8D). Connect Hex Hose Fitting (8D) into Drop Elbow Outlet (8E) by turning Hex Hose Fitting (8D).
UNIT STARTUP: Turn on hot and cold water supplies, and check all connections for leaks.
FINAL FLUSHING: For final flushing, turn the valve on and allow water to run through the Hose (10A) for several minutes.
Allow water to run for several minutes until all foreign matter clears the line.
SHOWER ARM INSTALLATION: Place Rubber Seal (11A) inside Tapered Hose Fitting (11B). Conned Hand Shower (11C) to Hose (11D) by turning Tapered Hose Fitting (118) clockwise.
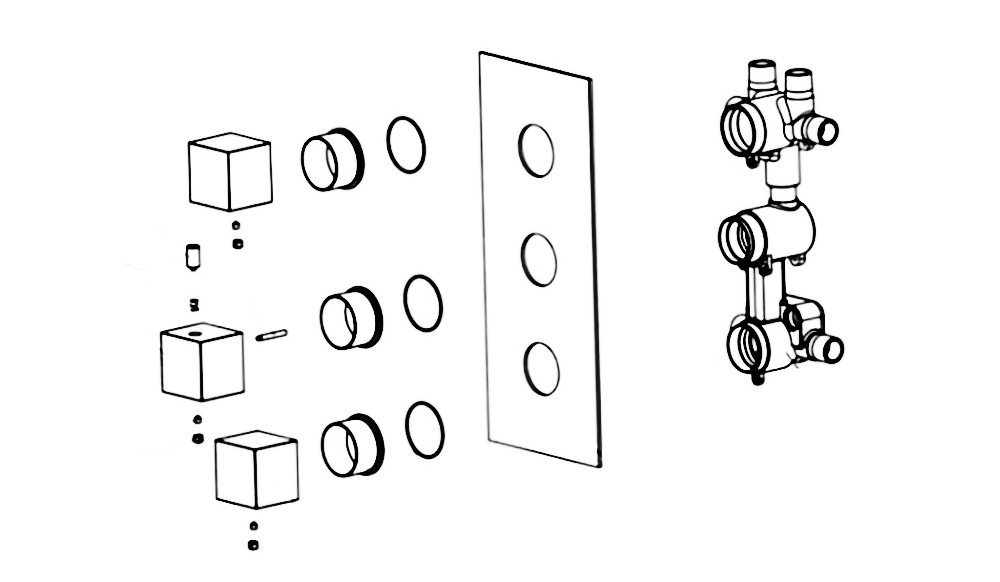
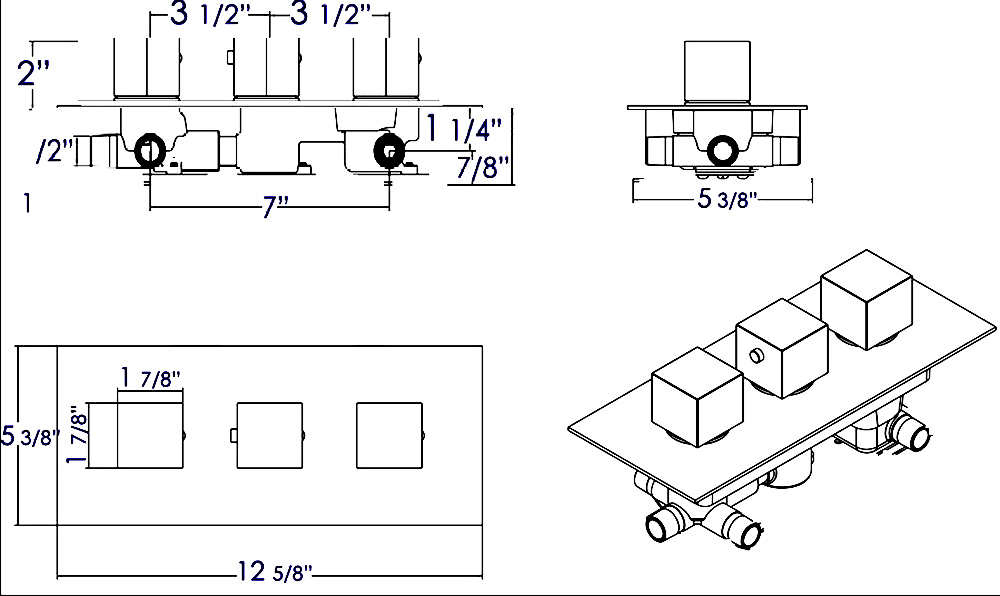
Mixer
 
Step 1
Multiple Bodyspray Installation
• Water Supply
• Nipple Mamelon Nipple
• Pressure Balancing Loop
1. Route the water supply lines.
2. If installing more than one bodyspray off the same supply line, construct a pressure balancing loop.
Locate a tee along the loop at each bodyspray installation location.
3. Do not strap the pipes at this time.
Single Bodyspray Installation
• Nipple Mamelon Nipple
1. Route the water supply line.
2. Install an elbow to the end of the supply pipe at the bodyspray installation location.
Step 2
Install the Plaster Guard
•Elbow (or Tee)
•Install the plaster guard
Set Piping Depth
Align mark with the front of the stud face
•Thin Wall
Align mark with the front of the stud face
•Standard Wall
Install the plaster guard. Push until the plaster guard is snug against the face of the elbow (or tee).
Step 3
1. Install the water-resistant wallboard.
2. Cut out a 4" (10.2 cm) to 4-1/4" (10.8 cm) square at each the installation location.
3. Install the finished wall material.
Step 4
- Escutcheon
- Leak Shield
- Adapter
- Extension
- Socket Wrench With Bit
- Screw
- Waterway Passage
1. Insert the escutcheon into the rough opening. The double ribs of the leak shield should be facing up.
2. If the leak shield makes contact with the elbow: Enlarge the hole in the back of the leak shield to 1-1/4" (3.2 cm).
3. Thread the adapter onto the nipple using the provided 0.4" bit, 11 mm or 7/16" socket, extension and socket wrench.
Use masking tape to hold the bit in place, as the bit could fall off and cause damage.
IMPORTANT! The escutcheon should sit loosely at this point. If it is tight against the wall, use a longer pipe nipple.
4. Align the groove in the waterway with the double ribs on the leak shield.
5. Press the waterway into place over the adapter. Secure the waterway to the adapter with the screw provided.
6. Verify that the escutcheon does not turn or shift.
Step 5
With the ribs of the sprayhead facing up, install the sprayhead to the waterway.
|