How to Install Reno Juno Waterfall Bathtub Faucet | BSY-8007
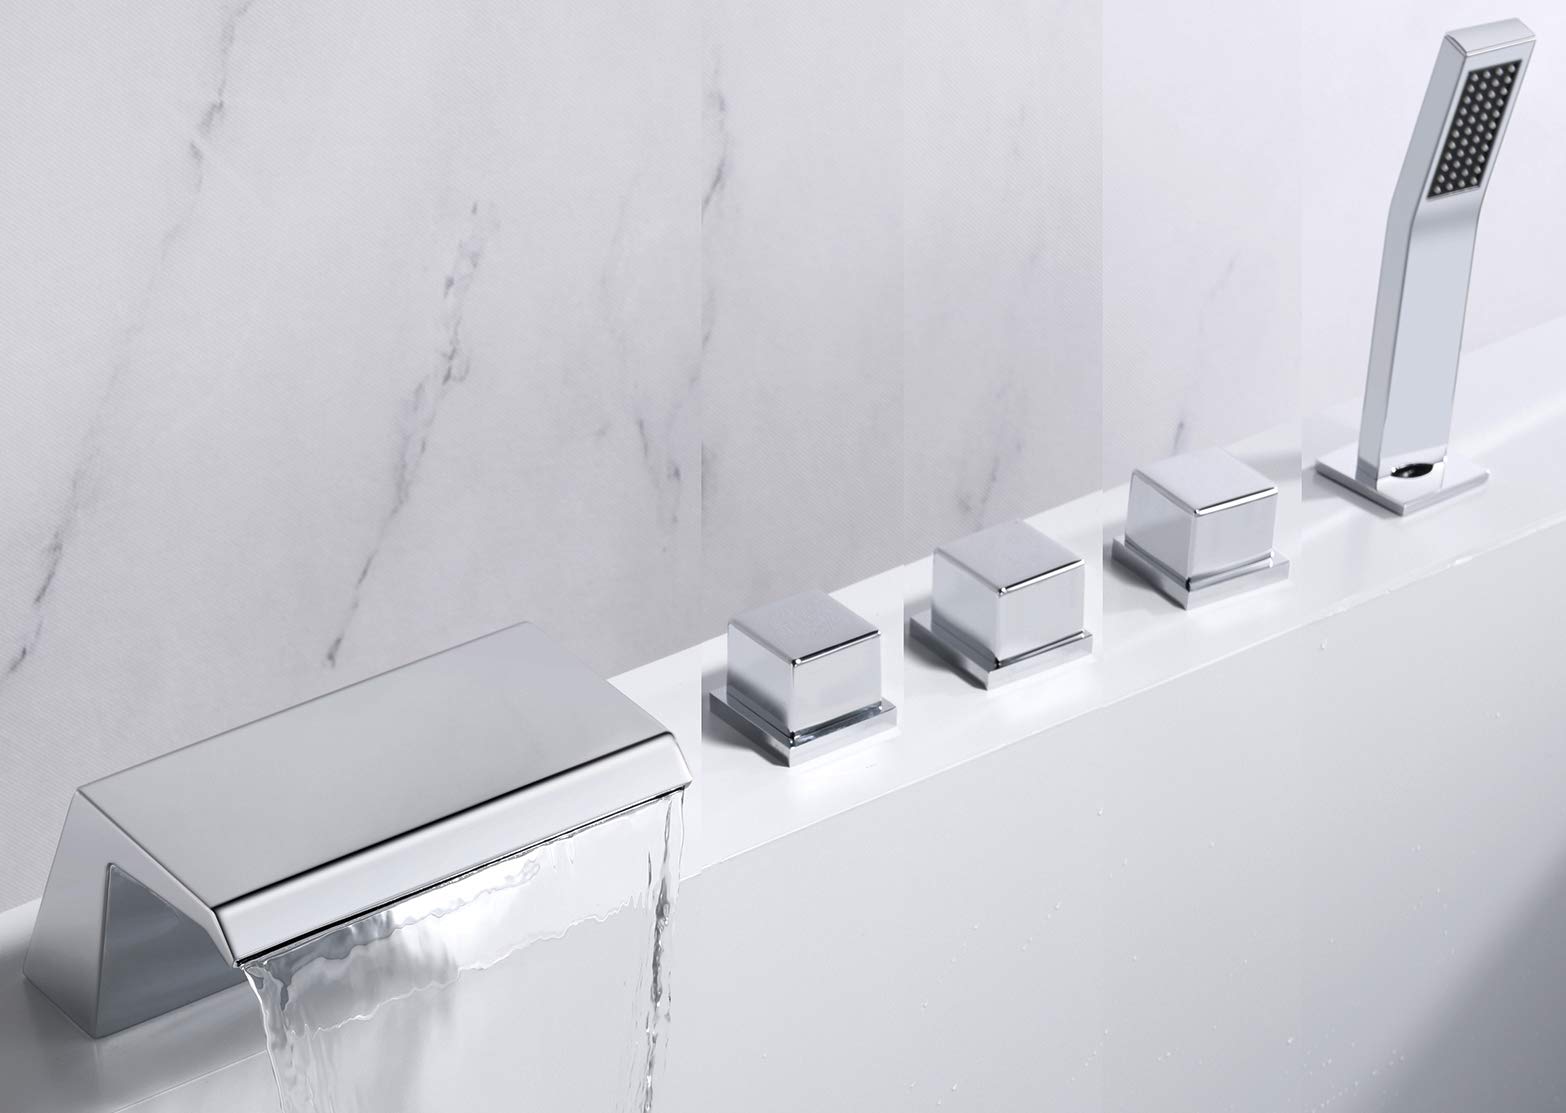
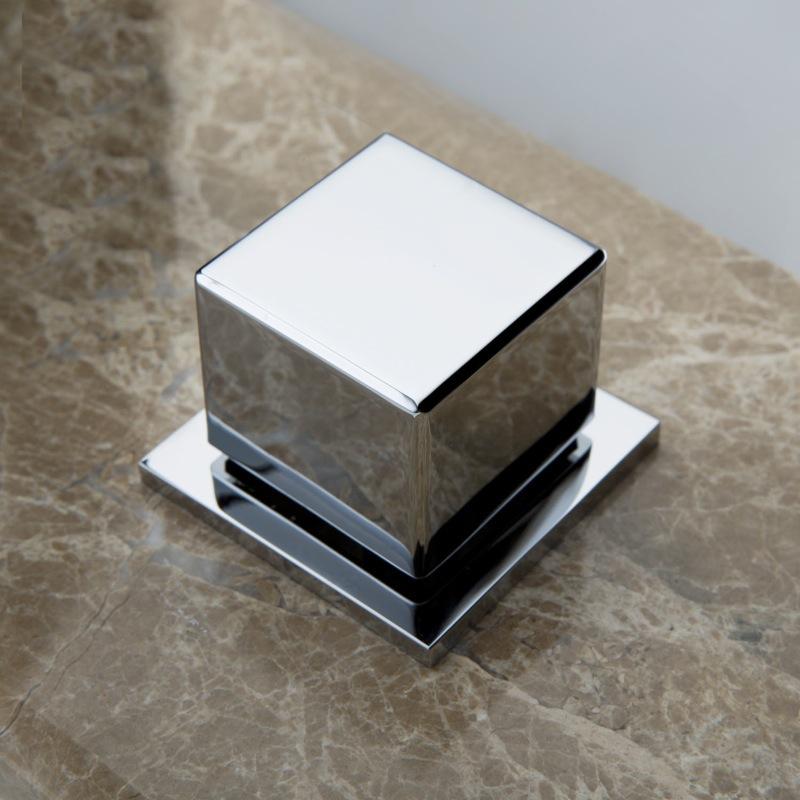
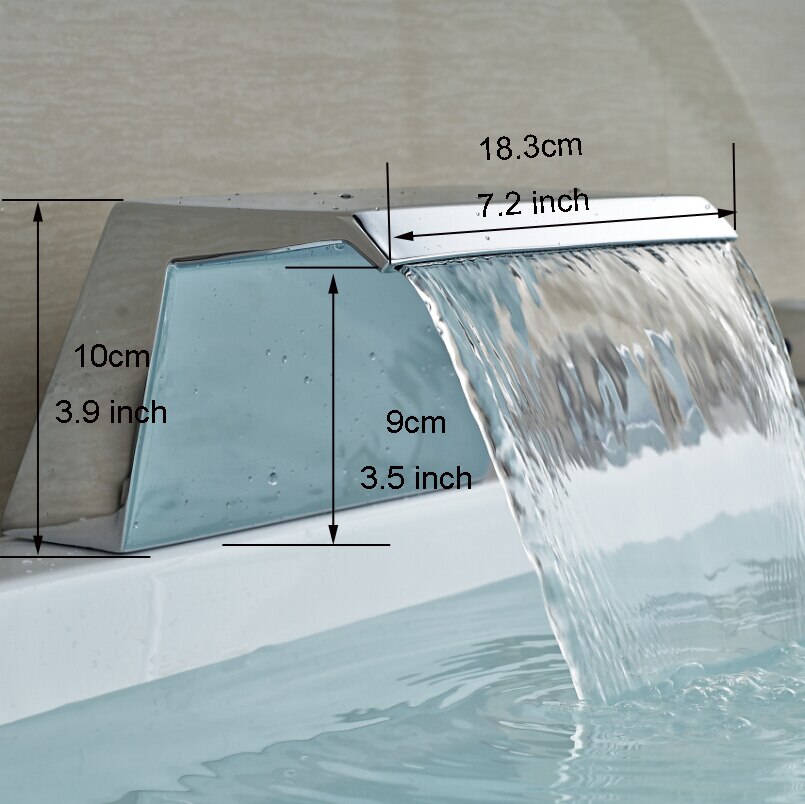
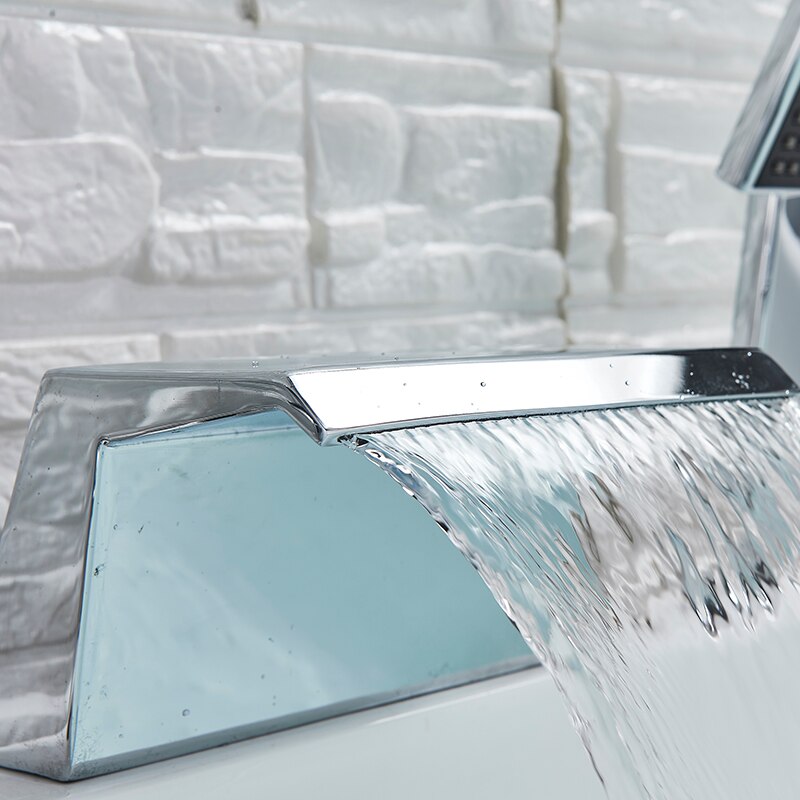
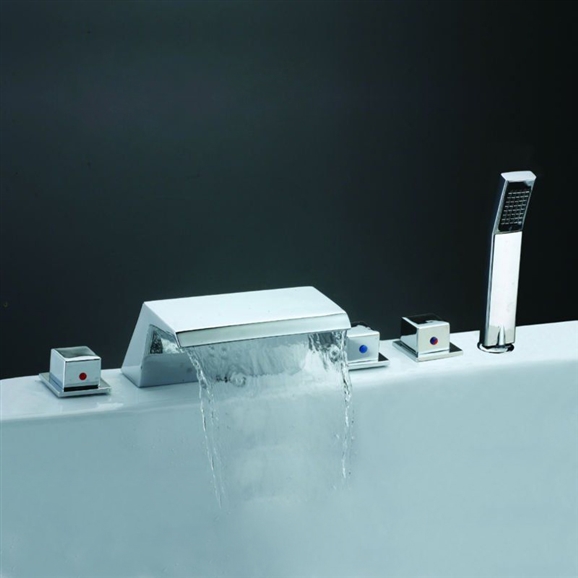
| Class and sophistication added to your bathing experience, that's what our Juno Waterfall Bathtub Faucet is offering. A generous waterfall of water will cascade into your bathtub. Chrome temperature control handles ensure that you have your water exactly the way you desire. Be sure, when it comes to new Bathtub Faucet, we are offering shape, finish and styles you're looking for. This has an elegant design and elevates the appeal of your decor made from the highest quality and for great tastes. It comes super seal technology inside, capable of delivering superior performance with a solid construction for long durability that will upgrade your bathroom with a modern and cool look for a long period of time. | |  |
| |
|
| |
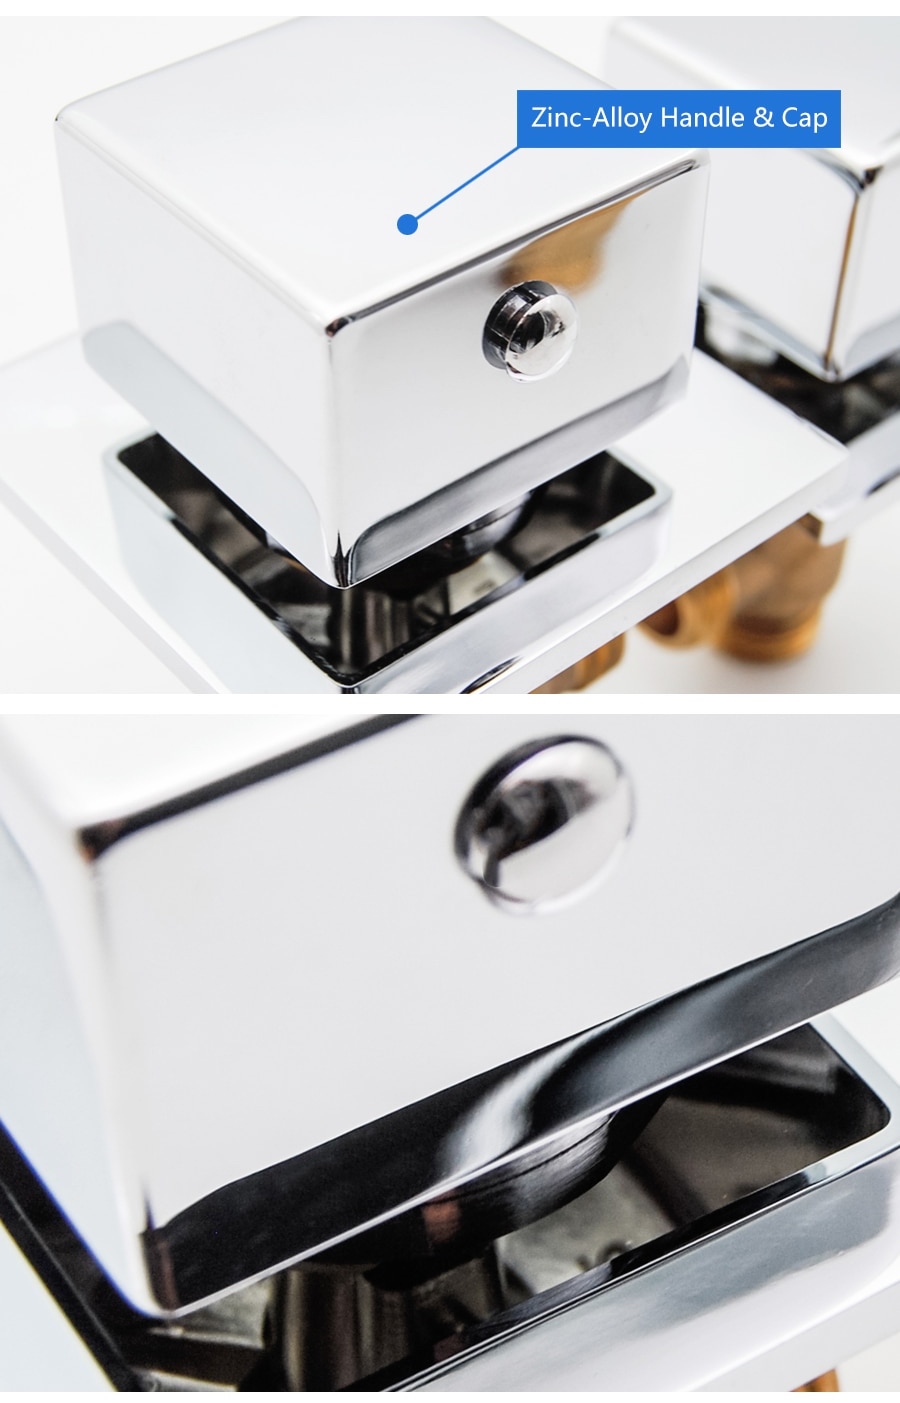
| | Features: |
faucet | Visit Product Page

| - Type: Bath & Shower Faucets
- Valve Core Material: Ceramic
- Bath & Shower Faucet Type: Deck-Moun B & S Faucets
- Surface Finish: Chrome
- Style: Contemporary
- Number of Handles: Triple Handles
- Surface Treatment: Polished
- Suitable Place: Bathtub
- Type: Waterfall Bath Tub Faucet
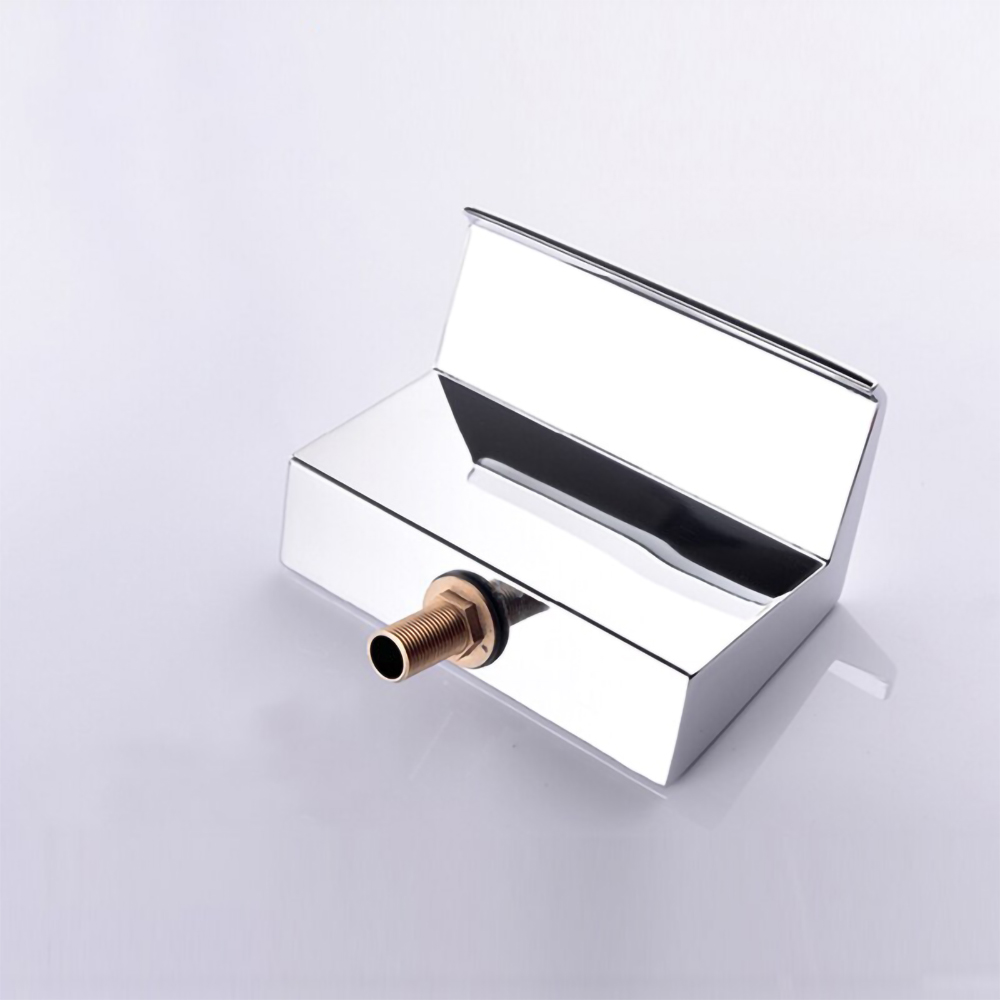
- Spout Material: Stainless steel (sus304)
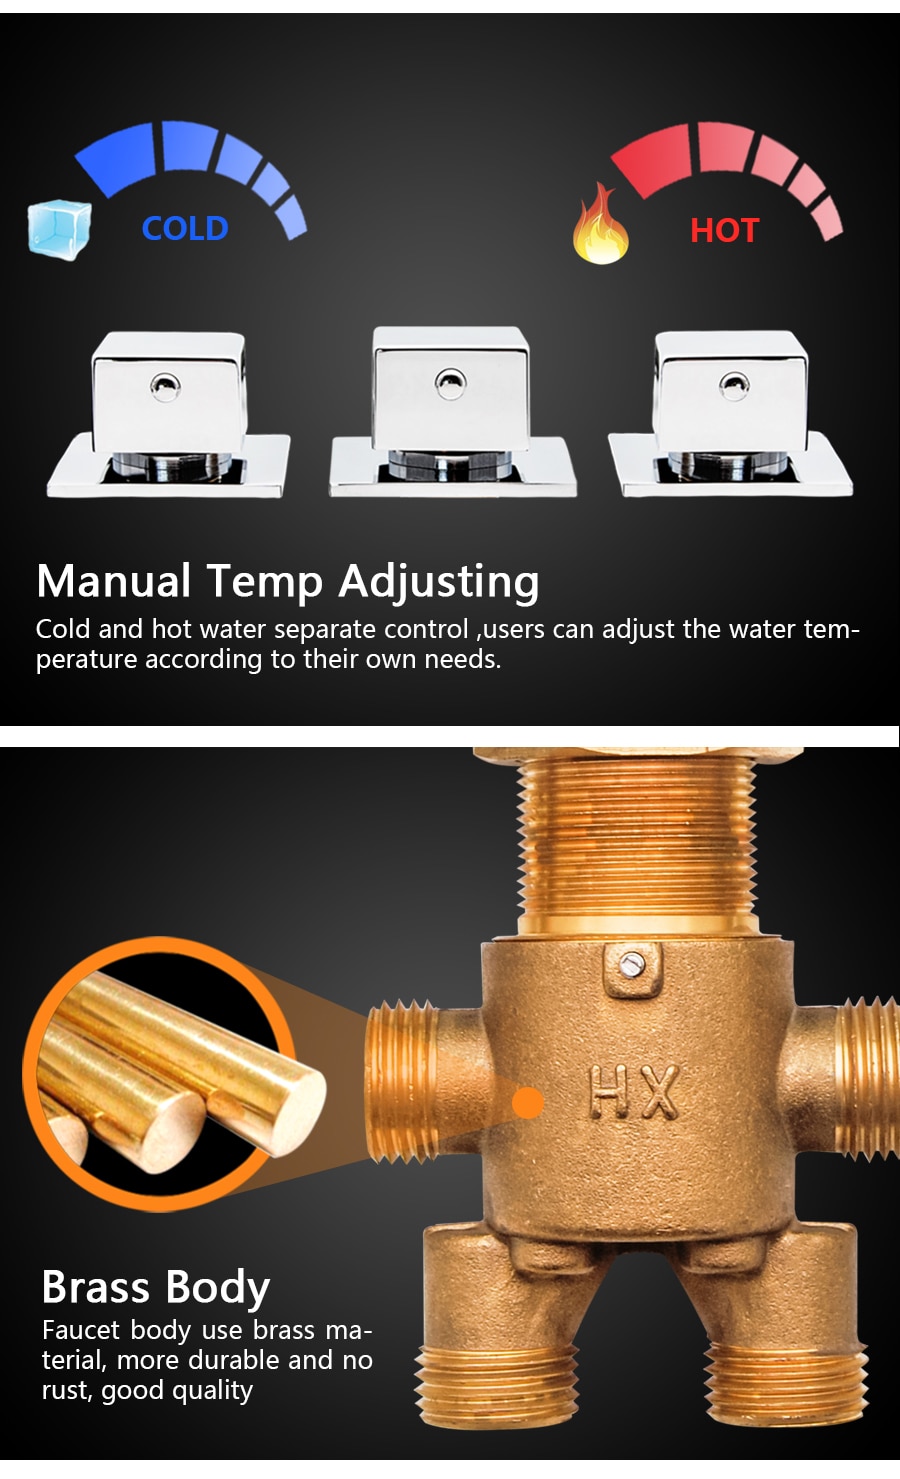
- Valve Material: Brass
- Flow Rate: 1.8 GPM
| | 
|
Important Note:
Before you begin, please read the installation instructions below. Observe all local building and safety codes.
Unpack and inspect the product for any shipping damages. If you find damages, do not install.
Please note all showers must be installed by a professional and certified plumber otherwise warranty may be voided.
|
|
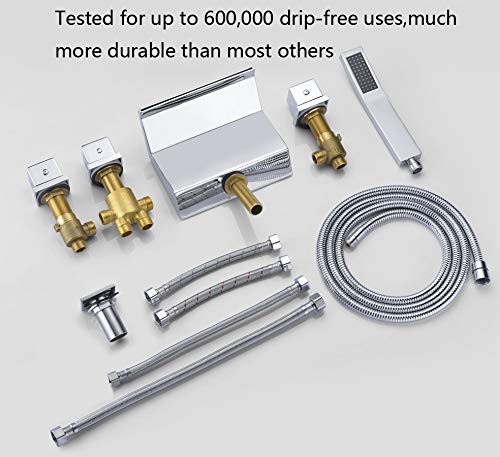
Faucet Set Installation Instructions
|
Step 1:
|
bath faucet
|
Step 2:
|
|
|
|
|
|
|
|
|
|
|
|
|
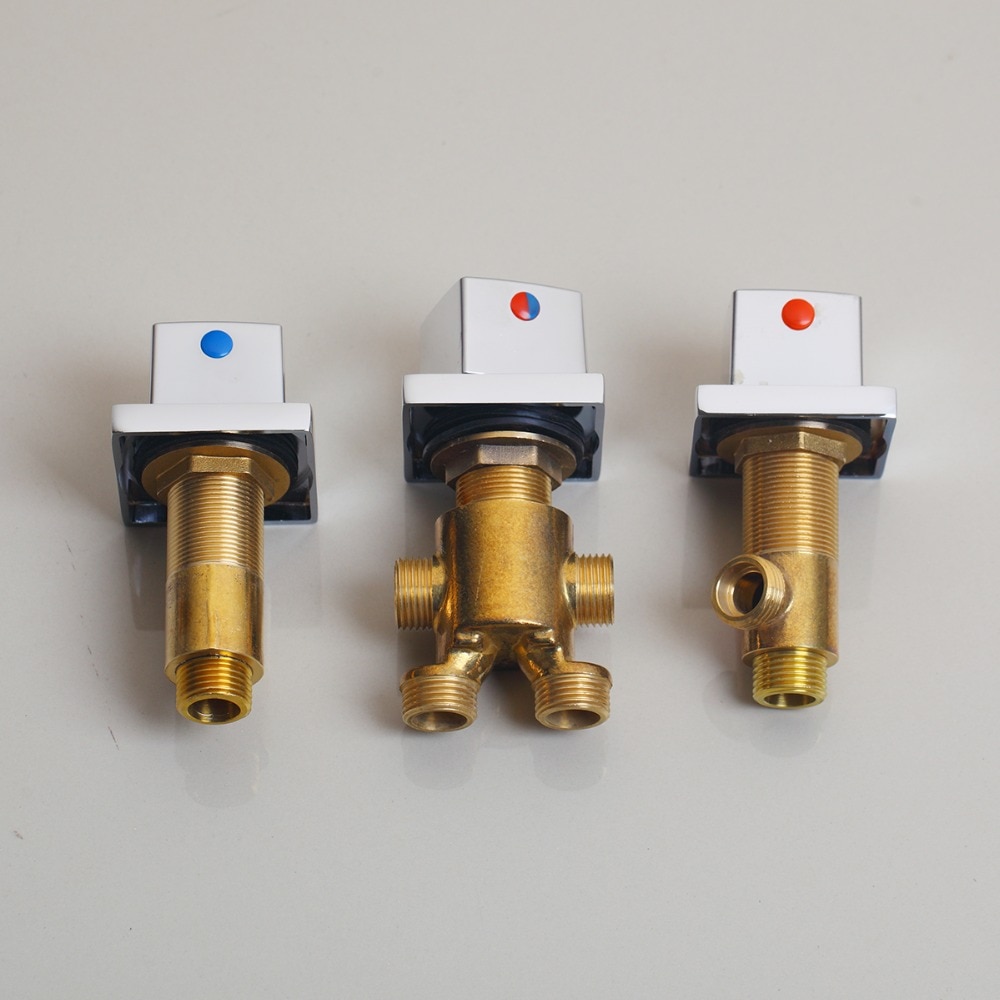
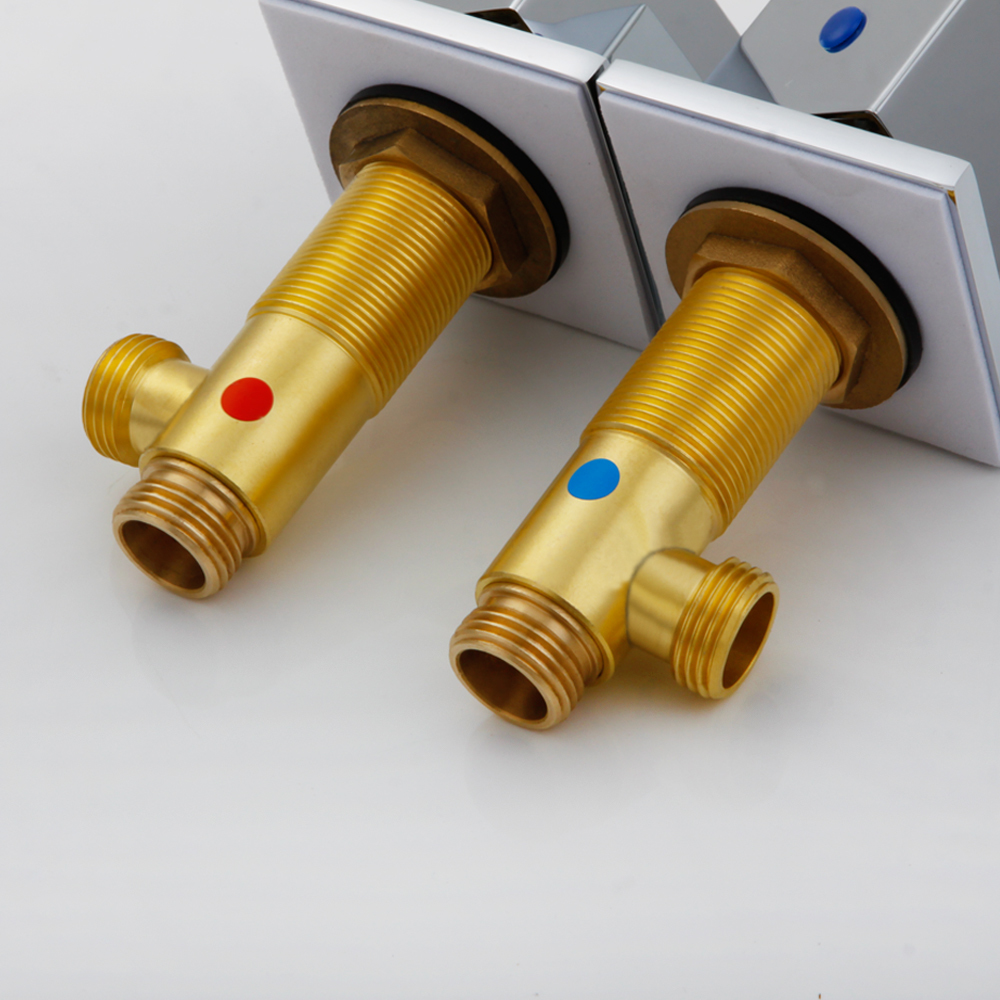
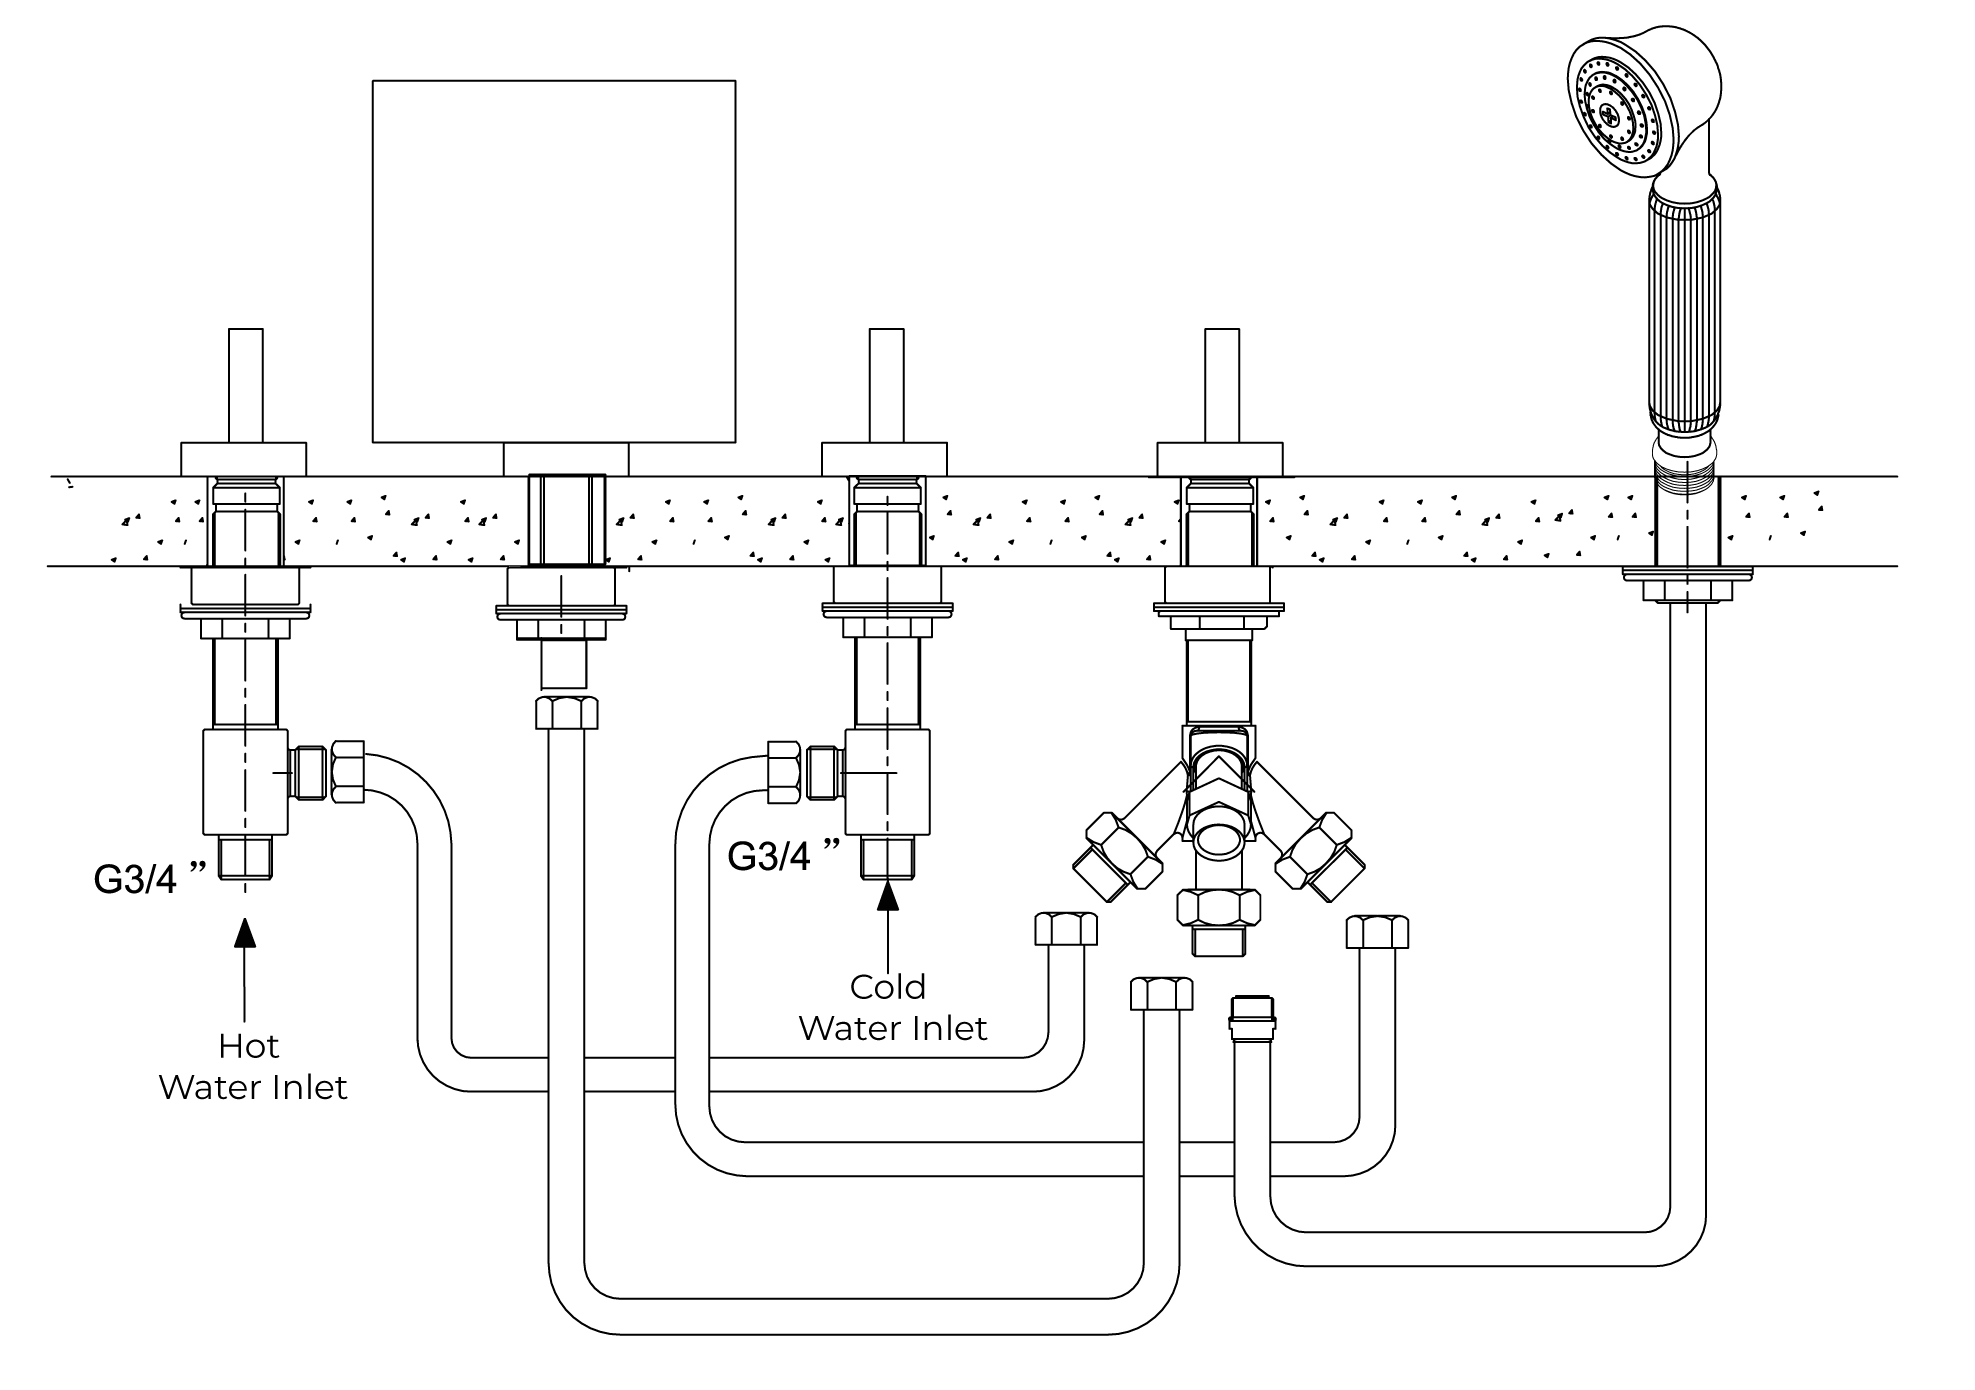
Connection Type A
|
|
|
|
|
Connection Type B
|
|
|
|
|
|
|
|
Connection Type C
|
|
|
|
|
|
|
|
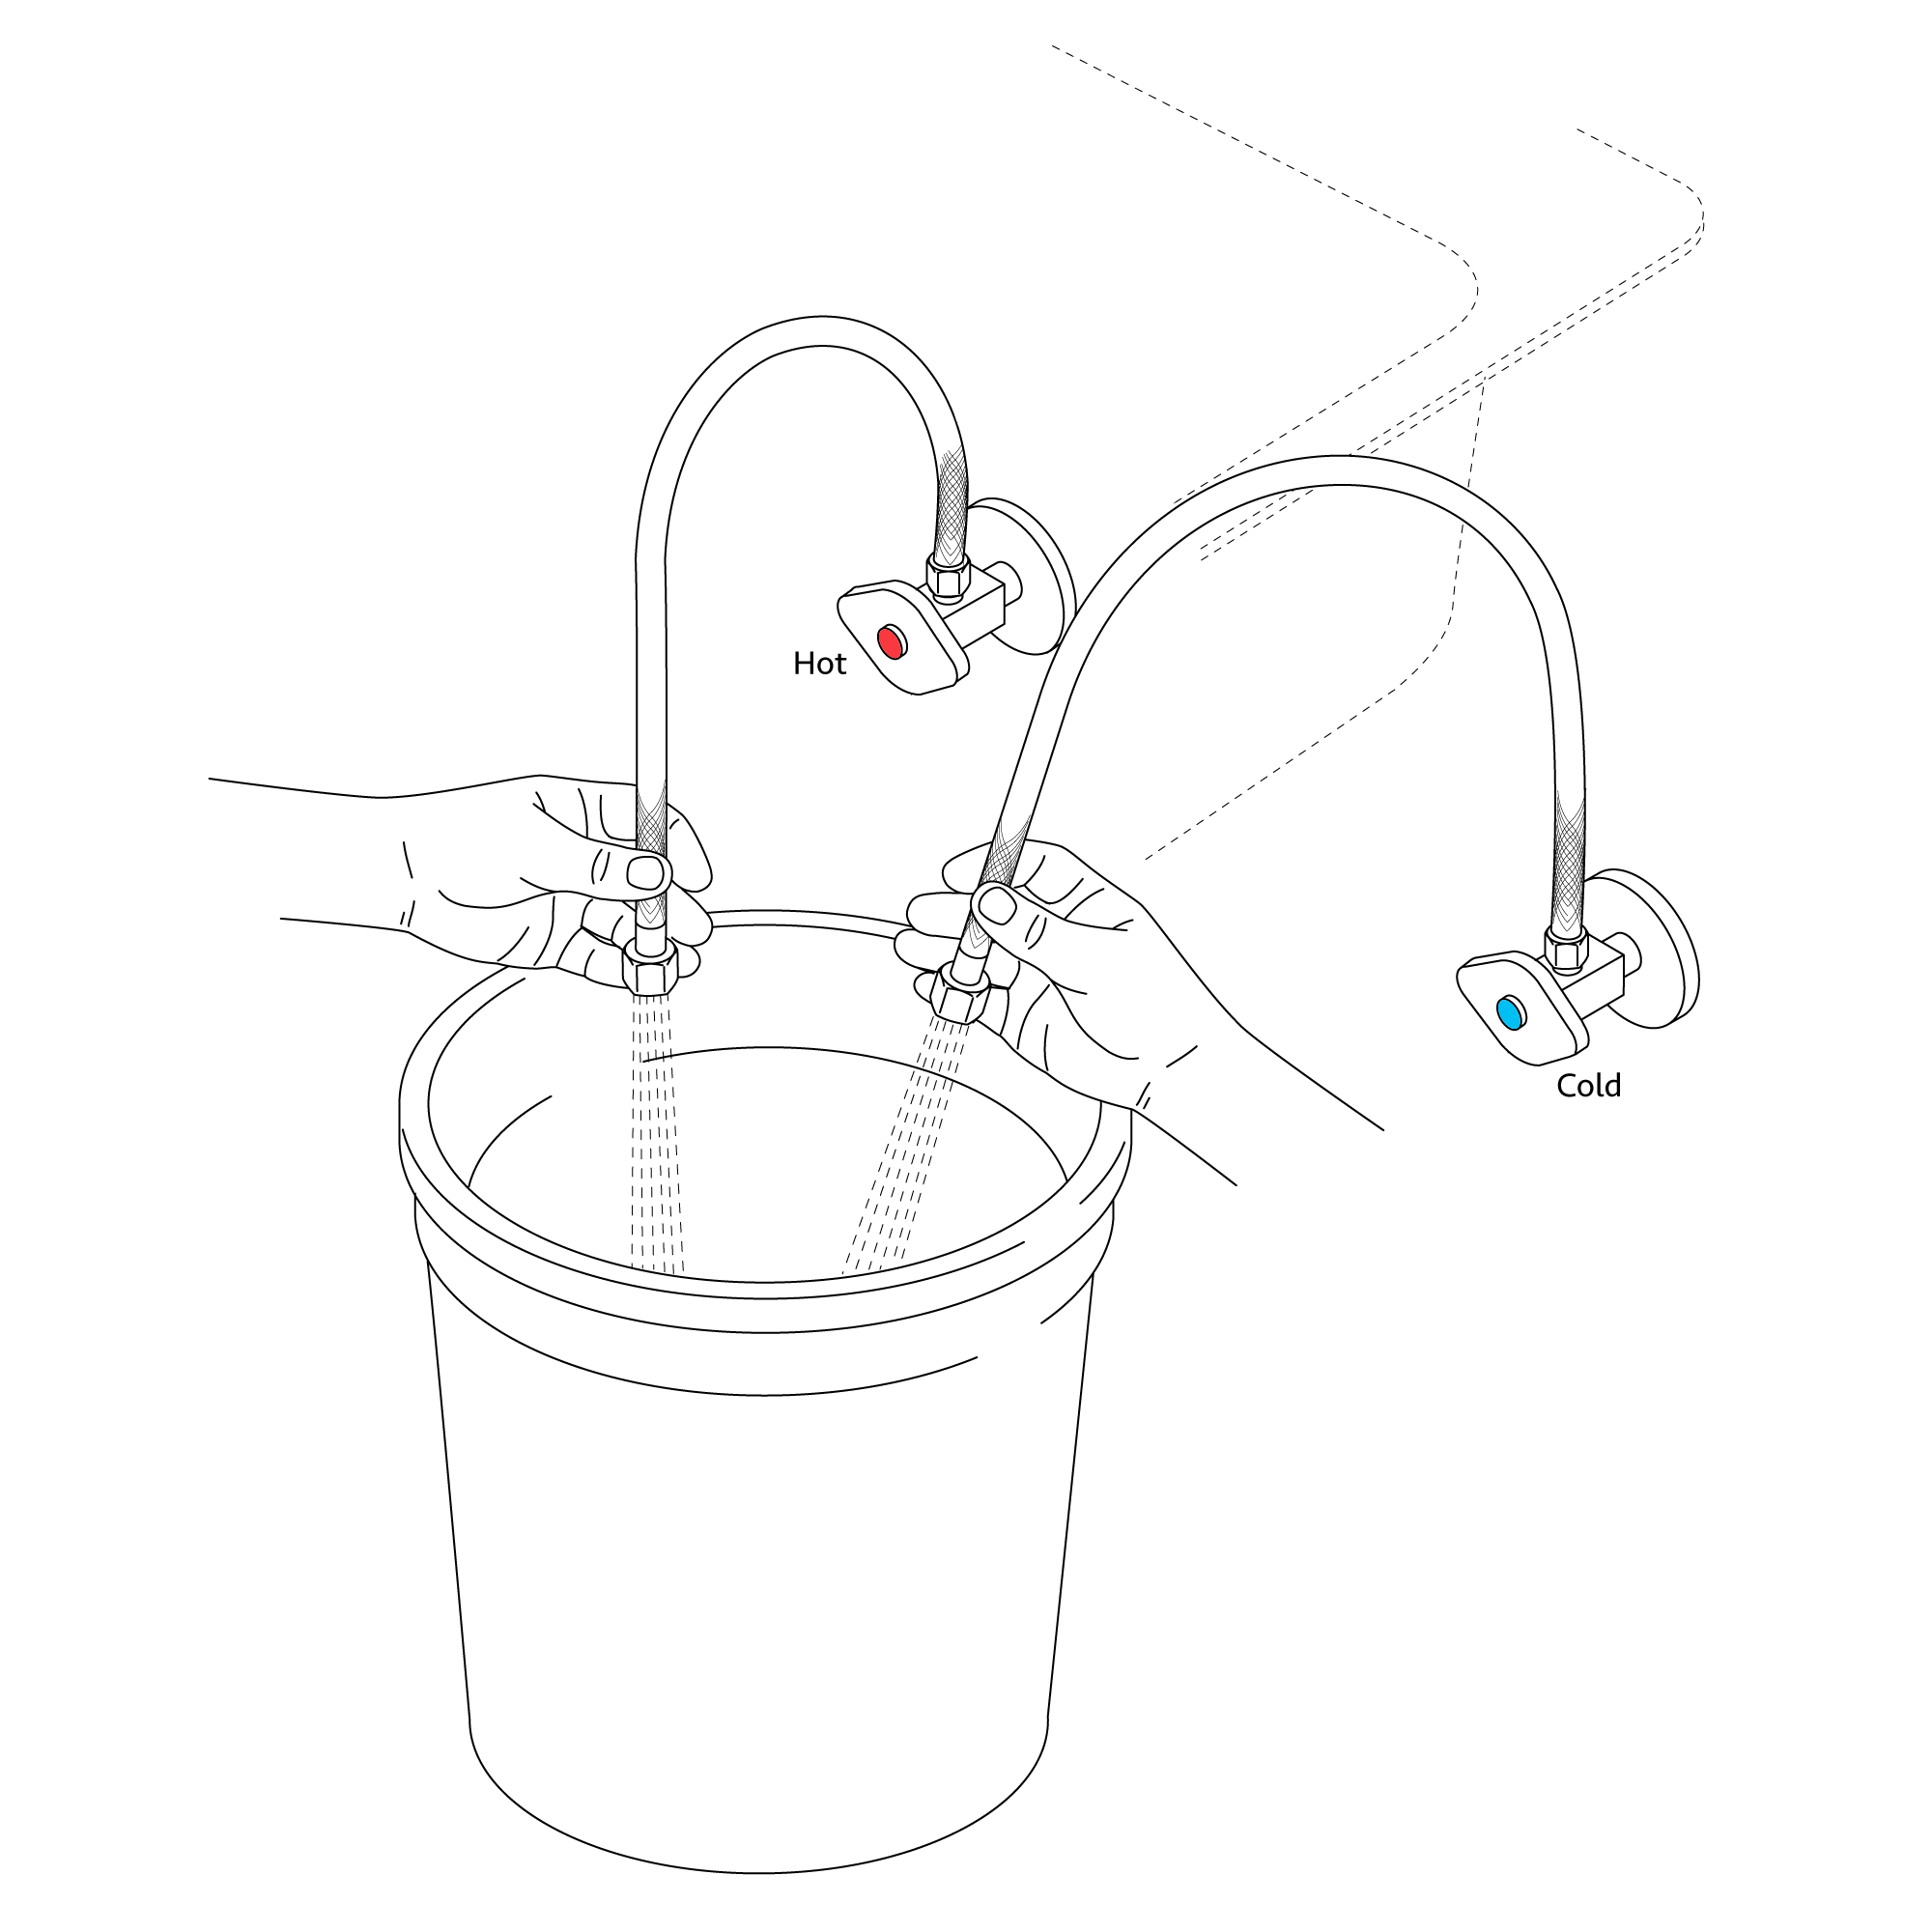
Flush Debris from Waterpipe lines
|
|
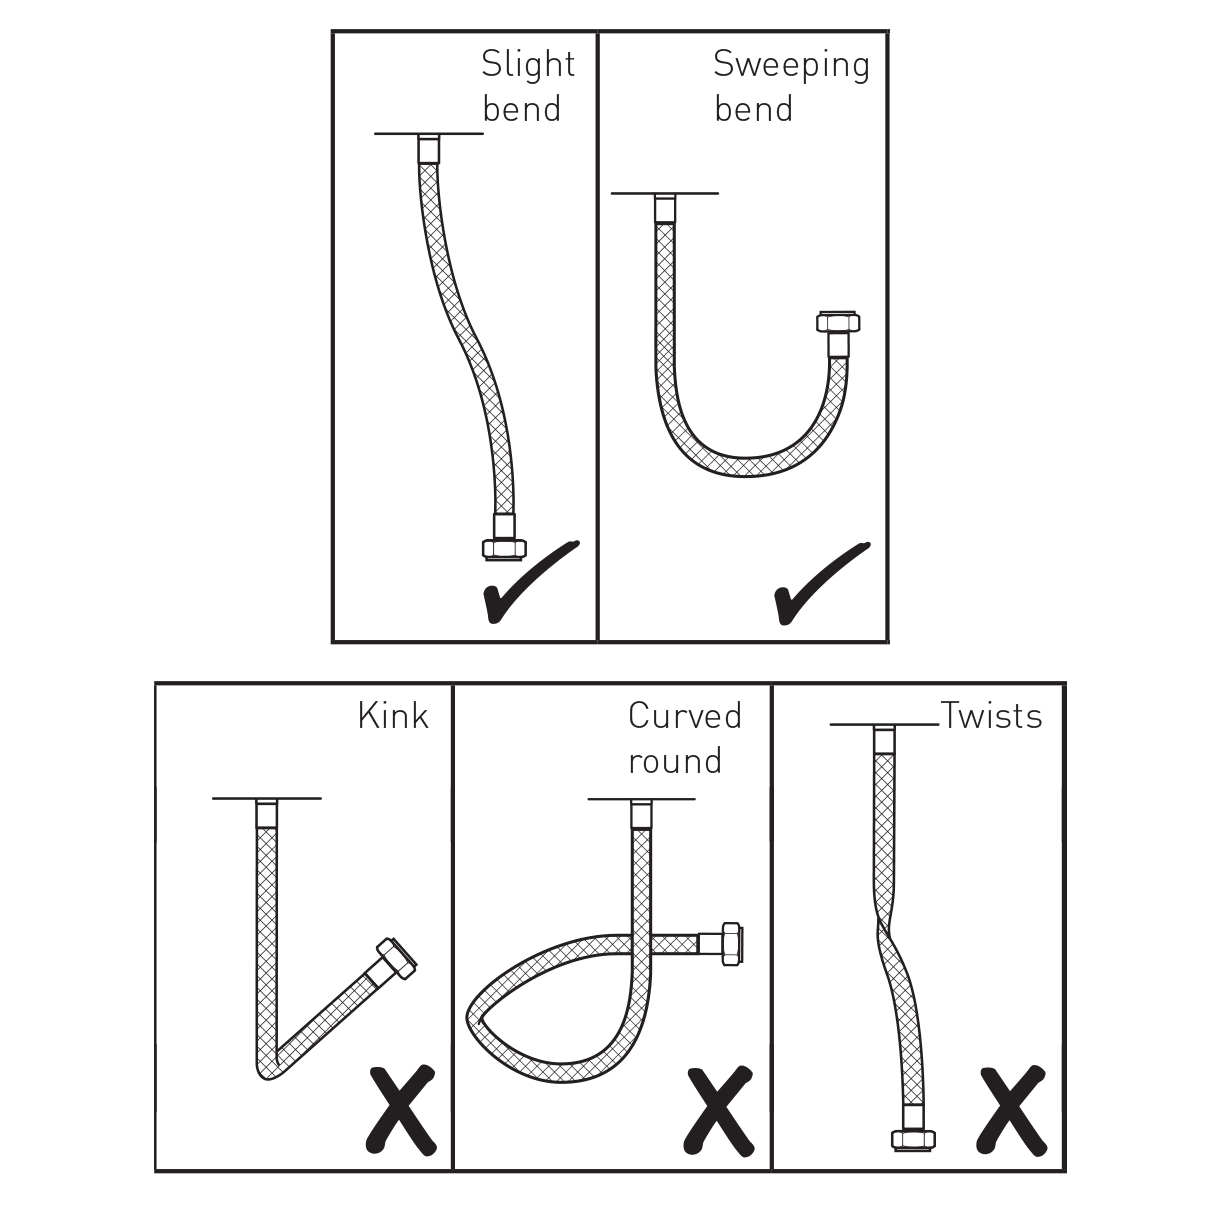
Correct way for Hose
|
|
|
|
|
|
|
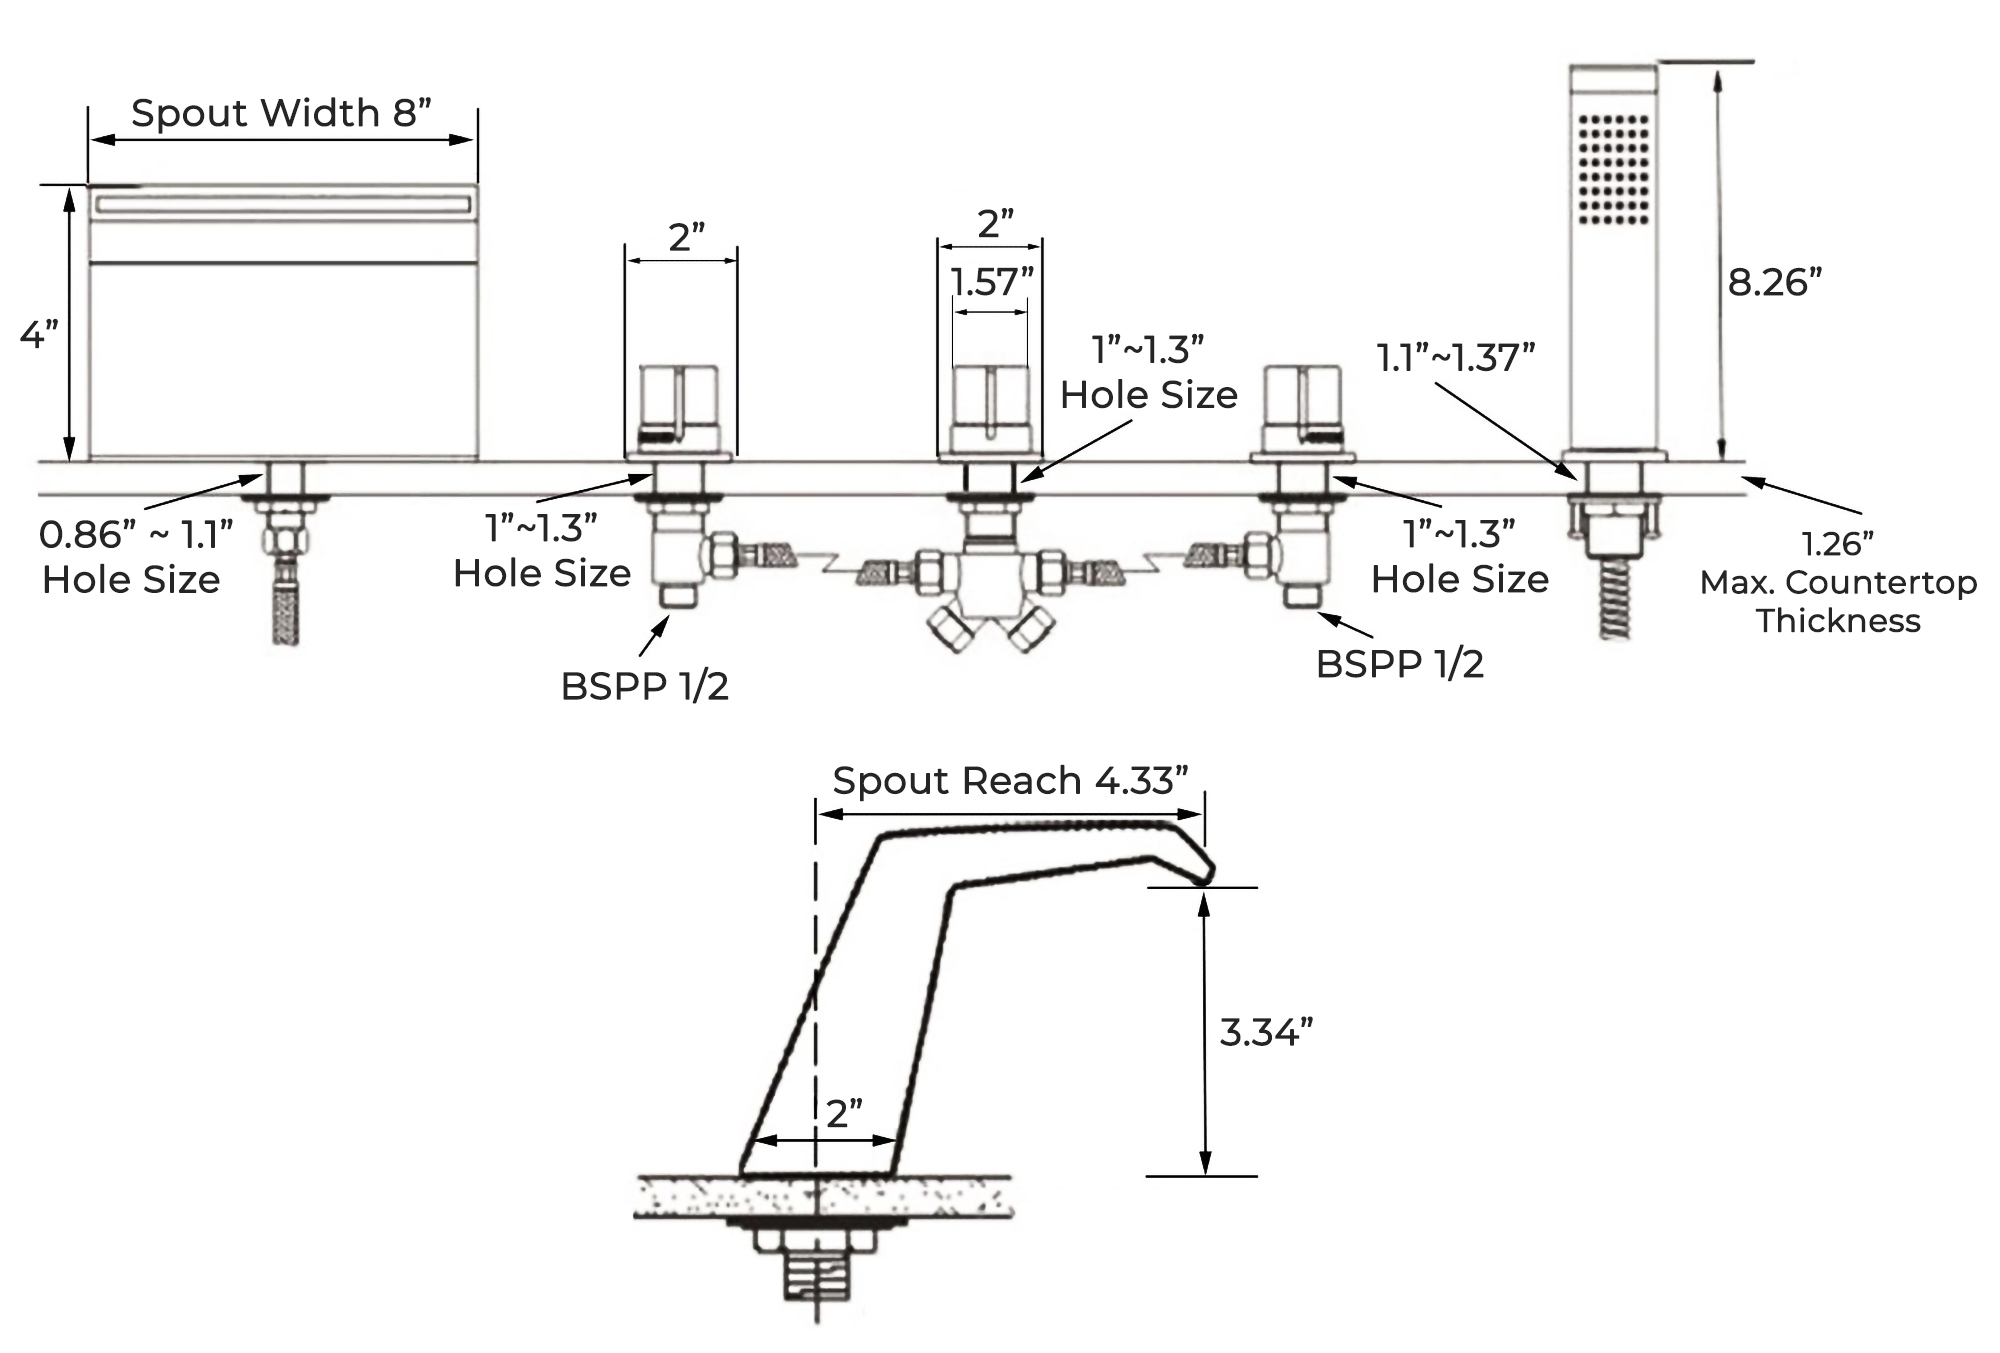
Installation Instruction
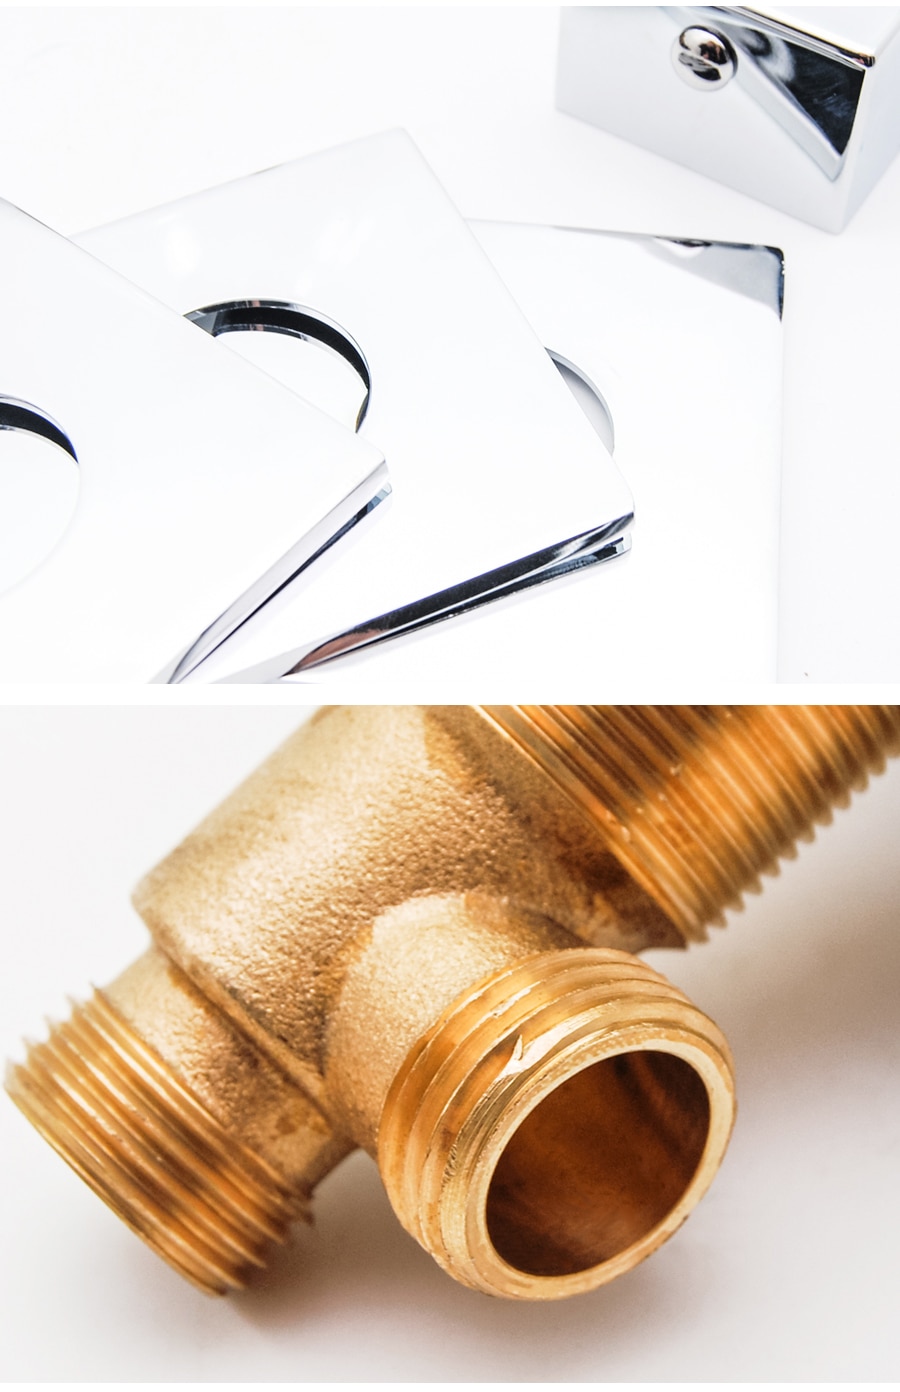
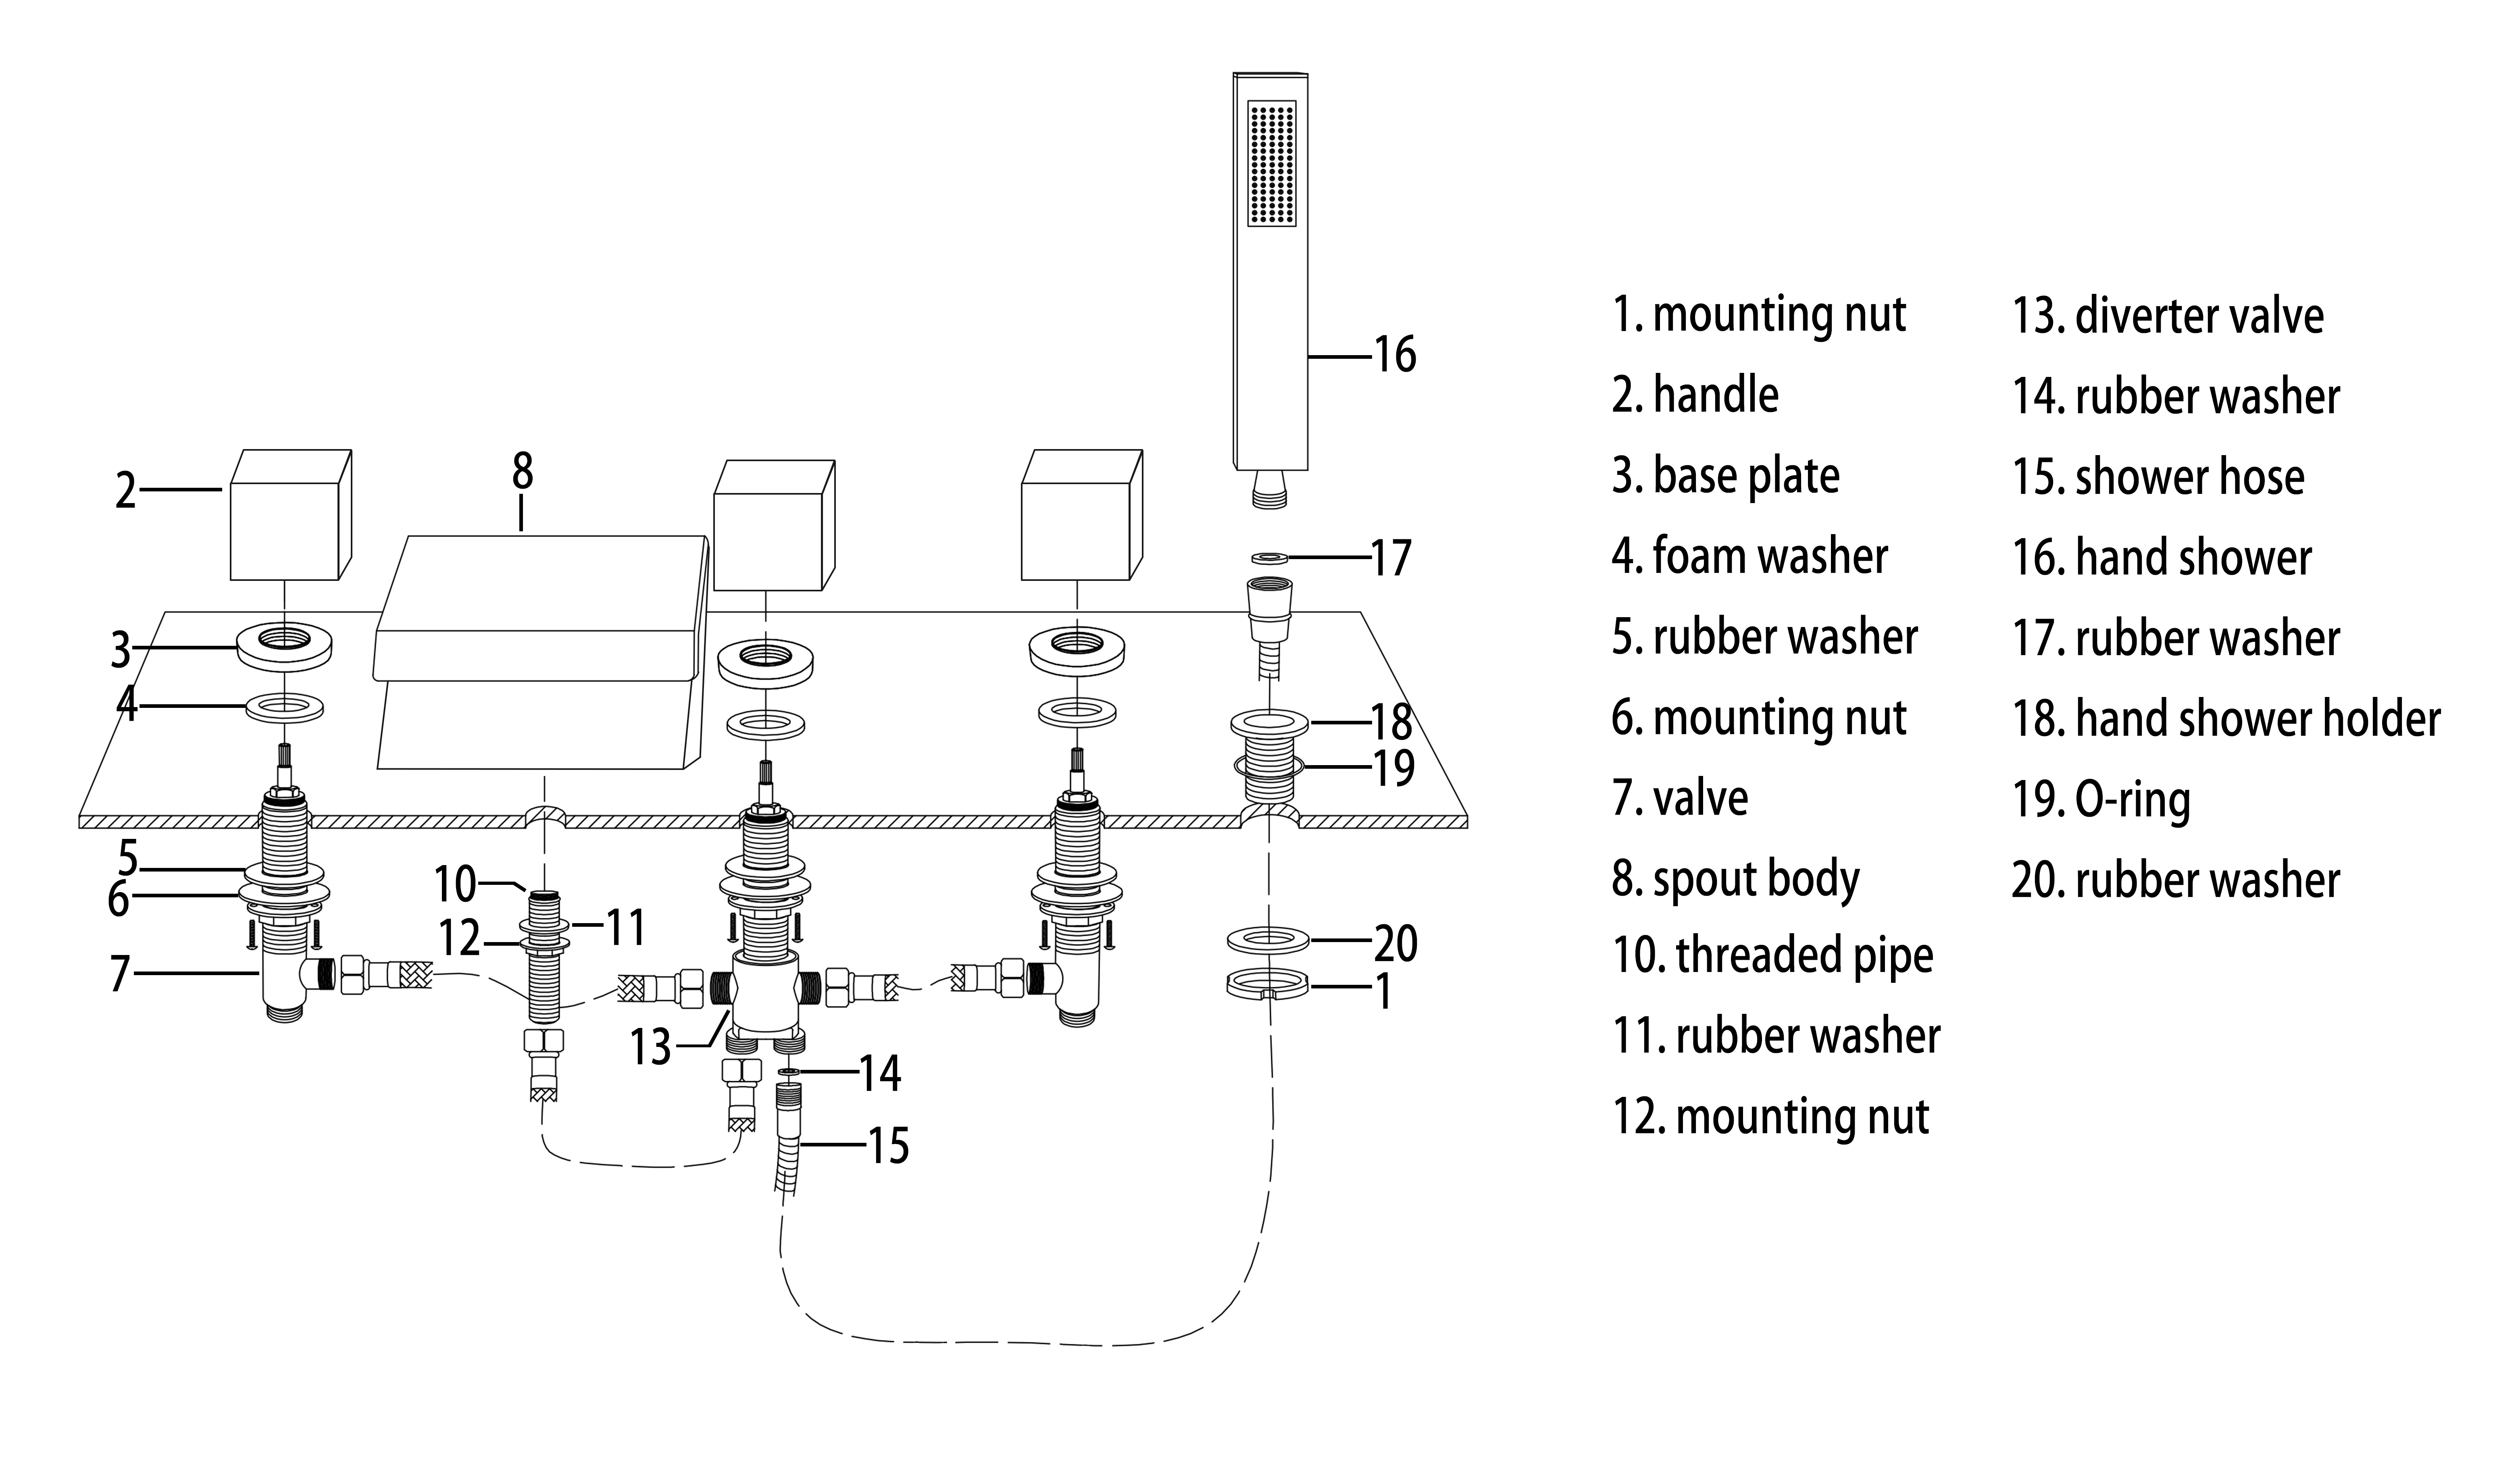
1. Screw threaded pipe into the spout body, and fit O-ring into the bottom groove of spout body.
2. Insert spout body into the specified drill hole on the countertop.
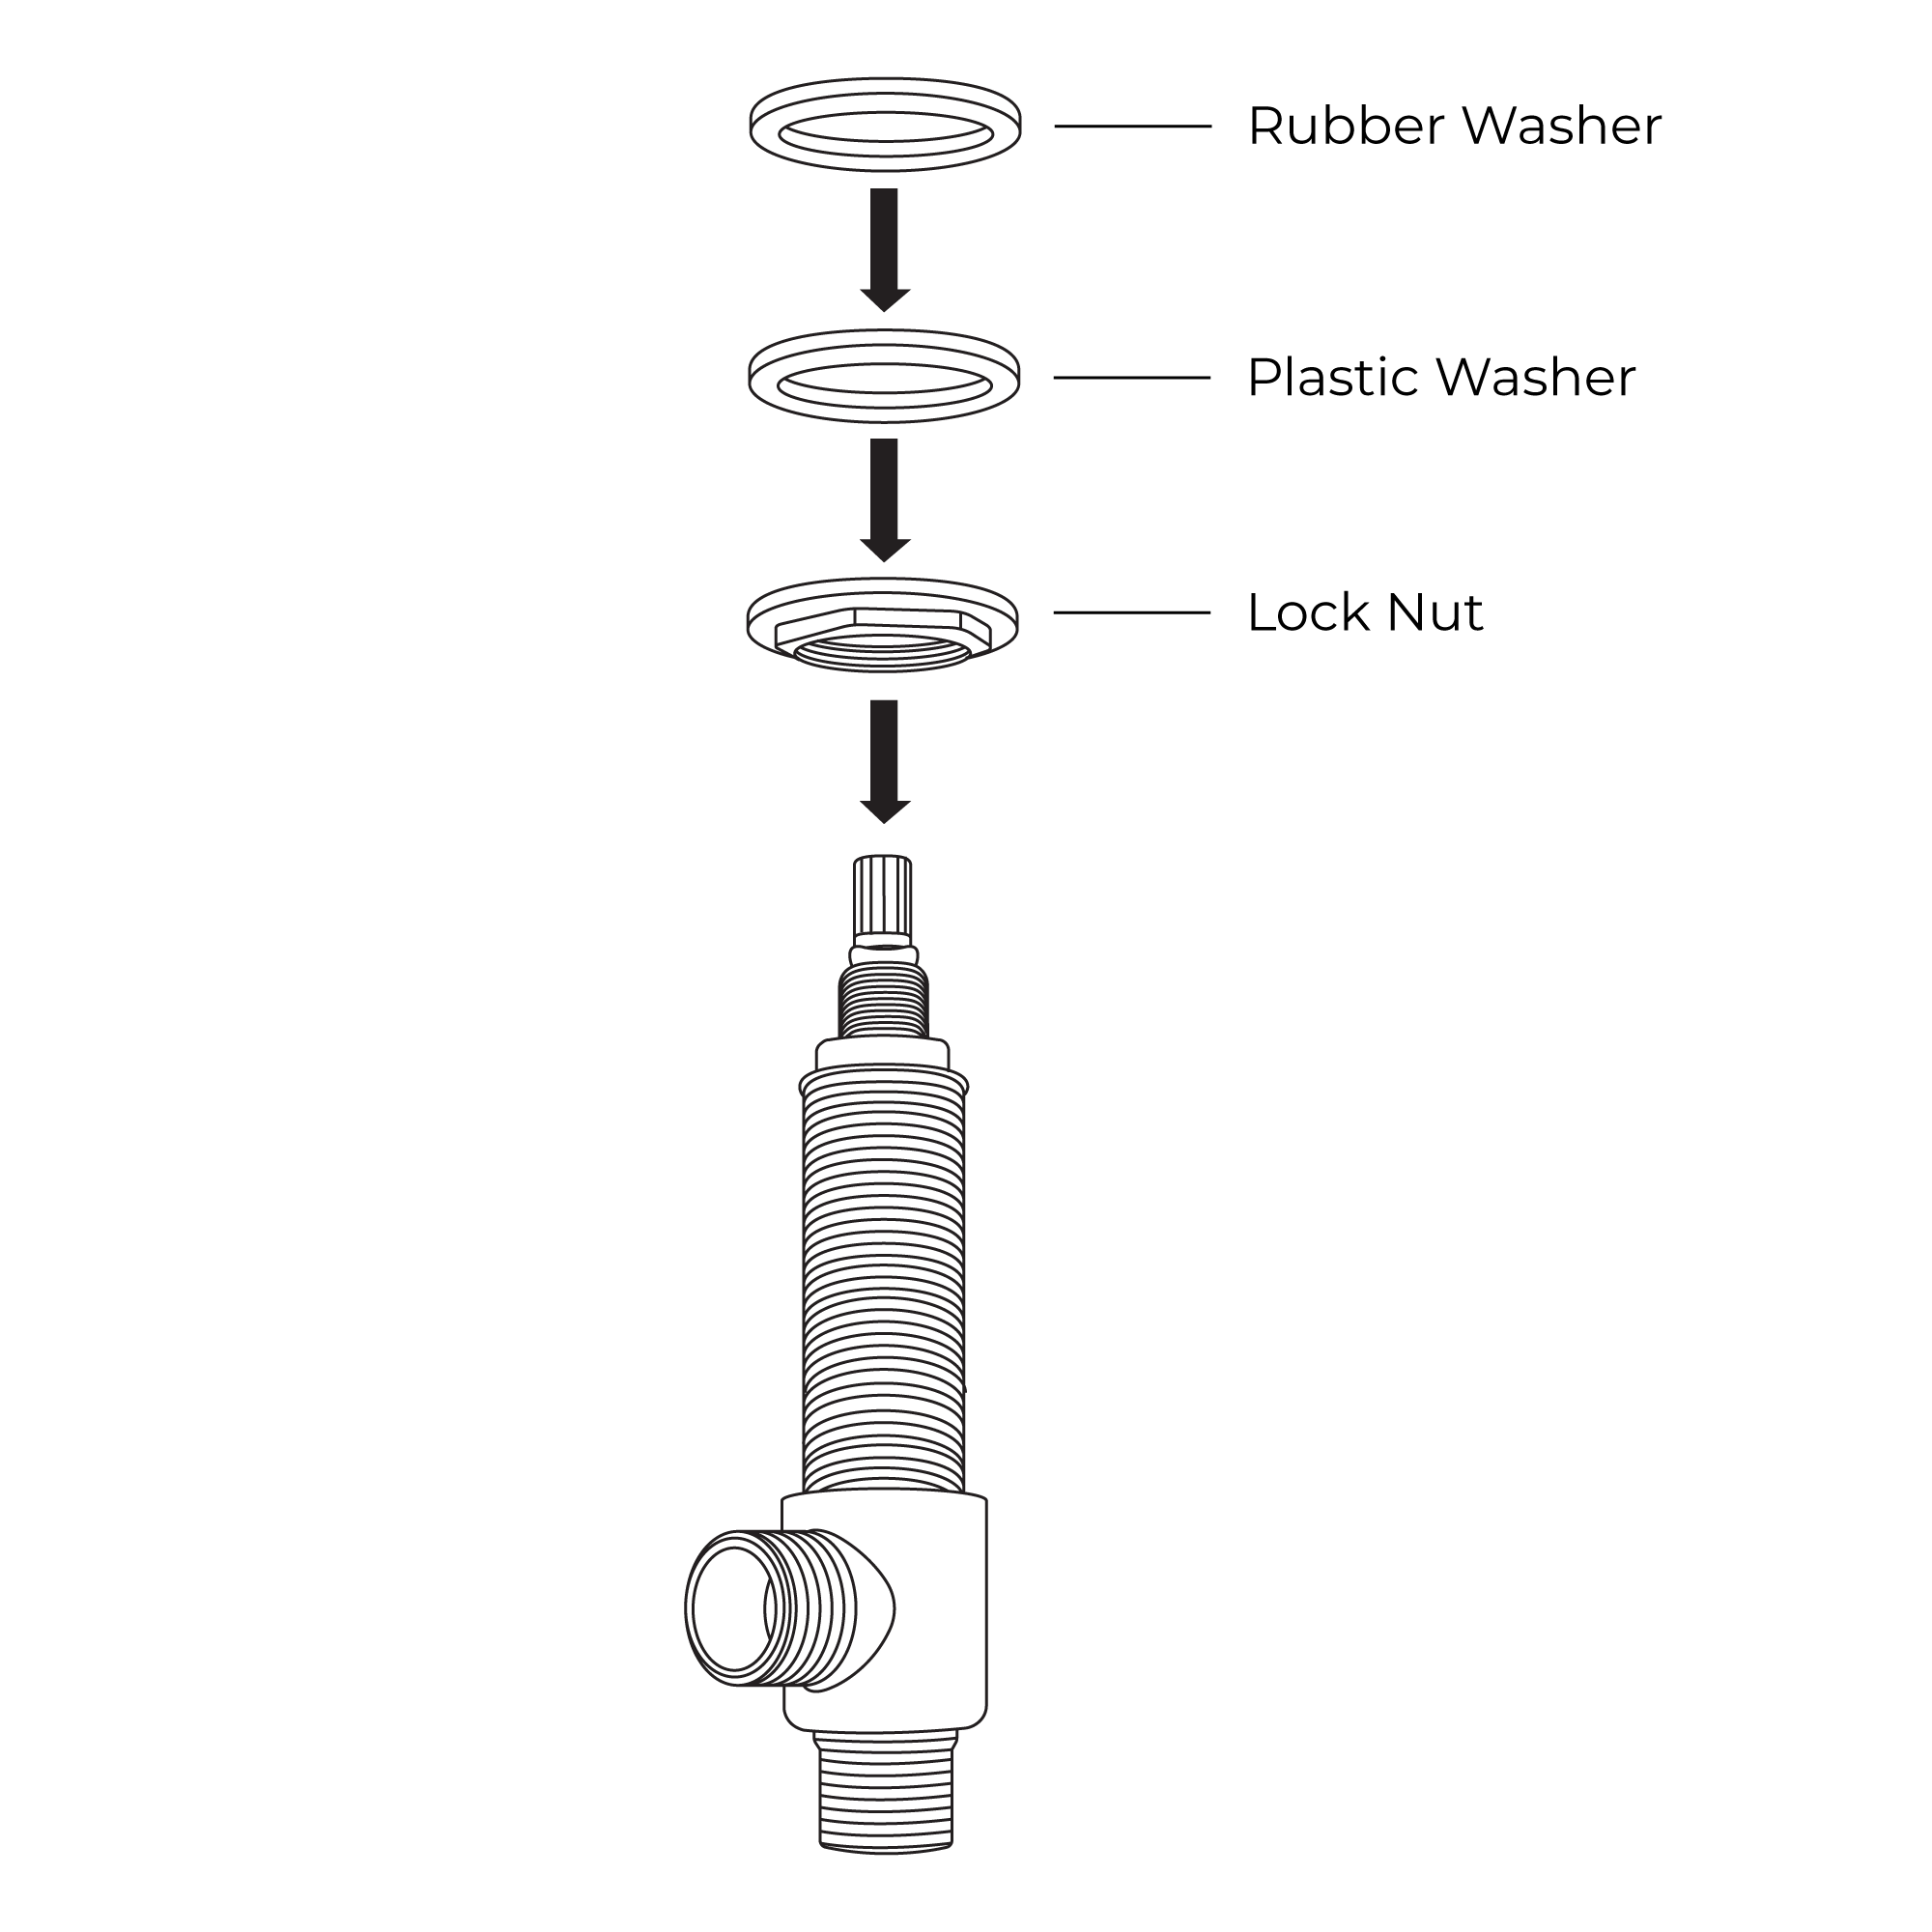
3. Install rubber washer to the threaded tailpipe of the spout body from underneath the counter top and then screw the mounting nut.
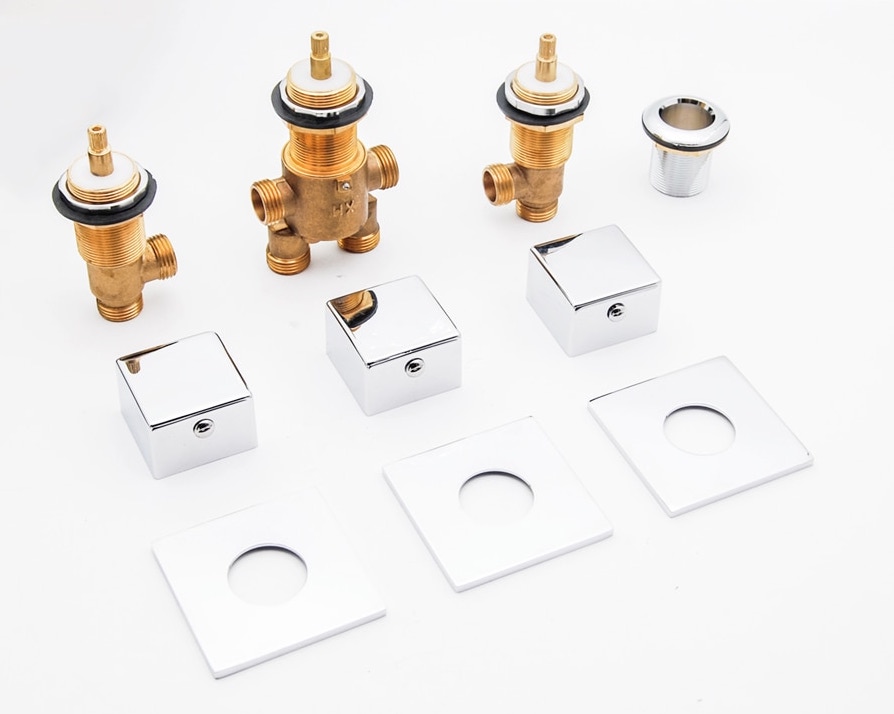
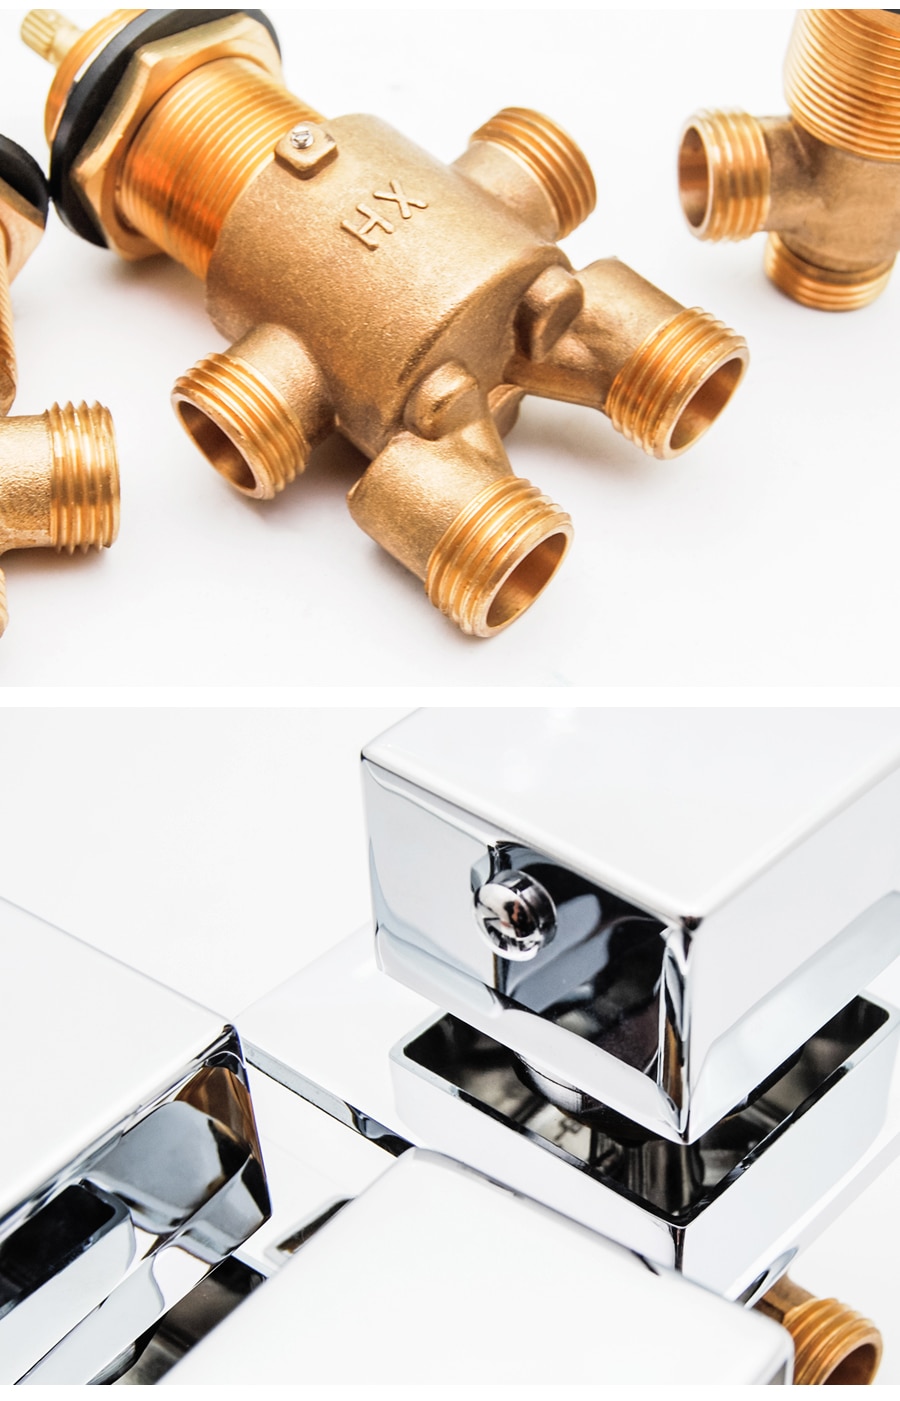
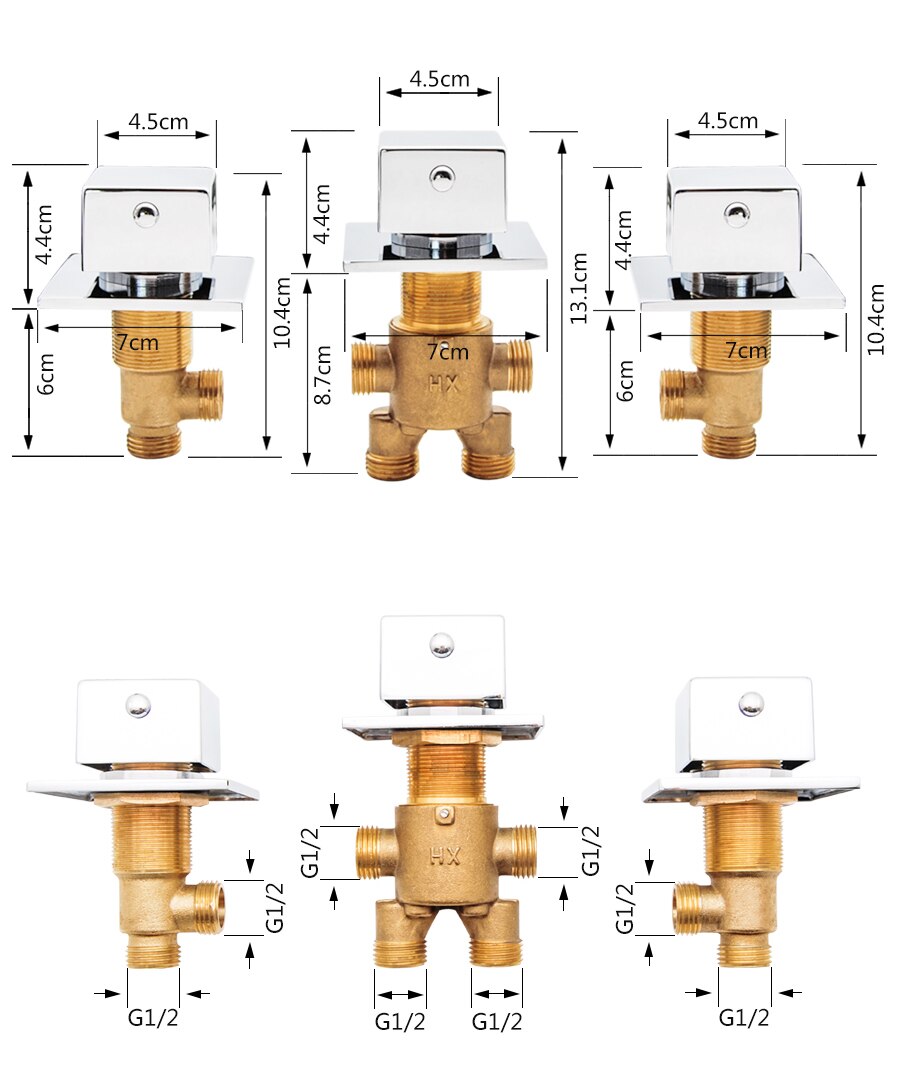
4. Install valve into specified drill hole from underneath the counter top. Screw bonnet nut into valve and fit the handle. Adjust the height and position of valve, then screw mounting nut to tighten valve underneath counter top securely.
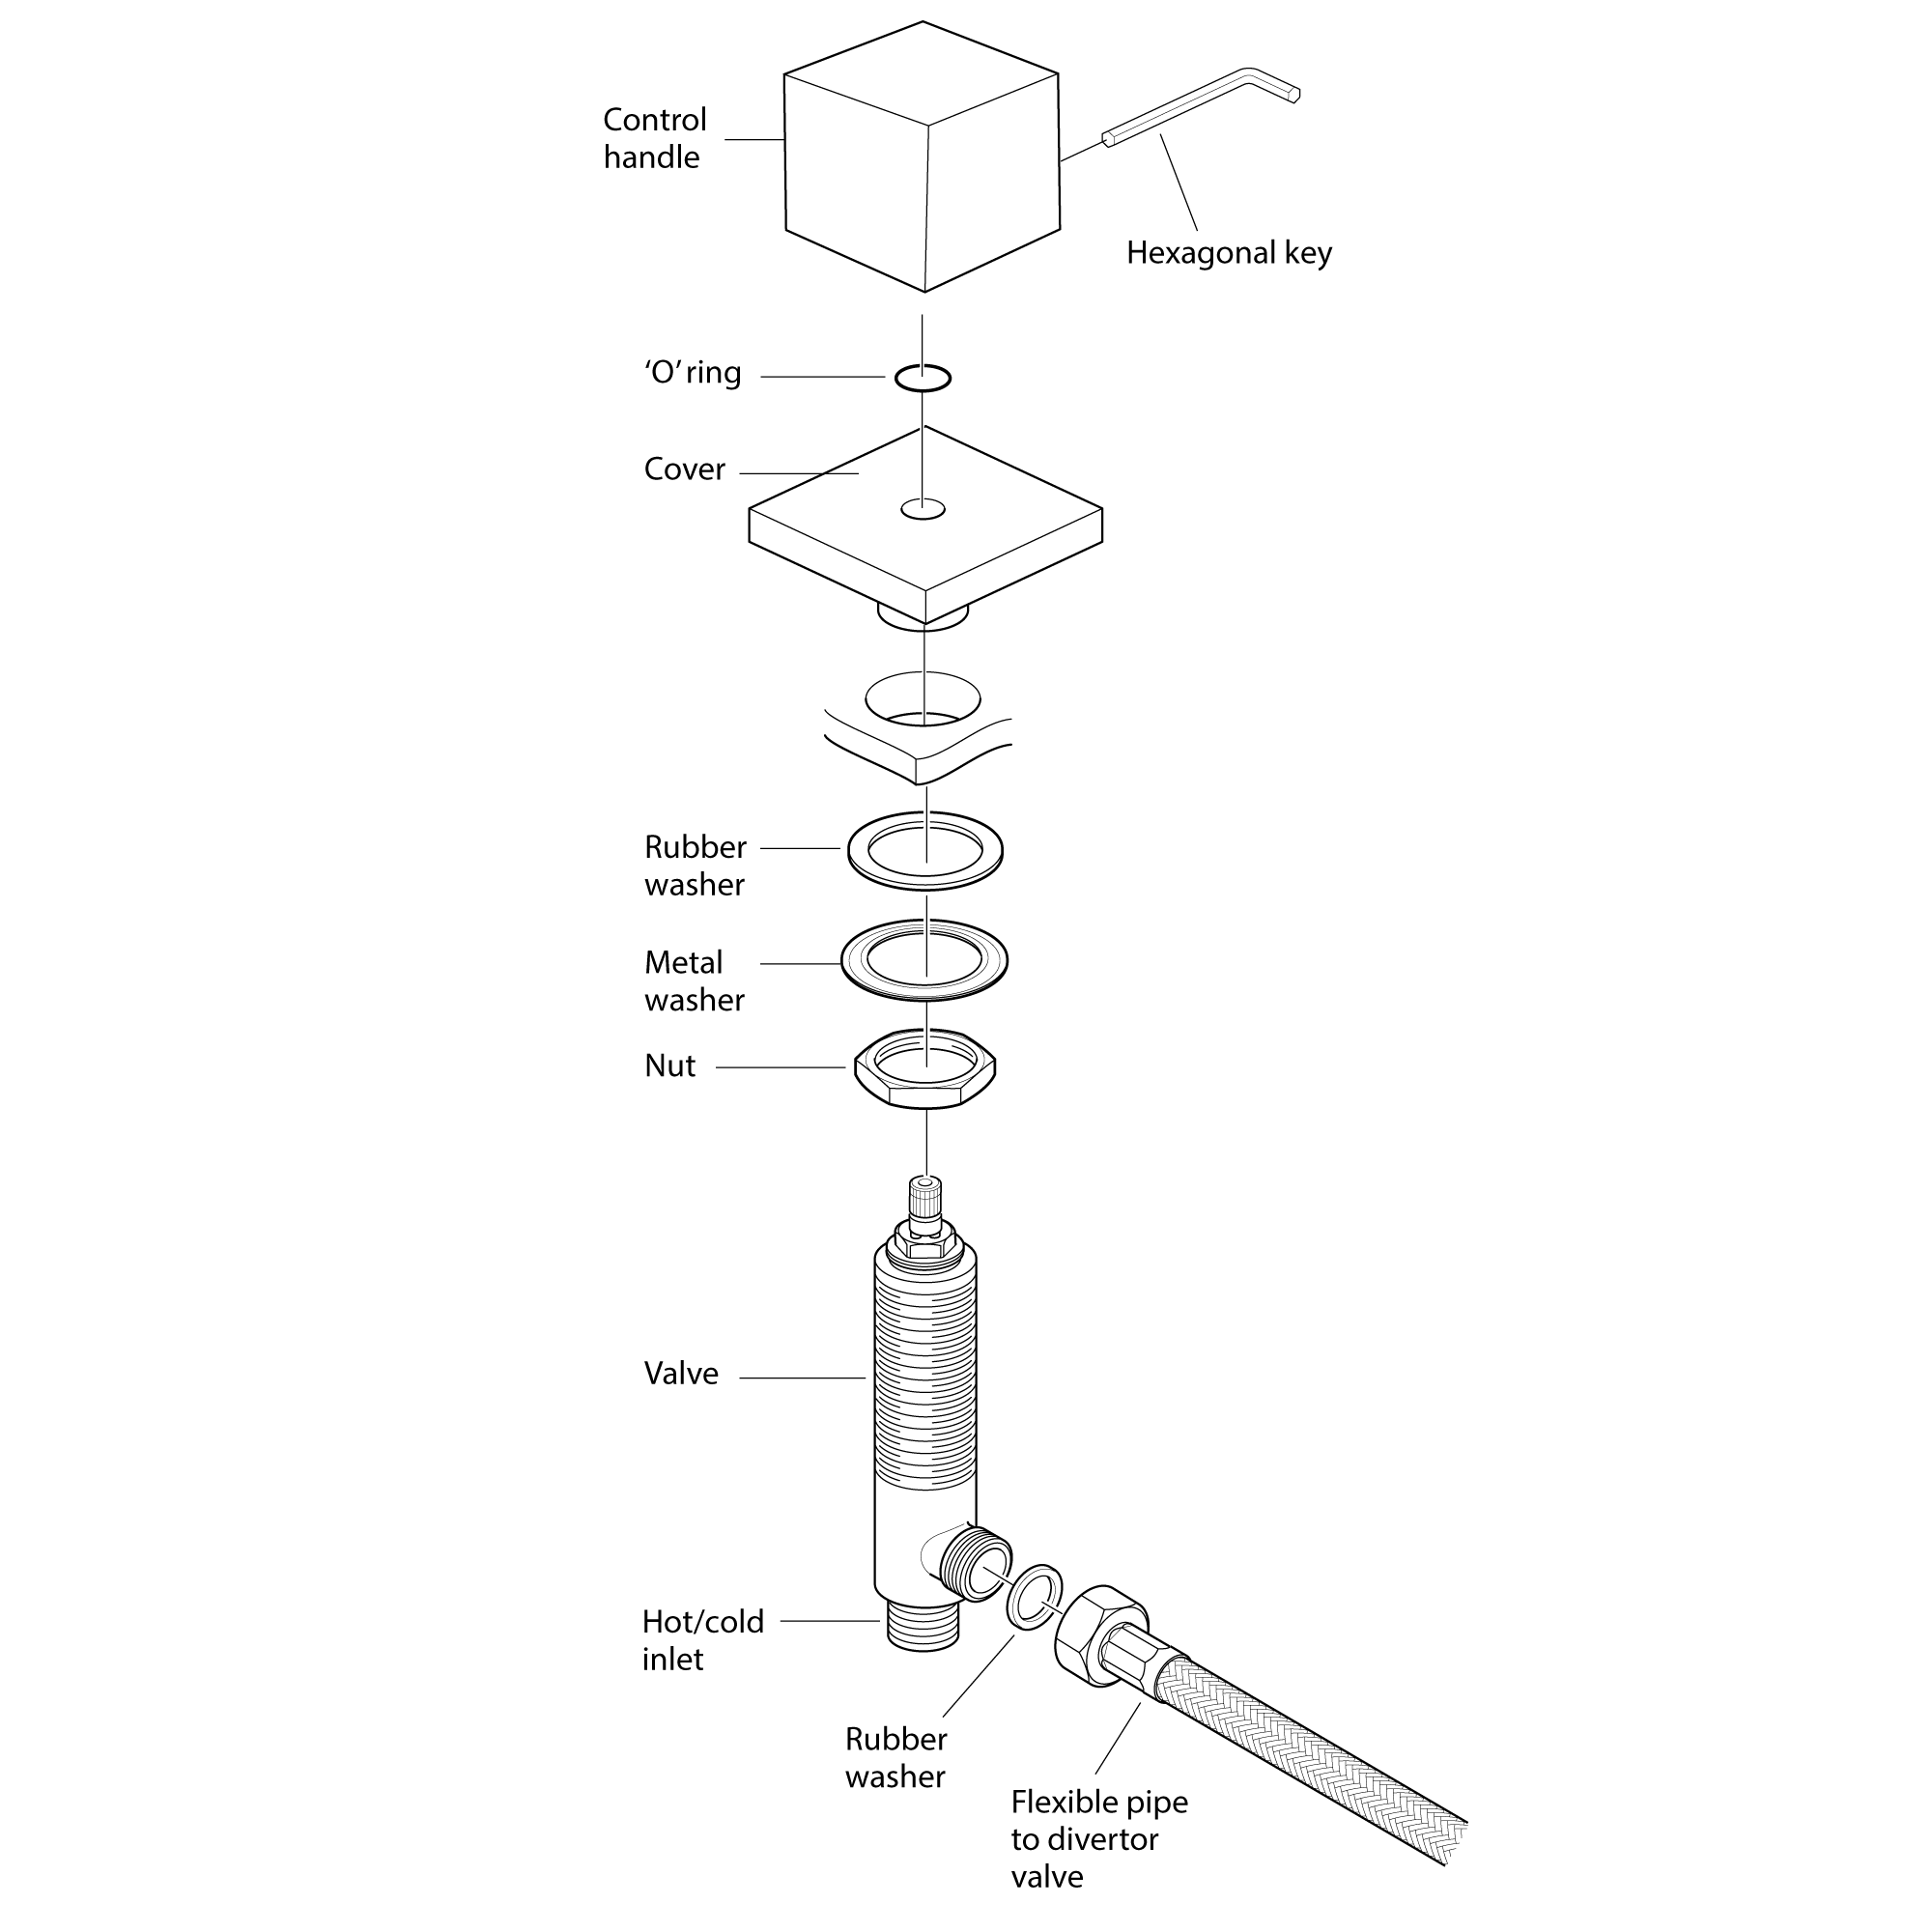
5. Tighten set screw with Allen key to fix the handle.
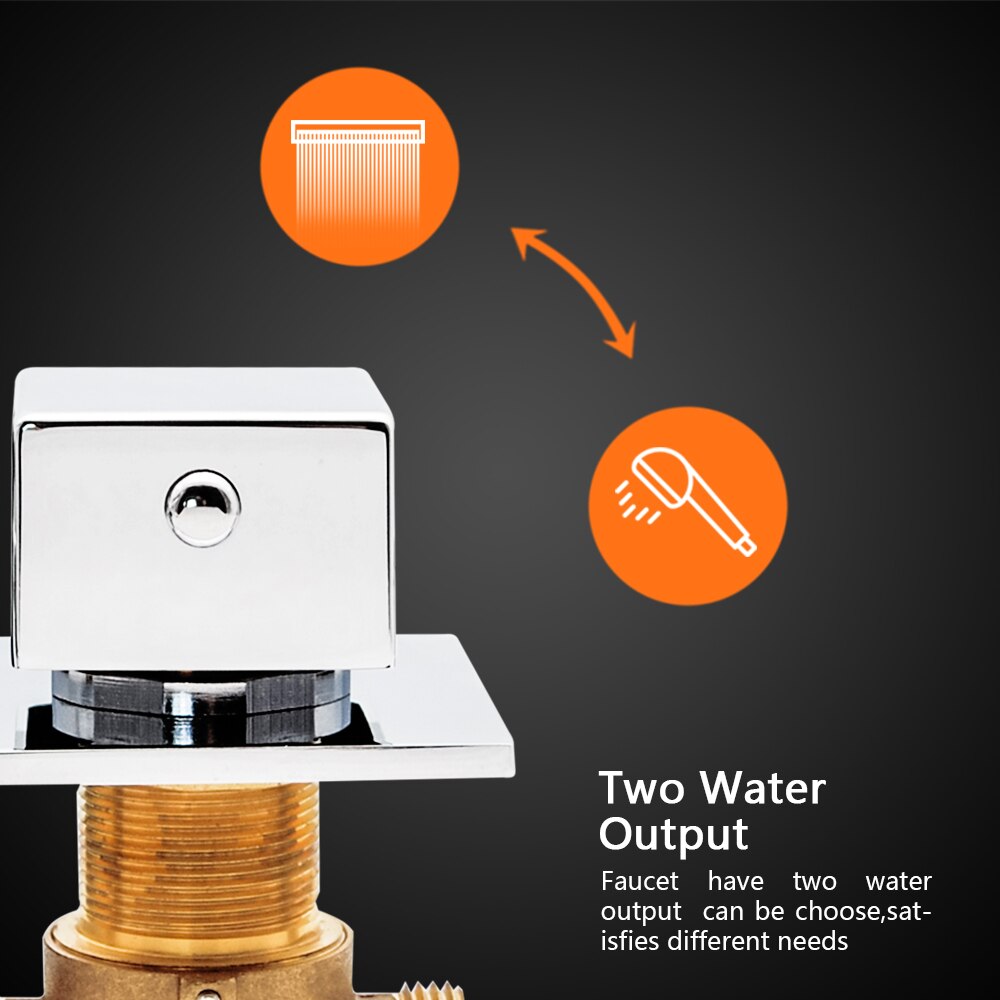
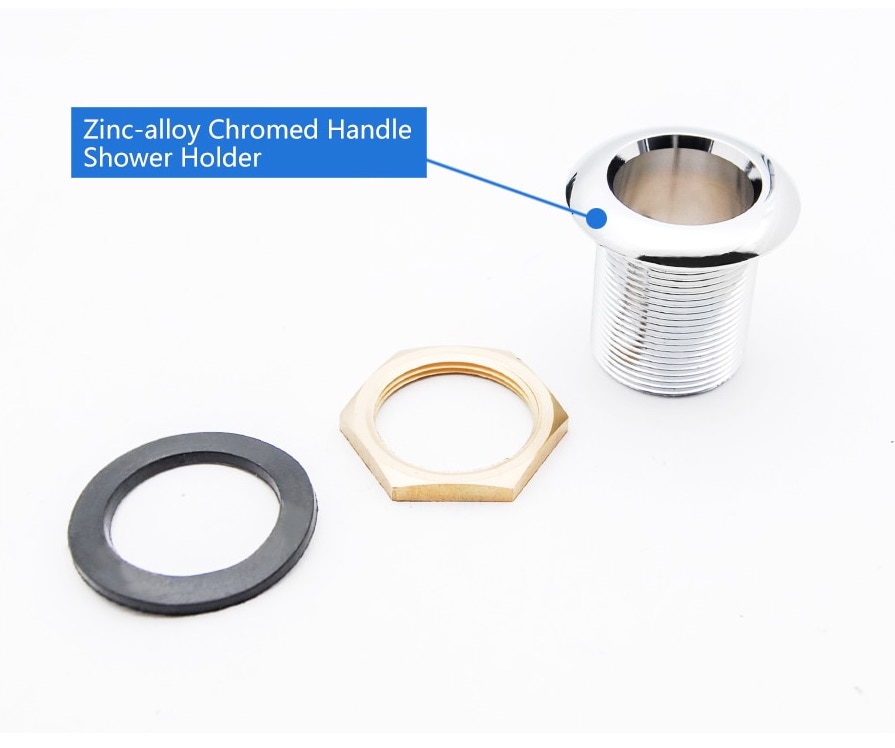
6. Install the O-ring and insert the hand shower holder into the specified drill hole. Put on the rubber washer and screw in the mounting nut securely underneath the counter top.
7. Connect the shower hose to the hand shower and diverter valve. Make sure to add the rubber washer at both ends.
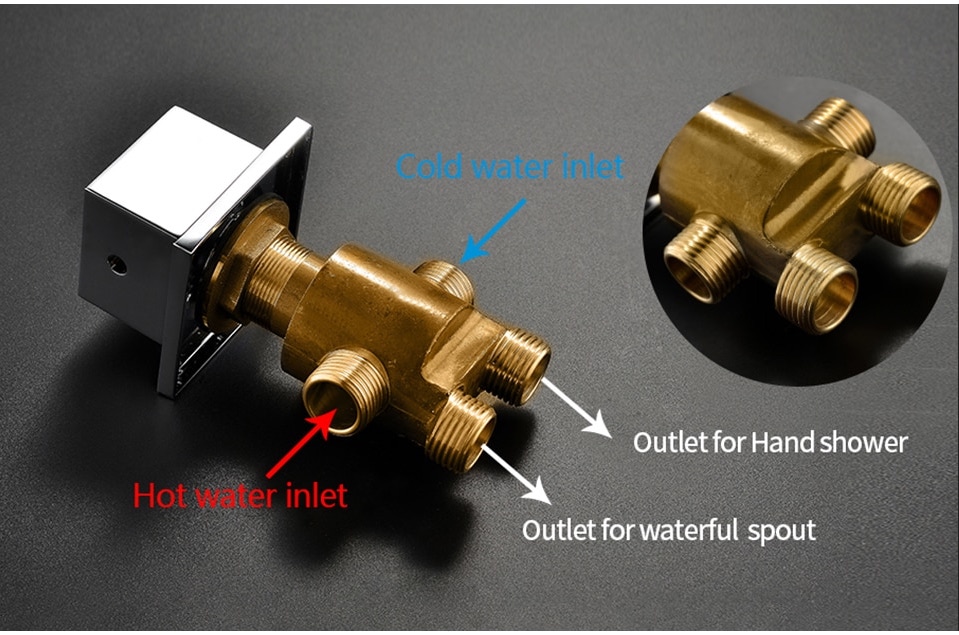
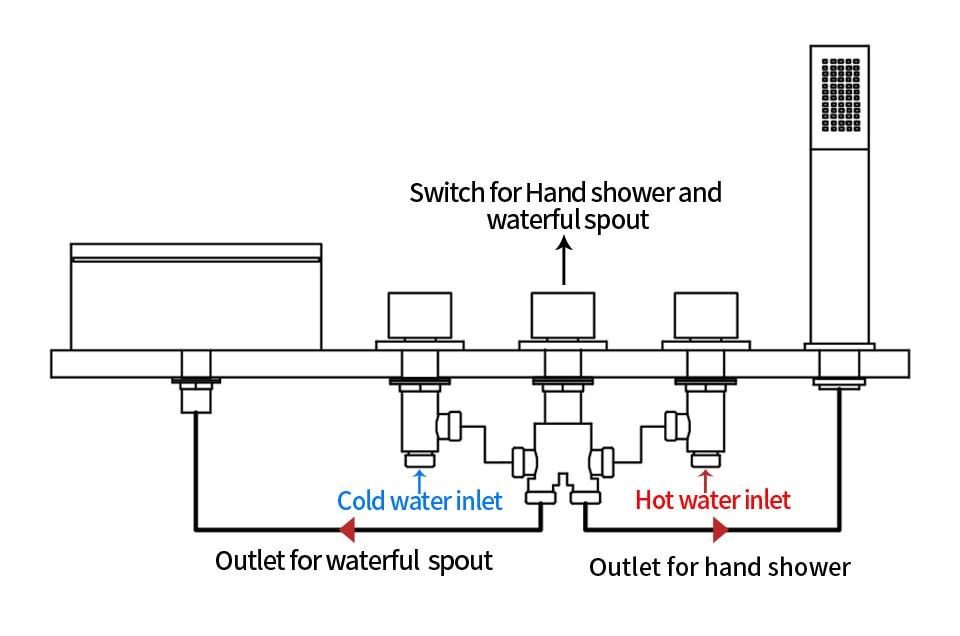
8. Connect the other waterlines according to the picture.
9. Connect waterlines (not included) onto the bottom of the hot & cold valve and then to main water supply lines.
|
|
|
|
|
|
|
Cleaning & Maintenance
To keep product clean and shiny follow the instruction below.
1. Flush with clean water and dry with soft cloth only.
2. Do not use any detergent, polisher, sane-cloth, or a scraper.
3. Do not use acid detergent.
|
|
1. Ensure that the water supply below your sink is completely shut off by turning the valve all the way to the right.
2. Remove the T-connector from the spout in order. To remove the T-connector, first remove the nut that is holding it in place, as shown. Set the parts aside.
3. Insert the spout into the prepared center mounting hole. From below, Slide one of the provided rubber gaskets onto the threaded shank, followed by the metal washer. Secure the the spout to the surface using the lock nut. Tighten firmly with a basin wrench.
4. Reattach the T-connector to the spout in the reverse order of its removal, as shown. Ensure that the rubber o-ring is seated properly, and that the nut is tightened firmly using an adjustable wrench.
5. Thread one of the provided lock nuts onto each of the valve stems. Thread to the bottom of each stem. Slide one of the provided plastic washers, followed by a rubber washer, onto each stem as well.
6. One of the faucets valve stems are labeled by color - red for hot. From below, insert the hot valve stem into the left-side faucet hole, as shown. From above, thread one of the provided bell flanges onto the stem.
7. Install the hot handle onto the stems spindle. Once installed, loosen the bell flange until none of the spindle is exposed, as shown.
8. From beneath the sink, position the stem so that the outlet on the side of the stem is pointing inward, towards the T-connector. While holding in place, hand tighten the lock nut. Finish tightening using a basin wrench.
9. Repeat steps 6-8 to install the cold valve stem into the right-side faucet hole.
10. Use the provided braided water lines to connect the hot and cold valve stems to the T-connector. Use an adjustable wrench to tighten, but be careful not to overtighten. Apply thread sealant or plumbers tape to each threaded connection before attaching.
11. Connect the main water supply lines to the valve stems. Apply plumbers tape or thread sealant to the threads before tightening.
12. Turn the faucet on and allow the water to flow for approximately 60 seconds. Ensure that there are no leaks, and that both hot and cold water are running properly.
|
|
|
Flexible Connecting Hose
Care must be taken when connecting the flexible connection hose from the power supply box to the spout to ensure it does not bend sharply and kink or twist.
See above for recommended ways to fit the flexible connecting hose.
Important: Failure to follow these guidelines may result in poor performance and damage to the flexible connection hose.
|
|
|
Installation Type: Deck Mounted
Number of Holes Required: 5
3 Hole Centre Size: 8"-16"
"T" shape connector can be rotated
Note 1: If it is leaking from "T" shape connector, please check if there has a rubber ring, and if it is damaged.
Note 2: If the rubber ring is good, but it is still leaking, please use sealant tape to tight it. If it is still leaking after you do it, the "T" connector thread may be damaged, replace it.
|
|
|
|
|
|
|
|
|